

Walkthrough Menu
- General Tips
- Chapter 1: The Letter from China
- Chapter 2: The Silence of Buddha
- Chapter 3: The Auction House
- Chapter 4: The Indian Cave
- Chapter 5: The Curse of the Forest
- Chapter 6: The Gates of Wisdom
- Chapter 7: The dragon tower
General Tips
- There is no time limit for this game.
- Once you have selected an item from the hidden object list, it will be removed from the list.
- Too many incorrect clicks will break the cursor for a brief period.
- By clicking hint button you can find the hidden objects .
- Items marked in yellow color are hidden objects.
- Items marked in red color are belongs to Inventory.
- Items marked in purple color belongs to navigation part .
Chapter 1: The Letter from China
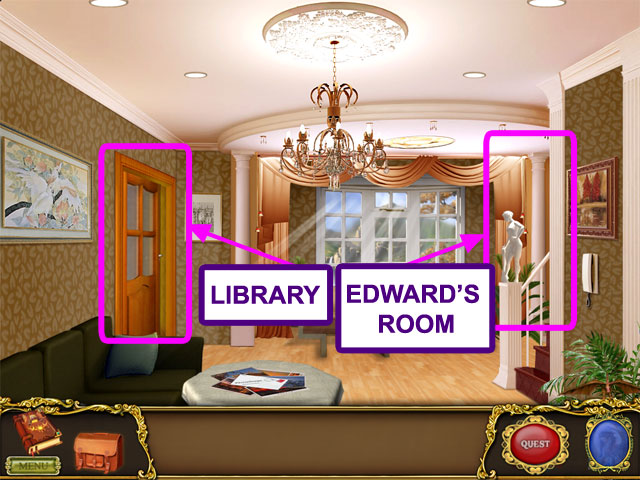
- LIBRARY.
- EDWARD’S HALL.
- Find the hidden objects.
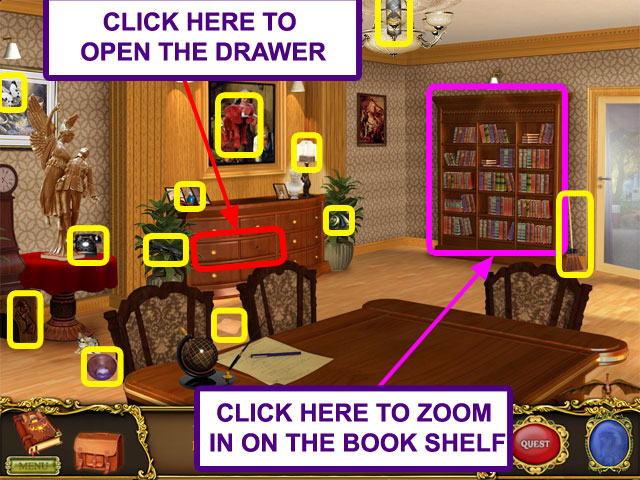
- Find the hidden objects in the library.
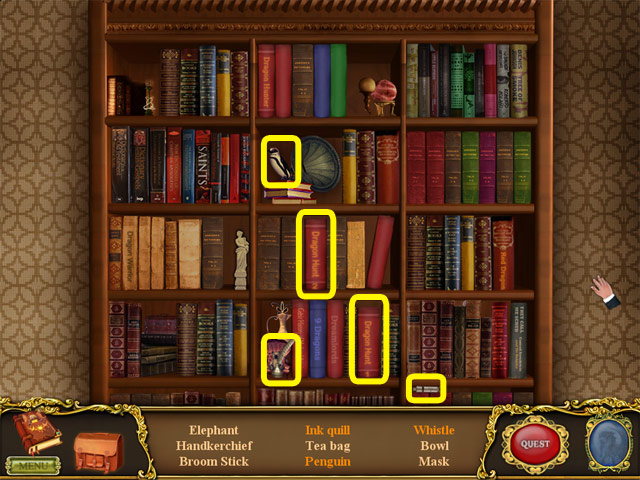
- Find the two Dragon Hunt books on the book shelf.
- Open the drawer to find a clue.
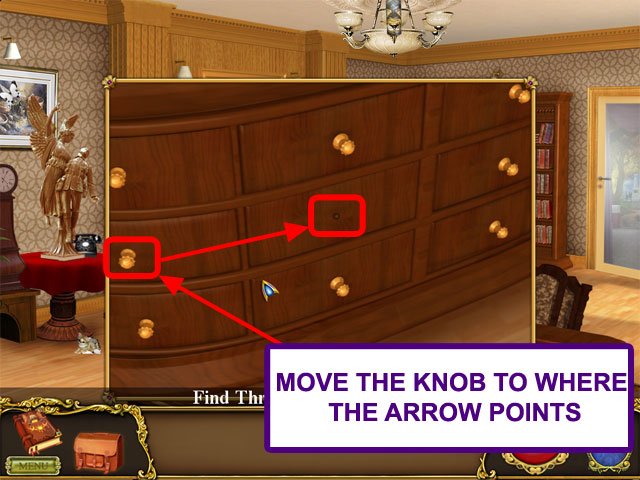
- Pick a knob and move it to the correct drawer.
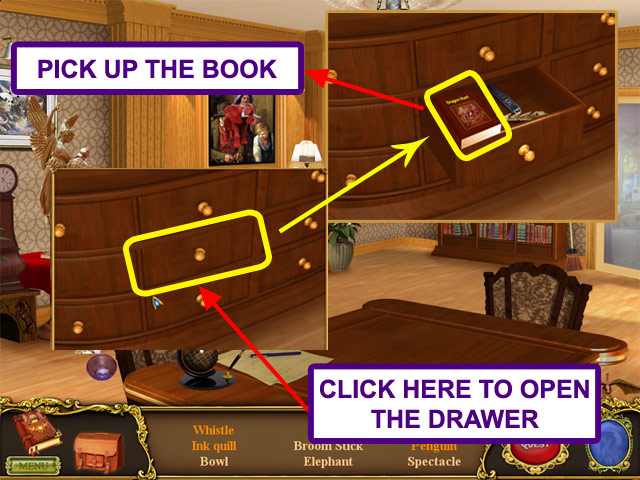
- Open the drawer and pick up the Dragon Hunt book.
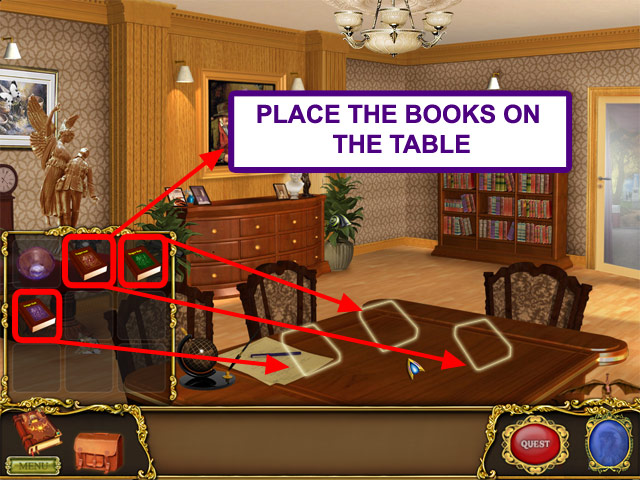
- Place the Dragon Hunt books from your inventory into the correct spots on the table.
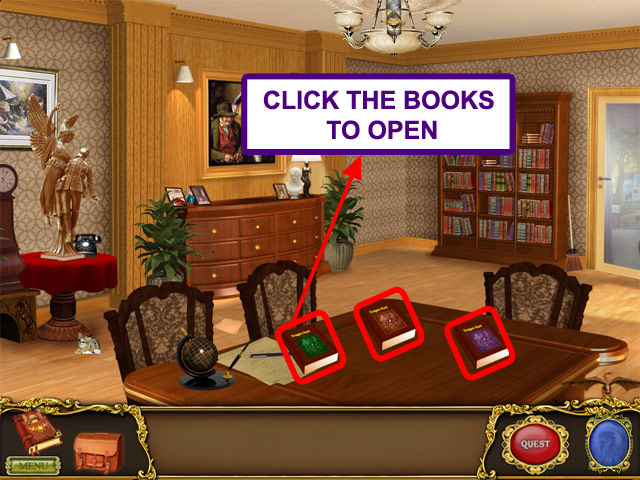
- Open each book to receive a clue.
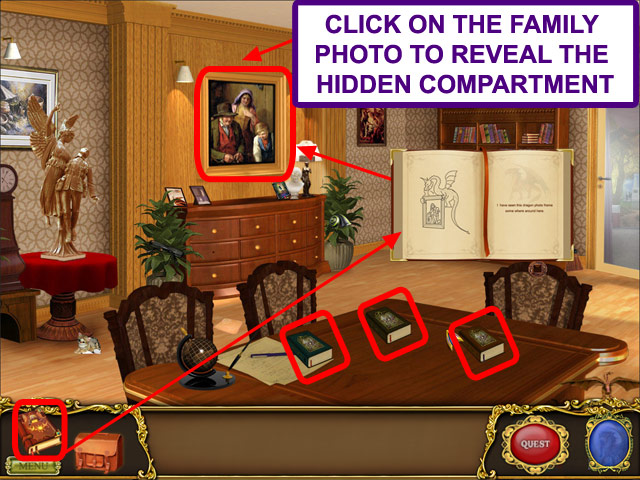
- Look inside the journal and click on the family photo to reveal a hidden compartment.
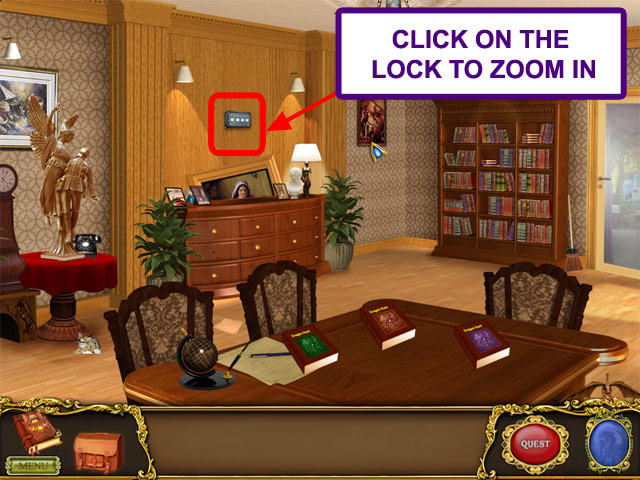
- Click the spot to open the Lock.
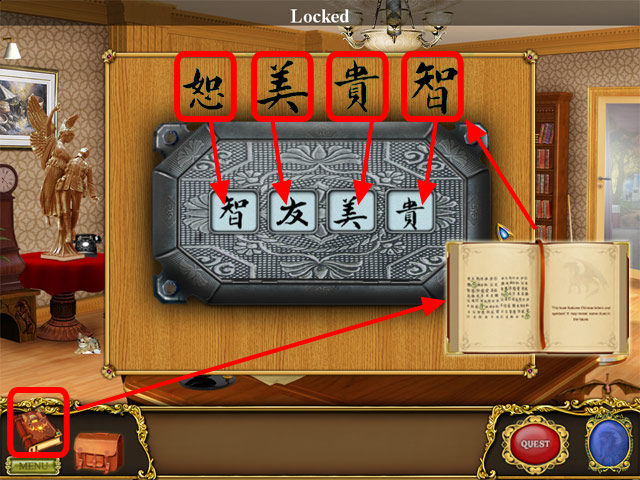
- Refer to your journal to decipher the code and receive a clue.
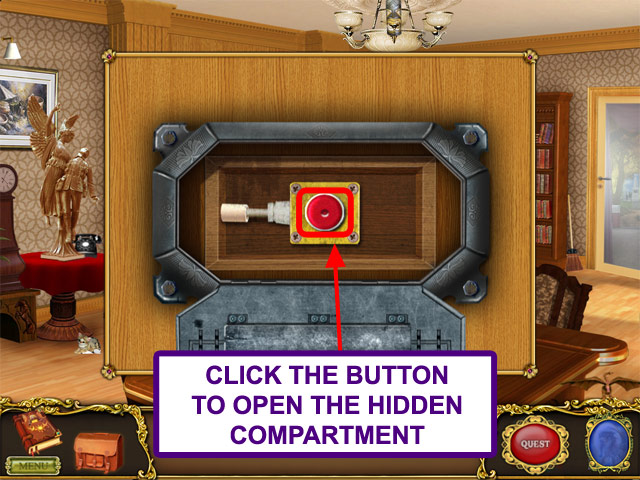
- Click on the button to open the hidden compartment.
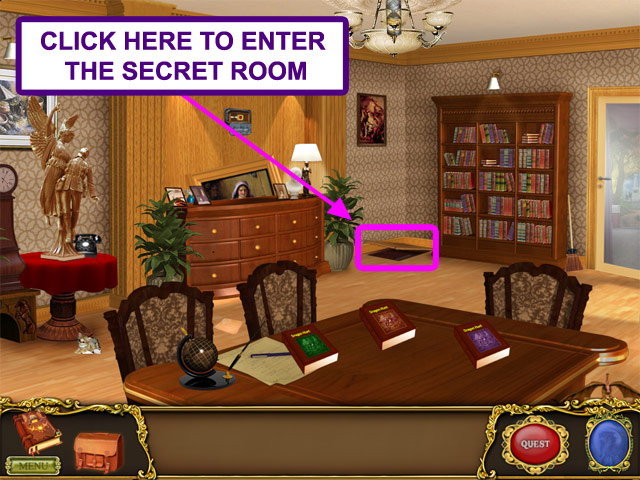
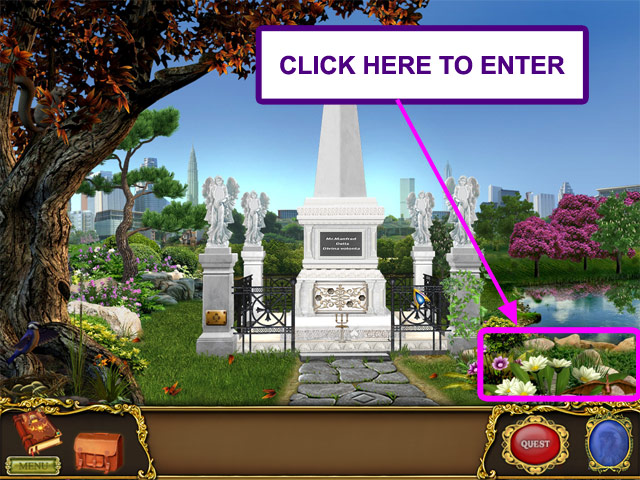
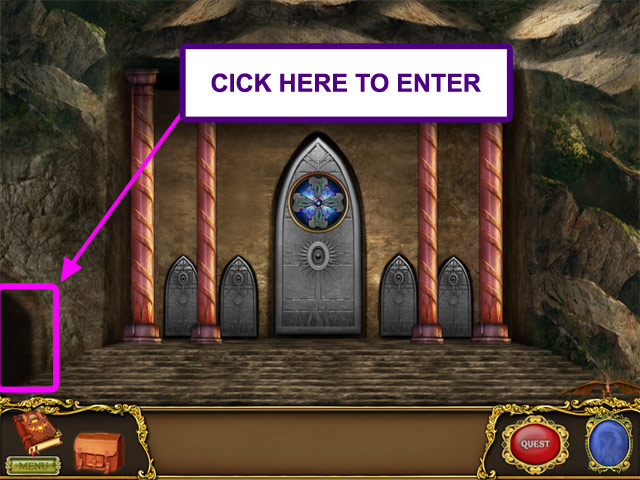
- Click here to enter the secret room.
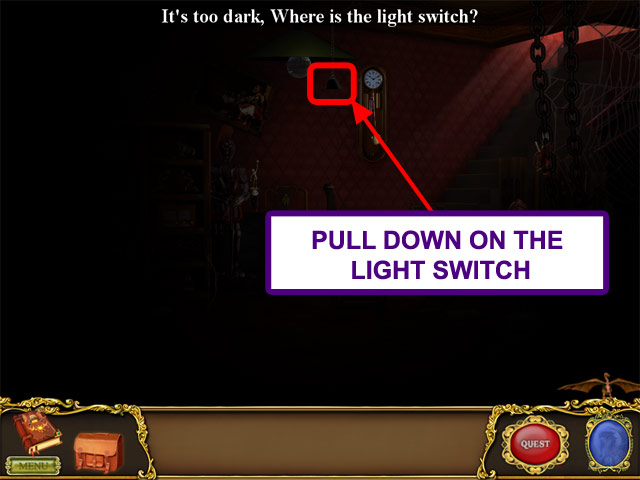
- The room is too dark. Pull down on the switch to turn on the lights.
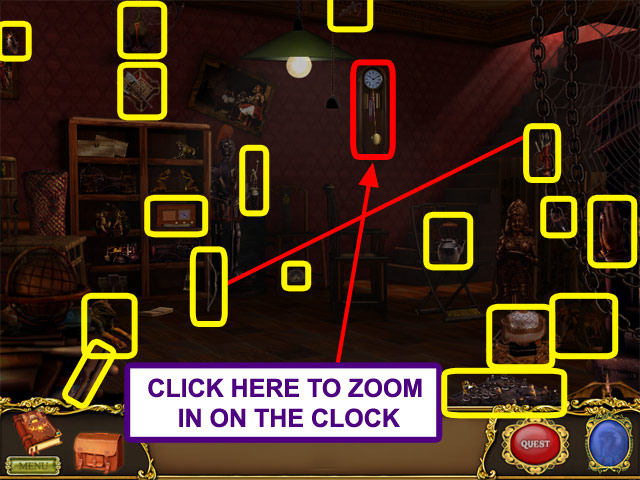
- Find the hidden objects in the secret room.
- Click the bow and then the arrow to get the "Bow with Arrow".
- Click on the clock to zoom in.
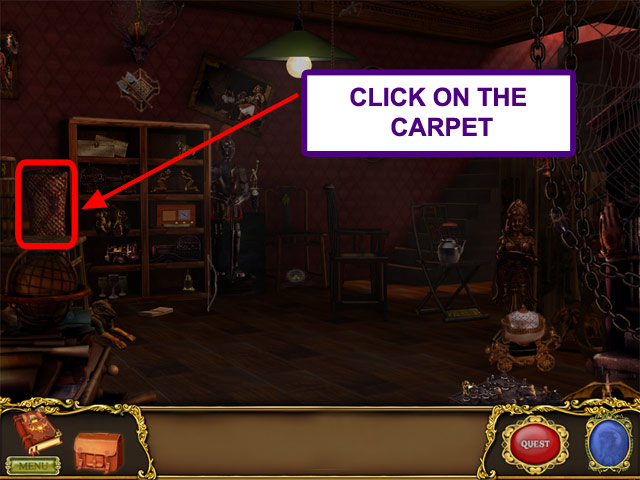
- Click on the carpet.

- Stop the clock to find a hidden object.
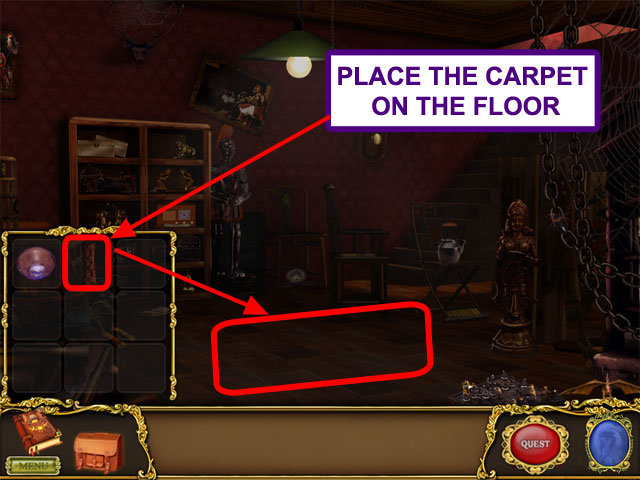
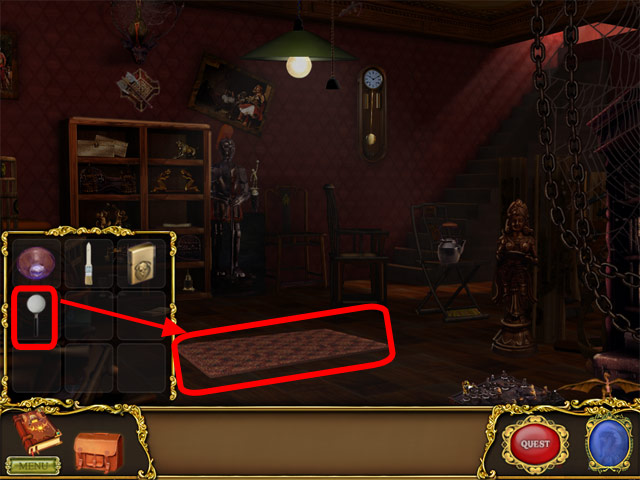
- Click on the carpet in your inventory.
- Place the carpet on the floor.
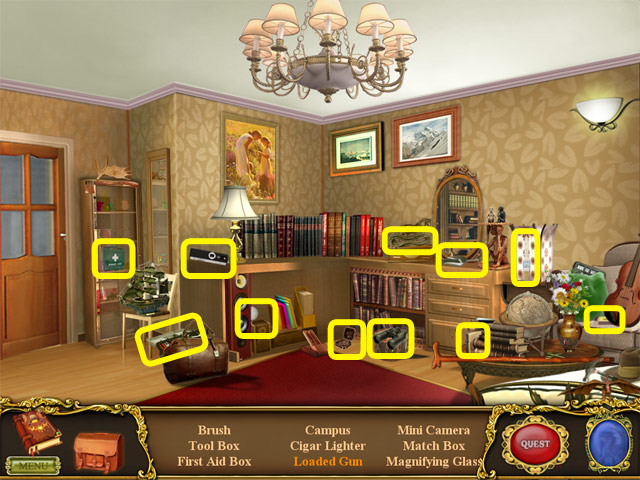
- Find the hidden objects in Edward's room.

- Open the locked drawer with the key.
- Get the bullets from the top drawer, unlock the bottom drawer, and select the gun to get a hidden .object.
- Select the magnifying glass in your inventory to see the secret hidden in the carpet.
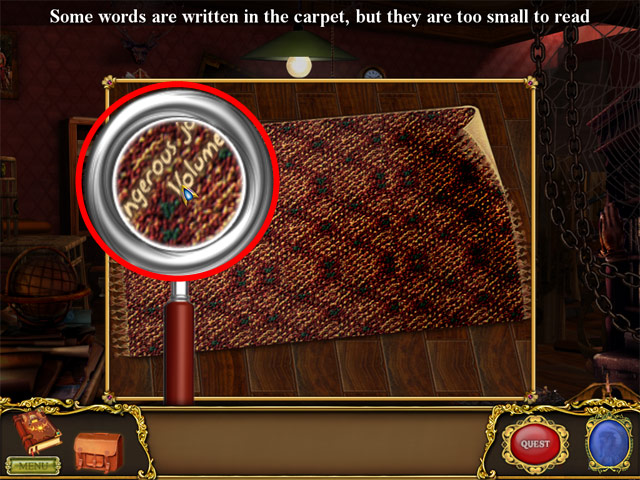
- Click on the carpet's hidden message to read it.
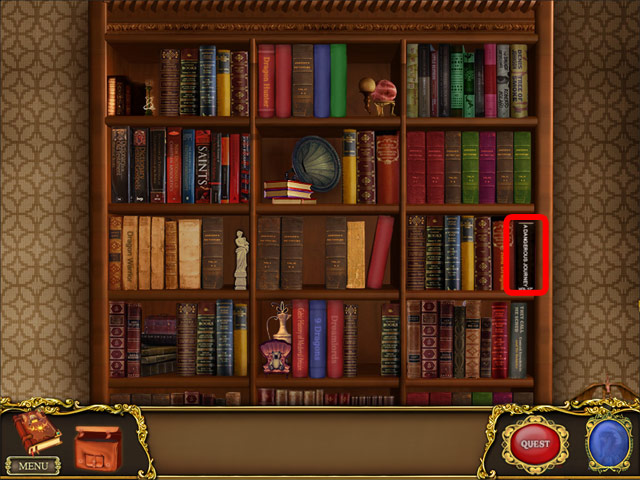
- Select the book "The Dangerous Journey Volume 12" from the bookshelf.
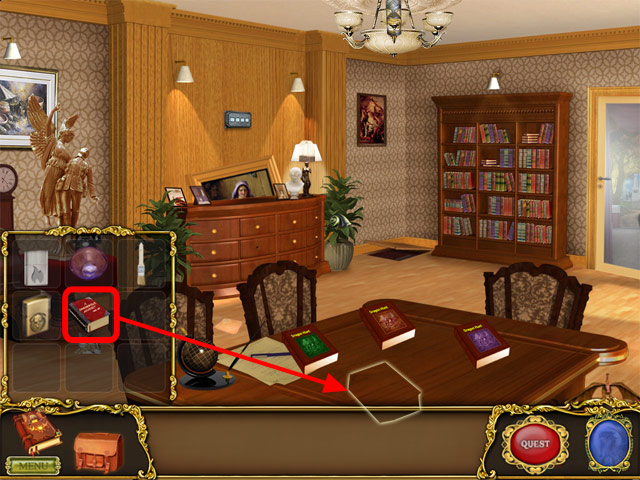
- Select the book "The Dangerous Journey Volume 12" in your inventory and place it on the table.
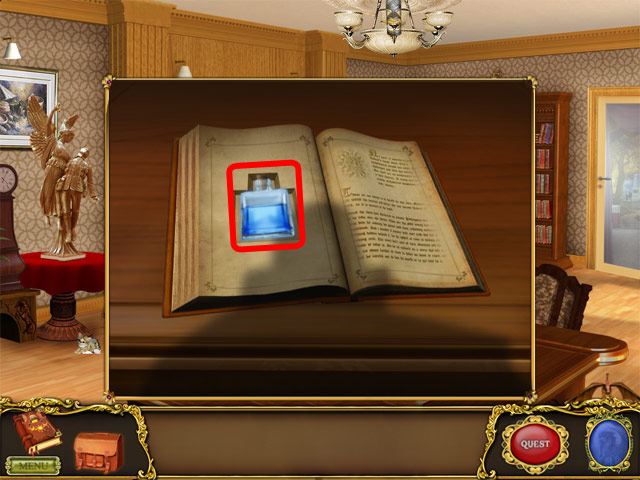
- Remove the bottle from inside the book to reveal clues.
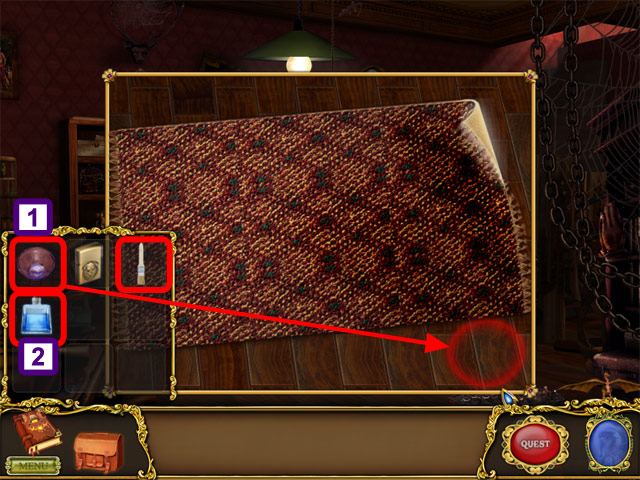
- Flip over the carpet.
- Select the bowl in your inventory and place it in the correct position.
- Pour the solution from its bottle to the bowl.
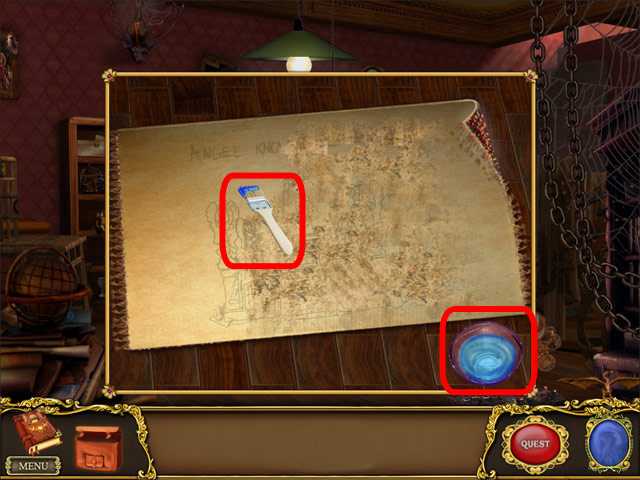
- Select the brush in your inventory and clean the carpet with the solution.
- Click to zoom in and find the hidden objects.
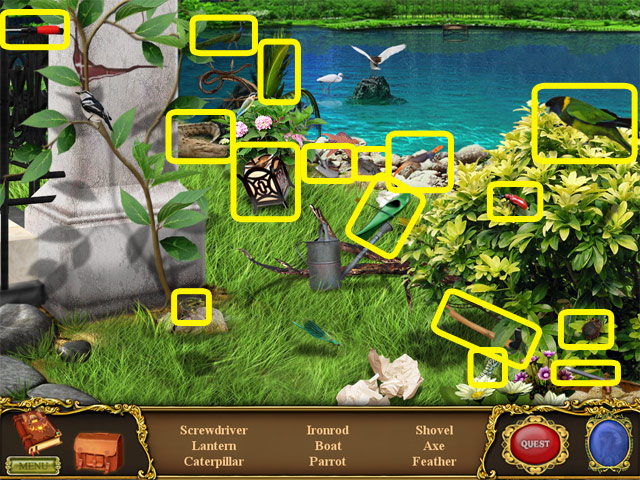
- Find the hidden objects in the graveyard.
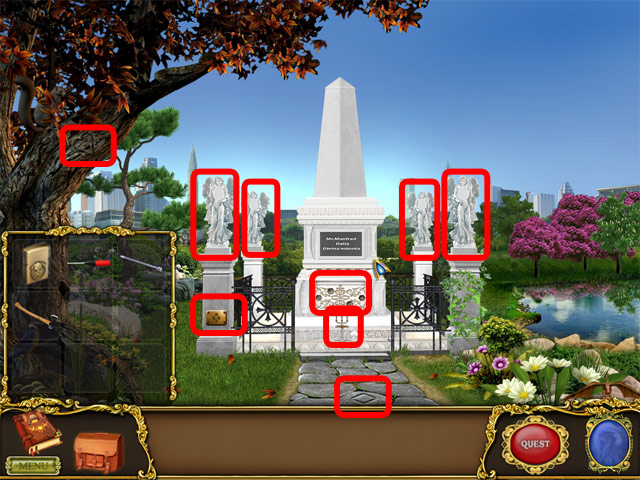
- Click on the angels to receive a clue.
- Click on the marked portion to zoom.
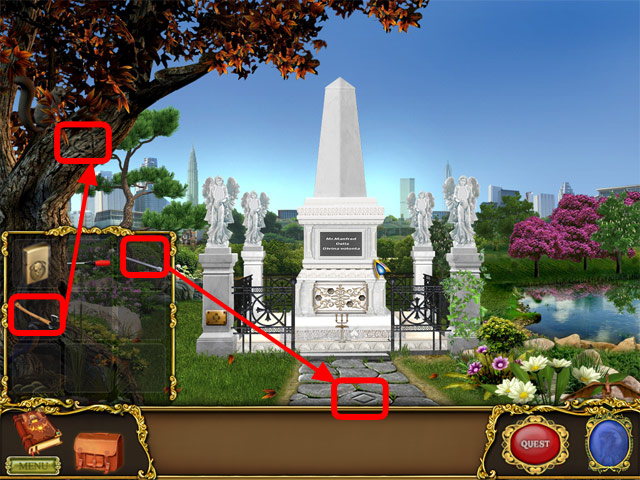
- Use the axe in your inventory to cut the tree on the heart symbol and reveal a secret button.
- Use the iron rod in your inventory to dig a path near the diamond symbol and reveal a secret button.
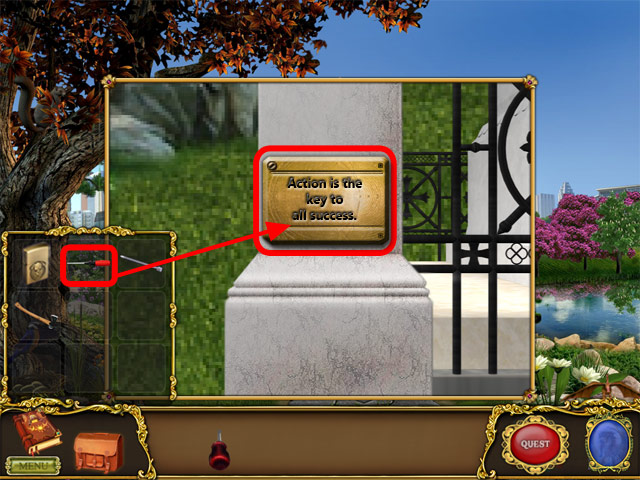
- Use the screwdriver in your inventory to remove the screws on the clover symbol plate.
- Click on the secret button.
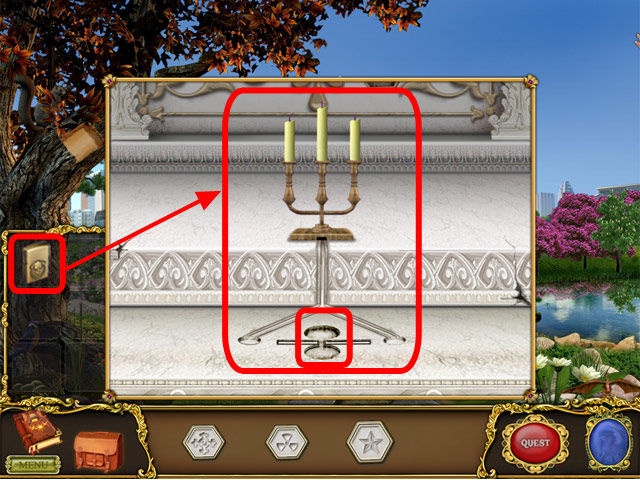
- Use the lighter from your inventory to light the candle.
- Click on the melting wax to collect a secret button.
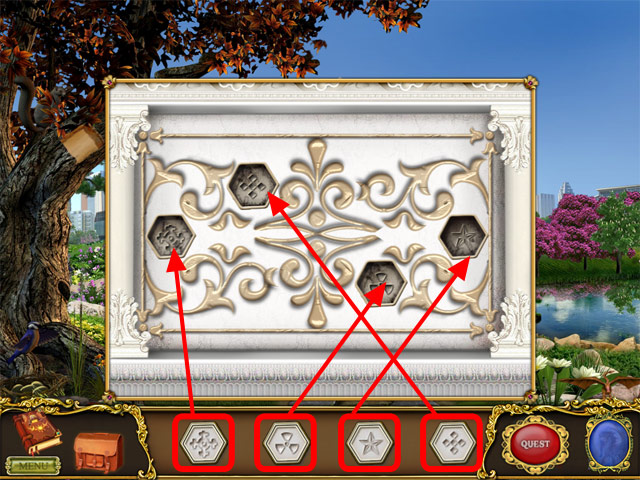
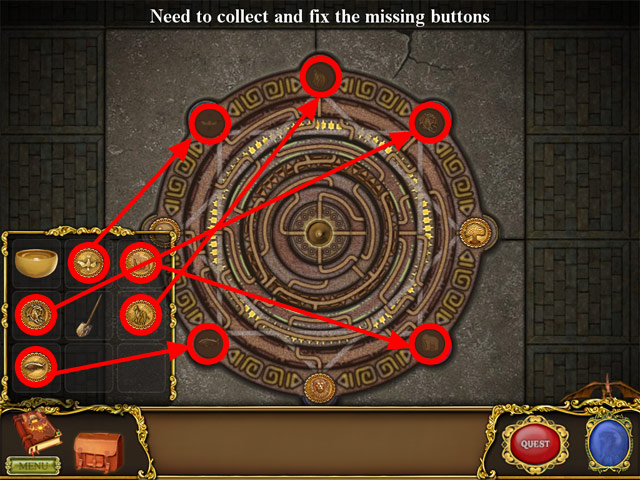
- Pick the secret buttons from the panel and fix it in the respective portion.
- Place the secret buttons on the correct spots on the panel.
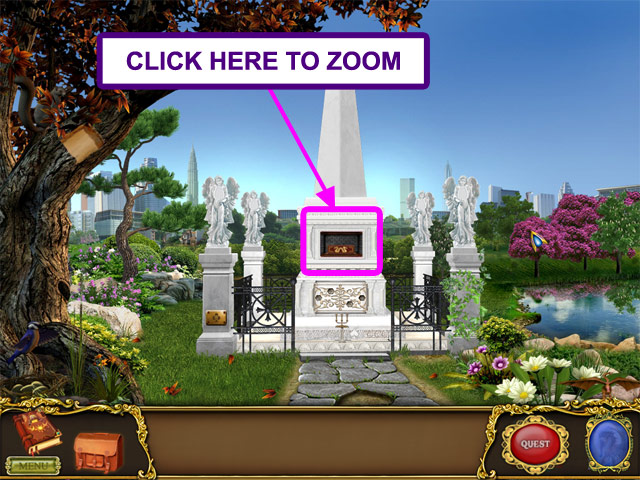
- Click here to zoom in.
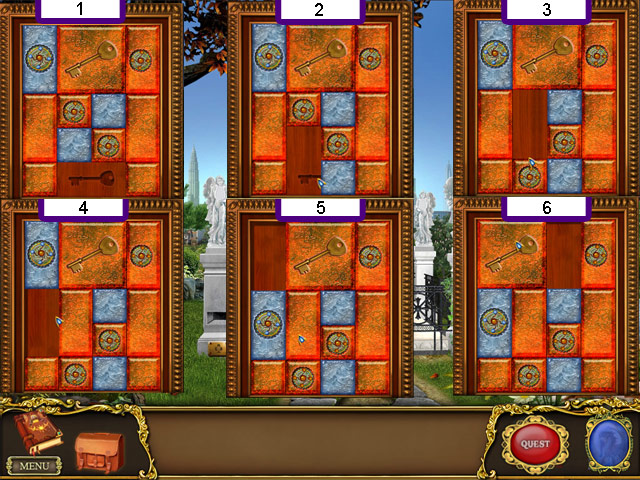
- Move the tiles to slide the key down.
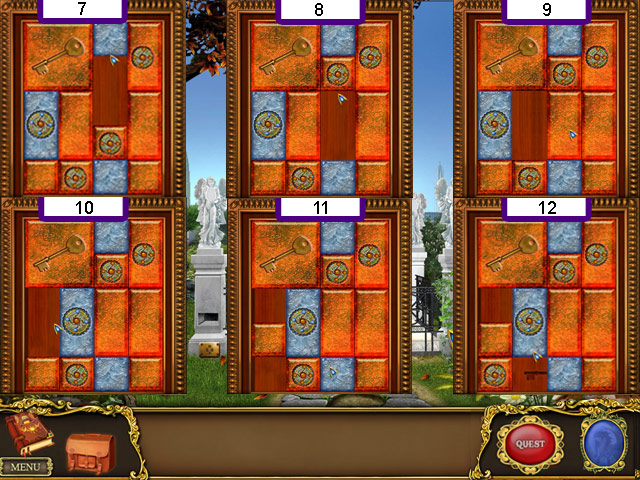

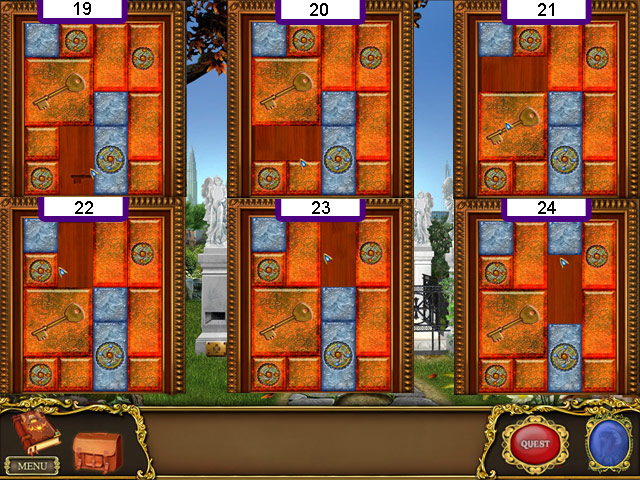
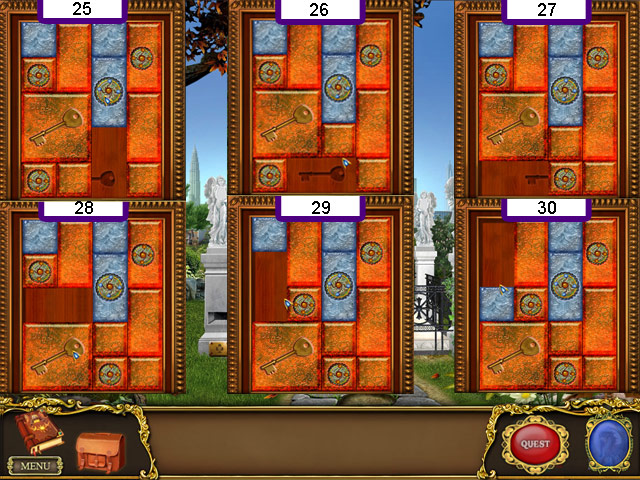
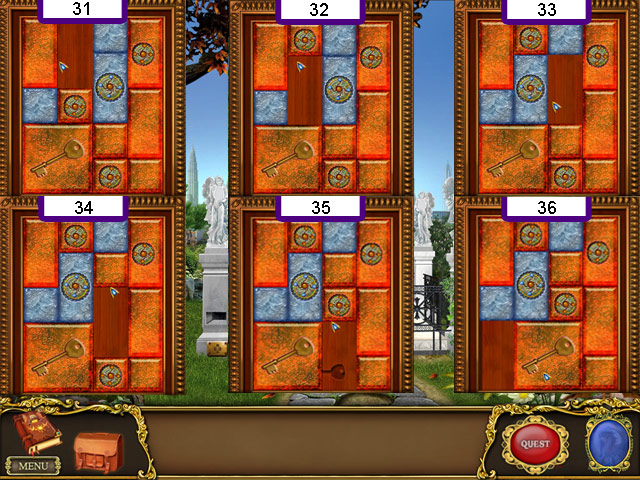
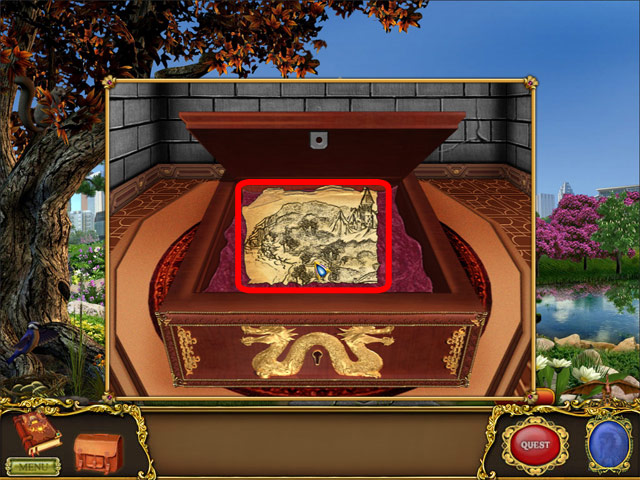
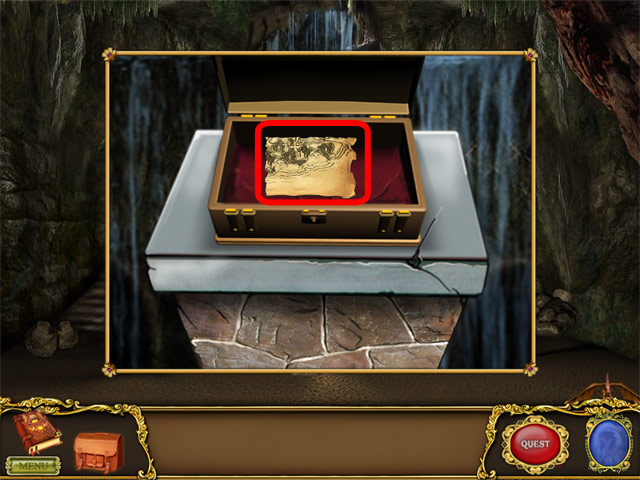
- Use the key in your inventory to open the chest and collect the first part of the map.
Chapter 2: The Silence of Buddha

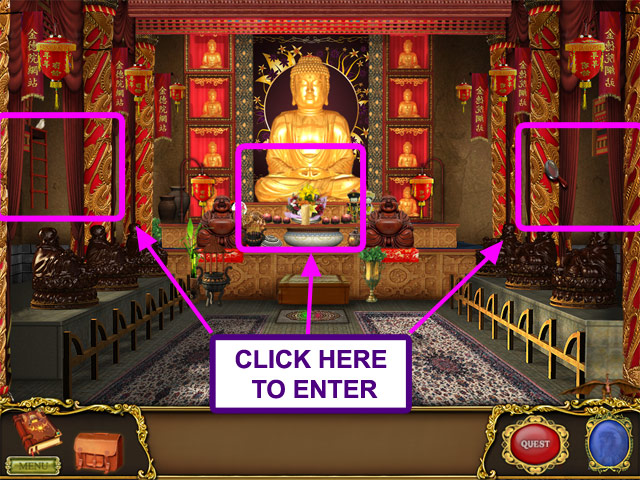
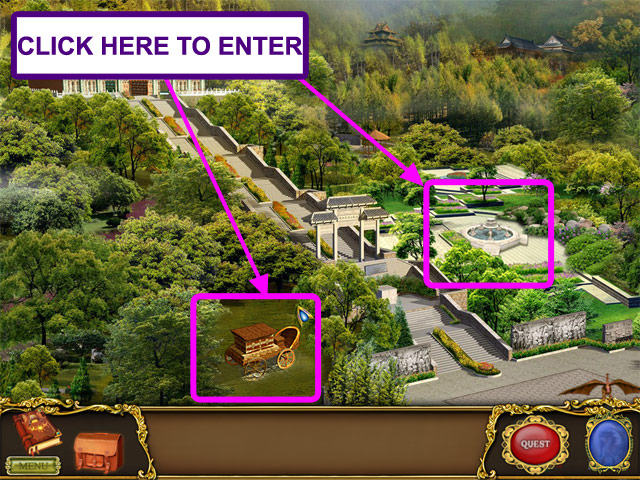
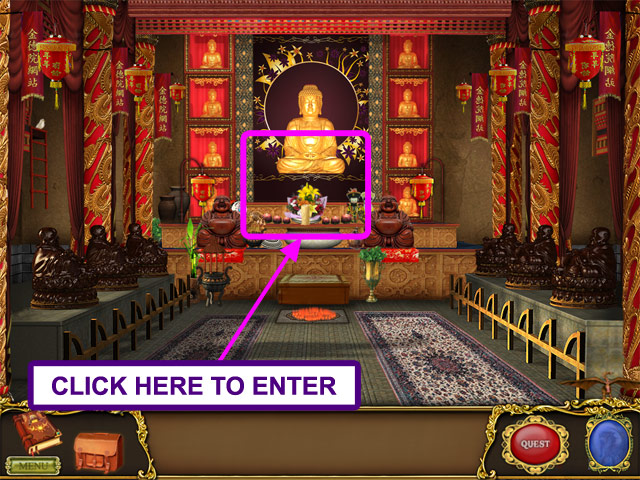
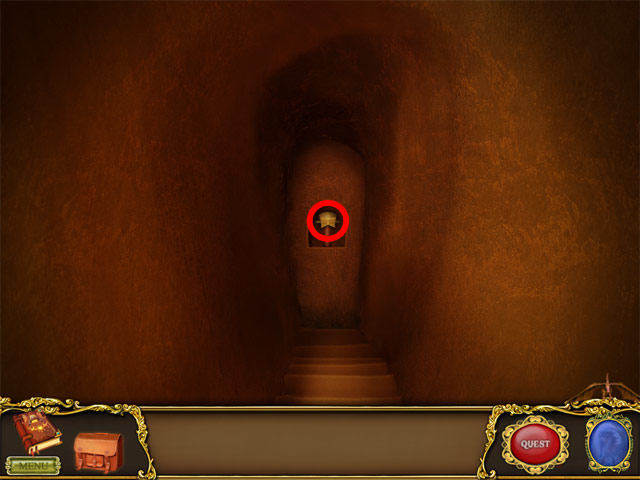
- Click to enter the Buddhist Temple.
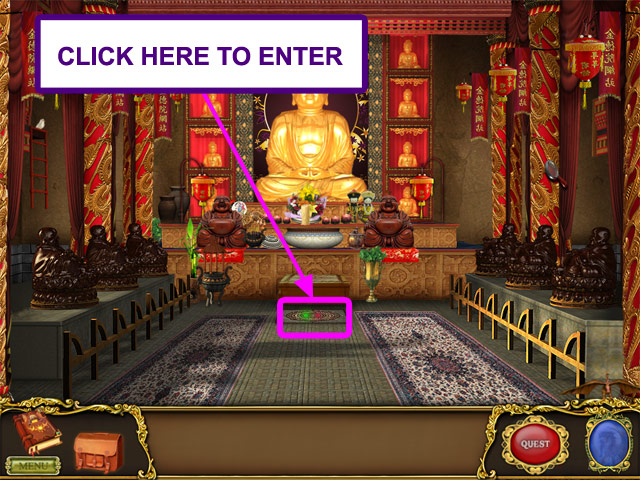
- Click the highlighted section to proceed to the next level.
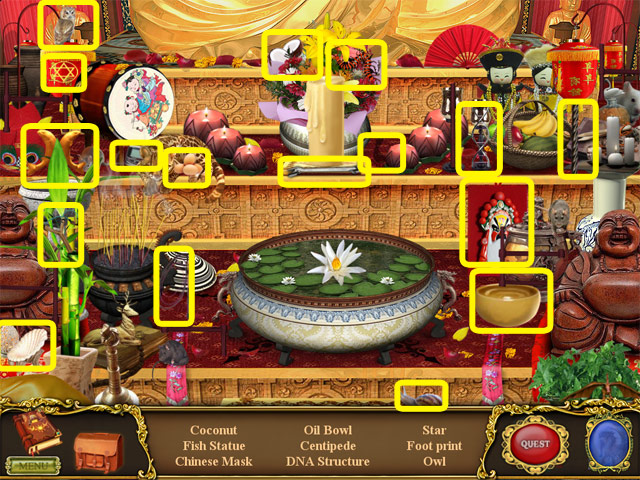
- Find the hidden objects at the base of the Buddha statue.
- Click to zoom in.
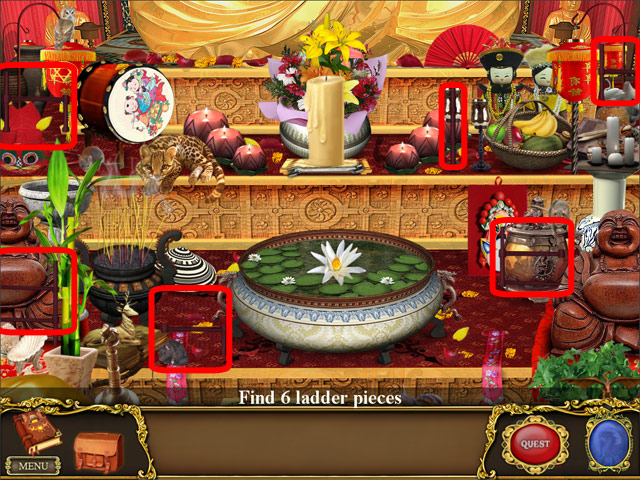
- Find the six ladder pieces required for the next level.
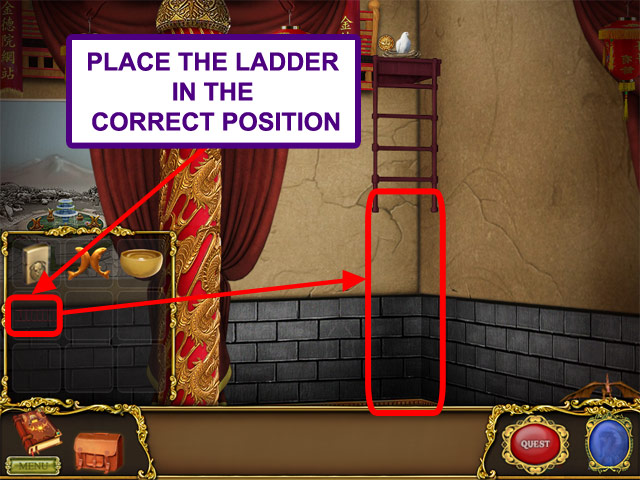
- Select the bottom ladder in your inventory and connect it to the top ladder.
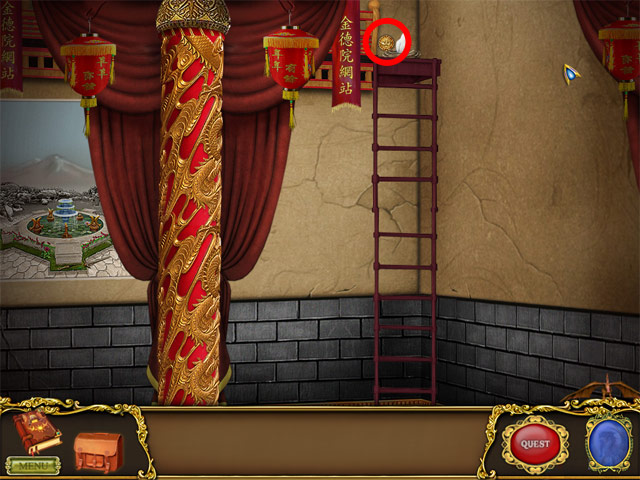
- Collect the secret button.
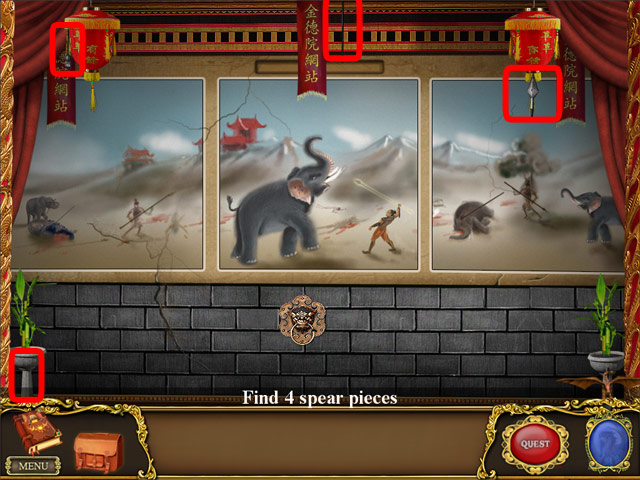
- Find the four pieces of the spear.
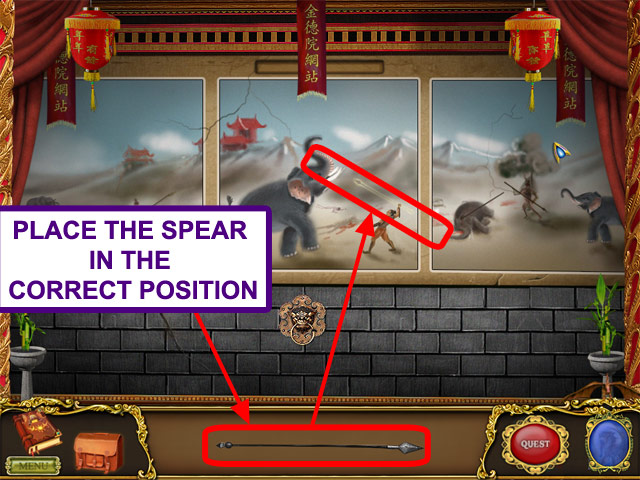
- Pick up the spear and place it in the correct spot on the painting.
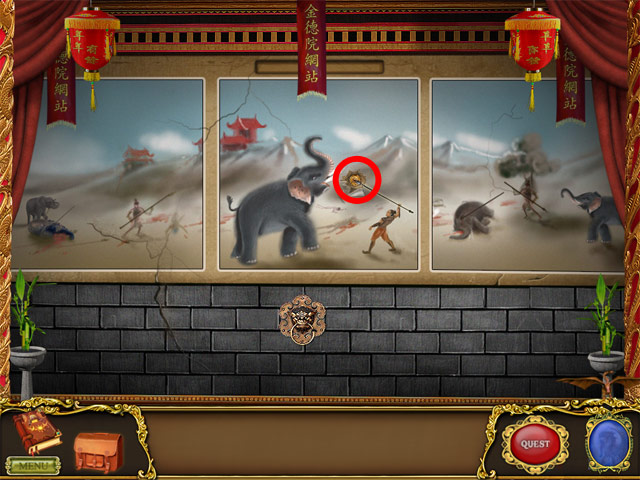
- Collect the secret button.

- Click to zoom in.
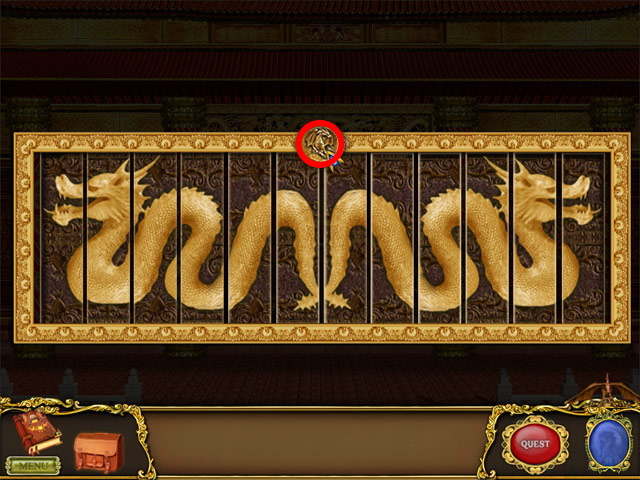
- Rotate the panels to complete the dragon image.
- Collect the secret button.
- Click to Zoom in.
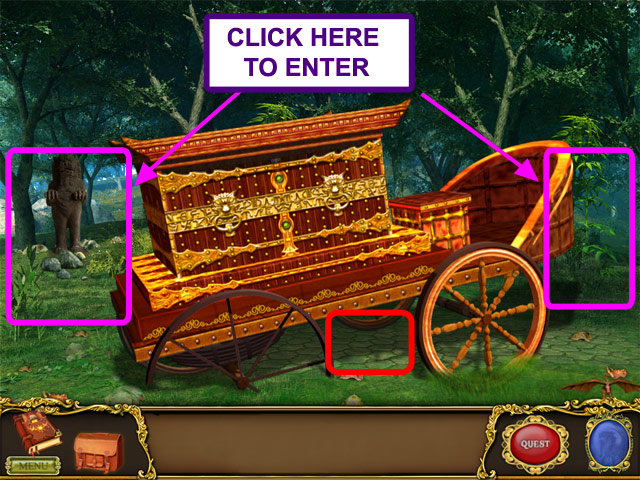
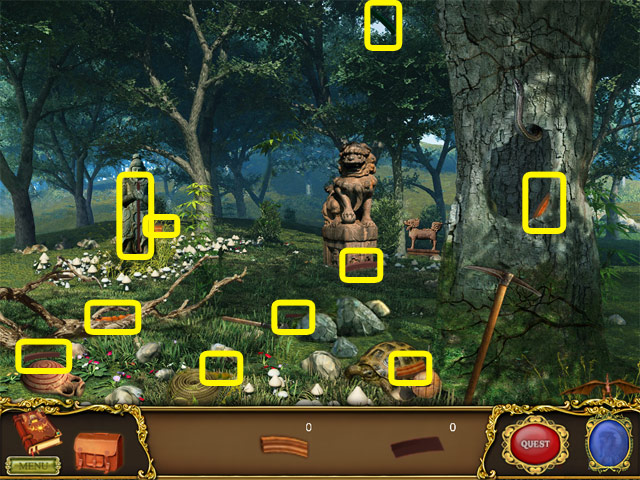
- Click to zoom in and find hidden objects.
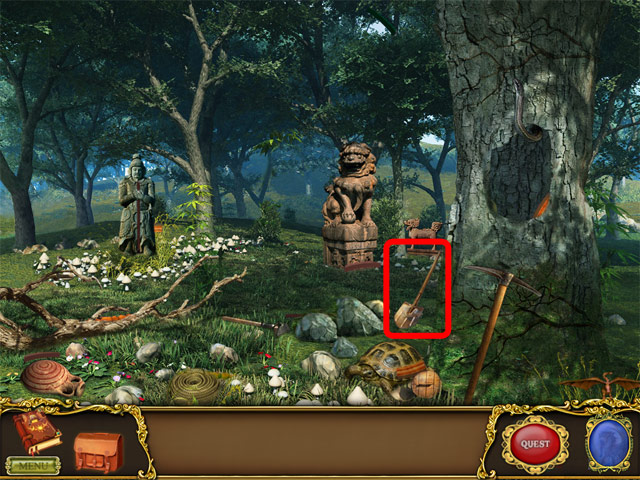
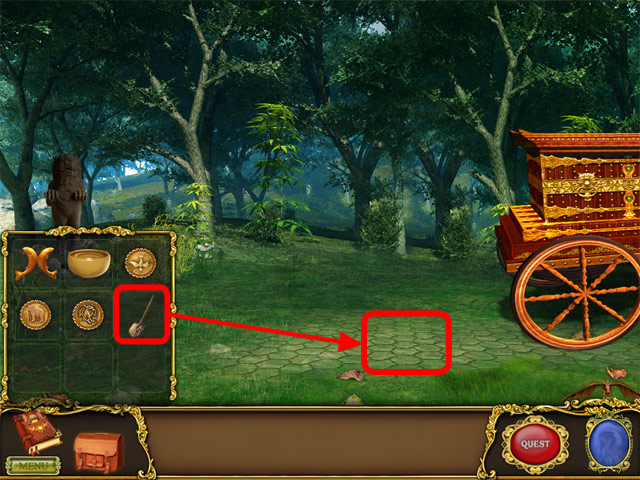
- Collect the shovel for use in another level.
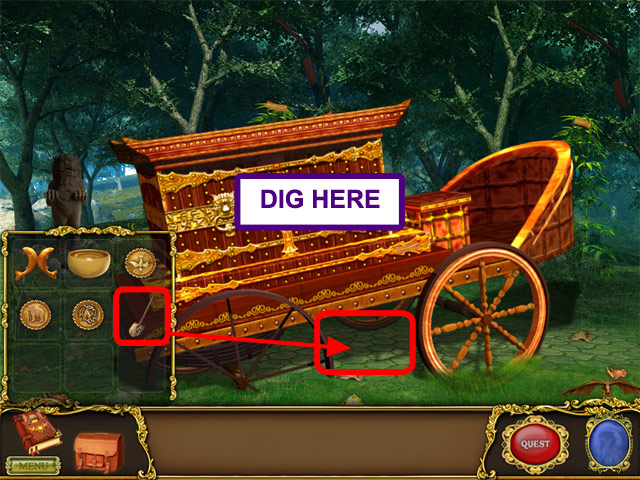
- Use the shovel in your inventory to dig at the correct spot.
- Find the 10 broken parts of the wagon wheel.
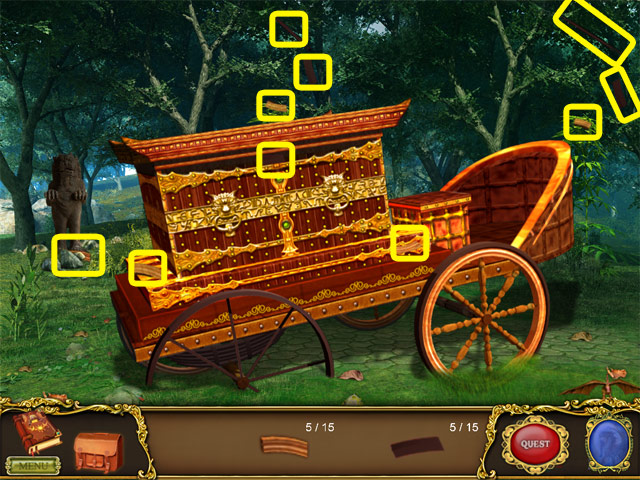
- Find the 10 broken parts of the wagon wheel.
- Find the 10 broken parts of the wagon wheel.
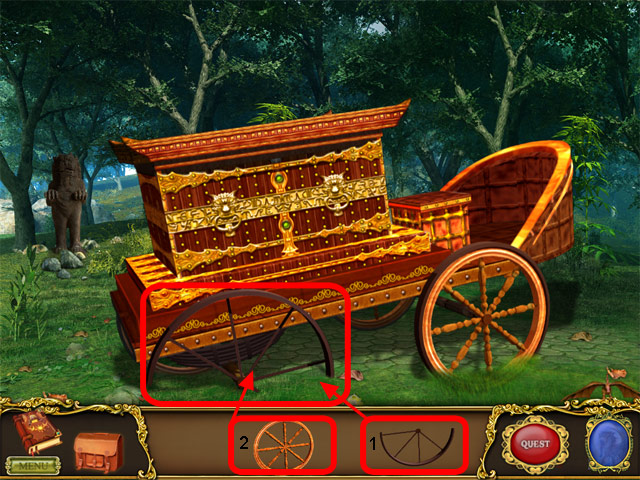
- Place the wheels on the correct spots on the wagon.
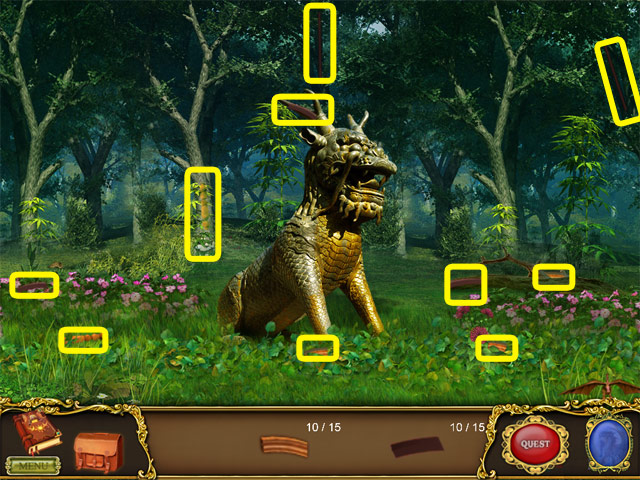
- Use the shovel in your inventory to dig up the area and collect a secret button.
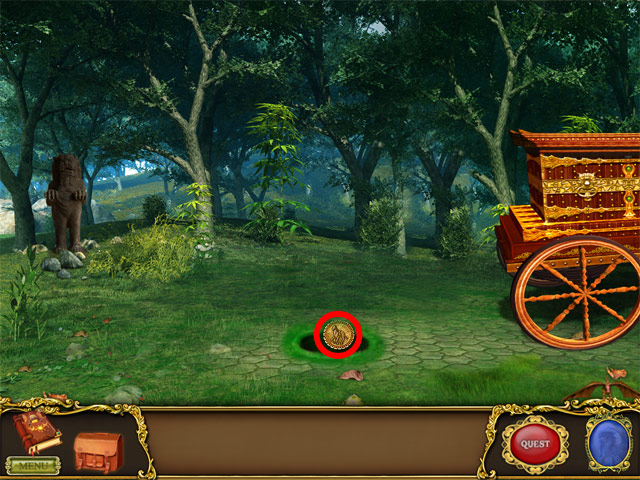
- Collect the secret button for use in a future level.
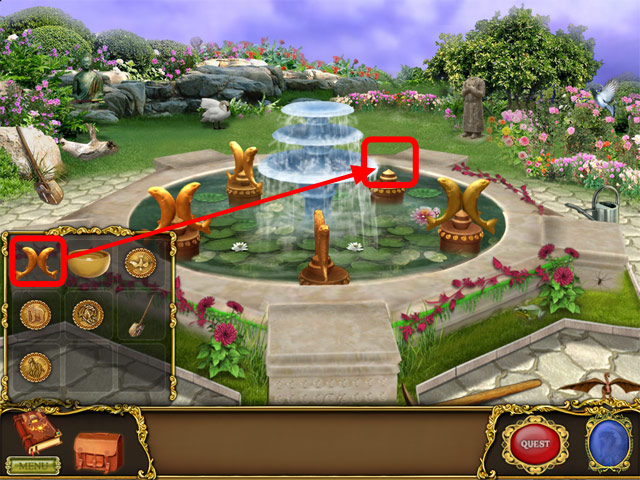
- Select the fish statue in your inventory and place it in the correct position.
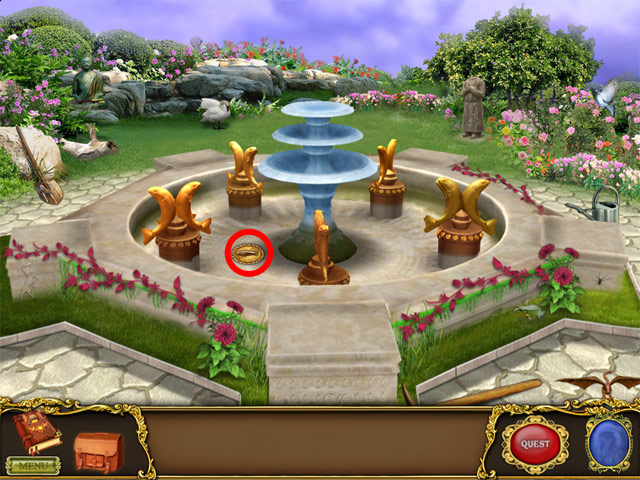
- Collect the secret button for use in a future level.

- Click to enter the Buddhist Temple.
- Select the secret buttons in your inventory and place them on the correct spots.
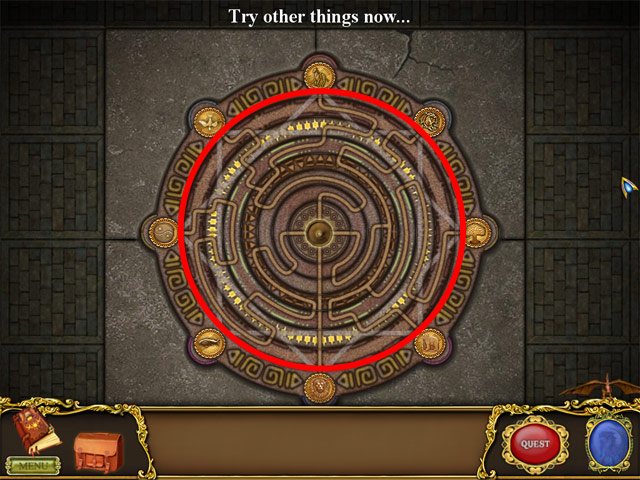
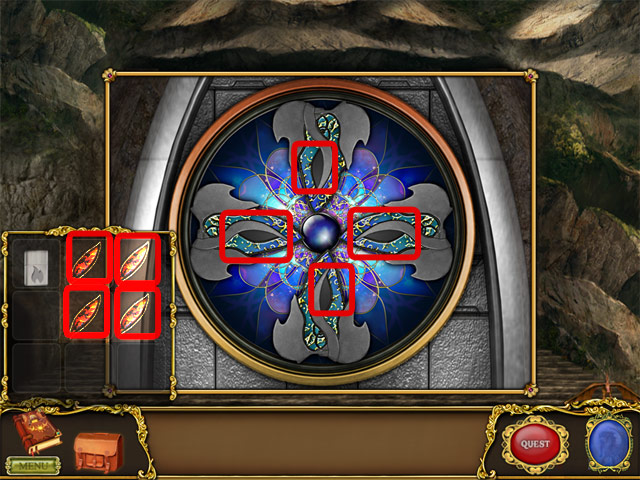
- Rotate the inner circle to the correct position.

- Select the bowl from your inventory and pour in oil to light the lamp.
- Click to zoom in.
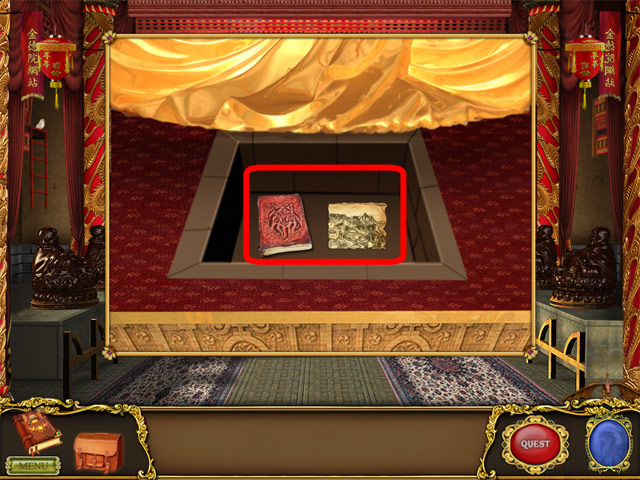
- Collect the map piece and the diary.
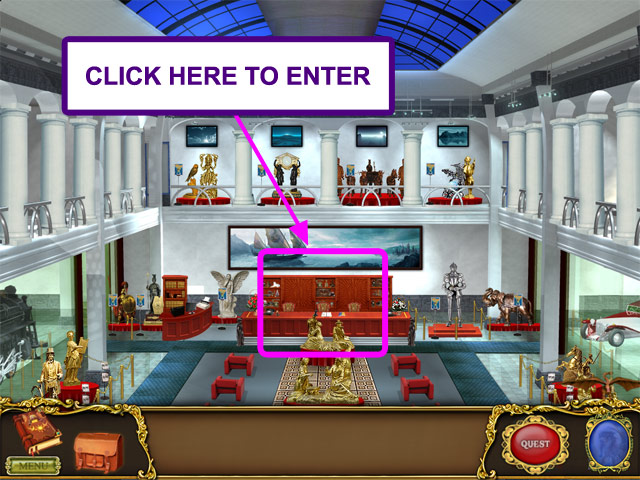
Chapter 3: The Auction House
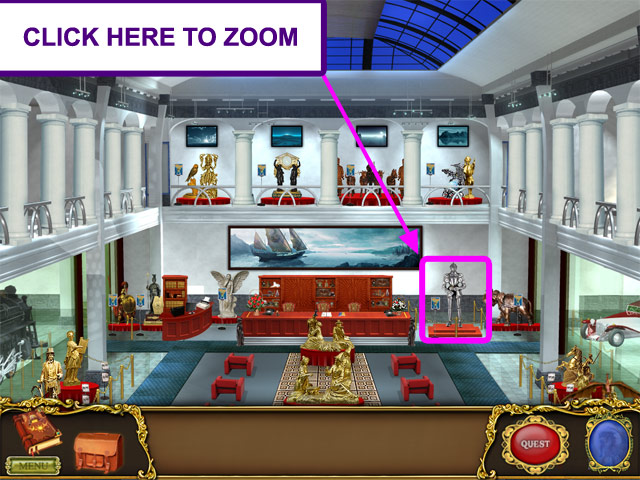
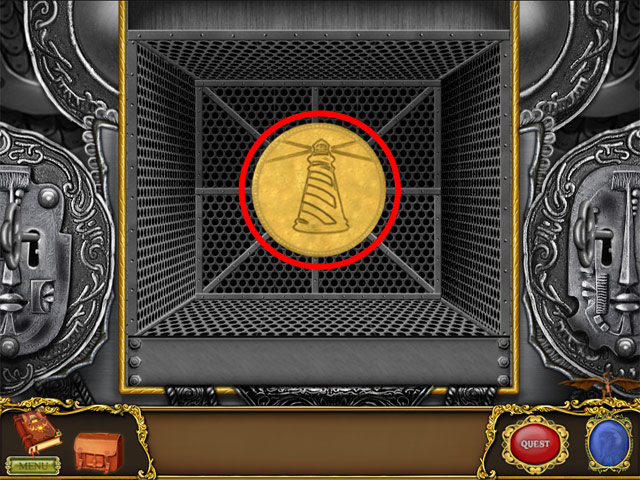
- Click here to zoom in.

- Rearrange the buttons to collect the keys.
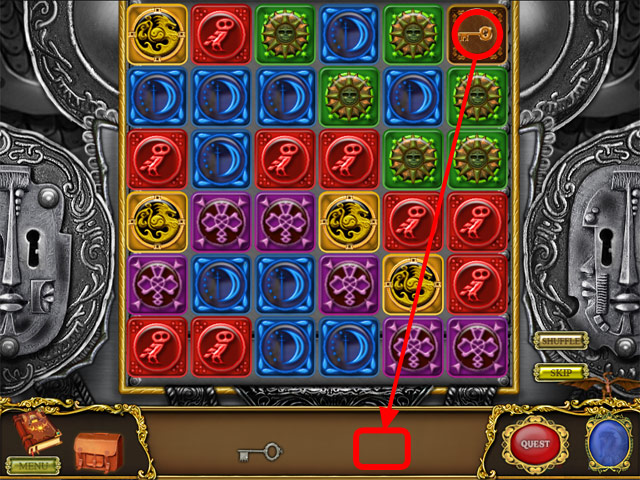
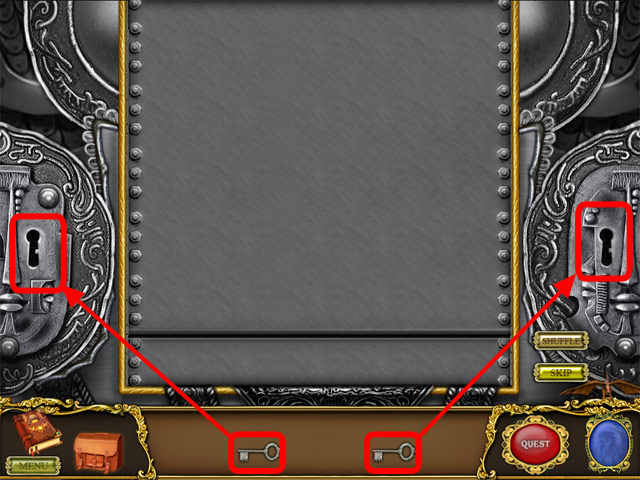
- Use the keys at the bottom of your screen to open the right and left chest locks.
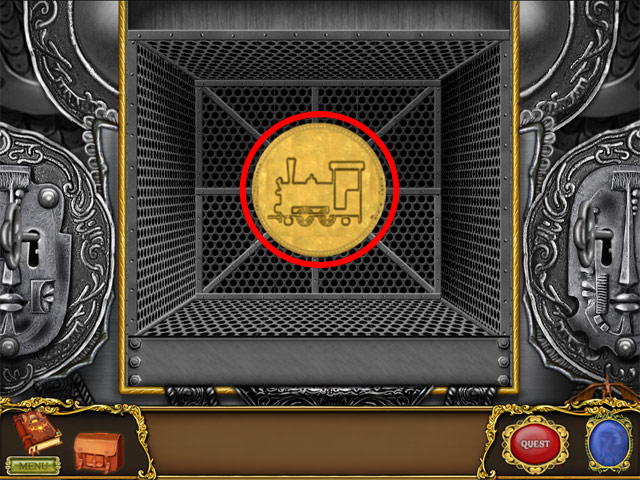
- Click on the coin to collect a secret clue.
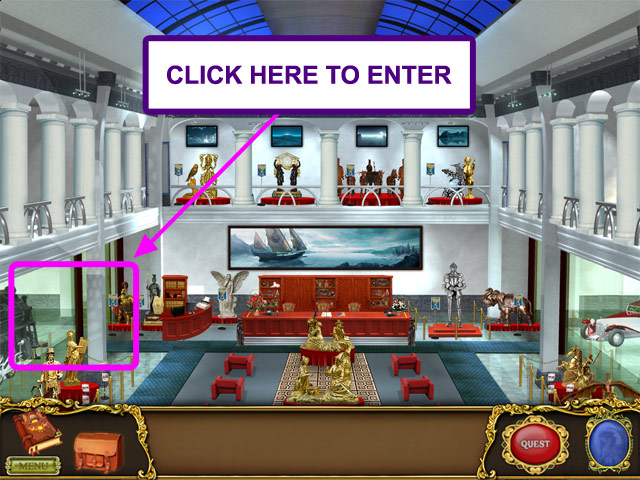
- Click to zoom in.
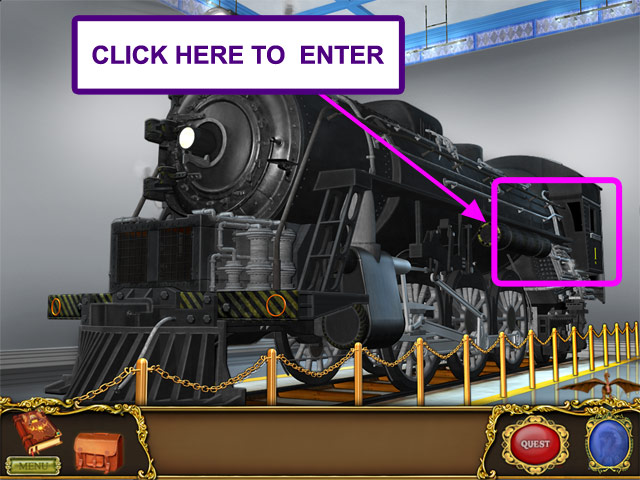
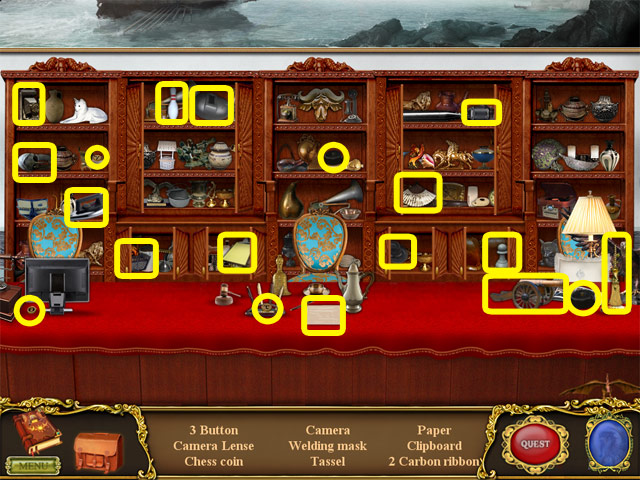
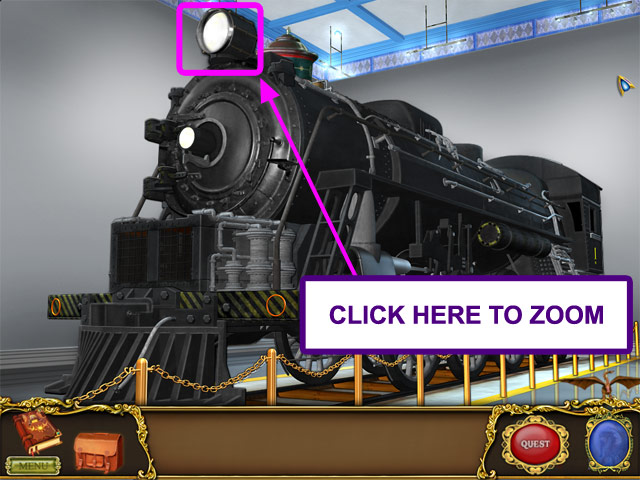
- Click to enter the train.
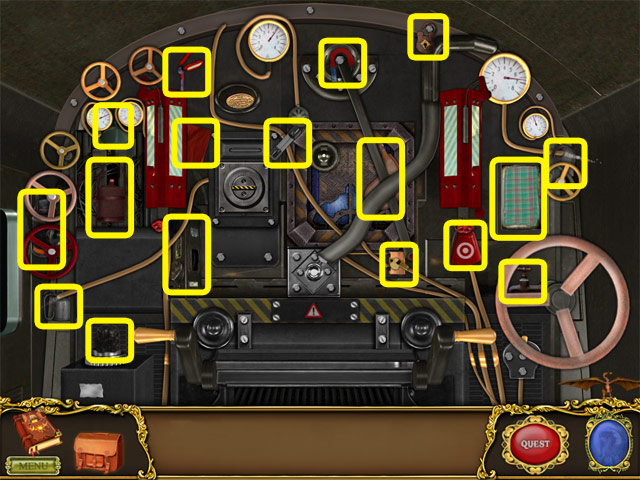
- Find the hidden objects inside the train.
- Use the screwdriver in your inventory to remove the screws.
- Click to retrieve a secret clue.
- Zoom in to find more hidden objects.
- Find the hidden objects.

- Click to zoom in.
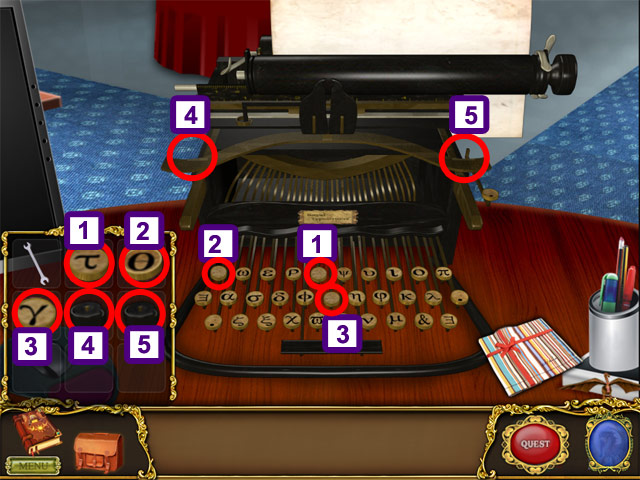
- Place the typewriter keys in your inventory in the correct spots on the typewriter.
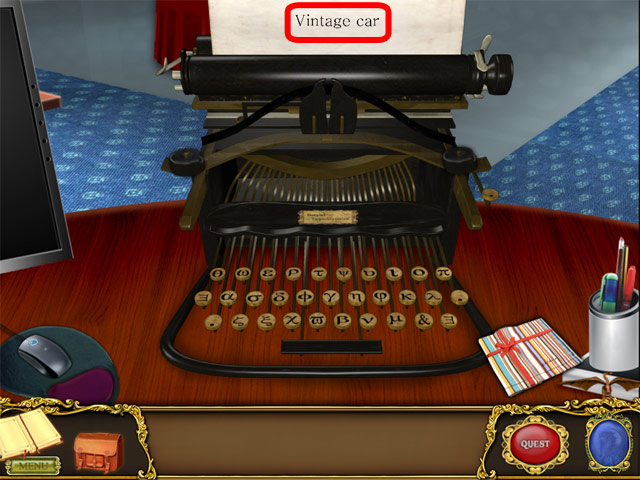
- Using your journal as a reference, type the correct symbols to form the word "vintage car".
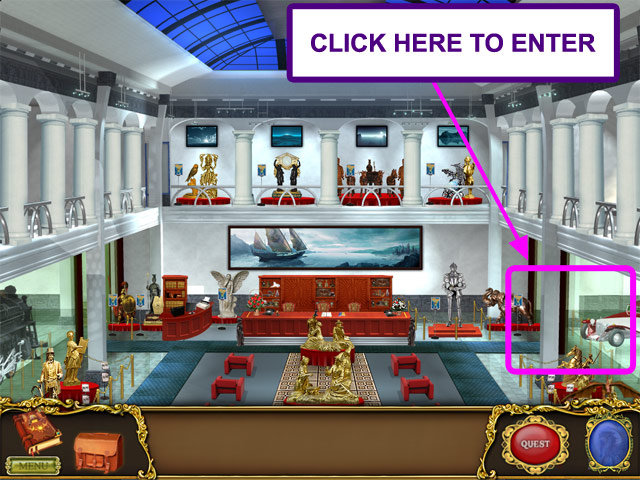
- Click to zoom in.
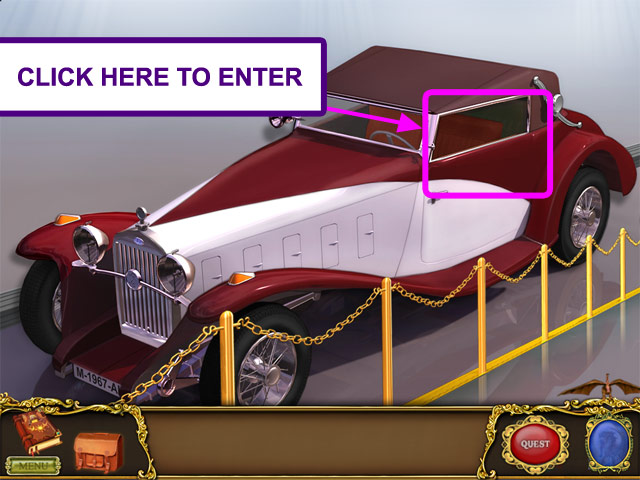
- Click on the door to enter the car.
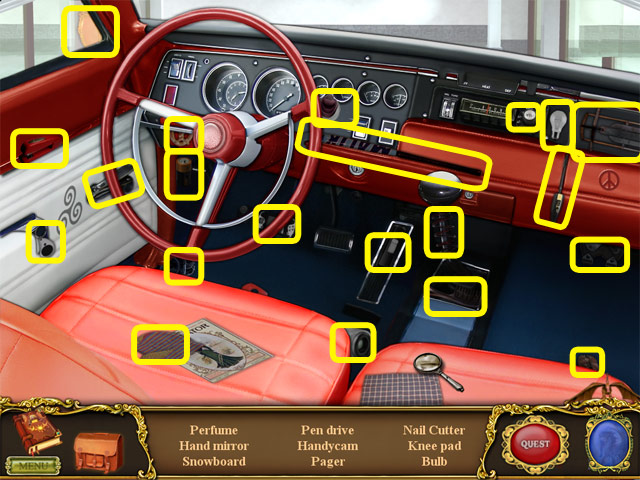
- Find the hidden objects inside the car.
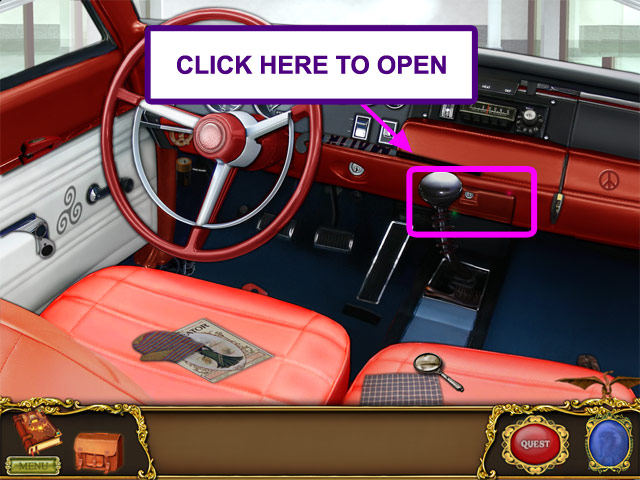
- Click to zoom in and find a secret clue.
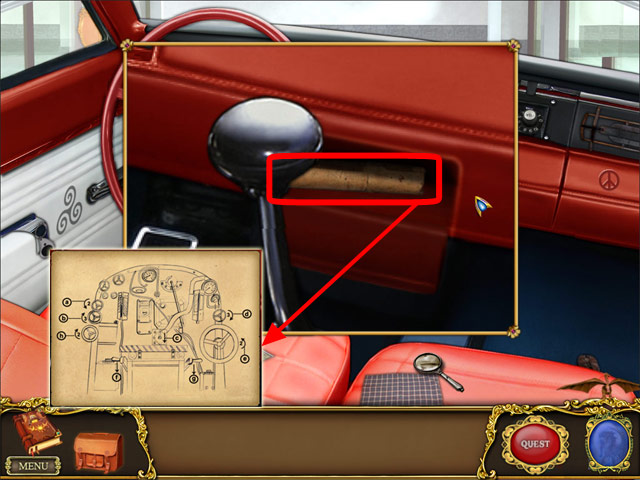
- Click to open the car manual.
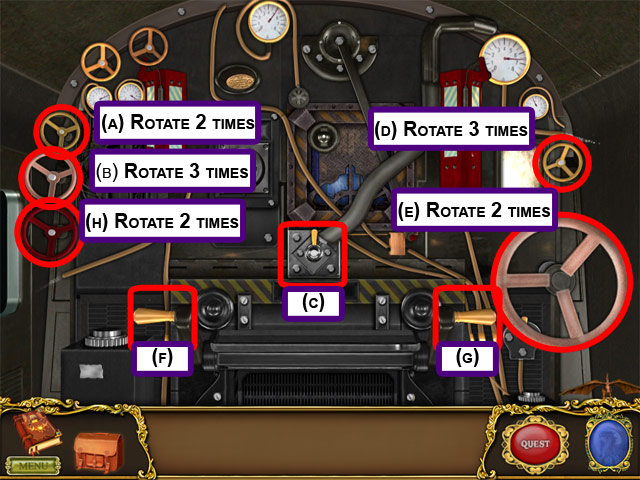
- Use the information in the manual to stop the engine (refer to your journal).
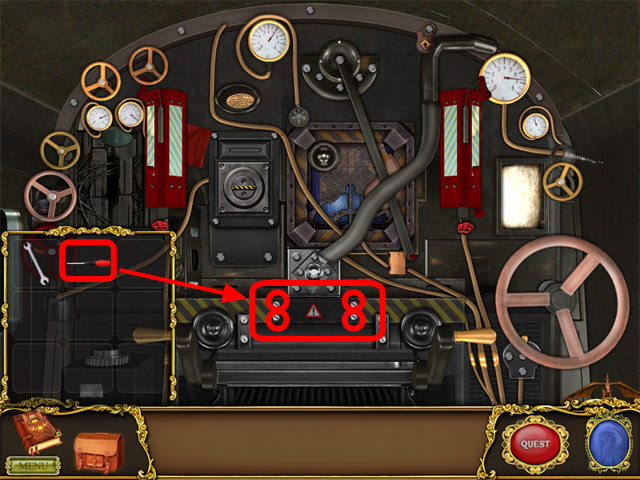
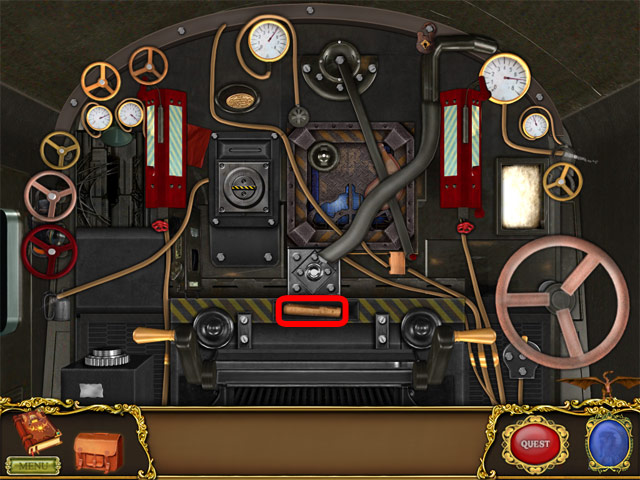
- Click to zoom in.
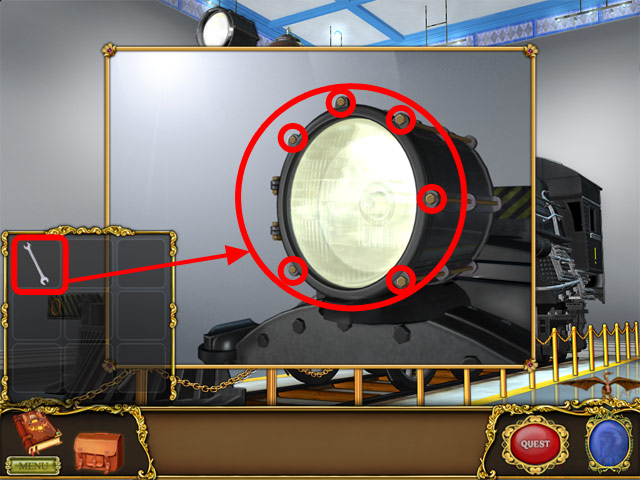
- Use the wrench in your inventory to remove the screws one by one.
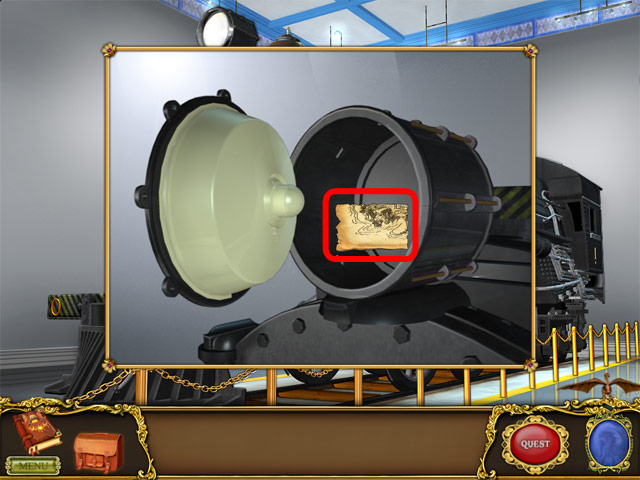
- Click to pick up the third piece of the map.
Chapter 4: The Indian Cave

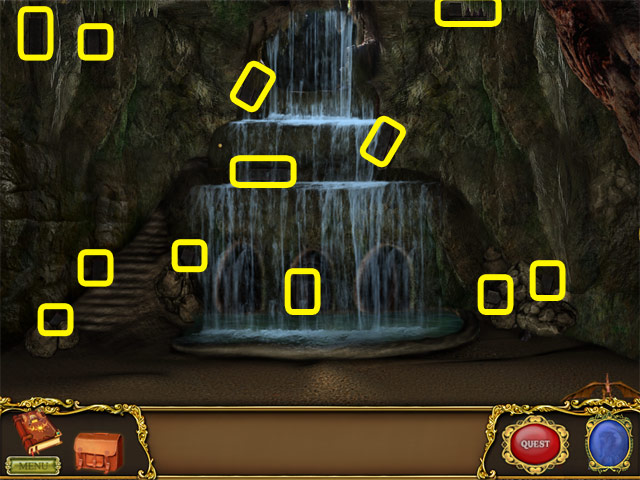
- Click to zoom in and hunt for more hidden objects.
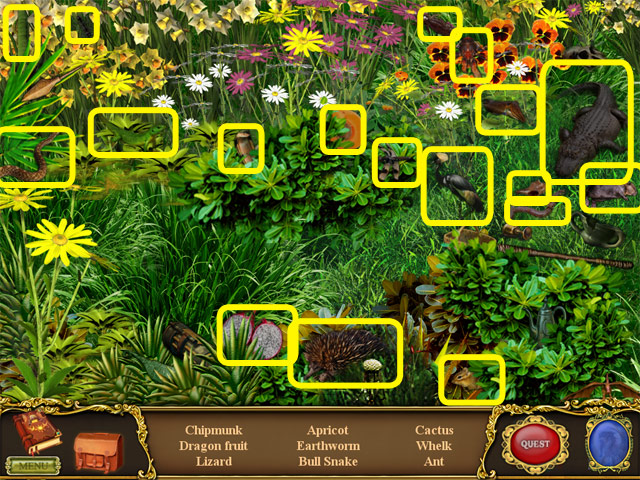
- Find the hidden objects.
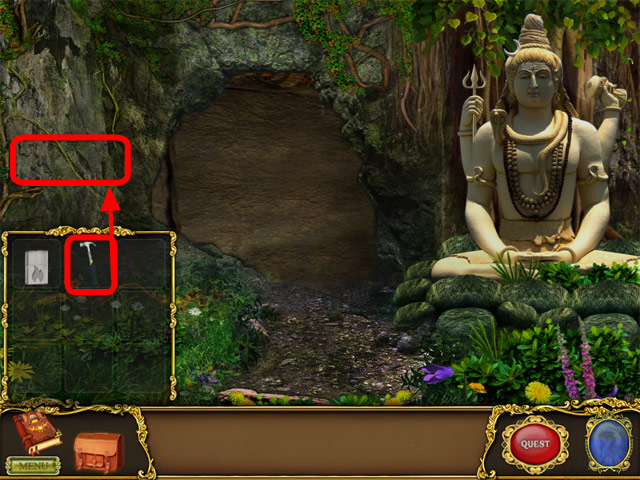
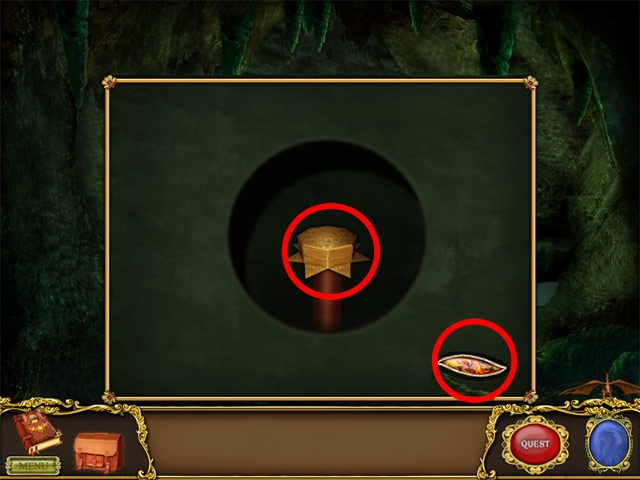
- Use the hammer in your inventory to crack the cave wall and reveal hidden clues.

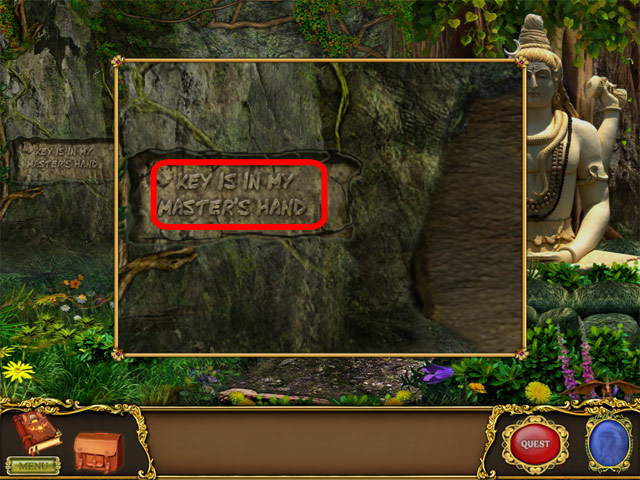
- Click to reveal a hidden clue.

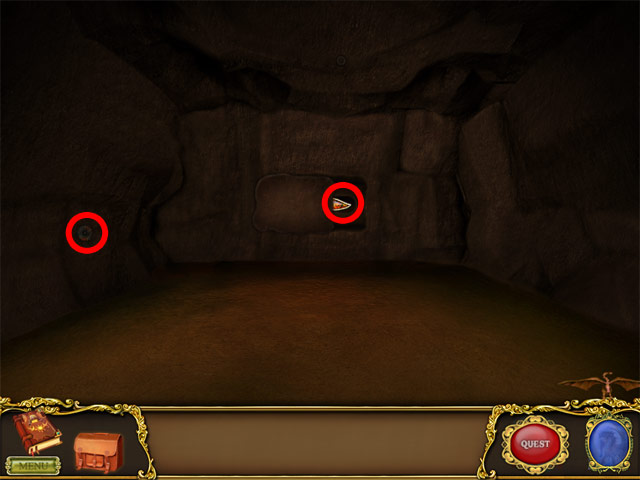
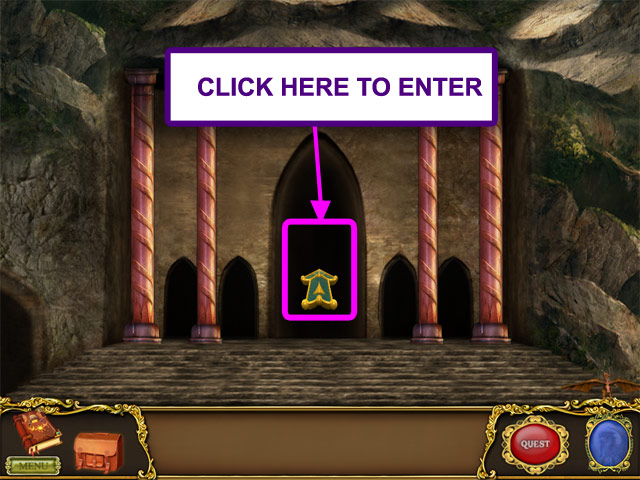
- Click to open the cave.
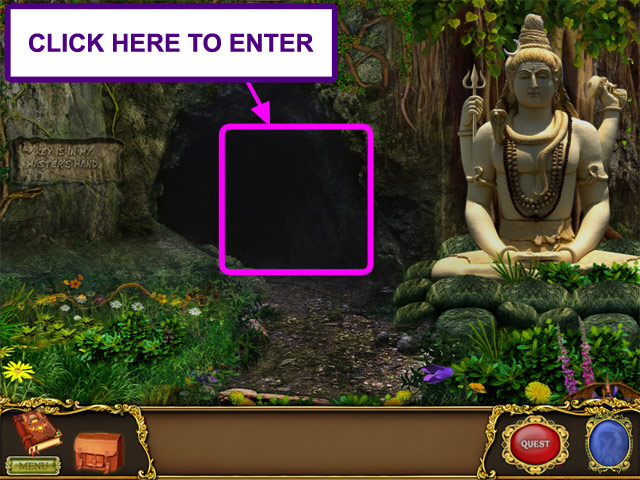
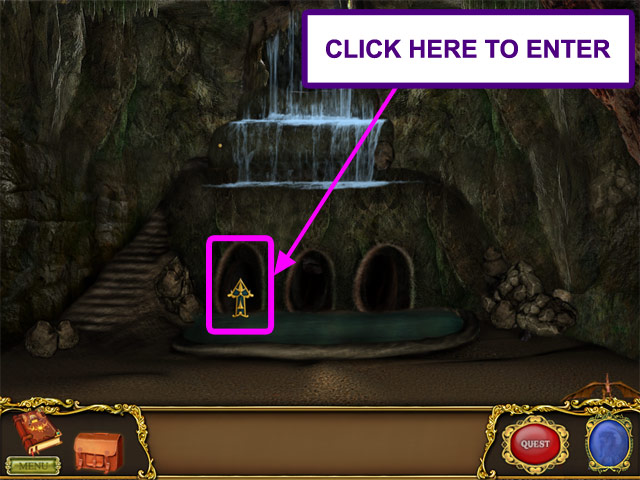
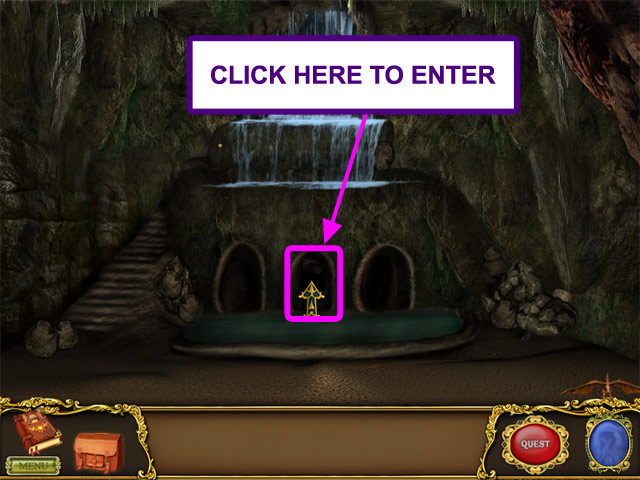
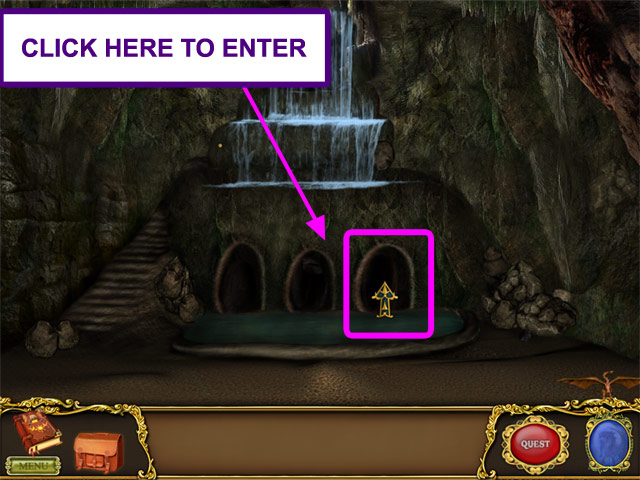
- Click here to enter the cave.
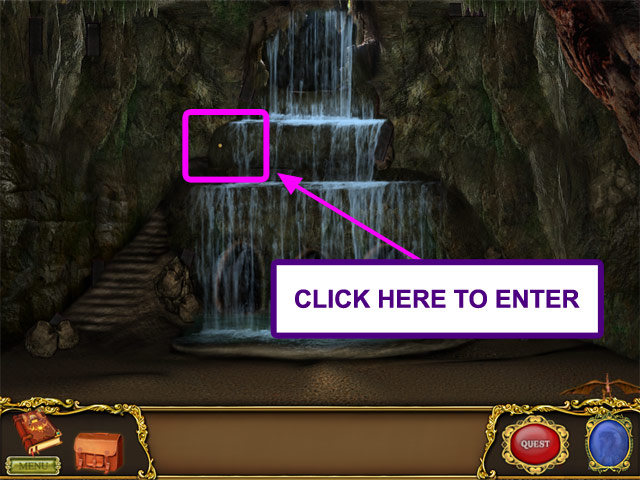
- Click on the waterfall to reveal your next clue.
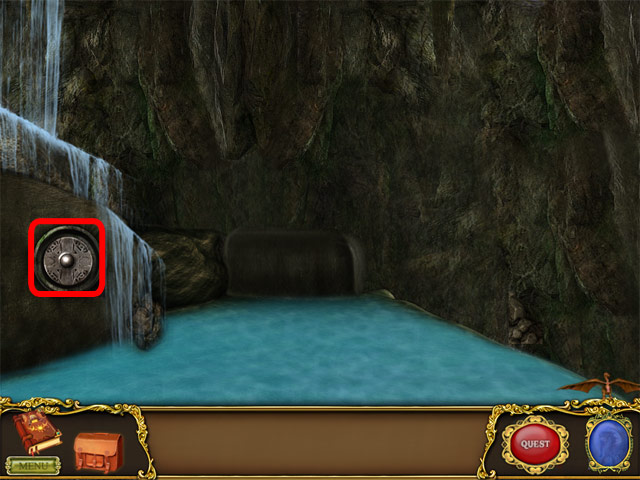
- Click the portion to get some secret clue.
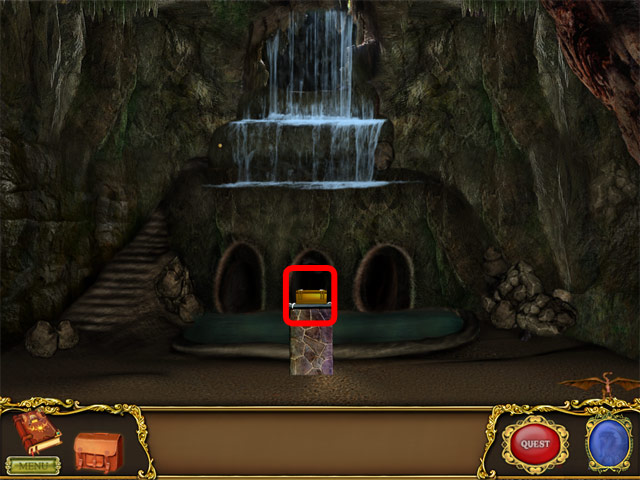
- Gather the pieces of the opening lever to proceed.
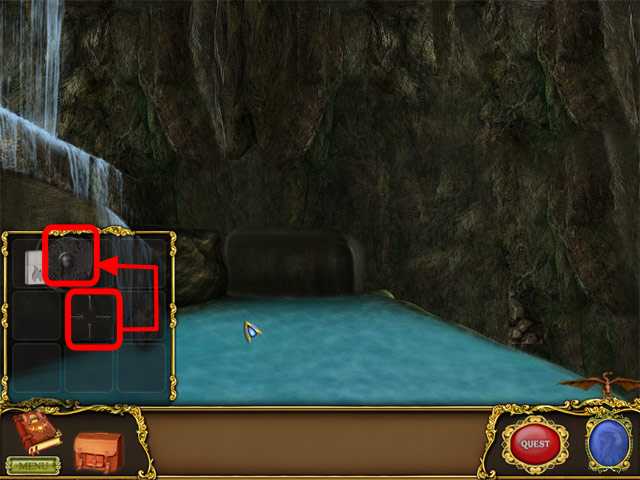
- Take the opening lever from your inventory and place it in the right spot.
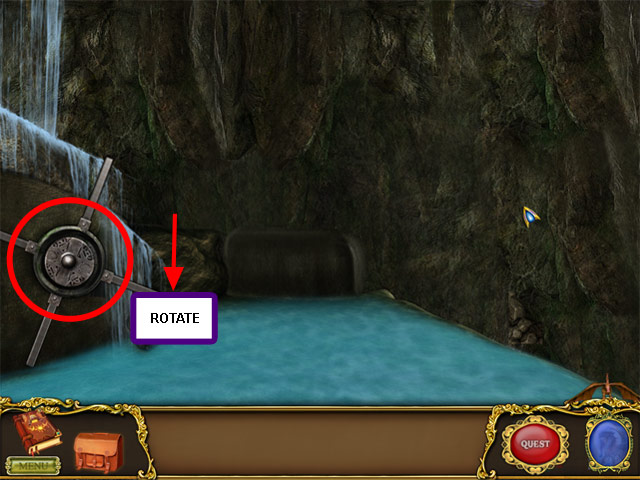
- Rotate the lever to stop the flow of water.
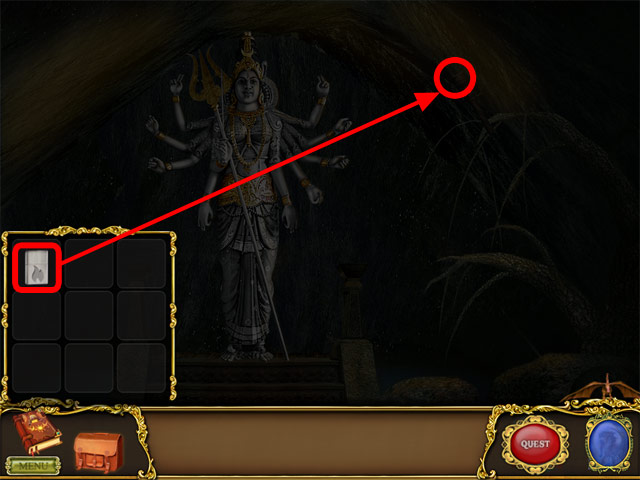
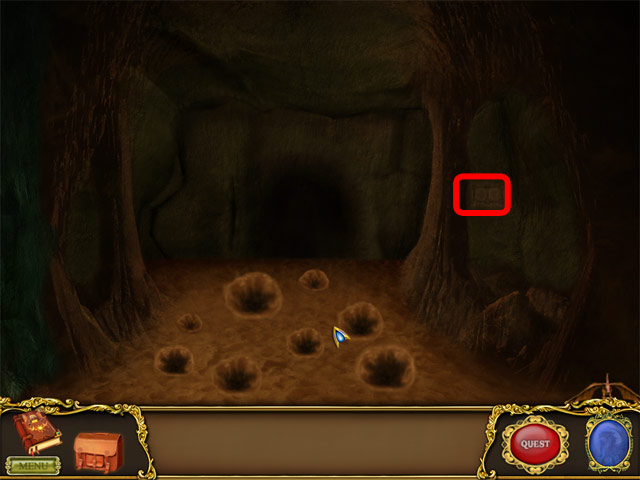
- Click here to enter the first cave.
- Use the lighter in your inventory to ignite the torch.
- Click to proceed to the next level.
- Find the objects displayed in the bottom panel.
- Click the marked portion to enter the second cave.
- Use the lighter in your inventory to ignite the torch.
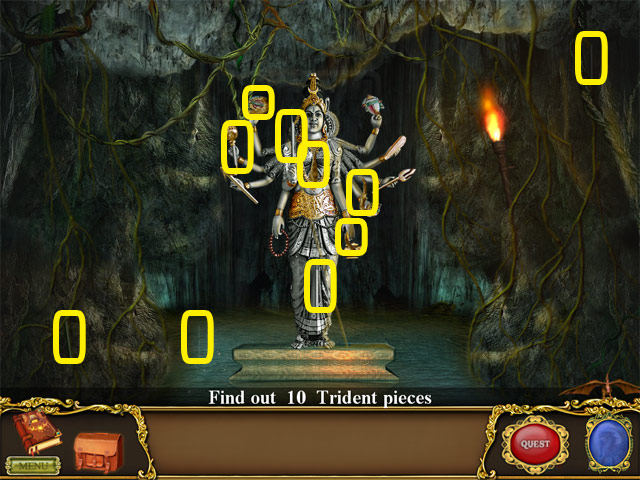
- Find the 10 pieces of the staff.
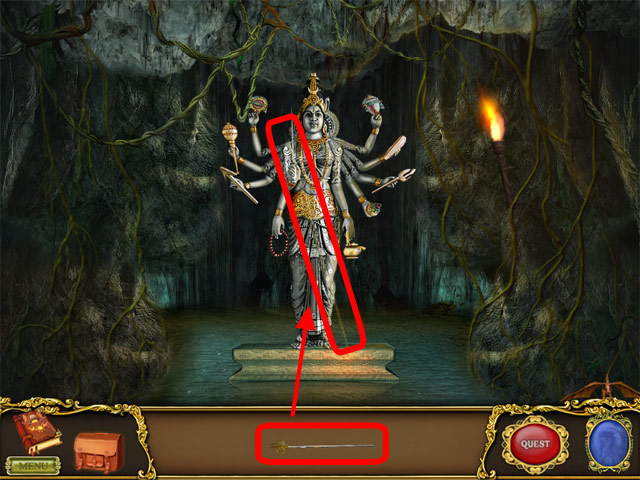
- Select the assembled staff in the bottom panel and place it in the correct spot.
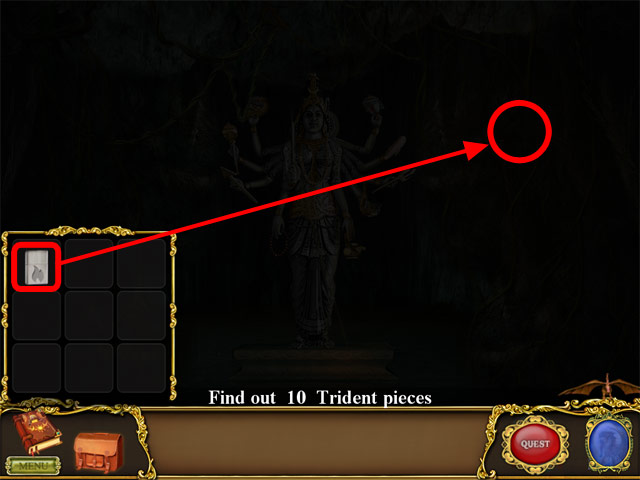
- Click the marked portion to enter the third cave.
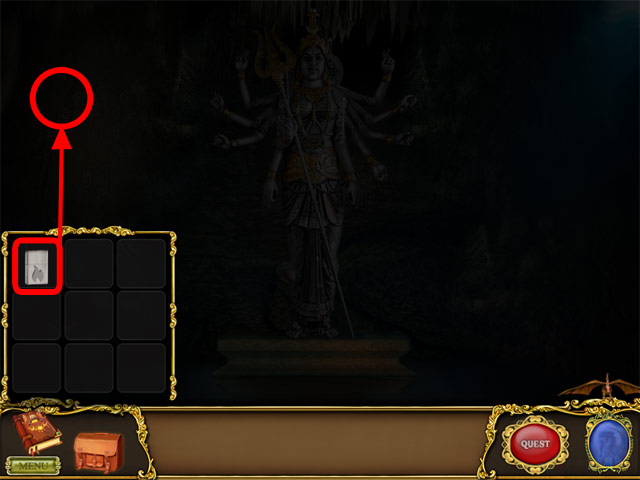
- Use the lighter in your inventory to ignite the torch.
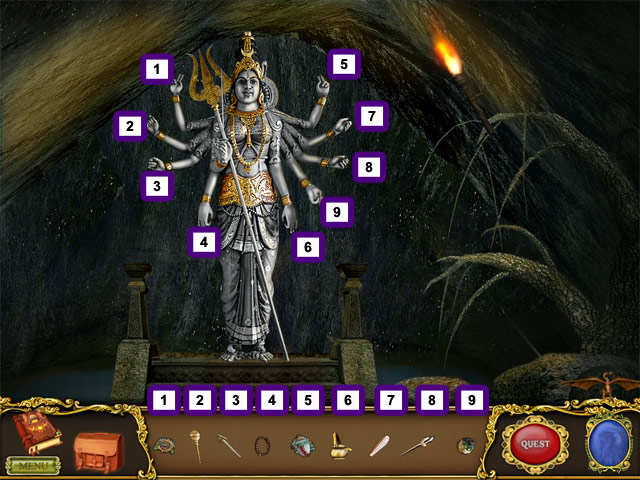
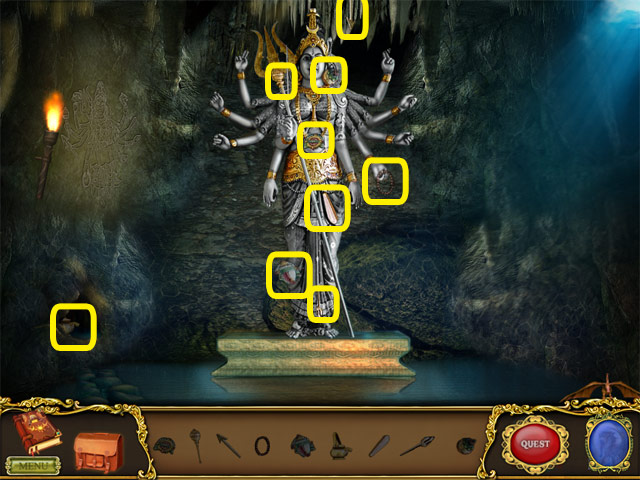
- Place each object in the bottom panel in the correct spot on the statue.
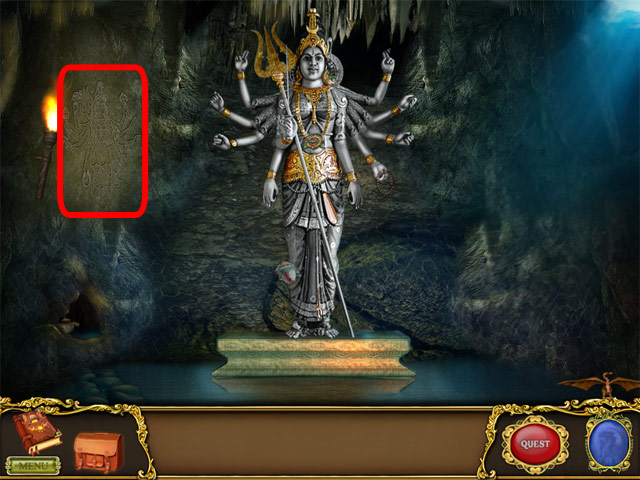
- Click to zoom in for a secret clue.
- Click and collect the fourth piece of the map.
Chapter 5: The Curse of the Forest
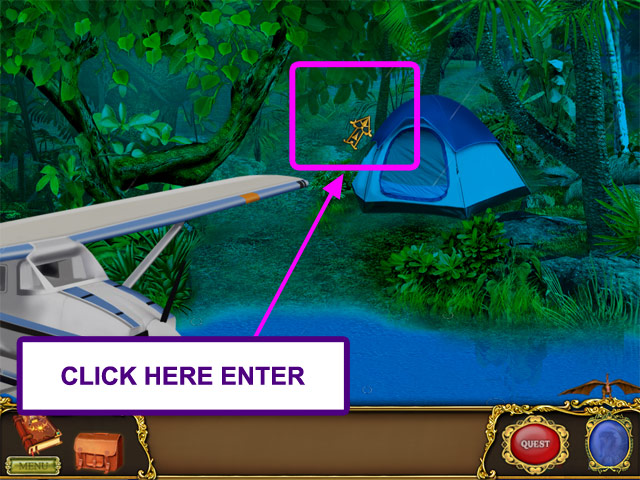
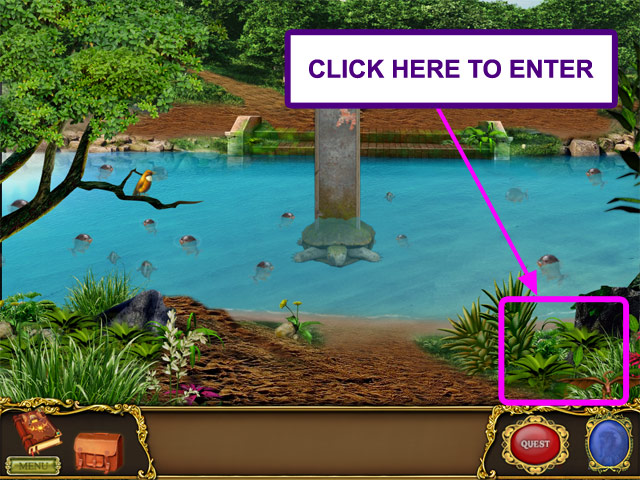
- Click to enter the forest.
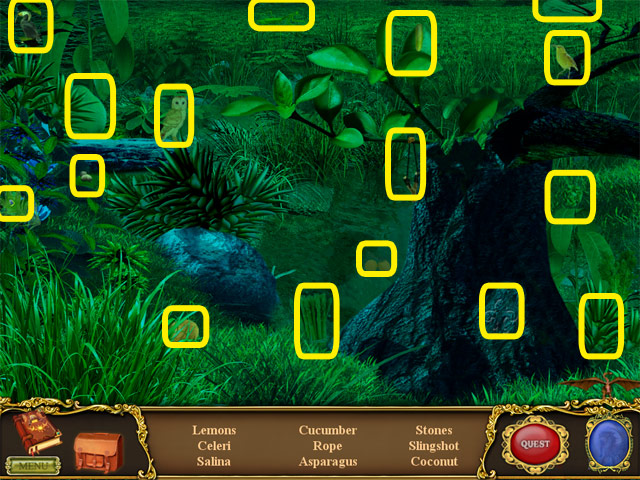
- Click to zoom in for more hidden objects.
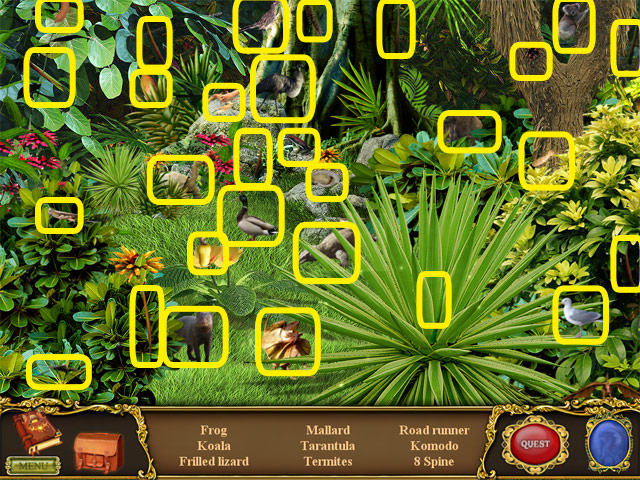
- Find the hidden objects in the forest.
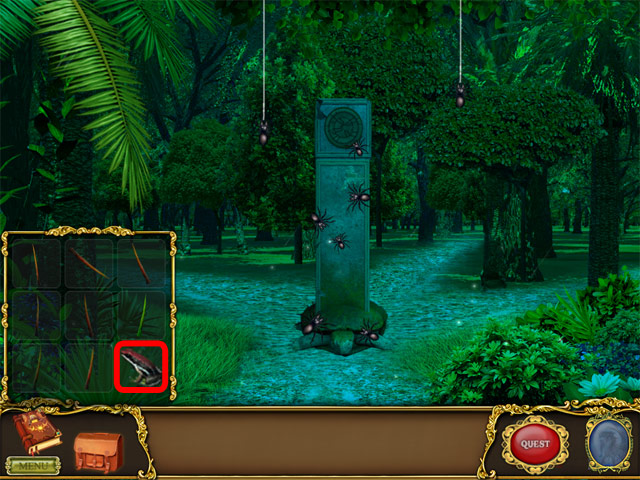
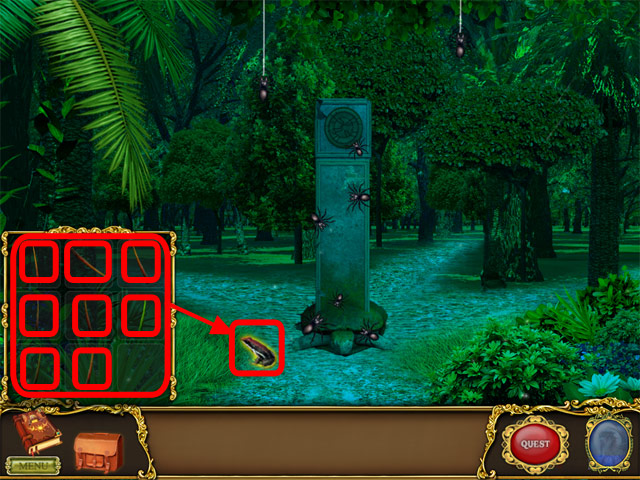
- Select the poisonous frog in the inventory and place it on the correct spot.
- Touch the frog with each of the eight spines in your inventory to add poison to the spines.
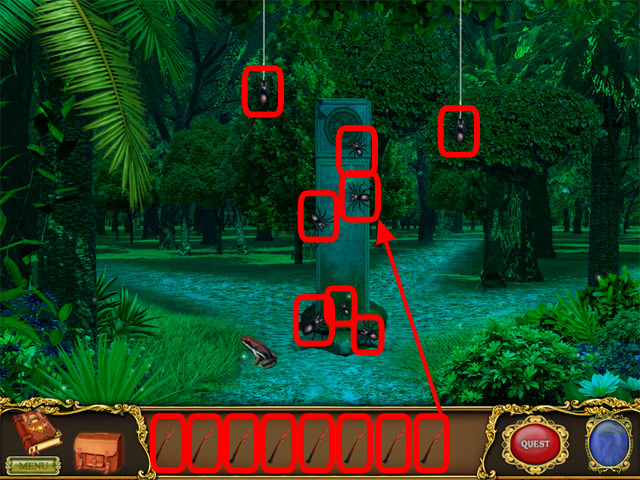
- Kill each spider with one of spines you've just poisoned.
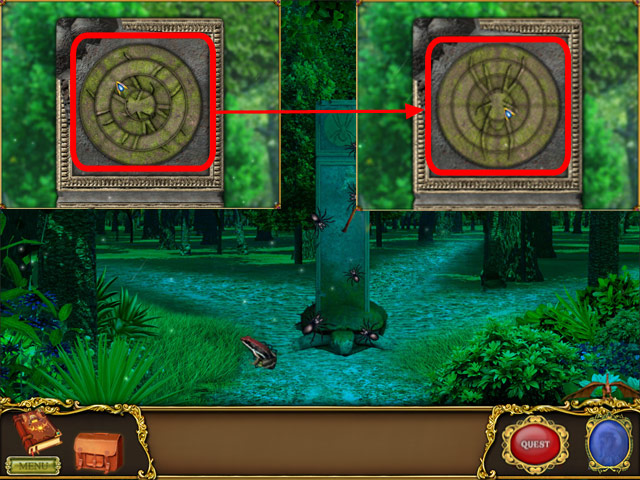
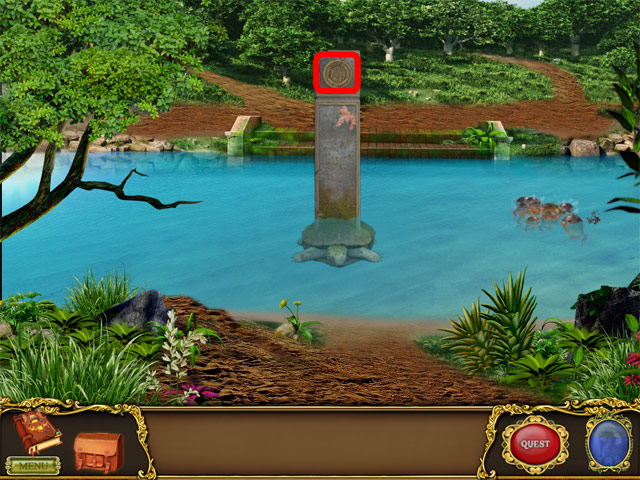
- Rotate the puzzle to reveal the image of a spider.
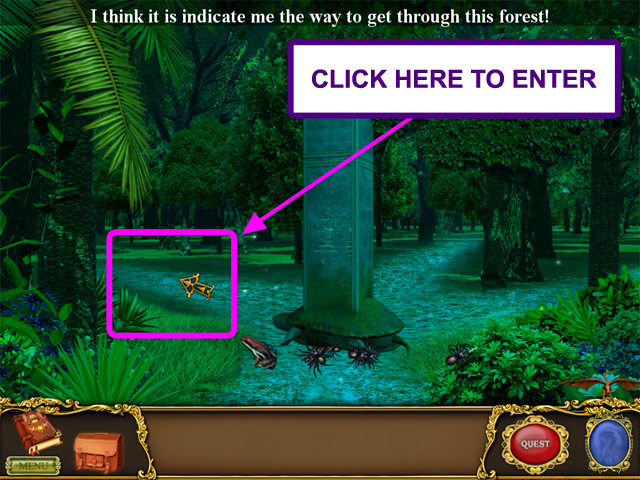
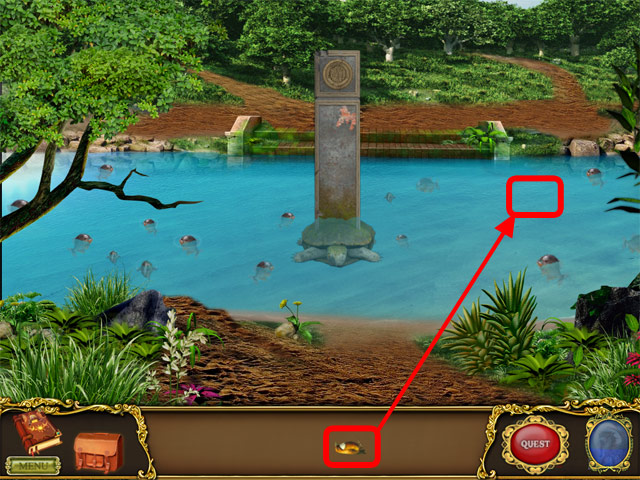
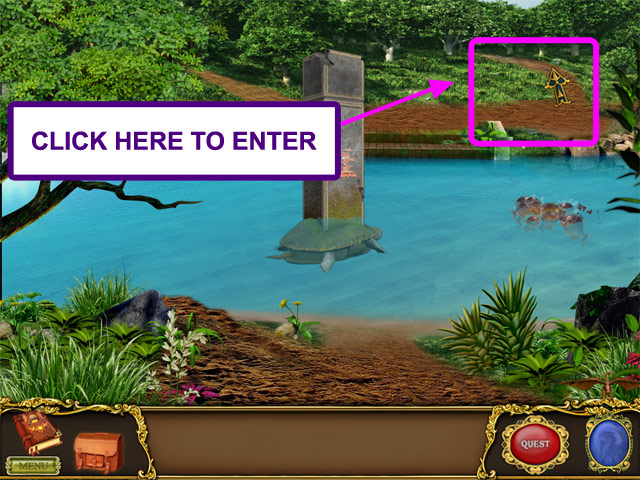
- Click in the direction the turtle is facing to proceed on the correct route.
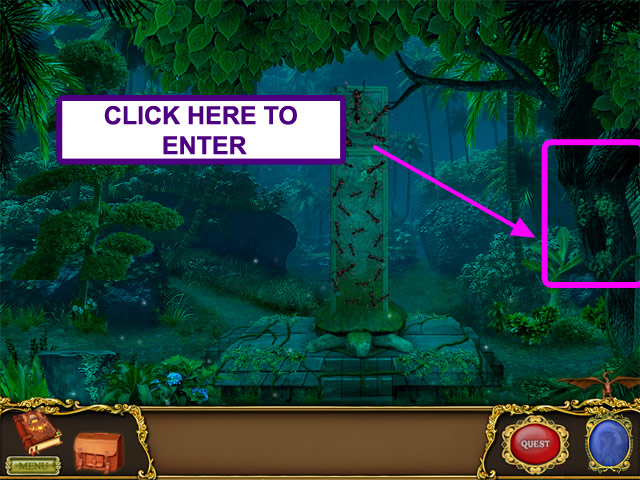
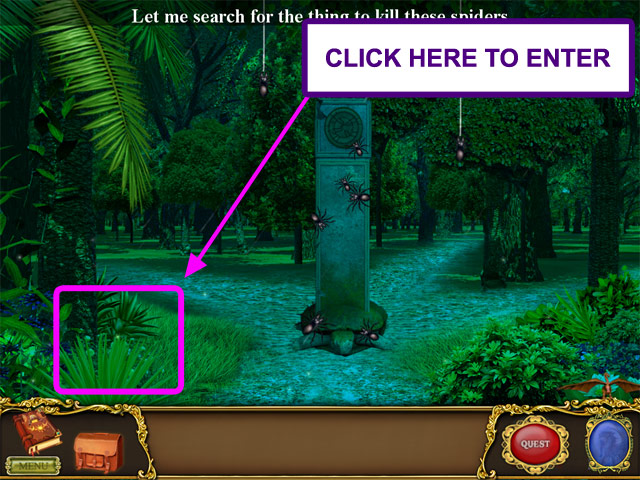
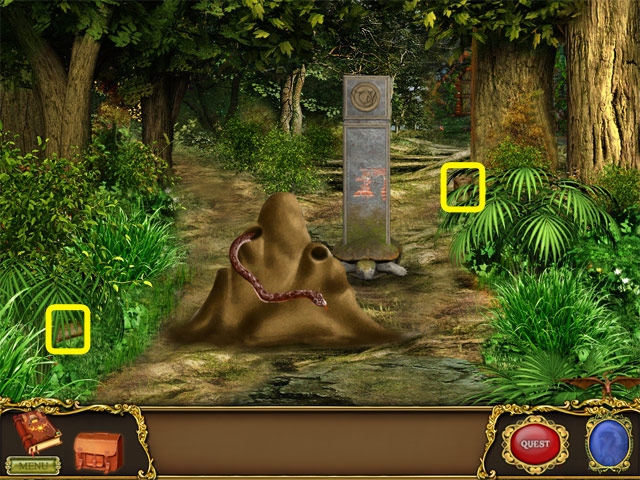
- Click here to zoom in and find more hidden objects.
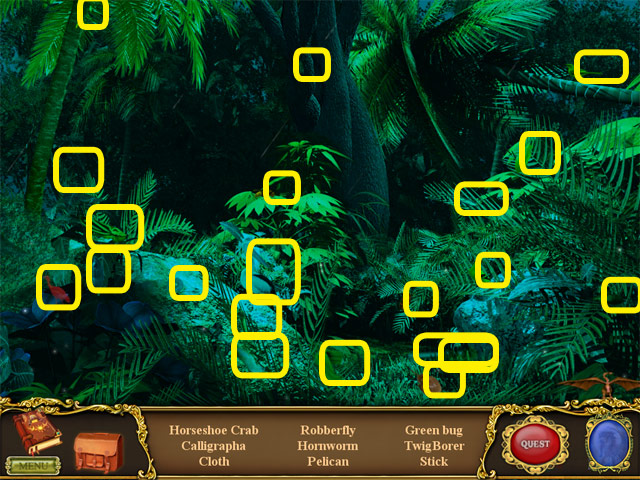
- Find the hidden objects.
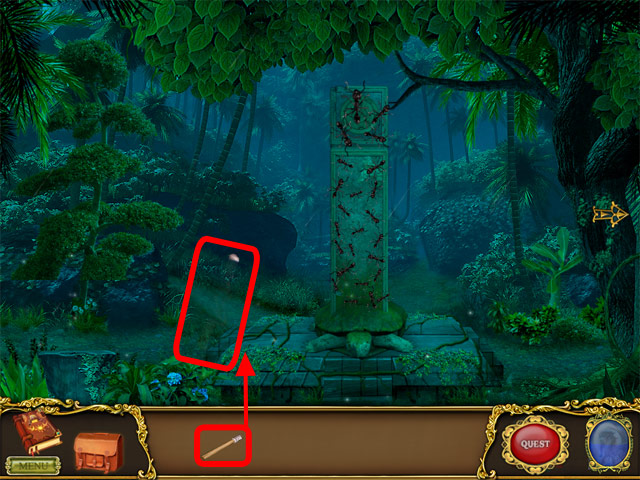
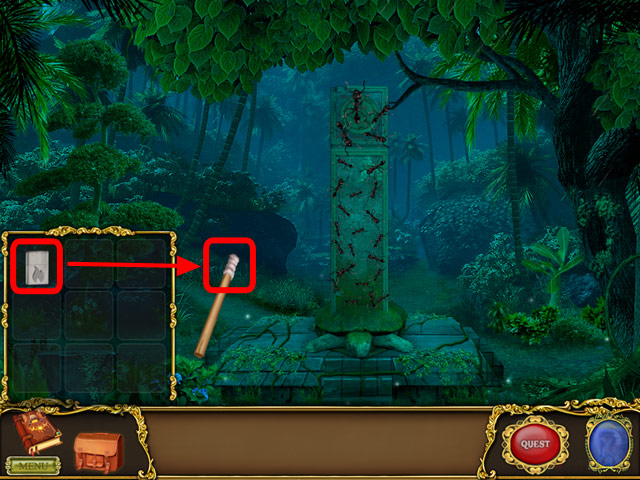
- Select the stick in the bottom panel and place it in the correct spot above.
- Use the lighter in your inventory to ignite the torch.
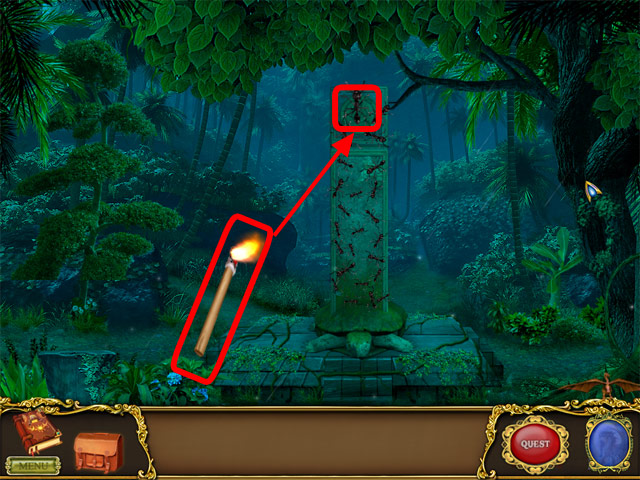
- Use the torch to kill all the ants.
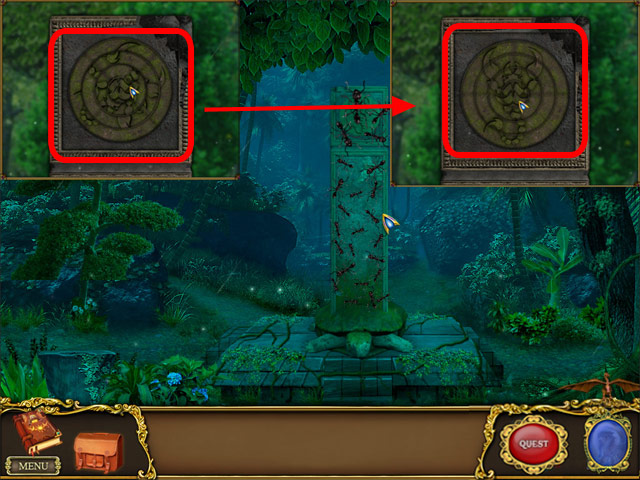
- Rotate the panels to form the correct image.
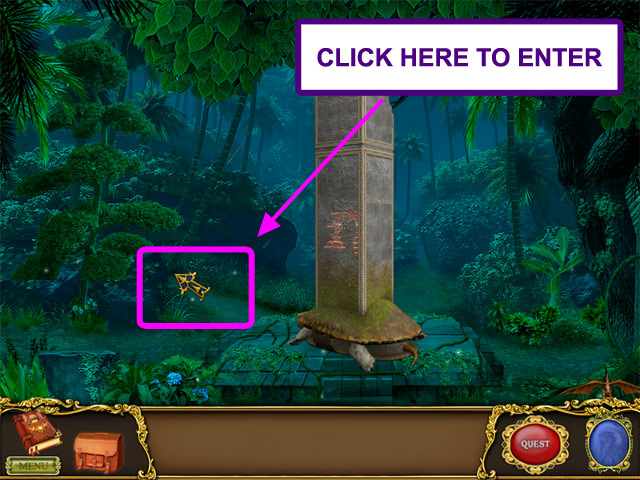
- Click in the direction the turtle is facing to proceed on the correct route.
- Zoom in to find the hidden objects.
- Find the hidden objects.
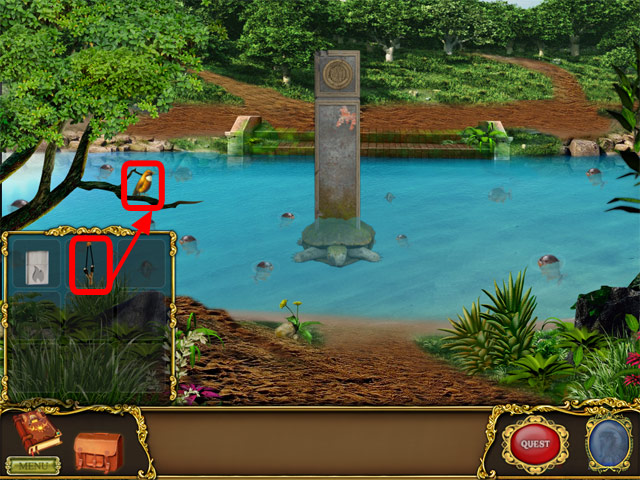
- Use the sling shot in your inventory to shoot the bird.
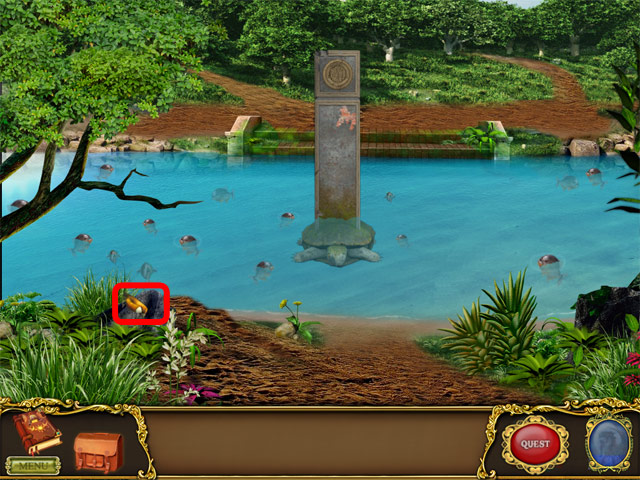
- Click the bird.
- Select the bird in the bottom panel and throw it in the water to divert the fishes.
- Click Here to Zoom in.

- Rotate the panels to form a fish image.
- Click in the direction the turtle is facing to proceed on the correct route.
- Find the two wood logs.
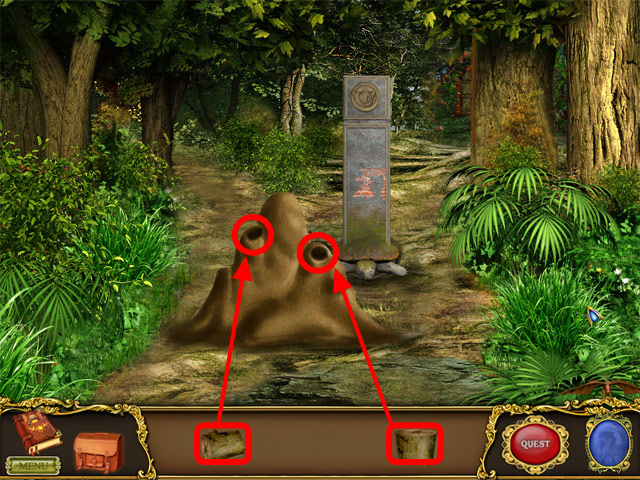
- Use the wood logs you’ve found to close the mud holes.
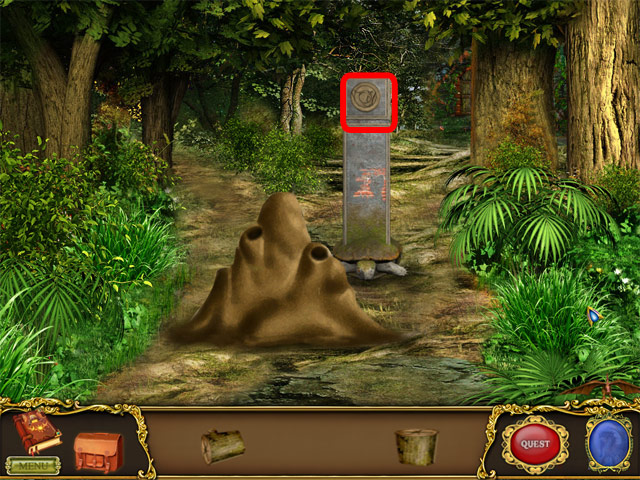
- Click to zoom in.
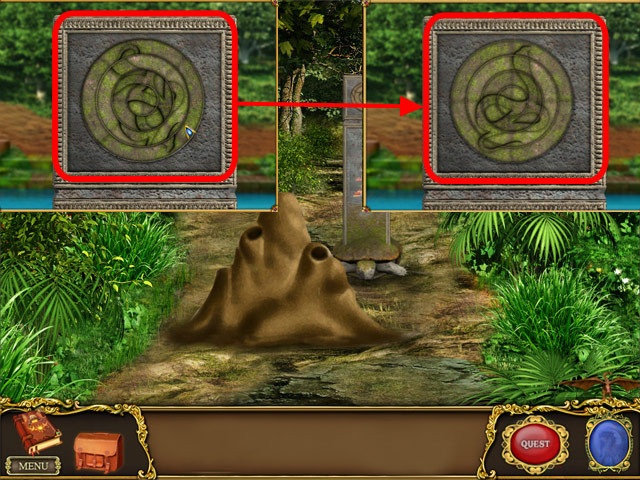
- Rotate the panels to form a snake image.
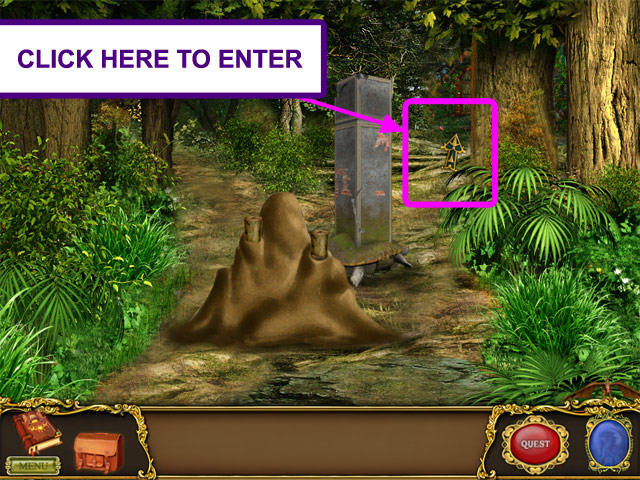
- Click in the direction the turtle is facing to proceed on the correct route.
Chapter 6: The Gates of Wisdom

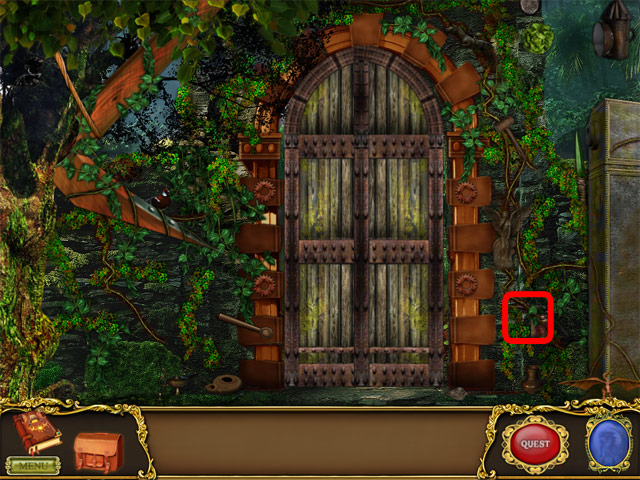
- Find the objects hidden around the gate.
- Click to pick up the gas torch.

- Use the lighter in your inventory to ignite the gas torch.
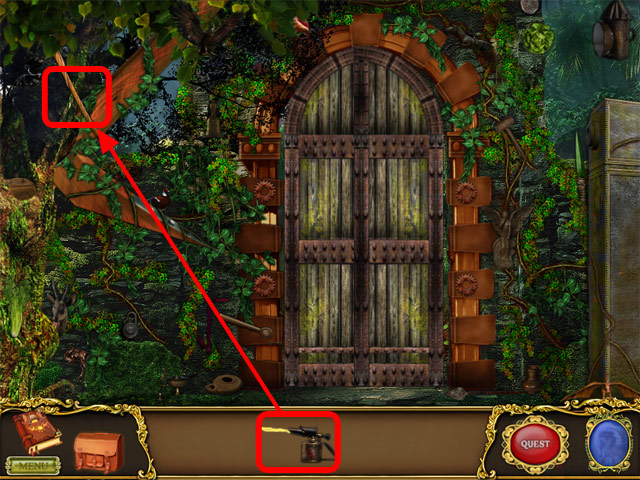
- Use the lit torch in the bottom panel to release the plow.
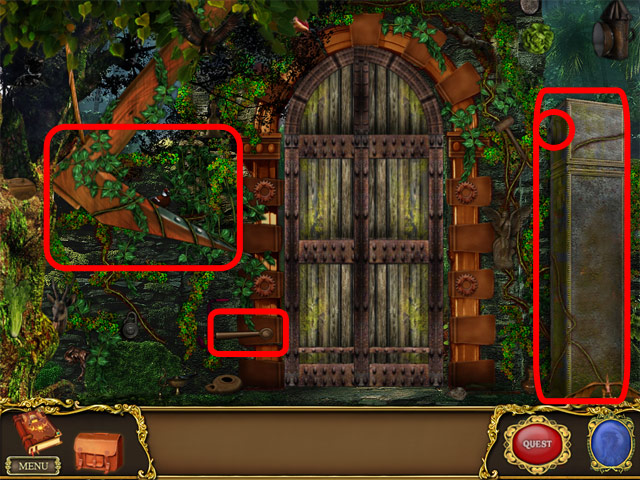
- Click to zoom in.
- Use the lever to align the plough and pillar to open the gate .
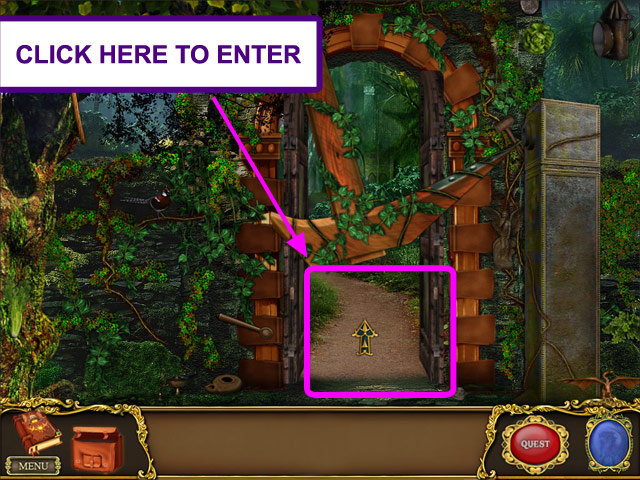
- Click to enter the cave.
- Click to reveal a secret clue.
- Collect the key to open the first gate.
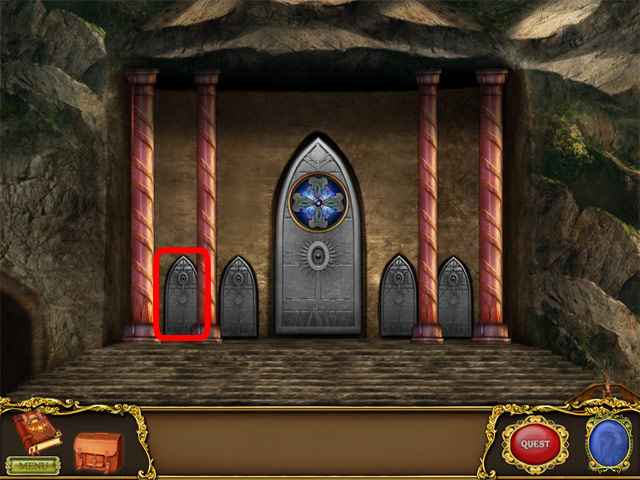
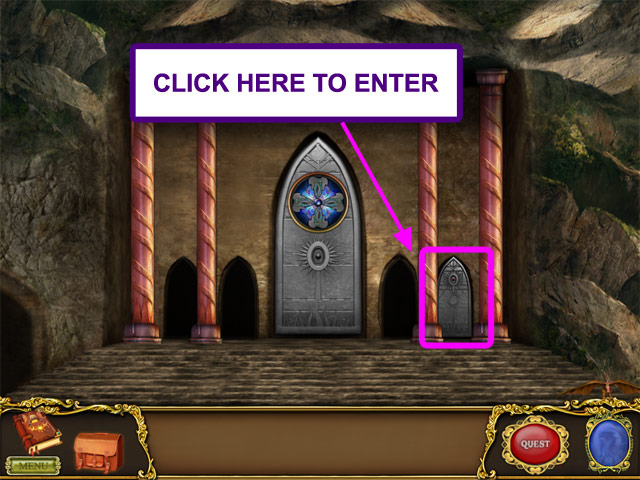
- Click the marked Portion to enter .

- Open the first gate with the key you’ve collected.
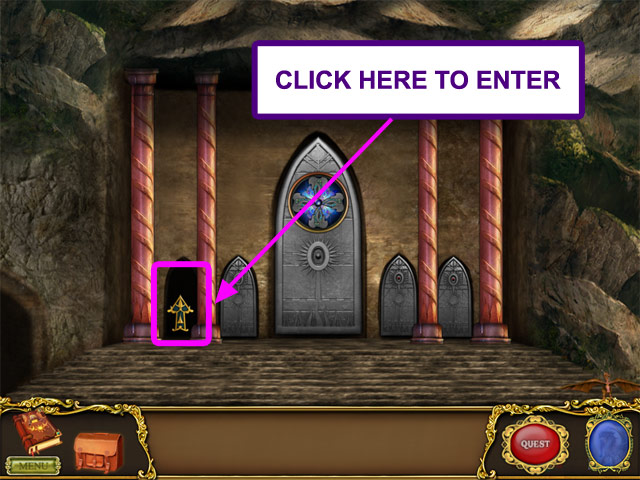
- Click here to enter into the first cave.
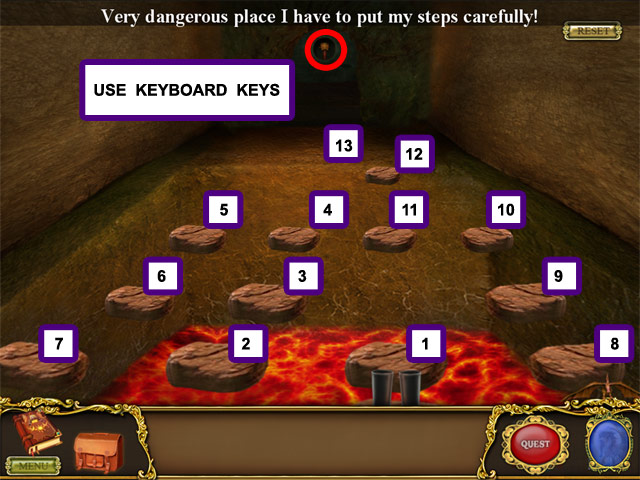
- Place the steps carefully to reach items at the end.
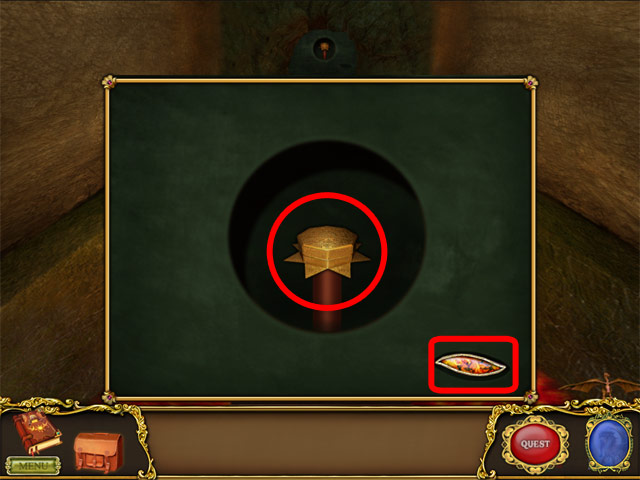
- Collect the key to the second gate (and that dragon eye will come in handy later, too).
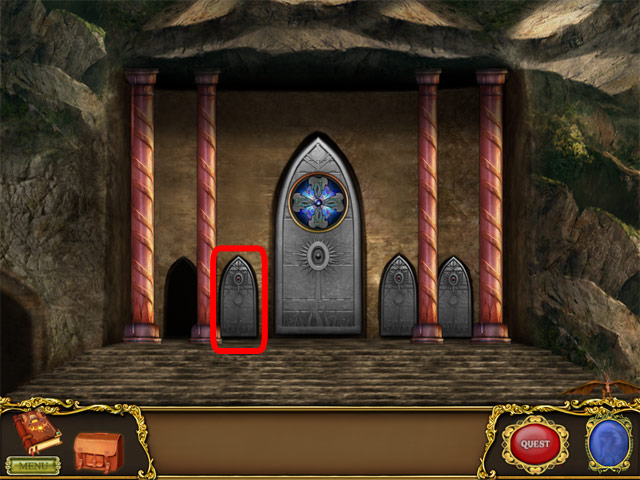
- Open the second gate with the key you’ve collected.
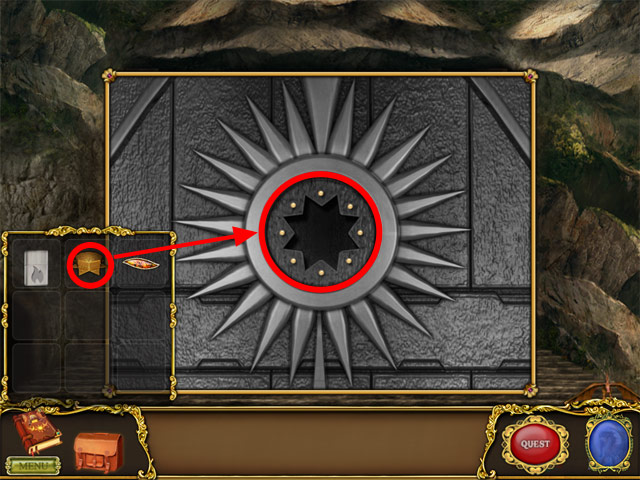
- Use the key in your inventory in the correct position to unlock the gate.

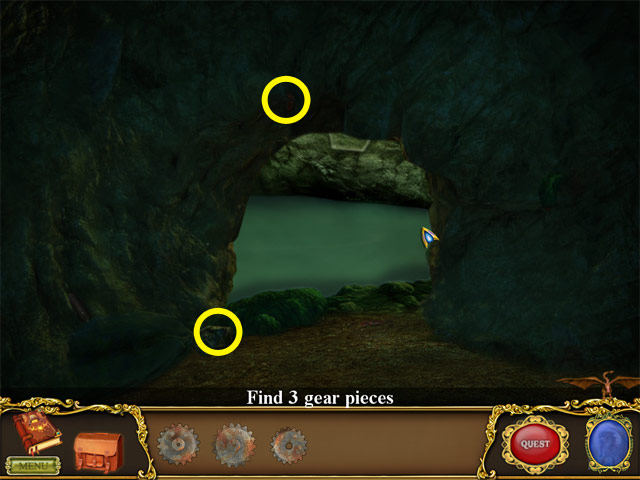
- Click to enter the cave pool.
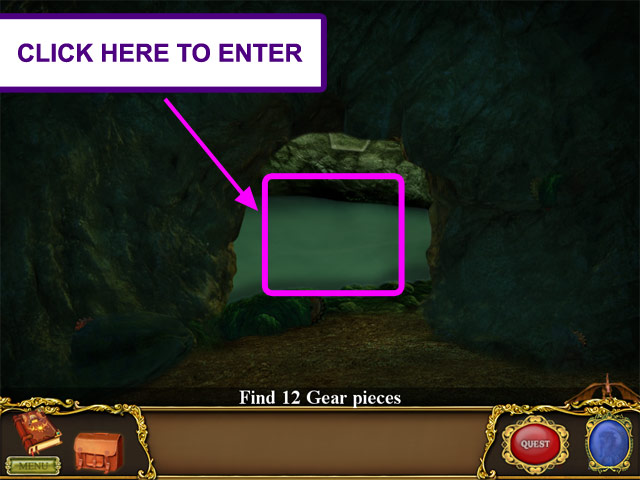
- Click the marked portion to enter.
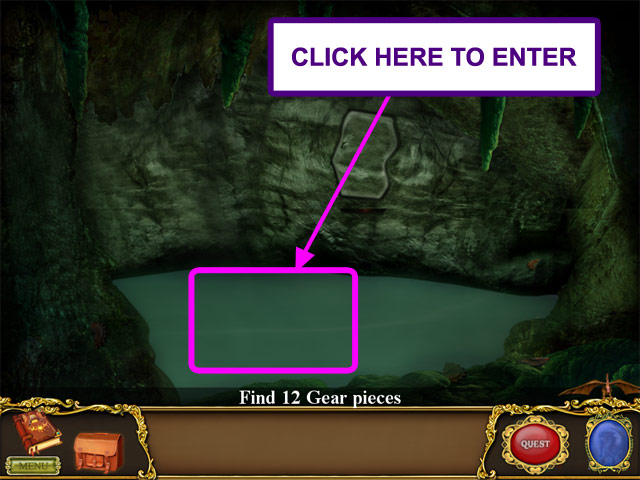
- Find the 12 gear pieces around the pool.
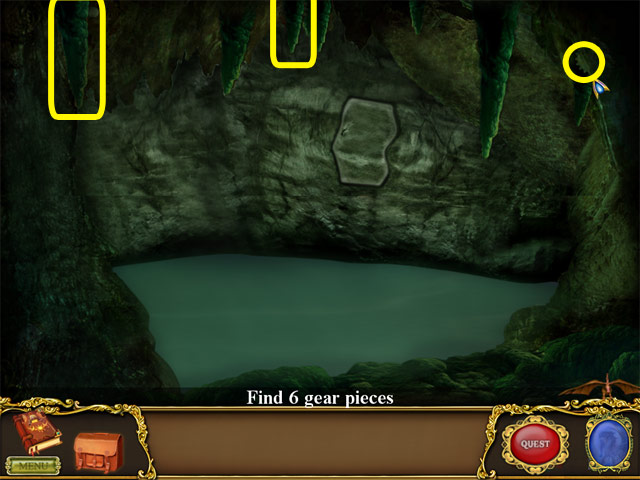
- Collect all the gear pieces and the axe.
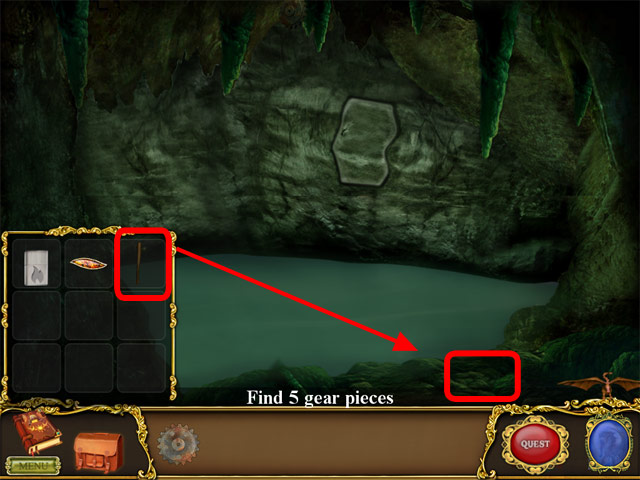
- Use the axe to dig up the secret spot.
- Move the stone to collect the gear.
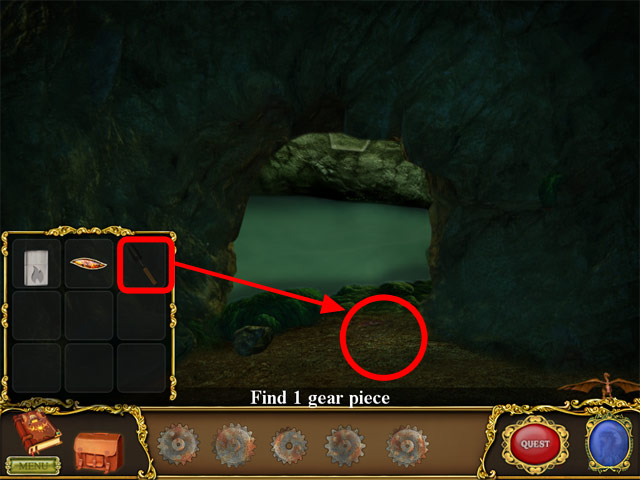
- Use the shovel to dig up the secret spot and collect the gear.
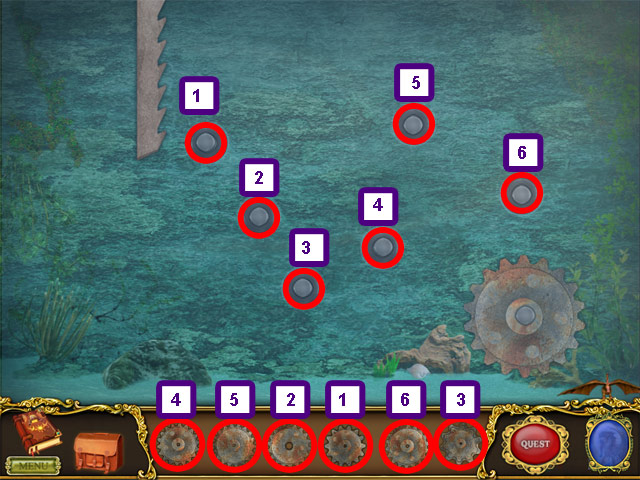
- Move the gears from the bottom panel to the correct spots above.
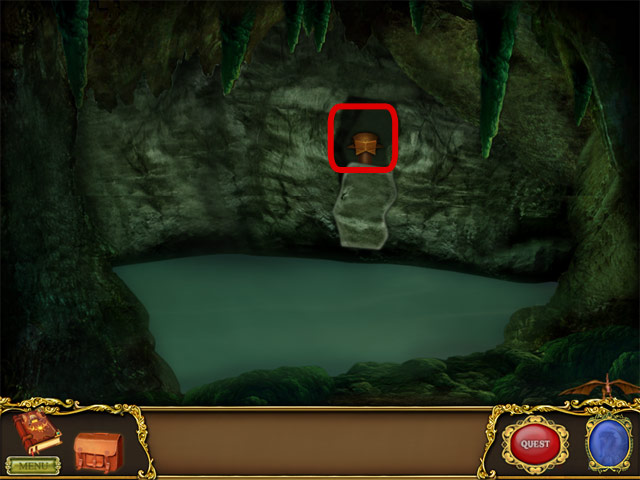
- You’ll need that key to move on to the next level.
- Collect the key to the third gate and the dragon eye (it will come in handy later).
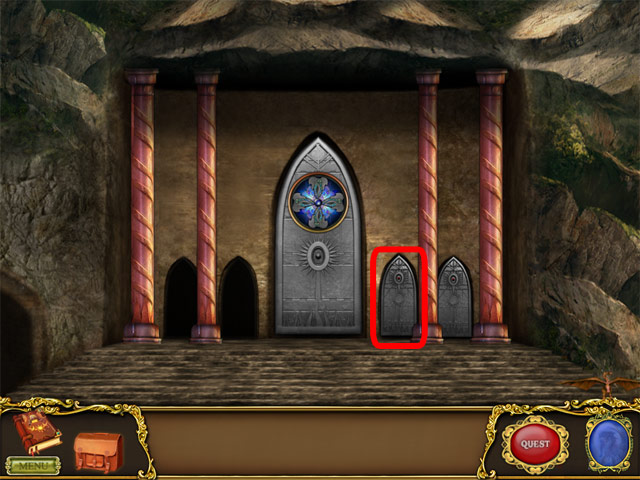
- Click the marked Portion to enter .

- Use the key in your inventory in the correct position to unlock the gate.
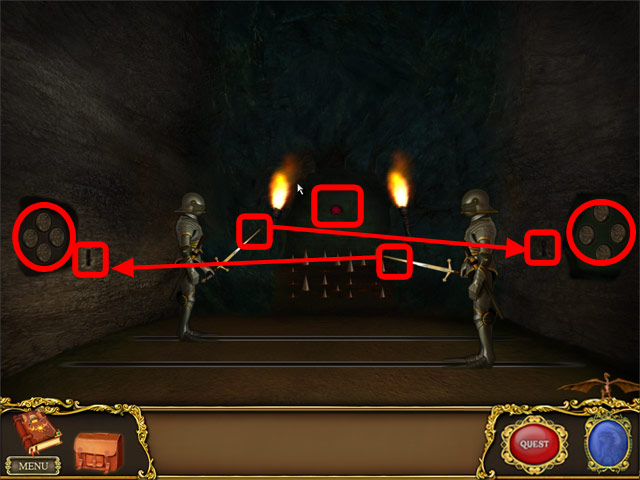
- Click the switches to activate the guards.
- Collect the key and the dragon eye at the far end of the room.
- Click to enter the fourth gate.
- Click the secret panel to zoom in.
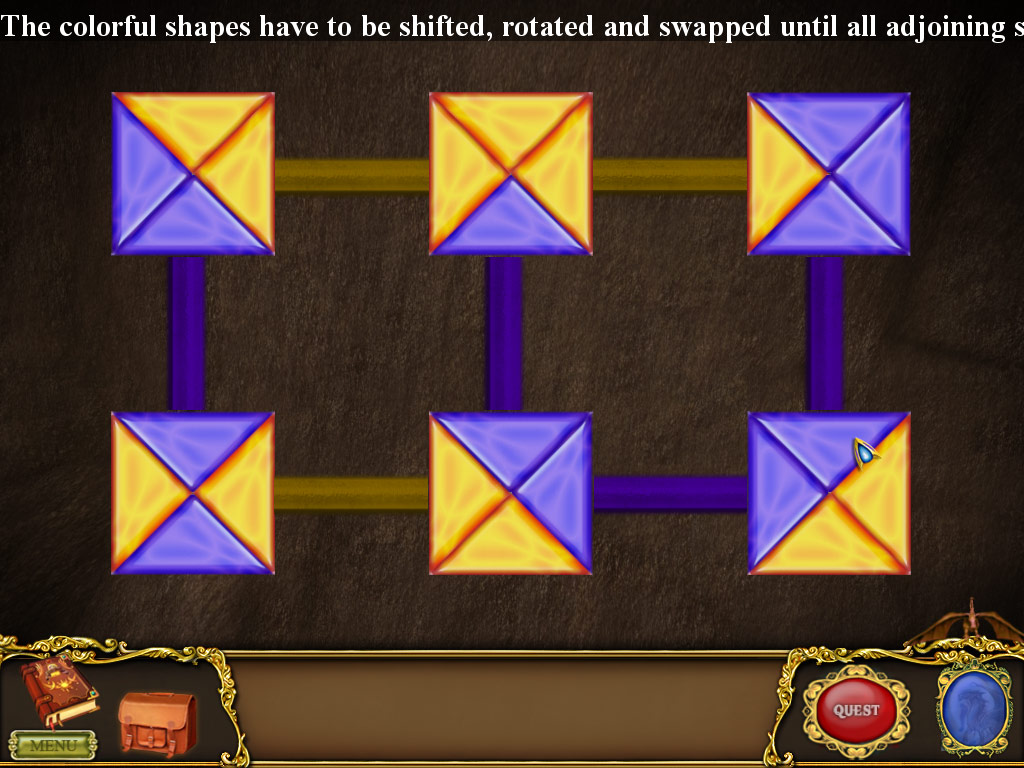
- Shift, rotate, and swap the colorful squares to solve the puzzle.
- Pick up the final dragon eye.
- Take the dragon eyes from your inventory and insert them in the correct spots .
- Enter the main gate of the cave.
Chapter 7: The dragon tower
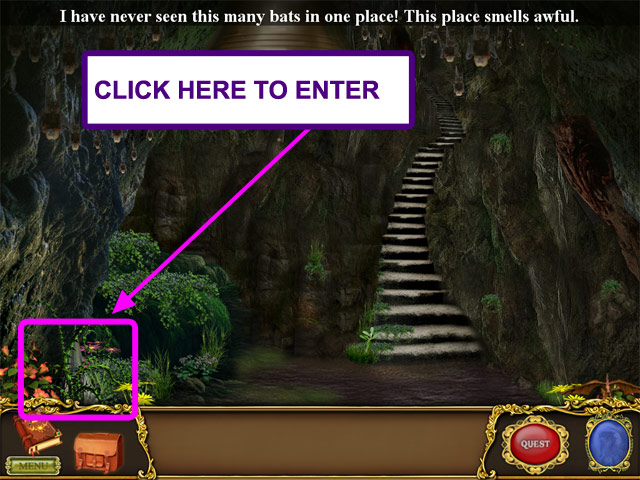
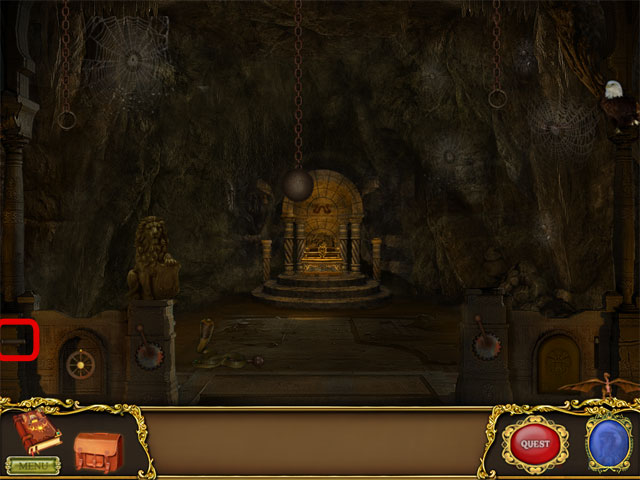
- Zoom in to hunt for hidden objects.
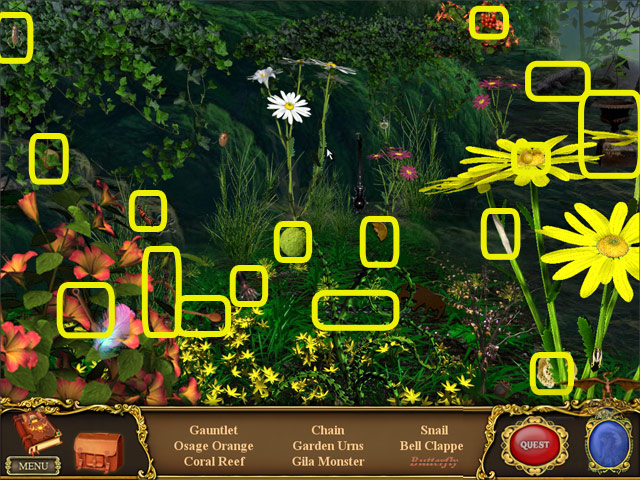
- Find the hidden objects.
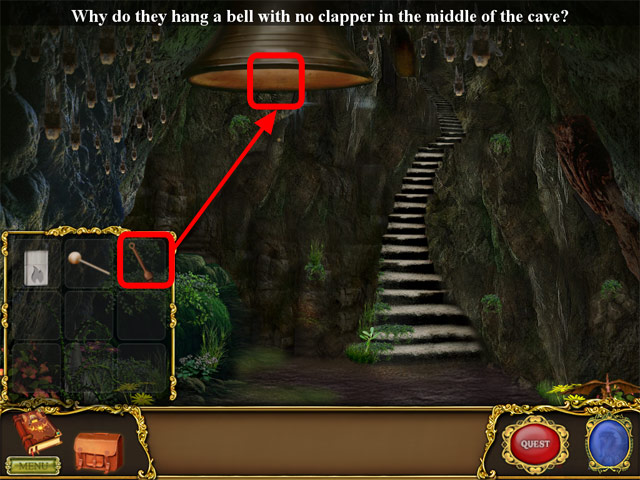
- Select the bell clapper in your inventory and place in it the bell.
- After you’ve placed the clapper in the bell, ring it five times.
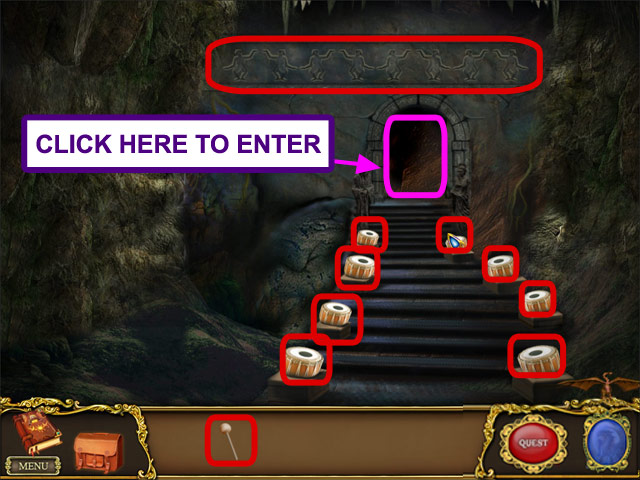
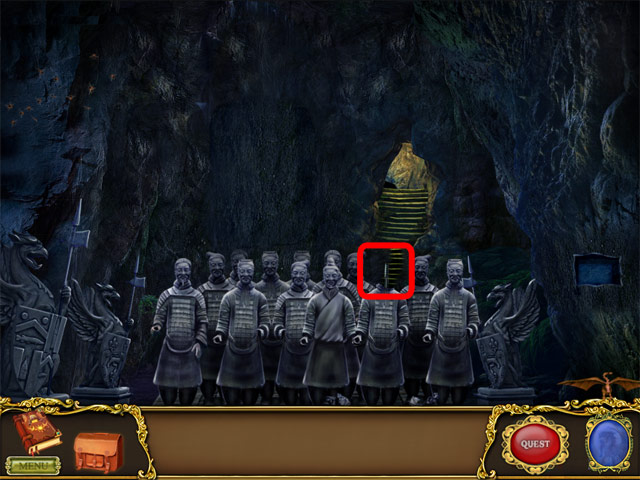
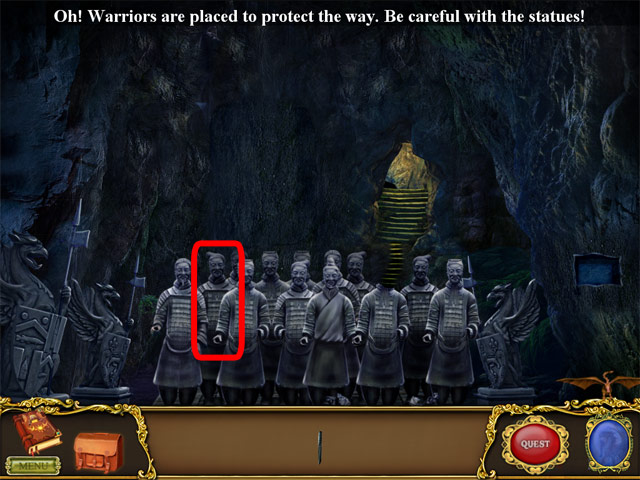
- Use the drumstick in your inventory and beat the drums to change the position of the statues.
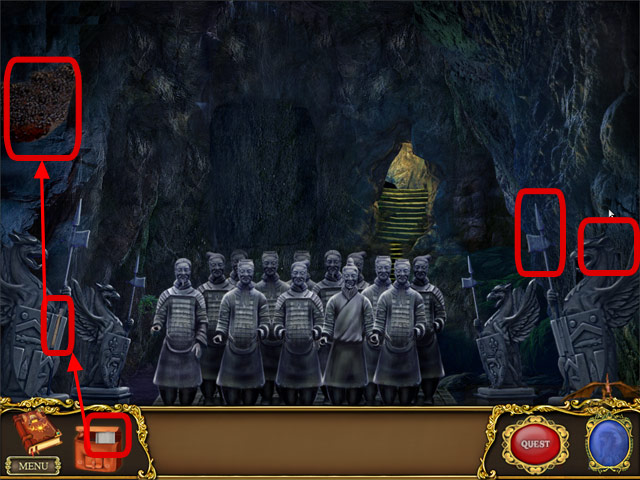
- Use the lighter in your inventory to light the torch and collect a key .
- Click on the spear to collect a key.
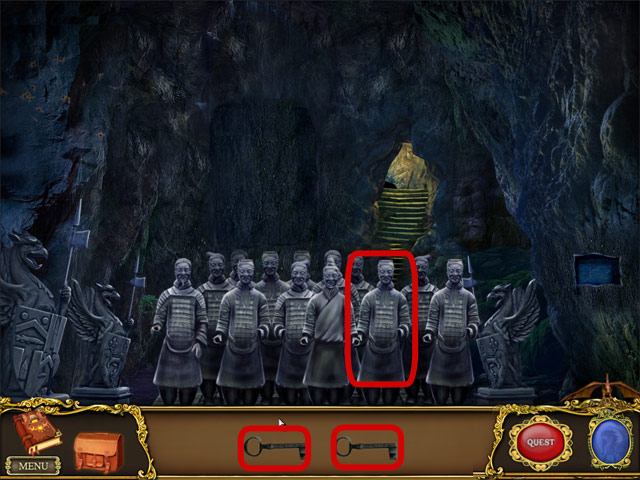
- Click on the soldiers and access the chest.
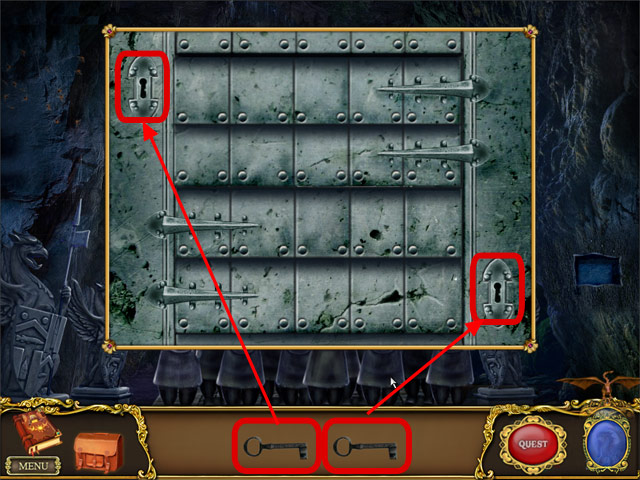
- Use the keys in the bottom panel to open the soldiers’ chest.
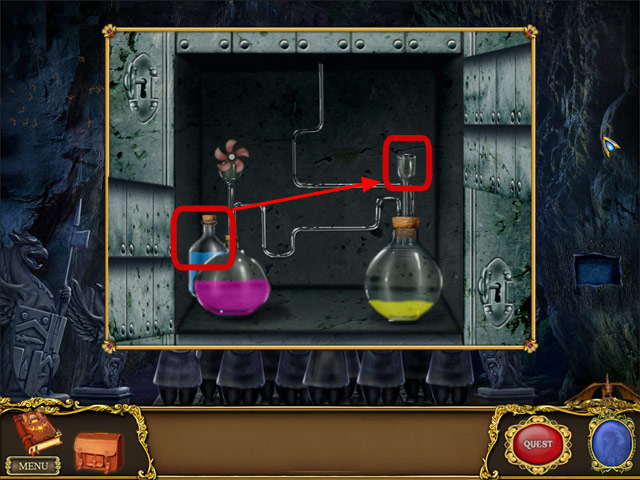
- Select the blue potion and pour it into the yellow solution.
- Take the key from the broken head of the soldier.
- Click on the soldiers and use the key to open the chest.
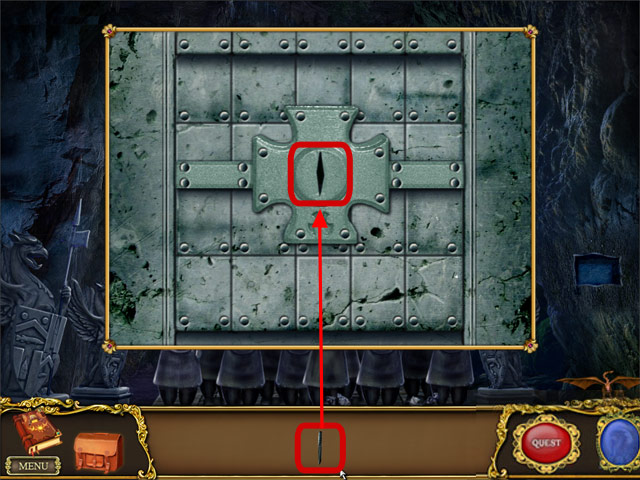
- Open the chest with the key in the bottom panel.
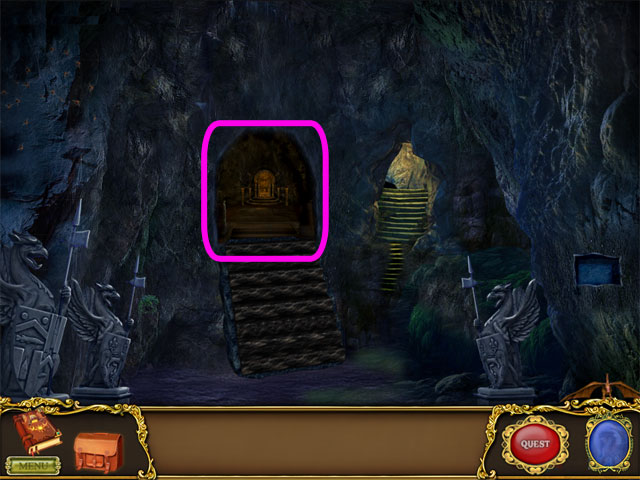
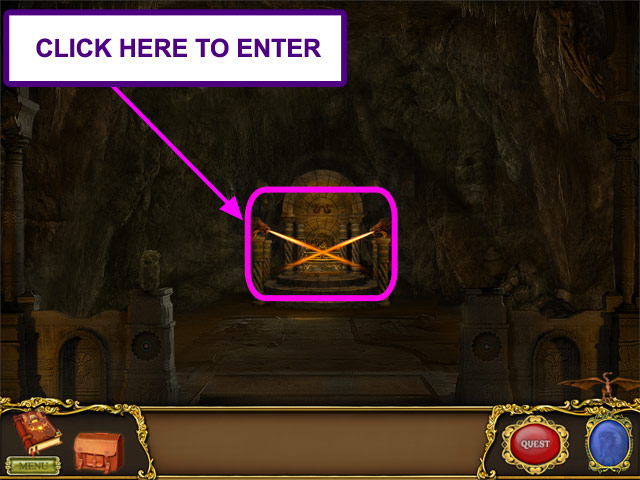
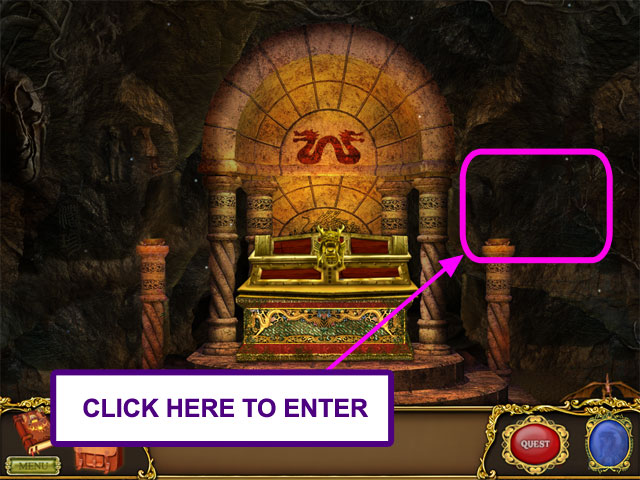
- Click to enter the secret room.
- Click the marked portion to reveal the clue.
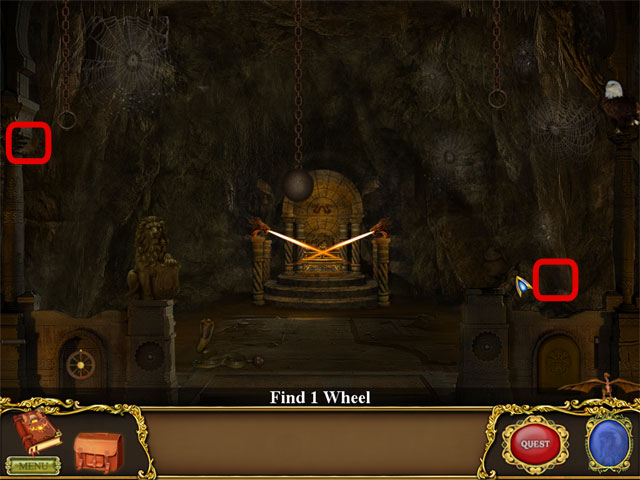
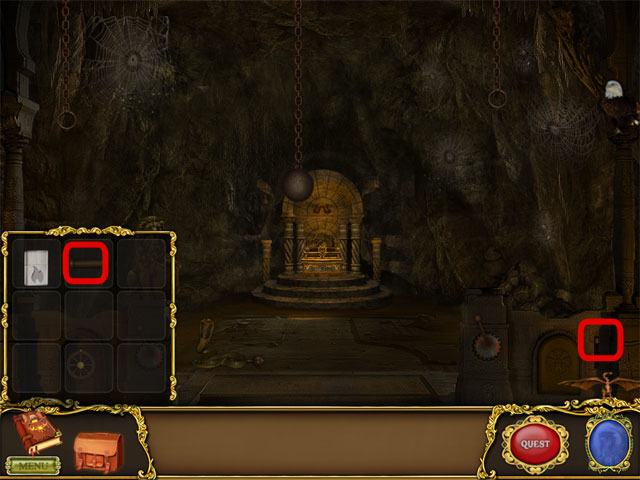
- Find the two wheels.
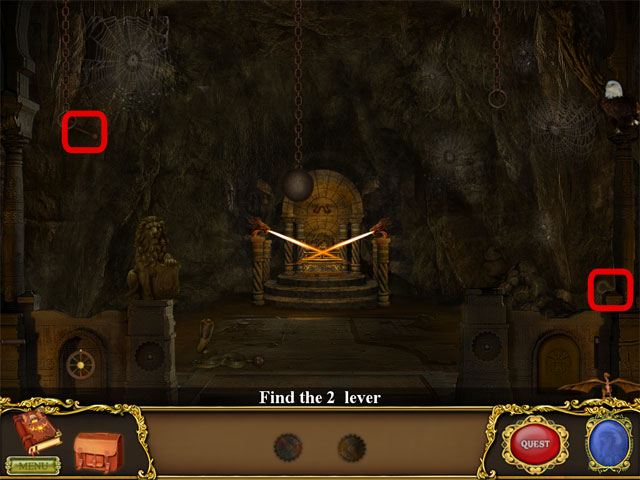
- Find the two rod.
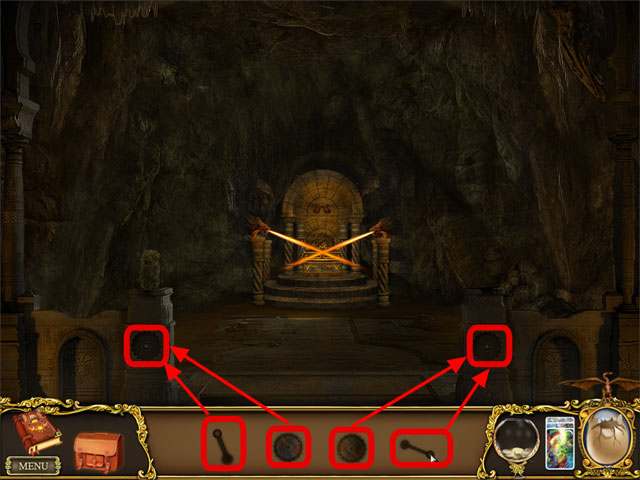
- Once the wheel is in place, rotate it.
- Pick the Lock and Scissor.
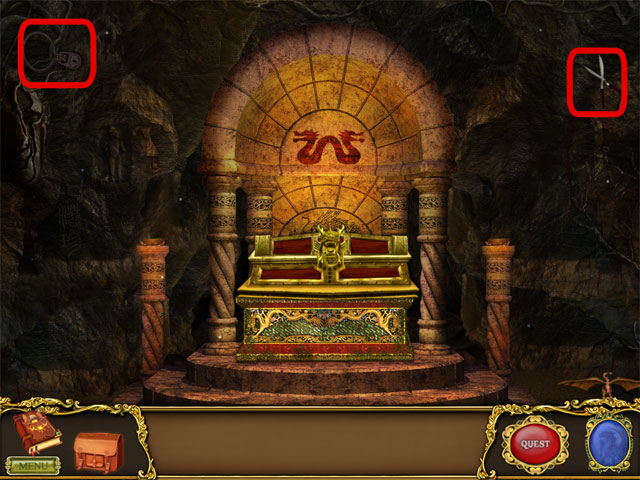
- Click to zoom in.
- Click on the stone to collect the key.
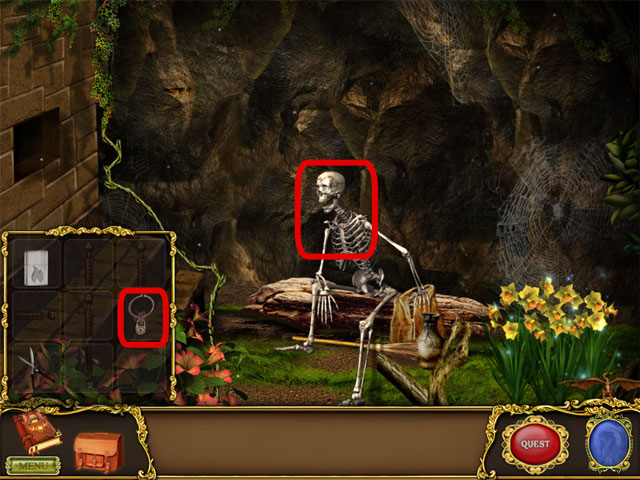
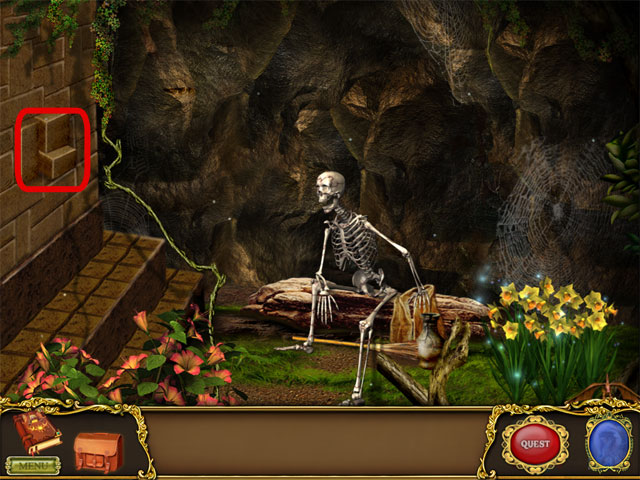
- Pick the lock and place it around the skeleton’s neck.
- Collect the key.
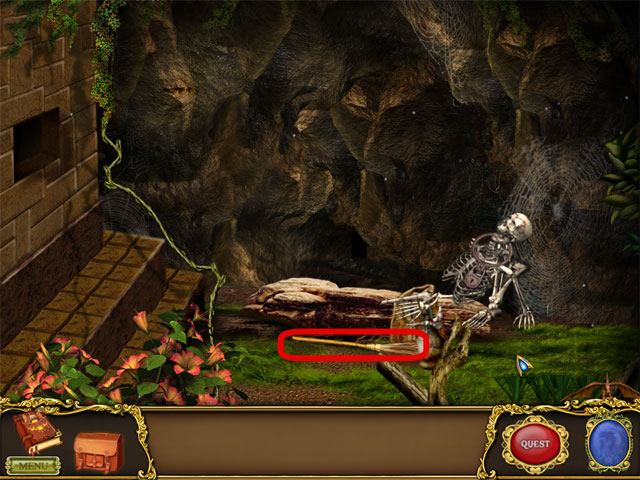
- Pick up the broomstick.
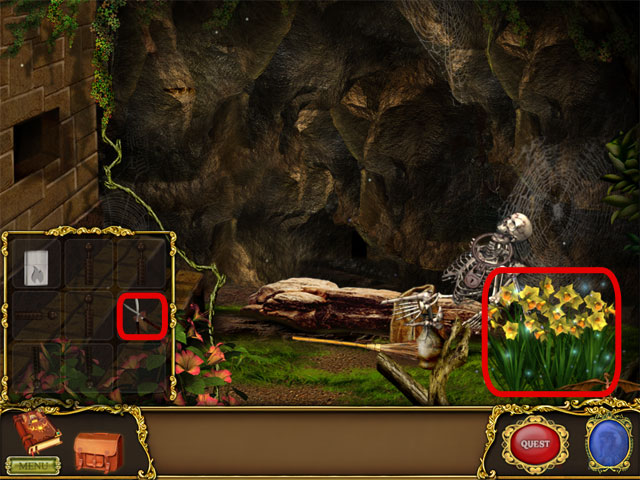
- Use the scissors in your inventory to cut the indicated plants.
- Collect the key.

- Pull the chain to move the iron ball down.
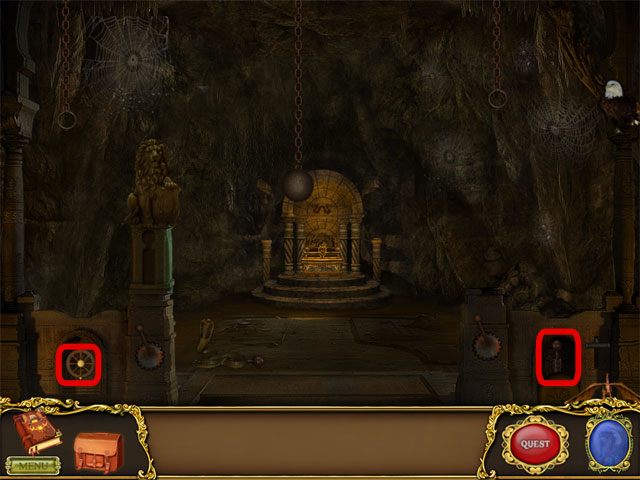
- Rotate the wheel and collect the key.
- Pick up the knob.
- Select the handle in your inventory and fix it to the rod.
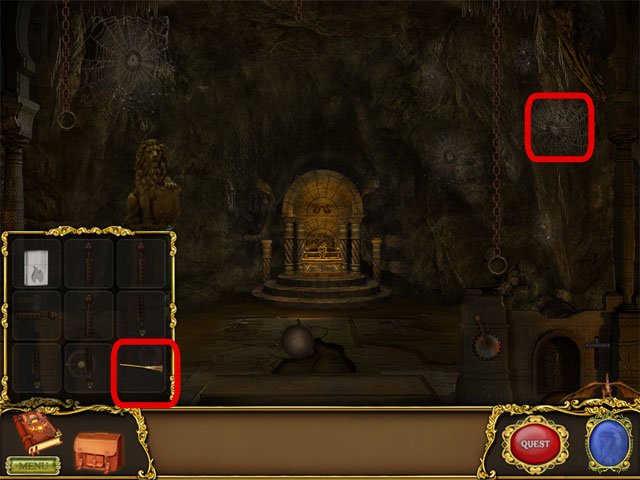
- Use the broomstick in your inventory to clean the spider nest.
- Collect the key.
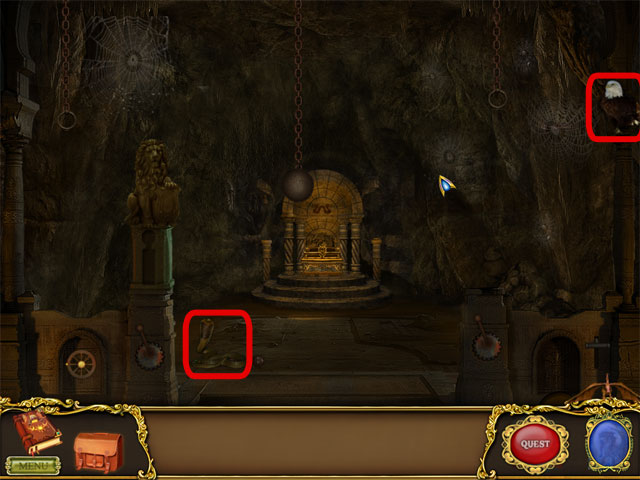
- Click the eagle to four times to get a key.
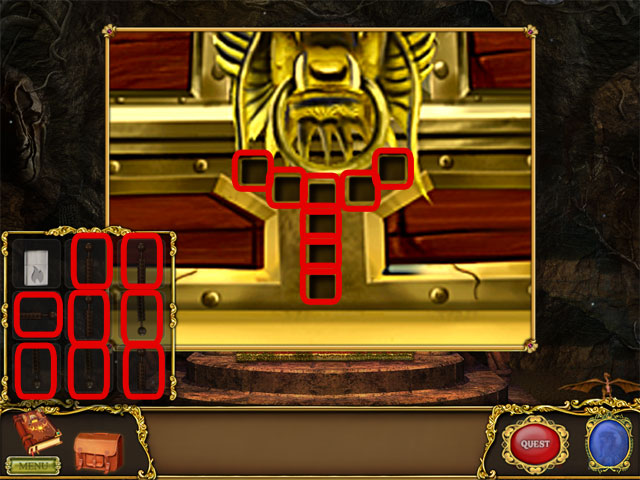
- Place the keys in the correct spots on the lock.
Created at: 2010-11-30