Walkthrough Menu
- General Tips
- Chapter 1: A Secret Past
- Chapter 2: A Dark Stranger in Bucharest
- Chapter 3: Strange Dreams
- Chapter 4: A Dark Curse
- Chapter 5: The Wedding
General Tips
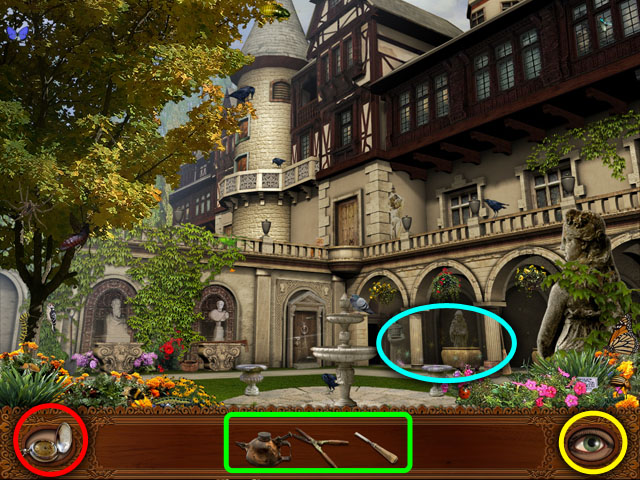
- You can change players by clicking on change player in the main menu.
- Click the options menu to adjust the different sound volumes, toggle full screen, or mute all sounds. You can also watch the credits from here.
- While playing the game you can click on the watch circled in red in the screenshot to access the options menu or quit back to the main menu.
- The inventory is circled in green and holds the objects you need to use in the game.
- The hint button is to the right of the screen circled in yellow.
- After clicking on the hint button it will turn red. When all of the red color is gone from the eye you can use another hint.
- A hot spot is shown with sparkles, like in the screenshot circled in blue.
Chapter 1: A Secret Past
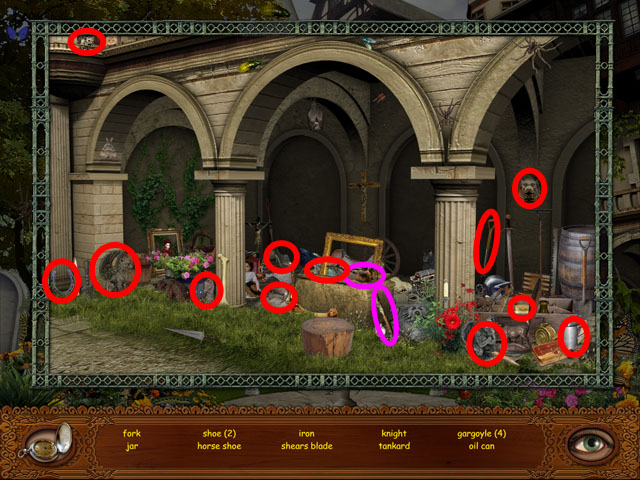
- Click on the door highlighted with sparkles in the middle to zoom in. The door is locked.
- Back out of the close up by click outside of it and then move to right side by clicking the arrow to the right of the screen.
- Click on the hotspot highlighted with sparkles in the bottom right corner.
- Find hidden objects listed at the bottom of the screen, in any order, circled in red in the image.
- The hidden objects are all randomized except for the inventory items circled in purple and may be different in your play-through.
- After finding all of the objects, you will receive a SHEAR BLADE and an OIL CAN.
- Move back the first scene by clicking the bottom of the screen and then click on the bottom of that screen to go to the fountain.
- Click on the small house hotspot on the right of the screen.
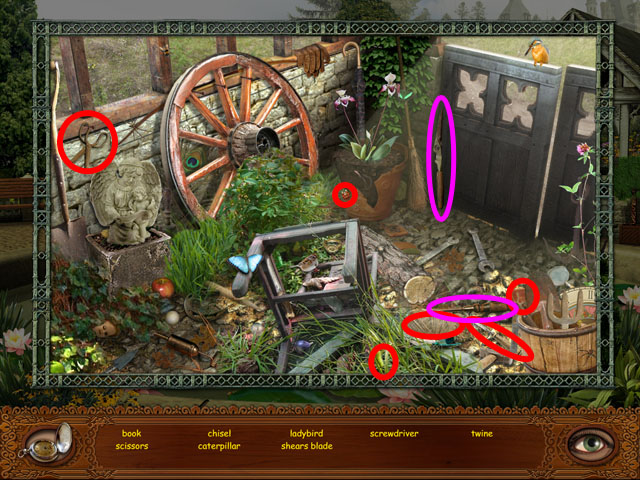
- Find hidden objects listed at the bottom of the screen, in any order, circled in red in the image.
- The hidden objects are all randomized except for the inventory items circled in purple and may be different in your play-through.
- After you find all of the objects you will receive a SHEAR BLADE and a CHISEL.
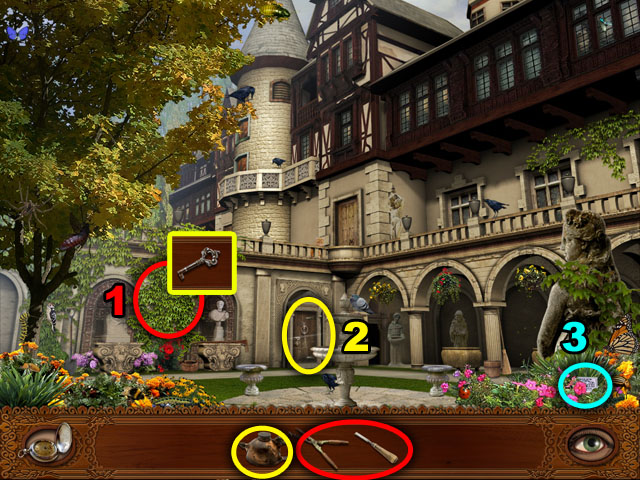
- Return to the entrance by clicking on the top right of the screen and then go to the right.
- Combine the SHEAR BLADES in the inventory.
- Click on the bush circled in red (1).
- Cut the bushes with the SHEARS circled in red.
- Take out the brick with the CHISEL.
- Collect the KEY and use it on the door marked in yellow (2).
- Use the KEY to the door.
- Use the OIL circled in yellow in the inventory to open the door.
- Collect the MATCHES (3). You will need them later.
- Enter the basement, but there is no light. You will need to return upstairs.
- Click on the hotspot highlighted with sparkles in the bottom right corner.
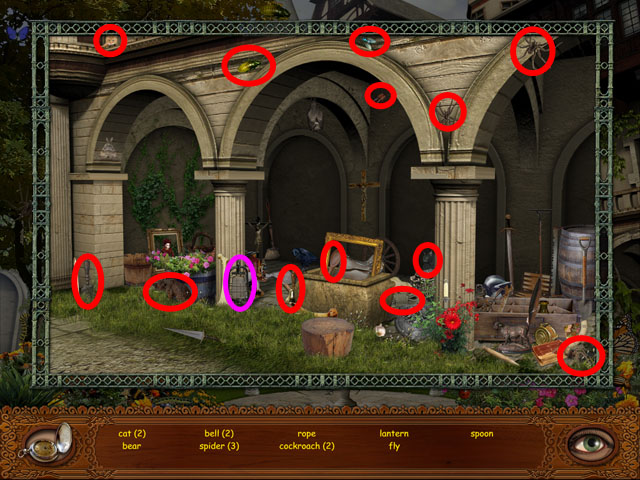
- Find hidden objects listed at the bottom of the screen, in any order, circled in red in the image.
- The hidden objects are all randomized except for the inventory item circled in purple and may be different in your play-through.
- You will receive a LANTERN. Enter the basement again.
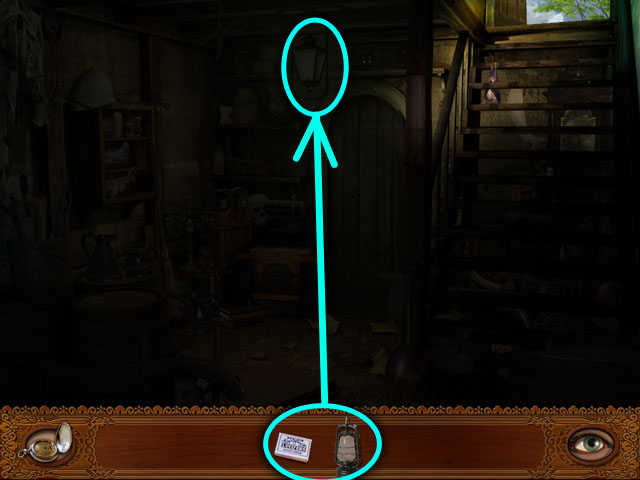
- Combine the MATCHES and the LANTERN in the inventory.
- Place the lighted LANTERN upper side of the screen.
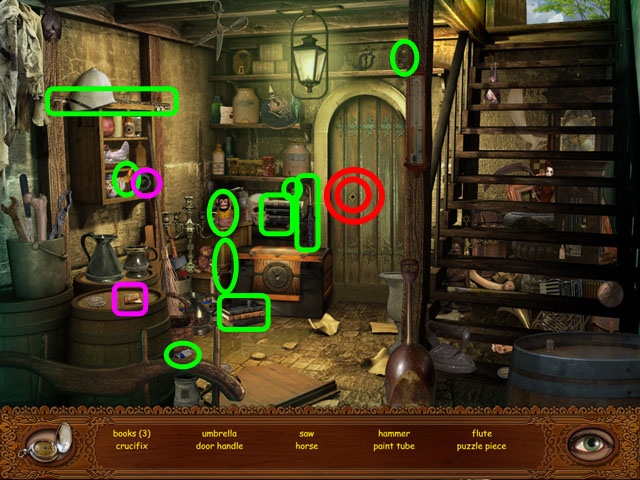
- Find hidden objects listed at the bottom of the screen, in any order, circled in green in the image.
- The hidden objects are all randomized except for the inventory item circled in purple and may be different in your play-through.
- You will receive a DOOR HANDLE and find a puzzle piece.
- Fix the door highlighted in red with the DOOR HANDLE in the inventory.
- Enter the next room from the door.
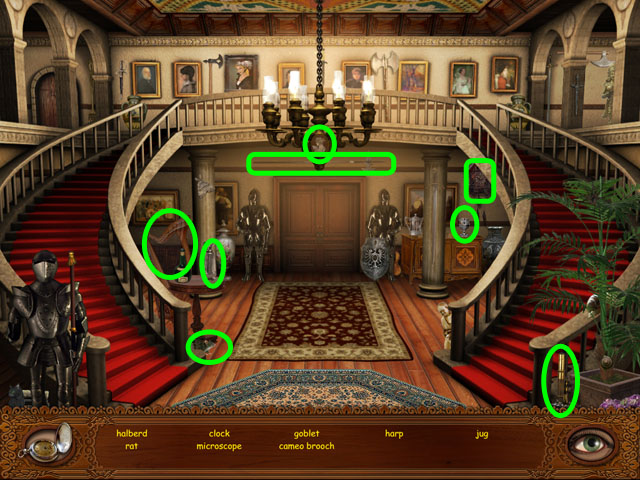
- Find hidden objects listed at the bottom of the screen, in any order, circled in green in the image.
- The hidden objects are all randomized and may be different in your play-through.
- Click on the door in the middle.
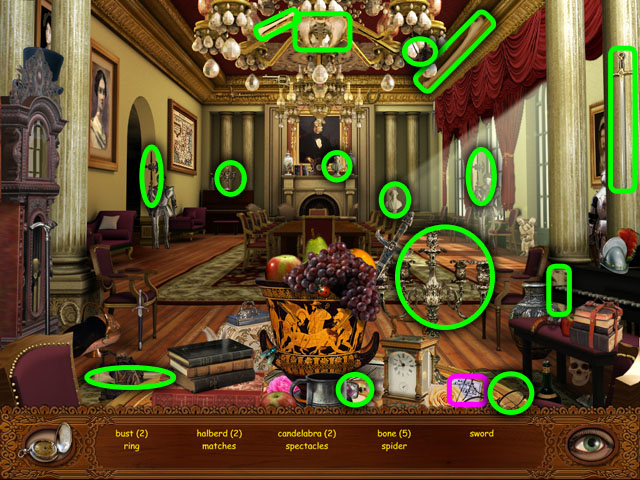
- Find hidden objects listed at the bottom of the screen, in any order, circled in green in the image.
- The hidden objects are all randomized except for the inventory item circled in purple and may be different in your play-through.
- After finding all the objects you will receive a box of MATCHES.
- Return to the entrance hall from the left side.
- Move to the upstairs to the left.
- Click on the door in the middle of the screen.
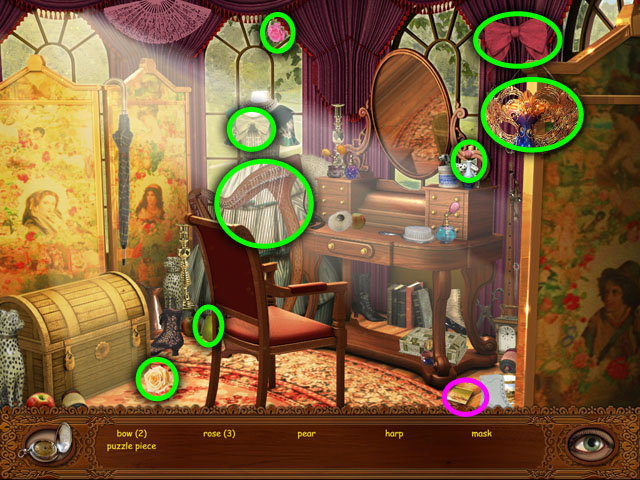
- Find hidden objects listed at the bottom of the screen, in any order, circled in green in the image.
- The hidden objects are all randomized except for the special item circled in purple and may be different in your play-through.
- You will find a puzzle piece here.
- Click on the chest in the bottom left corner.
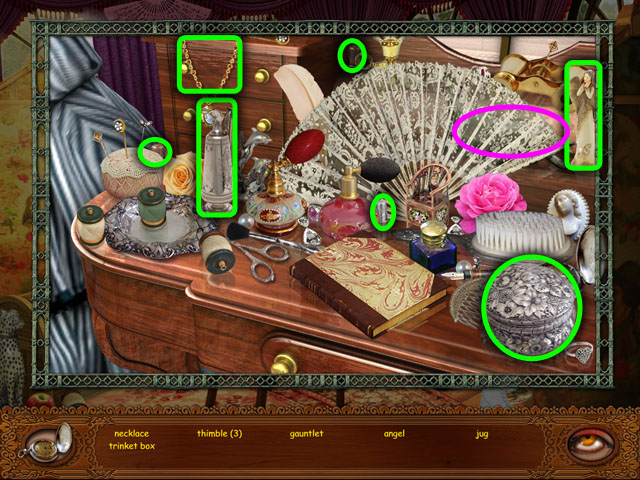
- Find hidden objects listed at the bottom of the screen, in any order, circled in green in the image.
- The hidden objects are all randomized except for the inventory item circled in purple and may be different in your play-through.
- After finding all the objects you will receive a GAUNTLET.
- Return to the garden by going to the right, and towards the bottom three times.
- Click on the sparkling area to the right.
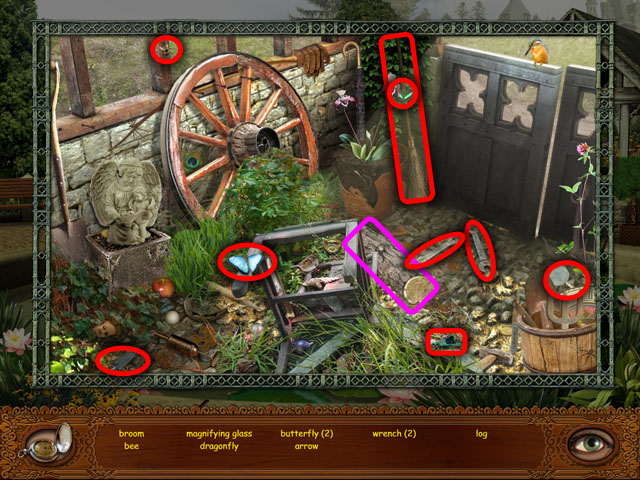
- Find hidden objects listed at the bottom of the screen, in any order, circled in red in the image.
- The hidden objects are all randomized except for the inventory item circled in purple and may be different in your play-through.
- After finding all of the hidden objects you will receive a LOG.
- Return to the entrance and move to the right side of the garden.
- Enter the cellar from the door in the middle.
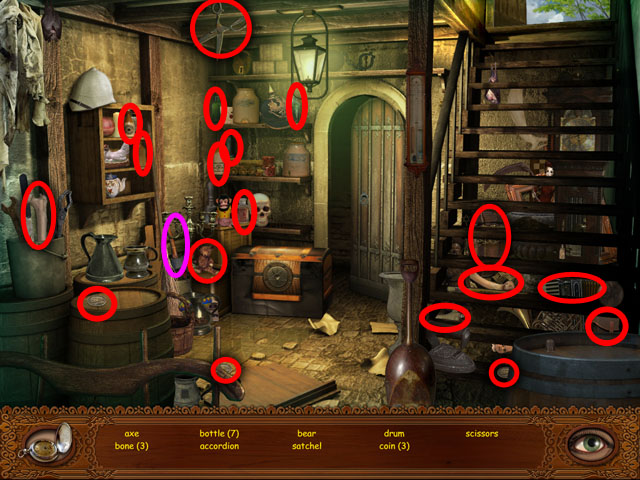
- Find hidden objects listed at the bottom of the screen, in any order, circled in red in the image.
- The hidden objects are all randomized except for the inventory item circled in purple and may be different in your play-through.
- After finding all of the hidden objects you will receive an AXE.
- Return to the outside by the stairs.
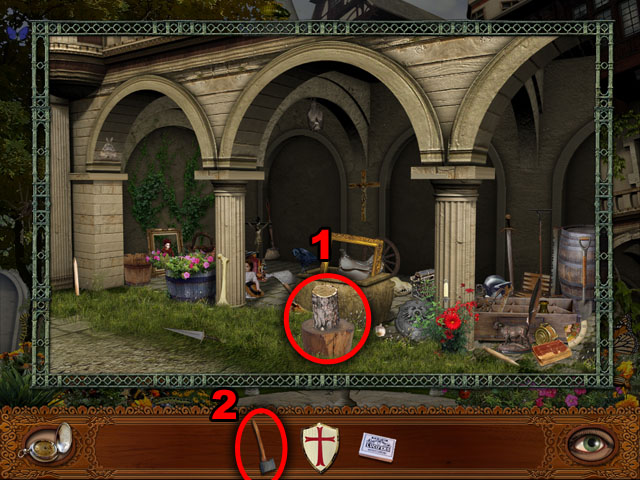
- Place the LOG in the middle (1).
- Cut the LOG to make firewood with the AXE (2).
- Take the FIREWOOD and return to the mansion.
- Move to the entrance hall.
- Click on the fireplace in the middle.
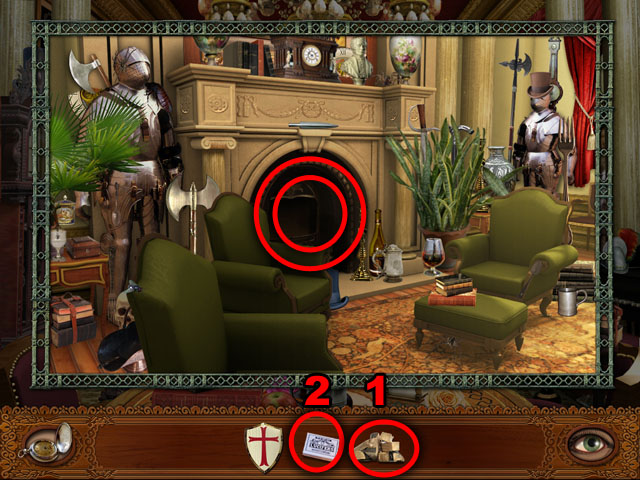
- Set the FIREWOOD in the fireplace (1).
- Light the wood in the fireplace with the MATCHES (2).
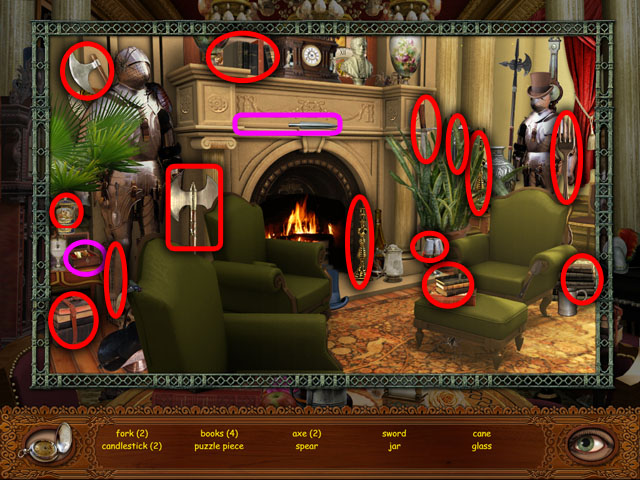
- Find hidden objects listed at the bottom of the screen, in any order, circled in red in the image.
- The hidden objects are all randomized except for the inventory items circled in purple and may be different in your play-through.
- You will receive a SPEAR HEAD and find another puzzle piece.
- Leave the dining hall to the left and go upstairs again.
- Get the SHIELD to the right of the door. Go back downstairs.
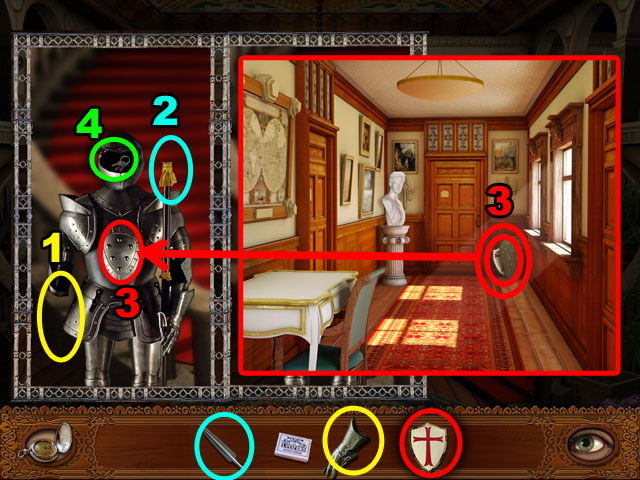
- Click on the left suit of armor in front of the door to zoom in.
- Place the GLOVE highlighted in yellow (1).
- Place the SPEAR HEAD highlighted in light blue (2).
- Place the CEILED highlighted in red (3).
- Collect the KEY highlighted in green (4).
- Return upstairs and enter the middle room and use the KEYS on the chest in the bottom left corner.
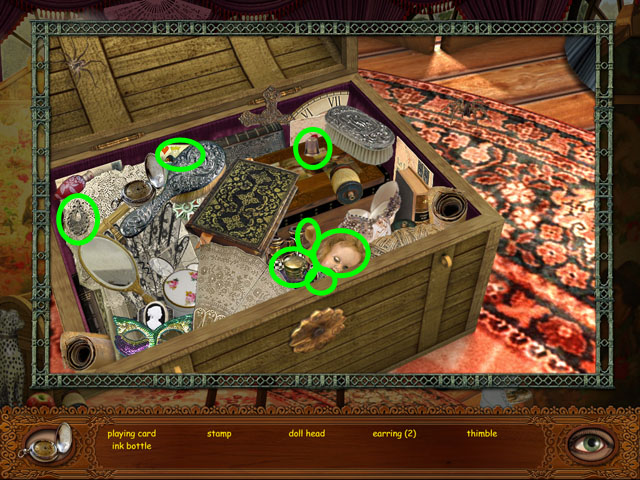
- Find hidden objects listed at the bottom of the screen, in any order, circled in red in the image.
- The hidden objects are all randomized and may be different in your play-through.
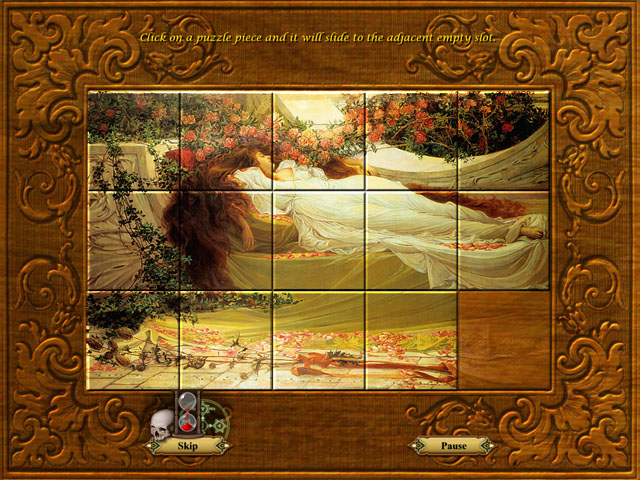
- Complete the puzzle to finish this mini-game.
- Click on a puzzle piece and it will slide to the adjacent empty slot.
- Rearrange the pieces to match the final image in the screenshot.
- Solve the top row first and then work from the left to the right to solve the puzzle.
- You will receive the heart-shaped KEY after you finish it.
- Return to the cellar in the basement.
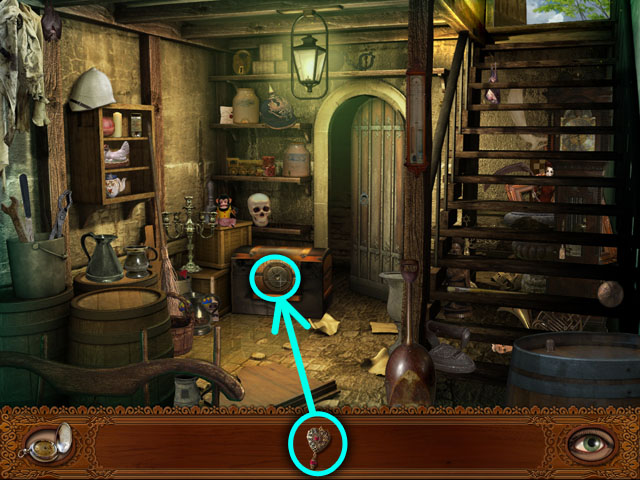
- Click on the chest and then open the chest with the KEY from the inventory.
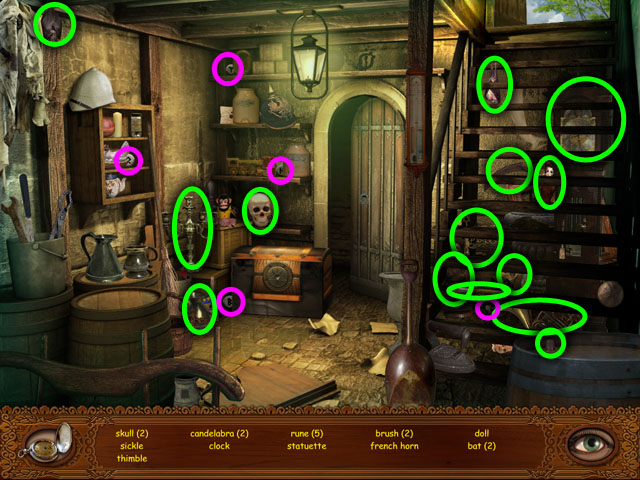
- Find the hidden objects listed at the bottom of the screen, in any order, circled in green in the image.
- The hidden objects are all randomized except for the special items circled in purple and may be different in your play-through.
- You will find 5 runes in this scene.
- After finishing the scene you will be taken to the next puzzle on the chest.
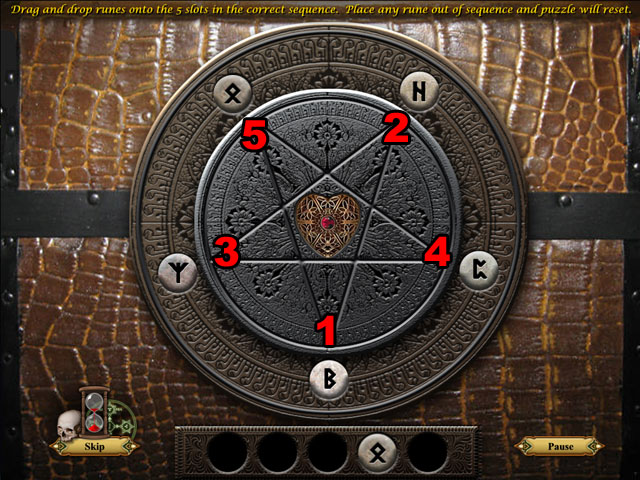
- Drag runes onto the 5 spots in the correct order.
- If you make a mistake, you will need to start over from the beginning again.
- See the screenshot for the final image.
Chapter 2: A Dark Stranger in Bucharest
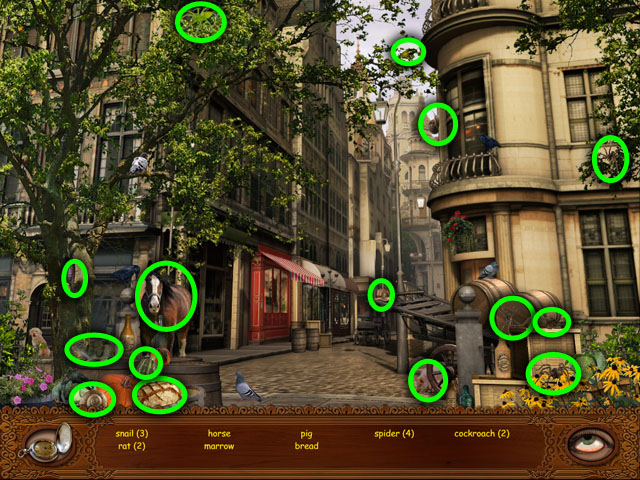
- Find the hidden objects listed at the bottom of the screen, in any order, circled in green in the image.
- The hidden objects are all randomized and may be different in your play-through.
- Click on the barrels highlighted with sparkles in the middle as hotspot.
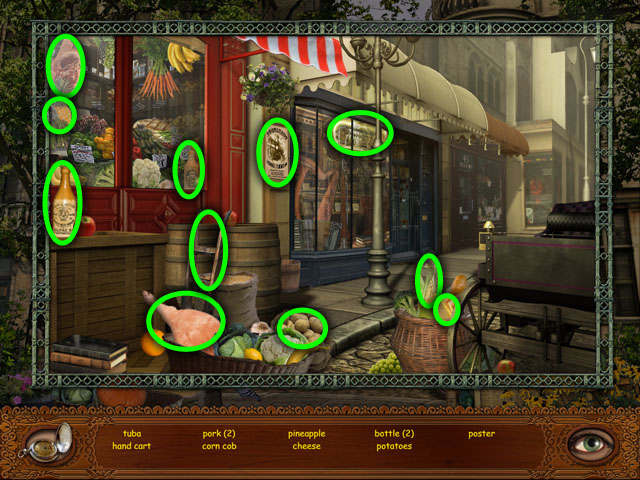
- Find hidden objects listed at the bottom of the screen, in any order, circled in red in the image.
- The hidden objects are all randomized and may be different in your play-through.
- Click on the sparkling hotspot in the middle of the screen.
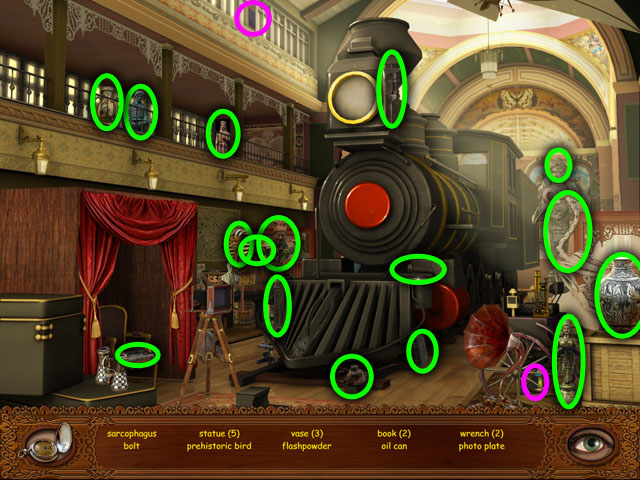
- Find the hidden objects listed at the bottom of the screen, in any order, circled in green in the image.
- The hidden objects are all randomized except for the inventory items circled in purple and may be different in your play-through.
- After finding all of the hidden objects you will receive POWDER and a PHOTO PLATE.
- Click on the camera in the middle to zoom in.
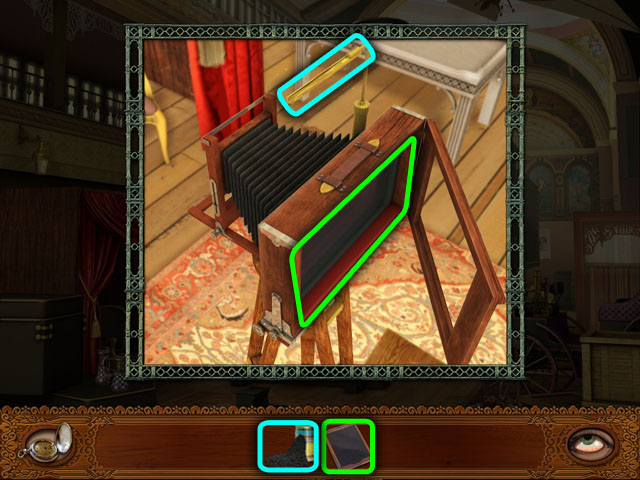
- Place the PHOTO PLATE highlighted in green on the back of the camera.
- Place the flash POWDER highlighted in light blue on the metal piece at the top.
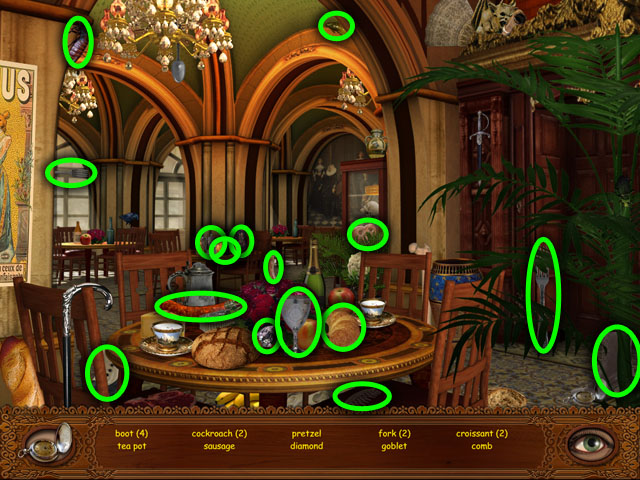
- Find the hidden objects listed at the bottom of the screen, in any order, circled in green in the image.
- The hidden objects are all randomized and may be different in your play-through.
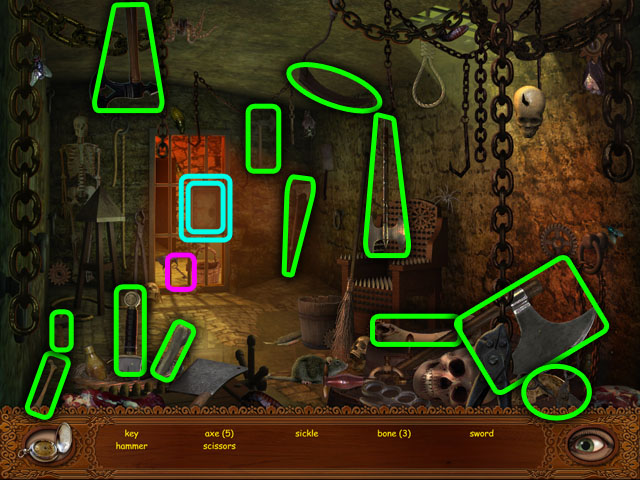
- Find hidden objects listed at the bottom of the screen, in any order, circled in red in the image.
- The hidden objects are all randomized except for the inventory item circled in purple and may be different in your play-through.
- You will receive the KEY.
- Click on the door lock highlighted in light blue in the image.
- Use the KEY from your inventory.
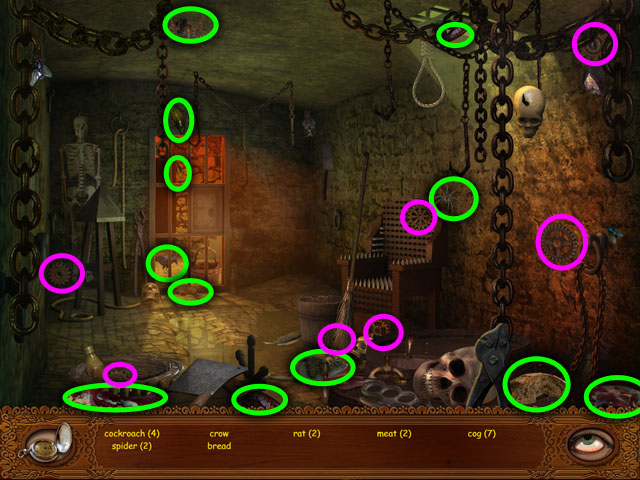
- Find the hidden objects listed at the bottom of the screen, in any order, circled in green in the image.
- The hidden objects are all randomized except for the inventory items circled in purple and may be different in your play-through.
- You will receive the 7 COGS for use in the next puzzle.
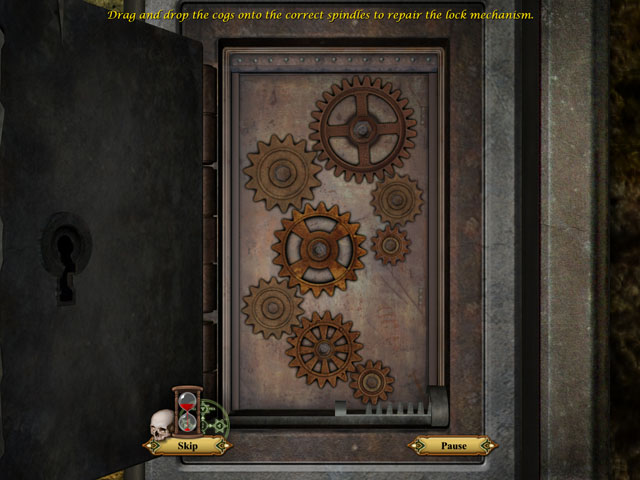
- Arrange the COGS to repair the lock mechanism.
- The cogs must be laid out in a way that they all touch each other.
- Click a cog to pick it up and click again on one of the metal circles to set it down.
- Start from the small cog that is already in the scene and end at the row of teeth at the bottom. These must be touching your cogs as well.
- The puzzle will automatically complete when you have the right combination.
- See the screenshot for the final image.
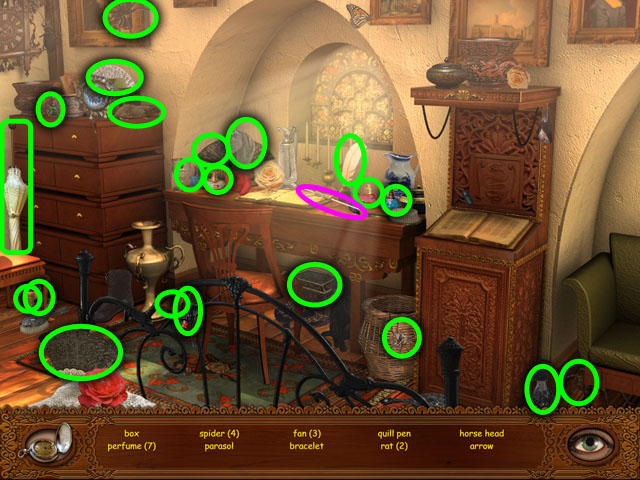
- Find the hidden objects listed at the bottom of the screen, in any order, circled in green in the image.
- The hidden objects are all randomized except for the special item circled in purple and may be different in your play-through.
- You will find an arrow with a note written in code.
- Click on the right side of the screen highlighted with sparkles.
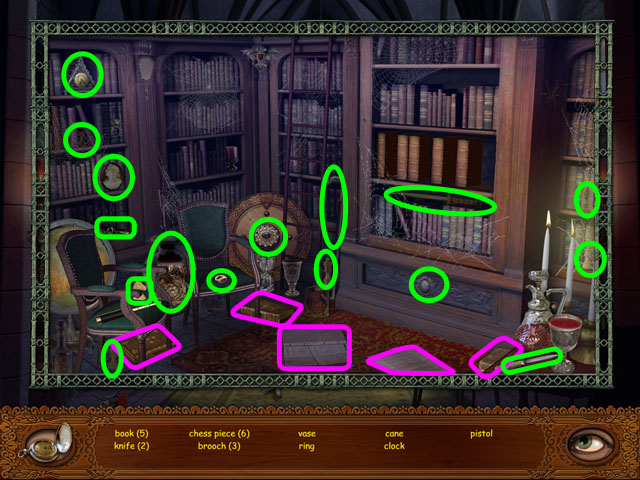
- Find the hidden objects listed at the bottom of the screen, in any order, circled in green in the image.
- The hidden objects are all randomized except for the inventory items circled in purple and may be different in your play-through.
- You will receive 5 BOOKS into your inventory.
- After finding all objects, click on the hot spot again.
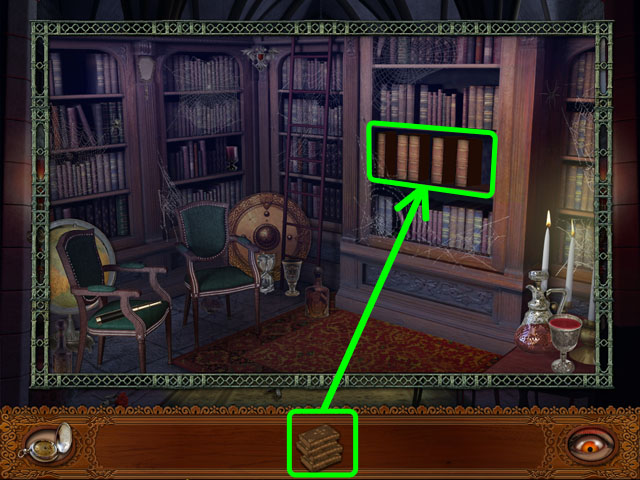
- Place the BOOKS highlighted in green into the bookshelf.
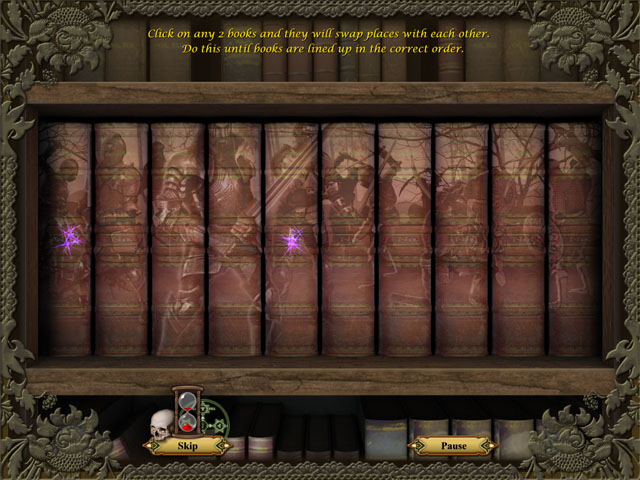
- Click on any two books to swap them. Arrange the books to make correct order.
- When the books are in the right order the puzzle will automatically close.
- See the screenshot for the final image.
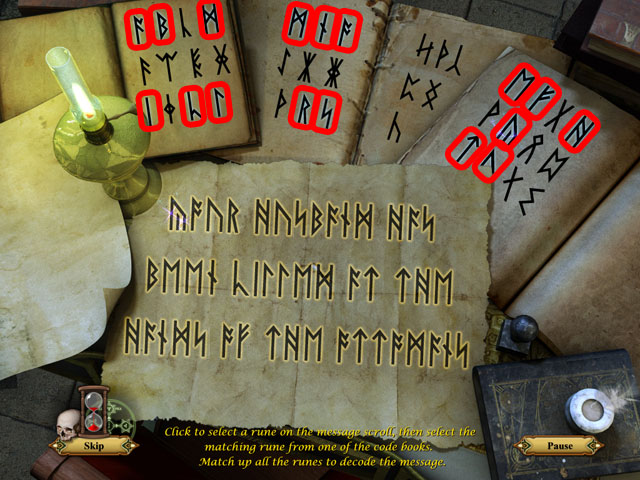
- Find same symbols in the paper and the books to complete this puzzle.
- First click on a symbol at the top and then click the same symbol in the writings at the bottom.
- See the screenshot for all of the symbols used in the message.
Chapter 3: Strange Dreams
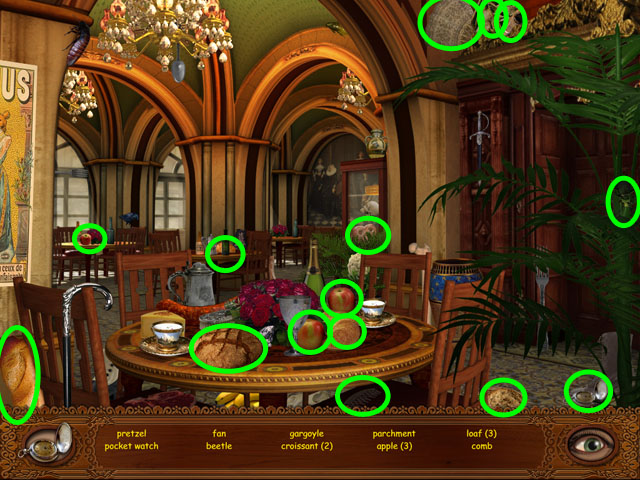
- Find the hidden objects listed at the bottom of the screen, in any order, circled in green in the image.
- The hidden objects are all randomized and may be different in your play-through.
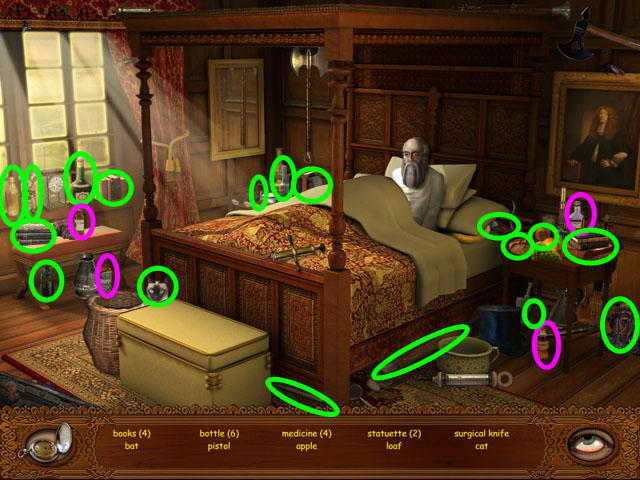
- Find the hidden objects listed at the bottom of the screen, in any order, circled in green in the image.
- The hidden objects are all randomized except for the special items circled in purple and may be different in your play-through.
- Collect your father’s medicine.
- Click on the chest highlighted with sparkles beside the bed.
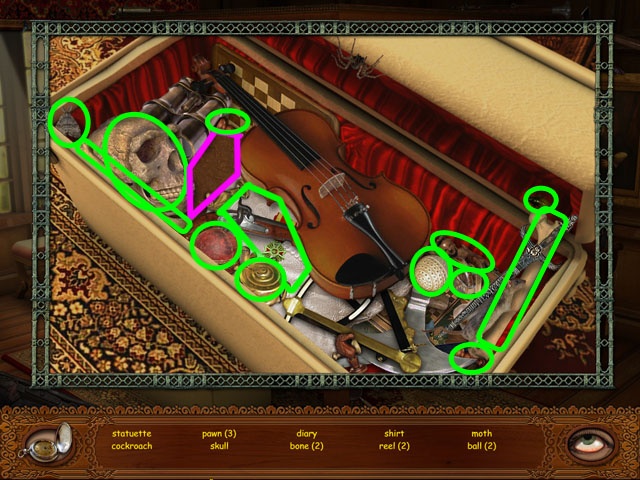
- Find the hidden objects listed at the bottom of the screen, in any order, circled in green in the image.
- The hidden objects are all randomized except for the special item circled in purple and may be different in your play-through.
- You will find an old diary written by your mother.
- Click on the middle door in the hallway.
- Click on the chest in the bottom left corner.
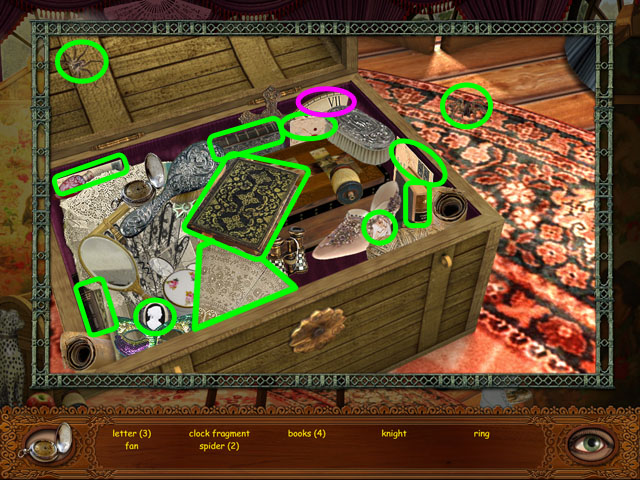
- Find the hidden objects listed at the bottom of the screen, in any order, circled in green in the image.
- The hidden objects are all randomized except for the inventory item circled in purple and may be different in your play-through.
- You will receive a CLOCK PIECE.
- Go back to the entryway by clicking back twice, then enter the main hall in the middle.
- Click on the fireplace highlighted with sparkles.
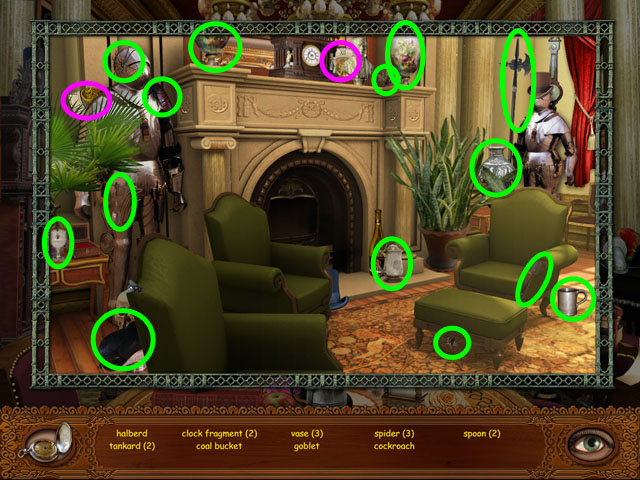
- Find the hidden objects listed at the bottom of the screen, in any order, circled in green in the image.
- The hidden objects are all randomized except for the inventory items circled in purple and may be different in your play-through.
- You will receive two CLOCK PIECES.
- Return to the garden area to right of the main entrance outside and click on the right side of the screen highlighted with sparkles.
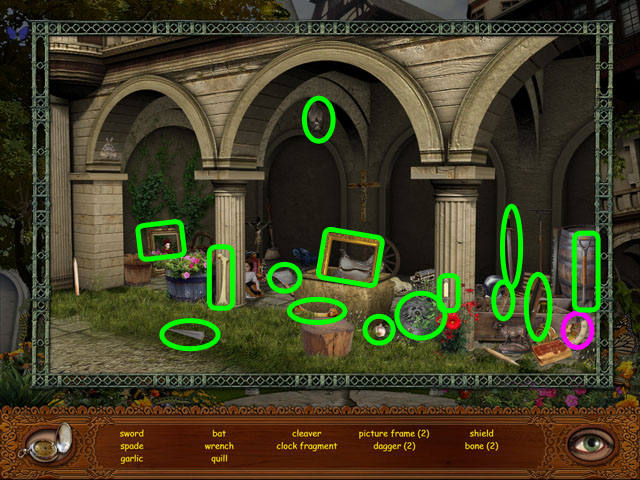
- Find the hidden objects listed at the bottom of the screen, in any order, circled in green in the image.
- The hidden objects are all randomized except for the inventory item circled in purple and may be different in your play-through.
- You will receive a CLOCK PIECE.
- Return to the fountain from the main entrance and click on the small house beside it with the sparkles.
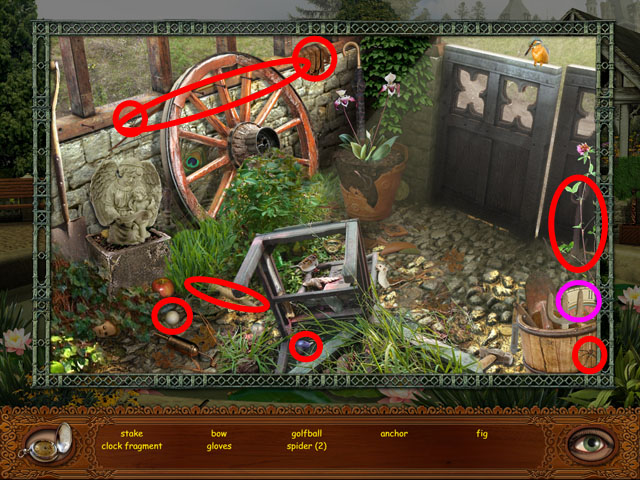
- Find the hidden objects listed at the bottom of the screen, in any order, circled in red in the image.
- The hidden objects are all randomized except for the inventory item circled in purple and may be different in your play-through.
- You will receive a CLOCK PIECE.
- Return to the main hall with the fireplace and click on the clock in the left side of the screen to zoom in.
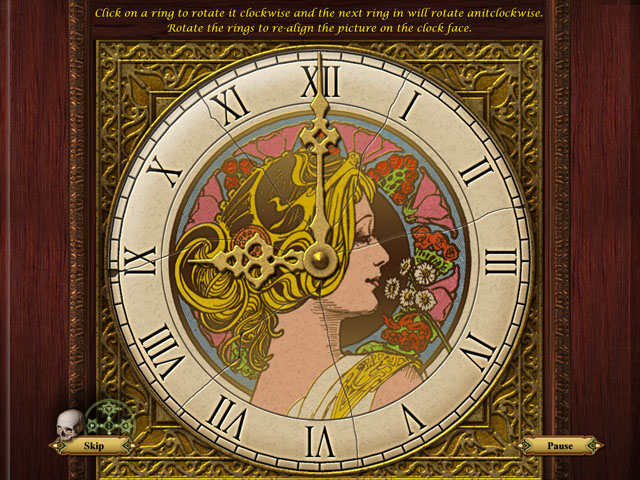
- Place all PIECES OF CLOCK from the inventory to the spots where they are missing.
- You will need to put them in the correct location. Use the cracks on the face to help you line them up.
- Solve the ring puzzle in the middle of the clock face.
- Clicking on a ring will rotate it and the ring on the inside of it. Rotating the middle ring will rotate the outside ring.
- Start by putting the outside ring in the correct position and move inwards from there lining each ring up with the last.
- By the time you get to the middle ring, you will have solved the puzzle.
- See the screenshot for the final image.
- Collect the KEY inside the clock.
- Return to the fountain by clicking on the door and then the bottom of the screen twice.
- Move to downstairs by clicking the stairs to the left of the statue.
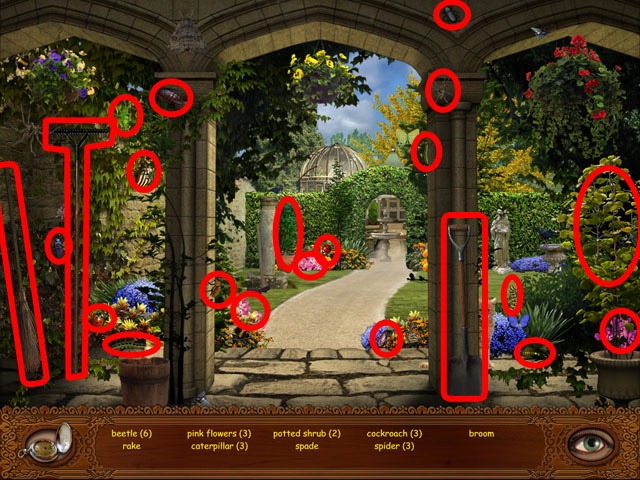
- Find the hidden objects listed at the bottom of the screen, in any order, circled in red in the image.
- The hidden objects are all randomized and may be different in your play-through.
- Go to straight into the garden.
- Click on the middle of the screen to zoom in.
- Open the lock with the KEY from the inventory.
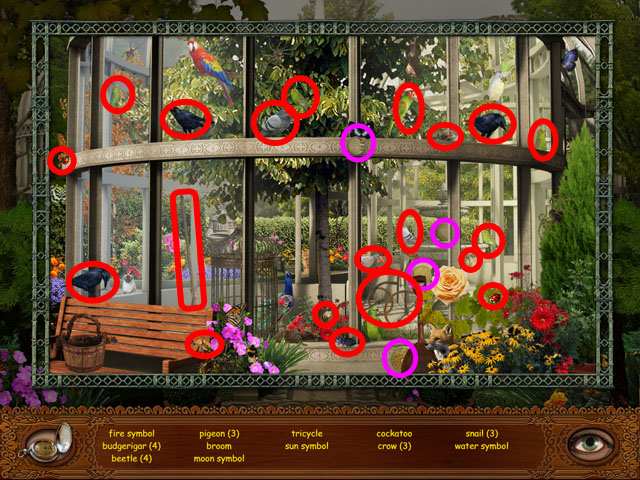
- Find the hidden objects listed at the bottom of the screen, in any order, circled in red in the image.
- The hidden objects are all randomized except for the inventory items circled in purple and may be different in your play-through.
- You will find the FIRE SYMBOL, WATER SYMBOL, MOON SYMBOL and SUN SYMBOL.
- Click on the lock again.
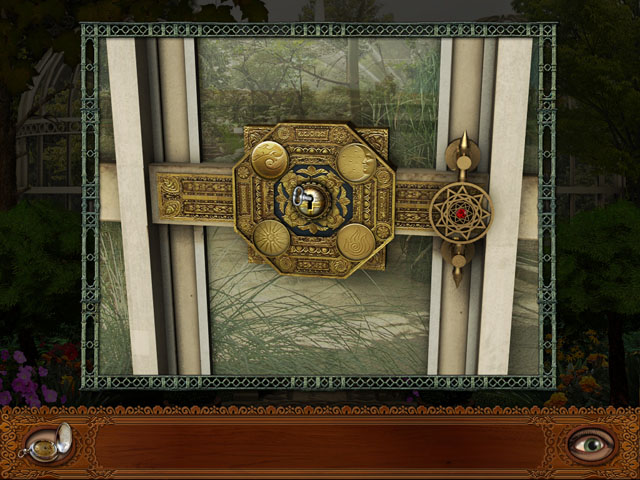
- Place all symbols in correct spots.
- If you place a symbol in the wrong place it will go back into your inventory.
- See the screenshot for the solution.
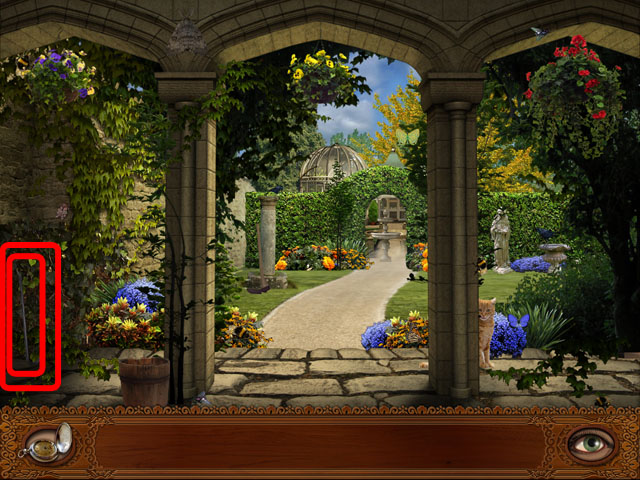
- Click the hole to zoom in.
- Return to the garden two scenes previous and find the crowbar highlighted in red in the bottom left corner.
- Return to the menagerie and click on the hole again.
- Open it with the crowbar from the inventory.
- Collect the box.
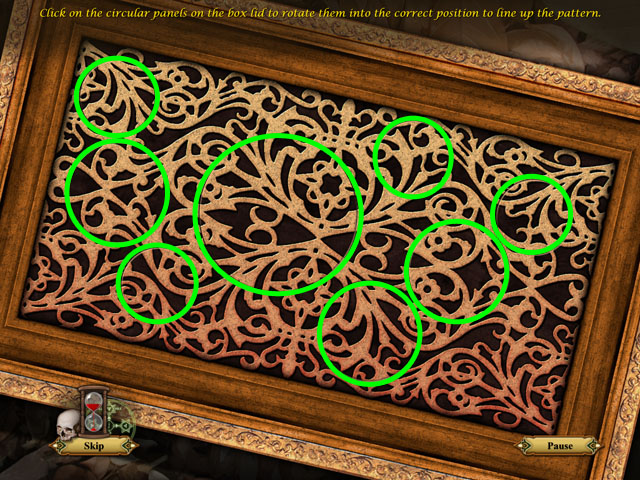
- Click on the 8 circular panels highlighted in green to rotate into the correct position.
- Match the patterns on the plates to the pattern on the box.
- The puzzle will close automatically once it is finished.
- See the screenshot for the final image.
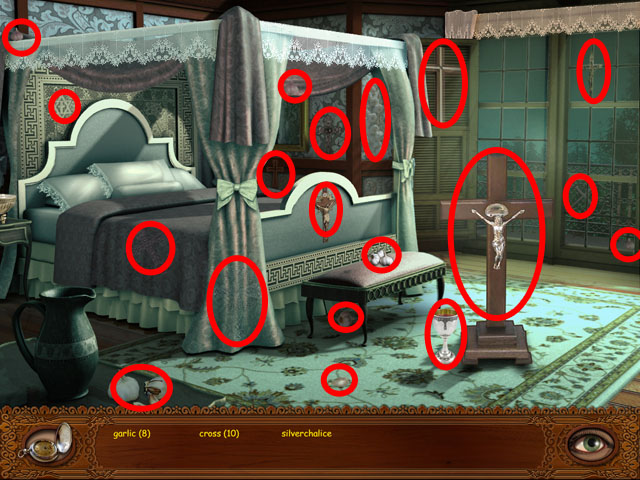
- Find the 8 garlic, 10 crosses and the silver chalice, in any order, highlighted in red in the image.
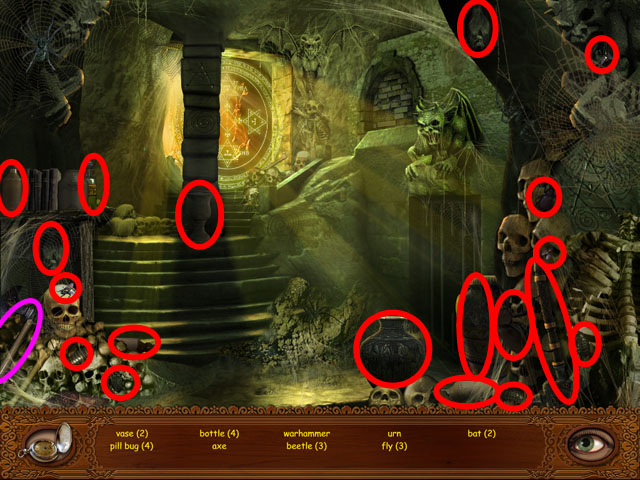
- Find the hidden objects listed at the bottom of the screen, in any order, circled in red in the image.
- The hidden objects are all randomized except for the inventory item circled in purple and may be different in your play-through.
- You fill find a WARHAMMER.
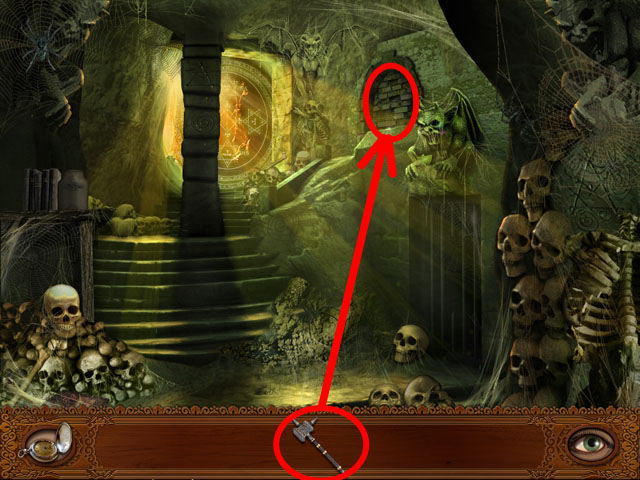
- Break the bricks with the WARHAMMER.
- Click the newly opened hole to exit the scene.
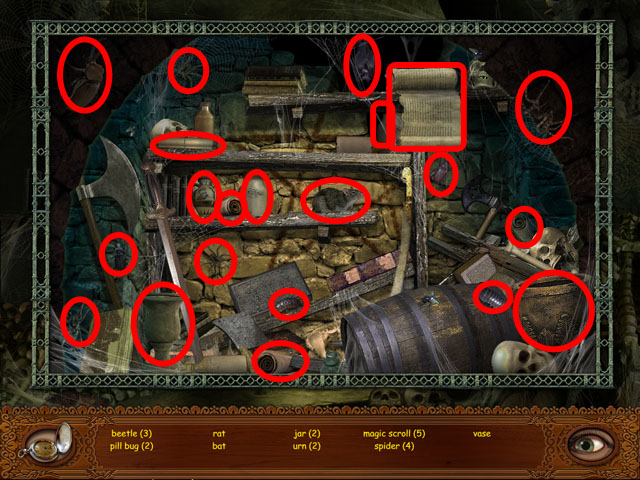
- Find the hidden objects listed at the bottom of the screen, in any order, circled in red in the image.
- The hidden objects are all randomized and may be different in your play-through.
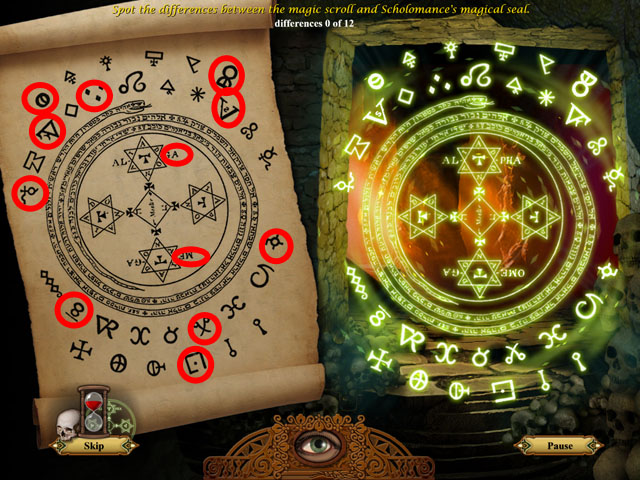
- Find 12 differences between the script and the light.
- You can click on either side of the image to find the differences.
- Refer to the screenshot for the solution.
Chapter 4: A Dark Cure
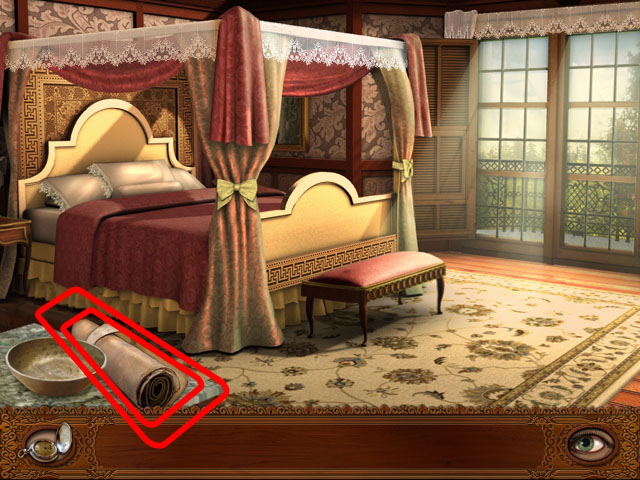
- Collect the scroll in the bottom left corner of the screen.
- Return to the fountain outside and move downstairs from there.
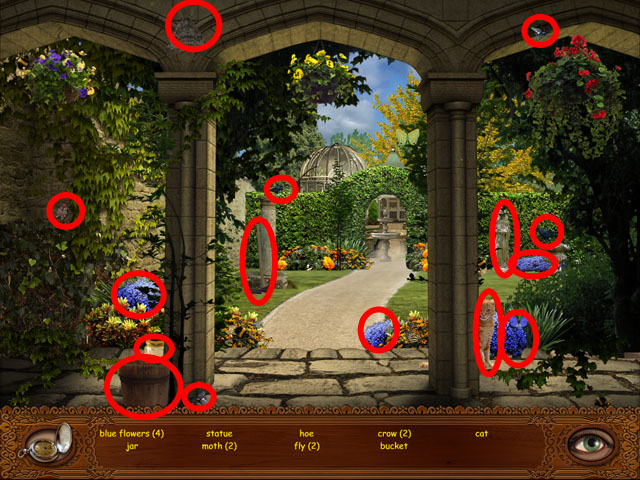
- Find the hidden objects listed at the bottom of the screen, in any order, circled in red in the image.
- The hidden objects are all randomized and may be different in your play-through.
- Keep going to the straight to the Aviary.
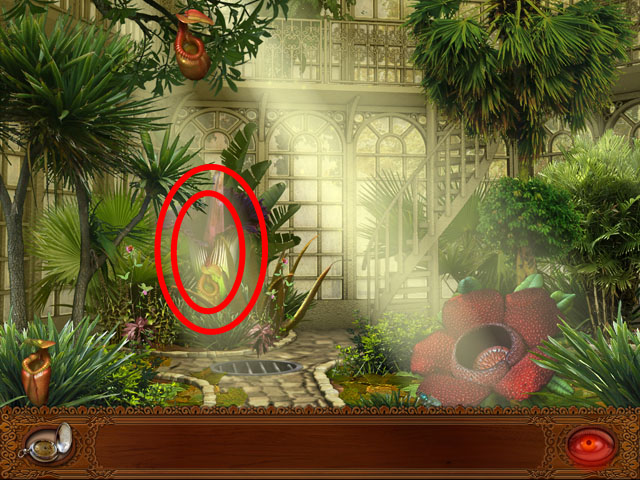
- Click on the flower in the middle to collect the powder.
- Return to the outside of the Aviary and click on the hotspot on the left.
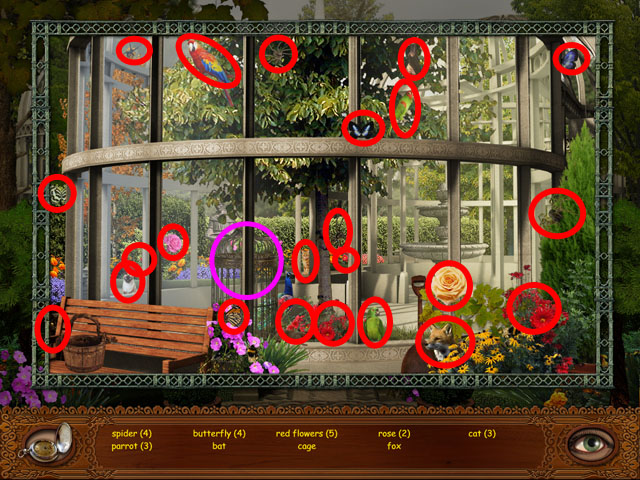
- Find the hidden objects listed at the bottom of the screen, in any order, circled in red in the image.
- The hidden objects are all randomized except for the inventory item circled in purple and may be different in your play-through.
- You will receive a BIRDCAGE.
- Return to the fountain and click on the small house on the right side of the screen.
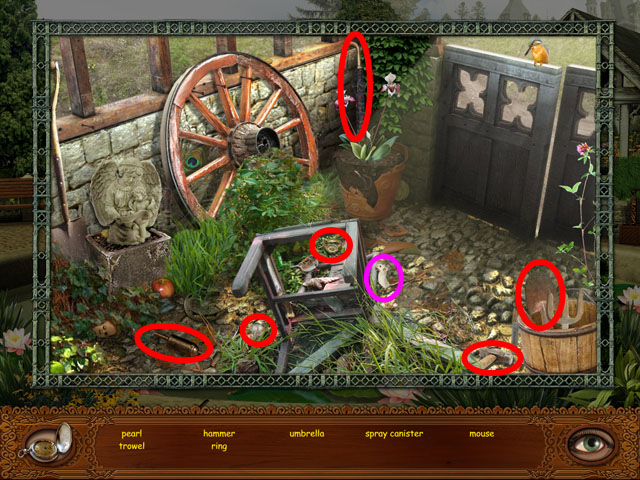
- Find the hidden objects listed at the bottom of the screen, in any order, circled in red in the image.
- The hidden objects are all randomized except for the inventory item circled in purple and may be different in your play-through.
- You will receive a WHITE RAT.
- Return downstairs and go to the Aviary.
- Click to the left of the big red flower in the bottom right corner of the screen.
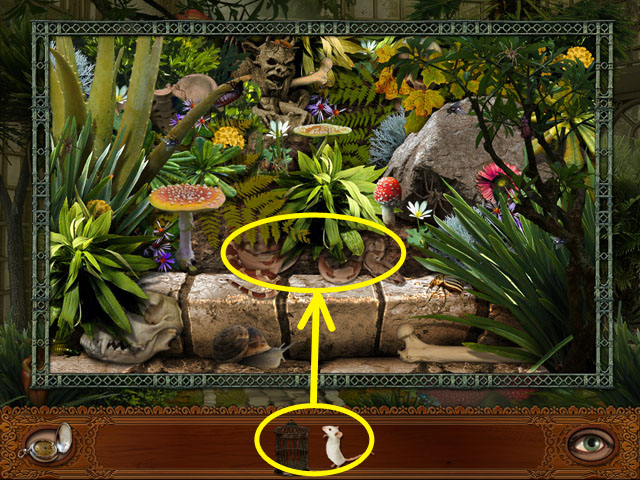
- Combine the bird cage and the rat in the inventory.
- Place it in front of the big snake in the middle to open up that hot spot.
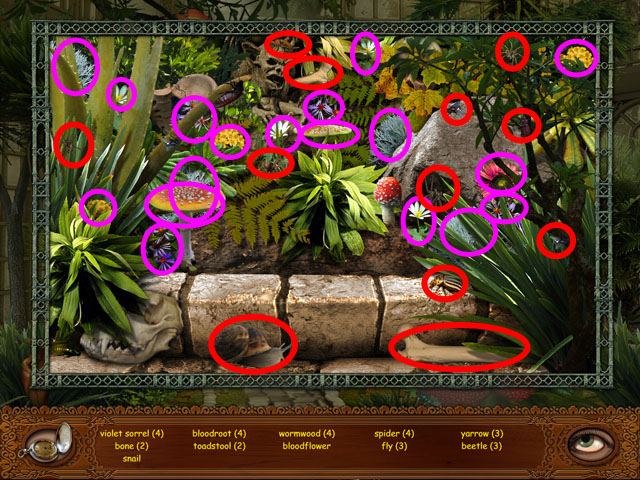
- Find the hidden objects listed at the bottom of the screen, in any order, circled in red in the image.
- The hidden objects are all randomized except for the special items circled in purple and may be different in your play-through.
- You will find yarrow, violet sorrel, wormwood, bloodflower, bloodroot, and toadstools here.
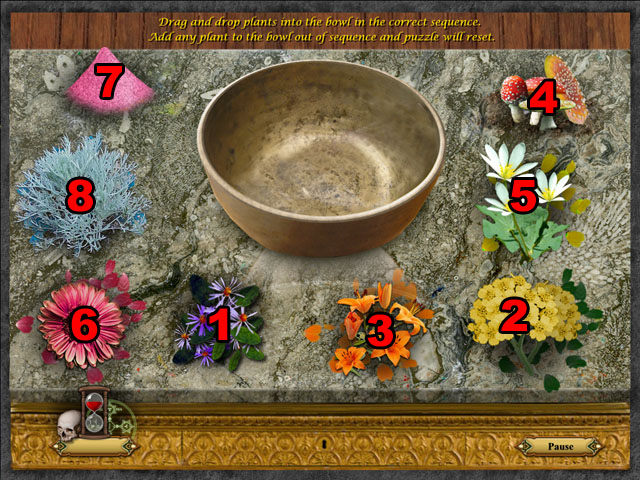
- Click on the bowl in the bottom corner of the screen.
- Place the ingredients into the bowl in correct order to finish this puzzle.
- If you mess up the order, all of the ingredients will go back to their original places.
- The bowl will glow when you are over it with your mouse. If it is not glowing you won’t place the ingredient in the bowl and the puzzle will reset.
- See the screenshot for the correct order.
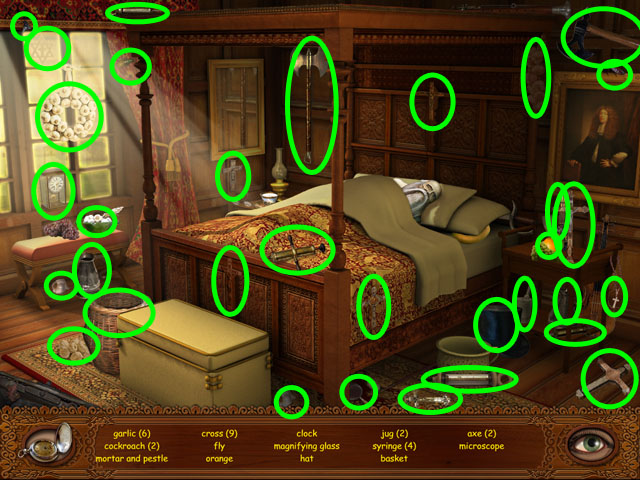
- Find the hidden objects listed at the bottom of the screen, in any order, circled in green in the image.
- The hidden objects are all randomized and may be different in your play-through.
Chapter 5: The Wedding
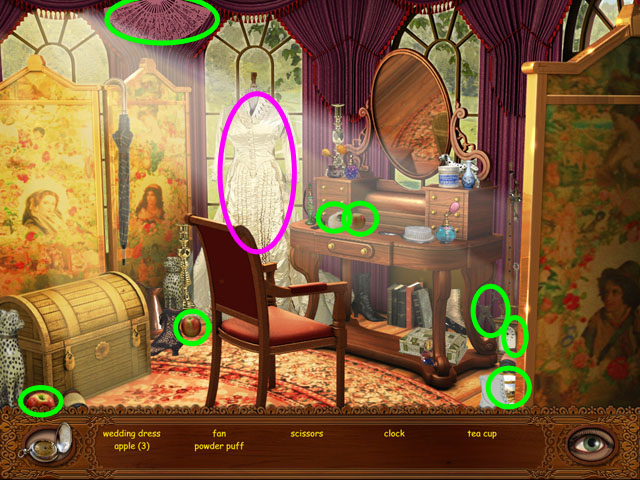
- Click at the right of the screen to exit the room.
- Find the hidden objects listed at the bottom of the screen, in any order, circled in green in the image.
- The hidden objects are all randomized except for the special items circled in purple and may be different in your play-through.
- You will find a wedding dress in this room.
- Click on the sparkling dressing table hot spot in the middle of the screen.
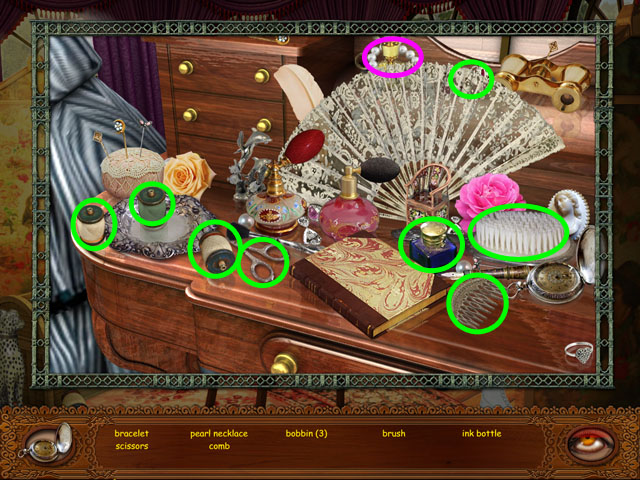
- Find the hidden objects listed at the bottom of the screen, in any order, circled in green in the image.
- The hidden objects are all randomized except for the special item circled in purple and may be different in your play-through.
- You will find a pearl necklace.
- Click on the chest hot spot in the bottom left corner of the screen.
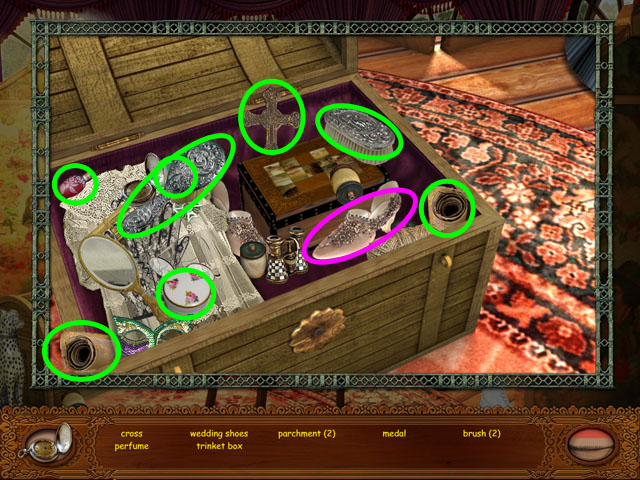
- Find the hidden objects listed at the bottom of the screen, in any order, circled in green in the image.
- The hidden objects are all randomized except for the special item circled in purple and may be different in your play-through.
- You will find a pair of shoes.
- Return to the entrance hall.
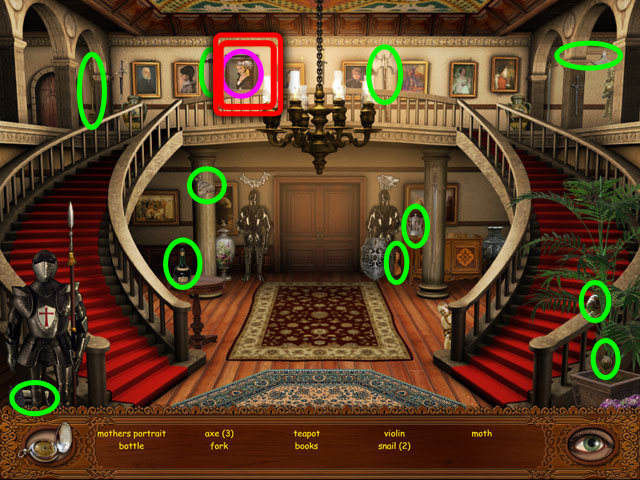
- Find the hidden objects listed at the bottom of the screen, in any order, circled in green in the image.
- The hidden objects are all randomized except for the special item circled in purple and may be different in your play-through.
- You will find your mother’s portrait in this scene and it will expose a safe.
- Click on the safe highlighted in red.
- Return to the dining hall just past the entrance hall.
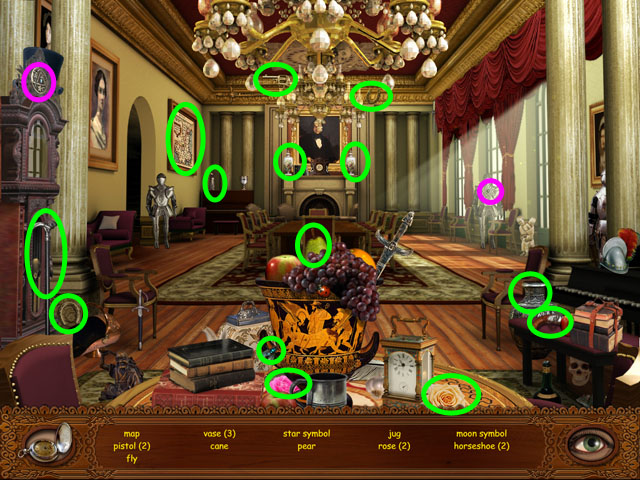
- Find the hidden objects listed at the bottom of the screen, in any order, circled in green in the image.
- The hidden objects are all randomized except for the inventory items circled in purple and may be different in your play-through.
- You will receive a STAR SYMBOL and a MOON SYMBOL.
- Exit the dining hall.
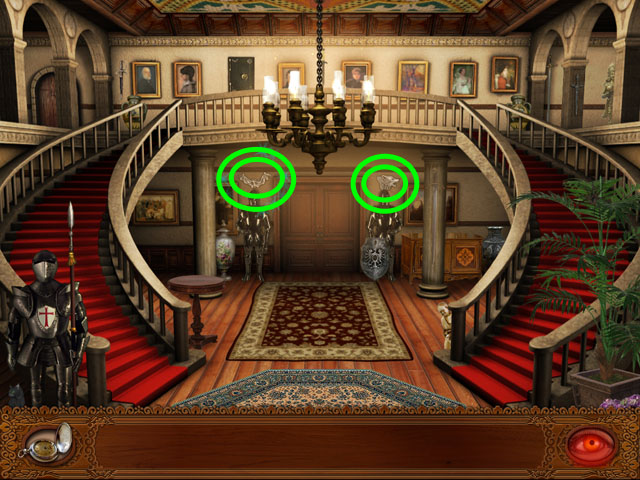
- Collect the two symbols highlighted in green in the image.
- You will receive a BAT SYMBOL and a WOLF SYMBOL.
- Click on the safe again.
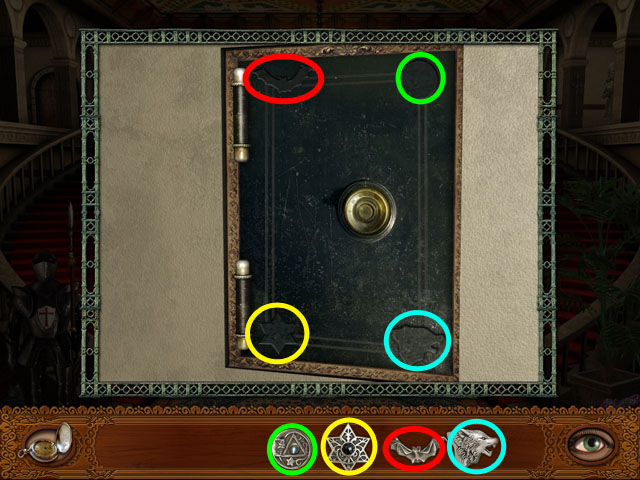
- Place all symbols into correct position.
- Mach the shape of the symbols from your inventory with the outline on the safe.
- Follow the screenshot for the solution.
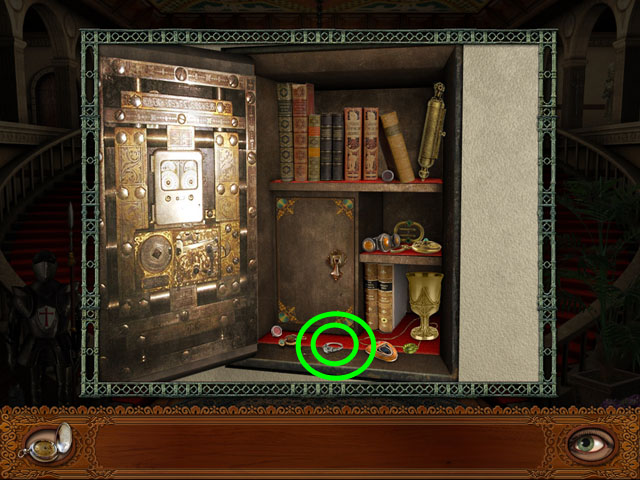
- Collect the ring highlighted in green.
- In the wedding scene click to move forward after watching the cut scene.
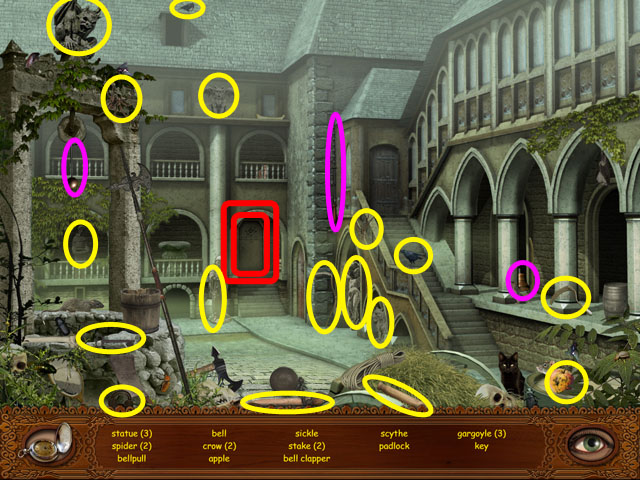
- Click on the door highlighted in red in the middle and try to open it.
- Find the hidden objects listed at the bottom of the screen, in any order, circled in green in the image.
- The hidden objects are all randomized except for the inventory items circled in purple and may be different in your play-through.
- You will receive a HANDLE, a BELL and a BELL CLAPPER.
- Combine the BELL and the BELL CLAPPER in the inventory.
- Click on the door to zoom in.
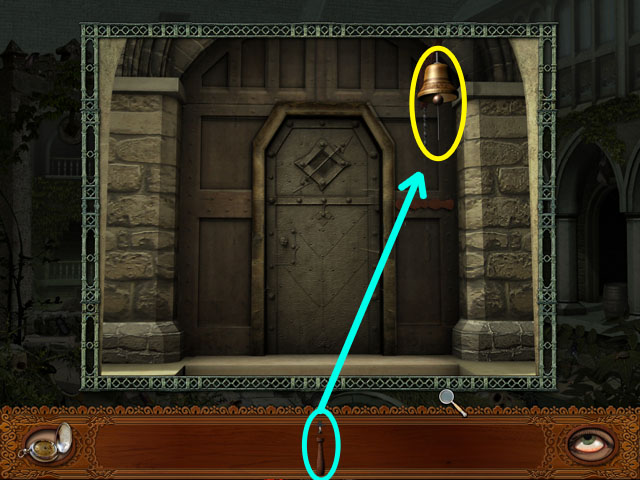
- Place the fixed bell in the upper right corner of the screen on the piece of wood.
- Place the handle under the BELL.
- Enter the hallway.
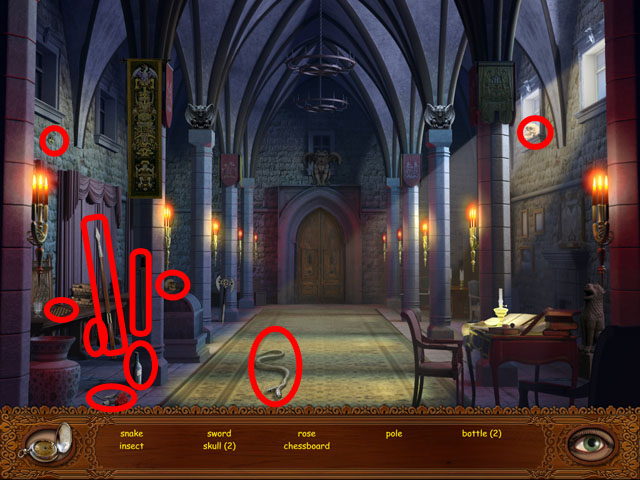
- Find the hidden objects listed at the bottom of the screen, in any order, circled in red in the image.
- The hidden objects are all randomized and may be different in your play-through.
- Congratulations! You Finished Vampire Brides: Love Over Death!
Created at: 2010-09-14

