

Walkthrough Menu
- General Tips
- Chapter 1: The Guardian of Arden
- Chapter 2: The Brood Academy
- Chapter 3: The Artifact
- Chapter 4: The Chalice
General Tips
- This is the official guide for Amaranthine Voyage: Legacy of the Guardians.
- This guide will not mention when you have to zoom into a location; screenshots will show each zoom scene.
- The screenshots will show where to play Hidden-Object Puzzles (HOP).
- This guide will give step-by-step solutions for all puzzles that are not random. Read the instructions in the game for each puzzle.
Chapter 1: The Guardian of Arden
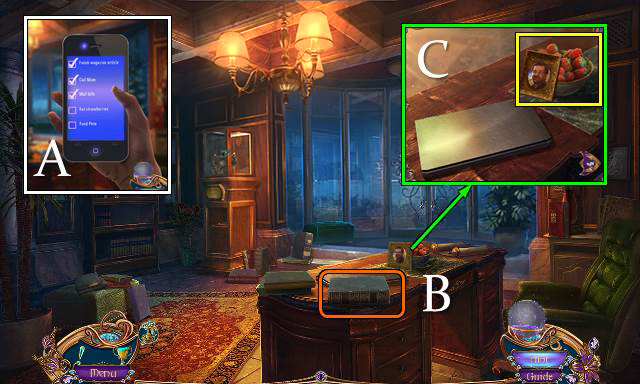
- Put down your phone (A).
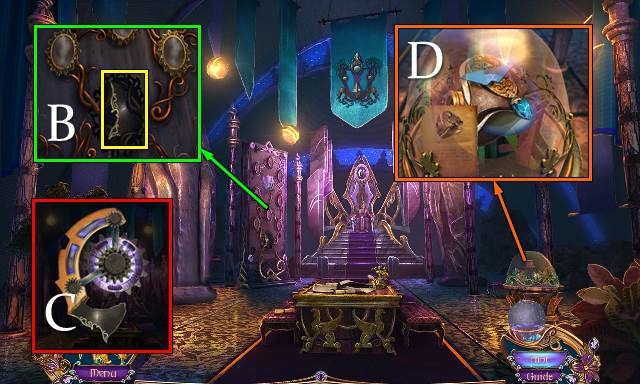
- Look at the book (B).
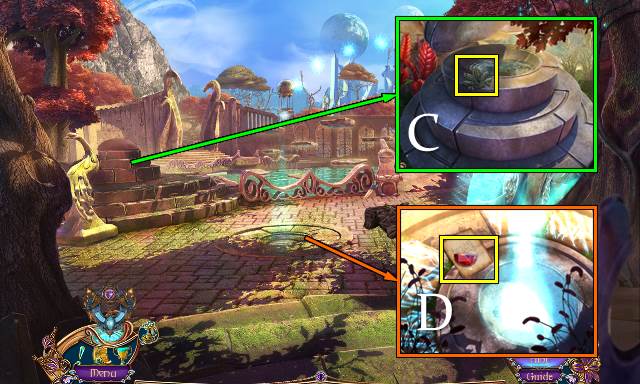
- Open the laptop, move the picture, eat the strawberries and take the FRUIT BOWL (C).
- Put down the phone.
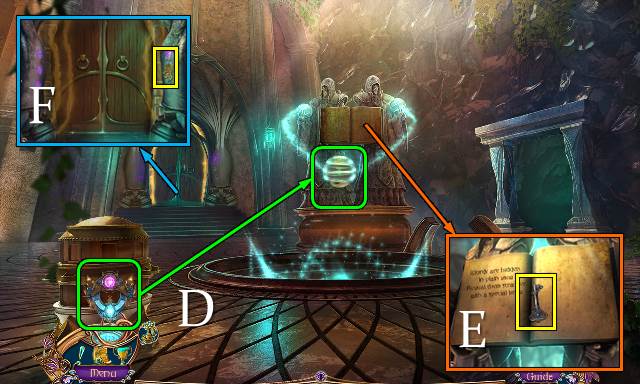
- Read the note and take the POUCH (D).
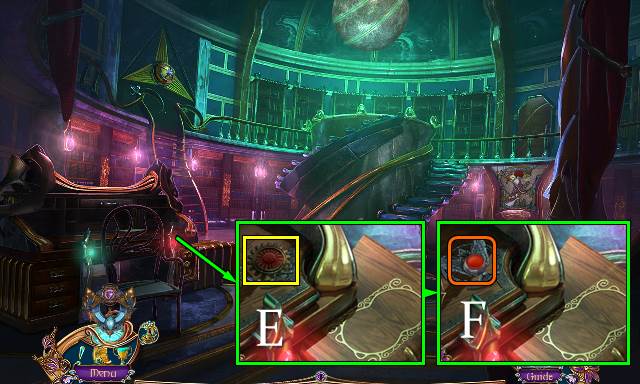
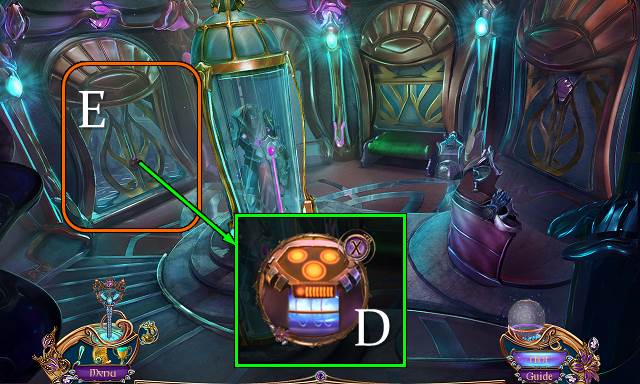
- Find all the books (E).
- Go forward.
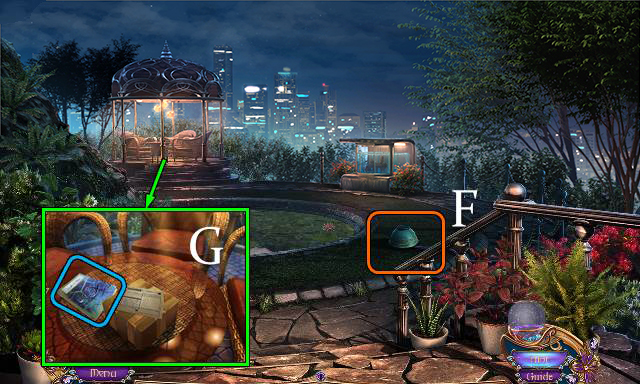
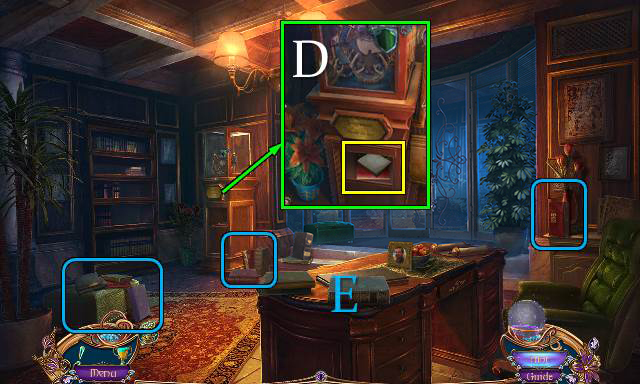
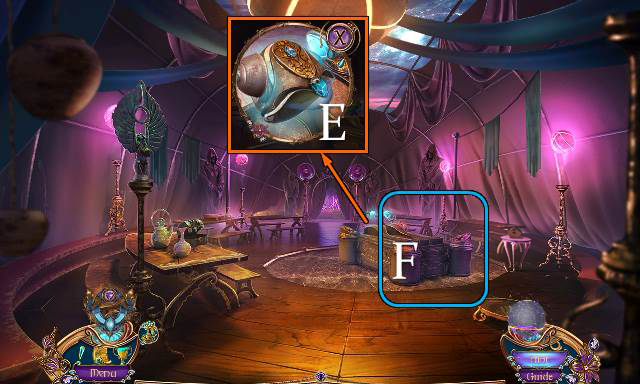
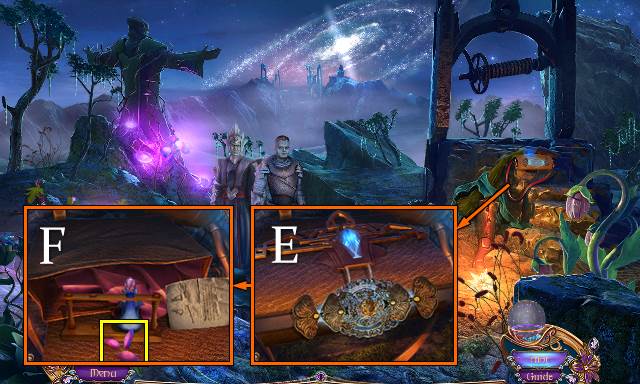
- Use the FRUIT BOWL (F).
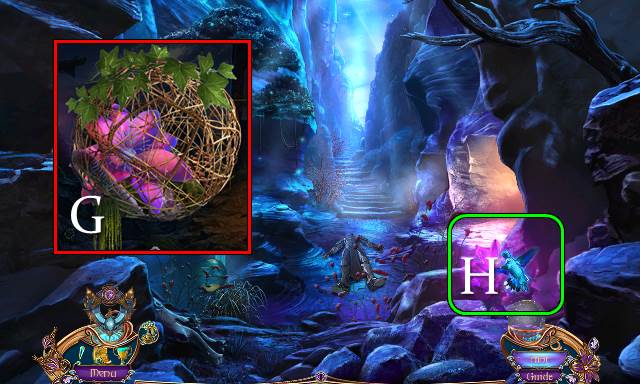
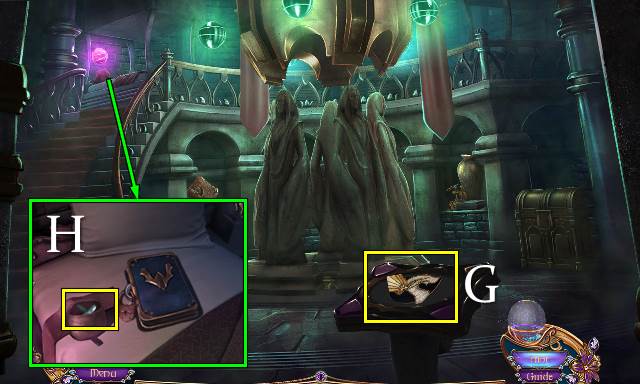
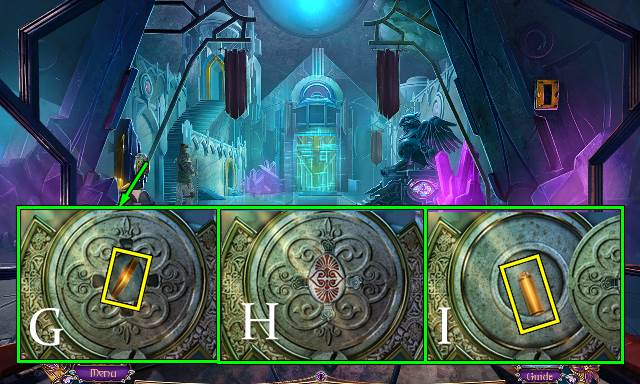
- Move the note; open the magazine to get a DRAGONFLY (G).
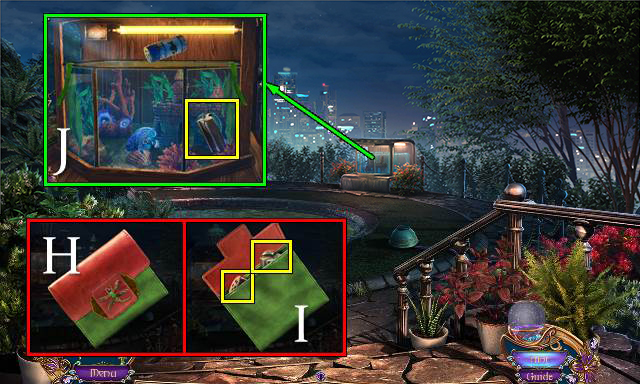
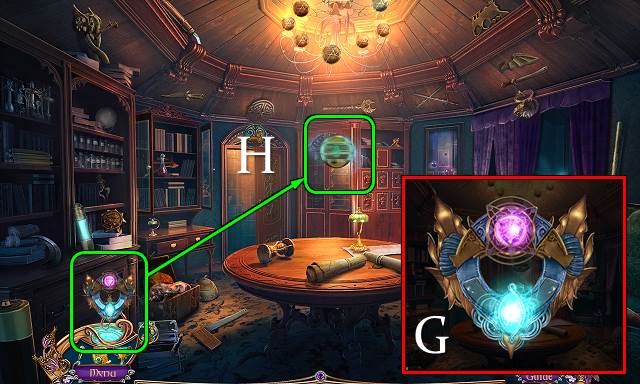
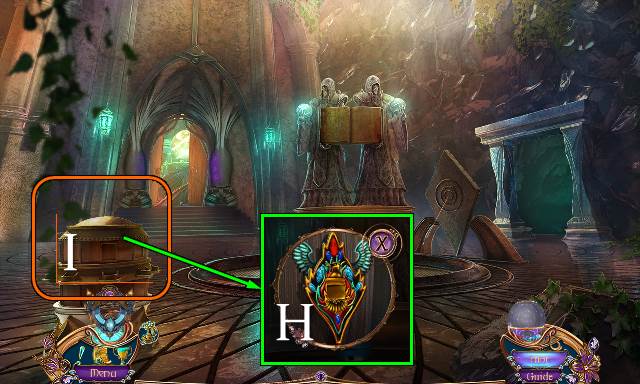
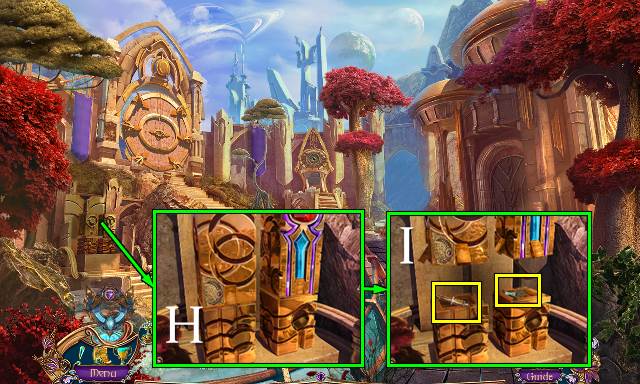
- Access the POUCH and place the DRAGONFLY (H); open the pouch and take the MAGNET and FISH FOOD (I).
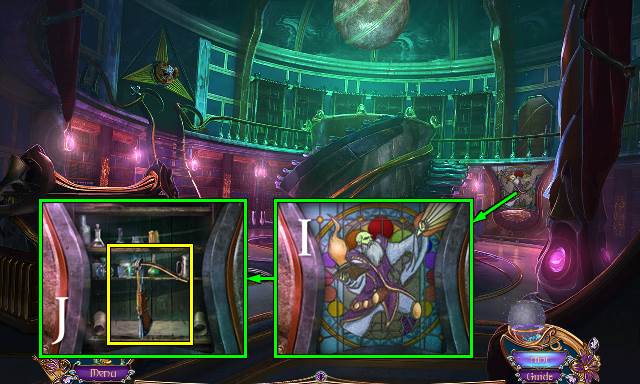
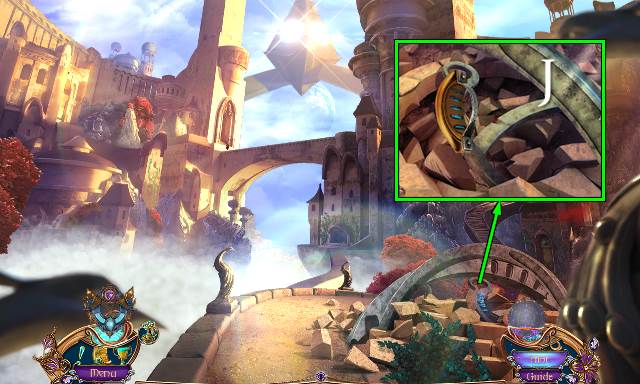
- Use the FISH FOOD; take the GLOVER COAT-OF-ARMS with the MAGNET (J).
- Close the phone.
- Walk down.
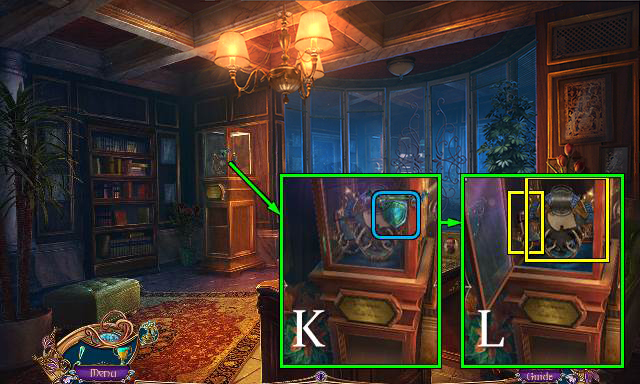
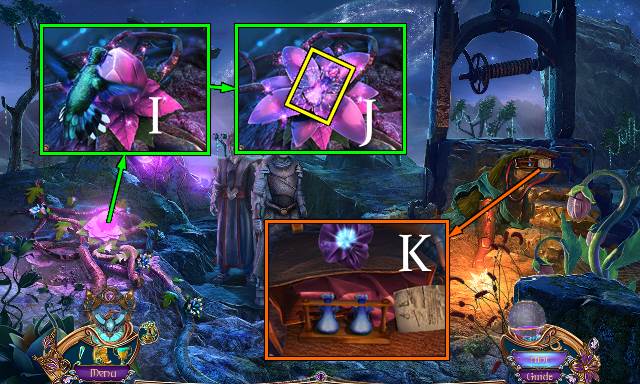
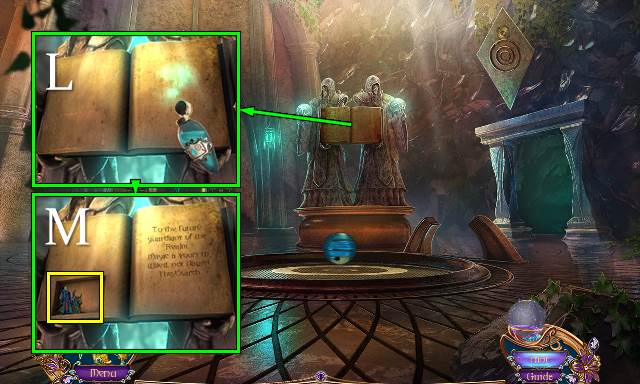
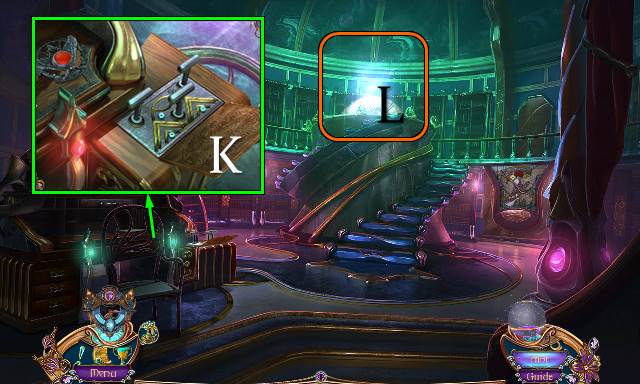
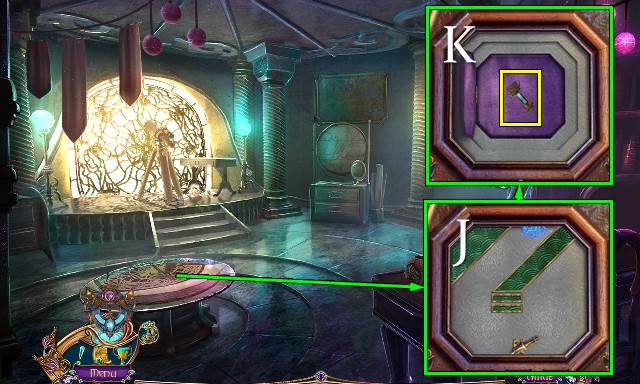
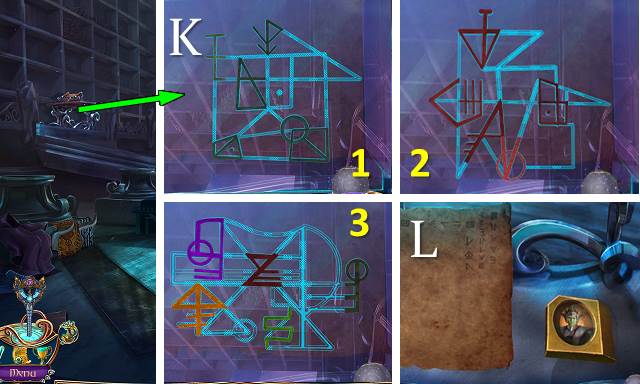
- Place the GLOVER COAT-OF-ARMS (K); read the note and take the INCOMPLETE MEDALLION and TRANSLATOR (L).
- Go forward.

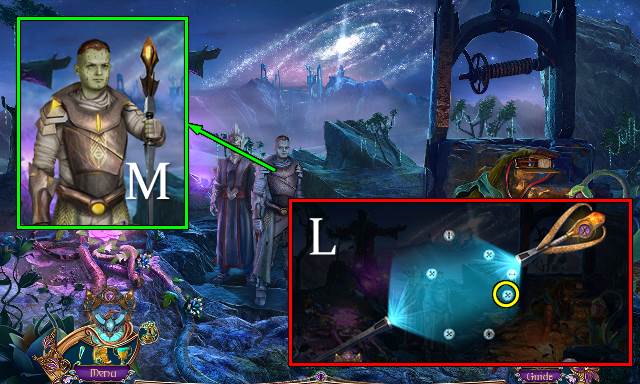
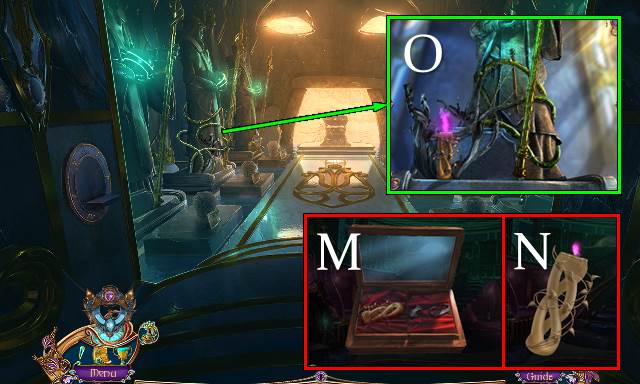
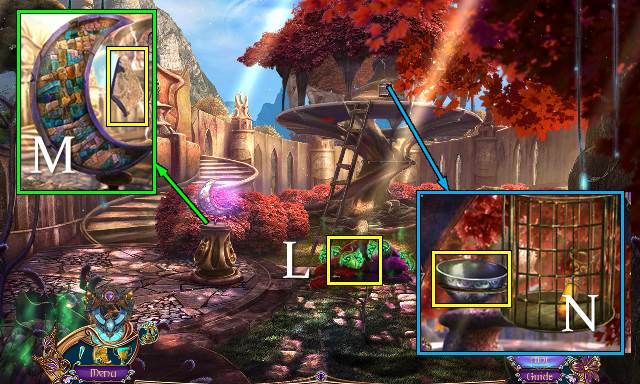
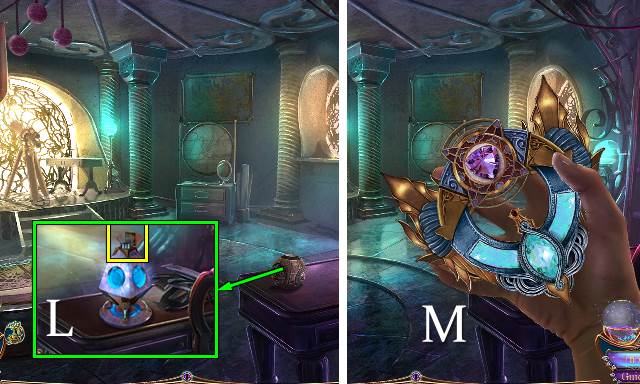
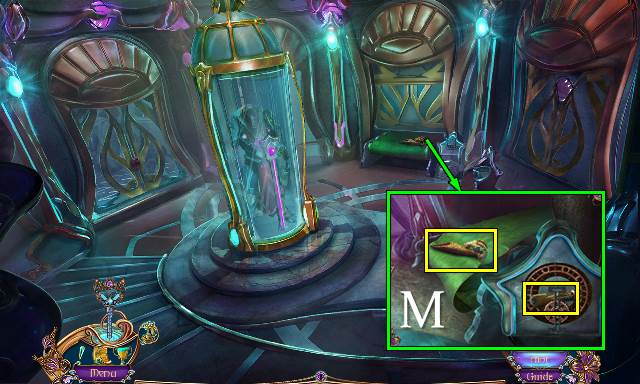
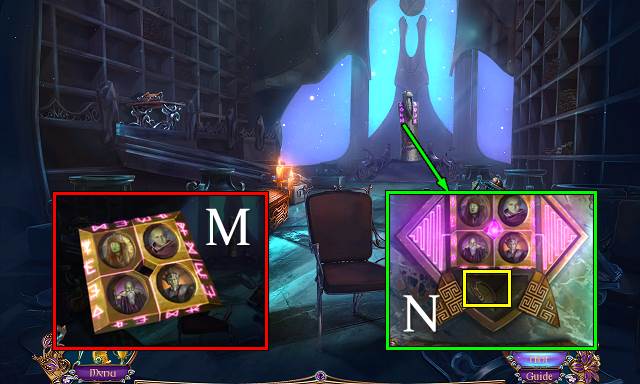
- Use the TRANSLATOR (M).
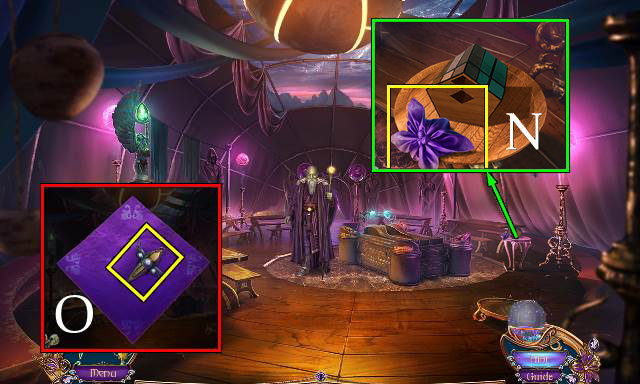
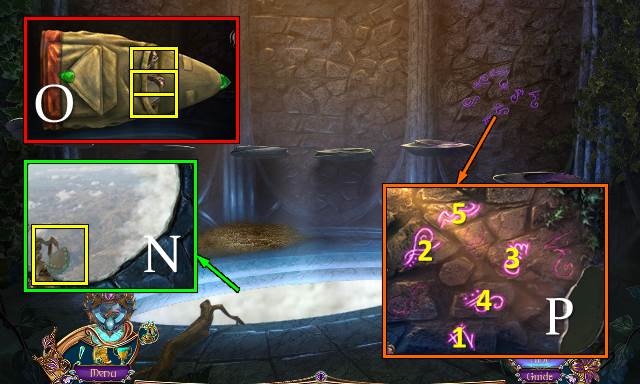
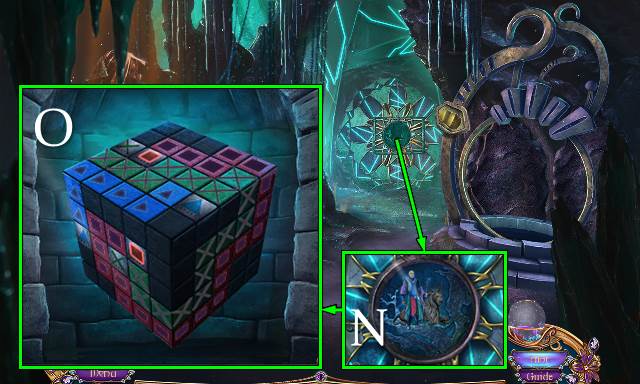
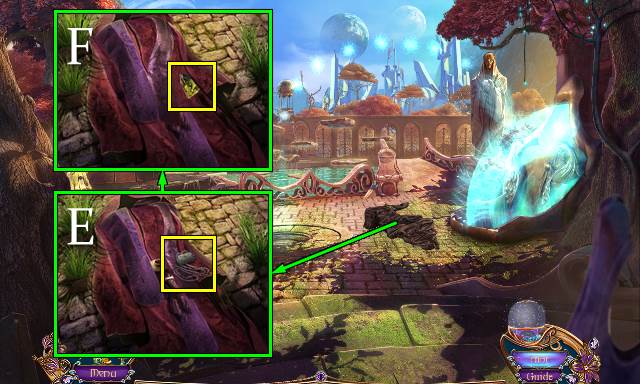
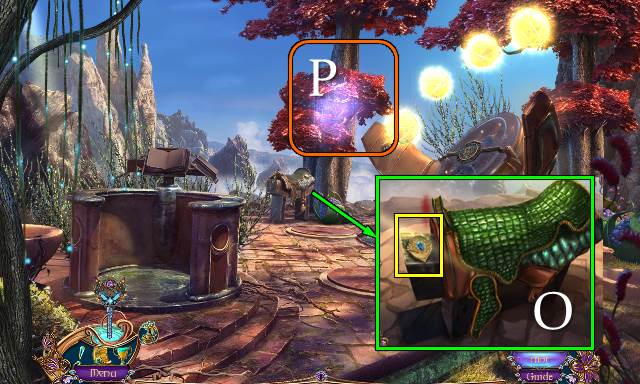
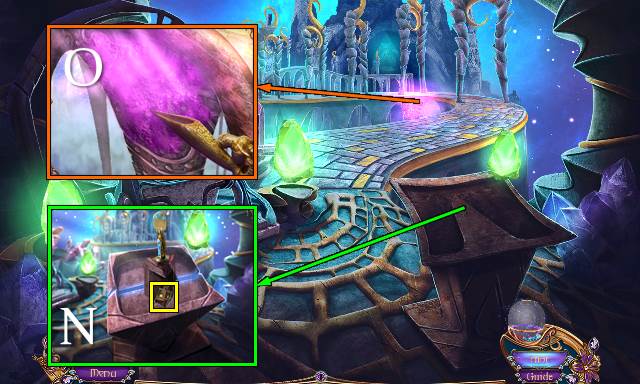
- Take the WRAPPED CLOTH (N).
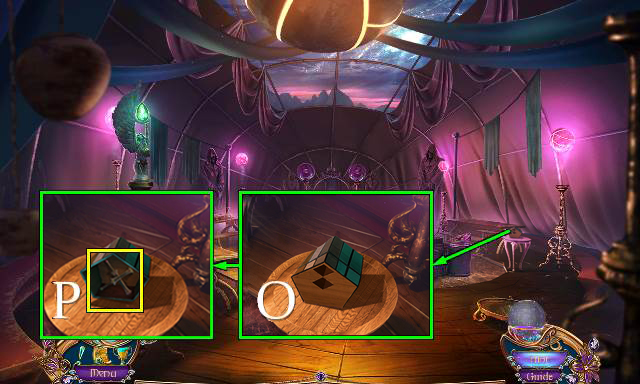
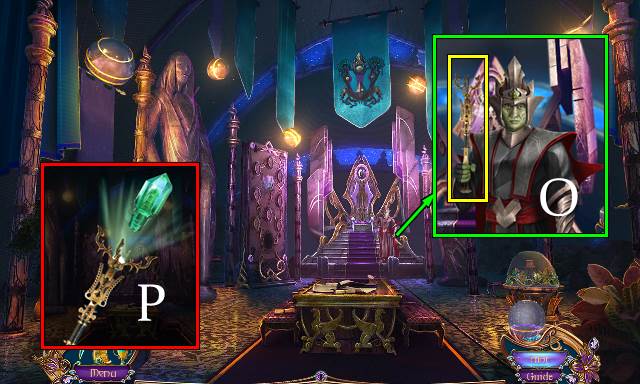
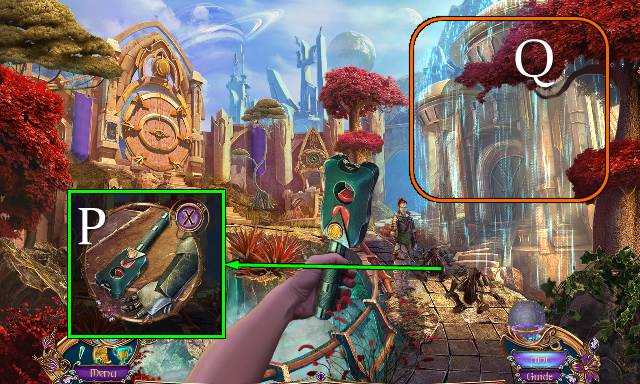
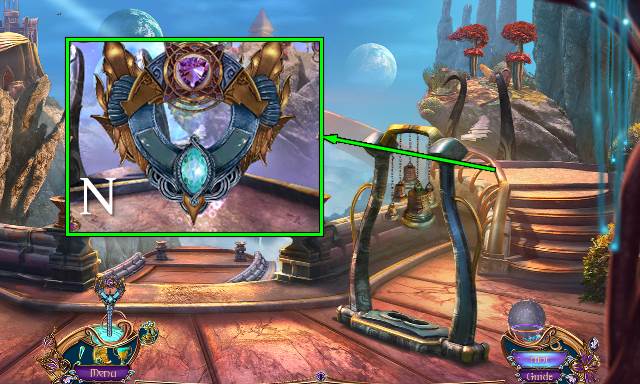
- Access and open the WRAPPED CLOTH; read the note and take the GUARDIAN PENDANT (O). You receive the CLOTH.
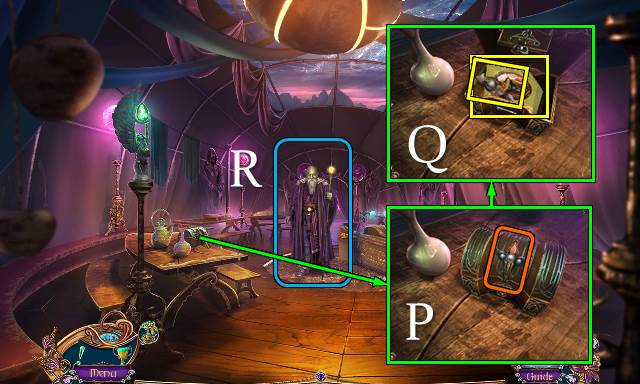
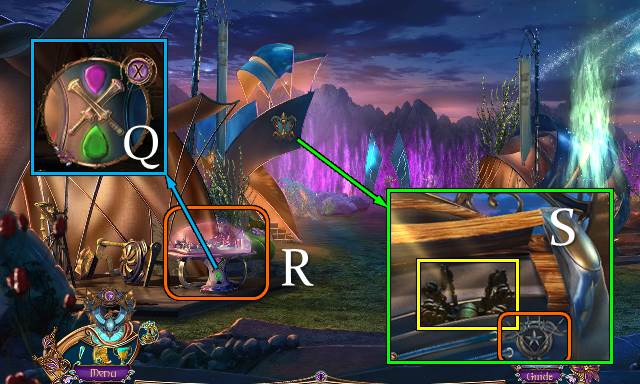
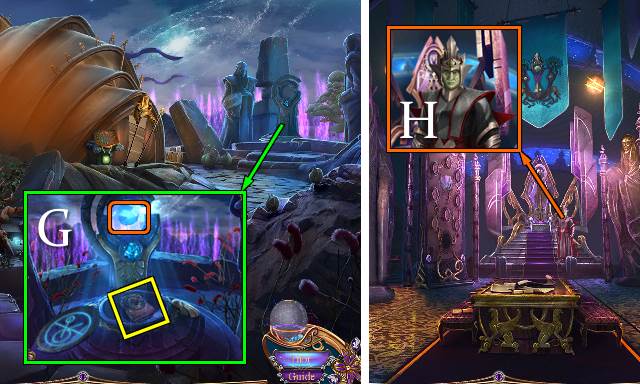
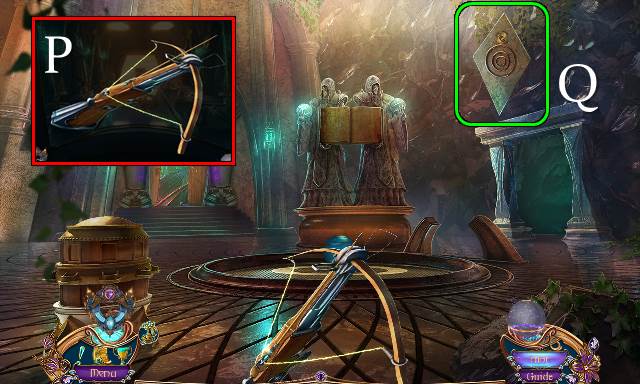
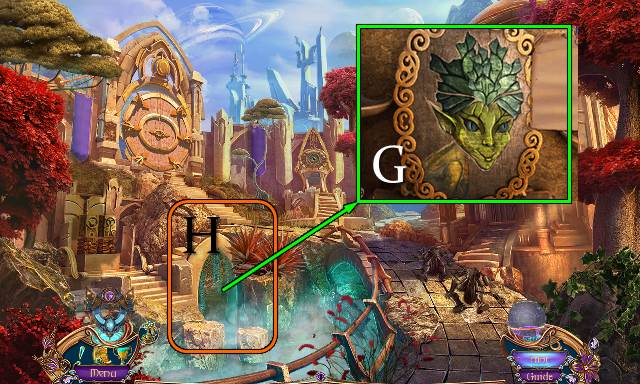
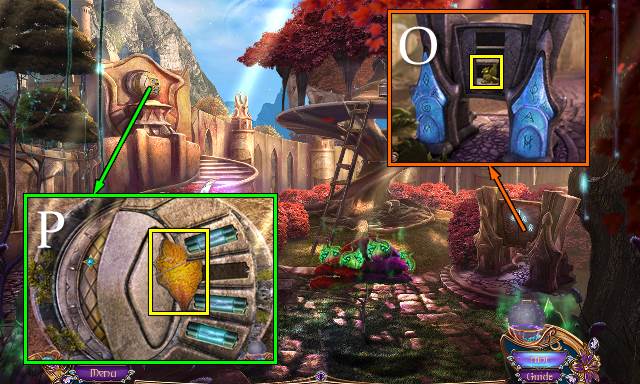
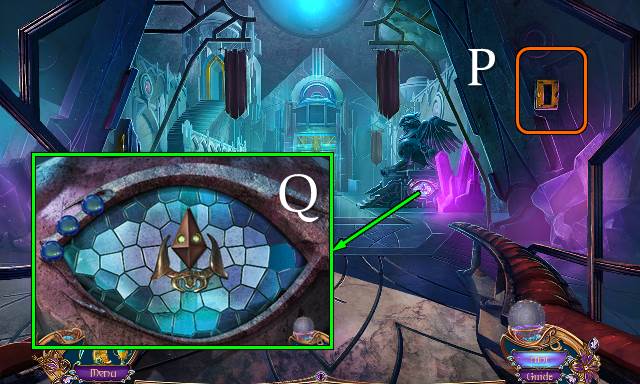
- Take the map and place the GUARDIAN PENDANT (P). Read the note and take the DAGGER and PHOTOGRAPH (Q).
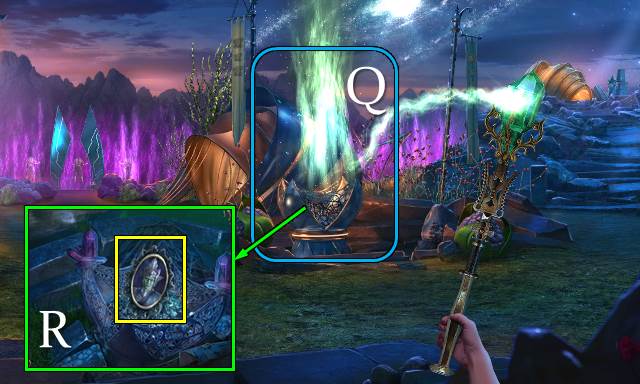
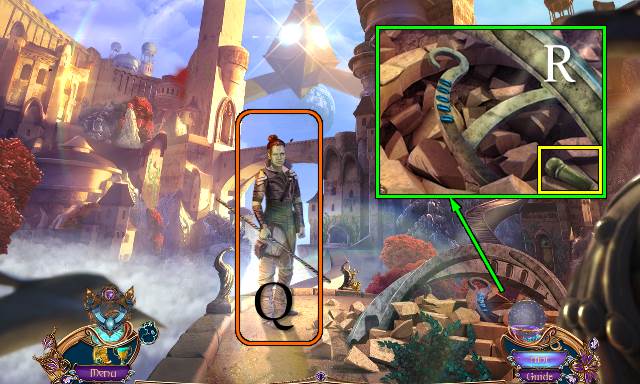
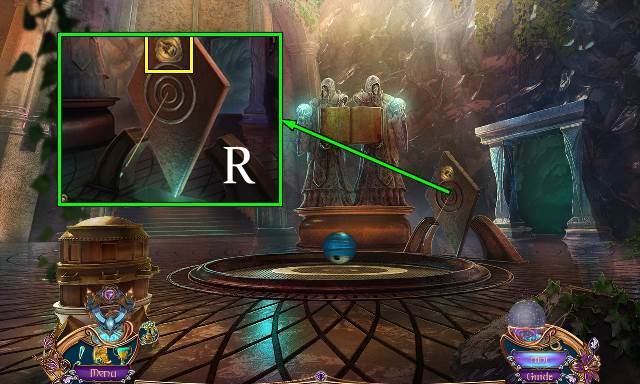
- Talk to Onslow (R).
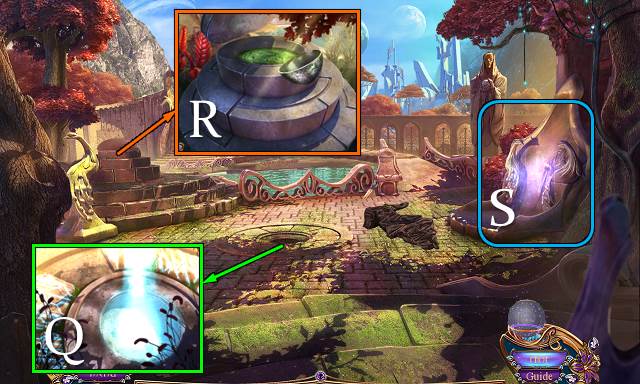
- Go forward.
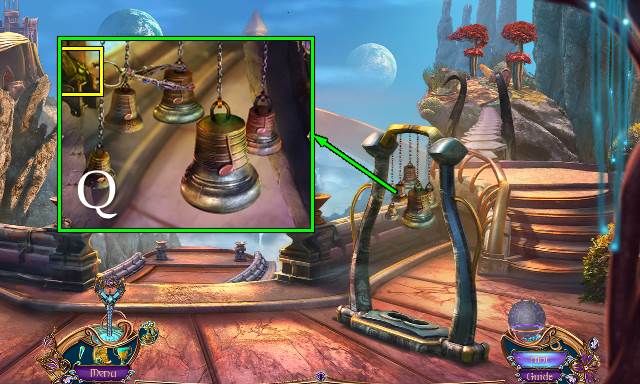
- Listen to the Voice Message.
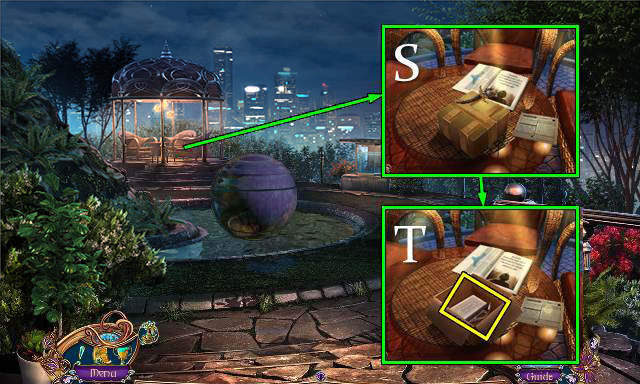
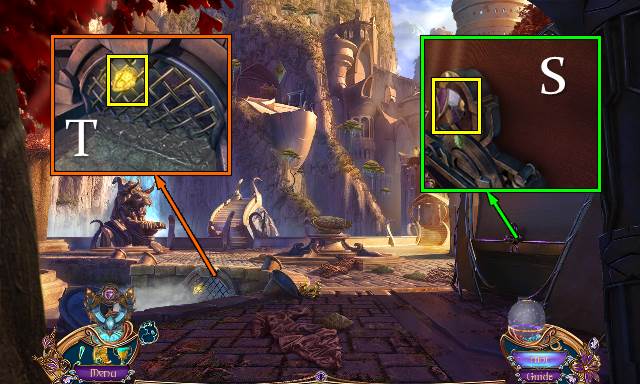
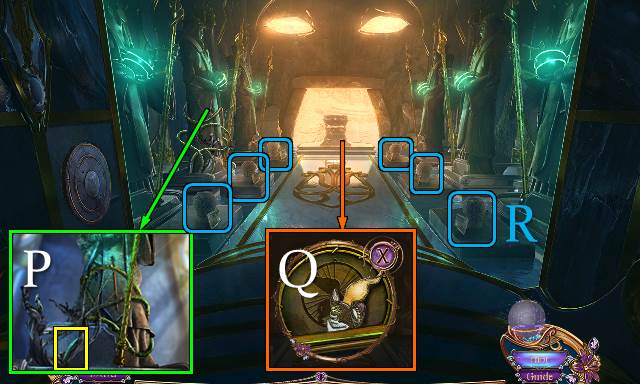
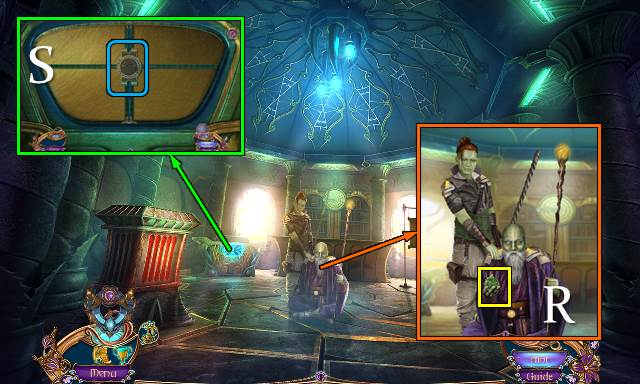
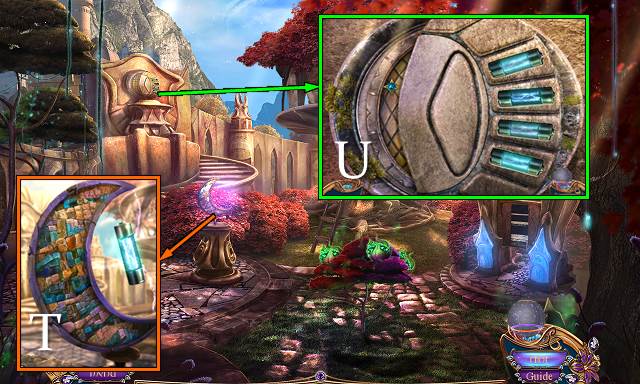
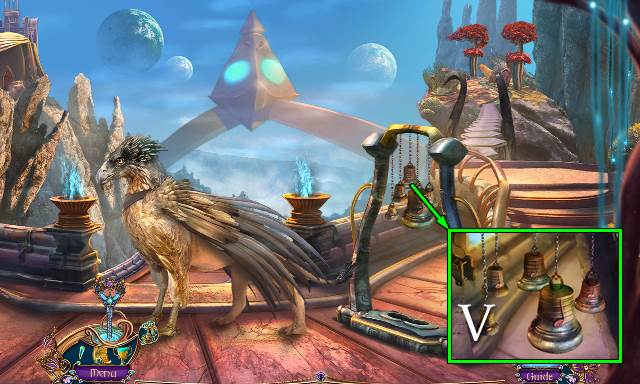
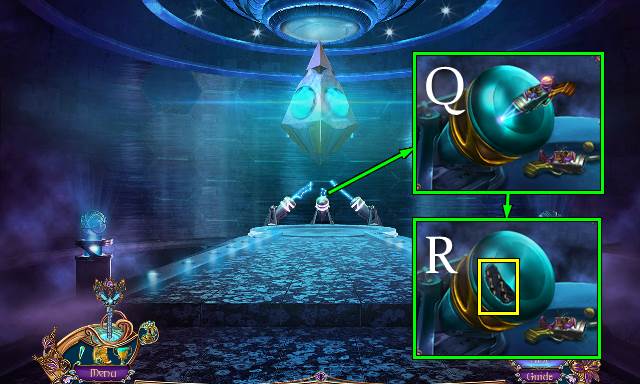
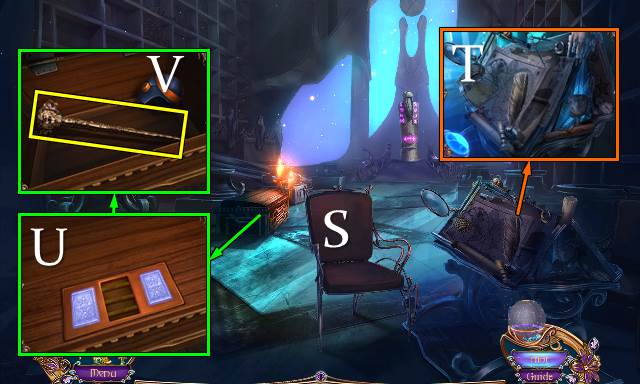
- Use the DAGGER (S); take the LAPTOP CHARGER (T).
- Walk down.

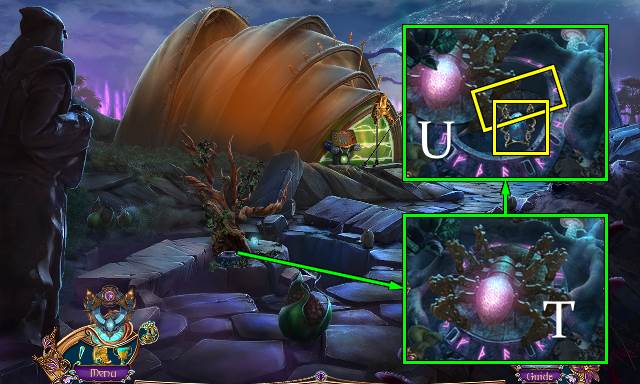
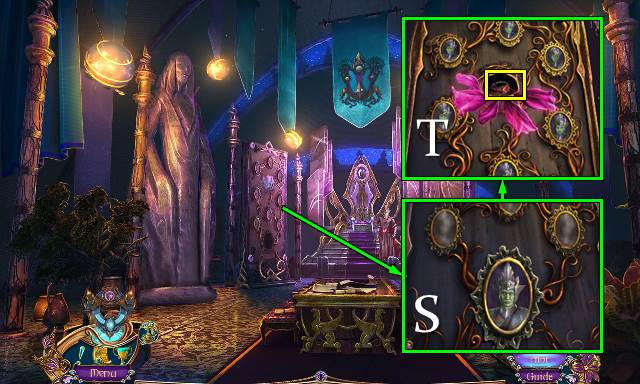
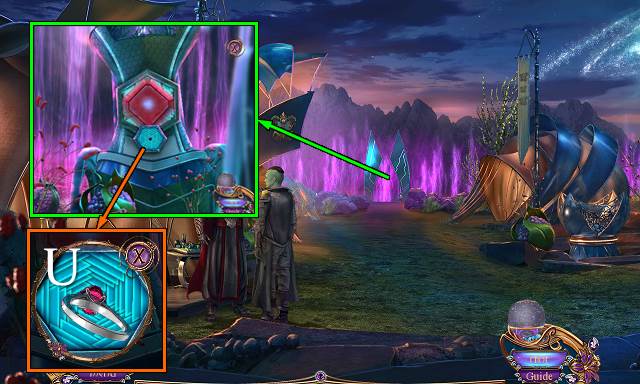
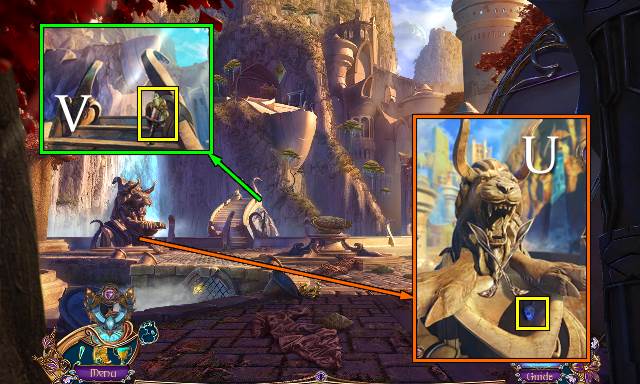
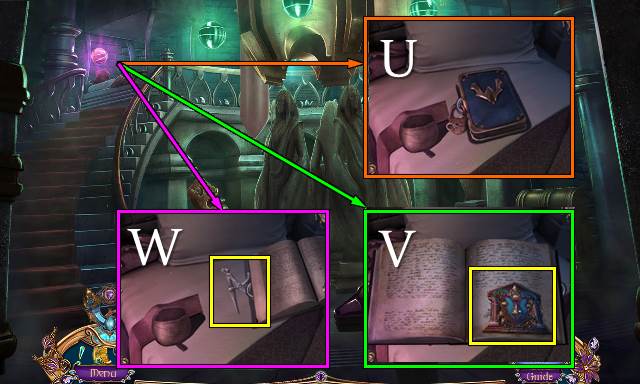
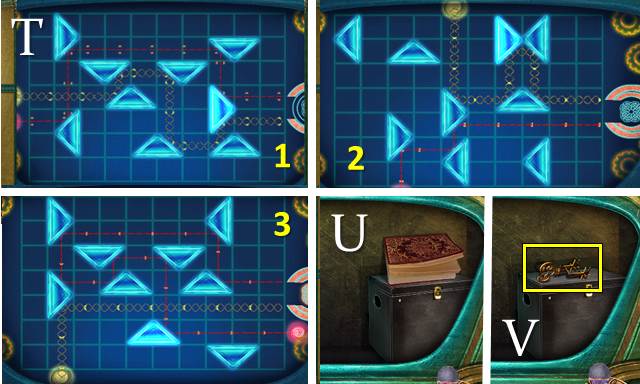
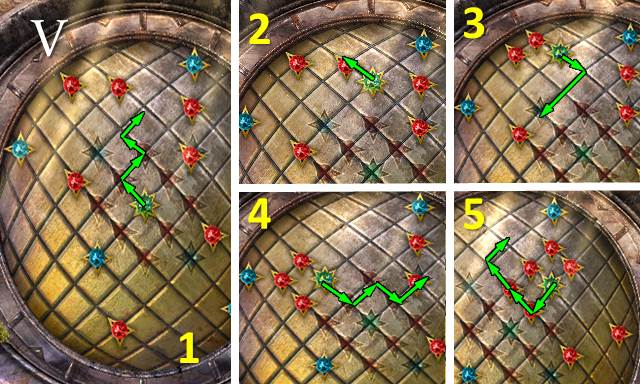
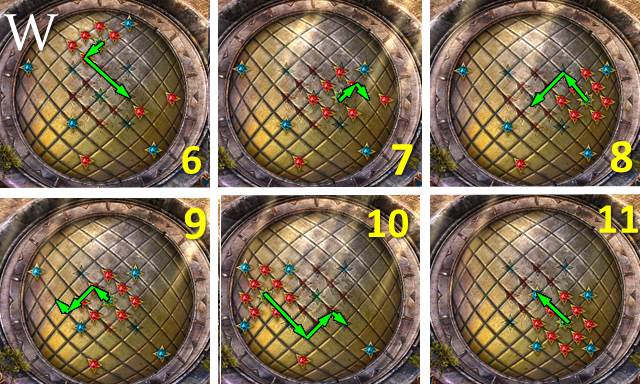
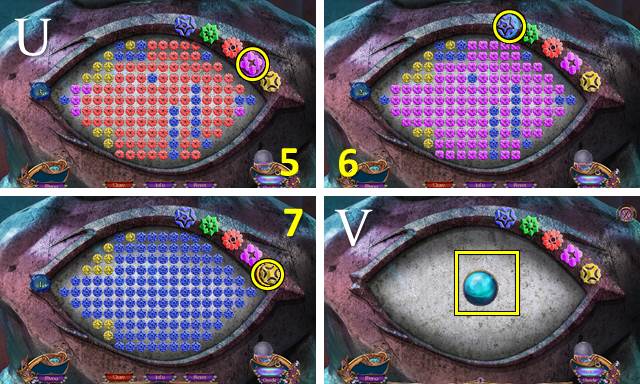
- Place the LAPTOP CHARGER; place the PHOTOGRAPH and find the symbols (U). Select the red room (V). You receive the GUARDIAN'S PHOTO.
- Go left.
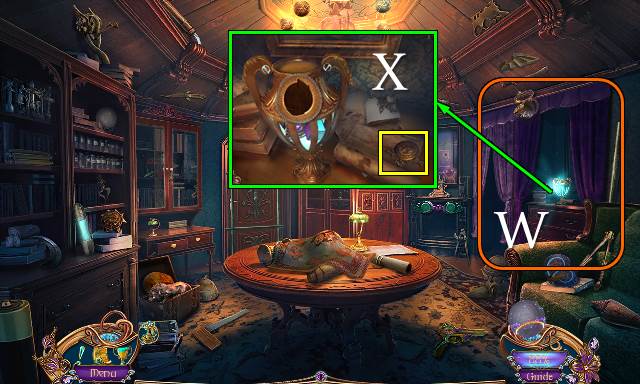
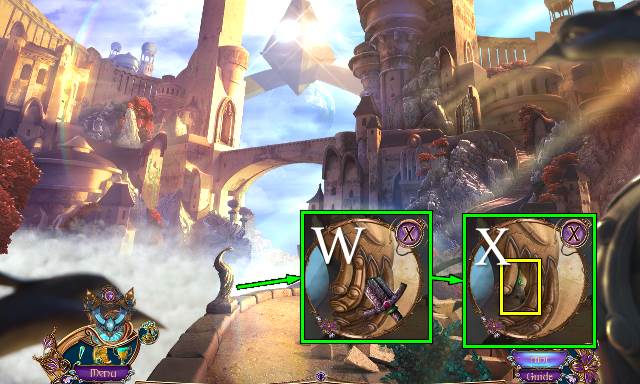
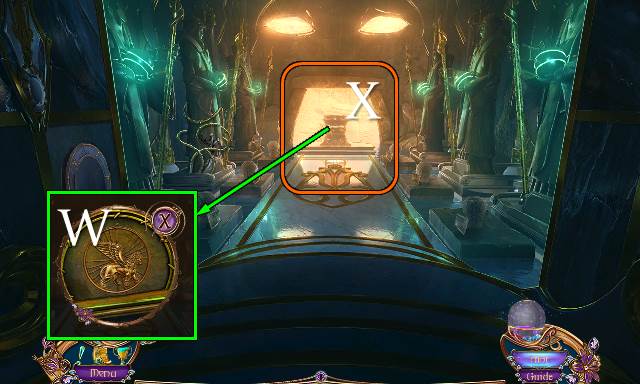
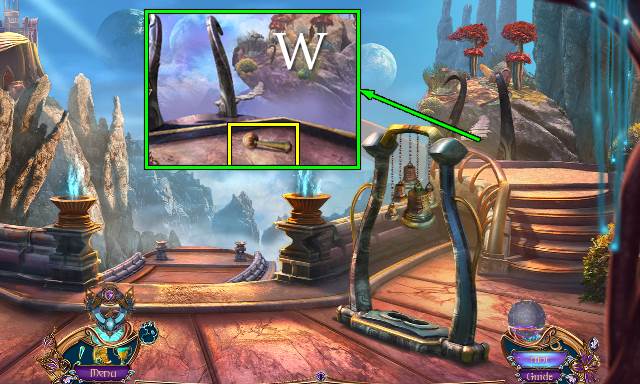
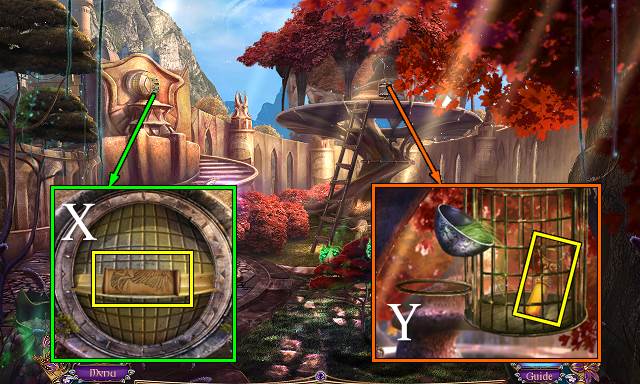
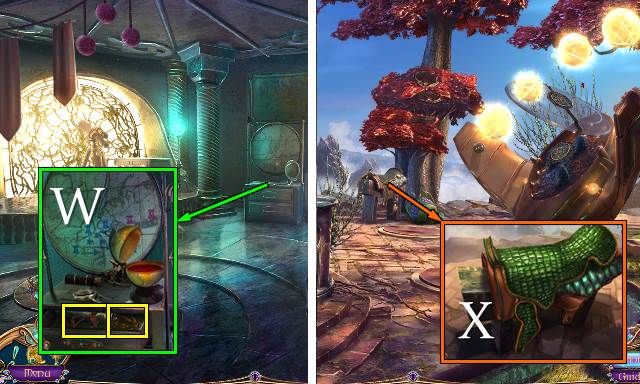
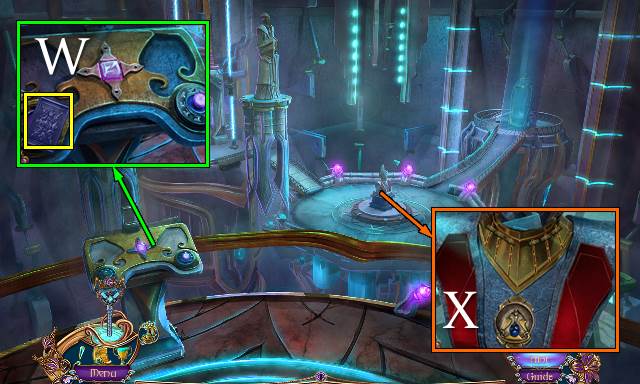
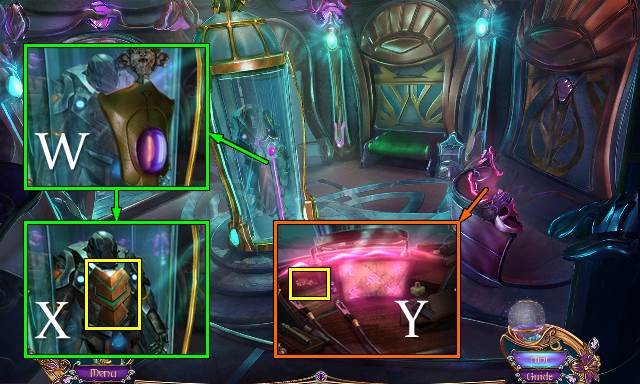
- Open the curtain (W).
- Read the note and take the BRONZE HANDLE (X).
- Walk down.
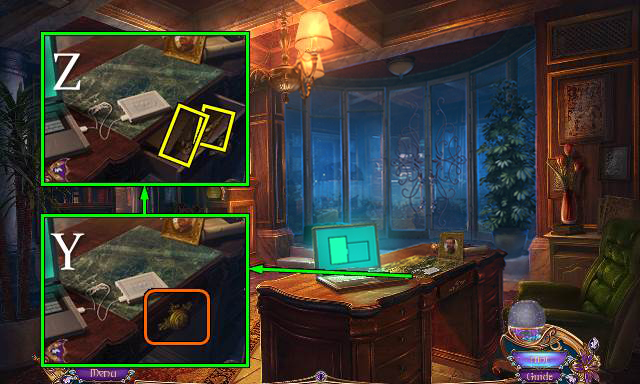
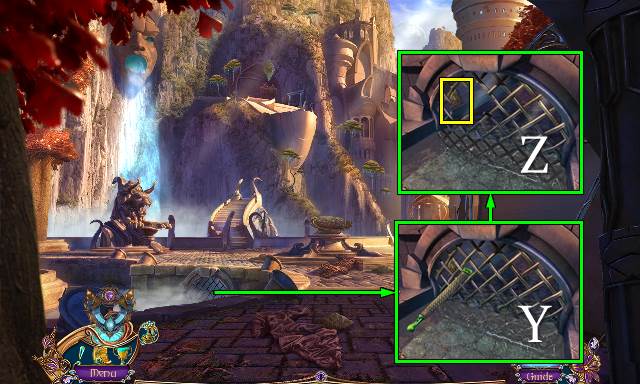
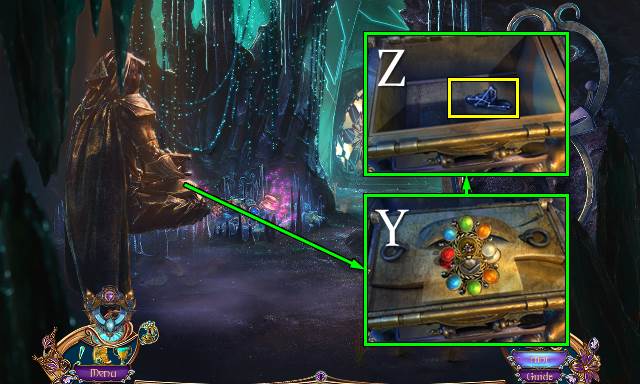
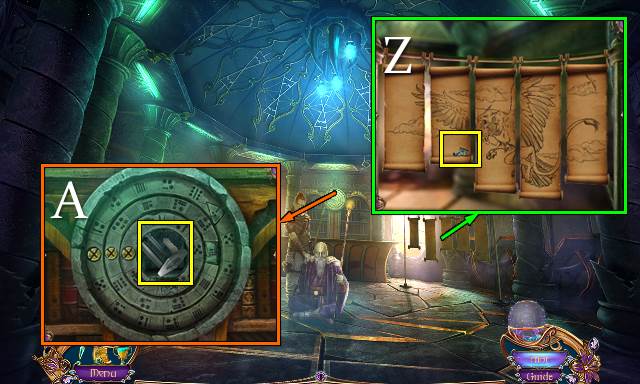
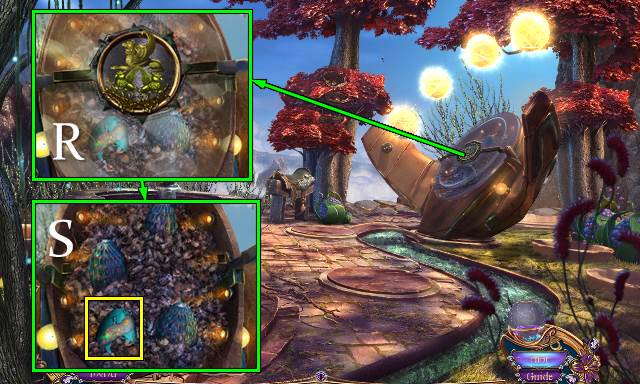
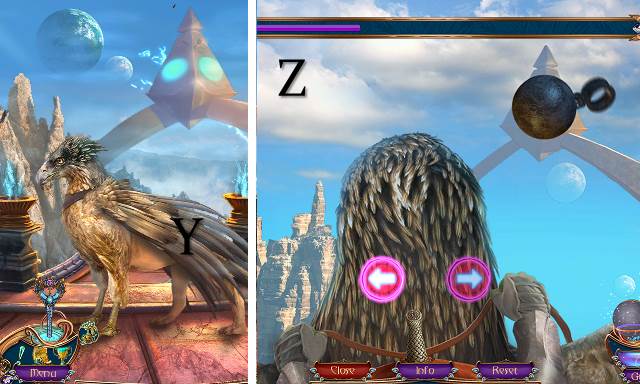
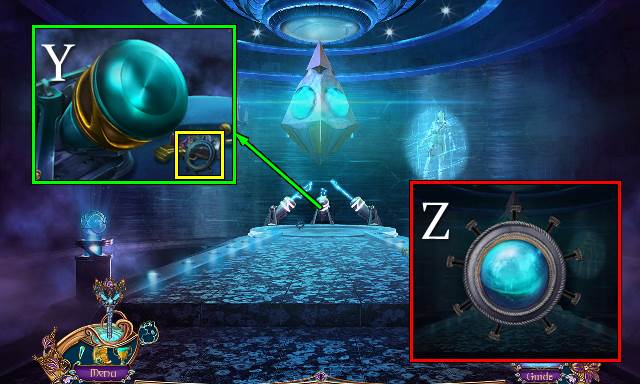
- Scroll right. Place the BRONZE HANDLE (Y). Read the note and take the CREATURE PENDANT and GOLDEN KEY (Z).
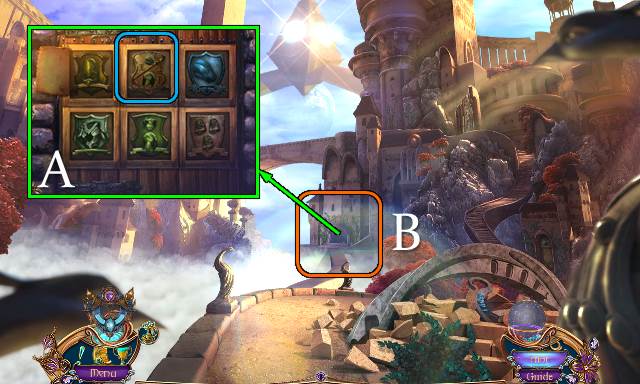
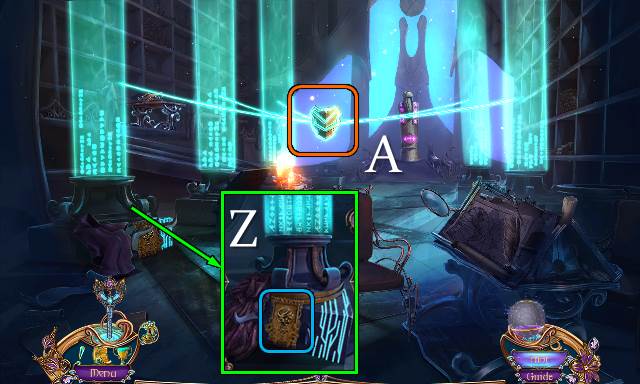
- Go left.
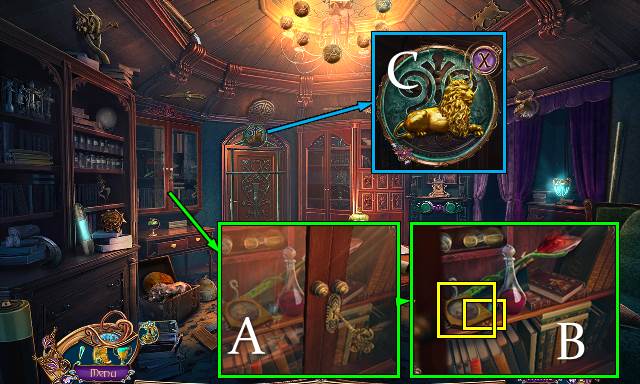
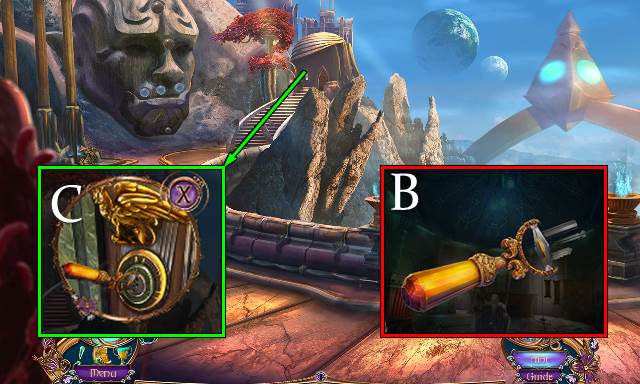
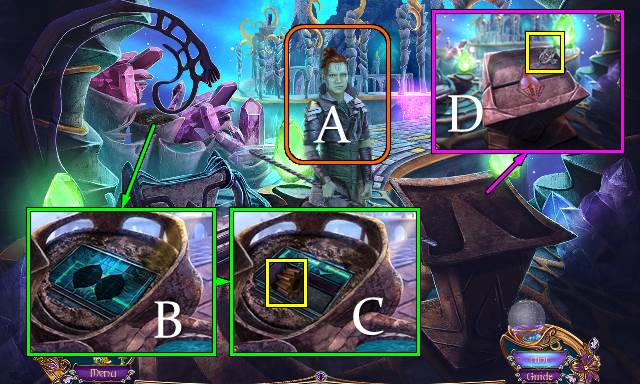
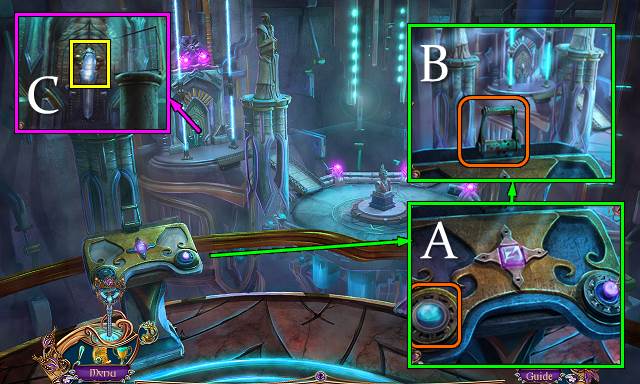
- Use the GOLDEN KEY (A). Take the INCOMPLETE FRAME and ENERGY GEM (B).
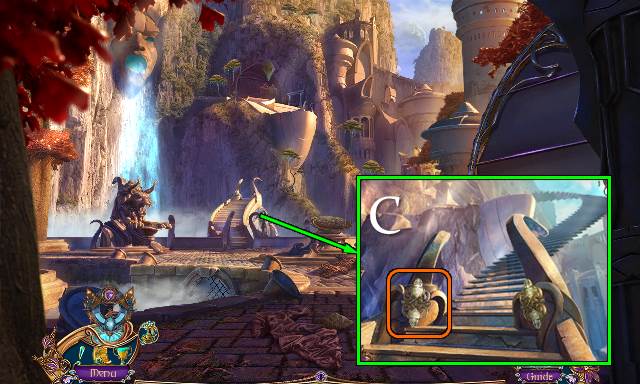
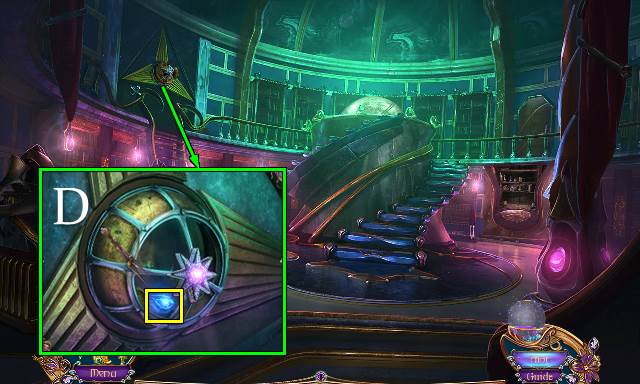
- Place the CREATURE PENDANT (C).
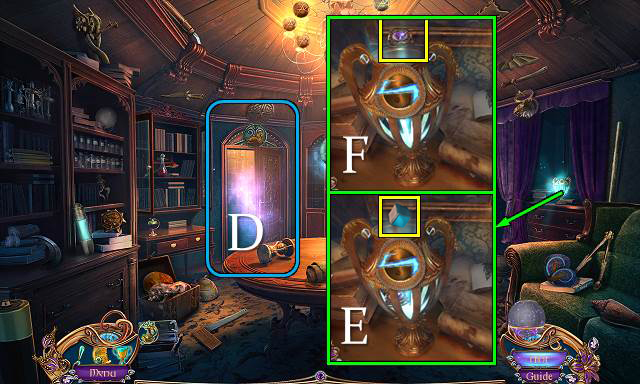
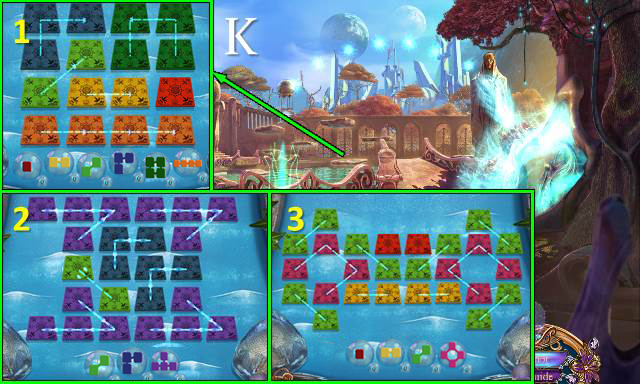
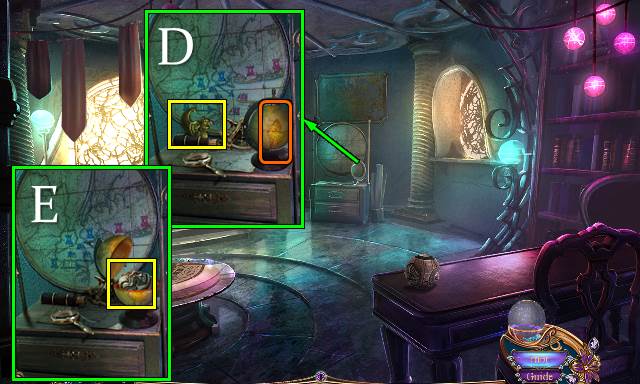
- Open the door. Play the HOP (D); receive THE SOURCE CENTRAL PIECE.
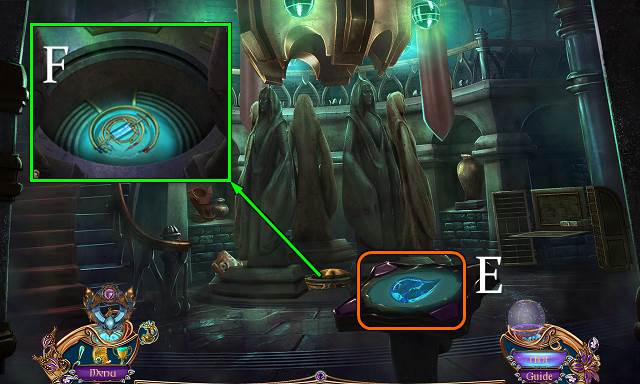
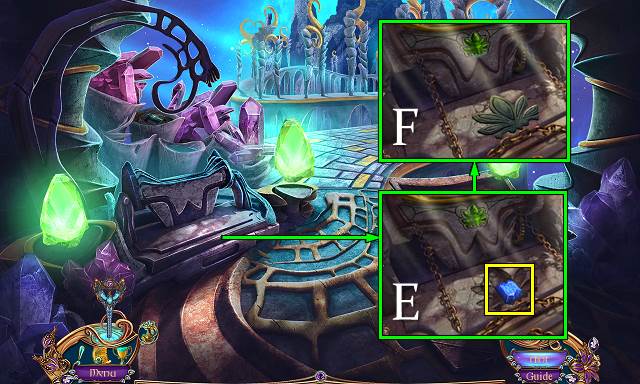
- Place THE SOURCE CENTRAL PIECE; take GEOMETRIC PIECES 1/2 (E) and the CRYSTAL COMPONENT (F).
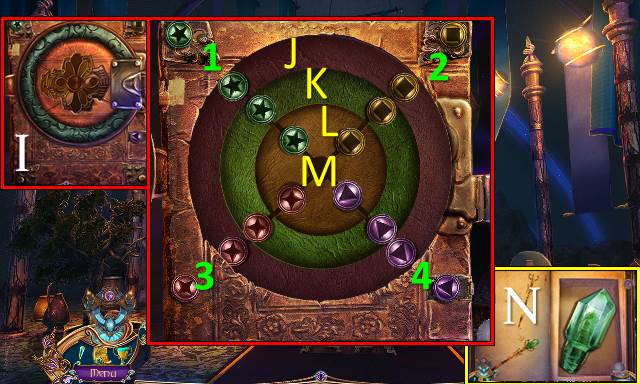
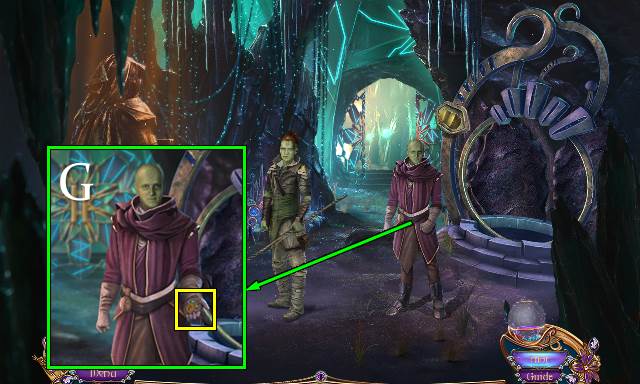
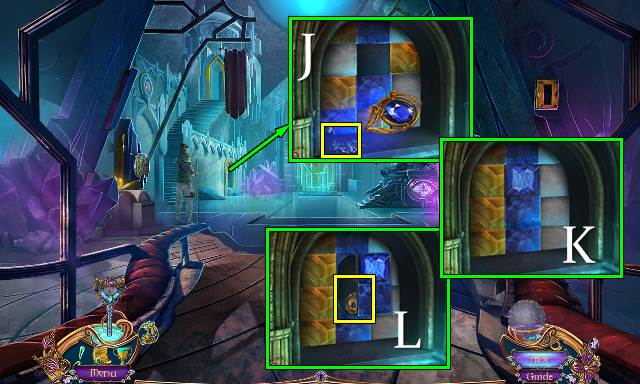
- Access the INCOMPLETE MEDALLION and place the ENERGY GEM and CRYSTAL COMPONENT (G).
- Select the Medallion and move it over the sphere (H).
- Go down and forward.
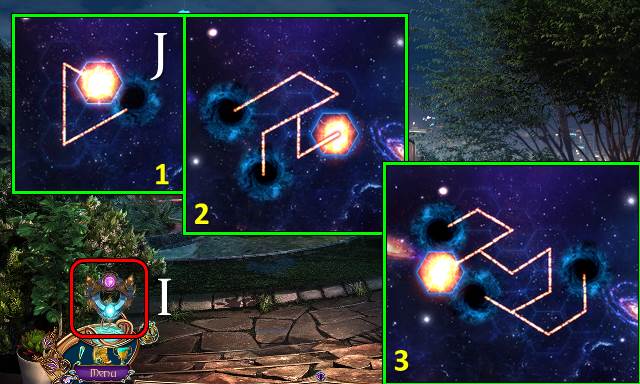
- Select the Medallion (I) for a mini-game (J).

- Use the Medallion (K).
- Go forward twice.
- Take the BROKEN GLASS CUTTER (L).
- Take the COG (M).
- Scroll right.
- Go right.
- Take GEOMETRIC PIECES 2/2 (N).
- Walk down twice.
- Place the GEOMETRIC PIECES (O); open the box and take the CROSSED SWORDS (P).
- Go forward and scroll left.
- Place the CROSSED SWORDS (Q).
- Play the HOP (R); you receive the SILVER GUARD BADGE.
- Place the SILVER GUARD BADGE; take the SPIDER MECHANISM (S).
- Scroll right and go right.
- Place the SPIDER MECHANISM (T); move the lid and take the GLOWING GEM and STONE WING (U).
- Walk down twice.
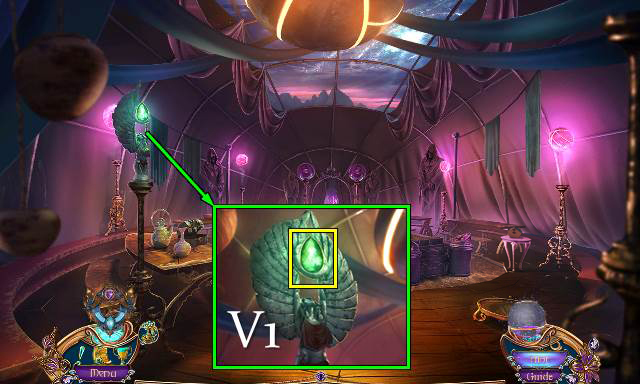
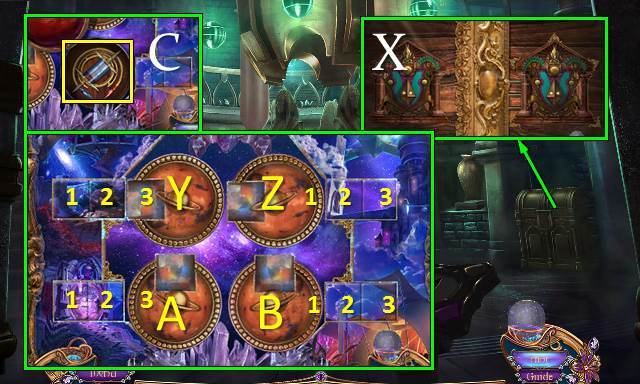
- Place the STONE WING; take the GREEN GEM (V1).
- Go forward and right.
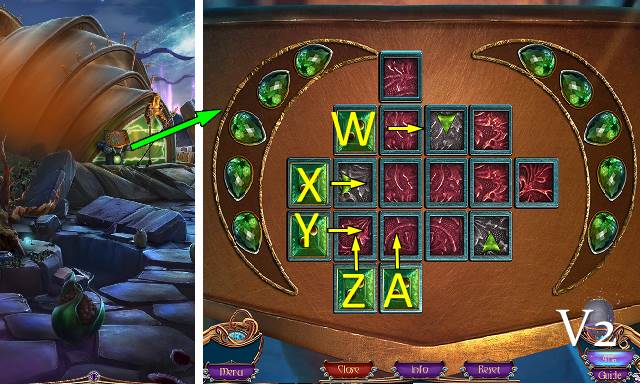
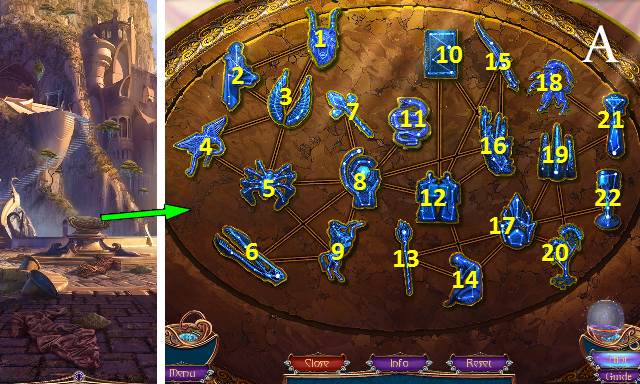
- Place the GREEN GEM for a mini-game (V2).
- Solution: W-X-Z-A-Y.
- Go forward.
- Take the BLADE (B).
- Access the BROKEN GLASS CUTTER and place the COG and BLADE; you receive the FIXED CUTTER (C).
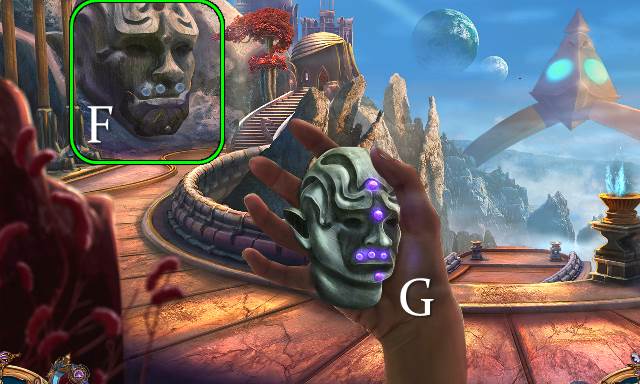
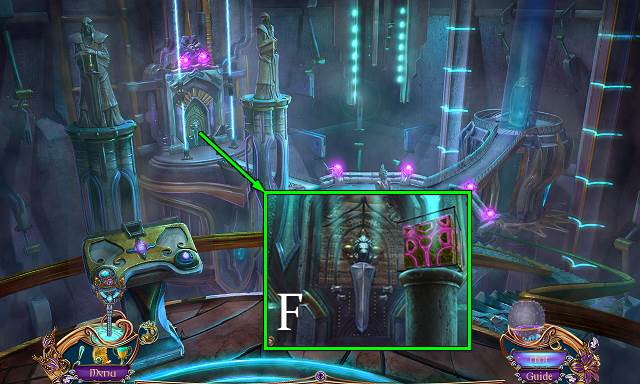
- Use the FIXED CUTTER. Read the note and take the HELMET (D).
- Go to the Guardian's Tent.
- Place the HELMET (E).
- Play the HOP (F); you receive the SHRINE CRYSTAL.
- Go to the Shrine.
- Place the SHRINE CRYSTAL; take SERA'S DIARY (G).
- Go forward.
- Talk to Exarch and give him SERA'S DIARY (H).
- Access SERA'S DIARY and open it for a mini-game (I).
- Solution: L2-K2-J2-(turn K4-K2)-K2-(turn K2-K4)-J4-(turn K4-K3)-K4-(turn K4-K3)-(turn L3-L4)-L3-M-L1-K1-(turn L1-L2).
- L1-(turn L1-L3)-M.
- Take the BROOD FIRE GEM (N).
- Talk to the Exarch; take the BROKEN SCEPTER (O).
- Access the BROKEN SCEPTER and place the BROOD FIRE GEM. You receive the CEREMONIAL SCEPTER (P).
- Walk down twice.
- Use the CEREMONIAL SCEPTER (Q).
- Take the EXARCH'S PORTRAIT (R).
- Go to the Exarch's Tent.
- Place the EXARCH'S PORTRAIT (S).
- Take the EXARCH'S RING (T).
- Walk down twice.
- Place the EXARCH'S RING (U).
- Go forward.
Chapter 2: The Brood Academy
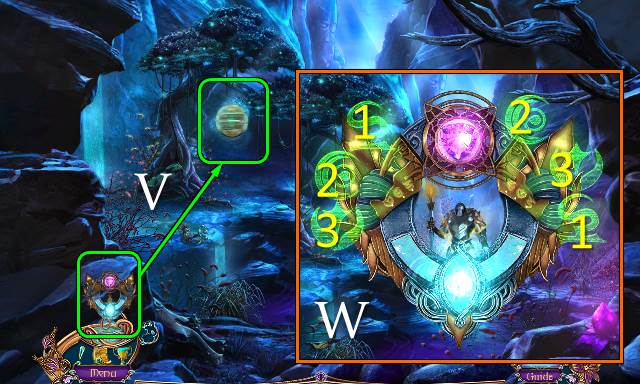
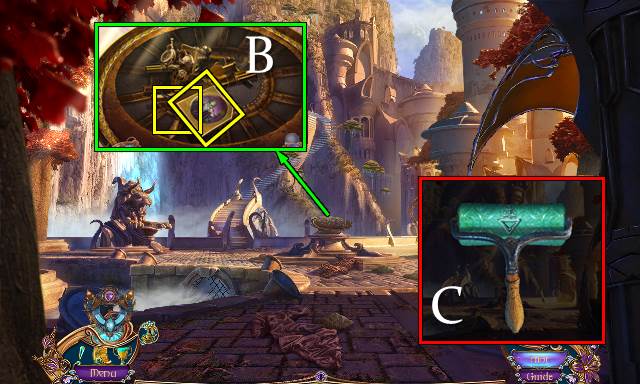
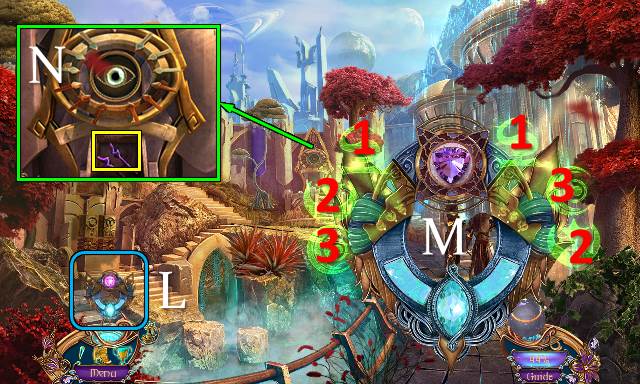
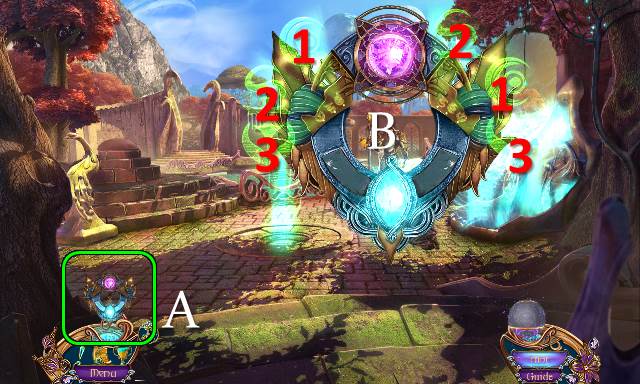
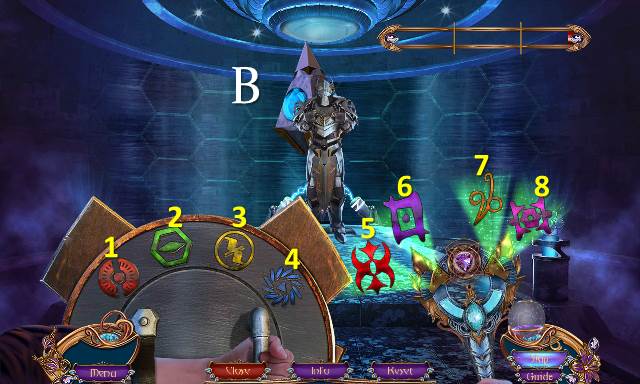
- Charge the Medallion (V).
- Use the Medallion; select the symbols in pairs (W).

- Take the BROKEN STAFF (X).
- Go forward.
- Talk to Kato (Y).
- Take the SNAKE RATTLE (Z).
- Read the note and take the GLOWING STICK (A).
- Walk down.
- Use the SNAKE RATTLE (B). Take the ROLLER and BIRDHOUSE. Collect the ENERGY DEW with the CLOTH (C).
- Use the GLOWING STICK and remove the branches; play the HOP (D). You receive a GEM BROOCH.
- Go forward.
- Place the GEM BROOCH; open the bag (E). Read the note and take the PETALS (F).
- Walk down.
- Access the BIRDHOUSE and place the PETALS. You receive a NESTED BIRDHOUSE (G).
- Use the NESTED BIRDHOUSE; you receive a LURED HUMMINGBIRD (H).
- Go forward.
- Use the LURED HUMMINGBIRD (I). Take the EMPTY ENERGY COCOON (J).
- Place the EMPTY ENERGY COCOON and use the ENERGY DEW; receive the CHARGED ENERGY COCOON (K).
- Access the BROKEN STAFF; place the CHARGED ENERGY COCOON and select the indicated node (L). You receive the NIDOLI STAFF.
- Talk to Kato and give him the NIDOLI STAFF (M).
- Go forward.
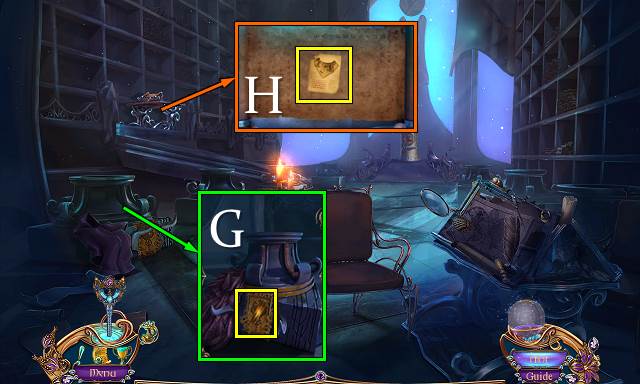
- Pull the vine and take the BELT BAG (N).
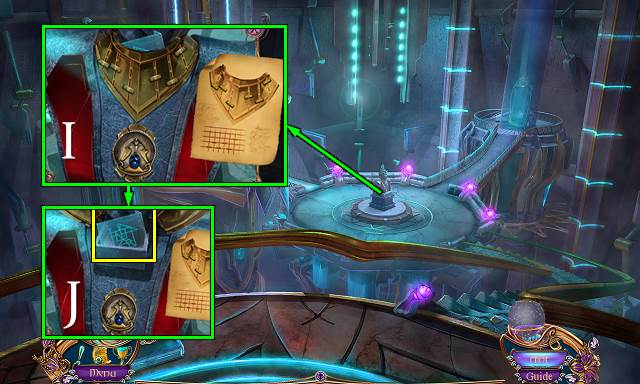
- Access and open the BELT BAG; take the MIRROR SHARD and CLAW SPREADER (O).
- Place the MIRROR SHARD; push the runes in the indicated order (P).
- Go forward.
- Talk to Sera (Q).
- Take the PESTLE (R).
- Go left.
- Take STAINED GLASS PIECES 1/3 (S).
- Take the ERANU RUNE (T).
- Use the CLAW SPREADER; take CONSTELLATION FRAGMENTS 1/3 (U).
- Take the BROKEN SWORD (V).
- Walk down.
- Use the BROKEN SWORD (W); take the FILE (X).
- Go left.
- Use the FILE (Y); take the COAT OF ARMS (Z).
- Walk down.
- Read the note and place the COAT OF ARMS (A).
- Play the HOP (B); you receive the ACADEMY CREST.
- Go left.
- Place the ACADEMY CREST (C).
- Go forward.
- Charge the Medallion (D).
- Take the HERBALIST KEY (E).
- Take the GRIFFIN RUNE (F).
- Go right.
- Take the VISION EYE (G).
- Take the SACRED WATER (H).
- Read the note and take CONSTELLATION FRAGMENTS 2/3 (I).
- Walk down twice.
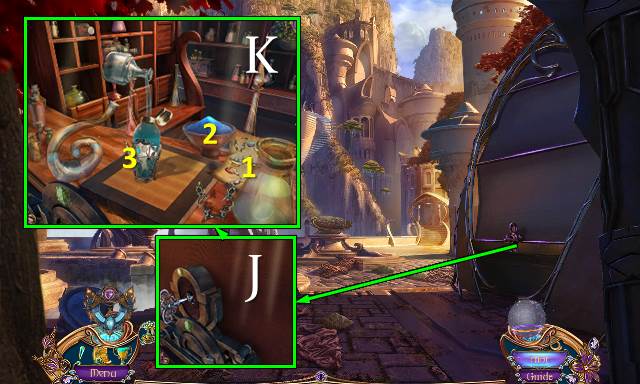
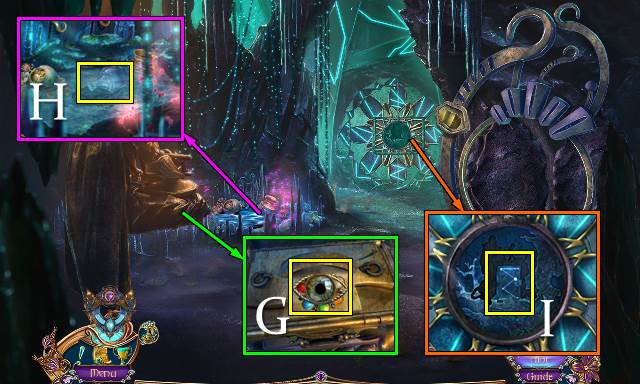
- Use the HERBALIST KEY (J). Read the instructions (1); place the GLOWING GEM and use the PESTLE (2); pour the SACRED WATER (3) and add the powder. You receive the REVEALING POTION (K).
- Go forward.
- Use the REVEALING POTION (L). Take ERANU'S FIGURINE (M).
- Go right.
- Place ERANU'S FIGURINE (N) for a mini-game (O).
- Go forward.
- Take the WATER HANDLE (P).
- Take STAINED GLASS PIECES 2/3 (Q).
- Read all six plaques (R).
- Place the GRIFFIN RUNE and ERANU RUNE; move the symbols to the numbers according to the information on the plaques (S). Take the SIEGE GRIFFIN (T).
- Walk down.
- Place the WATER HANDLE. Take the PENDANT BASE (U).
- Access the PENDANT BASE and place the SIEGE GRIFFIN. You receive the GRIFFIN PENDANT (V).
- Go forward.
- Place the GRIFFIN PENDANT (W).
- Play the HOP (X); you receive the RITUAL DAGGER.
- Walk down.
- Place the RITUAL DAGGER (Y). Take CONSTELLATION FRAGMENTS 3/3 (Z).
- Walk down twice.
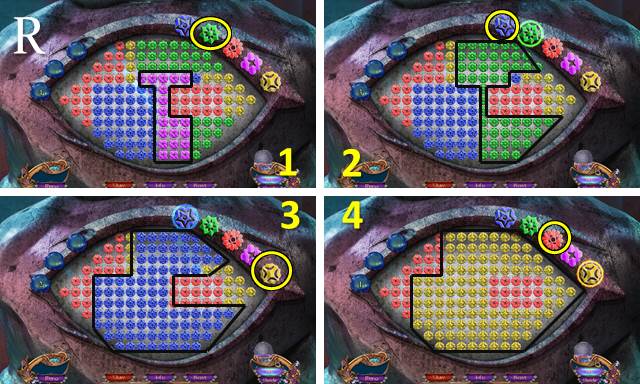
- Place the CONSTELLATION FRAGMENTS for a mini-game (A).
- Solution: (15-16)-(16-12)-(12-8)-(8-6)-(12-10)-(8-9)-(21-19)-(19-17)-(17-14)-(14-12)-(12-8)-(8-7).
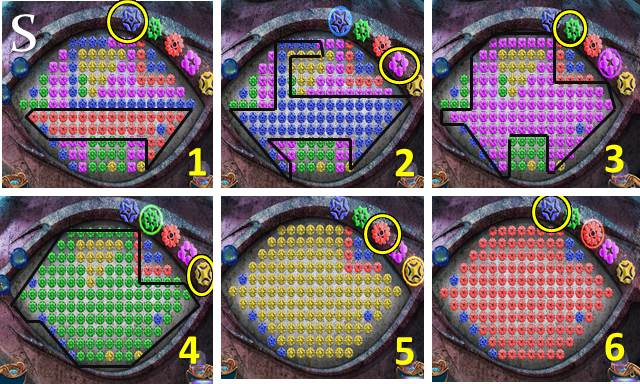
- (8-12)-(12-14)-(14-13)-(16-12)-(12-14)-(14-17)-(17-20)-(22-17)-(17-14)-(19-17)-(17-14)-(14-12)-(12-8)-(8-5)-(5-3)-(3-1).
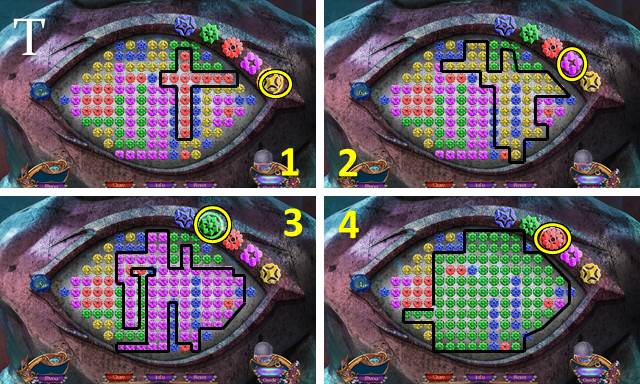
- (11-8)-(8-12)-(12-14)-(14-17)-(17-19)-(19-21)-(21-18)-(21-19)-(19-17)-(17-14)-(14-12)-(12-16)-(16-15).
- (11-8)-(8-12)-(12-14)-(14-17)-(17-19)-(19-21)-(17-14)-(14-12)-(12-16)-(12-8)-(3-5)-(5-8)-(8-12)-(12-14)-(14-17)-(12-8)-(8-11)-(12-8)-(8-5)-(3-2)-(4-5)-(5-8).
- Take ONSLOW'S PHOTO and the ROLLER BASE (B).
- Access the ROLLER BASE and add the ROLLER; you receive the ROLLER SEAL (C).
- Go forward.

- Use the ROLLER SEAL (D).
- Go left.
- Take the PENDULUM COG (E); read the note and push the button (F).
- Go right.
- Take STAINED GLASS PIECES 3/3 (G).
- Open the pouch and take the LEVER (H).
- Walk down.
- Place the STAINED GLASS PIECES (I); take the EMPTY CROSSBOW (J).
- Place the LEVER and turn all three levers (K).
- Play the HOP (L); you receive a WOODEN BOX.
- Go down, right and forward.
- Access and open the WOODEN BOX (M). Read the note and put the candle on the flint. You receive the WEED KILLER (N).
- Place the WEED KILLER; you receive a CROSSBOW DART (O).
- Walk down twice.
- Access the EMPTY CROSSBOW and place the CROSSBOW DART; you receive a LOADED CROSSBOW (P).
- Use the LOADED CROSSBOW (Q).
- Take the ROYAL COIN (R).
- Go left and right.

- Place the ROYAL COIN (S); take the DIARY KEY (T).
- Use the DIARY KEY; open and read the diary (U).
- Take the ACADEMY EMBLEM (V).
- Take the DIVIDER (W).
- Place the ACADEMY EMBLEM for a mini-game (X).
- Solution: (A2-A3)-A-Yx3-(A3-Y3)-Ax3-(A1-A2-A3)-Ax2-Bx2-(A3-B1)-Ax3-(Y3-A3)-Ax3-(A3-A2-A1)
- Ax2-(B1-A3)-Bx2-(Z2-Z1)-Zx2-Yx3-(Z1-Y3)-(B2-B1)-Bx3-Zx3-(B1-Z1)-Zx3-(Z1-Z2)-Z-B-(B3-B2-B1)
- Bx3-(B1-Z1)-Bx3-(A3-B1)-Bx2-(B1-B2-B3)-Y-Ax3-(Y3-A3)-A-Bx2-(A3-B1)-Bx2-(B1-B2)
- Bx3-(Z1-B1)-Zx3-(Z2-Z1)-Zx2-Yx3-(Z1-Y3)-Y-Ax3-(Y3-A3)-Ax3-(A3-A2)-Zx2-(Z3-Z2-Z1)-Zx2-Yx3
- Z1-Y3)-Y-A-(Y3-A3)-Y-(Y2-Y3)-Yx2-(Y3-Z1)-Zx2-(Z1-Z2-Z3)-Z-(B1-Z1)-Zx3-(Z1-Z2).
- Bx3-A-(A3-B1)-Yx2-(Y1-Y2-Y3)-Zx2-Yx2-(Y3-Z1)-Ax2-(A2-A3)-Y-A-(A3-Y3)-A-(B1-A3)-Ax2-(A3-A2).
- Y-(Y3-Y2-Y1)-Yx2-(Z1-Y3)-Yx2-(Y3-Y2).
- Take the PORTAL POWER CIRCLE (C).
- Walk down.
- Push the button. Take the CRYSTALLIZED TEAR with the DIVIDER (D).
- Go right.
- Place the CRYSTALLIZED TEAR (E).
- Place the PORTAL POWER CIRCLE; you receive the CHARGED POWER CIRCLE (F).
- Go to the Cave Passageway.
- Talk to Lucien; take the LOCK RING (G).
- Walk down.
- Place the LOCK RING (H).
- Play the HOP (I); you receive the JEWEL GRABBER.
- Walk down twice.
- Place the JEWEL GRABBER; you receive the JEWEL CARTRIDGE (J).
- Go to the Cave Passageway.

- Use the JEWEL CARTRIDGE; place the CHARGED POWER CIRCLE (K).
- Go right.
Chapter 3: The Artifact
- Try to go forward.
- Use the Medallion (L); match the symbols (M).
- Place the VISION EYE; take MEMORIAL GEM 1/3 (N).
- Go forward.
- Select the Medallion (O).
- Move the arm and take the NIDOLI STUN GUN (P).
- Use the NIDOLI STUN GUN (Q).
- Go right.
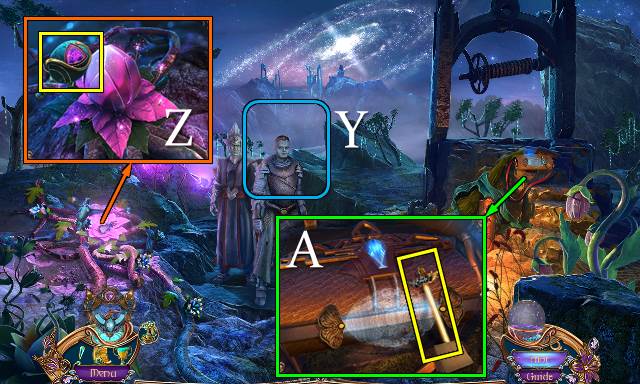
- Talk to Onslow; take the ELDER'S NECKLACE (R).
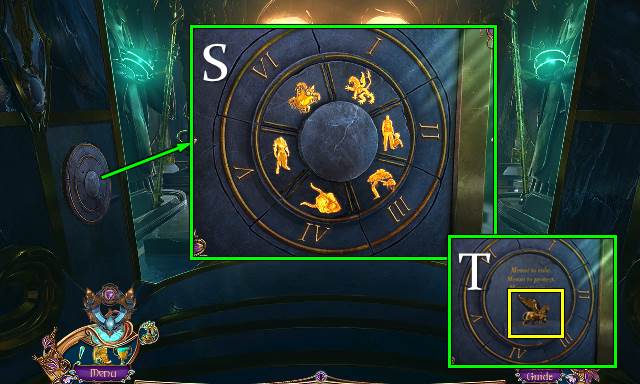
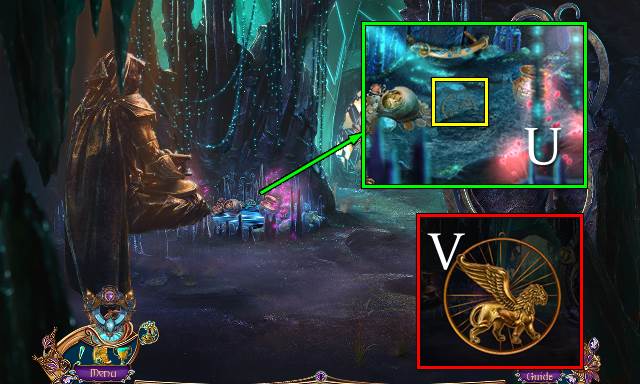
- Place the ELDER'S NECKLACE for a mini-game (S).
- Solution (T).
- Read the notebook (U); take the INTRICATE GATE KEY (V).
- Go down and forward.
- Take the MECHANISM HANDLE (W).
- Walk down.

- Place the MECHANISM HANDLE (X). Take the PILLAR SEGMENT (Y); place the PENDULUM COG and INTRICATE GATE KEY (Z).
- Go left.
- Use the Medallion (A) and match the symbols (B).
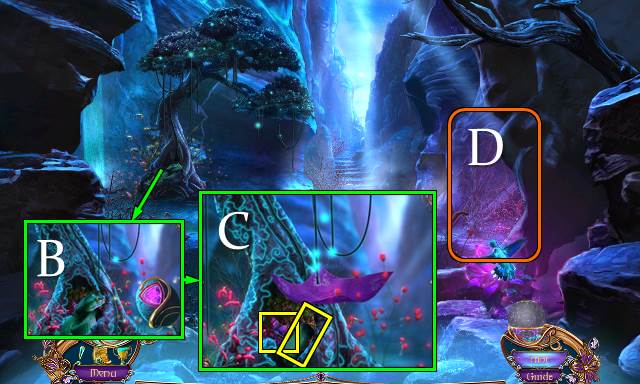
- Take the ARDENIAN ORNAMENT (C).
- Take MEMORIAL GEM 2/3 and read the note (D).
- Take the OFFICER TAG (E); move the fabric and take the LYEN QUEEN (F).
- Walk down.
- Read the note and place the LYEN QUEEN (G).
- Play the HOP (H); you receive the LYEN ROD.
- Go right.

- Place the LYEN ROD; take the CHALICE CANISTER (I).
- Talk to Onslow; give him the OFFICER TAG. Take the BRIDGE TILE (J).
- Walk down and left.
- Place the BRIDGE TILE for a mini-game (K).
- Solution 1-3.
- Go forward.
- Take the ACID FRUIT (L).
- Take the FLOOR PANEL (M).
- Take the BOWL (N).
- Place the PILLAR SEGMENT; take BABY GRIFFINS 1/2 (O).
- Take the ARDENIAN CONTINENT (P).
- Walk down.
- Place the FLOOR PANEL (Q).
- Place the ACID FRUIT; take the FRUIT ACID with the BOWL (R).
- Play the HOP (S); you receive the EMPTY BATTERY.
- Go forward.
- Place the EMPTY BATTERY; you receive the CHARGED BATTERY (T).
- Place the CHARGED BATTERY for a mini-game (U).
- Solution (V).
- Solution continued (W).
- Take the SCROLL PART (X).
- Use the FRUIT ACID; take the OFFICER KEY BASE (Y).
- Go to Onslow's Chambers.
- Place the SCROLL PART for a mini-game; take the CALENDAR PIECES (Z).
- Place the CALENDAR PIECES. Align the rings; take the OFFICER KEY PART (A).
- Go down and forward.
- Scroll left.
- Access the OFFICER KEY BASE; place the OFFICER KEY PART. You receive the OFFICER KEY (B).
- Use the OFFICER KEY (C).
- Go left.
- Take the MOTHER GRIFFIN; place the ARDENIAN CONTINENT (D). Take the HEAD AMULET (E).
- Walk down.
- Use the HEAD AMULET (F).
- Push all the buttons (G).
- Play the HOP (F); you receive MEMORIAL GEM 3/3.
- Walk down.
- Place the MEMORIAL GEM (H).
- Take the SMALL CANNON and MECHANISM PART 1/2 (I).
- Go forward and left.
- Place the SMALL CANNON for a mini-game (J); the solution is random.
- Take MECHANISM PART 2/2 (K).
- Place the MECHANISM PART and CHALICE CANISTER. Take the MEDALLION PART (L).
- Place the MEDALLION PART (M).
- Walk down.
- Use the Medallion (N).
- Go right.
- Take the LINEAGE LOCKET (O).
- Play the HOP (P); you receive the NIPPERS.
- Walk down.
- Take BABY GRIFFINS 2/2 with the NIPPERS (Q).
- Go right.
- Place the BABY GRIFFINS and MOTHER GRIFFIN (R); take the PETRIFIED EGG (S).

- Place the PETRIFIED EGG (T); take the DRAWER ORNAMENT and BELL CLAPPER (U).
- Walk down.
- Use the BELL CLAPPER (V).
- Scroll left and go left.
- Place the DRAWER ORNAMENT. Read the note; take the STIRRUPS and REINS (W).
- Walk down, scroll right and go right.
- Place the STIRRUPS and REINS; receive the GRIFFIN SADDLE (X).
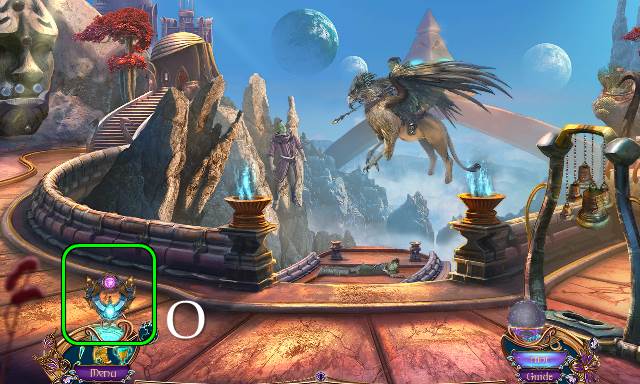
- Walk down.
- Place the GRIFFIN SADDLE and ride the griffin (Y) for a mini-game (Z).
Chapter 4: The Chalice
- Talk to Sera (A).
- Read the note and remove the sand; place the LINEAGE LOCKET (B). Take the MISSHAPEN GEAR (C).
- Take the EMBOSSED SLAB (D).
- Read the note and take the LAPIS LAZULI (E); place the ARDENIAN ORNAMENT and play the mini-HOP (F). You receive the EYE OF NIGHT.
- Go forward.
- Take METAL RINGS 1/2 (G). Place the EMBOSSED SLAB (H); take the HOLLOW CYLINDER (I).
- Use the EYE OF NIGHT; take ROYAL BRAND 1/2 (J). Place the LAPIS LAZULI and rearrange the tiles (K); take the EXARCH JEWEL (L).
- Go left.
- Take the CEREMONIAL CUP and CALAMITY KEY (M).
- Walk down twice.
- Use the CALAMITY KEY; take the SPARE GATE HANDLE and ROYAL BRAND 2/2 (N).
- Take the CHALICE DUST with the CEREMONIAL CUP (O).
- Go forward.
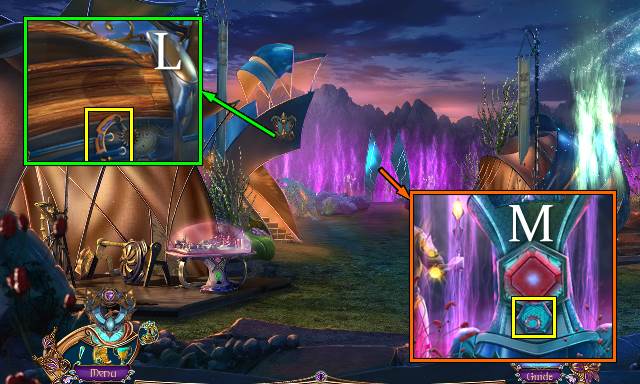
- Place the SPARE GATE HANDLE (P).
- Place the ROYAL BRAND for a mini-game (Q).
- Solution 1 (R).
- Solution 2 (S).
- Solution 3 (T).
- Solution 3 continued (U).
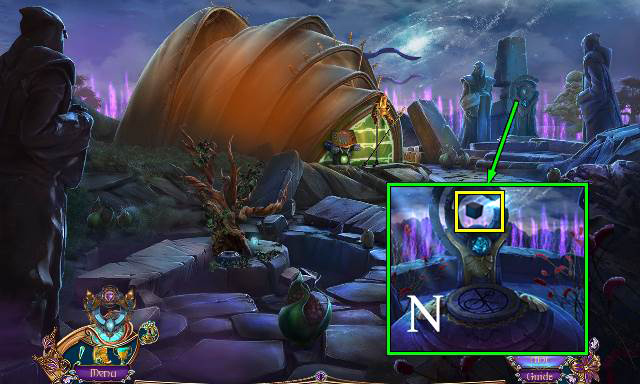
- Read the note and take the CORE (V).
- Go forward.
- Take LOCK PLATES 1/2 (W).
- Place the EXARCH JEWEL (X).
- Go right.
- Take the CORE BASE (Y).
- Access the CORE BASE and add the CORE; receive the OVERLOADED CORE (Z).
- Walk down.
- Place the OVERLOADED CORE (A); pull the lever (B).
- Take the NIDOLI MECHANISM (C).
- Walk down and left.
- Place the NIDOLI MECHANISM; push the three circles (D).
- Play the HOP (E); you receive the PROJECTION CUBE.
- Walk down and forward.
- Place the PROJECTION CUBE (F).
- Go left.
- Take METAL RINGS 2/2 (G).
- Take the BUST SKETCH (H).
- Walk down.
- Place the BUST SKETCH and move the sliders according to the instructions (I). Take the TEXT DECRYPTOR (J).
- Go left.
- Place the TEXT DECRYPTOR for a mini-game (K).
- Solution 1-3.
- Take the EXARCH'S PHOTO (L).
- Access the INCOMPLETE FRAME and attach the GUARDIAN'S PHOTO, ONSLOW'S PHOTO and EXARCH'S PHOTO; receive the COMPLETED FRAME (M).
- Place the COMPLETED FRAME. Take the CONVEYOR COG (N).
- Go to the Nidoli Barracks.

- Access the HOLLOW CYLINDER and attach the MISSHAPEN GEAR and METAL RINGS; you receive the CONVEYOR ROLLER (O).
- Place the CONVEYOR ROLLER and CONVEYOR COG; take the MATERIAL REAPER and NIDOLI CHEST LIGHT (P).
- Go to the Main Power Chamber.
- Use the MATERIAL REAPER (Q); take the ENERGY CONDUCTOR (R).
- Walk down and left.
- Move the chair (S).
- Place the NIDOLI CHEST LIGHT for a mini-HOP (T); receive LOCK PLATES 2/2.
- Place the LOCK PLATES (U); take the EXARCH REGALIA (V).
- Go to the Nidoli Barracks.
- Place the EXARCH REGALIA and push the button (W); take the DEFENSE SHIELD (X).
- Use the CHALICE DUST and place the ENERGY CONDUCTOR; take the CURATOR KEY (Y).
- Go to the Arden History Chamber.
- Place the CURATOR KEY (Z).
- Place the DEFENSE SHIELD; you receive the ARBITER SHIELD (A).
- Go down and right.
- Use the ARBITER SHIELD for a mini-game (B).
- Solution: 3-7-1, 2-8-4-5, 4-8-5-2-7.
- Congratulations! You've completed Amaranthine Voyage: Legacy of the Guardians.
Created at: 2016-11-13