- Welcome to the Dark Tales: Edgar Allan Poe's The Bells Walkthrough
- An author has vanished, and someone’s enacting the terrible events of his latest novel!
- Whether you use this document as a reference when things get difficult or as a road map to get you from beginning to end, we're pretty sure you'll find what you're looking for here.
- This document contains a complete Dark Tales: Edgar Allan Poe's The Bells game walkthrough featuring annotated screenshots from actual gameplay!
- We hope you find this information useful as you play your way through the game. Use the walkthrough menu below to quickly jump to whatever stage of the game you need help with.
- This walkthrough was created by prpldva, and is protected under US Copyright laws. Any unauthorized use, including re-publication in whole or in part, without permission, is strictly prohibited.
Walkthrough Menu
- General Tips
- Chapter 1: Street
- Chapter 2: Factory
- Chapter 3: Police Station
- Chapter 4: Archive
- Chapter 5: Bar
General Tips
- This is the official guide for Dark Tales: Edgar Allan Poe's The Bells.
- This guide will not mention each time you have to zoom into a location; the screenshots will show each zoom scene.
- Hidden-object puzzles are referred to as HOPs. This guide will not show HOP solutions. It will identify the location of the HOP and the inventory item acquired.
- This guide will show solutions for non-random puzzles. Please read the in-game instructions for each puzzle.
- In this game, you will sometimes have to select the new scene to trigger dialog, cut-scenes, or tasks prior to interacting with the scene.
Chapter 1: Street
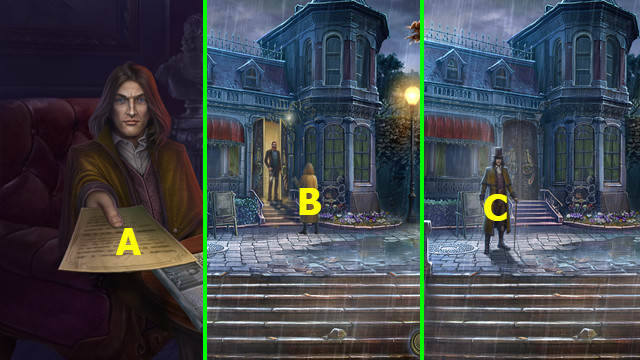
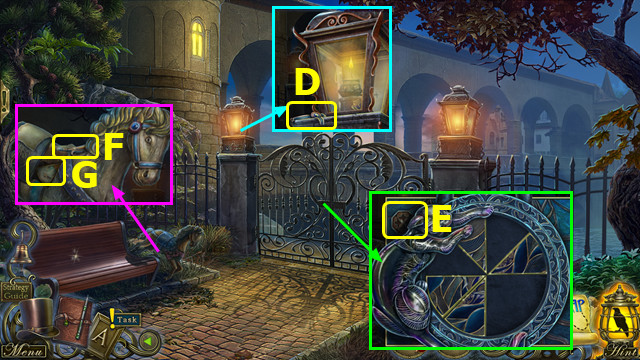
- Select (A); read note.
- Select (B).
- Talk (C).
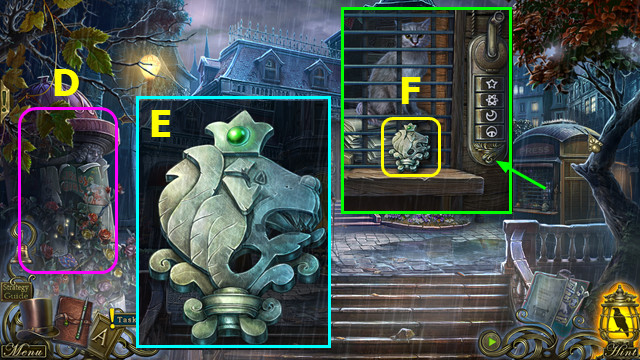
- Play HOP; earn LION (D).
- Select LION; solution (E); take 1/2 LION.
- Take 2/2 LION (F).
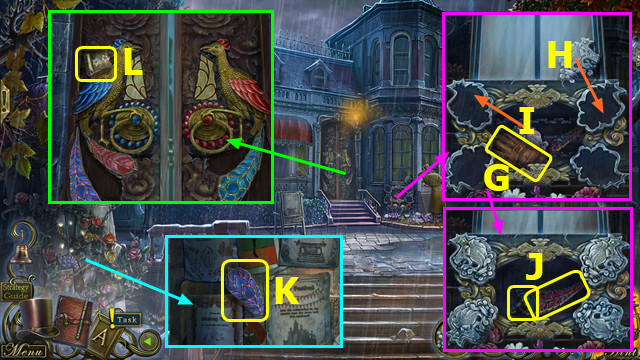
- Select; take GLOVE (G).
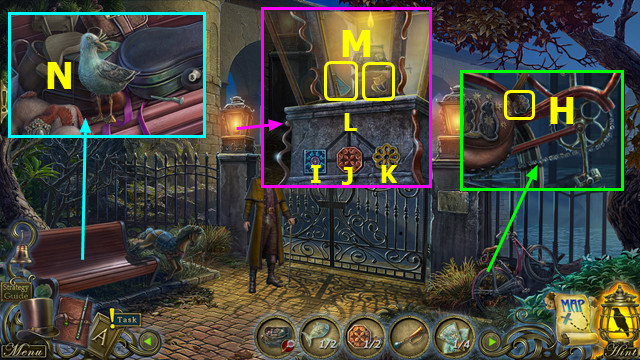
- Restore pieces (H-I).
- Place LION; take 1/2 UMBRELLA and 1/3 FEATHER (J).
- Use GLOVE; select 3x; take 2/3 FEATHER (K).
- Select; take CODE (L).
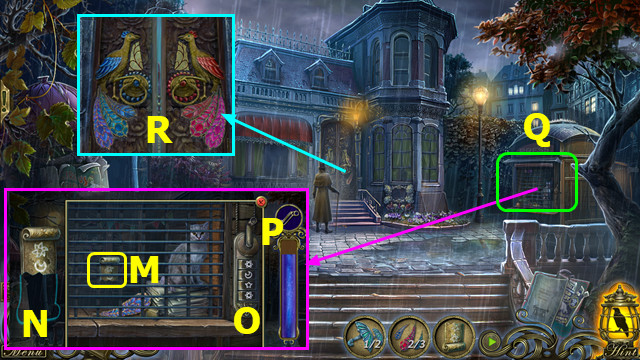
- Select (M); place CODE (N).
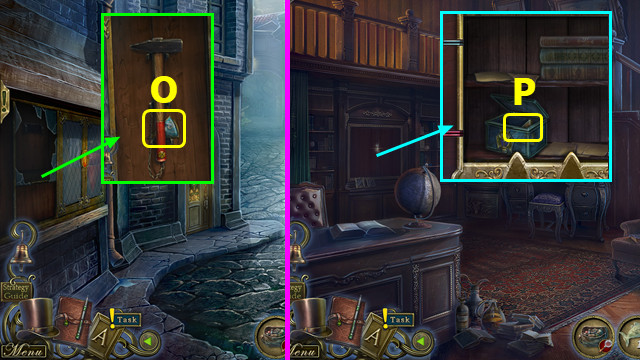
- Solution (O).
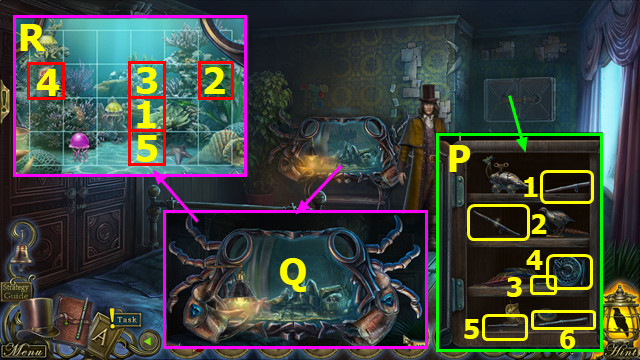
- Select the handle until the blue bar is full (P).
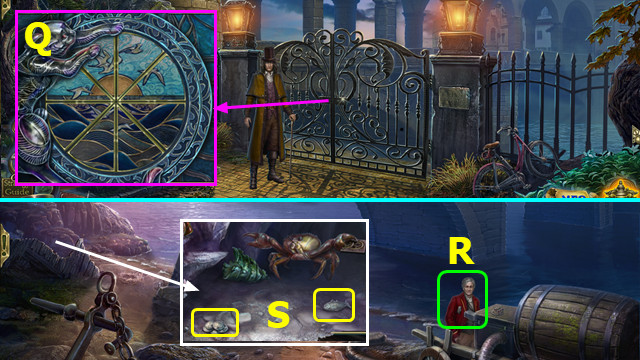
- Play HOP; earn 3/3 FEATHER (Q).
- Place FEATHER; solution (R).
- Go forward.
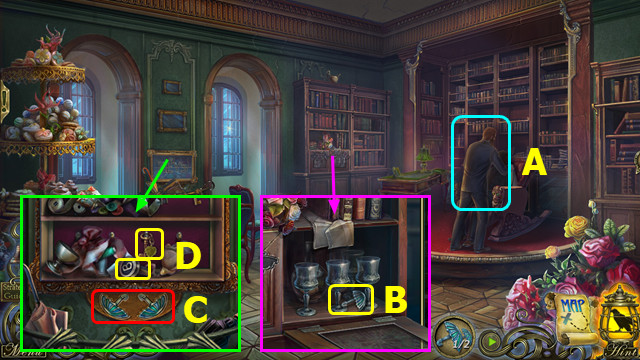
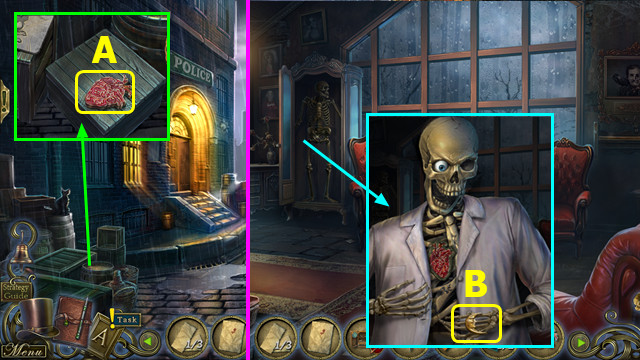
- Talk; take 1/3 EYE (A).
- Open cabinet; take 2/2 UMBRELLA (B).
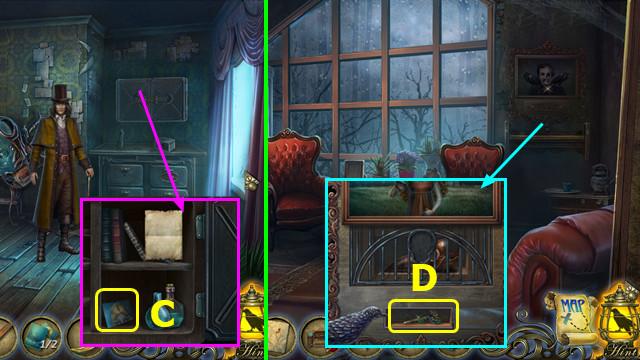
- Take BAG; place UMBRELLA (C).
- Play HOP; take 1/4 TYPEWRITER KEYS and 1/2 KEY (D).
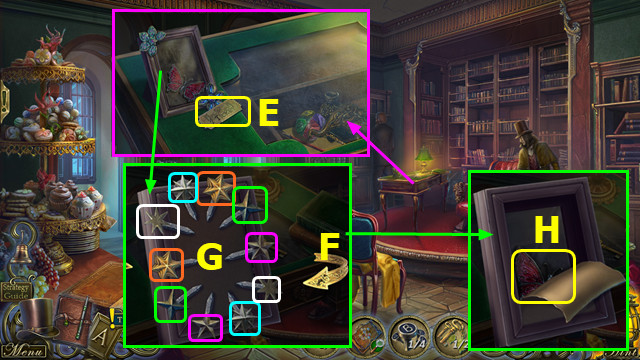
- Take 1/6 TICKET (E).
- Select frame; select up arrow (F).
- Select pairs (G).
- Take 1/2 BUTTERFLY (H).
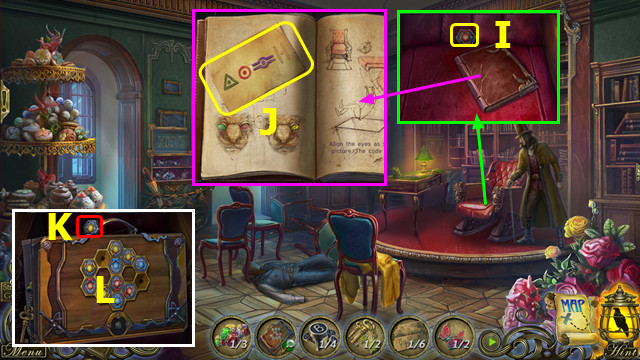
- Take BAG TILE; select journal (I); play HOP; earn 2/2 BUTTERFLY.
- Take CODE (J).
- Select BAG; select (K); place BAG TILE (L).
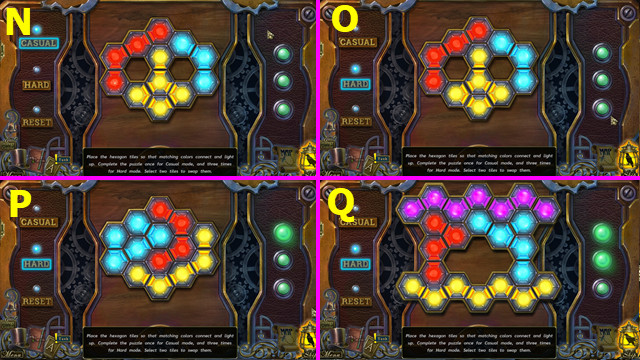
- Casual solution (N).
- Hard solution, part 1 (O).
- Hard solution, part 2 (P).
- Hard solution, part 3 (Q).
- Take 2/2 KEY.
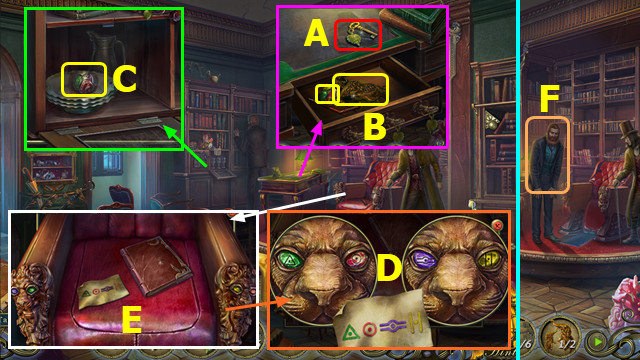
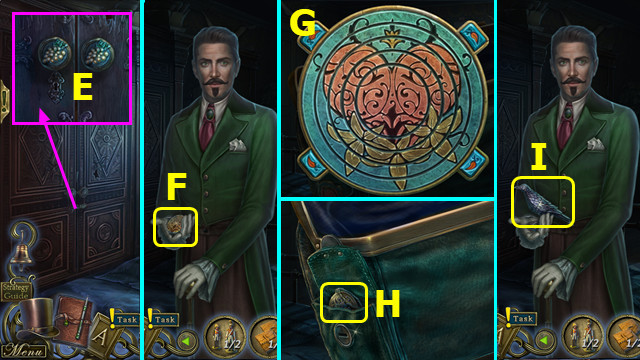
- Select (A).
- Place and select KEY; take 1/2 ELEPHANT and 2/3 EYE (B).
- Place BUTTERFLY; take 3/3 EYE (C).
- Place CODE and EYE; solution (D).
- Select (E).
- Talk (F).
- Go right.
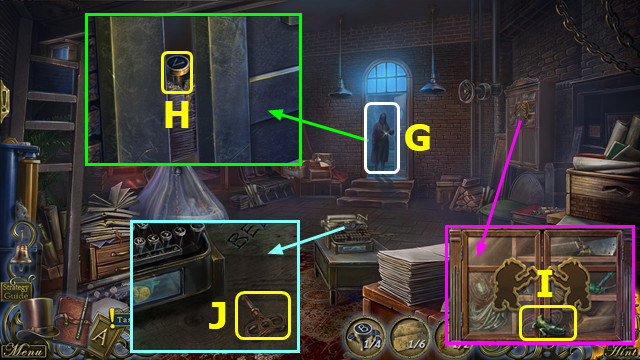
- Select (G).
- Take 2/4 TYPEWRITER KEYS (H).
- Take CROCODILE (I).
- Take WINDING KEY (J).
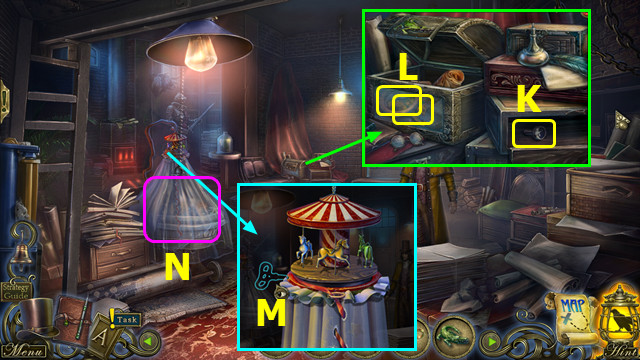
- Select; take 3/4 TYPEWRITER KEYS (K).
- Place CROCODILE; take 1/2 DISC and 1/2 BEAR (L).
- Use WINDING KEY (M).
- Play HOP; earn 4/4 TYPEWRITER KEYS (N).
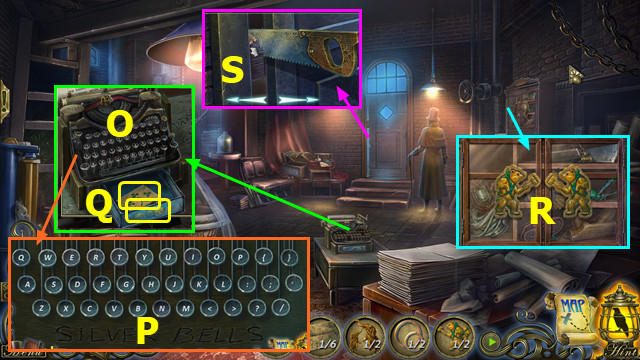
- Place TYPEWRITER KEYS (O).
- Select S-I-L-V-E-R-B-E-L-L-S (P).
- Take 1/2 ENVELOPE and 2/2 BEAR (Q).
- Place BEAR (R); play HOP; earn SAW.
- Place SAW; drag left and right to cut wood (S).
- Go forward.
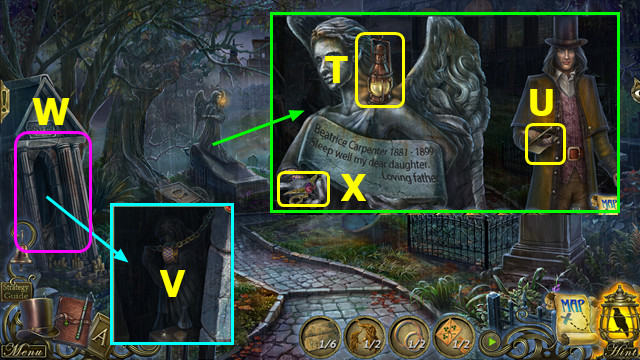
- Take LAMP (T).
- Take 1/2 BRACELET (U).
- Use LAMP (V).
- Play HOP; earn 2/2 BRACELET (W).
- Place BRACELET; take 1/3 SCISSORS (X).
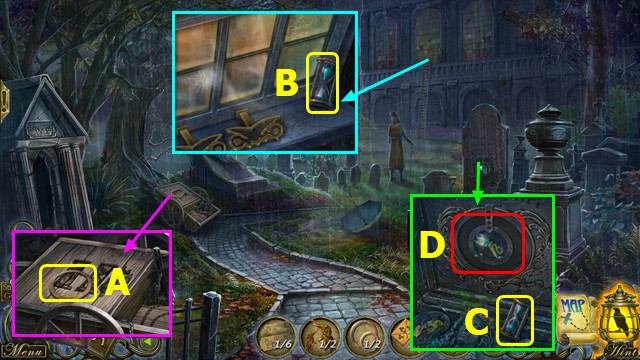
- Take 2/2 DISC (A).
- Take 1/2 HOURGLASS (B).
- Take 2/2 HOURGLASS (C).
- Place DISC (D).
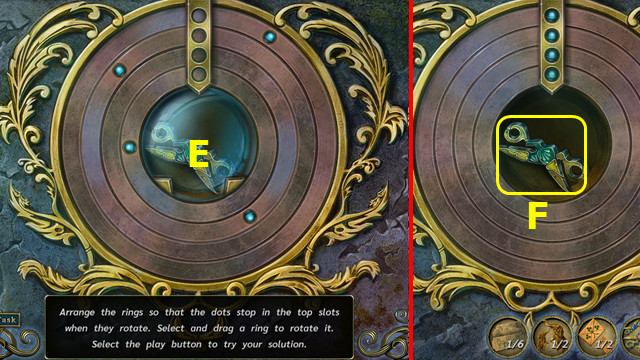
- Solution (E); select Play.
- Take 2/3 SCISSORS (F).
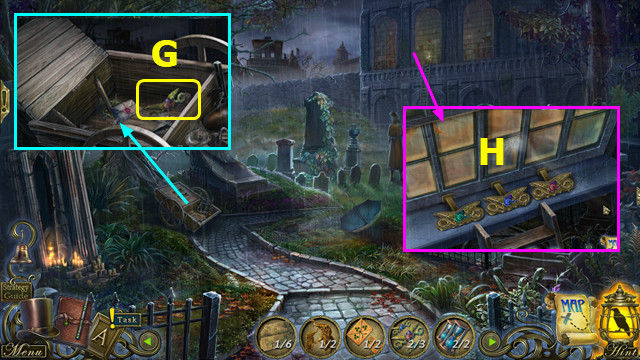
- Place HOURGLASS; play HOP; take 3/3 SCISSORS (G).
- Place SCISSORS (H).
- Go forward.
Chapter 2: Factory
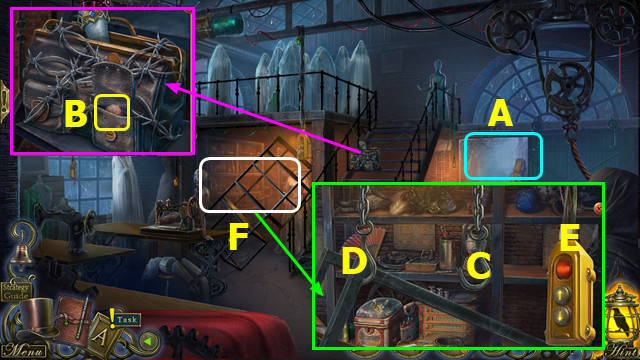
- Select (A).
- Open flap; take BUTTON (B).
- Move (C-D).
- Place BUTTON (E); select up arrow.
- Play HOP; earn TIARA (F).
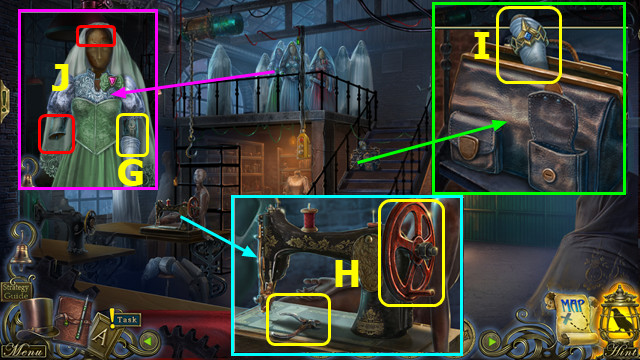
- Take WRENCH (G).
- Take CUTTERS; use WRENCH; take 1/2 CRANK (H).
- Use CUTTERS; take HAND (I).
- Place TIARA and HAND (J).
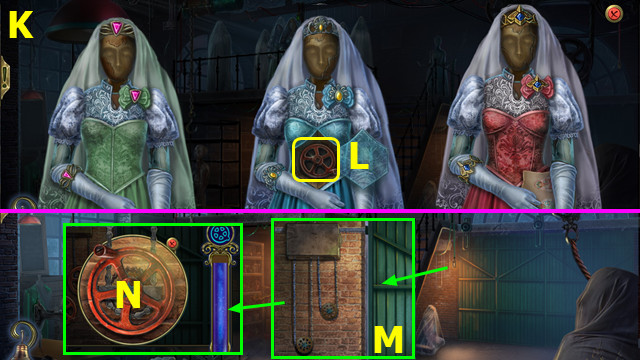
- Solution (K).
- Take 2/2 CRANK (L).
- Select; place CRANK (M).
- Select until the meter fills with blue (N).
- Go right.
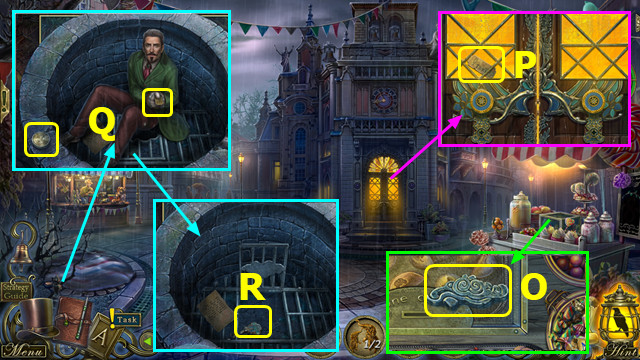
- Take CLOUD (O).
- Take 2/6 TICKET (P); select door.
- Talk; take 3/6 TICKET and COIN (Q).
- Take HANDKERCHIEF; place CLOUD; take 1/2 KEY (R).
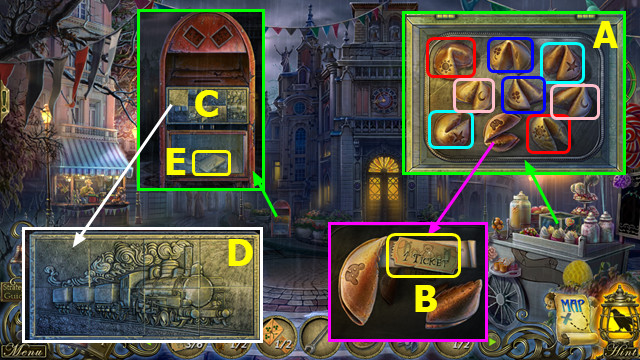
- Use COIN; select pairs (A).
- Select; take 4/6 TICKET (B).
- Use HANDKERCHIEF; select (C).
- Solution (D).
- Read note; take 5/6 TICKET (E).
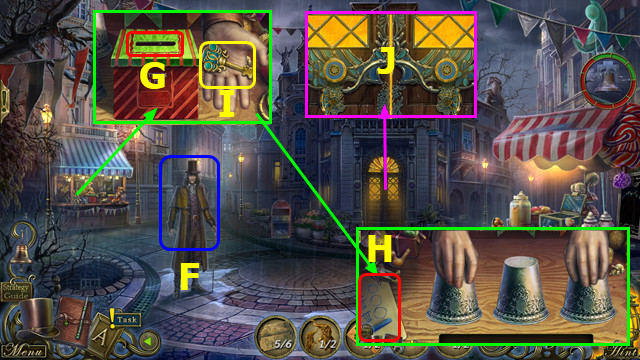
- Talk; take 6/6 TICKET (F).
- Place TICKET (G).
- This mini-game is randomly generated: find the ball three times (H).
- Take 2/2 KEY (I).
- Use KEY (J).
- Go forward.
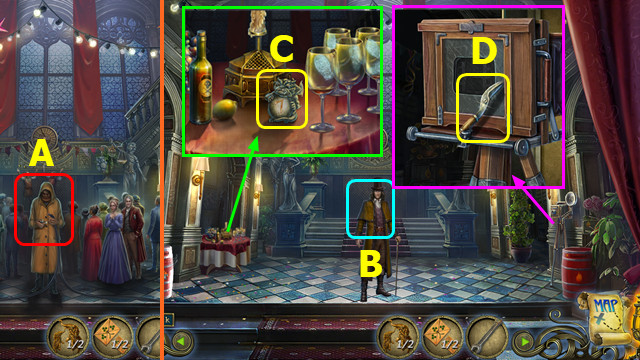
- Talk (A).
- Talk; take DETECTIVE ID (B).
- Take 1/2 WEIGHT (C).
- Take 1/2 SECATEURS (D).
- Walk down.
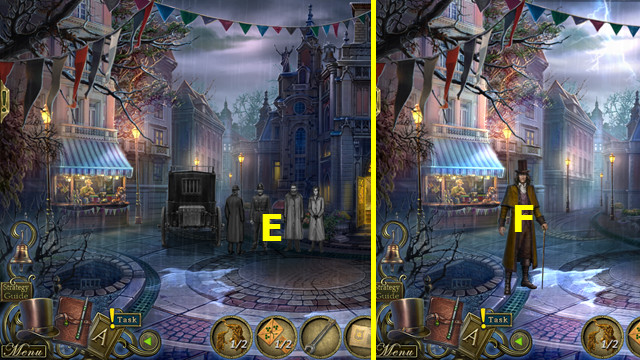
- Select (E).
- Talk (F).
- Go left.
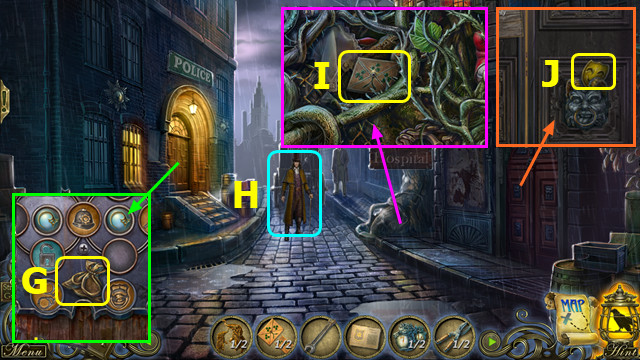
- Select; take BAG TOKEN (G).
- Talk (H).
- Take 2/2 ENVELOPE (I).
- Take 1/4 EMOTION TOKENS (J).
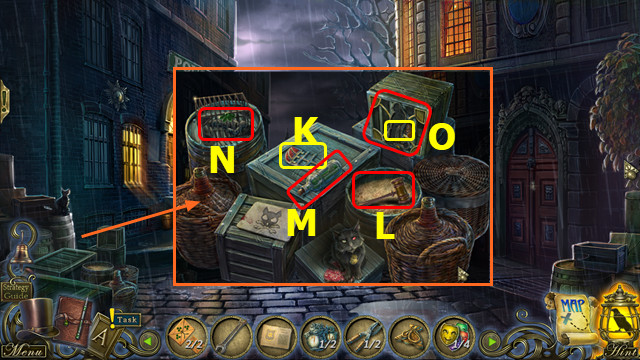
- Take 1/2 CAGE TOKEN (K).
- Place BAG TOKEN; use (L-M).
- Use (M-N).
- Use (N-O); take 1/3 DOOR CHIPS.
- Walk down.
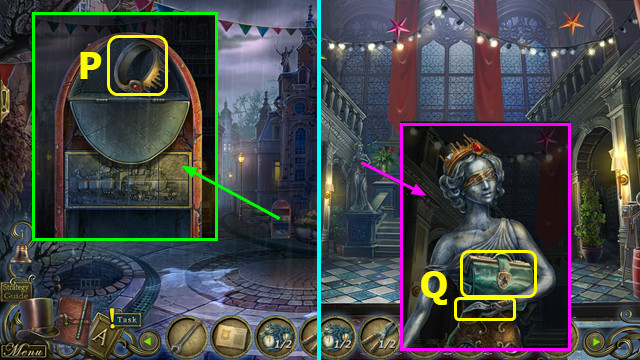
- Place ENVELOPE; take DIADEM (P).
- Go forward.
- Place DIADEM; take 2/2 SECATEURS and ALBERT'S BAG (Q).
- Walk down, left.
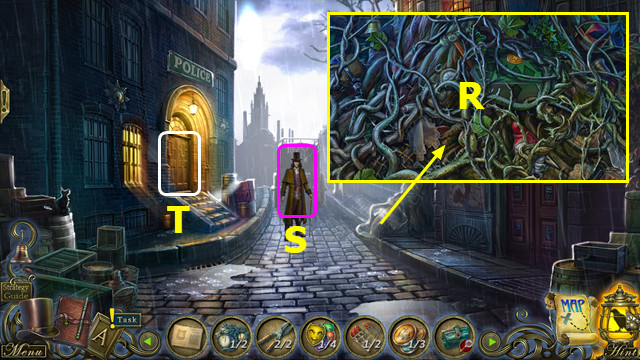
- Use SECATEURS; play HOP; earn 2/3 DOOR CHIPS (R).
- Talk; take 3/3 DOOR CHIPS (S).
- Select (T).
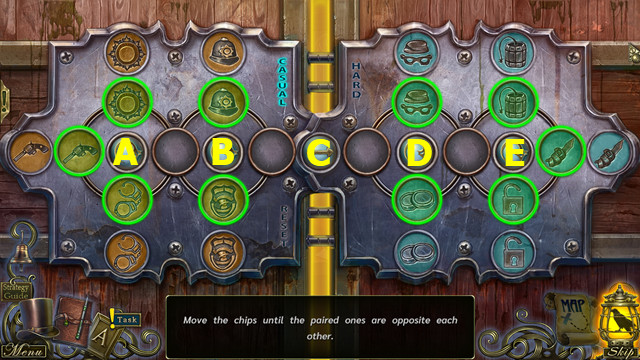
- Place DOOR CHIPS on device.
- Casual solution Bx2-Ax3-B-D-C-Ex3-Dx2-B-C-B-Ax3-Ex2-Dx2-E-Dx3-E-Dx2-E.
- Hard solution A-B-C-D-B-C-D-C-B-C-D-C-A-B-A-Ex3-D-Ex2-D-E-B-C-B.
- D-Ex3-D-C-Dx3-Bx2-Ax2-Bx3-Ax3-Bx2-C-Bx3-Dx2.
- Go left.
Chapter 3: Police Station
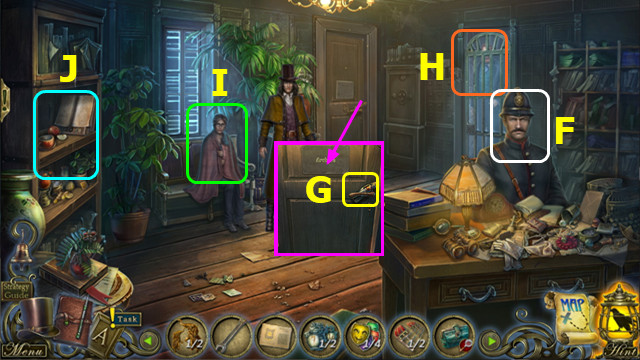
- Talk; give DETECTIVE ID (F).
- Take 1/2 STATUETTE (G).
- Talk; take LIGHTER (H).
- Talk (I).
- Select (J).
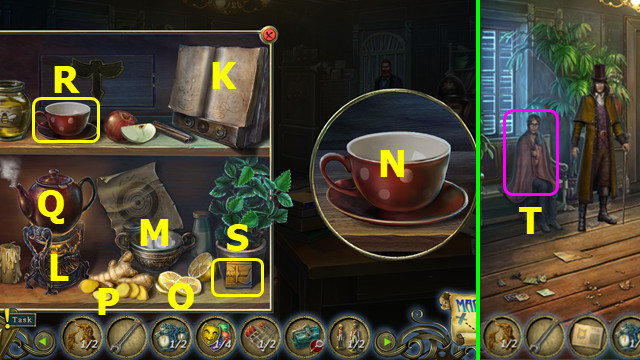
- Read recipe (K).
- Use LIGHTER (L).
- Move (M-N)-(O-N)-(P-N)-(Q-R).
- Take HOT TEA (R) and 1/2 IMAGE PART (S).
- Give HOT TEA; take 1/3 EVIDENCE and 2/2 WEIGHT (T).
- Return to Town Hall.
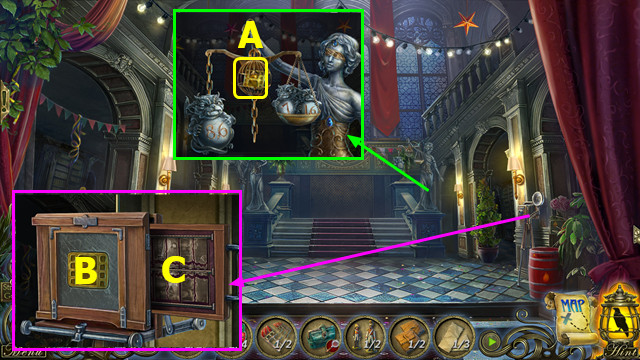
- Place WEIGHT; take FILM TOKEN (A).
- Place FILM TOKEN (B).
- Select (C).
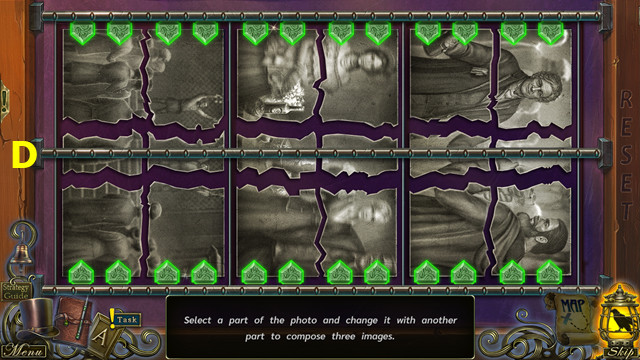
- Solution (D).
- Look at photos; take PHOTO.
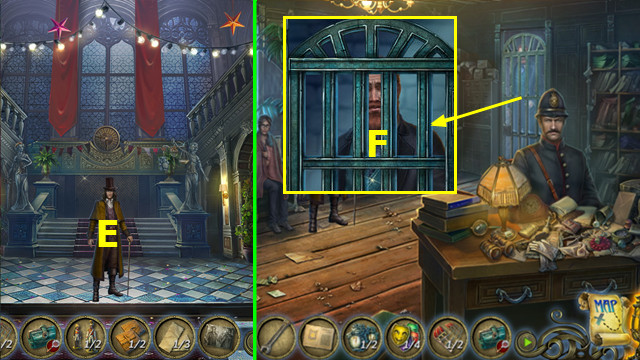
- Talk (E).
- Go to Police Station.
- Give PHOTO; take BAG INITIALS (F).
- BAG INITIALS on ALBERT'S BAG; play HOP; earn 2/2 ELEPHANT. Take BLOODY LETTER.
- Return to Town Hall.
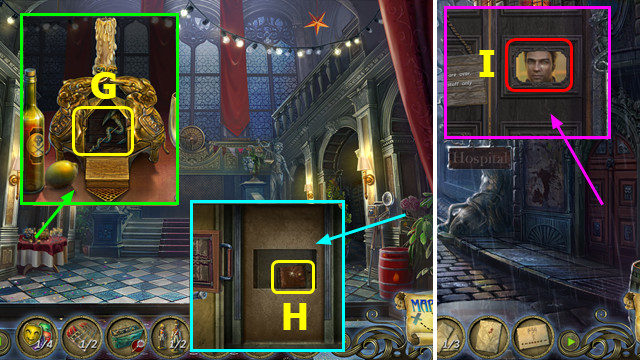
- Place ELEPHANT; take CADUCEUS (G).
- Place CADUCEUS; open wallet; take PASS (H).
- Walk down, left.
- Select; use PASS (I).
- Go right.
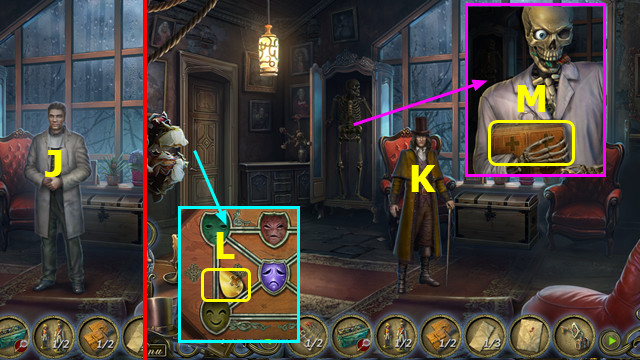
- Talk; take CHEST KEY (J).
- Talk (K).
- Take 1/2 DROP (L).
- Take MEDICAL BOX (M).
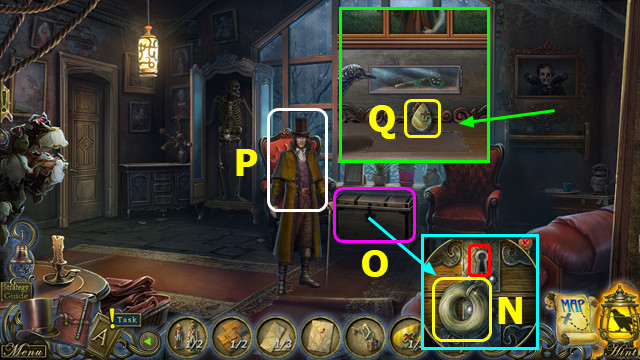
- Take THREAD; use CHEST KEY (N).
- Play HOP; earn 2/4 EMOTION TOKENS (O).
- Talk; take 3/4 EMOTION TOKENS (P).
- Take 2/2 DROP (Q).
- Take DRAGONFLY from MEDICAL BOX; place DROP. Play HOP; take 4/4 EMOTION TOKENS.
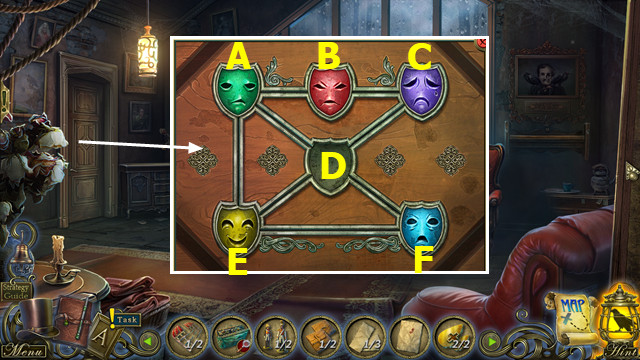
- Place EMOTION TOKENS on door.
- Solution D-C-B-A-E-D-C-B-A-E-F-D.
- Go left.
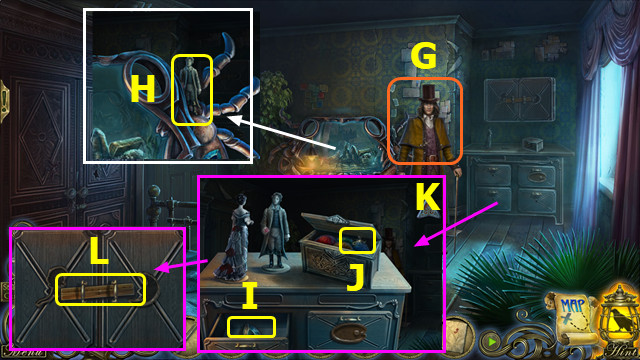
- Talk (G).
- Take GENTLEMAN STATUE (H).
- Place GENTLEMAN STATUE; take GEMSTONE (I).
- Open lid; take PIN (J).
- Pan up (K).
- Take RULER (L).
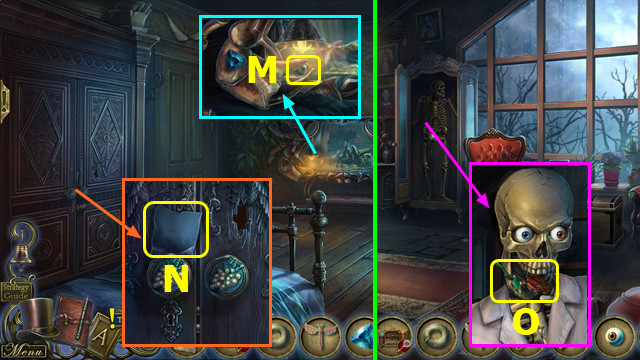
- Place GEMSTONE; take EYE (M).
- Take 1/2 PICTURE PART (N).
- Walk down.
- Place EYE; take ROSE (O).
- Walk left.
- Place ROSE; select 1-6; take FISHING ROD (P).
- THREAD and PIN on FISHING ROD.
- Use FISHING ROD (Q).
- Select 1-5 (R), earn FISH.
- Walk down 2x.
- Use FISH; take HEART (A).
- Go right.
- Open shirt; place HEART; take MOON (B).
- Go left.
- Place MOON; take 2/2 PICTURE PART (C).
- Walk down.
- Place PICTURE PART; take CLOSET KEY (D).
- Go left.
- Use CLOSET KEY (E).
- Take DISK (F).
- DISK on ALBERT'S BAG; solution (G).
- Select and open LOCKET; take 2/3 EVIDENCE and LOCKET (H).
- Give LOCKET; take RAVEN (I).
- Walk down.
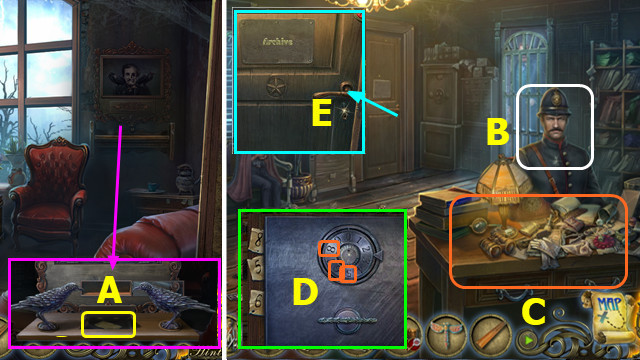
- Place RAVEN; take 3/3 EVIDENCE (A).
- Walk down, left.
- Give EVIDENCE (B).
- Play HOP (C).
- HOP mini-game; turn dial to 8-5-6 (D); earn KEY.
- Use KEY (E).
- Go forward.
Chapter 4: Archive
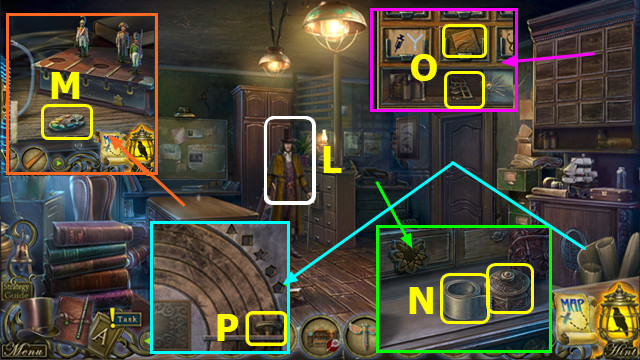
- Talk (L).
- Take PALETTE (M).
- Take TAPE and POWDER (N).
- Take 2/2 IMAGE PART; use RULER; take 2/2 CAGE TOKEN (O).
- IMAGE PART on MEDICAL BOX; take 1/2 REAGENT.
- Take 1/2 FIRE (P); place CAGE TOKEN; take LENS.
- Walk down.
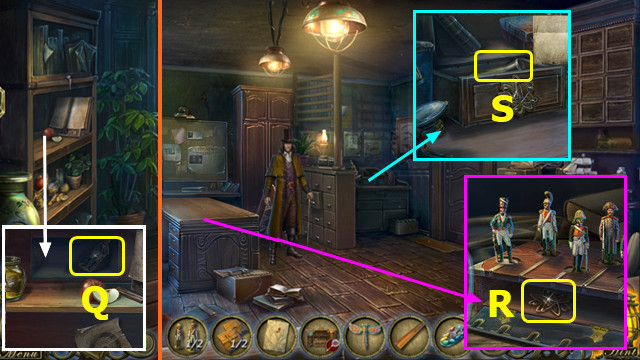
- Place DRAGONFLY; take 2/2 STATUETTE (Q).
- Go forward.
- Place STATUETTE; take ATOM (R).
- Place ATOM; take 2/2 REAGENT (S).
- Go to Chamber.
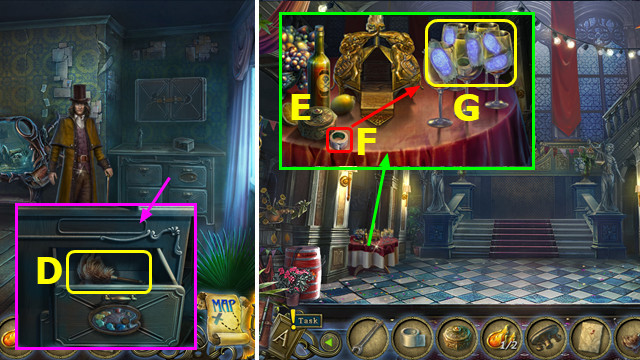
- Place PALETTE; take BRUSH (D).
- Go to Town Hall.
- Place POWDER and BRUSH (E).
- Place TAPE (F).
- Use (F-G); take FINGERPRINTS.
- Return to Archive.
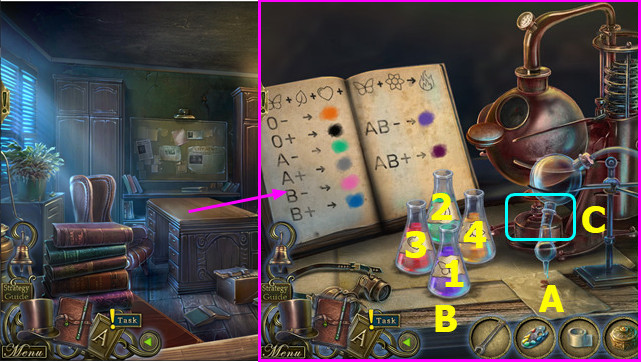
- Place BLOODY LETTER (A) and REAGENT (B).
- Select 1-2-3-1-4.
- Select (C).
- Take BLOOD TYPE (A).
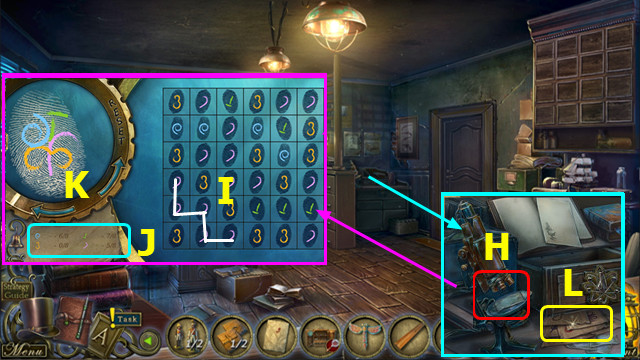
- Place LENS and FINGERPRINTS; select (H).
- This mini-game is randomly generated.
- Select chains of 3 or more (I) to complete the requirements (J).
- Use the arrows (K) to change levels; there are five hard levels and one casual level.
- Take TEST RESULTS (L).
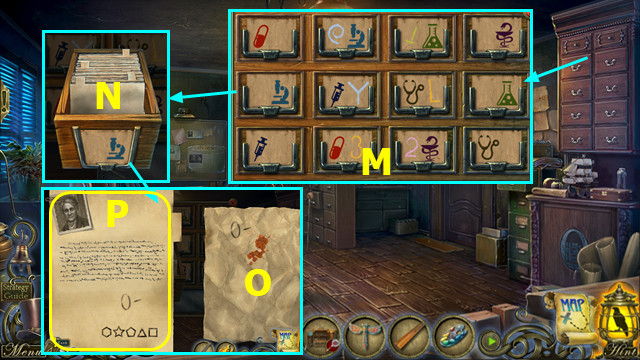
- Place TEST RESULTS in frames; solution (M).
- Select (N).
- Place BLOOD TYPE (O); read suspect files to find match; take NAME (P).
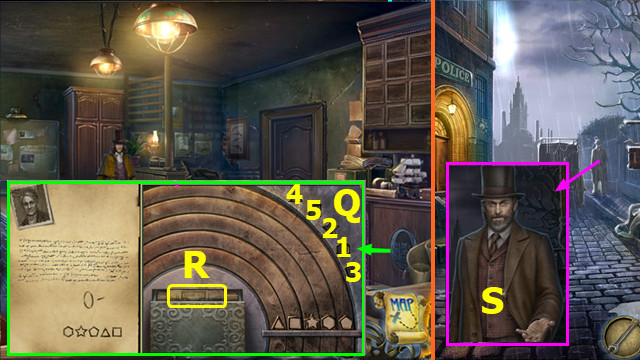
- Place NAME; select 1-5 (Q).
- Take ADDRESS (R).
- Walk down 2x.
- Give ADDRESS (S).
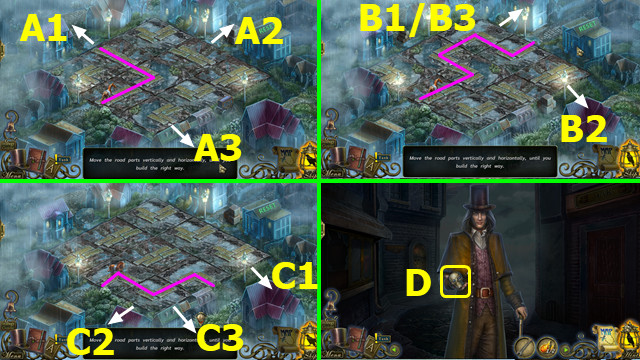
- Drag the paths one space (A1-A2-A3)-(B1-B2-B3)-(C1-C2-C3).
- Select scene; take SKULL (D).
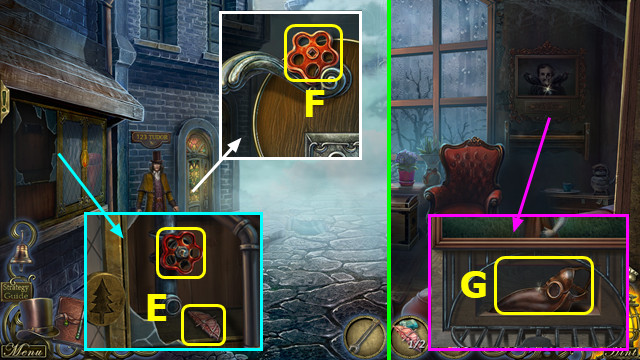
- Take 1/2 ACCESSORIES; use WRENCH; take 1/3 VALVE (E).
- Take 2/3 VALVE (F).
- Walk down, right.
- Place SKULL; take MASK (G).
- Walk down, forward.
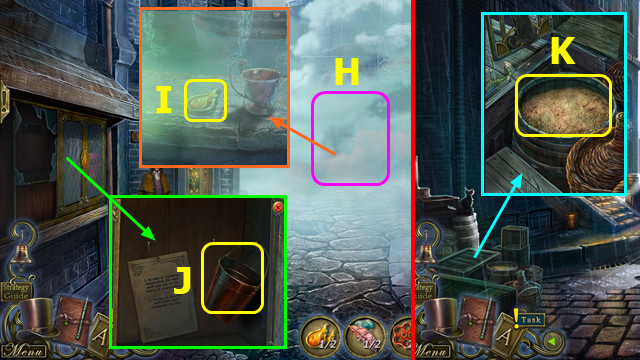
- Use MASK (H).
- Take 2/2 FIRE (I).
- Place FIRE; take BUCKET (J).
- Walk down.
- Use BUCKET; earn SAND (K).
- Go forward.
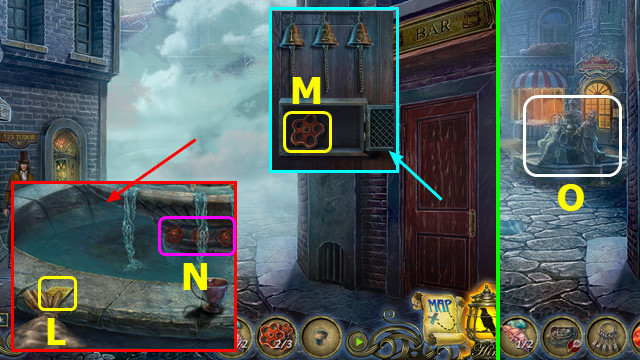
- Use SAND; take DIAMOND (L).
- Place DIAMOND; take 3/3 VALVE (M).
- Place VALVE (N).
- Play HOP; earn BAG (O).
- Open BAG; take KEYS and 1/2 CRYSTAL.
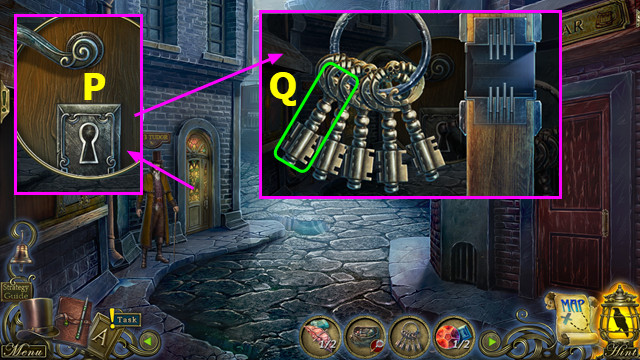
- Place and select KEYS (P).
- Select (Q).
- Go left.
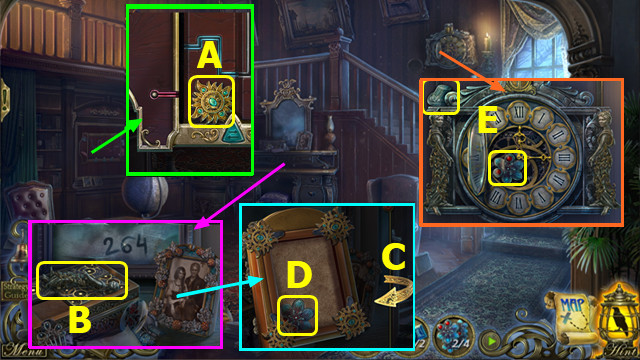
- Take SUN (A).
- Take FIGURINE (B).
- Turn frame over (C); place and select SUN; take 1/4 FLOWERS (D).
- Take 2/2 ACCESSORIES; place FIGURINE; take 2/4 FLOWERS (E).
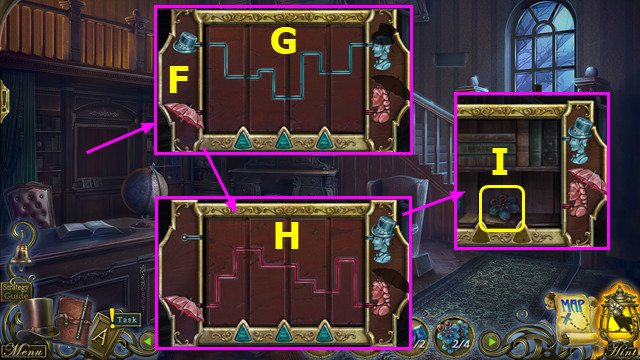
- Place ACCESSORIES (F).
- Solution, part 1 (G); drag the hat to the man.
- Solution, part 2 (H): drag the umbrella to the lady.
- Take 3/4 FLOWERS (I).
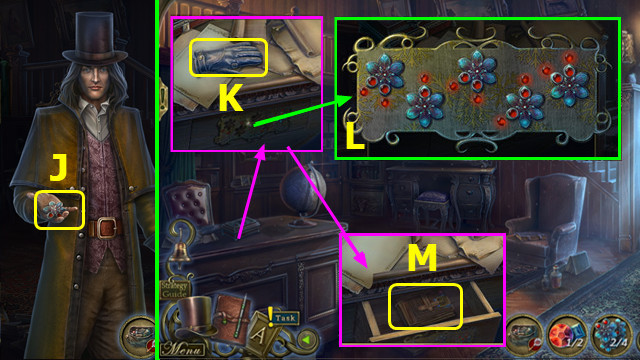
- Take 4/4 FLOWERS (J).
- Take GLOVE (K).
- Place FLOWERS; solution (L).
- Take NOTEBOOK (M).
- Take BOX PLATE from NOTEBOOK.
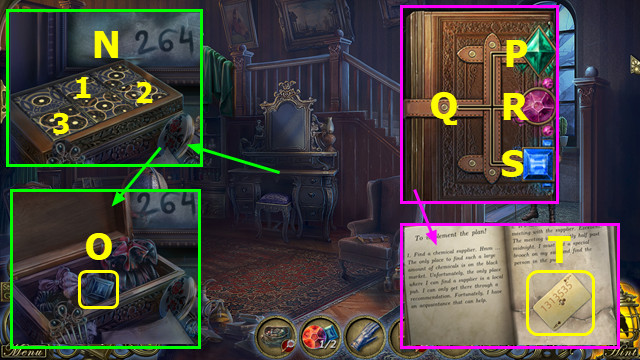
- Place BOX PLATE; select 1-2-3 (N); take 2/2 CRYSTAL (O).
- CRYSTAL on NOTEBOOK; select P-S-R-Q; take PASSWORD (T).
- Walk down.
Chapter 5: Bar
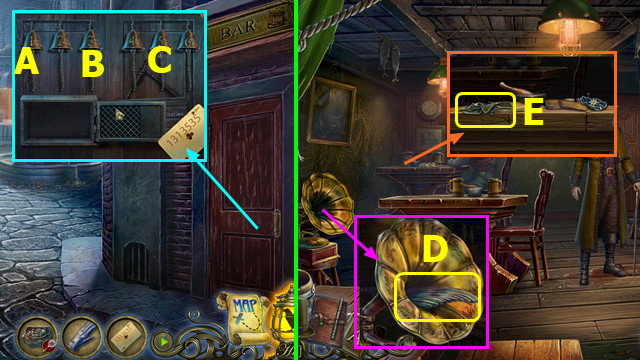
- Place PASSWORD; select A-B-A-B-C-B-C.
- Go right.
- Take FIN (D).
- Take BROKEN RECORD (E).
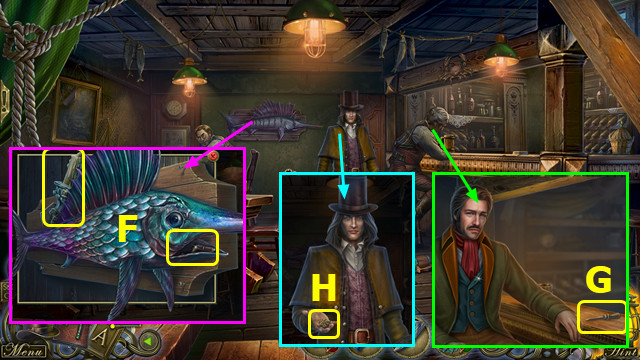
- Take CANDLE STICK; place FIN; take CRANK (F).
- Give GLOVE; take SCREWDRIVER (G).
- Take CLOVER (H).
- Walk down.
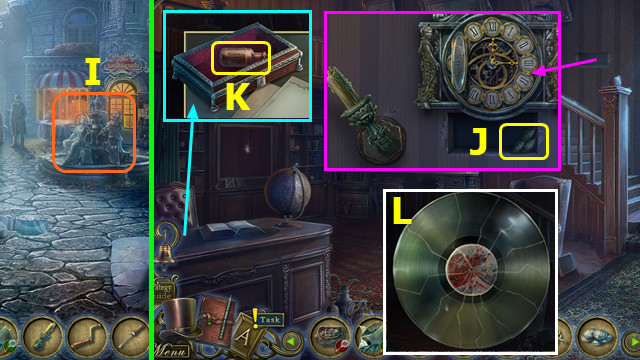
- Play HOP; earn COINS (I).
- Walk left.
- Place CANDLESTICK; take FISH SCALES (J).
- Place CLOVER; take GLUE (K).
- Restore BROKEN RECORD; add GLUE; take RECORD (L).
- Walk down, right.
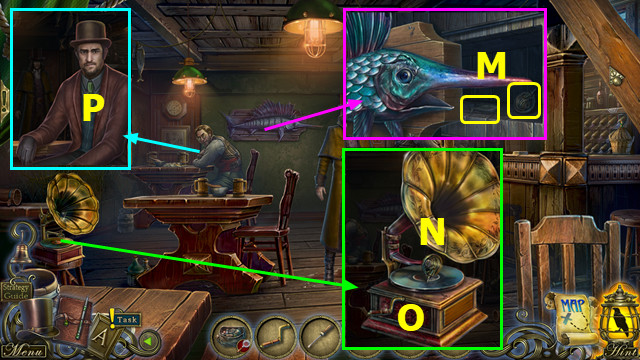
- Place FISH SCALES; take 1/2 FISH and NEEDLE (M).
- Replace NEEDLE; use SCREWDRIVER (N).
- Place CRANK and RECORD; select crank (O).
- Give COINS (P).
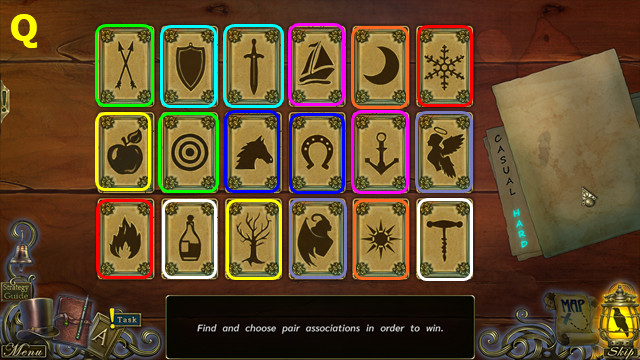
- This mini-game is randomly generated; your solution may vary.
- Select pairs (Q).
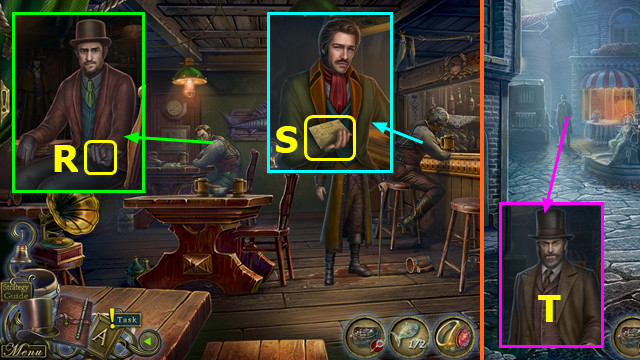
- Take JEWEL (R).
- Give JEWEL; take ADDRESS (S).
- Walk down.
- Give ADDRESS (T).
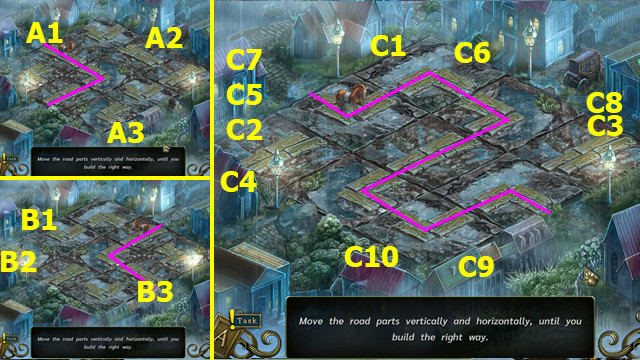
- Drag the paths one space (A1-A2-A3)-(B1-B2-B3)-(C1-C2-C3-C4-C5-C6-C7-C8-C9-C10).
- Take HARNESS (D).
- Select; take 1/2 FLOWER TOKEN (E).
- Take HORN (F).
- Place HARNESS; take 1/4 GATE PLATE (G).
- Take 2/2 FLOWER TOKEN (H).
- Place FLOWER TOKEN; select I-J-K-L.
- Take 2/4 GATE PLATE and OWL (M).
- Use HORN; play HOP; earn TREE (N).
- Walk down.
- Place TREE; take 3/4 GATE PLATE (O).
- Go left.
- Place OWL; take 4/4 GATE PLATE (P).
- Walk down, forward.
- Place GATE PLATE; solution (Q); select.
- Go forward.
- Talk (R).
- Play HOP; remove net; take COINS and 2/2 FISH (S).
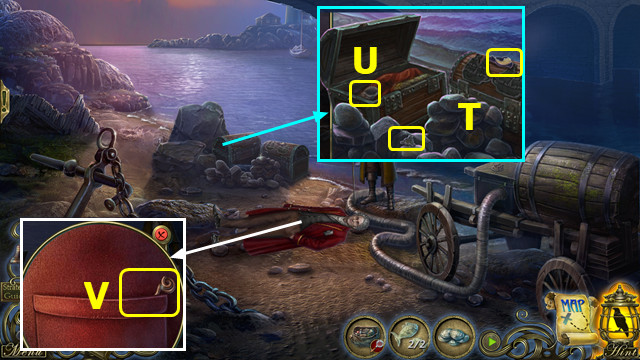
- Take SPOKE KEY and 1/2 CAT (T).
- Place FISH; take SHELL (U).
- Take MASTER KEY (V).
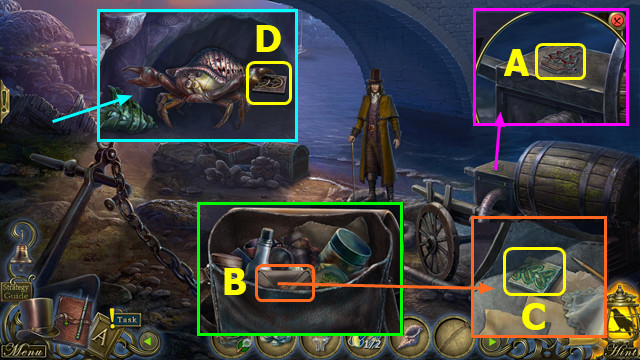
- Take 1/2 SAILBOAT (A).
- Select wallet in BAG (B); use MASTER KEY; take 1/4 PATTERN (C).
- Place SHELL; take 2/4 PATTERN (D).
- Walk down.
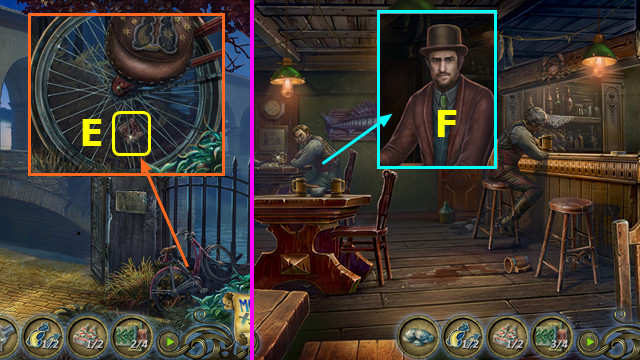
- Use SPOKE KEY; earn 3/4 PATTERN (E).
- Walk down, right.
- Give COINS (F).
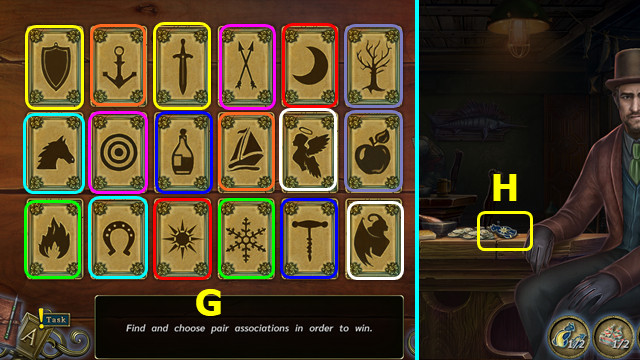
- This mini-game is randomly generated; your solution may vary.
- Select pairs (G).
- Take 2/2 CAT (H).
- Walk down, forward.
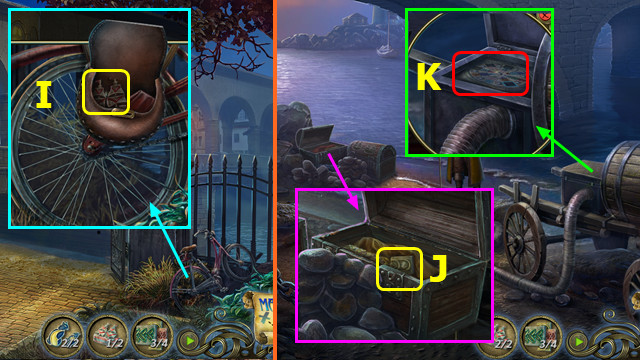
- Place CAT; take 2/2 SAILBOAT (I).
- Go forward.
- Place SAILBOAT; take 4/4 PATTERN (J).
- Open lid; select (K).
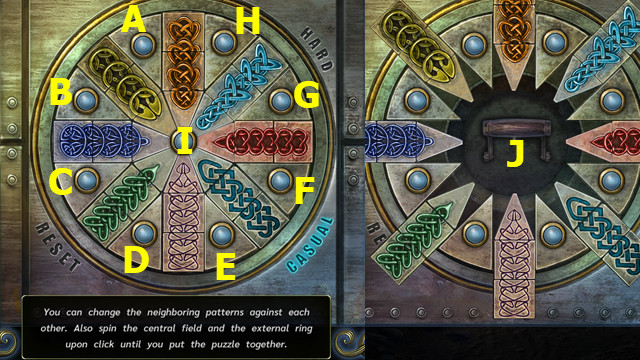
- Place PATTERN on the device.
- Casual solution Ax3-Bx3-Cx3-Dx3-Ex3-Fx3-Gx3-Hx3-Ix4.
- Hard solution Ax3-Bx3-Cx3-Dx3-Ex3-Fx3-Gx3-Hx3.
- Select the lever (J).
- Congratulations! You have completed Dark Tales: Edgar Allan Poe's The Bells!

