Walkthrough Menu
- Chapter 1: Atlantis
- Chapter 2: Docking Station
- Chapter 3: New Atlantis
- Chapter 4: Lower Level
- Chapter 5: Martian Caves
- Chapter 6: Two Keys
- Chapter 7: Astral World
- Chapter 8: Lair of the Bugs
- Chapter 9: Rescue
Chapter 1: Atlantis
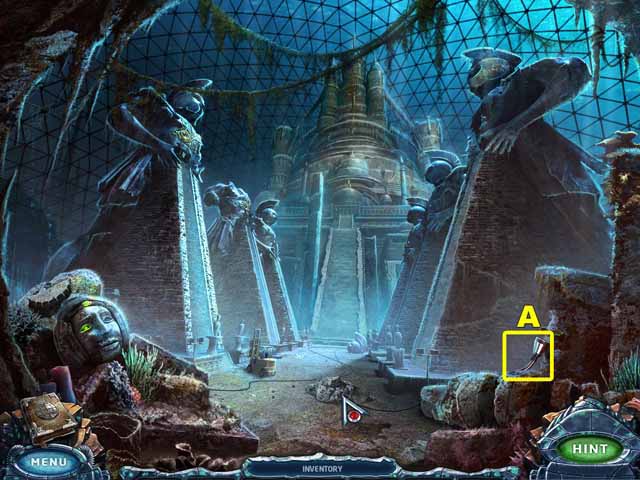
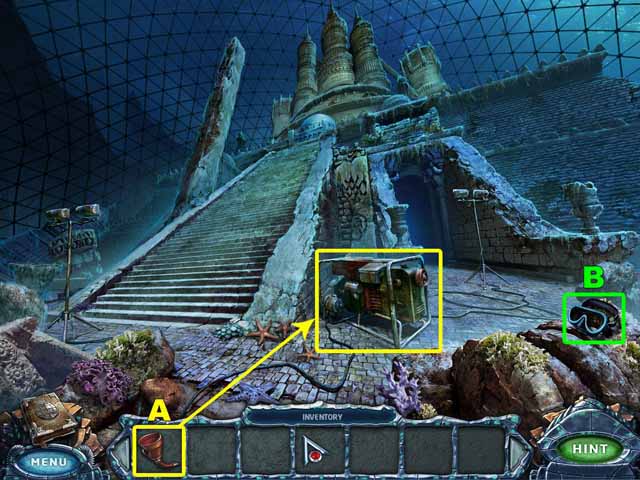
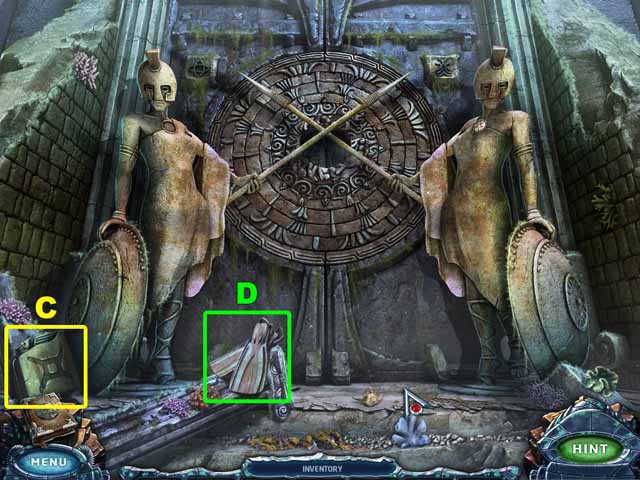
- Take the FUNNEL (A).
- Go to the base of the temple.
- Place the FUNNEL (A) in the generator.
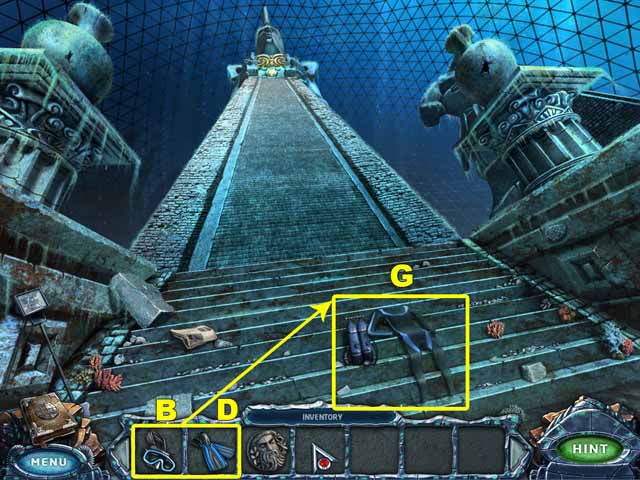
- Take the DIVING MASK (B).
- Go up the stairs to the temple entrance.
- Take the GAS CAN (С) and the FLIPPERS (D).
- Return to the base of the temple.
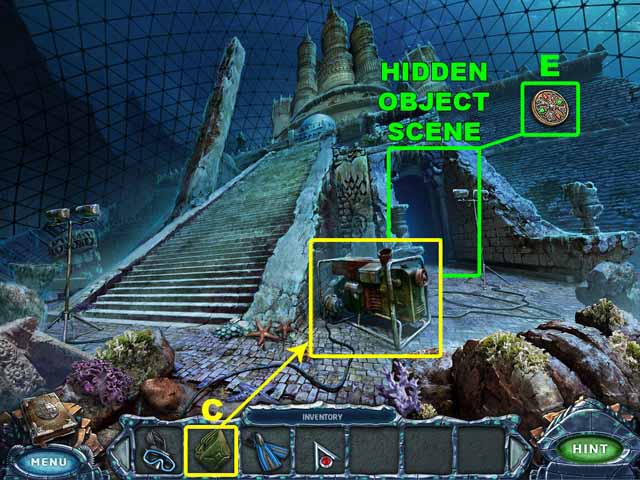
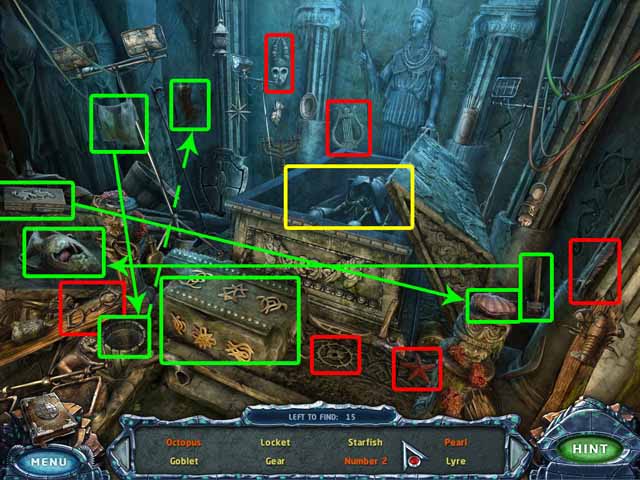
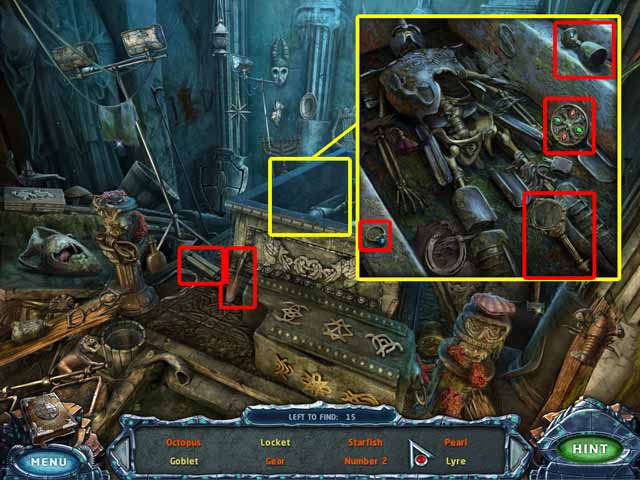
- Use the GAS CAN (С) on the generator.
- Pull the rope to turn on the lights.
- Click on the sparkles to access the hidden object area. Collect every object listed at the bottom of the screen to acquire the LOCKET (E).
- Go to the temple entrance.
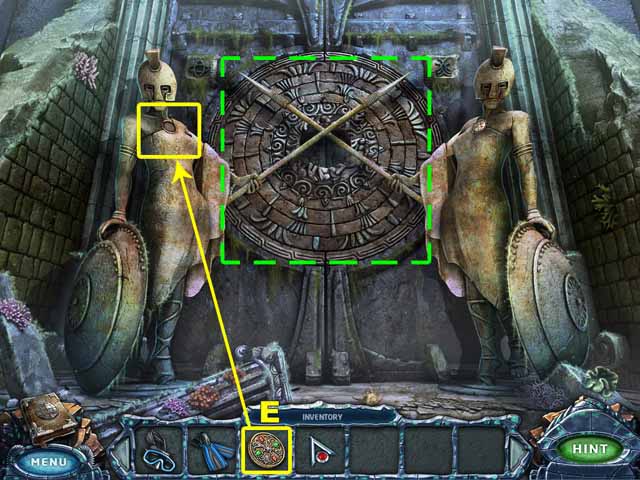
- Place the LOCKET (E) on the statue.
- The statues will withdraw their spears.
- Click on the door to see the symbols.
- Go to the top of the pyramid.
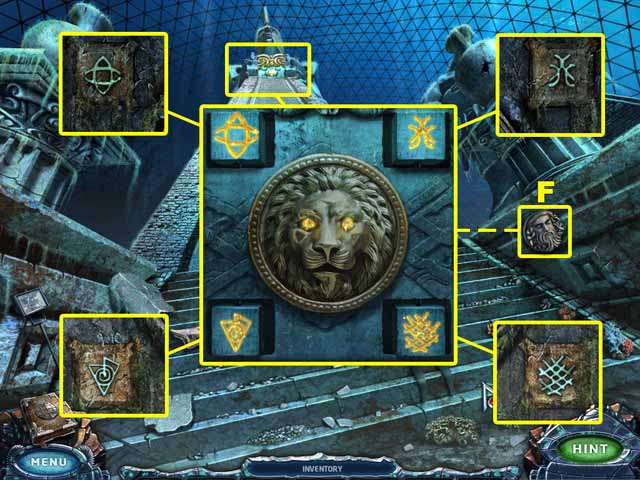
- Put the symbols in the correct position.
- Take the STONE DISK (F).
- Place the DIVING MASK (B) and FLIPPERS (D) near the diving suit.
- Take the DIVING GEAR (G).
- Go to the temple entrance.
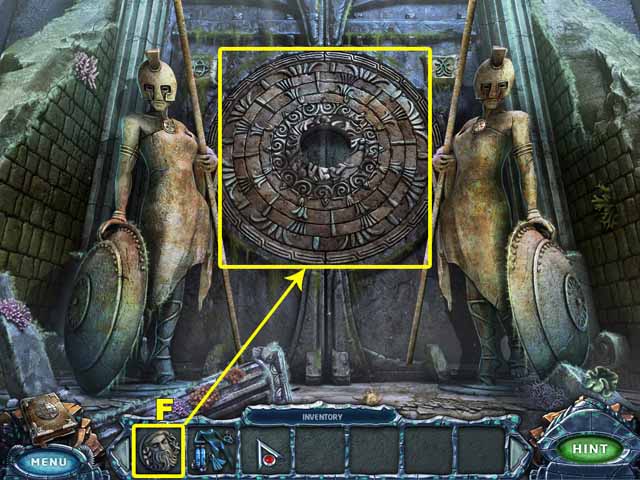
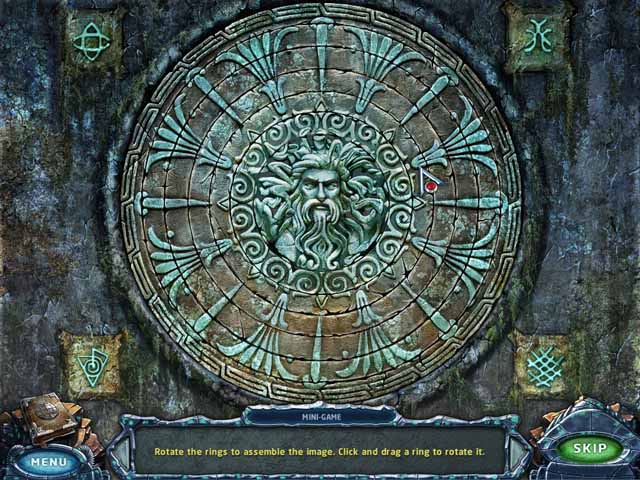
- Place the STONE DISK (F) in the lock.
- Rotate the discs to assemble the image.
- Enter the temple.
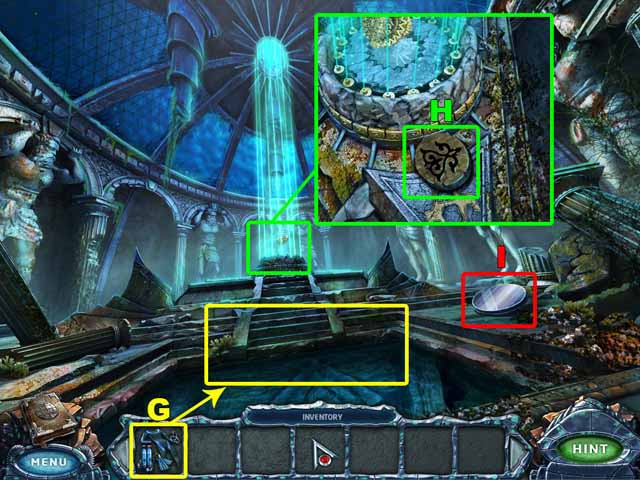
- Take the STONE DISK (H).
- Take the MIRROR (I).
- Use the DIVING GEAR (G) on the water.
- Enter the Underwater Cave.
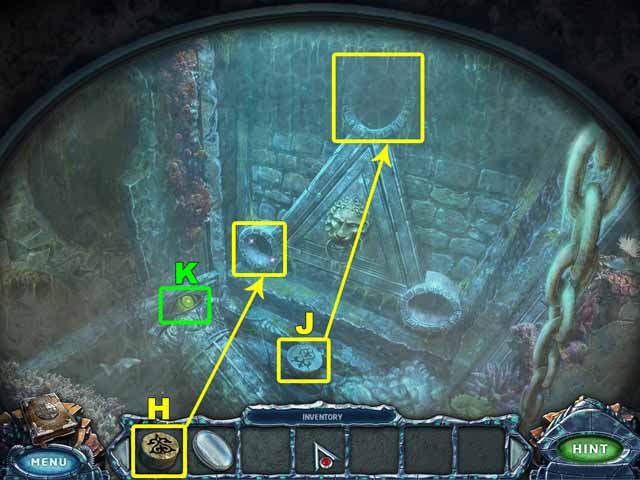
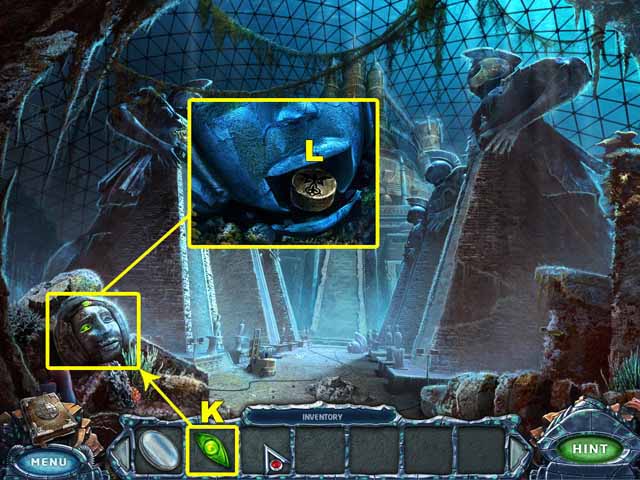
- Take the STONE DISK (J) and the EYE (K).
- Place the STONE DISKS (H and J) on the mechanism.
- Return to where you started.
- Place the EYE on the statue (K).
- Take the STONE DISK (L).
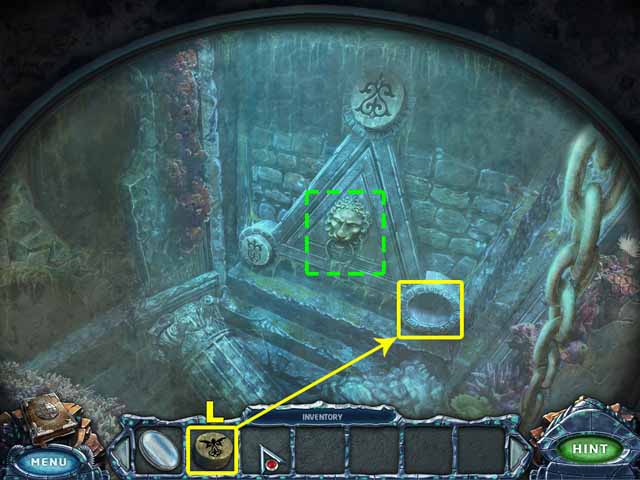
- Go to the Underwater Cave.
- Place the STONE DISK in the mechanism (L).
- Pull the ring.
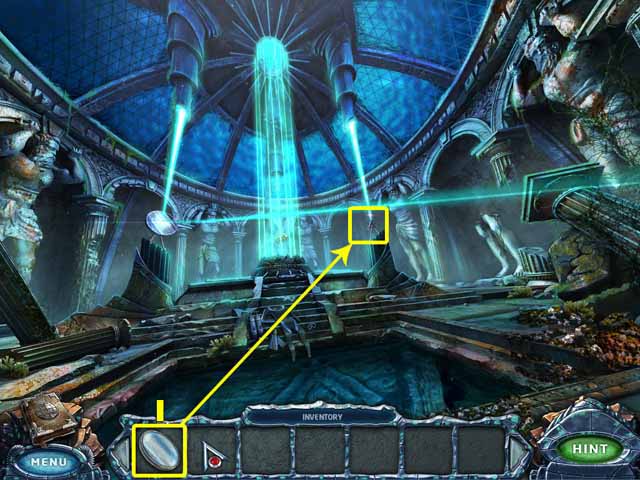
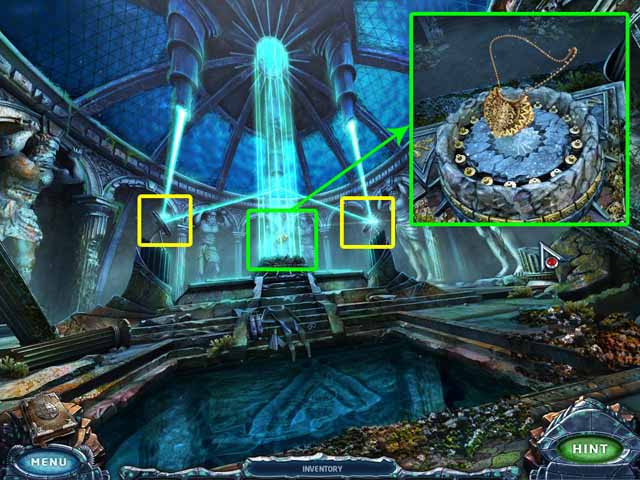
- Place the MIRROR (I) on the pedestal.
- Reposition the mirrors so the rays of lights are directed at the force field.
- Take Bellona's Locket.
Chapter 2: Docking Station
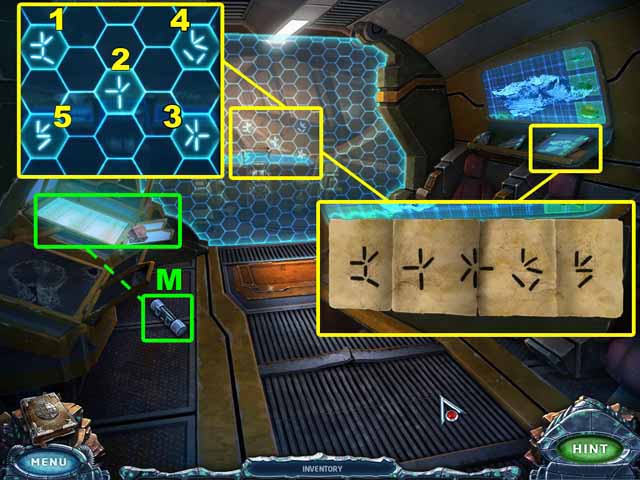
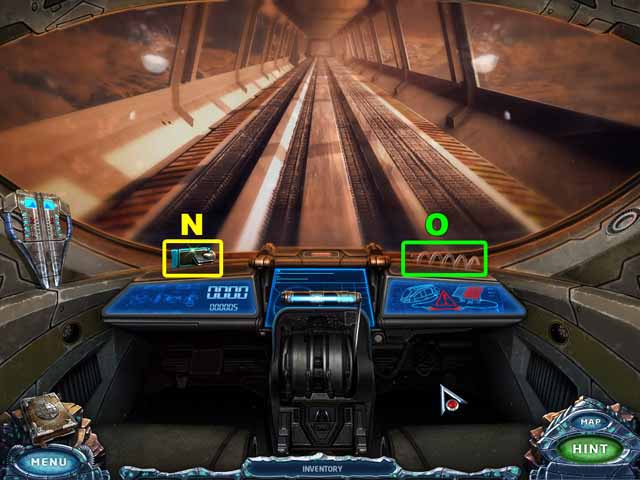
- Go to the Train.
- Take the MAP.
- Look at the piece of paper under the map.
- Take the stone and strike the glass with it.
- Take the FUSE (M).
- Click on the symbols in the same order as displayed on the piece of paper under the map.
- Enter the Train Cabin.
- Take the BLUE ACCESS CARD (N).
- Take the GLASS COIL (O).
- Return to the Dock.
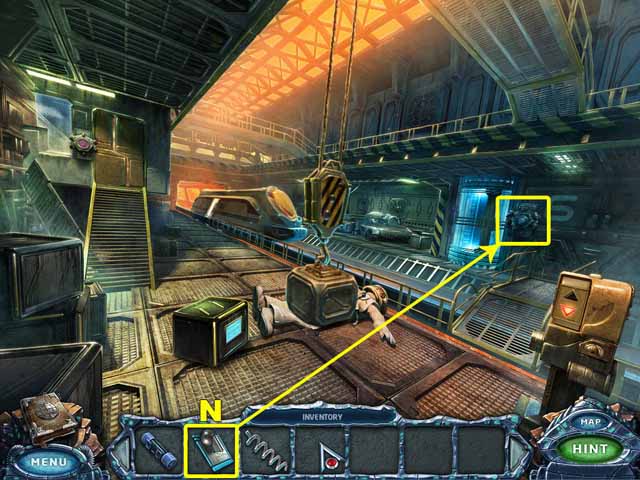
- Use the BLUE ACCESS CARD (N) to open the door to the Airlock.
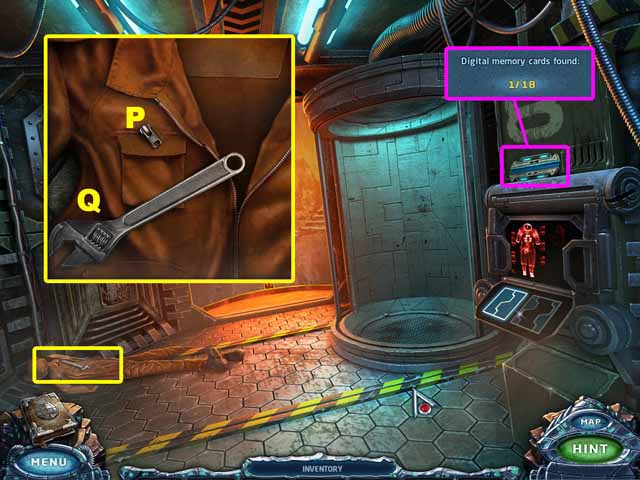
- Enter the Airlock.
- Take the first Digital Memory Card.
- Take the ZIPPER (P).
- Take the WRENCH (Q).
- Go to the Dock.
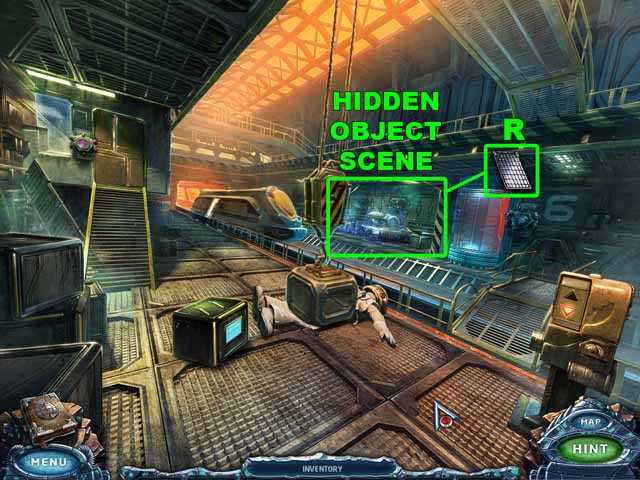
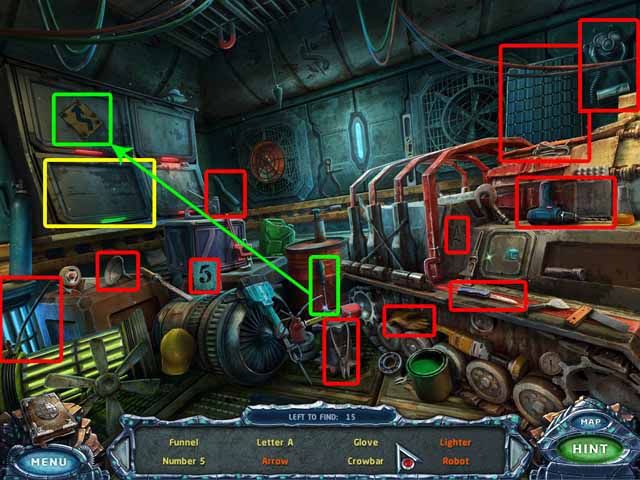
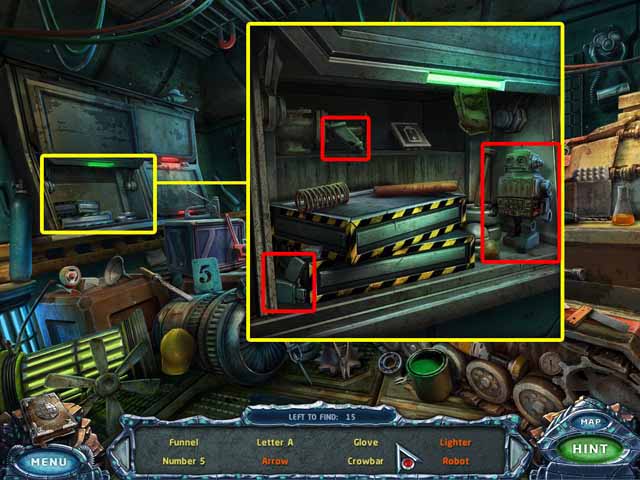
- Click on the sparkles to access the hidden object area. Collect every object listed at the bottom of the screen to acquire the SOLAR PANEL (R).
- Return to the Train.
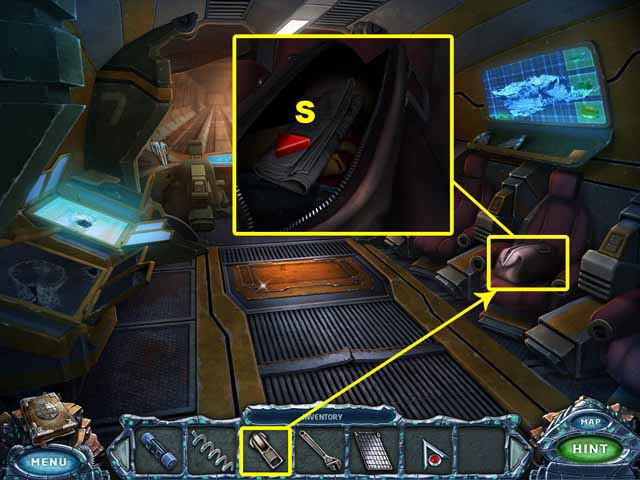
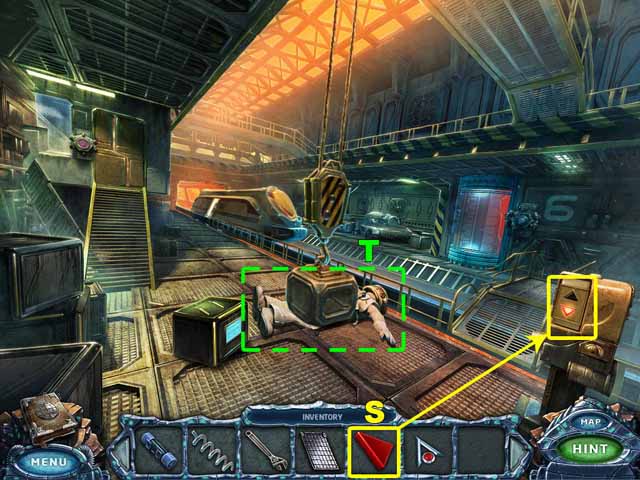
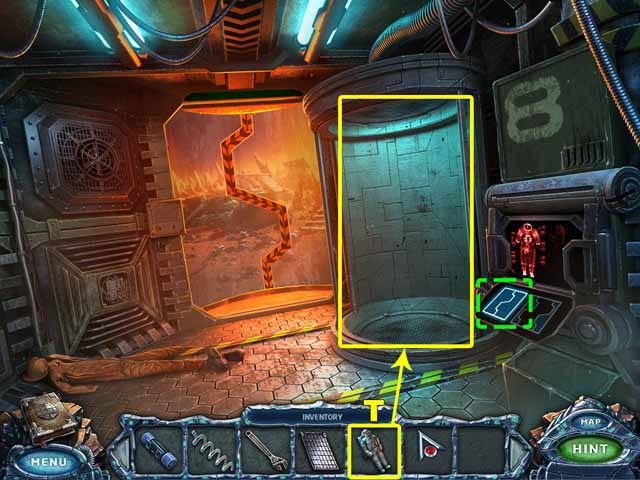
- Use the ZIPPER to open the bag.
- Take the UP BUTTON (S).
- Return to the Dock.
- Use the UP BUTTON (S) to activate the crane and lift the crate.
- Take the SPACESUIT (T).
- Go to the Airlock.
- Place the SPACESUIT (T) in the pressure chamber.
- Use the blue and white button to open the door to the Surface of Mars.
- Go out onto the Surface of Mars.
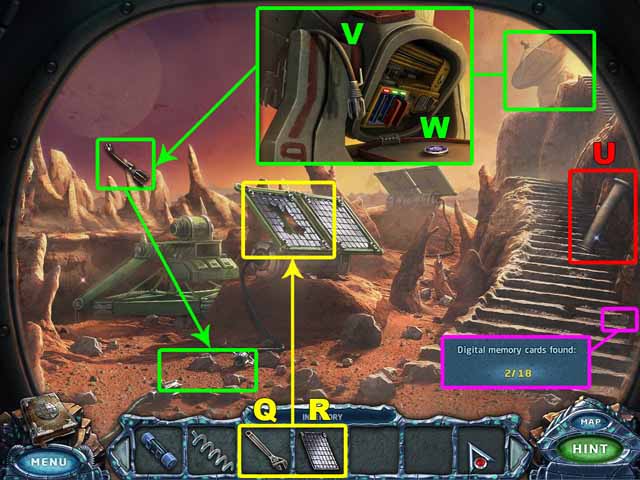
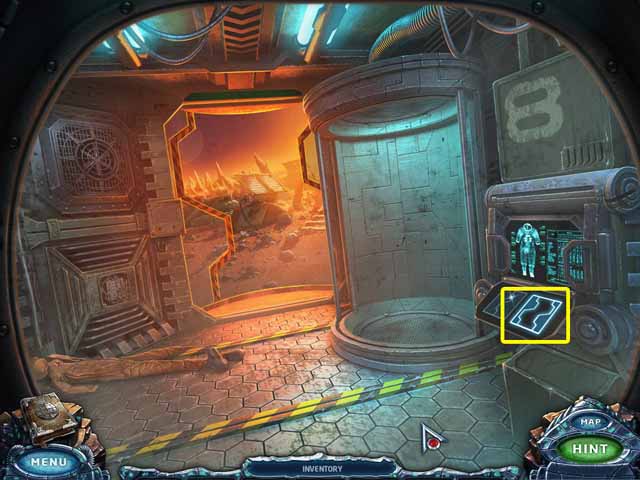
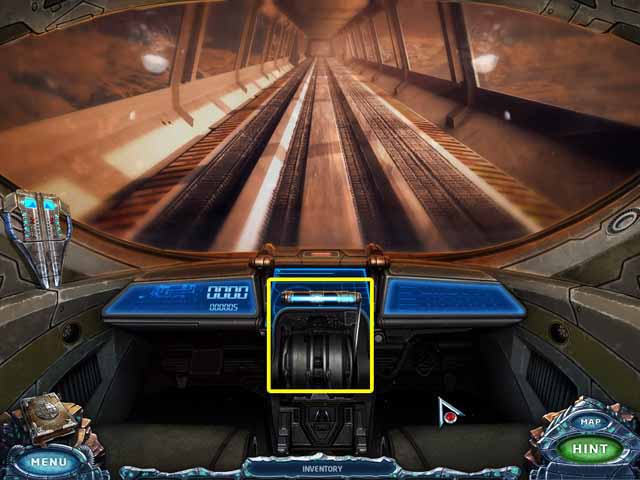
- Take the second Digital Memory Card.
- Use the WRENCH (Q) to remove the bolts holding the broken solar panel in place. Click on the panel to remove it.
- Install the new SOLAR PANEL (R).
- Place the bolts on the panel one by one. Use the WRENCH (Q) to tighten them.
- Take the PIPE (U).
- Take the CABLE (V) and the BUTTON (W).
- Use the CABLE (V) to connect the parts of the wire.
- Go to the Airlock.
- Close the door.
- Return to the Train.
- Pull the lever.
- Exit the train at the station.
Chapter 3: New Atlantis
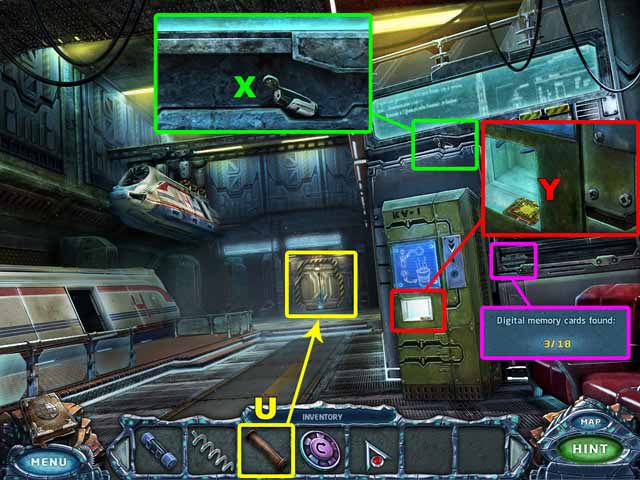
- Take the third Digital Memory Card.
- Take the LIGHTER (X).
- Take the MICROCHIP (Y).
- Place the PIPE (U) between the two doors.
- Enter the Passage.
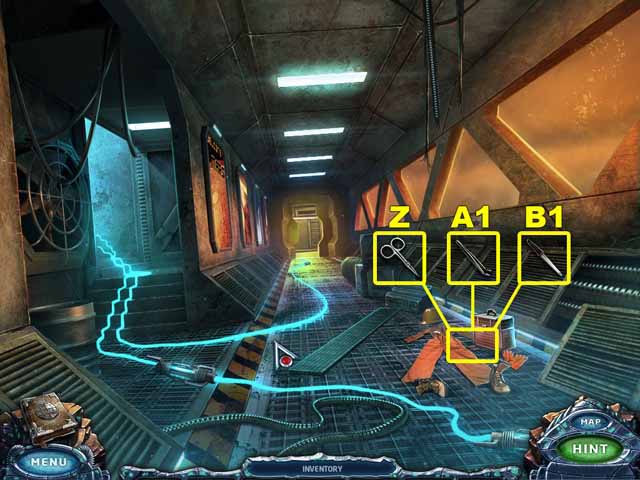
- Click on the tool case. Take the SCISSORS (Z), TWEEZERS (A1) and NAIL FILE (B1).
- Go to the First Floor.
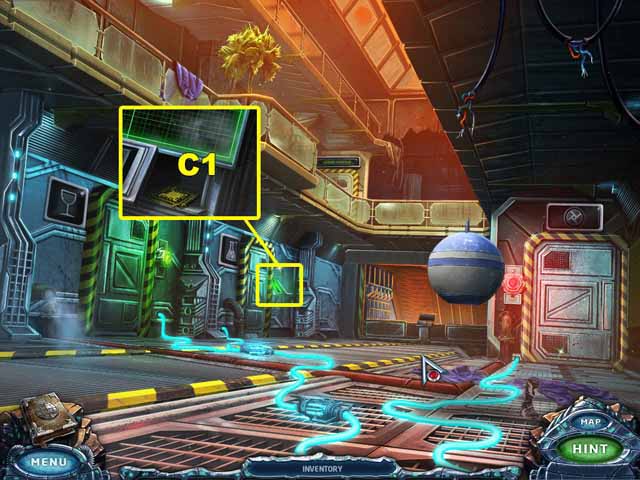
- Take the MICROCHIP (C1).
- Enter the elevator at the far end of the room.
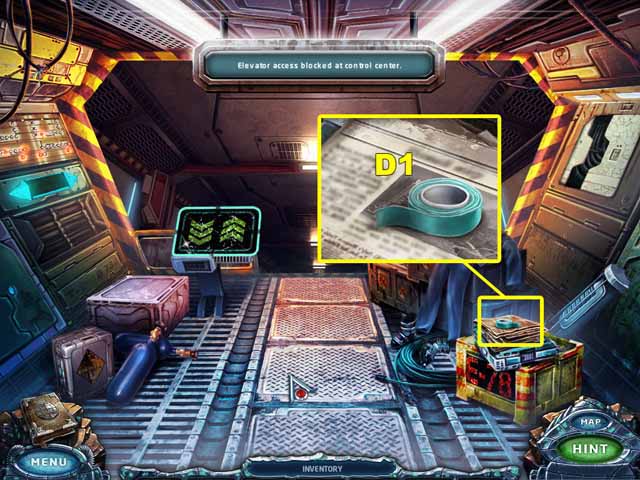
- Take the INSULATING TAPE (D1).
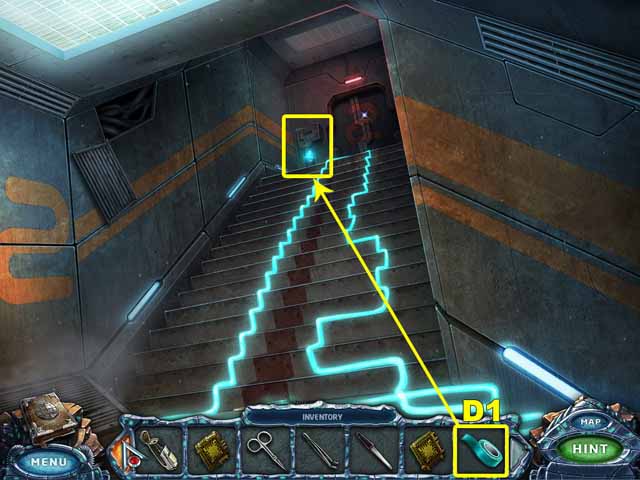
- Return to the Passage. Go left to walk up the stairs.
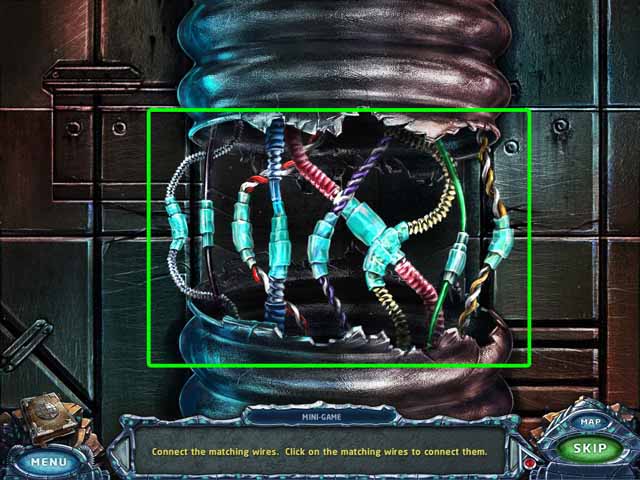
- Use the INSULATING TAPE (D1) to connect the exposed wires.
- Go to the Second Floor.
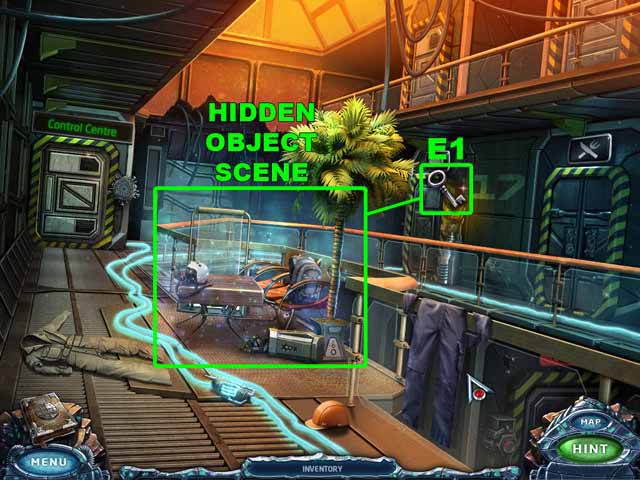
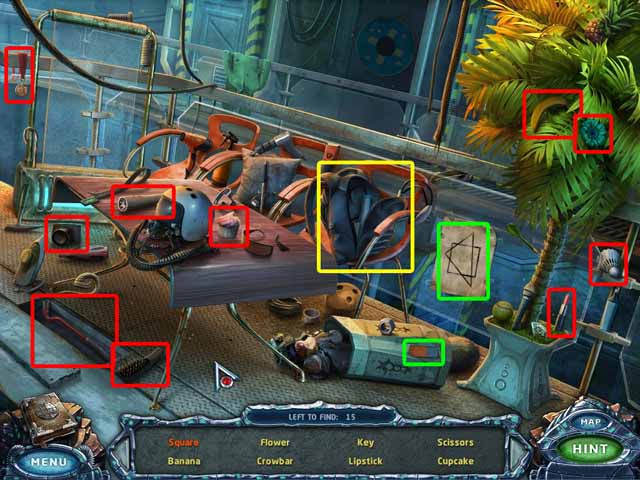
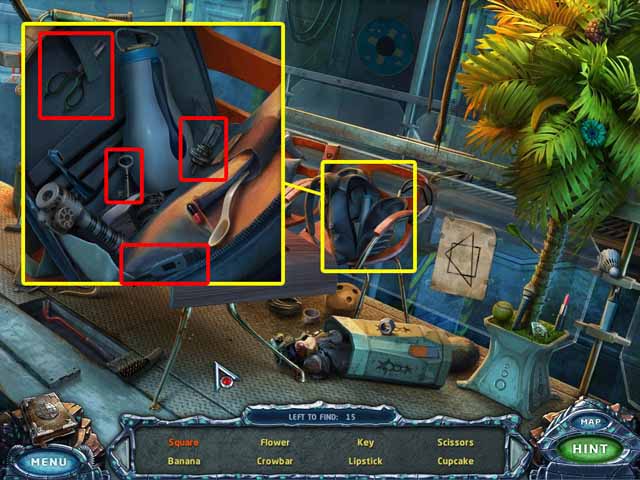
- Click on the sparkles to access the hidden object area. Collect every object listed at the bottom of the screen to acquire the KEY (E1).
- Go to the Passage.
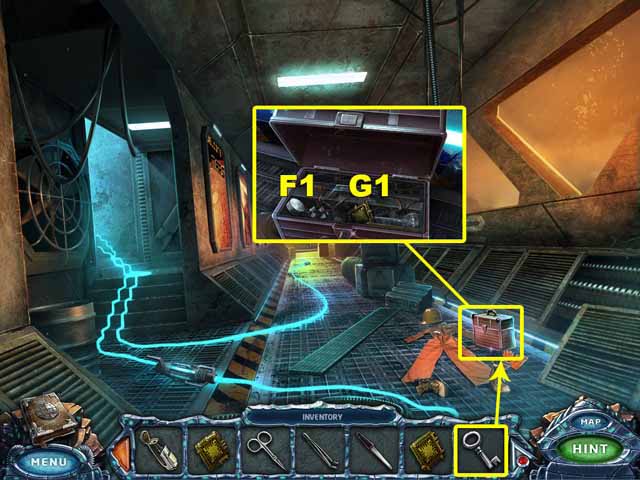
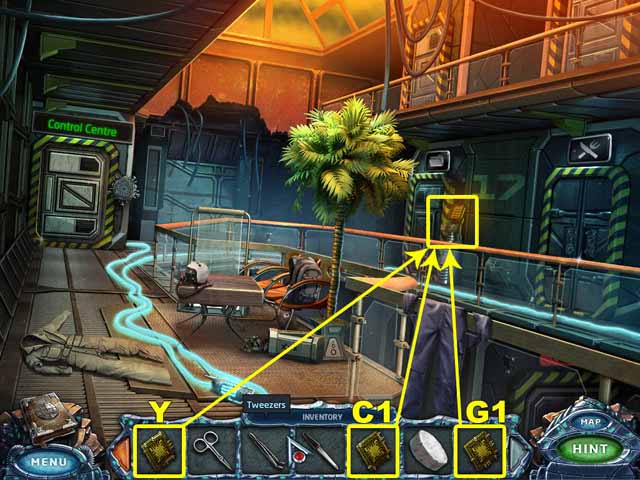
- Use the KEY to open the case.
- Take the SOLID FUEL (F1) and the MICROCHIP (G1).
- Go to the Second Floor.
- Place the MICROCHIPS (Y, C1 and G1) on the panel.
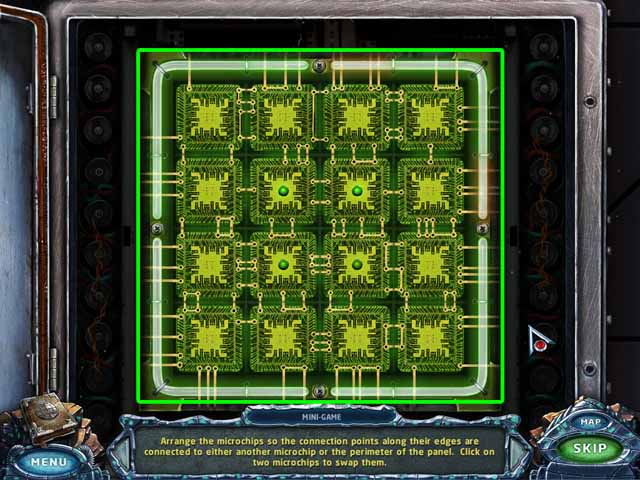
- Arrange the microchips in the correct configuration.
- Enter the Archives.
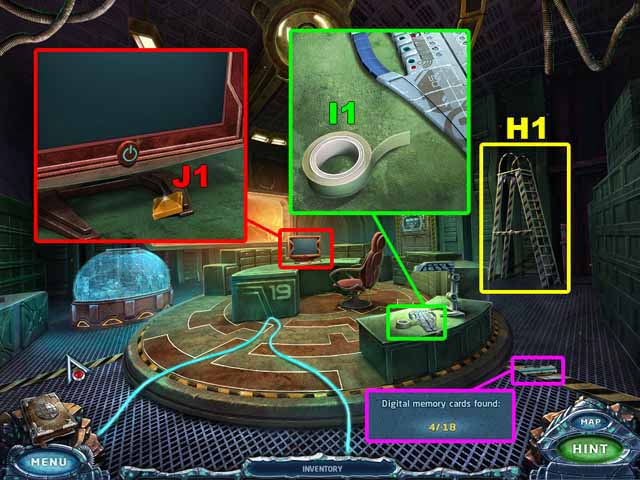
- Take the fourth Digital Memory Card.
- Take the LADDER (H1).
- Take the STICKY TAPE (I1).
- Take the GEM (J1).
- Switch on the screen.
- Return to the Station.
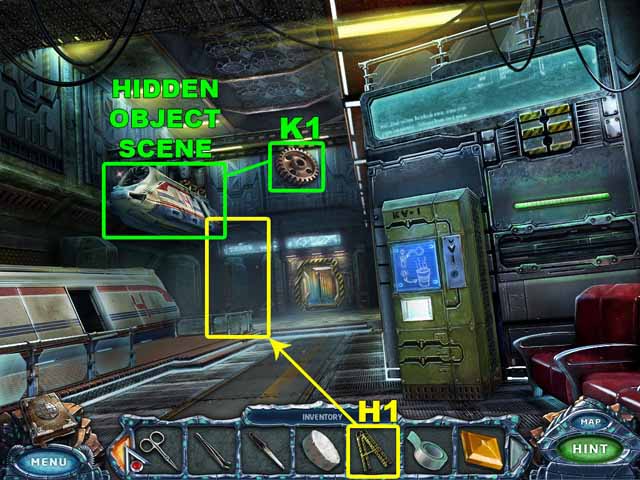
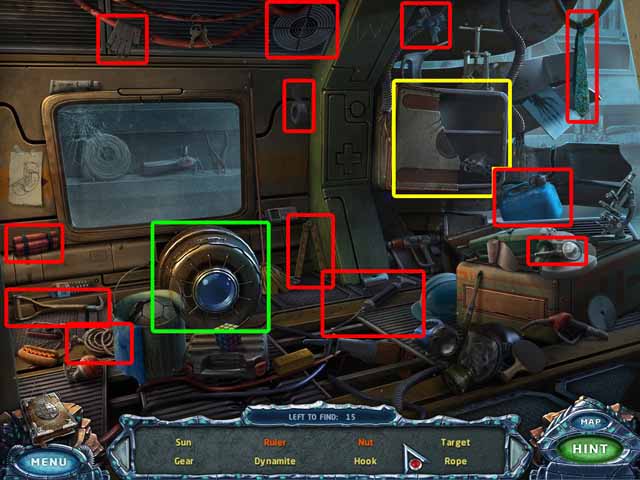
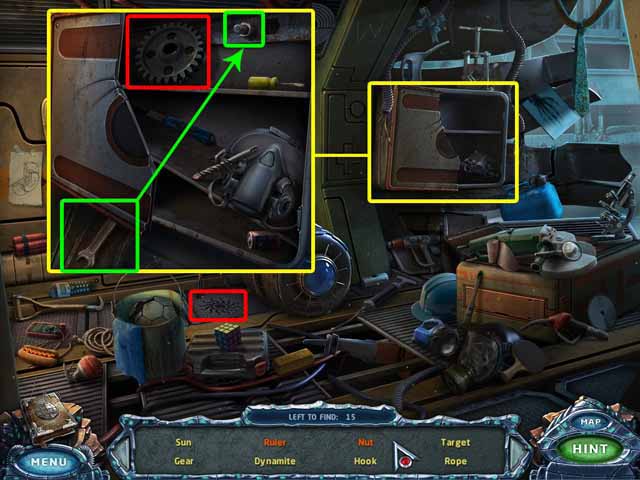
- Place the LADDER (H1) below the coach.
- Click on the sparkles to access the hidden object area. Collect every object listed at the bottom of the screen to acquire the GEAR (K1).
- Go to the Second Floor.
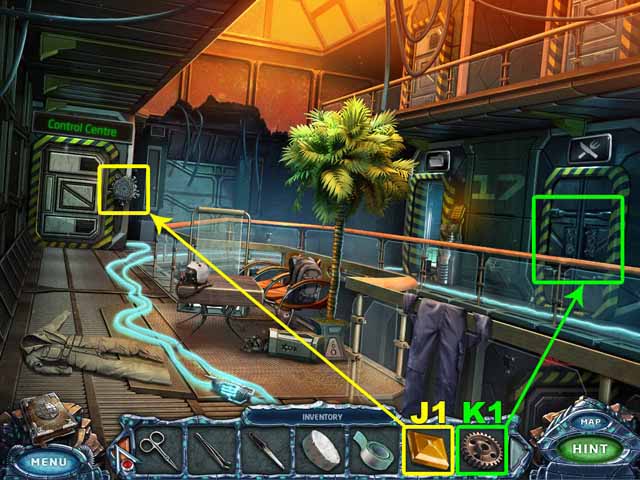
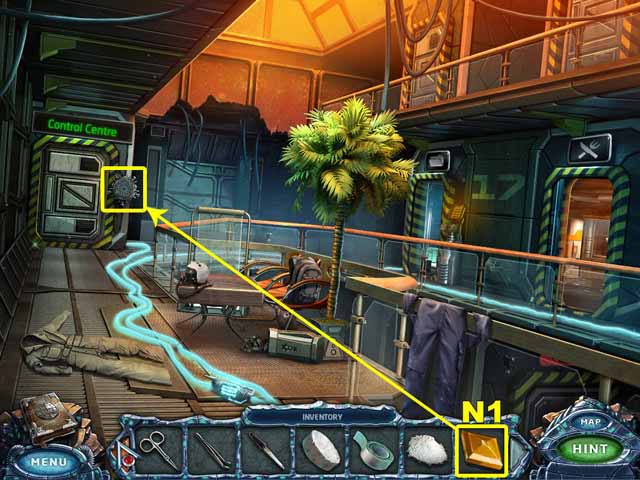
- Insert the GEM (J1) in the Control Center lock.
- Insert the GEAR (K1) into the Kitchen door.
- Enter the Kitchen.
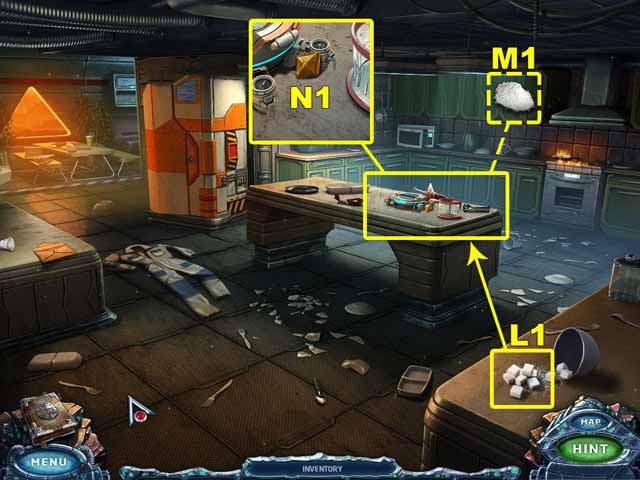
- Take the SUGAR (L1). Grind it in the food processor to get POWDERED SUGAR (M1).
- Take the GEM (N1).
- Go to the Second Floor.
- Insert the GEM (N1) in the Control Center lock.
- Return to the Archives.
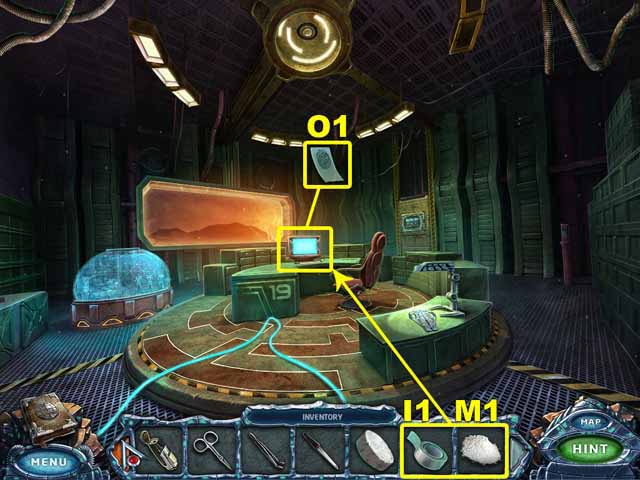
- Use the POWDERED SUGAR (M1) on the screen. Place the STICKY TAPE (I1) on the fingerprint.
- Take the FINGERPRINT (O1).
- Go to the First Floor.
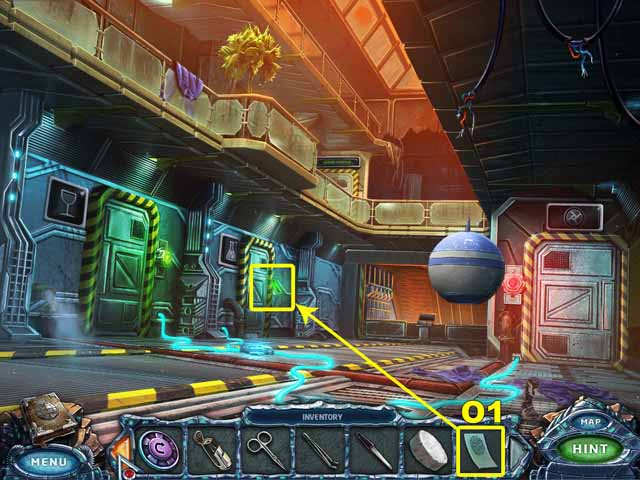
- Use the FINGERPRINT (O1) to open the door to the Laboratory.
- Enter the Laboratory.
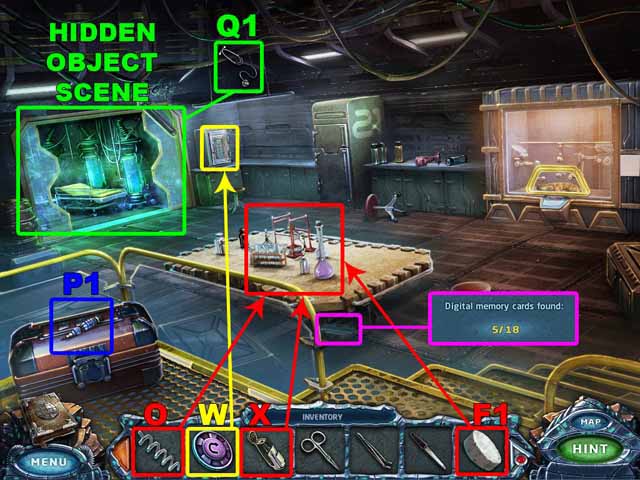
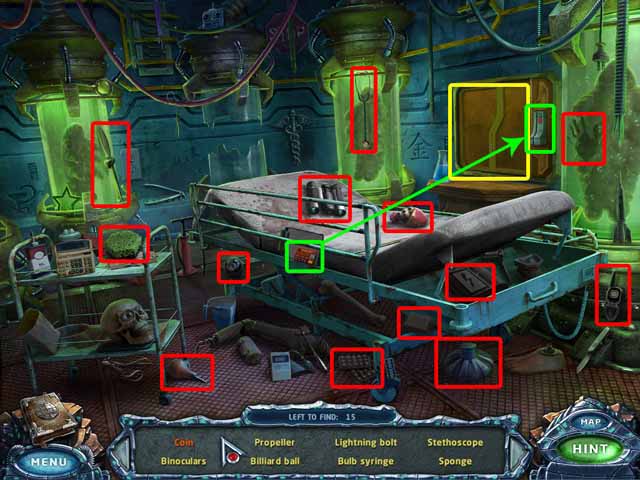
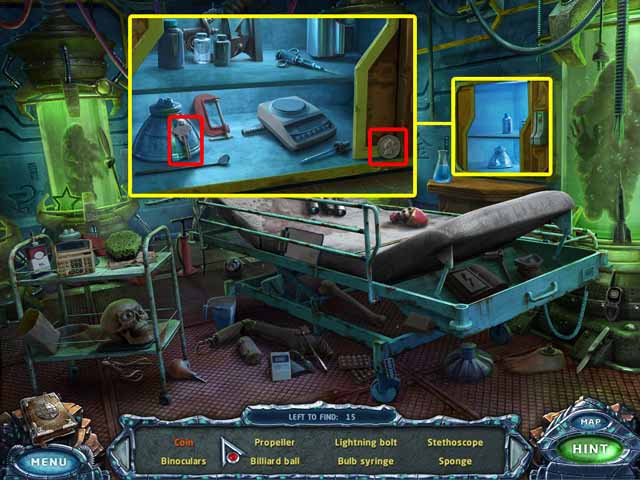
- Take the fifth Digital Memory Card.
- Place the BUTTON (W) on the safe.
- Place the GLASS COIL (O) on the chemistry set.
- Place the SOLID FUEL (F1) on the burner. Use the LIGHTER (X) to ignite it.
- Take the SCREWDRIVER (P1).
- Click on the sparkles to access the hidden object area. Collect every object listed at the bottom of the screen to acquire the STETHOSCOPE (Q1).
- Go to the Archives.
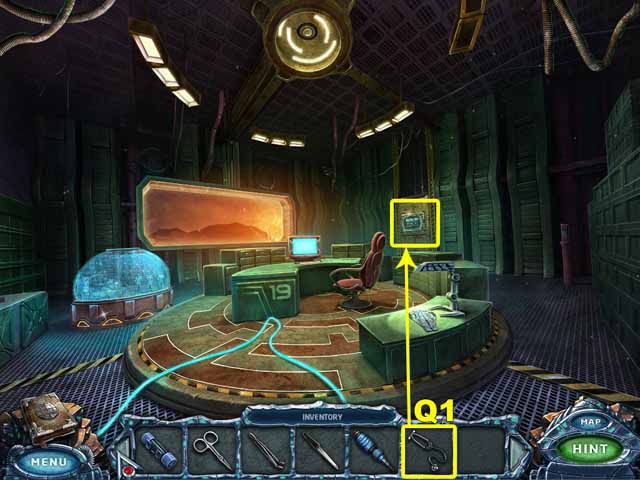
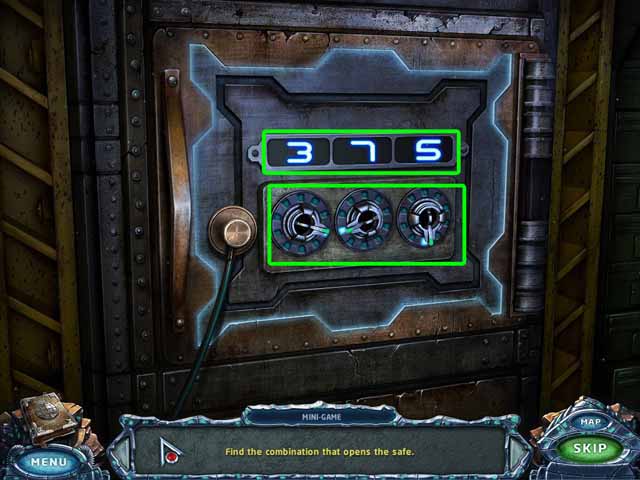
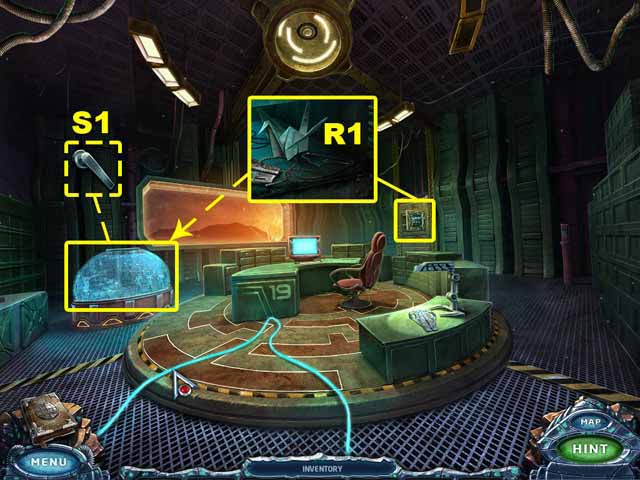
- Use the STETHOSCOPE (Q1) to open the safe.
- Take the PAPERCLIP ON A STRING (R1).
- Use the PAPERCLIP ON A STRING (R1) to retrieve the HANDLE (S1).
- Go to the Dock.
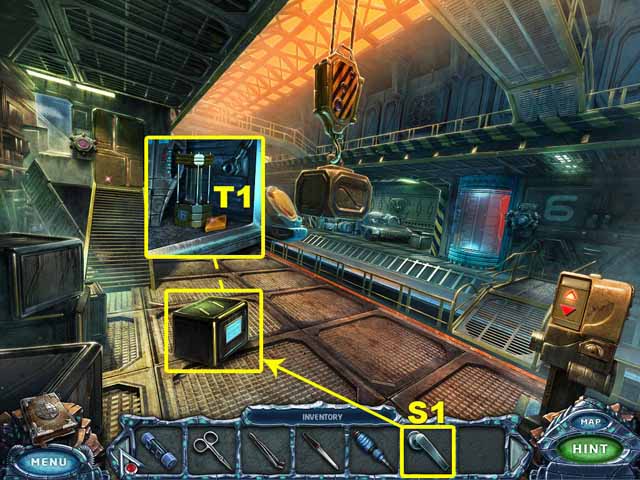
- Place the HANDLE (S1) on the case.
- Click on the handles to open the case.
- Take the GEM (T1).
- Go to the Train.
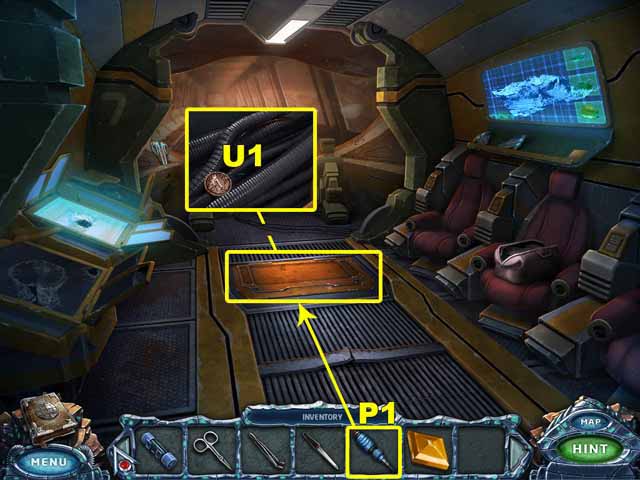
- Use the SCREWDRIVER (P1) to remove the cover on the floor. Take the COIN (U1).
- Go to the Station.
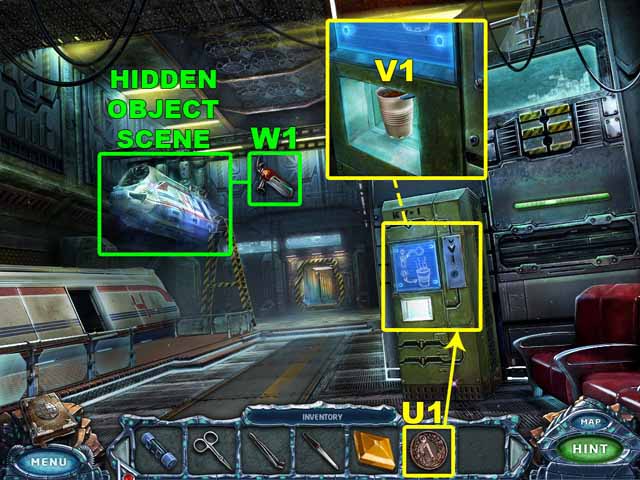
- Insert the COIN (U1) into the coffee machine. Click on the button below the coin slot. Take the CUP OF COFFEE (V1).
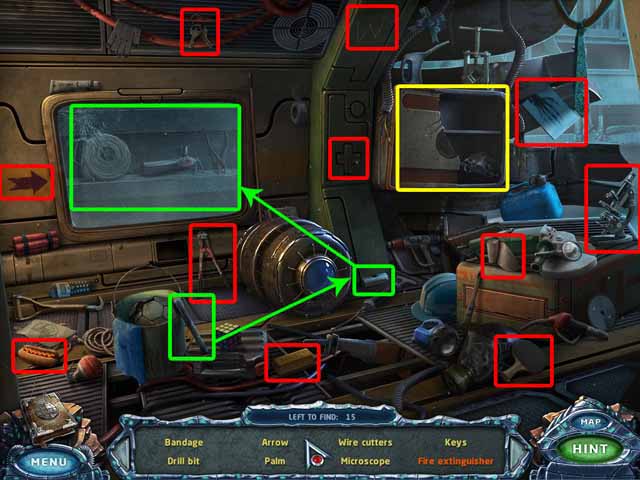
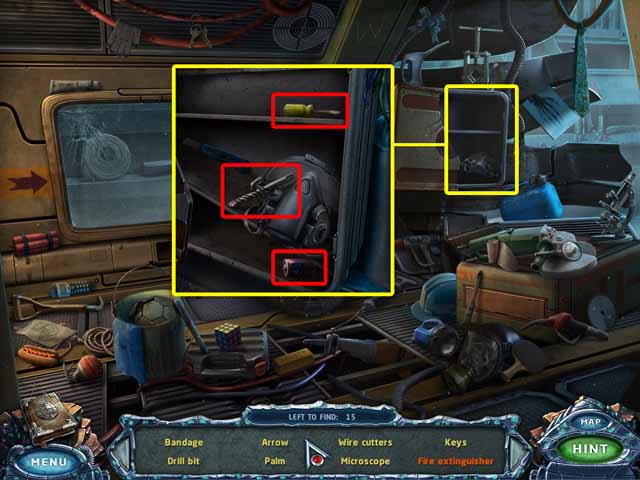
- Click on the sparkles to access the hidden object area. Collect every object listed at the bottom of the screen to acquire the FIRE EXTINGUISHER (W1).
- Go to the Second Floor.
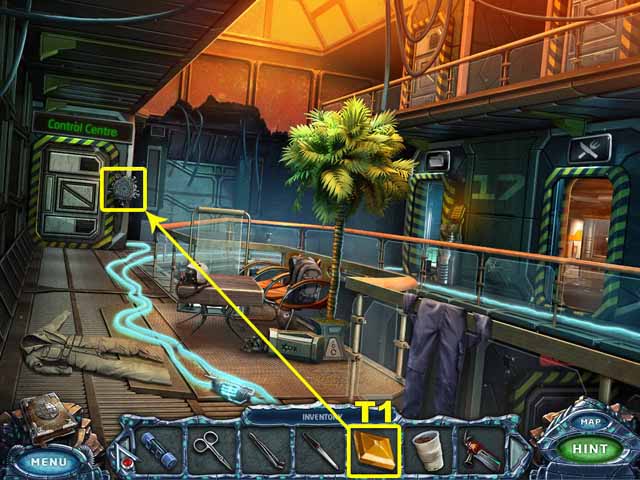
- Insert the GEM (T1) in the Control Center lock.
- Go to the Kitchen.
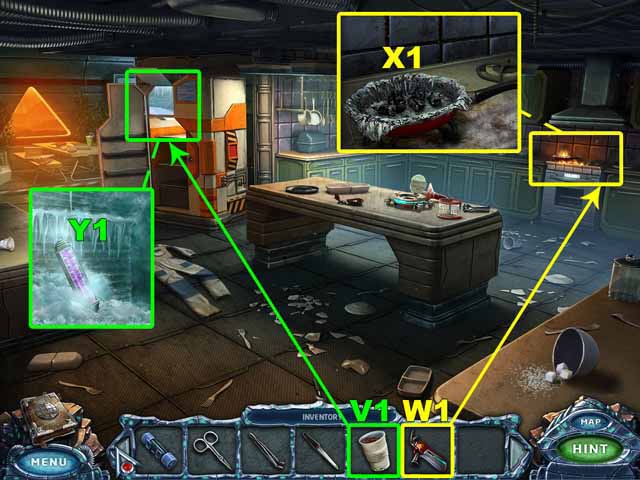
- Use the FIRE EXTINGUISHER (W1) to put out the fire on the oven. Take the FOIL (X1).
- Pour the CUP OF COFFEE (V1) on the ice in the freezer. Take the LIQUID ASPIRIN (Y1).
- Return to the Laboratory.
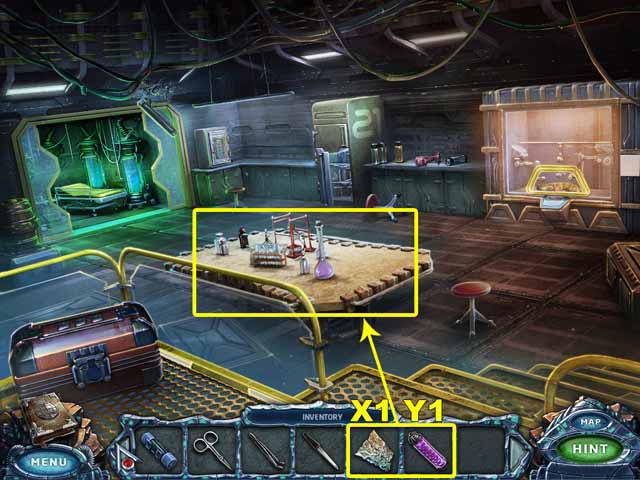
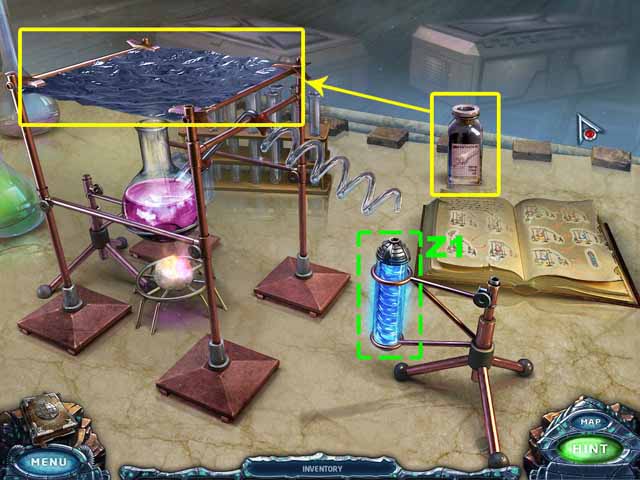
- Pour the LIQUID ASPIRIN (Y1) into the beaker.
- Place the FOIL (X1) over the beaker.
- Pour the nano-robots onto the foil.
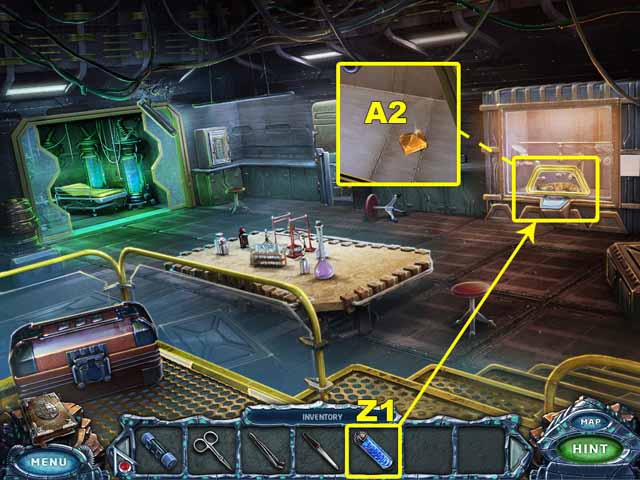
- Take the VACCINE (Z1).
- Place the VACCINE (Z1) in the slot below the medical pod to heal the cat.
- Take the GEM (A2).
- Go to the Second Floor.
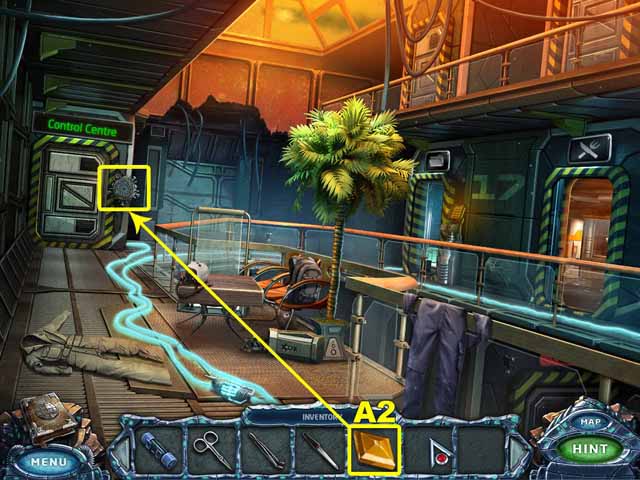
- Insert the GEM (A2) in the Control Center lock.
- Enter the Control Center.
Chapter 4: Lower Level
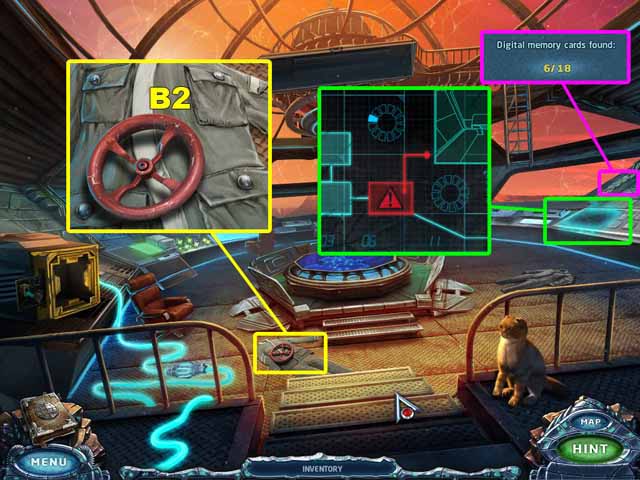
- Take the sixth Digital Memory Card.
- Take the VALVE HANDLE (B2).
- Use the right console to turn on the elevator.
- Go to the Elevator.
- Go down.
- Exit the Elevator.
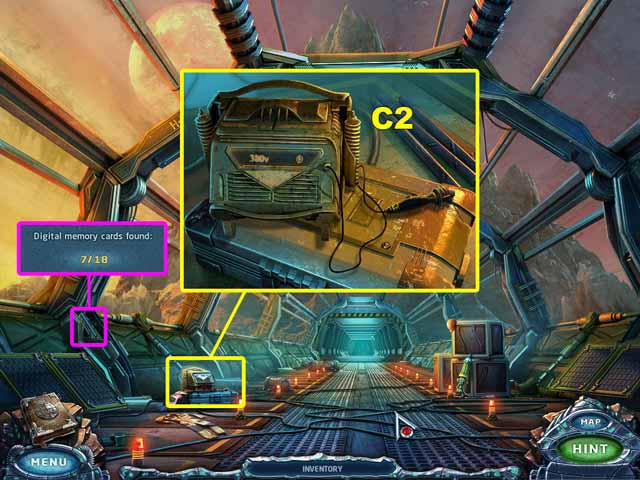
- Take the seventh Digital Memory Card.
- Take the WELDING DEVICE (C2).
- Go forward to the Excavation.
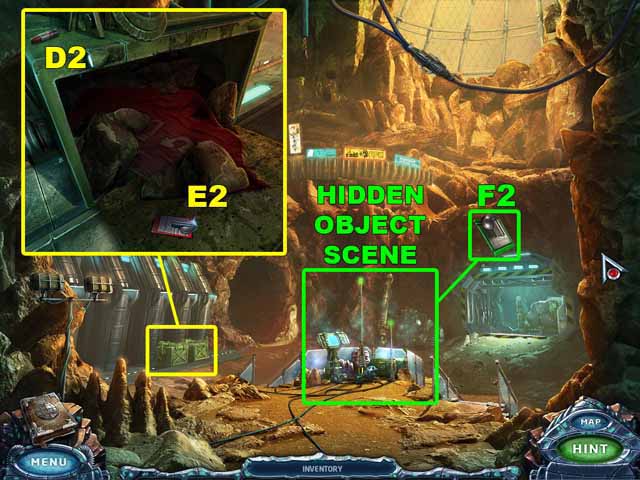
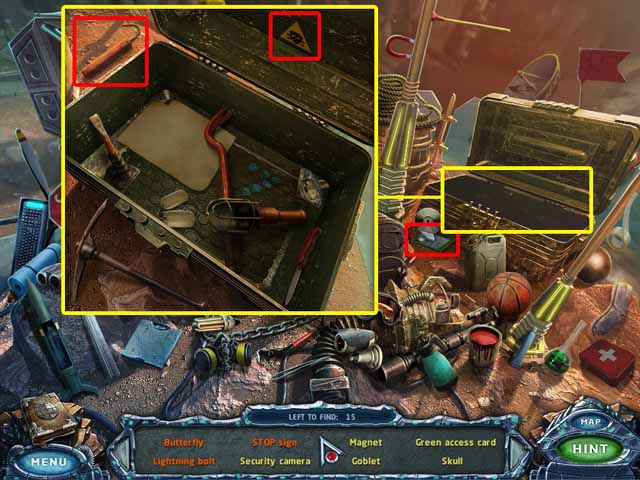
- Take the LIPSTICK (D2).
- Open the crate. Take the RED ACCESS CARD (E2). Examine the red banner.
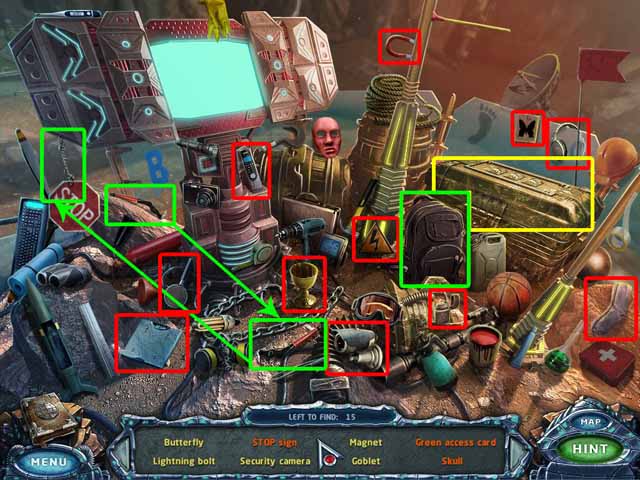
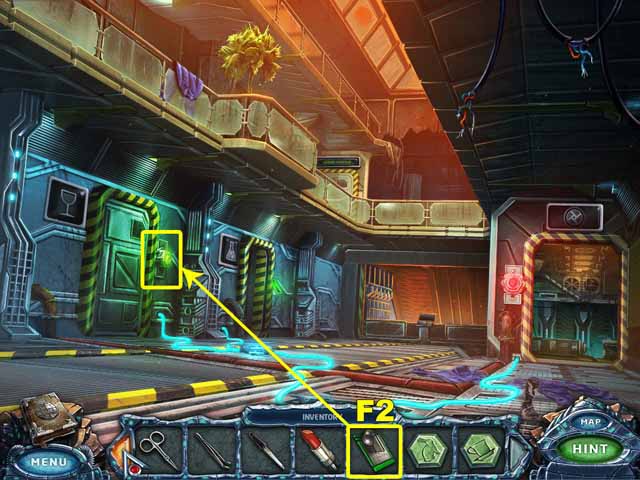
- Click on the sparkles to access the hidden object area. Collect every object listed at the bottom of the screen to acquire the GREEN ACCESS CARD (F2).
- Go right to enter the Garage.
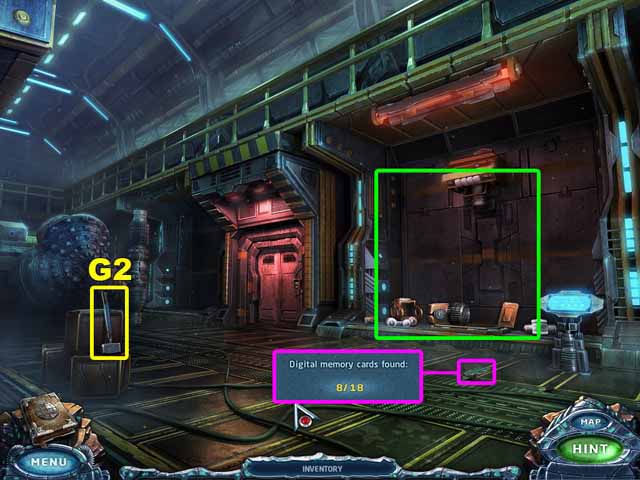
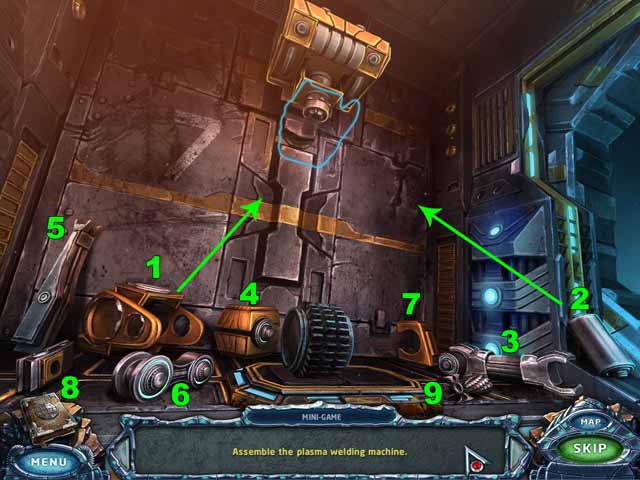
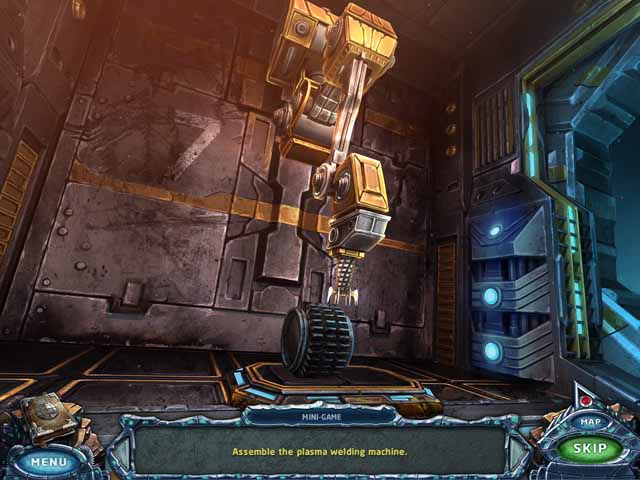
- Take the eighth Digital Memory Card.
- Take the SLEDGEHAMMER (G2).
- Assemble the Plasma Welding Machine.
- Go to the First Floor.
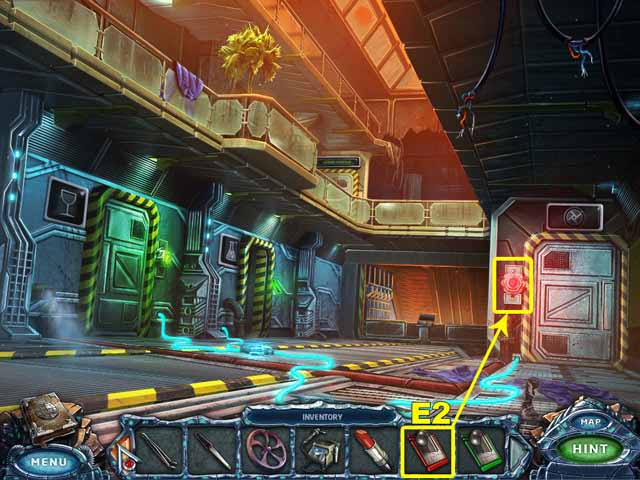
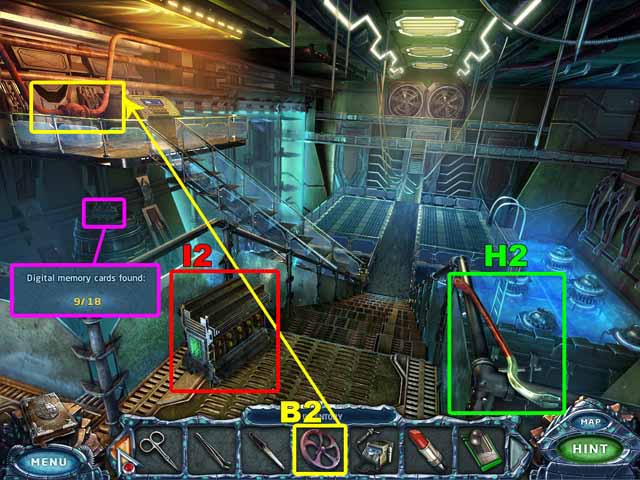
- Use the RED ACCESS CARD (E2) to open the Turbine Room.
- Enter the Turbine Room.
- Take the ninth Digital Memory Card.
- Take the CROWBAR (H2) and the BATTERY (I2).
- Place the VALVE HANDLE (B2) on the piping. Turn it to stop the flow of oxygen to the pipe on the First Floor.
- Go to the Second Floor.
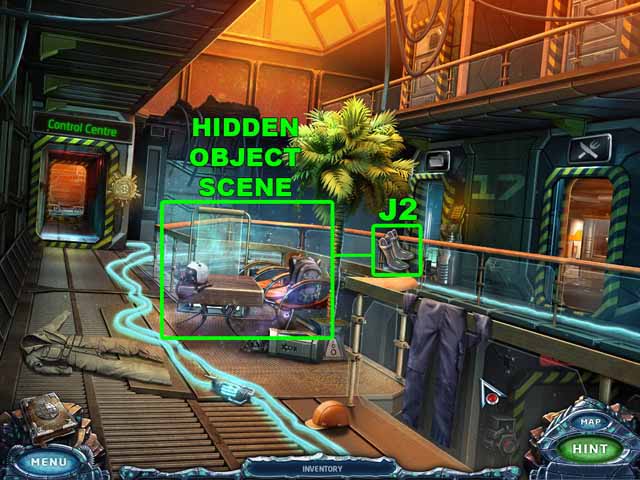
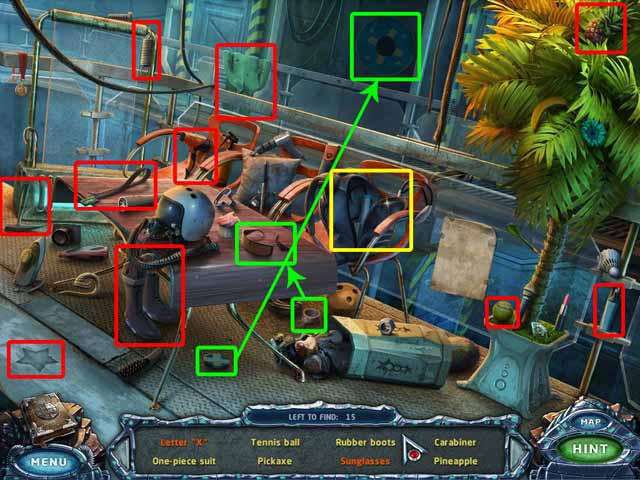
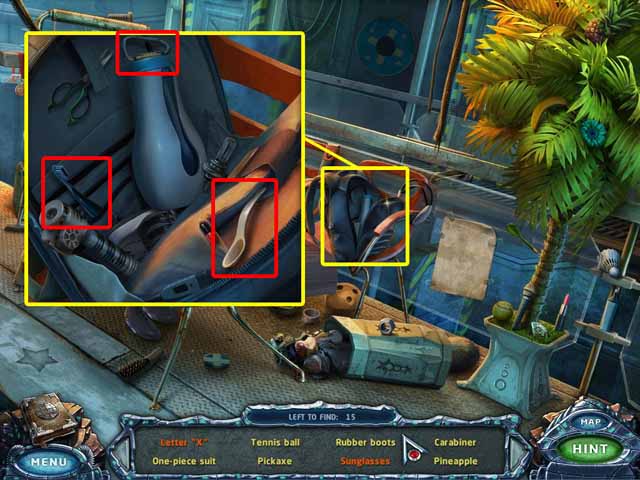
- Click on the sparkles to access the hidden object area. Collect every object listed at the bottom of the screen to acquire the RUBBER BOOTS (J2).
- Go to the Control Center.
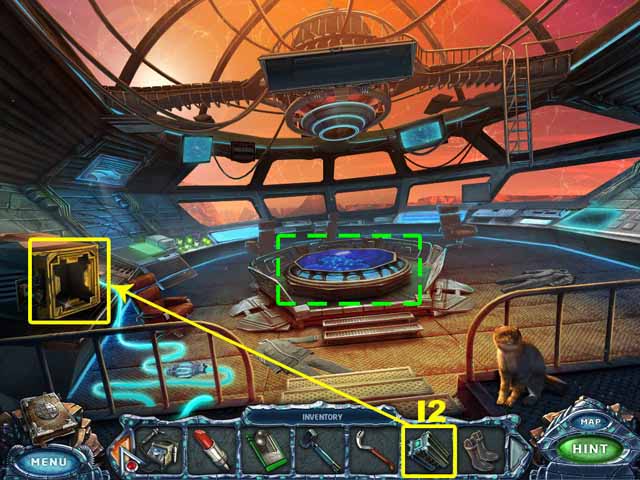
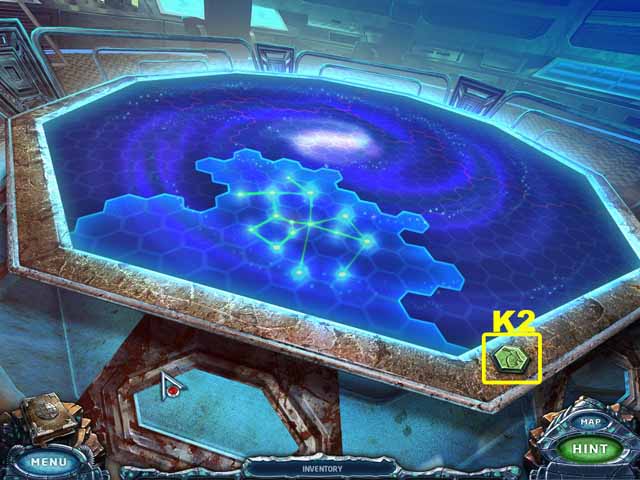
- Place the BATTERY (I2) in the slot.
- Take the TOKEN (K2).
- Go to the Turbine Room.
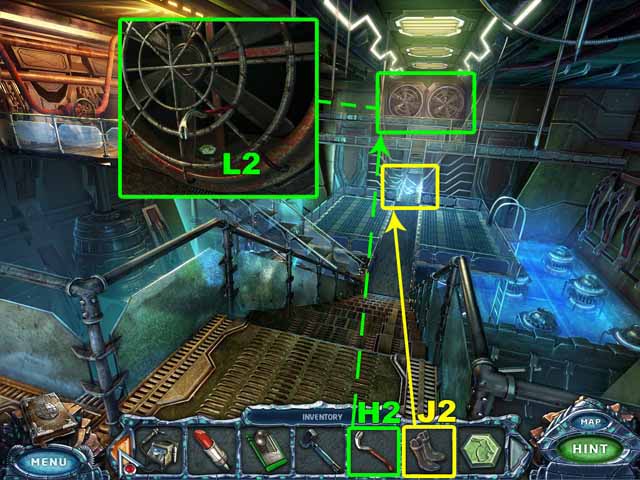
- Place the RUBBER BOOTS (J2) by the bridge.
- Shove the CROWBAR (H2) into the fan.
- Take the TOKEN (L2).
- Go to the First Floor.
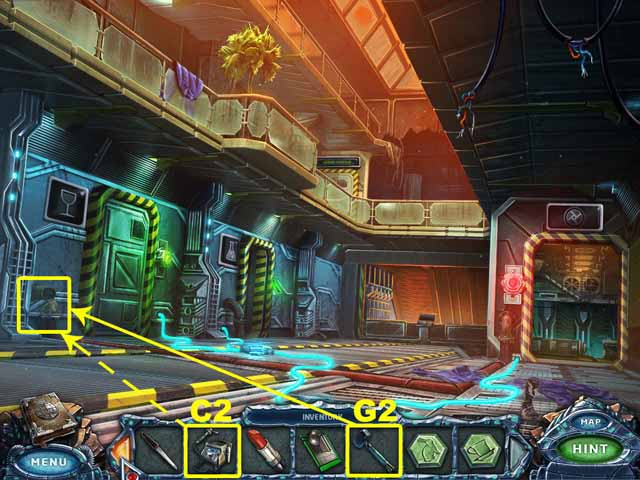
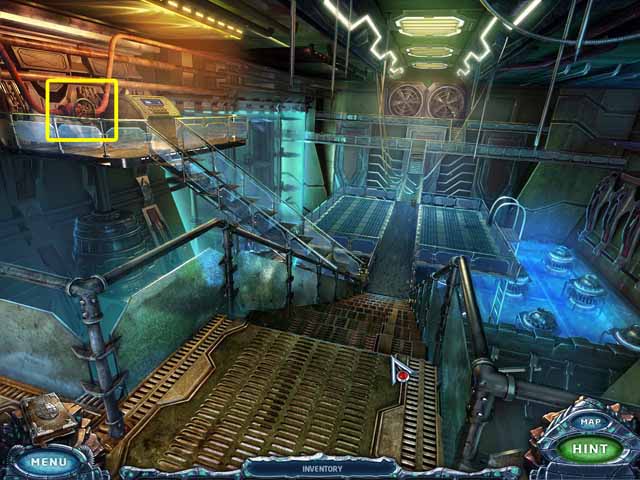
- Use the SLEDGEHAMMER (G2) to bend the pipe.
- Use the WELDING DEVICE (С2) to seal the pipe.
- Go to the Turbine Room.
- Turn the valve handle to start the flow of oxygen.
- Go to the First Floor.
- Use the GREEN CARD (F2) to open the door to the Bar.
- Enter the Bar.
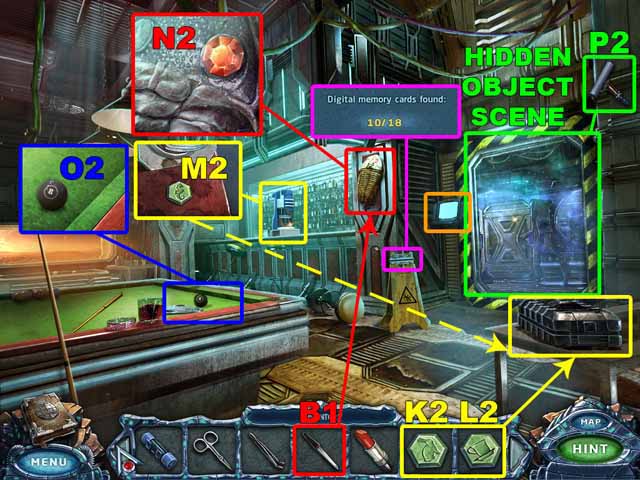
- Take the 10th Digital Memory Card.
- Take the BILLIARD BALL (O2).
- Use the NAIL FILE (B1) to get the GEM (N2).
- Take the TOKEN (M2) from the water cooler.
- Place the TOKENS (K2, L2 and M2) on the suitcase.
- Click on the control panel by the door.
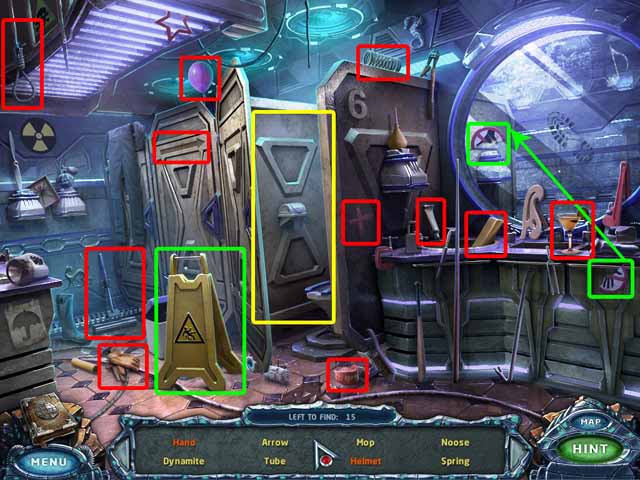
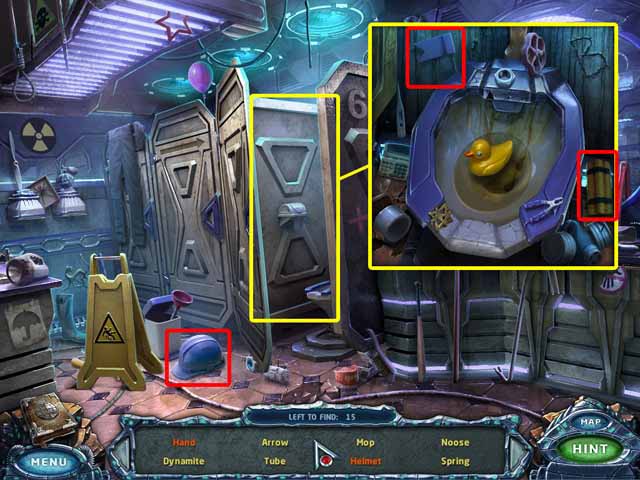
- Click on the sparkles to access the hidden object area. Collect every object listed at the bottom of the screen to acquire the MOP (P2).
- Return to the Control Center.
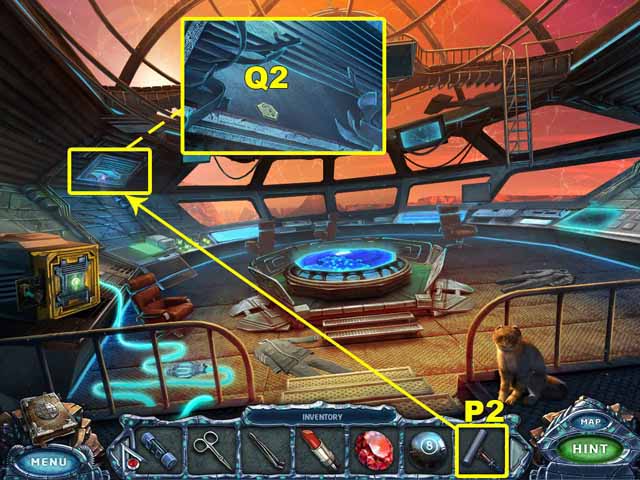
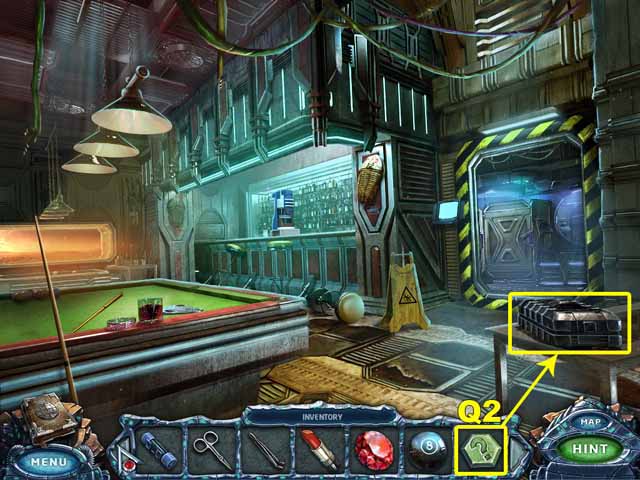
- Use the MOP (P2) to retrieve the TOKEN (Q2).
- Go to the Bar.
- Place the TOKEN (Q2) on the case.
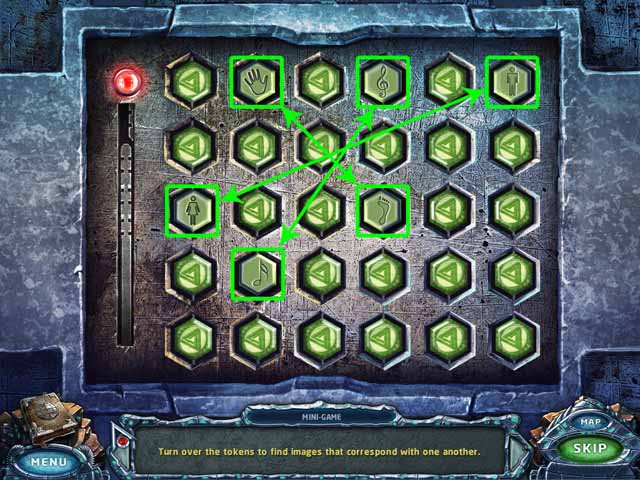
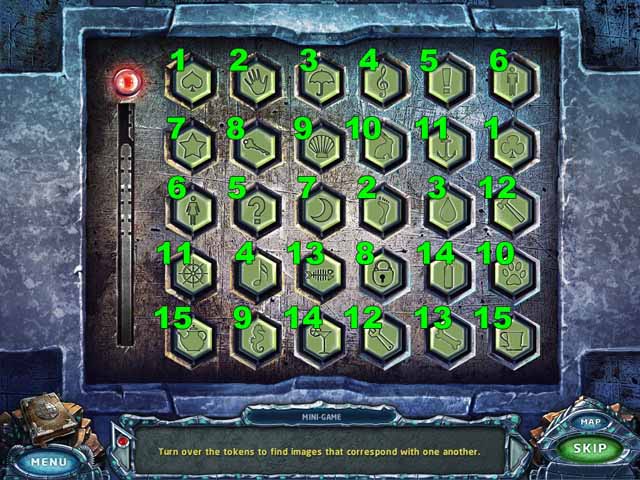
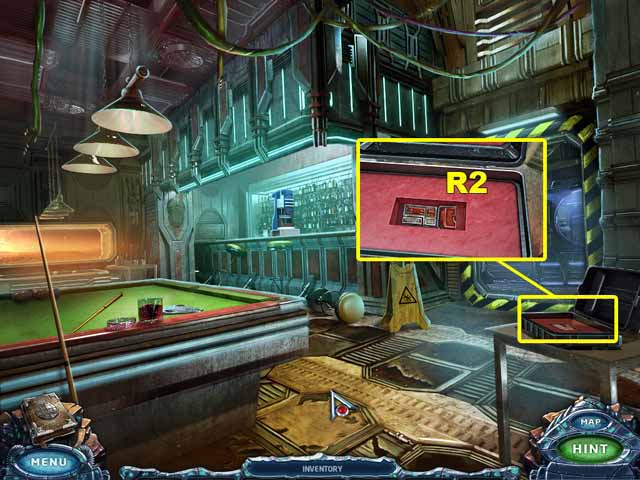
- Find the matching tokens.
- Take the ACCESS CARD (R2).
- Go to the Garage.
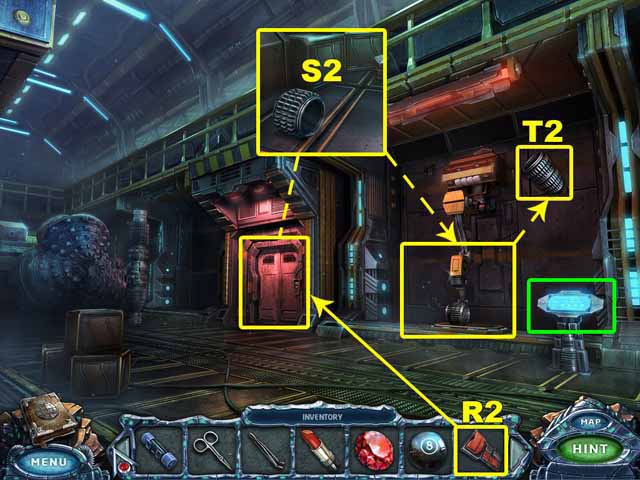
- Use the ACCESS CARD (R2) to open the closet.
- Take the DRILL BIT PART (S2).
- Place the DRILL BIT PART (S2) next to the other drill bit part.
- Turn on the Plasma Machine to weld the parts together and get the DRILL PART (T2).
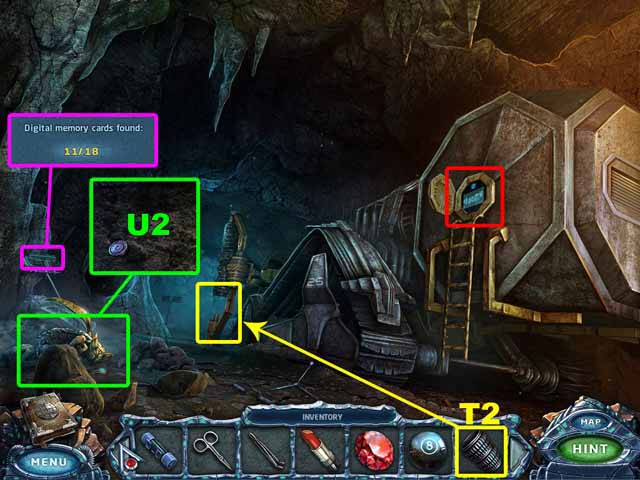
- Go to the Cave Entrance.
- Take the 11th Digital Memory Card.
- Take the BUTTON (U2).
- Place the DRILL PART (T2) on the drill.
- Click on the 'On' button to start the drill.
Chapter 5: Martian Caves
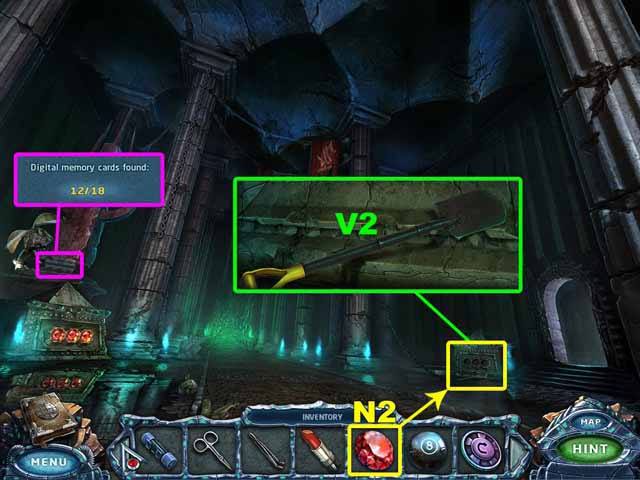
- You are in the Nave. Take the 12th Digital Memory Card.
- Insert the GEM (N2) into one of the slots on the base of the monument.
- Take the SHOVEL (V2).
- Enter the Crypt.
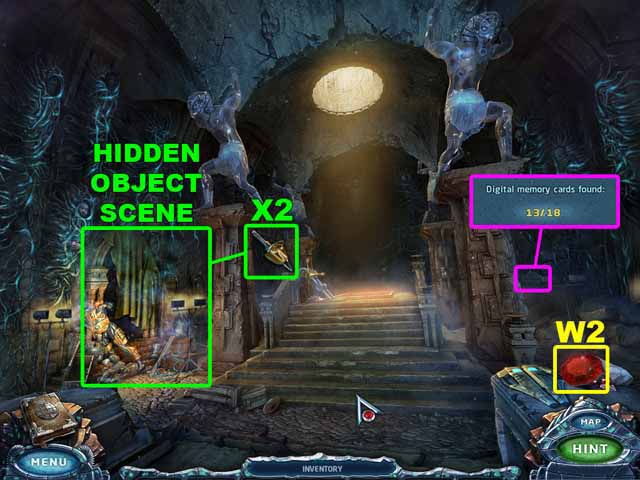
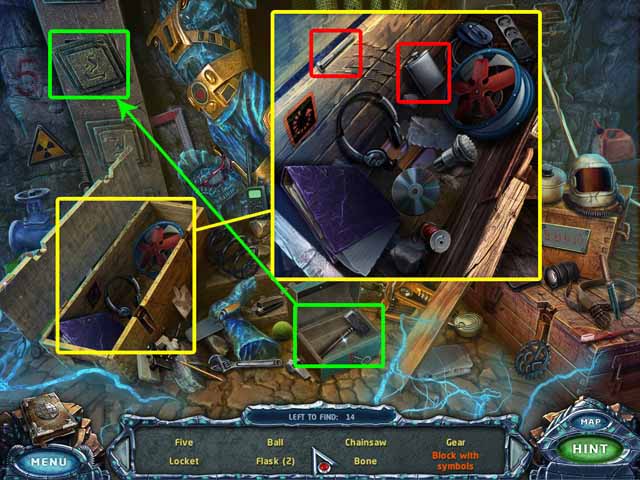
- Take the 13th Digital Memory Card.
- Take the GEM (W2).
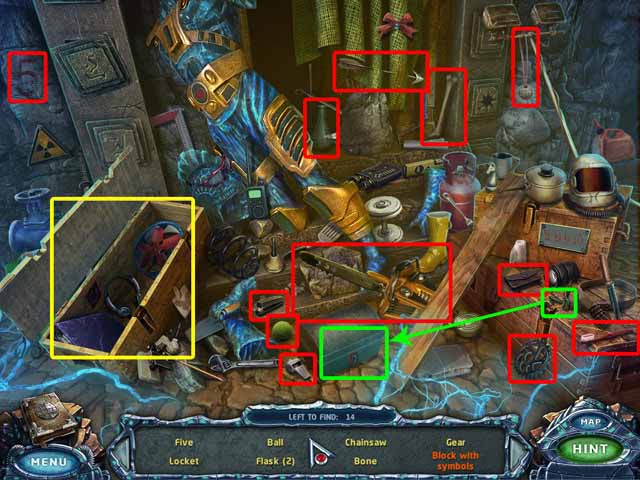
- Click on the sparkles to access the hidden object area. Collect every object listed at the bottom of the screen to acquire the CHAINSAW (X2).
- Return to the Nave.
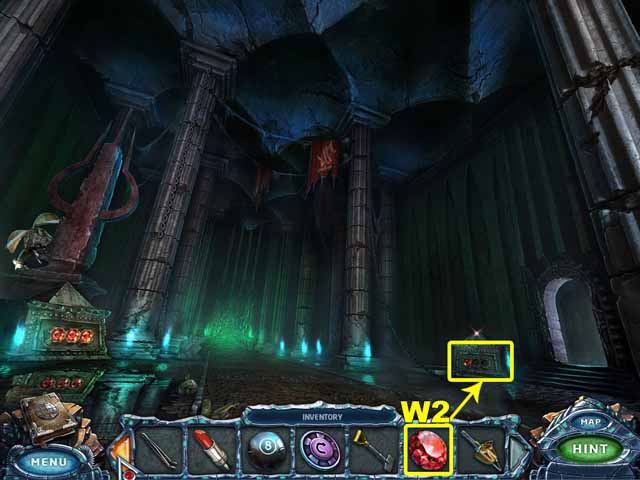
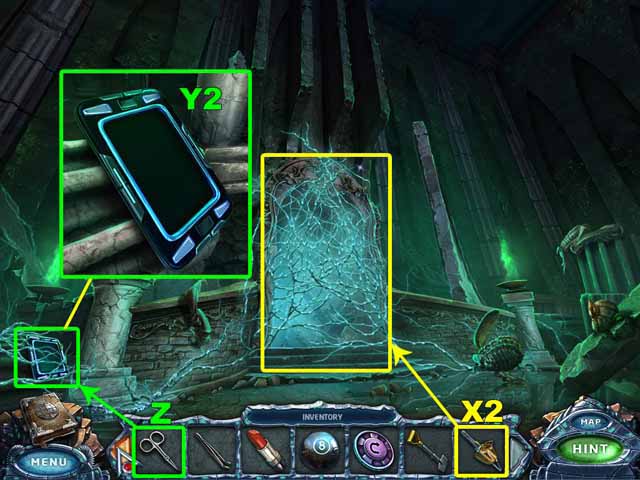
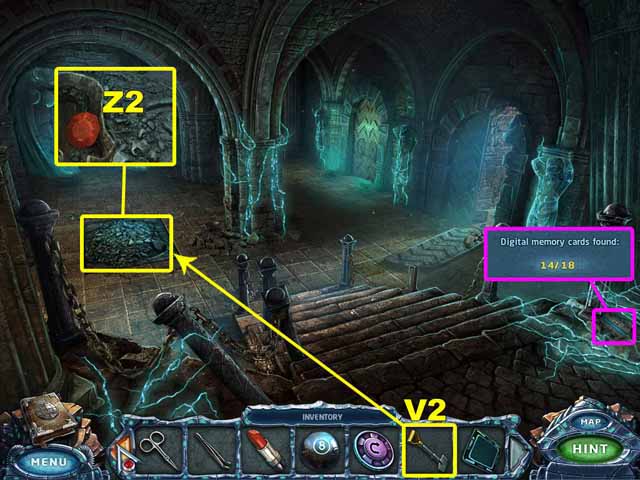
- Insert the GEM (W2) into one of the slots on the base of the monument.
- Go forward to the Nave Exit.
- Use the SCISSORS (Z) to remove the roots wrapped around the TRANSLATOR (Y2).
- Take the translator.
- Use the CHAINSAW (X2) to cut down the roots blocking the entrance to the Underground Hub.
- Enter the Underground Hub. Take the 14th Digital Memory Card.
- Use the SHOVEL (V2) to dig up the GEM (Z2).
- Go right to enter the Crevice.
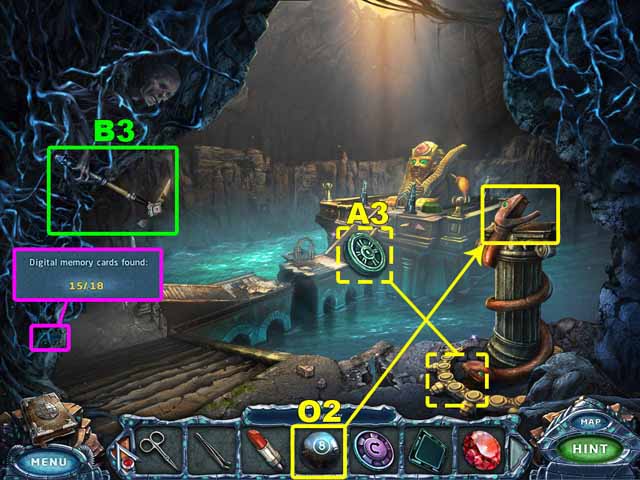
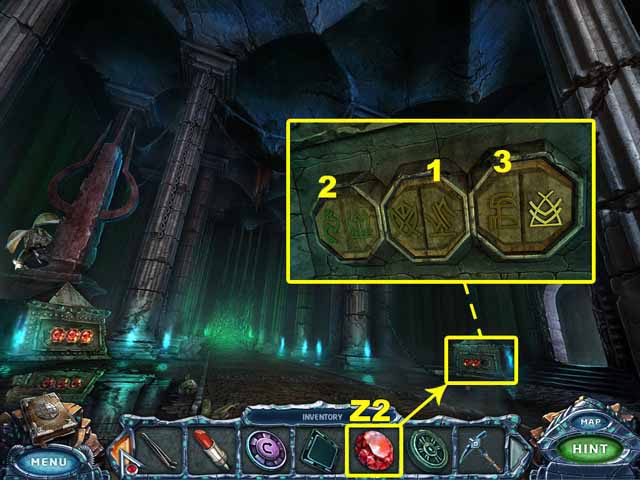
- Take the 15th Digital Memory Card.
- Drop the BILLIARD BALL (O2) in the snake's mouth to get the DISC (A3).
- Take the PICKAXE (B3).
- Go to the Nave.
- Insert the GEM (Z2) into one the last slot on the base of the monument.
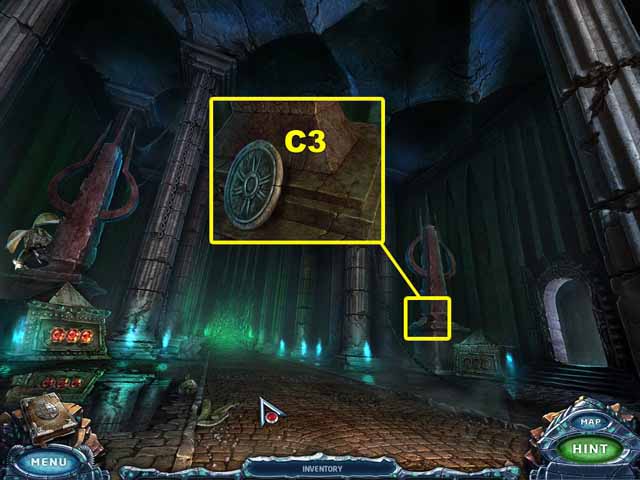
- Click on the symbols you saw on the banner in the Nave and on the banner in the crate in the Excavation.
- Take the DISK (C3).
- Go to the Underground Hub.
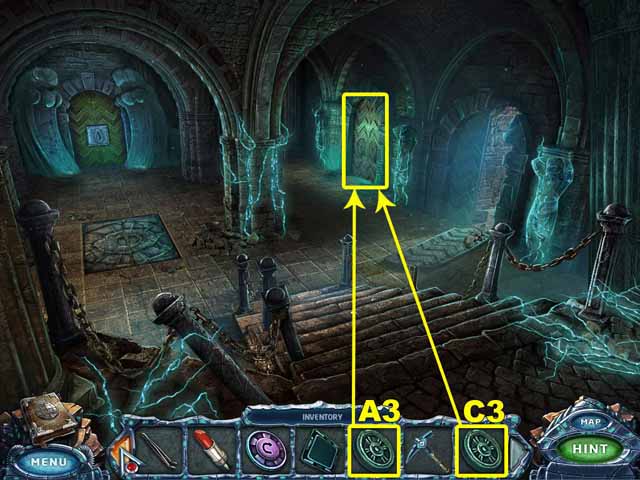
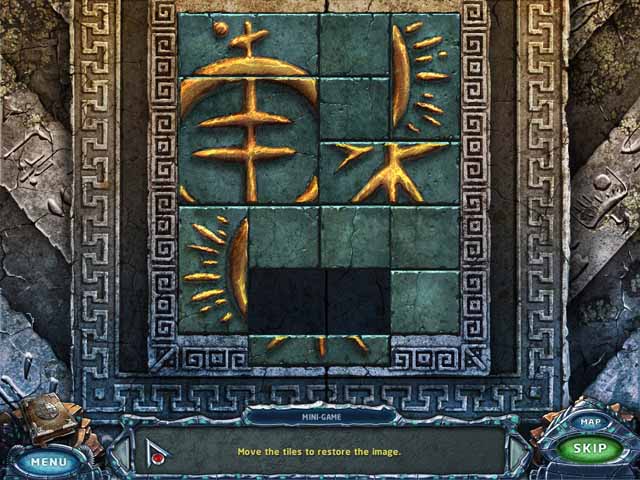
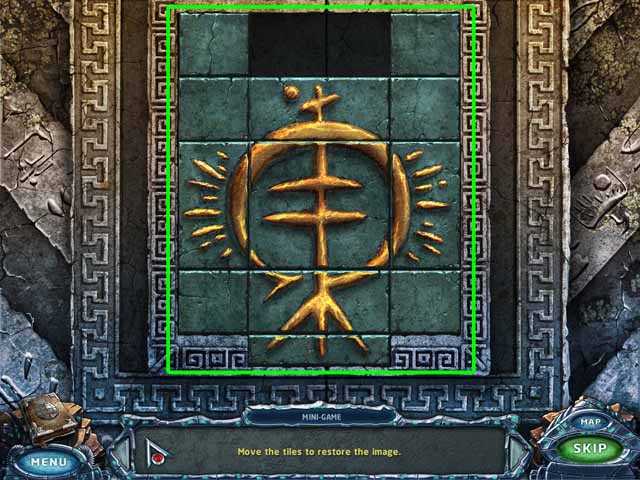
- Insert the DISKS (A3 and C3) on the door.
- Move the tiles to restore the image.
- Enter the Temple.
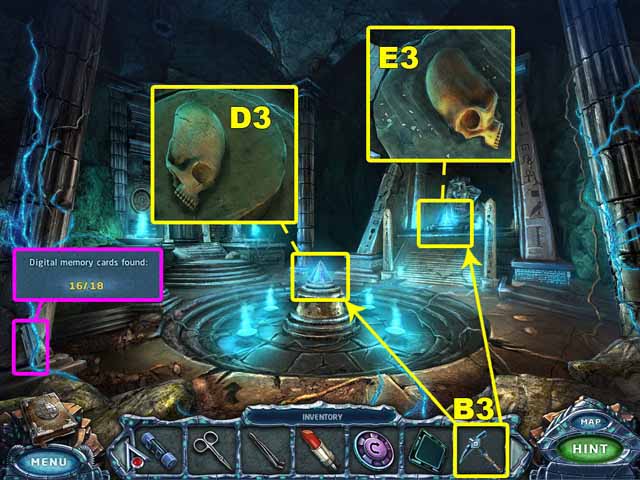
- Take the 16th Digital Memory Card.
- Use the PICKAXE (B3) to break the pyramids.
- Take the HALVES OF A SKULL (D3 and E3).
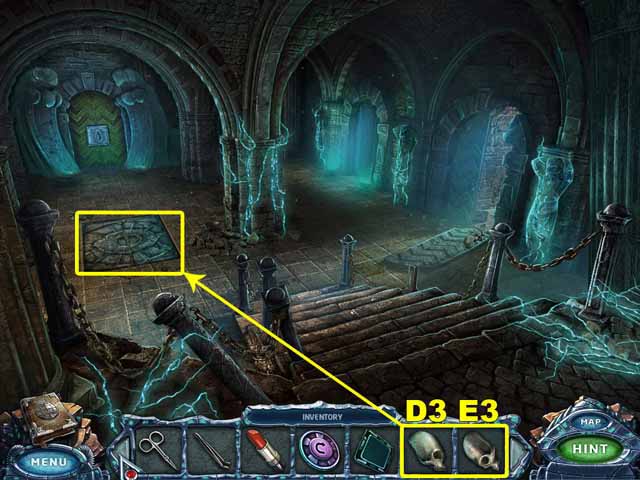
- Go to the Underground Hub.
- Place the PARTS OF A SKULL (D3 and E3) in the hatch.
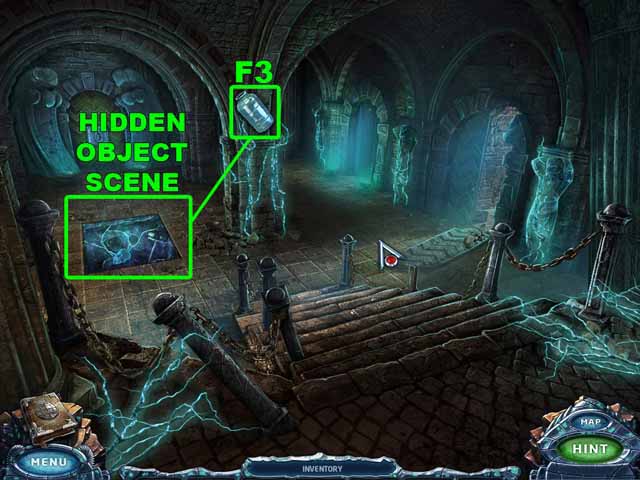
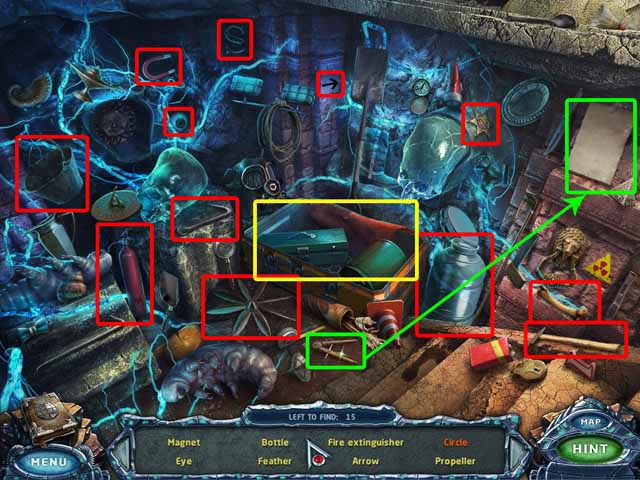
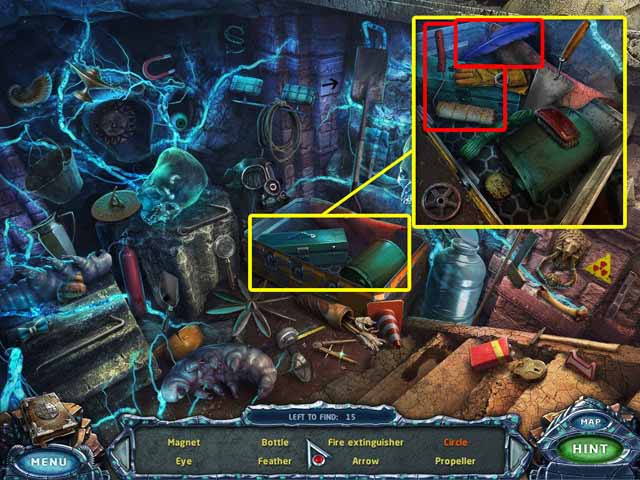
- Click on the sparkles to access the hidden object area. Collect every object listed at the bottom of the screen to acquire the BOTTLE (F3).
- Go to the Turbine Room.
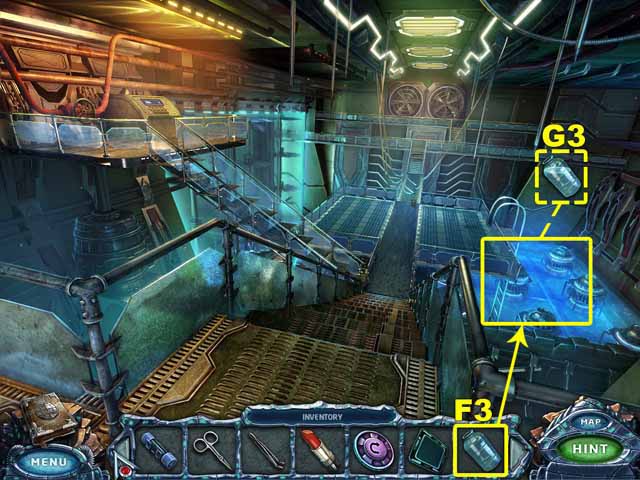
- Fill the BOTTLE (F3) with water. Take the BOTTLE OF WATER (G3).
- Go to the Bar.
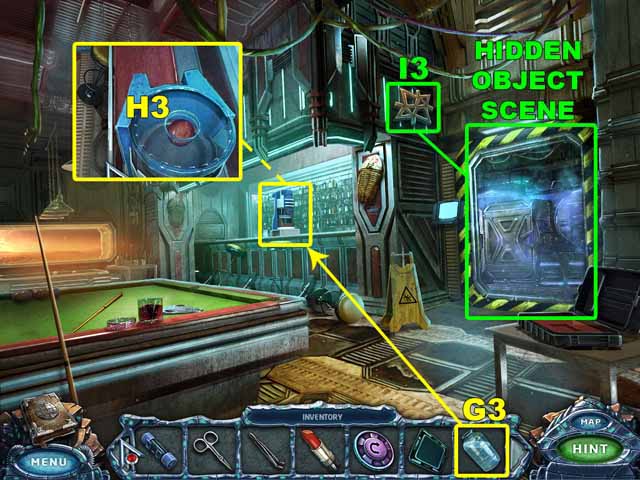
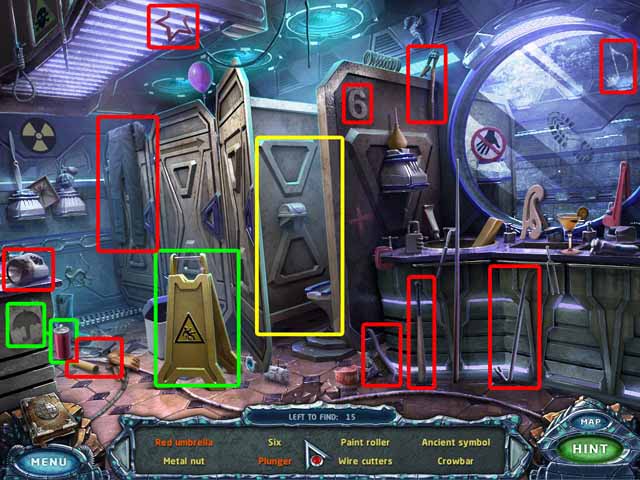
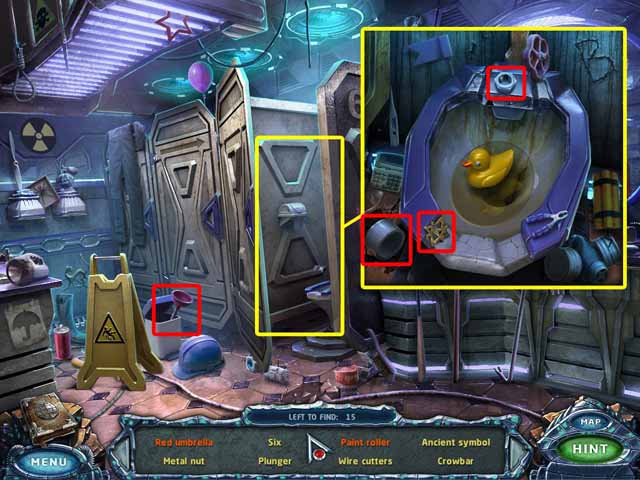
- Pour the BOTTLE OF WATER (G3) into the cooler. Take the MARS FIGURINE (H3).
- Click on the sparkles to access the hidden object area. Collect every object listed at the bottom of the screen to acquire the SYMBOL (I3).
- Go to the Temple.
Chapter 6: Two Keys
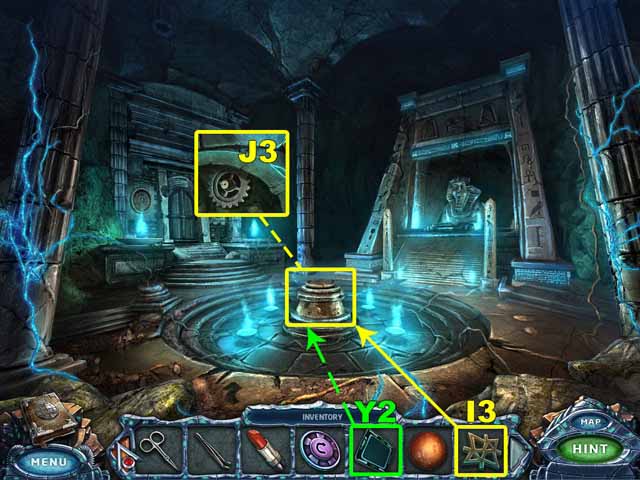
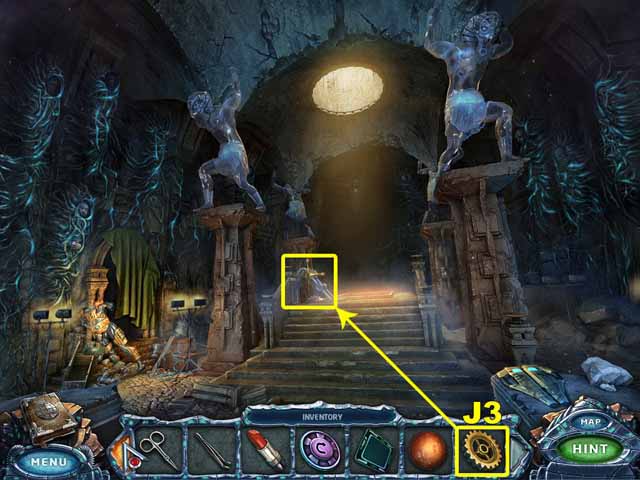
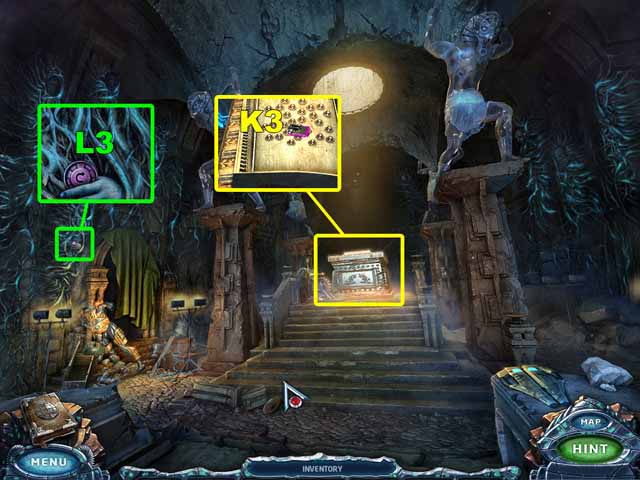
- Place the SYMBOL (I3) on the pedestal in the center of the room.
- Take the GEAR (J3).
- Use the TRANSLATOR (Y2) to read the symbols on the tablet.
- Go to the Crypt.
- Place the GEAR (J3) on the mechanism.
- Click on the handle to raise the coffin.
- Take the VIOLET ACCESS CARD (K3).
- Take the BUTTON (L3).
- Go forward to the Excavation.
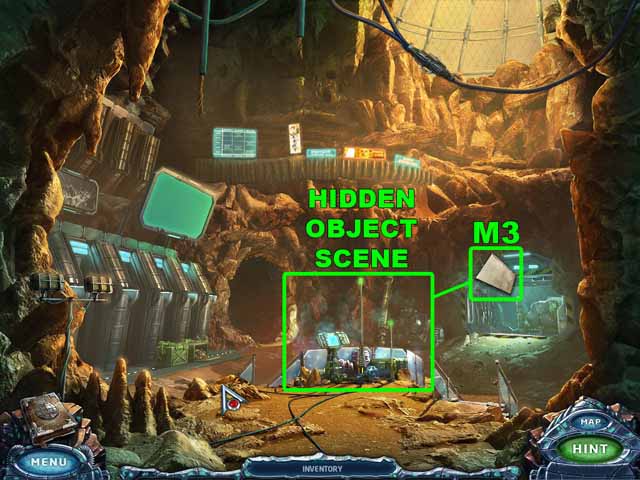
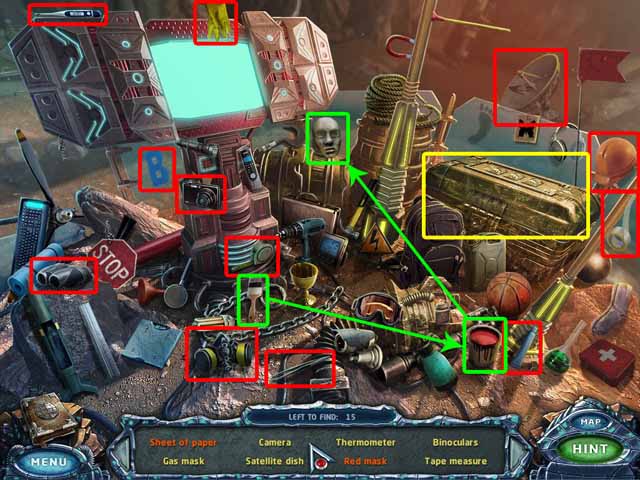
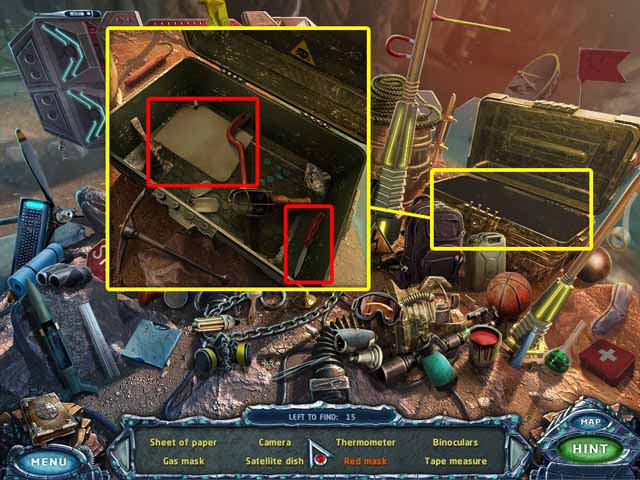
- Click on the sparkles to access the hidden object area. Collect every object listed at the bottom of the screen to acquire the SHEET OF PAPER (M3).
- Go to the Control Center.
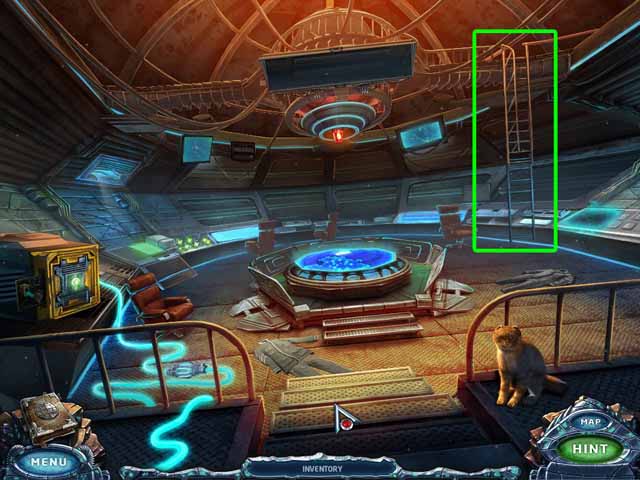
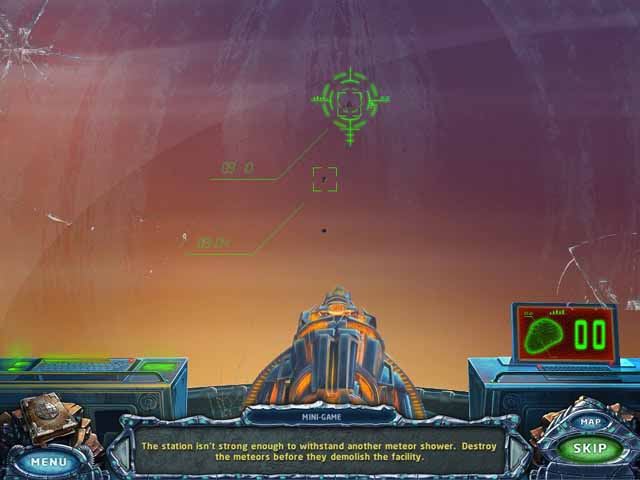
- Click on the top of the ladder. Win the meteorite mini-game.
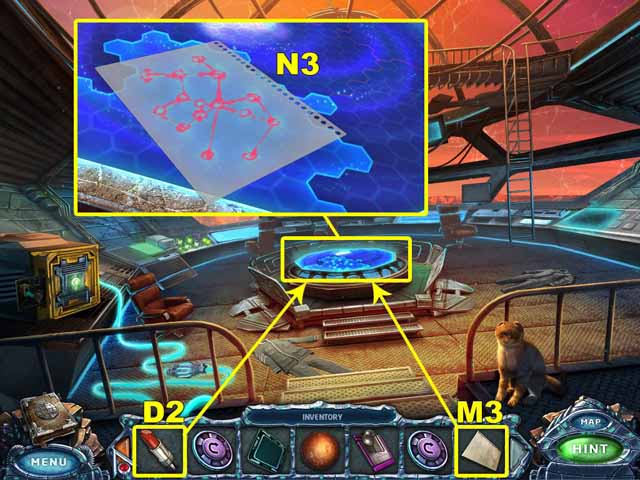
- Place the SHEET OF PAPER (M3) on the star map. Use the LIPSTICK (D2) to trace the constellation.
- Take the CONSTELLATION (N3).
- Go to the Crypt.
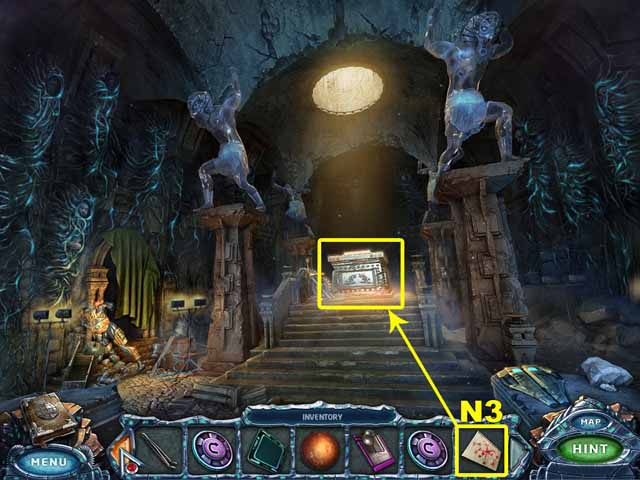
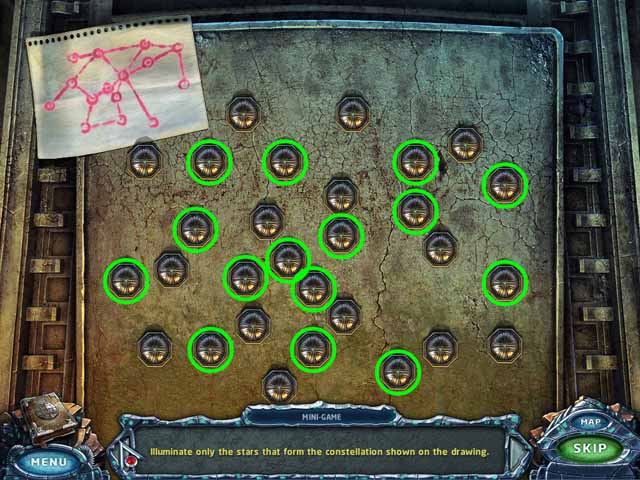
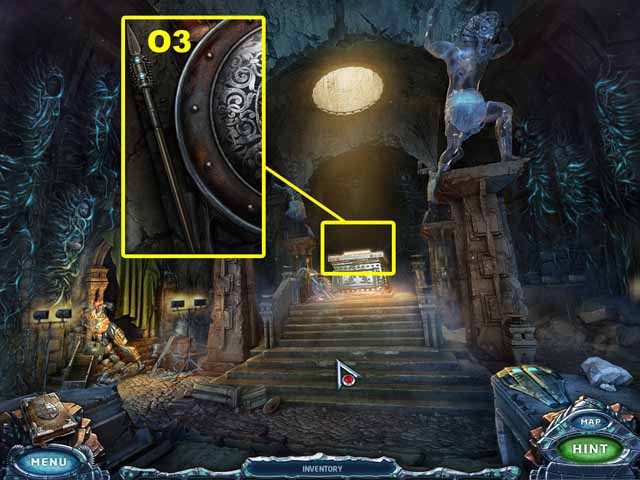
- Place the CONSTELLATION (N3) on the coffin.
- Re-create the constellation.
- Take the SPEAR (O3).
- Go to the Dock.
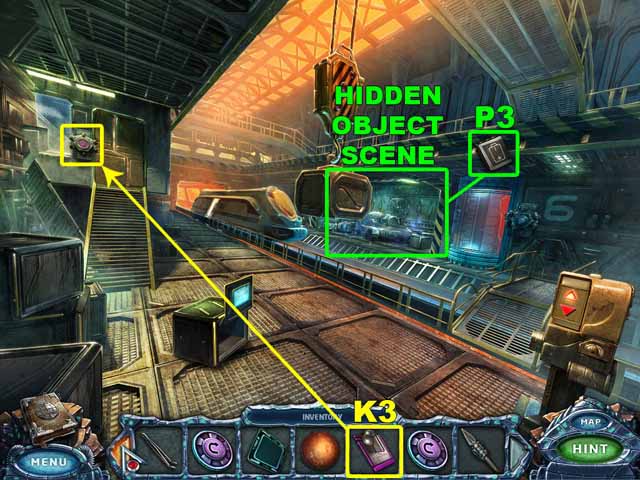
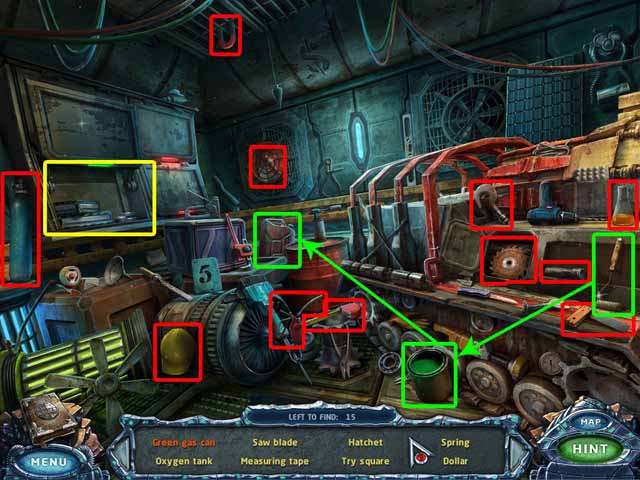
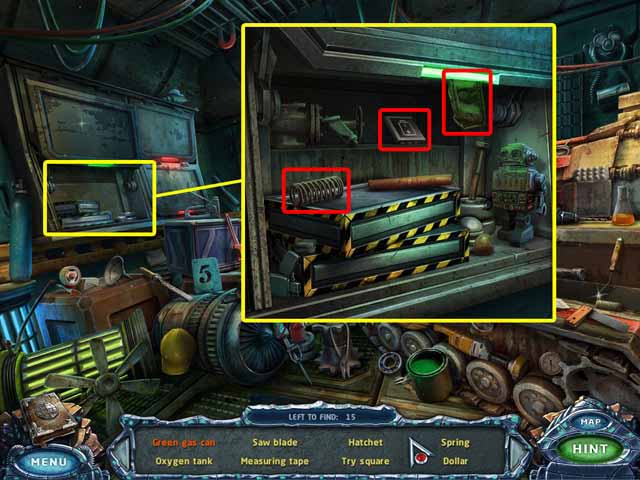
- Click on the sparkles to access the hidden object area. Collect every object listed at the bottom of the screen to acquire the BATTERY (P3).
- Use the VIOLET ACCESS CARD (K3) to unlock the door to the Control Office.
- Enter the Control Office.
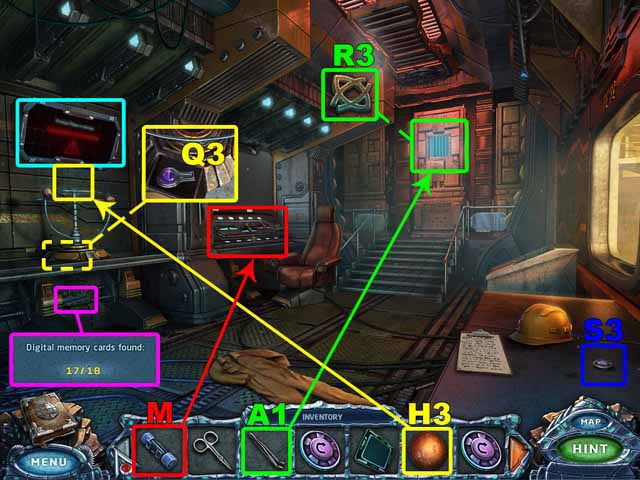
- Take the 17th Digital Memory Card.
- Insert the FUSE (M) in the control panel.
- Place the MARS FIGURINE (H3) where it belongs to open the cache.
- Take the FLASK FIGURINE (Q3).
- Use the TWEEZERS (A1) to take the SYMBOL (R3).
- Take the BUTTON (S3).
- Go to the Kitchen.
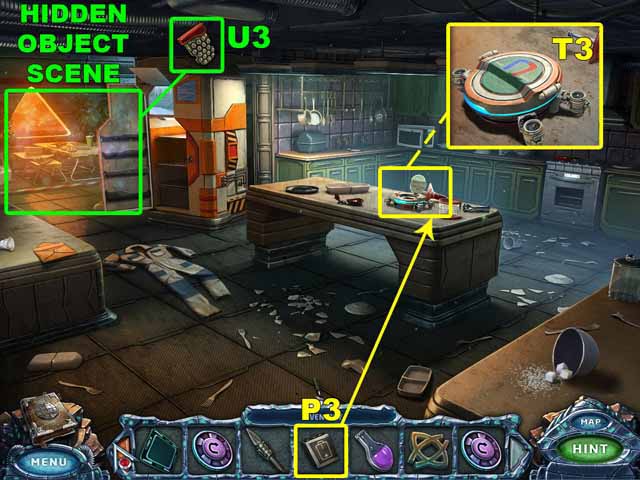
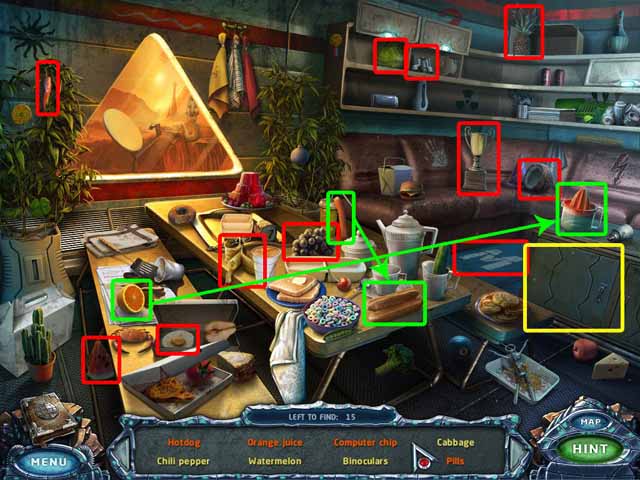
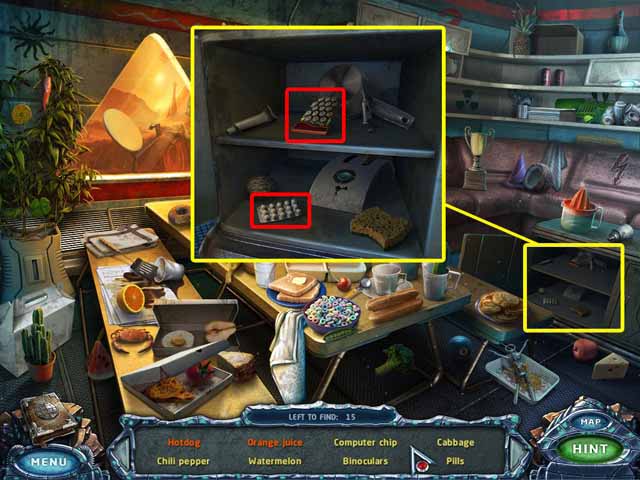
- Open the RADIO-CONTROLLED MAGNET (T3). Insert the BATTERY (P3).
- Close the magnet. Take it.
- Click on the sparkles to access the hidden object area. Collect every object listed at the bottom of the screen to acquire the COMPUTER CHIP (U3).
- Go to the Laboratory.
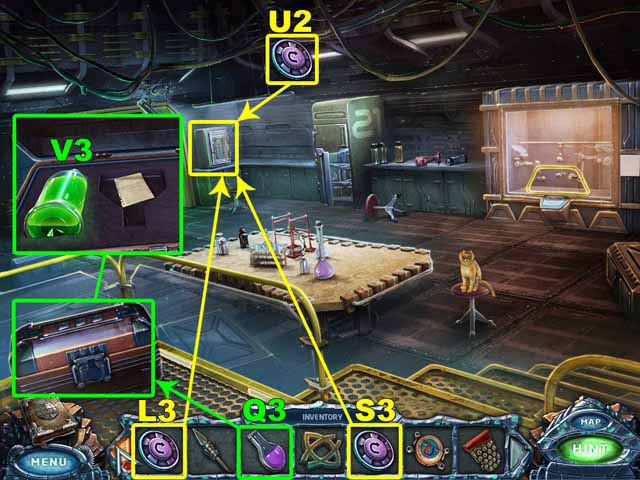
- Use the FLASK FIGURINE (Q3) to open the case.
- Take the ACID (V3).
- Place the BUTTONS (L3, S3 and U2) on the safe.
- Go to the Surface of Mars.
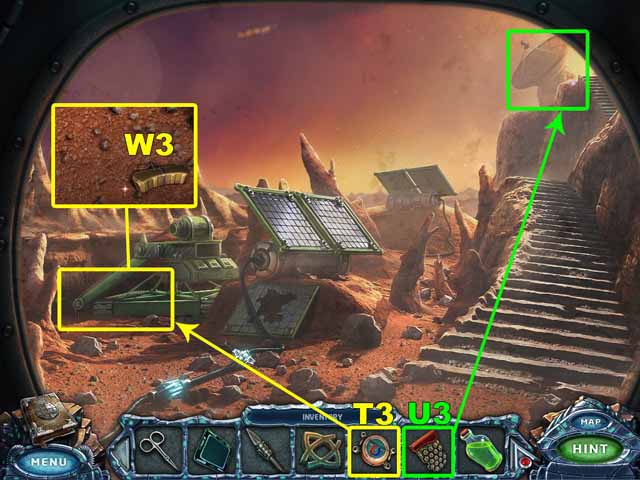
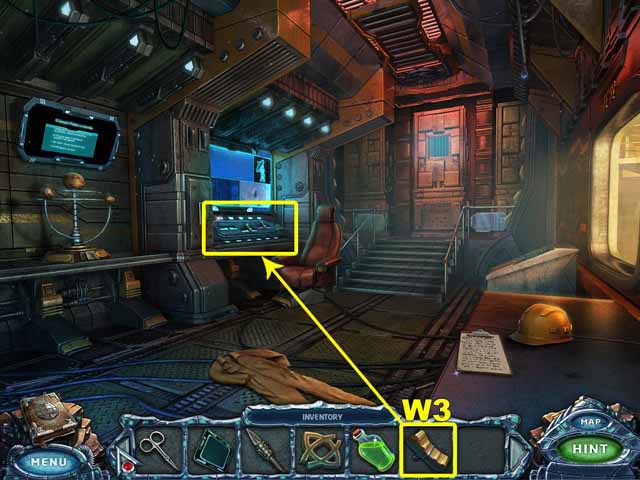
- Use the RADIO-CONTROLLED MAGNET (T3) to get the CONTROL KNOB (W3).
- Insert the COMPUTER CHIP (U3) into the antenna.
- Go to the Control Office.
- Place the CONTROL KNOB (W3) where it belongs.
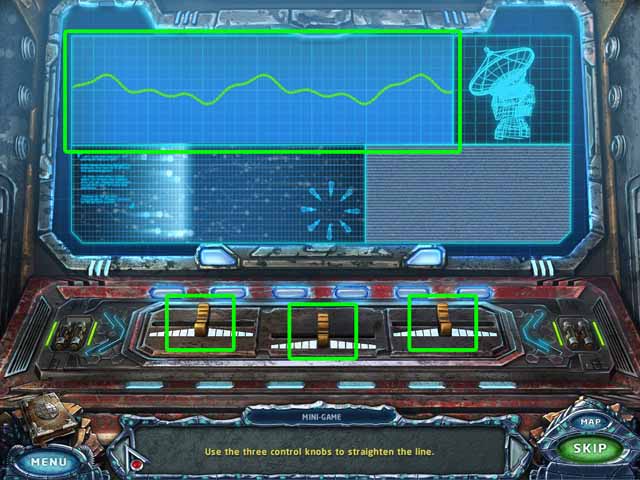
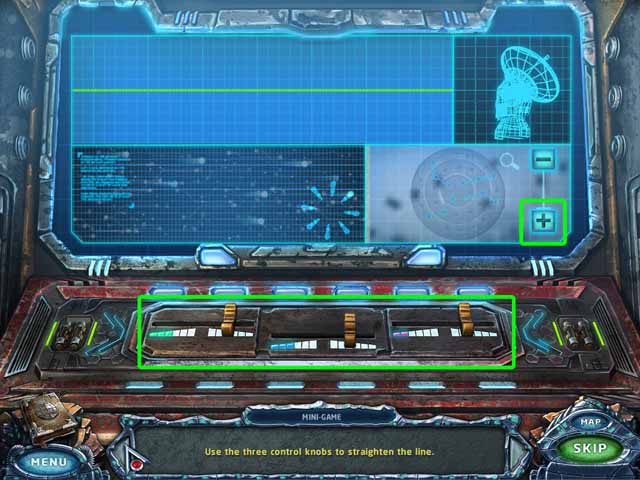
- Use the three control knobs to straighten the line.
- Click the '+' button to zoom in on the image on the surface of the planet until you see the scheme on the forehead.
- Go to the Temple.
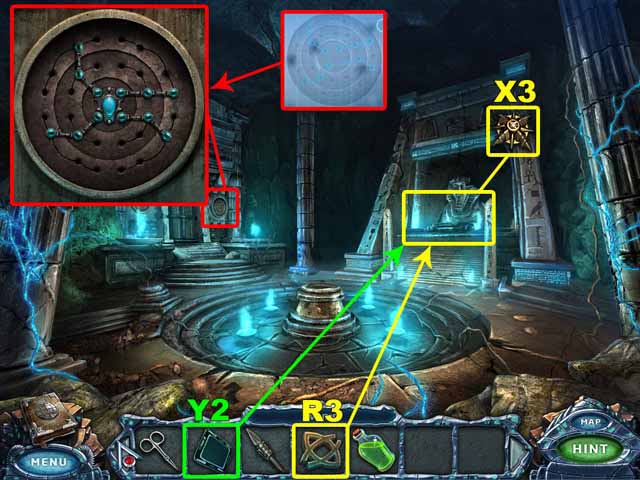
- To the right of the door, re-create the symbol you saw on the surface of the planet.
- Place the SYMBOL (R3) on the pedestal by the sphinx.
- Take the STAR (X3).
- Use the TRANSLATOR (Y2) to read the symbols on the tablet.
- Go to the Crypt.
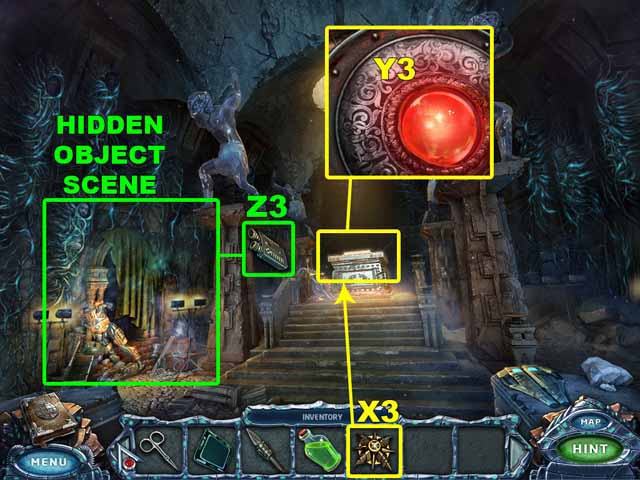
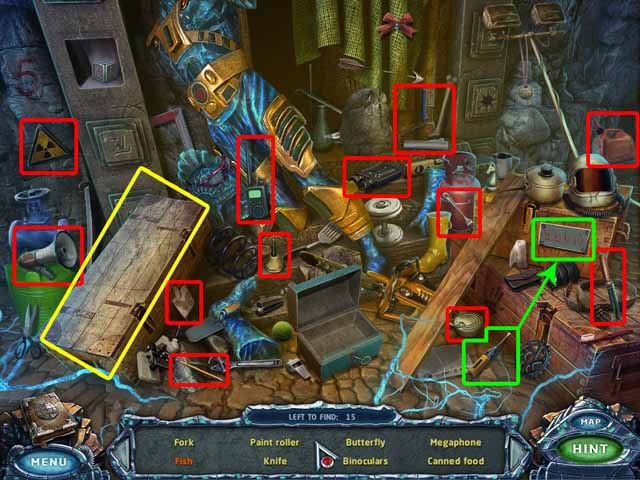
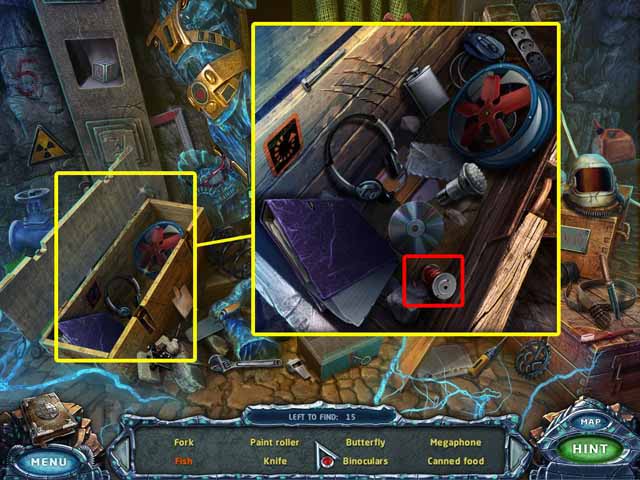
- Place the STAR (X3) on the shield in the coffin to open the cache. Take the RED SPHERE (Y3).
- Click on the sparkles to access the hidden object area. Collect every object listed at the bottom of the screen to acquire the BINOCULARS (Z3).
- Go to the Crevice.
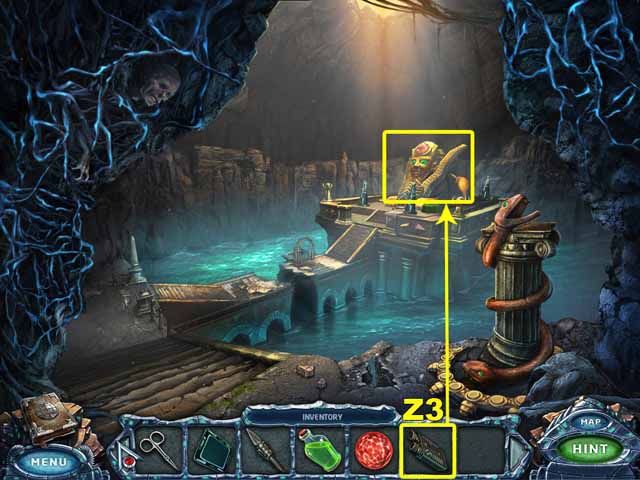
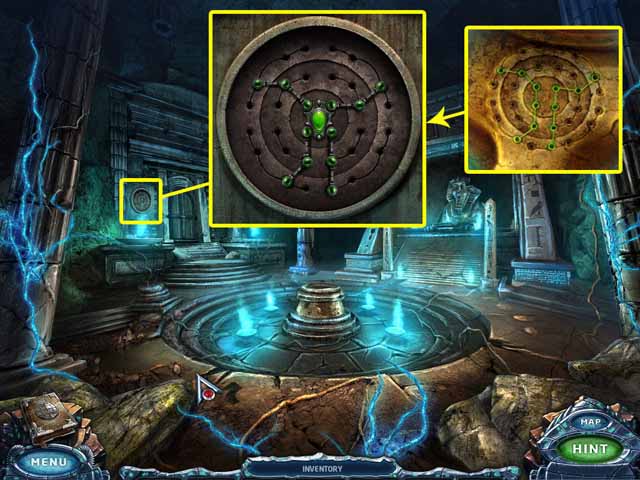
- Use the BINOCULARS (Z3) to look at the sphinx. Remember the symbol on its forehead.
- Go to the Temple.
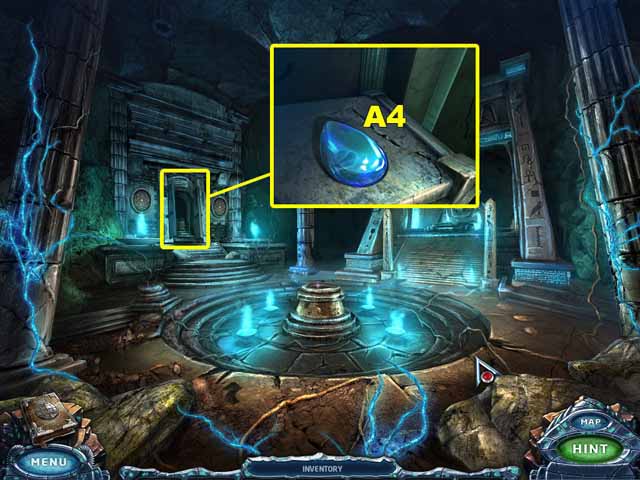
- To the left of the door, re-create the symbol you saw on the head of the sphinx.
- Take the DROP (A4).
- Go to the Underground Hub.
Chapter 7: Astral World
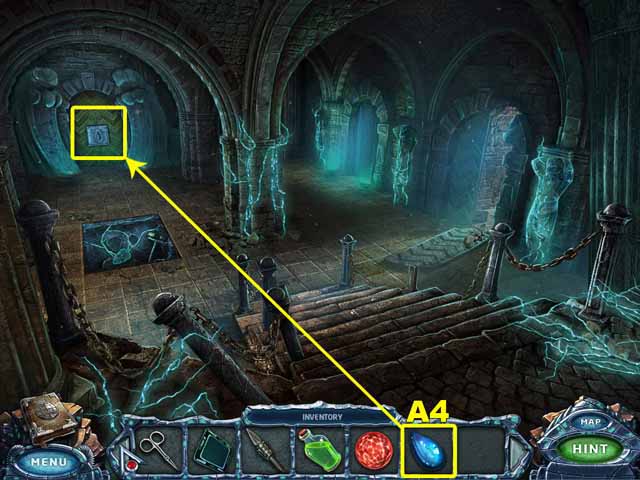
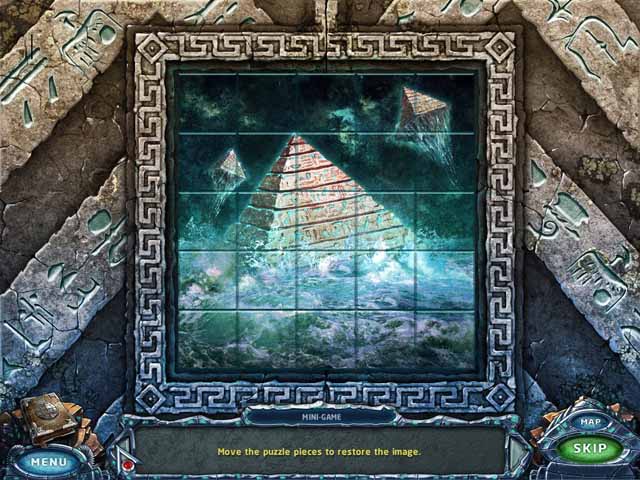
- Place the DROP (A4) on the door.
- Assemble the image on the door.
- Go to the Lake.
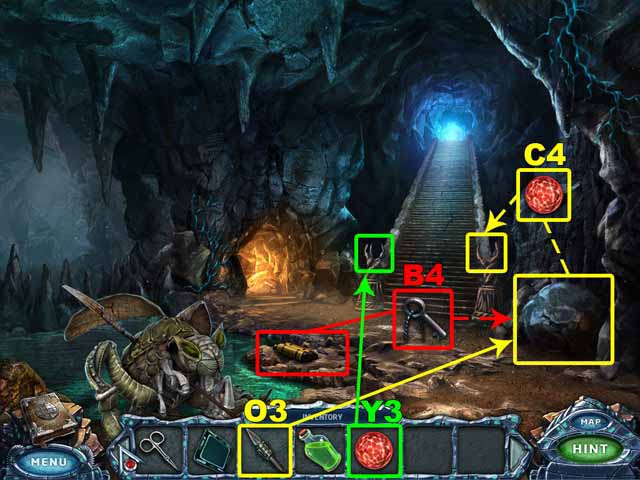
- Find the KEY (B4).
- Use the SPEAR (O3) to move the stone.
- Use the KEY (B4) to open the chest.
- Take the RED SPHERE (C4).
- Put the RED SPHERES (Y3 and C4) on the posts.
- Go to the Burrows.
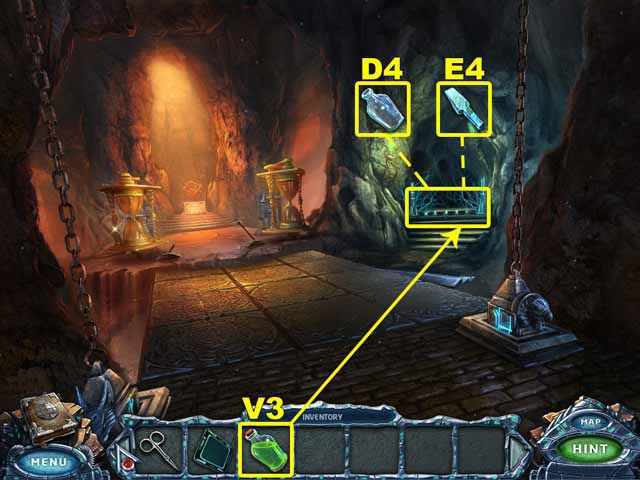
- Pour the ACID (V3) on the hatch.
- Take the EMPTY BOTTLE (D4).
- Take the SUPERSOLID DRILL BIT (E4).
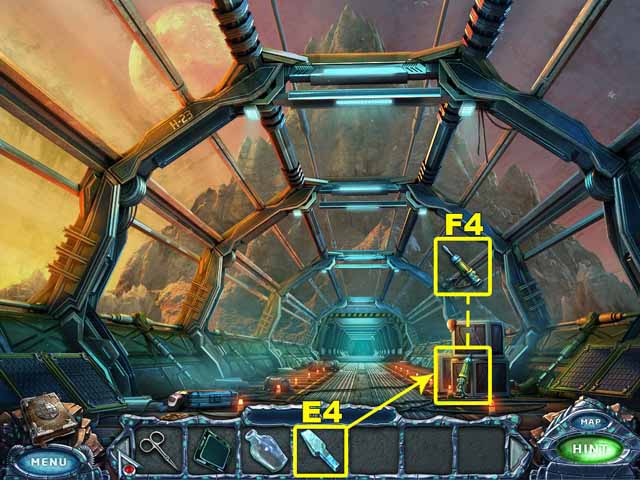
- Go to the Elevator Exit.
- Place the SUPERSOLID DRILL BIT (E4) on the broken jackhammer to get the JACKHAMMER (F4).
- Return to the Lake.
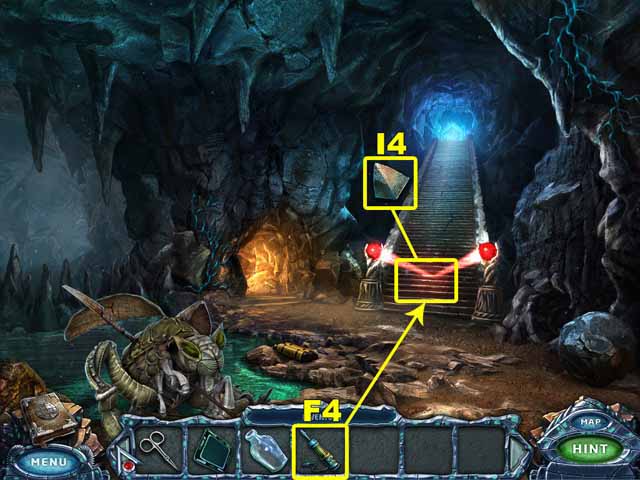
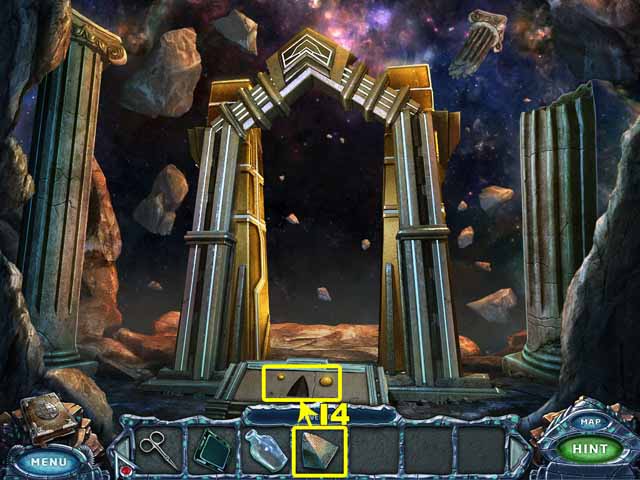
- Use the JACKHAMMER (F4) to break up the stairs.
- Take the PYRAMID (I4).
- Go to the Portal.
- Place the PYRAMID (I4) at the base of the portal.
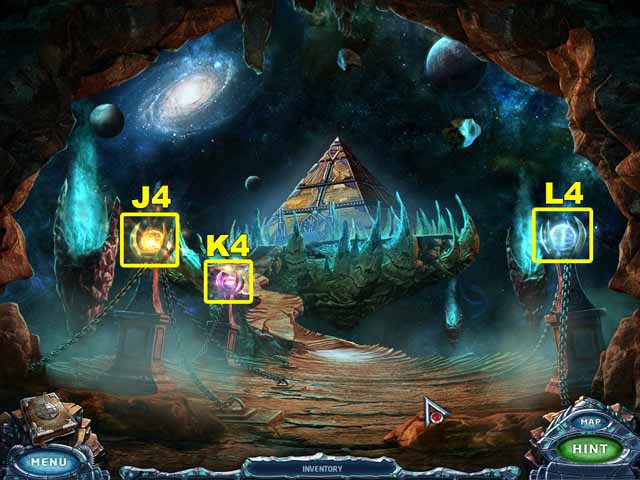
- Step into the Astral World.
- Take the planets (J4, K4 and L4).
- Go to the Pyramid Entrance.
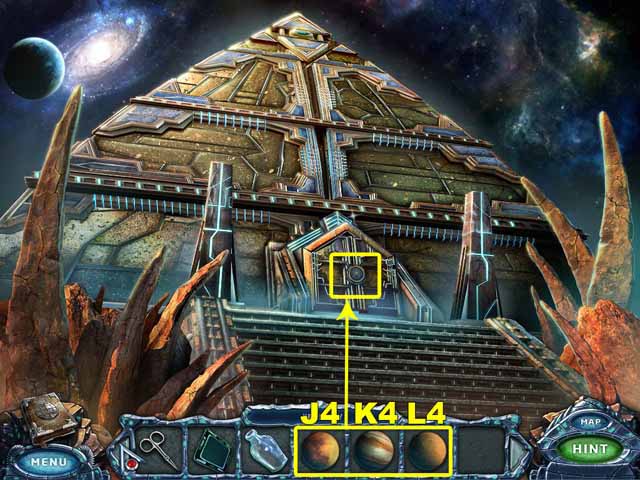
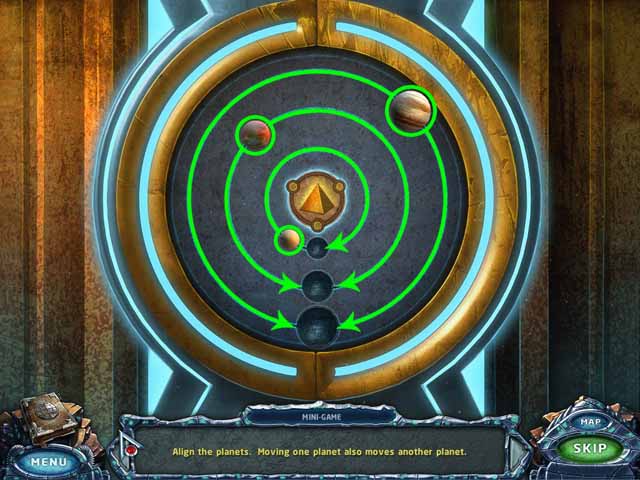
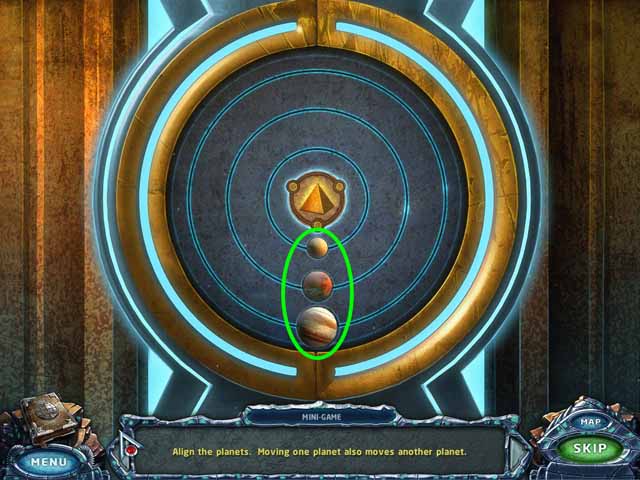
- Insert the PLANETS (J4, K4 and L4) in the door.
- Align the planets.
- Enter the Pyramid.
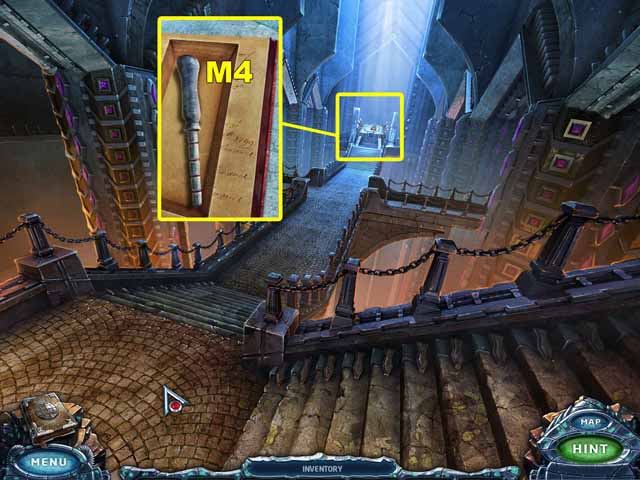
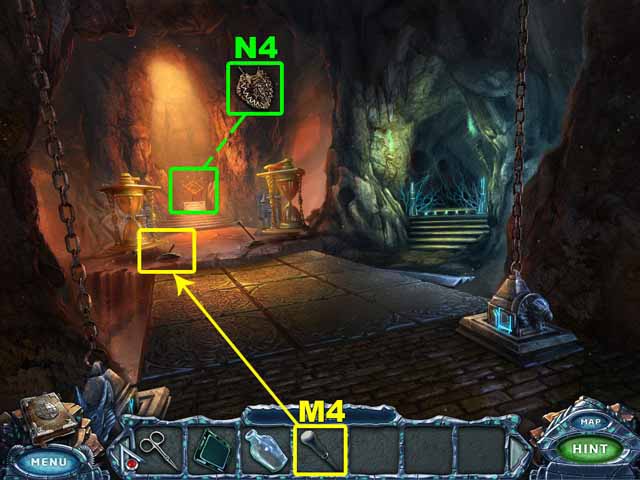
- Click on the cover of the book.
- Page through the book until you reach the end. Take the LEVER (M4).
- Go to the Burrows.
- Place the LEVER (M4) where it belongs.
Chapter 8: Lair of the Bugs
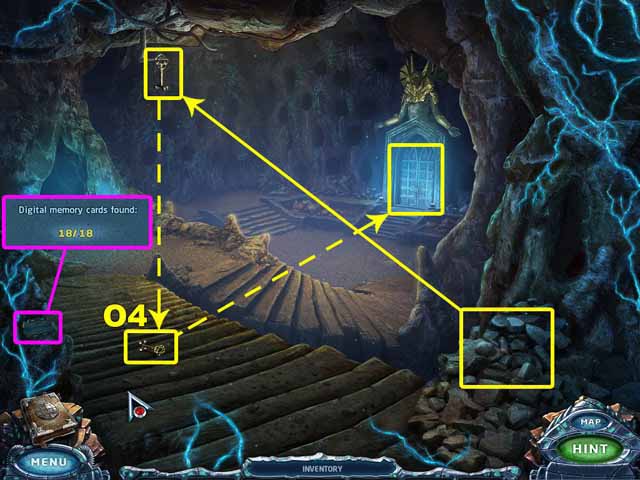
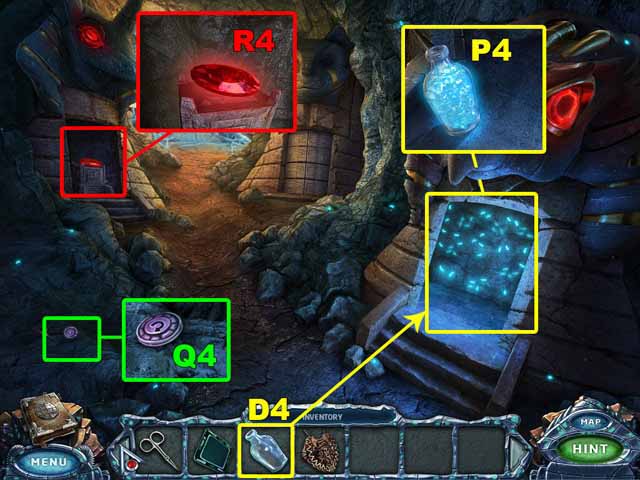
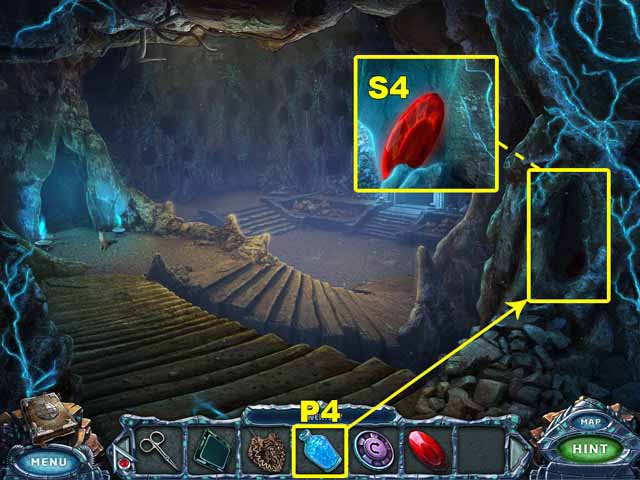
- Go left to enter the Heart of the Hive.
- Take the 18th Digital Memory Card.
- Use the stones to hit the KEY (O4).
- Open the door with the KEY (O4).
- Enter the Tunnel.
- Take the BUTTON (Q4).
- Take the GEM (R4).
- Place the EMPTY BOTTLE (D4) near the larvae.
- Click on the larvae to get the BOTTLE OF LARVAE (P4).
- Take the BOTTLE OF LARVAE (P4).
- Go to the Heart of the Hive.
- Use the BOTTLE OF LARVAE (P4) to illuminate the dark hole. Take the GEM (S4).
- Return to the Tunnel.
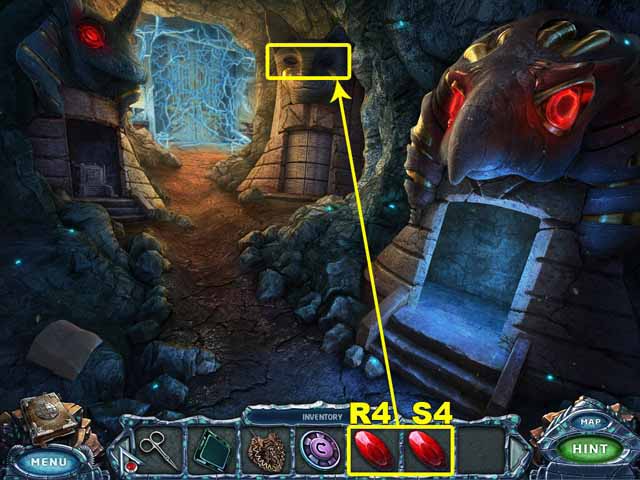
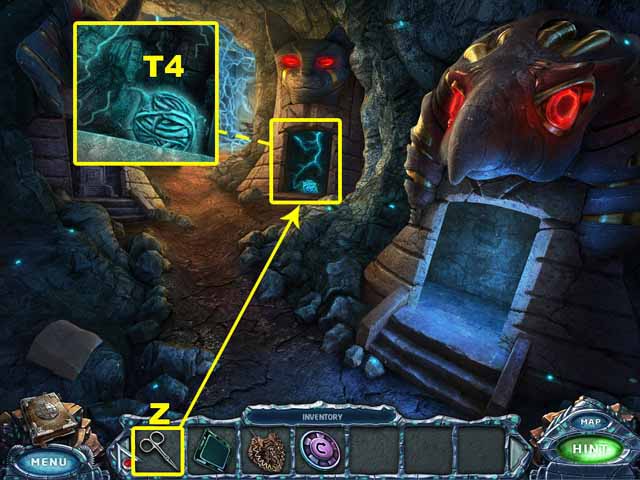
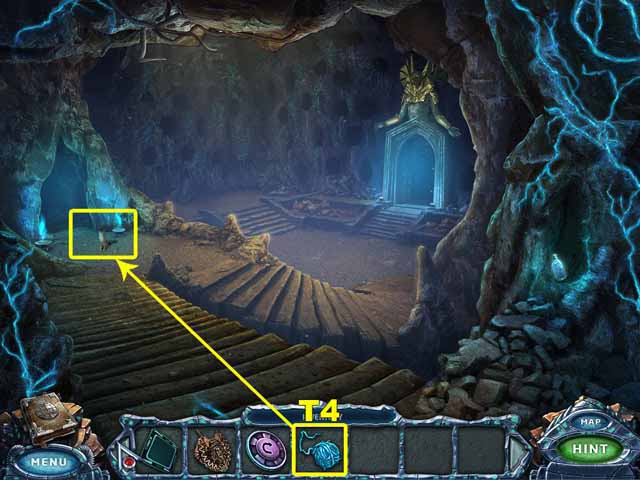
- Insert the GEMS (R4 and S4) into the eyes of the stone figure.
- Use the SCISSORS (Z) to cut the insect root.
- Take the ball of INSECT ROOT (T4).
- Go to the Heart of the Hive.
- Place the INSECT ROOT (T4) on the cat.
- Follow the cat into the tunnel.
- Go to the Laboratory.
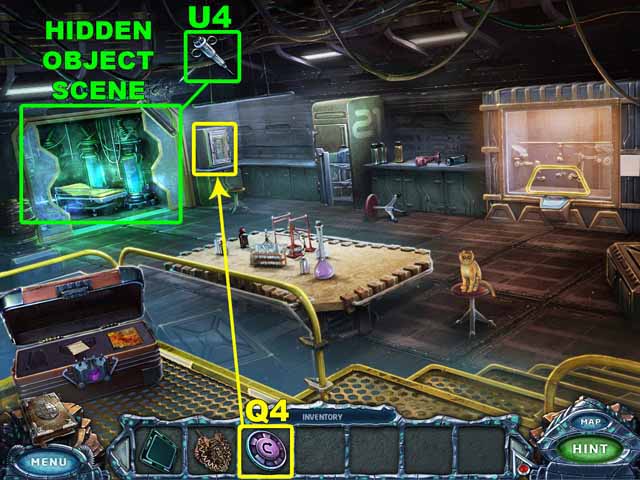
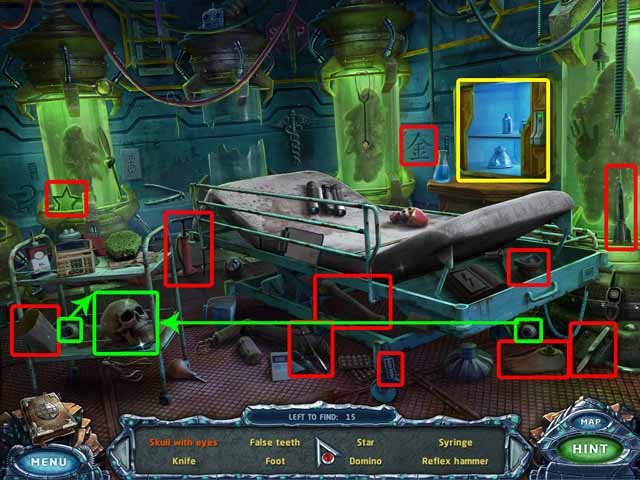
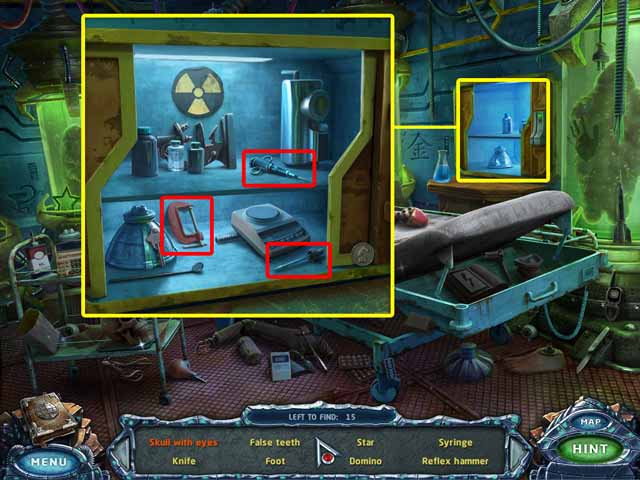
- Click on the sparkles to access the hidden object area. Collect every object listed at the bottom of the screen to acquire the SYRINGE (U4).
- Place the BUTTON (Q4) on the safe.
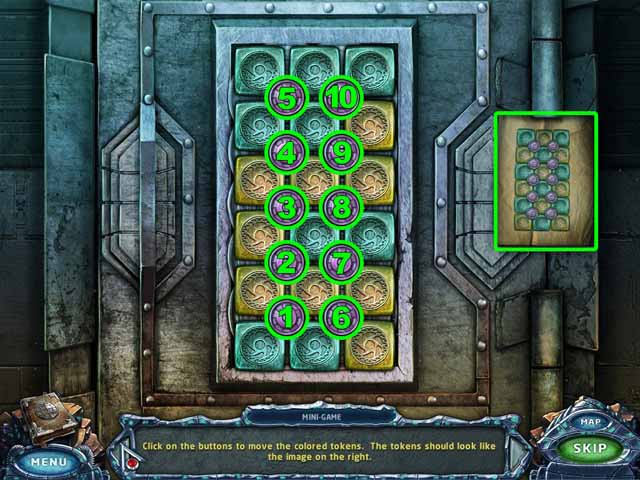
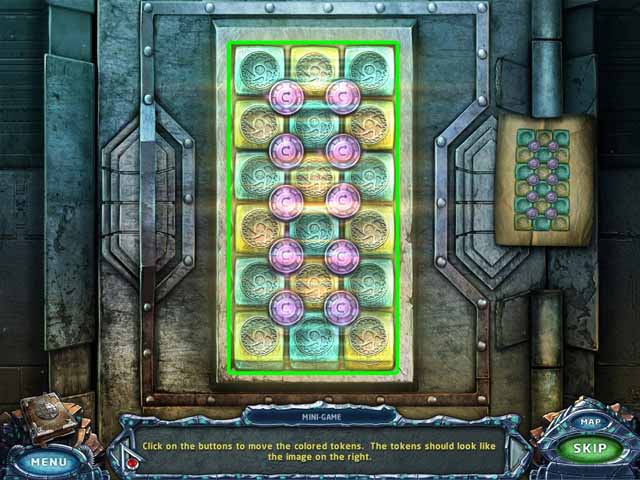
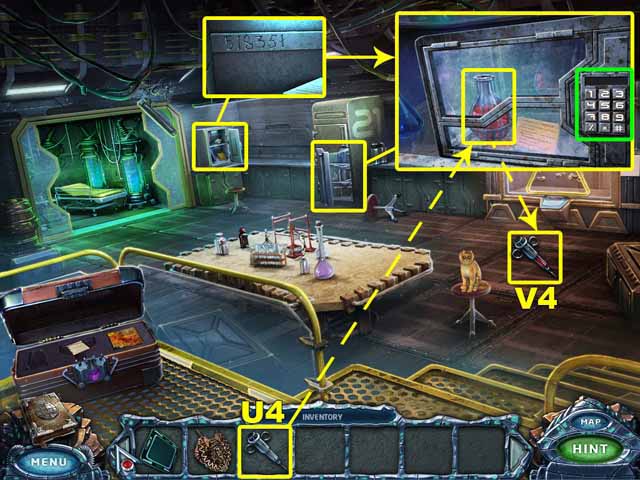
- Arrange the tokens on the pillar in the correct order.
- Click on the buttons in the following order: 4, 4, 10, 9, 1, 7, 6, 7, 2, 2, 6, 1, 1, 6.
- Remember the code in the safe.
- Enter the code to open the case containing the cat's blood. Use the SYRINGE (U4) on the blood to acquire the SYRINGE OF BLOOD (V4).
- Go to the Queen's Lair.
Chapter 9: Rescue
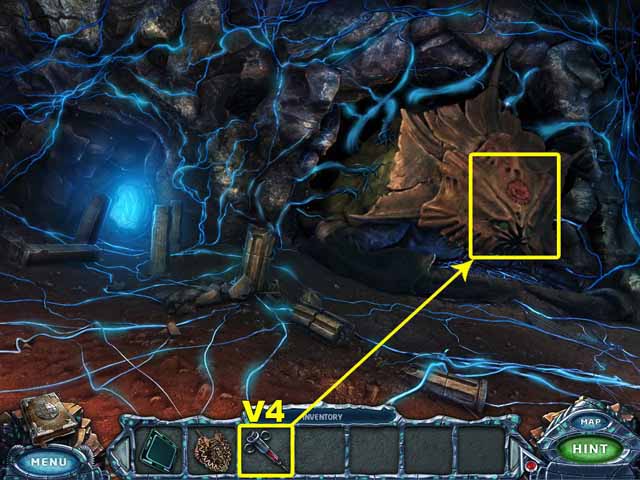
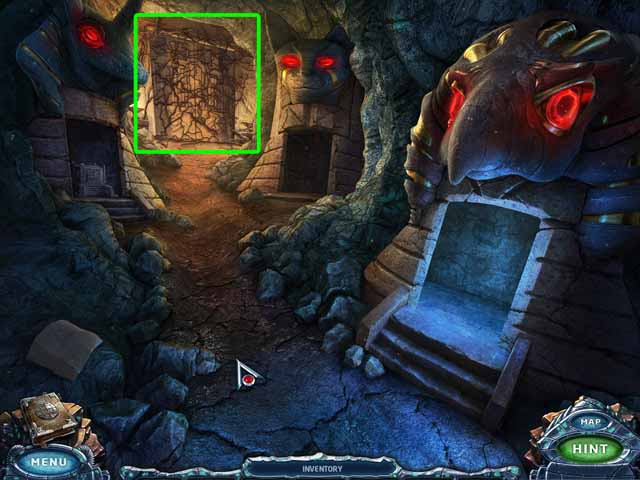
- Use the SYRINGE OF BLOOD (V4) on the Queen.
- Go to the Tunnel.
- Break the roots.
- Enter the Healing Room.
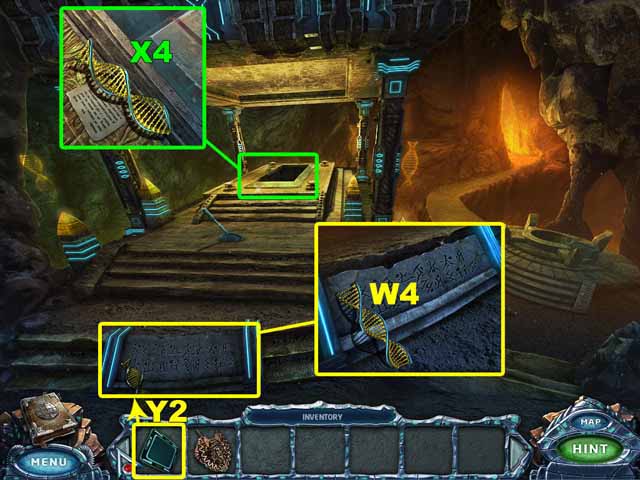
- Take the DNA (X4).
- Use the TRANSLATOR (Y2) to read the symbols on the tablet.
- Take the DNA (W4).
- Go to the Launch Pad.
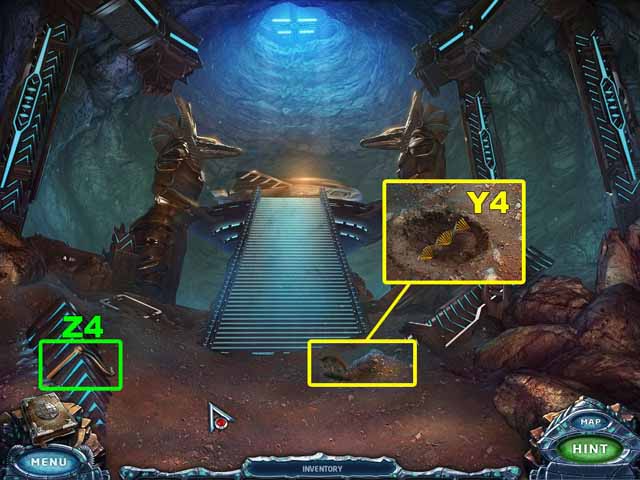
- Dig out the DNA (Y4).
- Take the HANDLE (Z4).
- Go to the Healing Room.
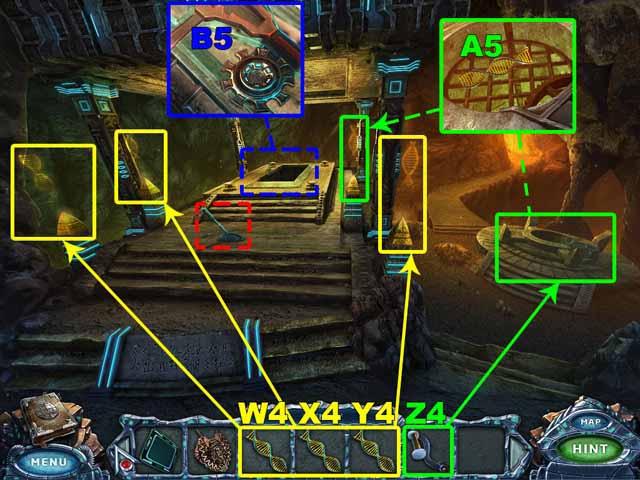
- Place the HANDLE (Z4) on the well.
- Click the handle.
- Take the DNA (A5).
- Put the DNA (W4, X4, Y4 and A5) where they belong.
- Pull the lever to lift the coffin.
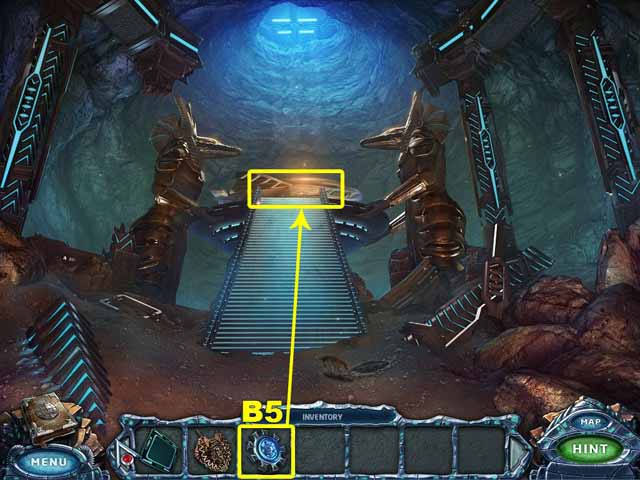
- Take the KEY (B5).
- Go to the LAUNCH PAD.
- Use the KEY (B5) to open the space ship.
- Enter the Spaceship.
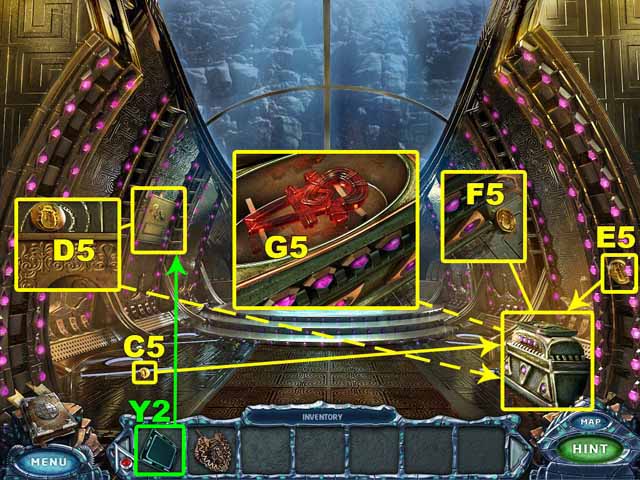
- Collect the COINS (C5, D5, E5 and F5).
- Put the COINS on the case.
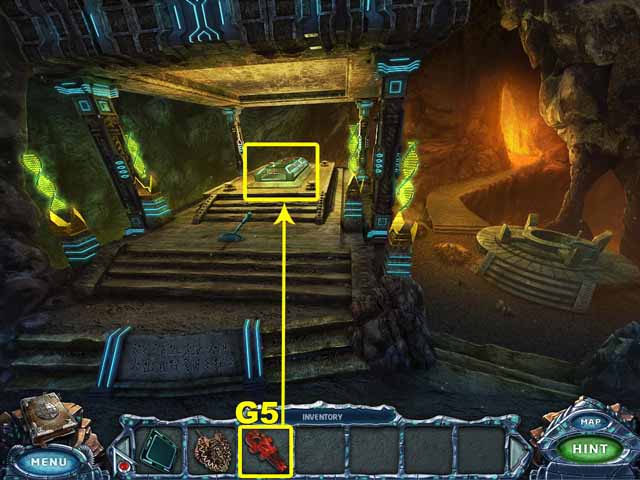
- Take the ELIXIR (G5).
- Go to the Healing Room.
- Place the ELIXIR (G5) on the coffin.
- Congratulations, you have completed Eternal Journey: New Atlantis!
Created at: 2012-08-25

