Walkthrough Menu
- General Tips
- Chapter 1: James' Trial
- Chapter 2: Elizabeth's Room
- Chapter 3: The Wolf Ring
- Chapter 4: The Mural
- Chapter 5: Catherine's Diary
- Chapter 6: Saving Elizabeth
General Tips
- This is the official guide for Grim Tales: The Vengeance.
- This guide will not mention each time you need to zoom into a scene; the screenshots will show each zoom scene.
- Inventory items marked with a blue '+' can be accessed and altered or combined with other items.
- We will use the acronym HOP for Hidden-object puzzles. Interactive items will be color-coded and some will be numbered; please follow the numbers in order.
- HOPs may be random: our lists may vary from yours.
- The Map is in your Diary and can be used to travel to locations.
Chapter 1: James' Trial
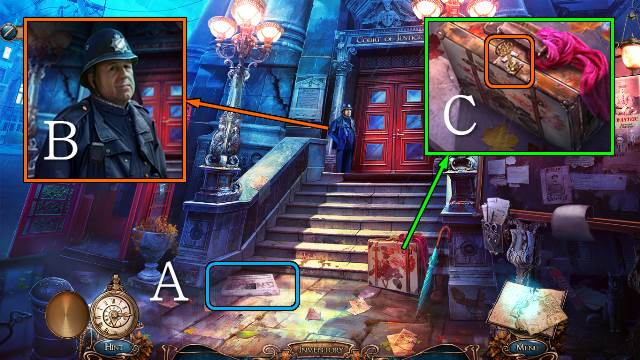
- Read the paper (A).
- Talk to the policeman (B).
- Break and remove the key (C).
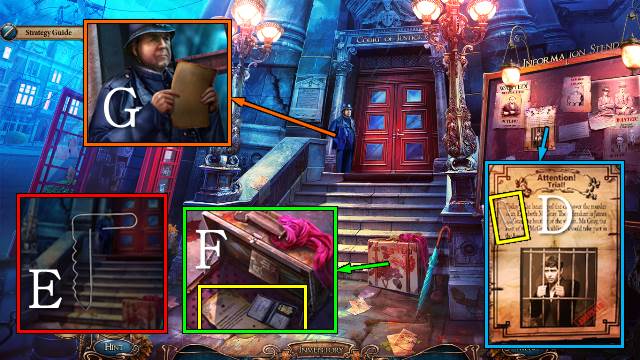
- Take the CLIP (D).
- Access the CLIP and bend it into a LOCKPICK (E).
- Open the case with the LOCKPICK; take the SUBPOENA (F).
- Give the SUBPOENA to the policeman (G).
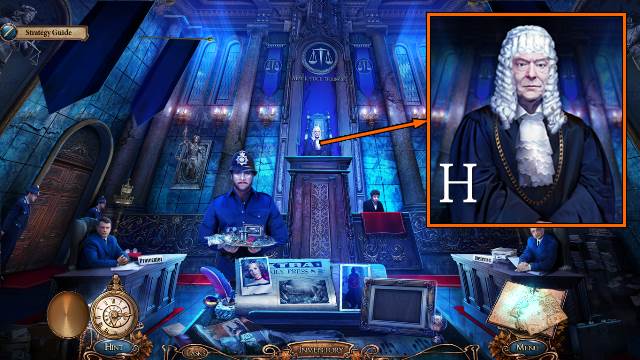
- Talk to the judge (H).
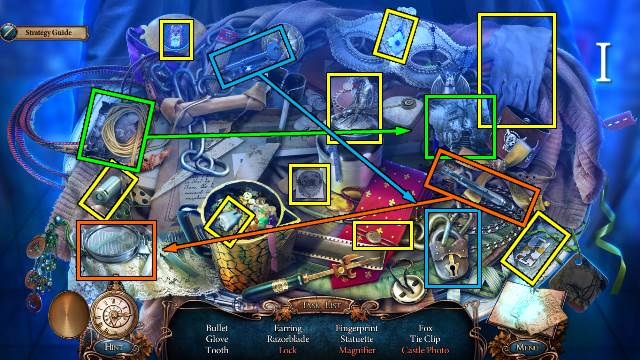
- Play the HOP (I).
- You receive the CASTLE PHOTO.
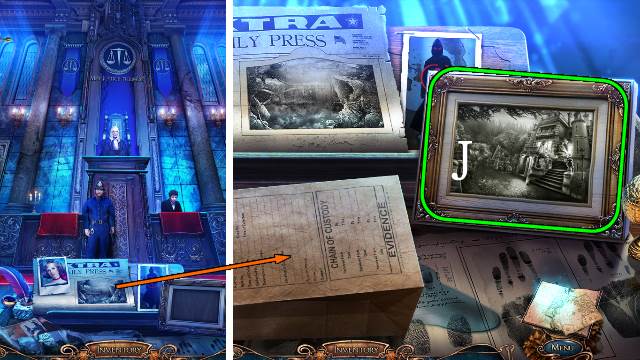
- Put the CASTLE PHOTO in the frame and enter the photo (J).
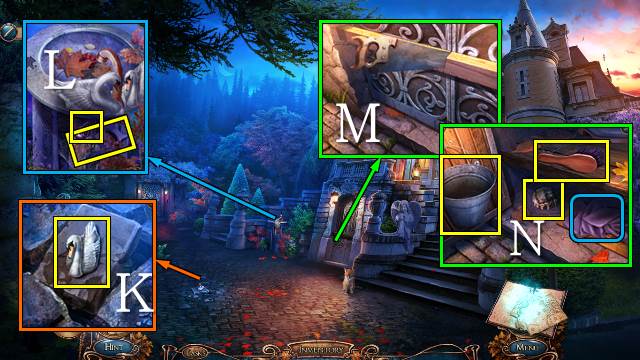
- Take the SWAN (K).
- Put the SWAN on the fountain; take the CRYSTAL and HANDSAW (L).
- Cut the beam with the HANDSAW (M); move the leaves, take the LION AMULET, BUCKET and BRUSH and move the rag (N).
- Walk forward.
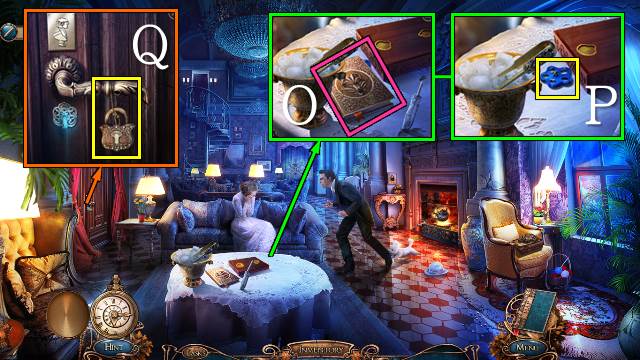
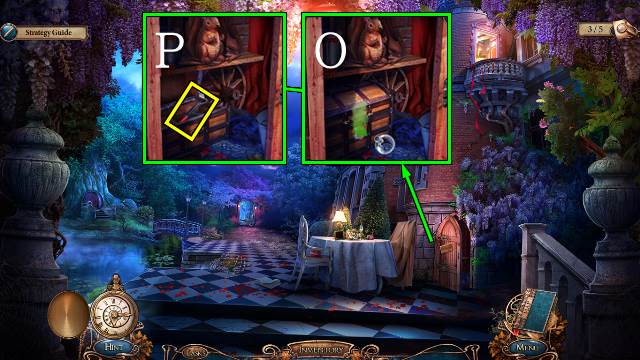
- Take the Book Clue (O).
- Take the VALVE (P).
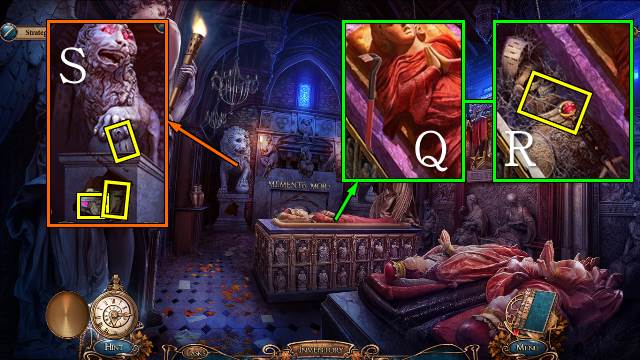
- Take the LOCK AMULET (Q).
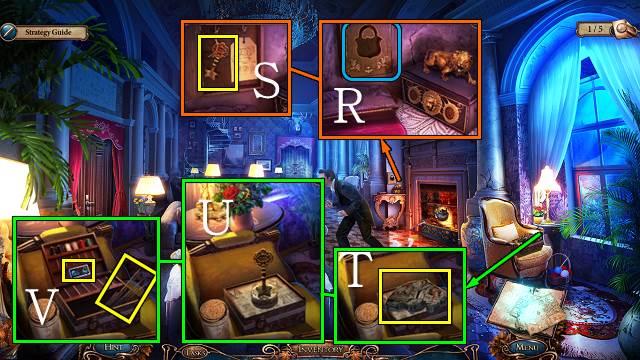
- Open the compartment with the LOCK AMULET (R); take the STAR KEY (S).
- Take the MURAL PIECE (T); open the box with the STAR KEY (U) and take the BROKEN RULER and WOLF DOMINO (V).
- Walk down.
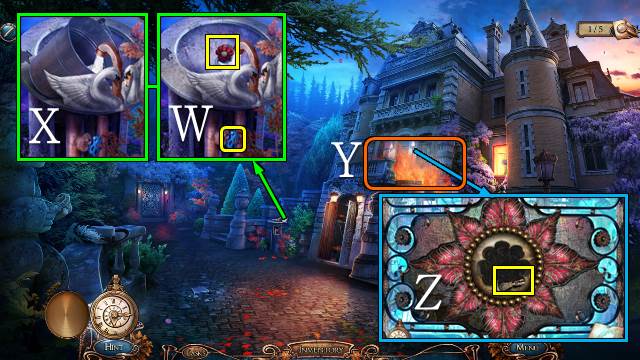
- Clean the fountain with the BRUSH, put the VALVE on it, turn the valve and take the RED STONE (W); fill the BUCKET to get a FULL BUCKET (X).
- Throw the FULL BUCKET on the fire (Y).
- Take the SLIDER and put the RED STONE in the hole for a mini-game (Z).
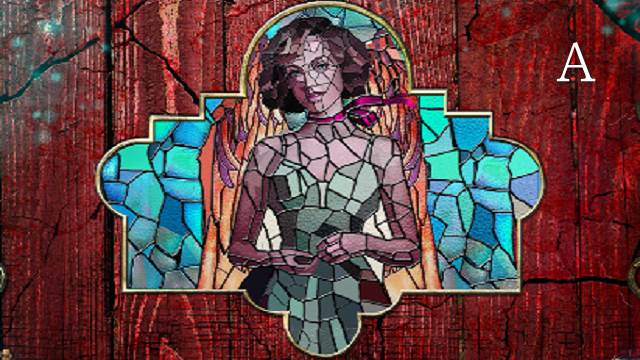
- Drag and drop the pieces into place (A).
- Walk forward.
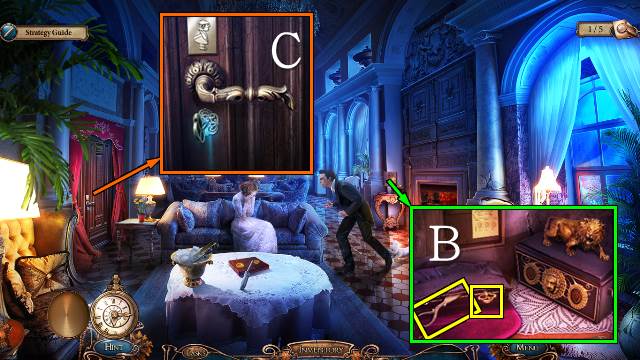
- Put the SLIDER on the zipper and open it; take the SILVER KEY and SCISSORS HALF (B).
- Open the lock with the SILVER KEY; turn the handle (C).
- Go left.
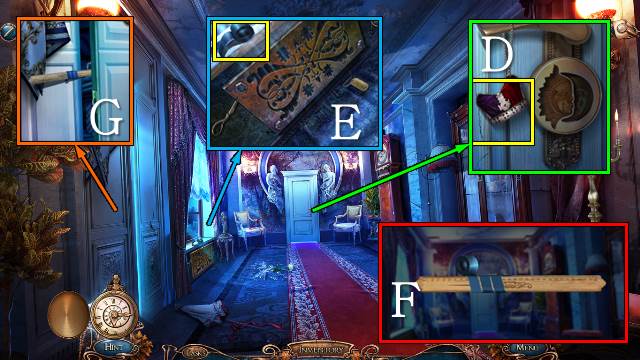
- Take the CROWN (D).
- Take the ADHESIVE TAPE (E).
- Access the BROKEN RULER; put the ADHESIVE TAPE on it and take the RULER (F).
- Open the latch with the RULER (G).
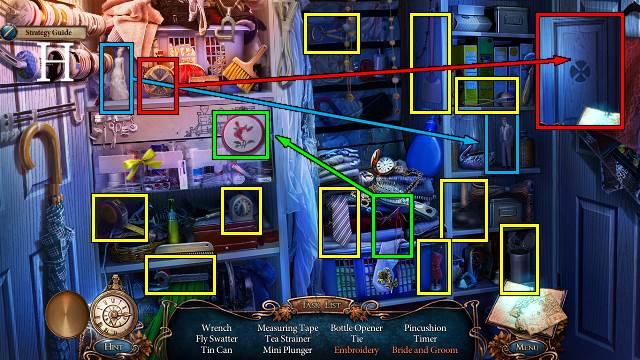
- Play the HOP (H).
- You receive the WRENCH.
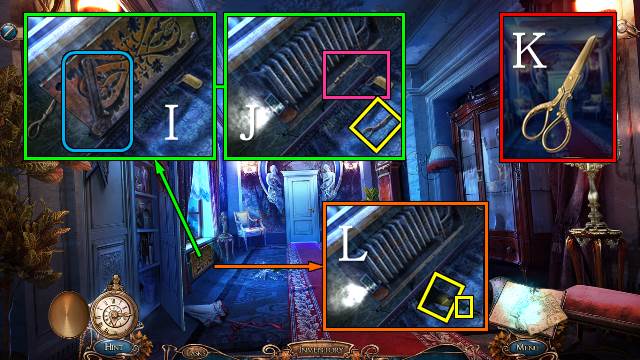
- Open the vent with the WRENCH (I); take the SCISSORS HALF and Whistle Clue (J).
- Access the first SCISSORS HALF and combine it with the other SCISSORS HALF; take the SCISSORS (K).
- Cut the carpet with the SCISSORS; take the PENDULUM and FOX DOMINO (L).
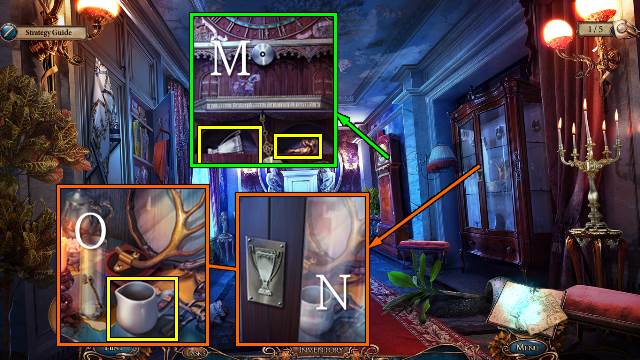
- Hang the PENDULUM from the clock; take the CUP AMULET and ANGEL AMULET (M).
- Open the cabinet with the CUP AMULET (N); take the MILK JUG (O).
- Walk down.
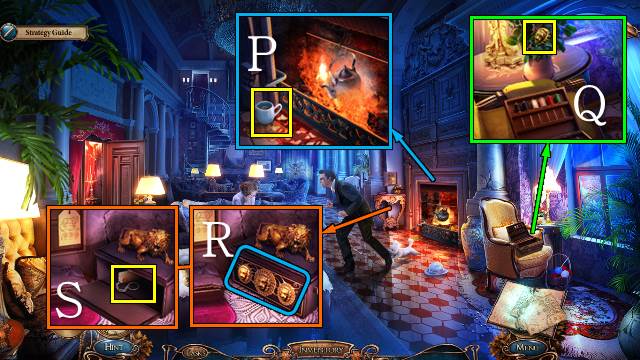
- Collect some OIL in the MILK JUG (P).
- Cut the roses with the SCISSORS; take the LION AMULET (Q).
- Put the two LION AMULETS on the box (R); take the CORK (S).
- Go left.
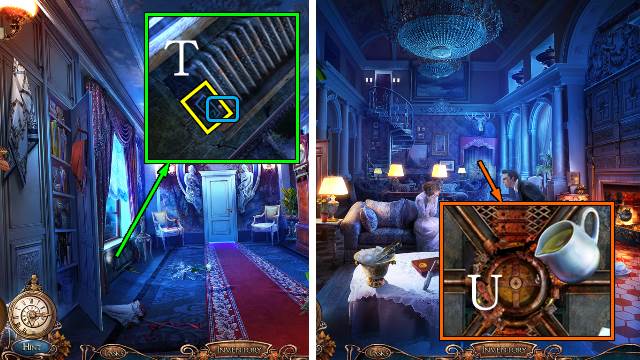
- Put the CORK in the radiator; take the BEAR DOMINO (T).
- Walk down.
- Pour the OIL on the lock (U).
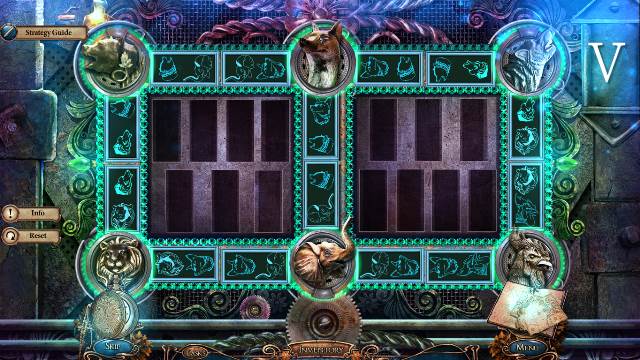
- Put the WOLF DOMINO, FOX DOMINO and BEAR DOMINO down for a mini-game.
- Place the tiles so that each image is next to an identical image (V).
- Walk forward.
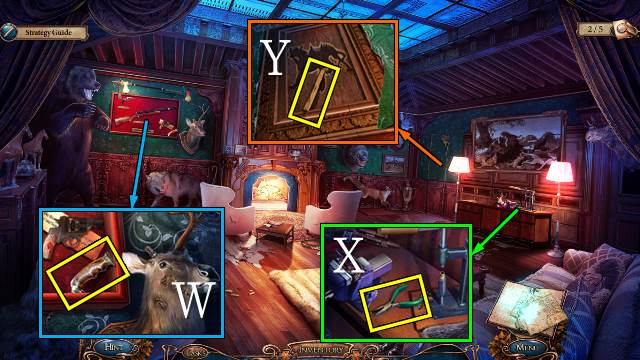
- Take the KNIFE GRIP (W).
- Take the PLIERS (X).
- Tear the wallpaper and take the STICK (Y).
- Walk down.
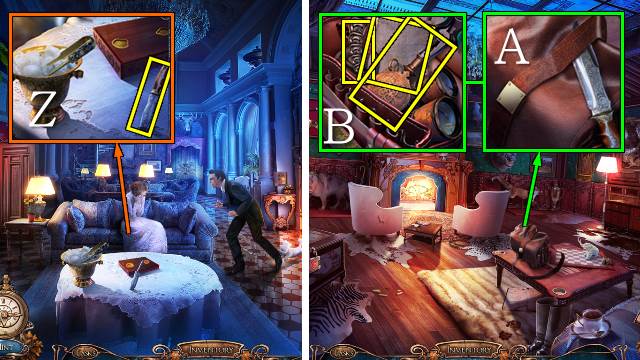
- Put the KNIFE GRIP on the knife and take the HUNTING KNIFE (Z).
- Walk forward.
- Cut the bag with the HUNTING KNIFE and open it (A); take the METALLIC FEATHER and OVEN MITT, uncork the flask with the PLIERS and take the POWDER FLASK (B).
- Walk down.
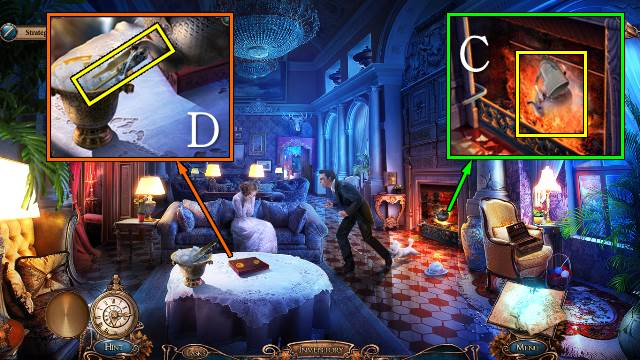
- Take the HOT KETTLE with the OVEN MITT (C).
- Pour water from the HOT KETTLE into the ice bucket; take the ICE TONGS (D).
- Go left.
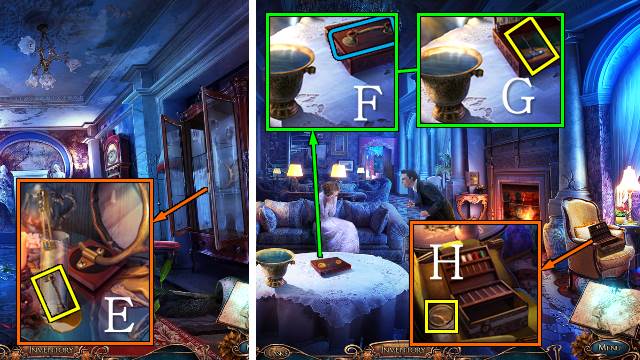
- Take the SHELL HANDLE with the ICE TONGS (E).
- Walk down.
- Open the box with the SHELL HANDLE (F); take the CORKSCREW (G).
- Open the jar with the CORKSCREW and take the MOON (H).
- Walk forward.
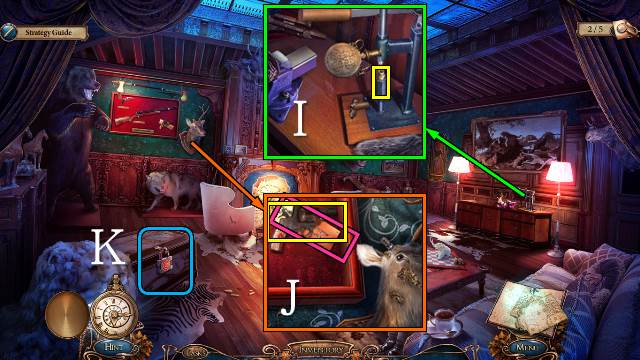
- Pour powder from the POWDER FLASK into the shell; pull the handle and take the BULLET (I).
- Put the BULLET in the REVOLVER and take it; take the Plaque Clue (J).
- Shoot the lock with the REVOLVER (K).
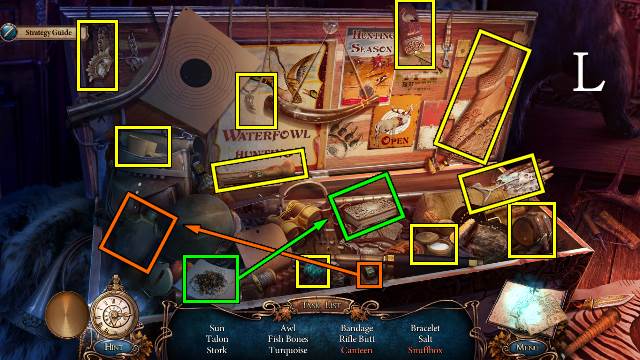
- Play the HOP (L).
- You receive the SUN.
- Go to the Corridor.
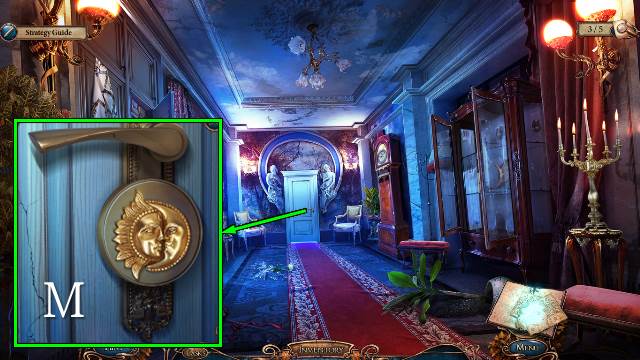
- Put the SUN and MOON on the lock and turn the handle (M).
- Walk forward.
Chapter 2: Elizabeth's Room
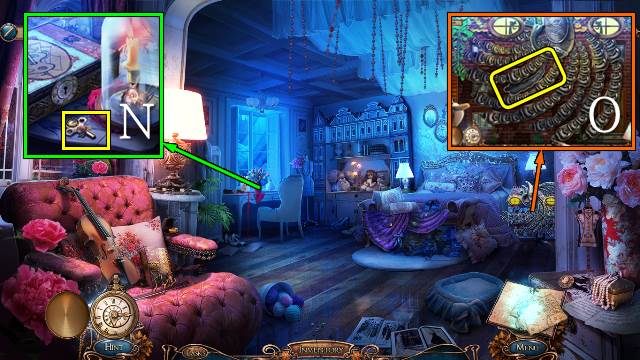
- Take the WIND-UP KEY (N).
- Put the METALLIC FEATHER on the doll's house (O).
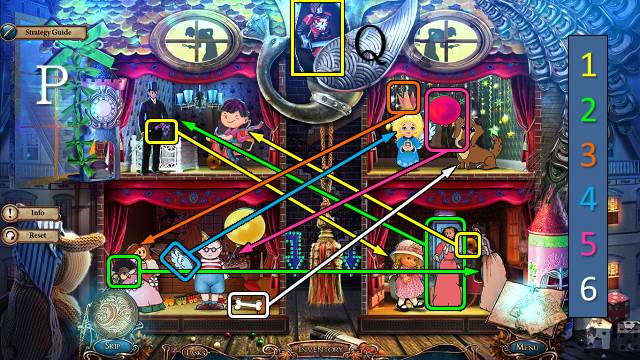
- Pull the tassel for a mini-game (P).
- Move the correct accessories to each puppet; each puppet can only hold one accessory at a time.
- Follow the colors by number.
- Take the PRINCE (Q).
- Walk down.
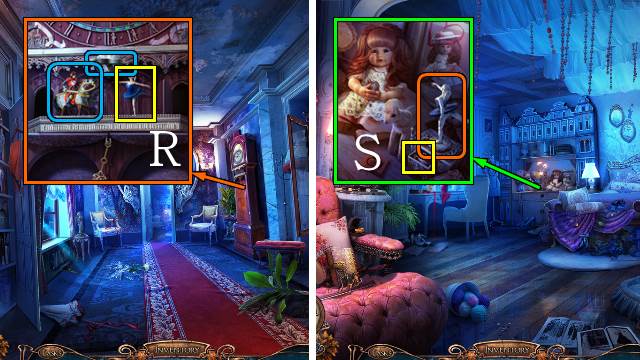
- Wind the clock with the WIND-UP KEY; put the PRINCE on the horse and take the DANCER (R).
- Walk forward.
- Put the DANCER on the music box; take the ANGEL AMULET (S).
- Go to the Castle Entrance.
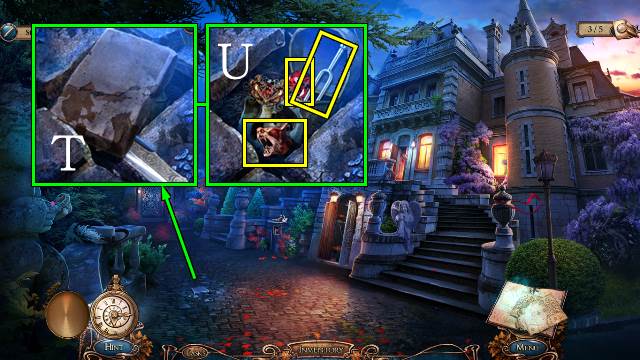
- Move the stone with the HUNTING KNIFE (T); take DOG'S HEAD 1/3, put the two ANGEL AMULETS on the skull and take the CRYSTAL and TUNING FORK (U).
- Go to Elizabeth's Bedroom.
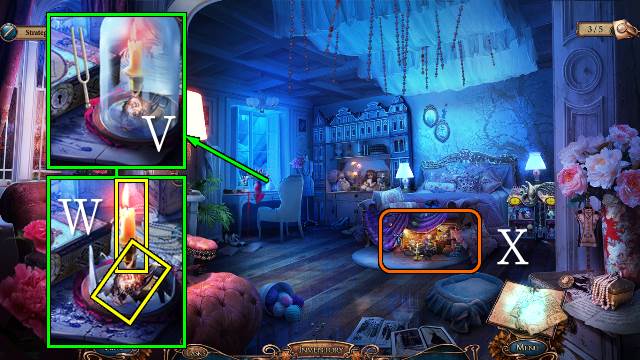
- Break the glass with the TUNING FORK (V); take DOG'S HEAD 2/3 and the CANDLE (W).
- Use the CANDLE under the bed (X).
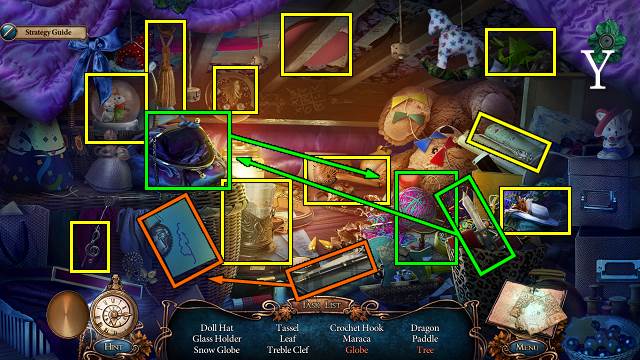
- Play the HOP (Y).
- You receive the DOLL HAT.
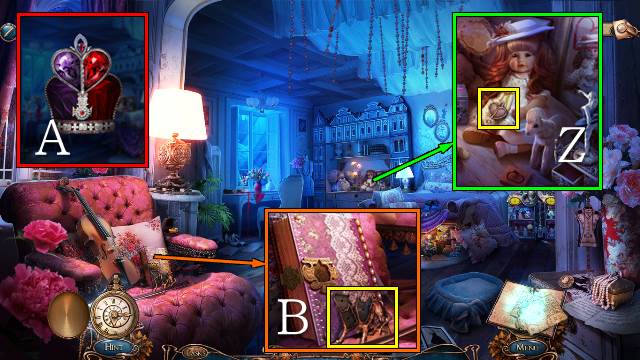
- Put the DOLL HAT on the doll; take the SILVER HEART (Z).
- Access the CROWN and put the SILVER HEART and two CRYSTALS on it; take the CROWNED HEART (A).
- Take the DOG AMULET; open the diary with the CROWNED HEART for a mini-game (B).
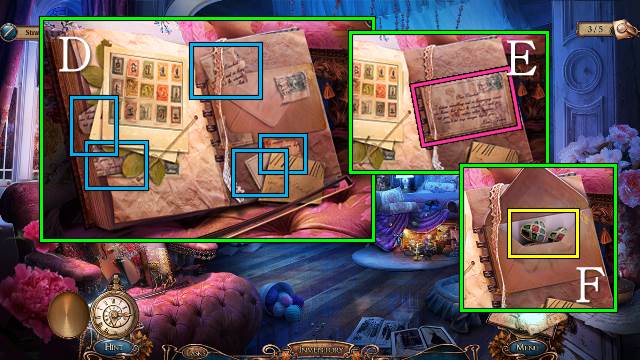
- Restore the note (D).
- Take the Note Clue (E).
- Take the CLOVER AMULET (F).
- Go to the Castle Entrance.
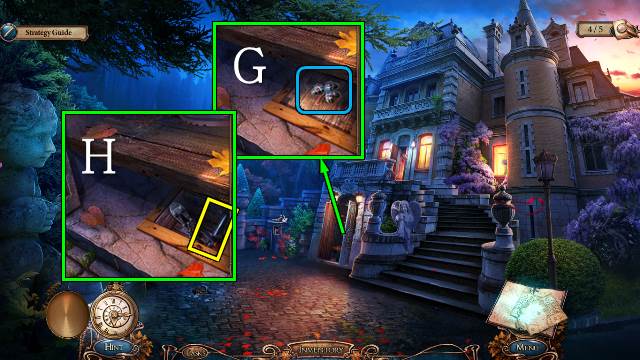
- Open the compartment with the CLOVER AMULET (G); take the VICE LEVER and remove the spring (H).
- Go to the Trophy Room.
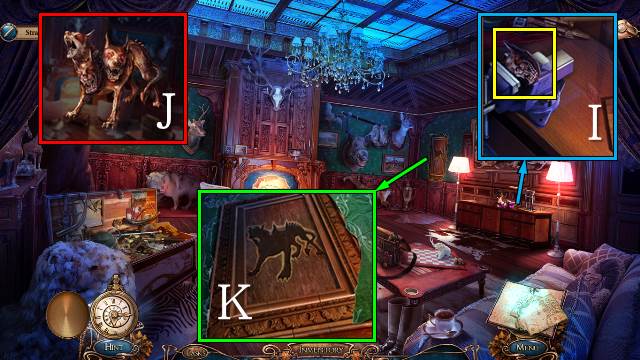
- Put the VICE LEVER on the vice and turn it; take DOG'S HEAD 3/3 (I).
- Access the DOG AMULET and put the DOG'S HEADS on it; take the THREE-HEADED DOG AMULET (J).
- Put the THREE-HEADED DOG AMULET on the secret door (K).
- Walk forward.
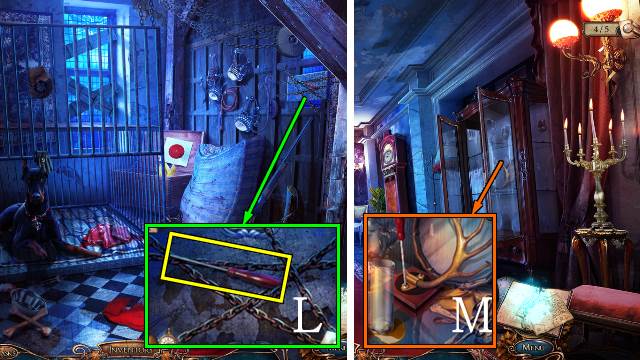
- Take the SCREWDRIVER (L).
- Go to the Corridor.
- Remove the screws with the SCREWDRIVER; take the HORN (M).
- Go to the Trophy Room.
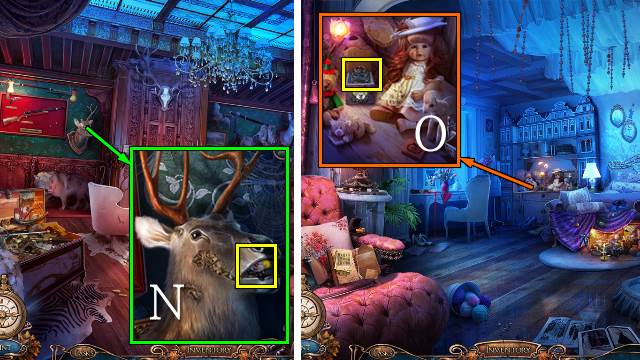
- Put the HORN on the deer and turn it; take the CLOWN AMULET (N).
- Go to Elizabeth's Bedroom.
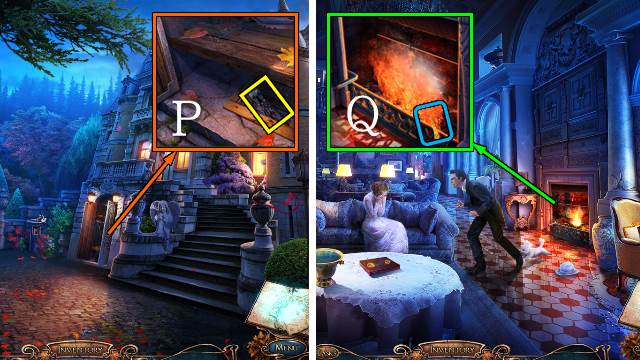
- Open the box with the CLOWN AMULET; take the SPRING (O).
- Go to the Castle Entrance.
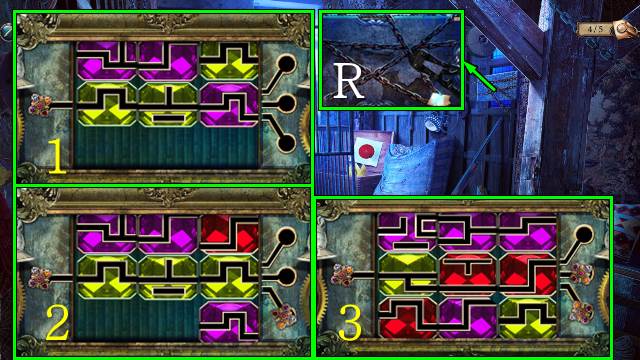
- Put the SPRING on the BOLT CUTTERS and pick it up (P).
- Walk forward.
- Light the STICK in the fire to get a BURNING STICK (Q).
- Go to the Kennels.
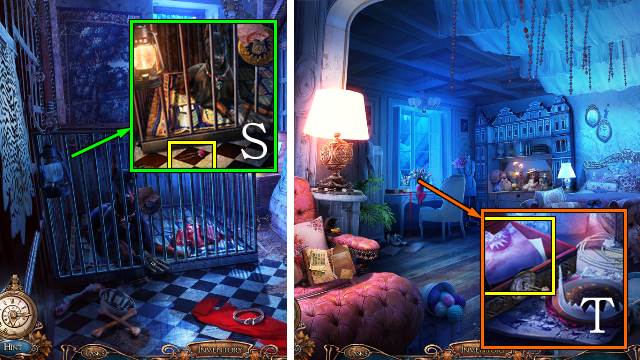
- Cut the chains with the BOLT CUTTERS for a mini-game (R).
- Move the columns of jewelled tiles up and down to create continuous tracks from left to right; move the jewel along the track to the slots on the other side.
- 1: default; 2: right tile 1 down; 3: left 3 down, middle 2 down, right 1 down.
- Light the lamp with the BURNING STICK; take the HAIRPIN (S).
- Go to Elizabeth's Bedroom.
- Pick the lock with the HAIRPIN; take the PICTURE HALF (T).
- Go to the Kennels.
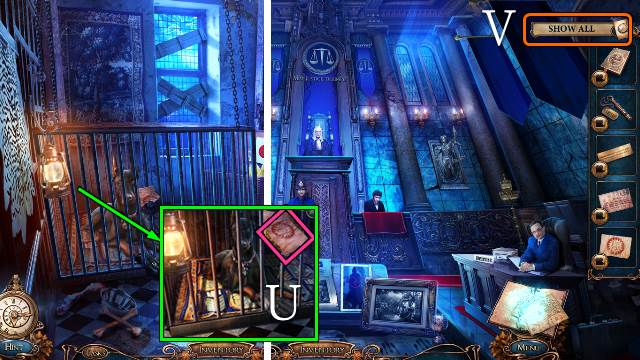
- Put the PICTURE HALF with the other half and take the Coat of Arms Clue (U).
- Select the 'Show All' button (V).
Chapter 3: The Wolf Ring
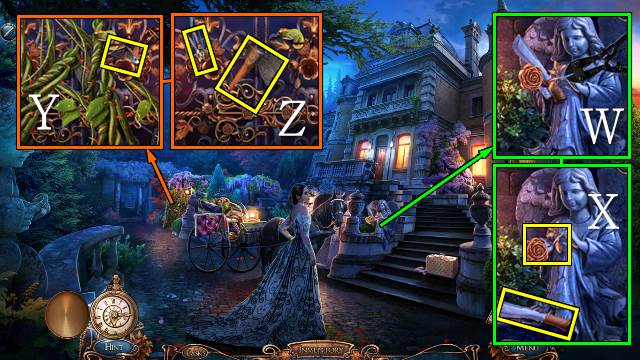
- Cut the rose with the BOLT CUTTERS (W); take the MACHETE and IRON FLOWER 1/2 (X).
- Take the PIECE OF GLASS (Y); cut the thorns with the MACHETE and take the HATCHET and CODE WHEEL (Z).
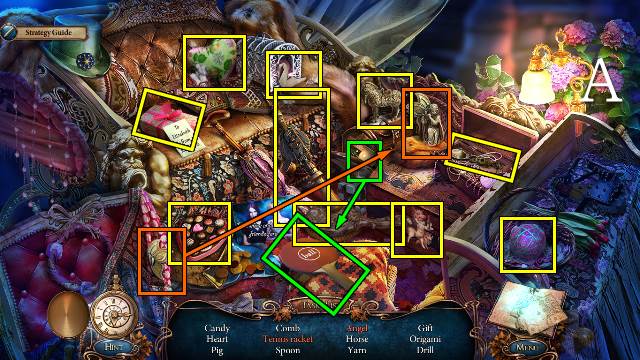
- Play the HOP (A).
- You receive the DRILL.
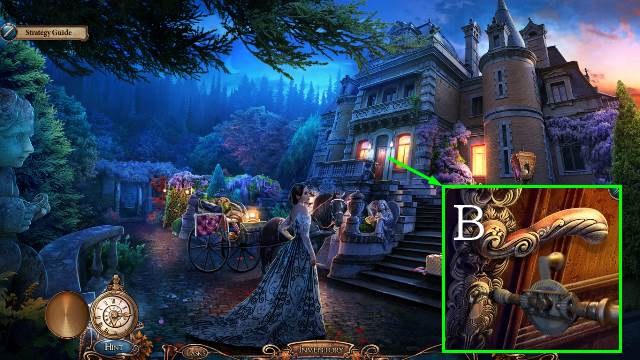
- Break the lock with the DRILL; turn the handle (B).
- Walk forward.
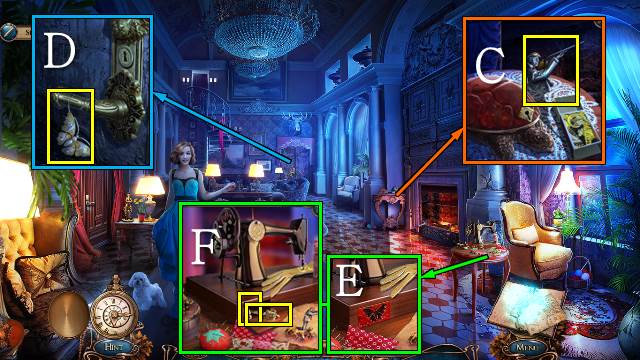
- Take STATUETTE PART (C).
- Take the BUTTERFLY AMULET (D).
- Put the BUTTERFLY AMULET on the sewing machine (E); take the CODE WHEEL and TORTOISE KEY (F).
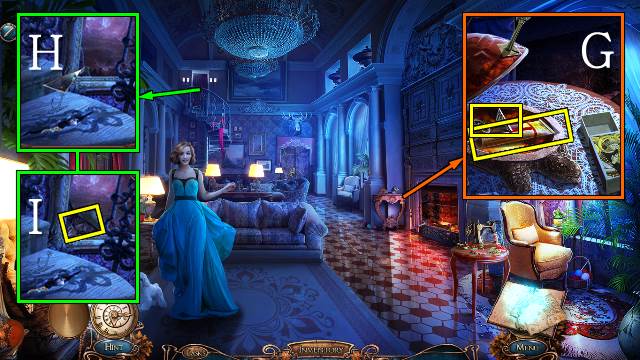
- Open the tortoise box with the TORTOISE KEY; take the TRIANGLE KEY and GLUE (G).
- Cut the painting with the PIECE OF GLASS (H); take the HORSE FIGURE (I).
- Walk down.
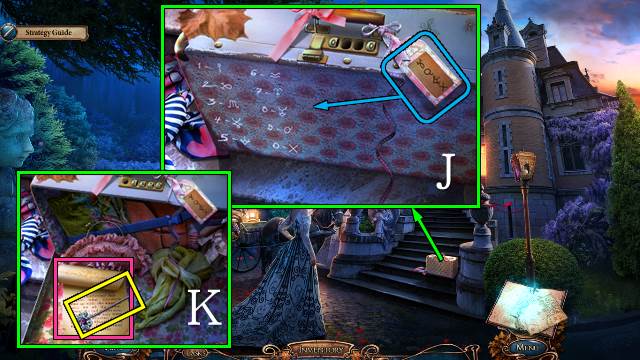
- Put the two CODE WHEELS on the suitcase for a mini-game.
- Find the numbers corresponding with the symbols on the tag and enter them into the lock (J).
- Solution: 2950.
- Take the HAIR STICK and Letter Clue (K).
- Walk forward.
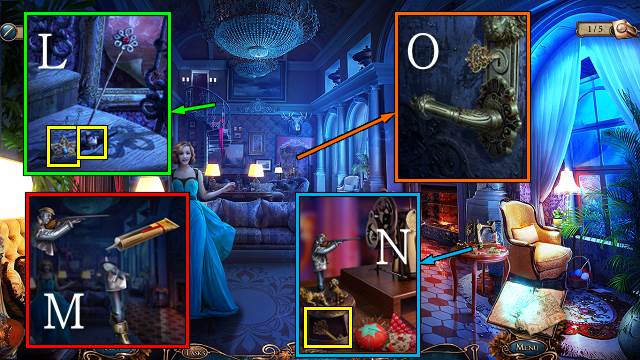
- Use the HAIR STICK on the stairs; take the STATUETTE PART and LIGHTNING AMULET (L).
- Access the top STATUETTE PART and put the bottom STATUETTE PART and GLUE on it; take the HUNTER (M).
- Put the HUNTER on the box and take the KEY TO THE TROPHY ROOM (N).
- Open the door with the KEY TO THE TROPHY ROOM (O).
- Walk forward.
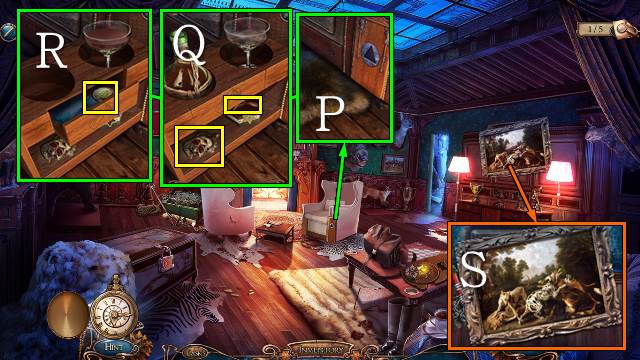
- Open the compartment with the TRIANGLE KEY (P), open the box with the LIGHTNING AMULET and take the SEWING MACHINE LEVER and SKULL KEY (Q); open the bottle with the CORKSCREW, pour the wine and take the JUPITER MINIATURE (R).
- Remove the painting for a mini-game (S).
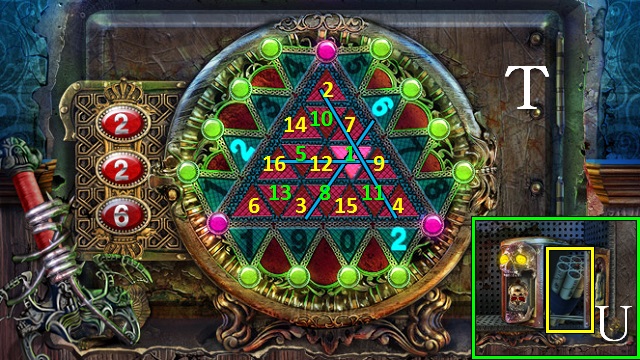
- Find the triangles at the intersection of the rows and columns indicated by the numbers on the left (T).
- Open the box with the SKULL KEY and take the DYNAMITE (U).
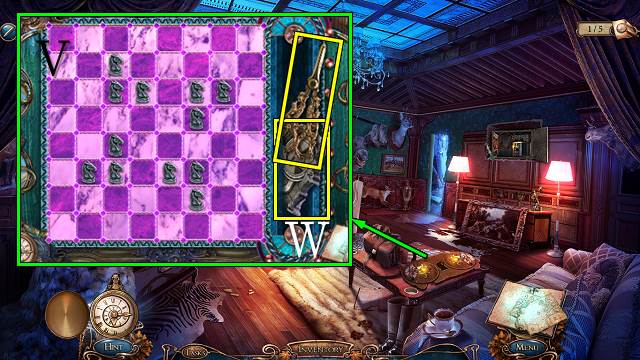
- Open the chess set with the HORSE FIGURE for a mini-game.
- Place the knights on the board until all squares are lit up (V).
- Take the SCISSORS and MURAL PIECE 2/4 (W).
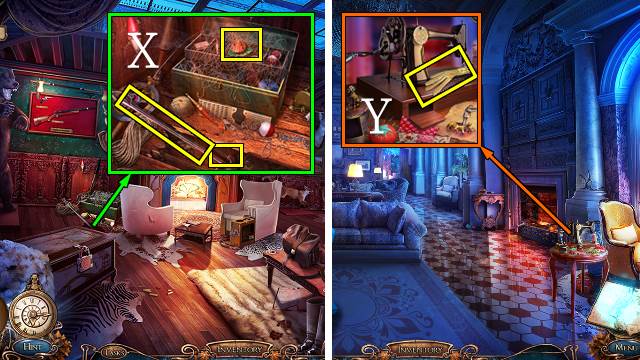
- Cut the floorboards with the HATCHET and the fishing line with the SCISSORS; take the LADYBUG AMULET, HARPOON and HOOK PART (X).
- Walk down.
- Break the sewing machine, put the SEWING MACHINE LEVER on it and take the EMBROIDERED GLOVE (Y).
- Walk forward and right.
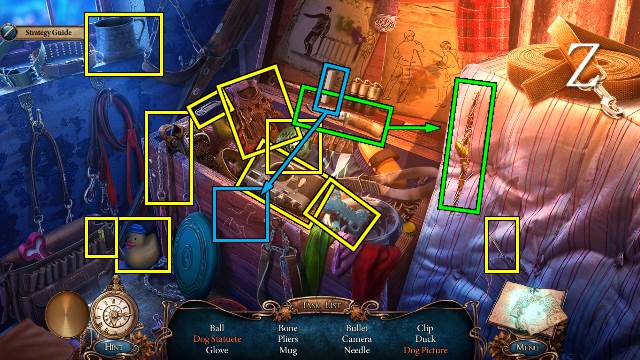
- Play the HOP (Z).
- You receive a BROKEN CAMERA.
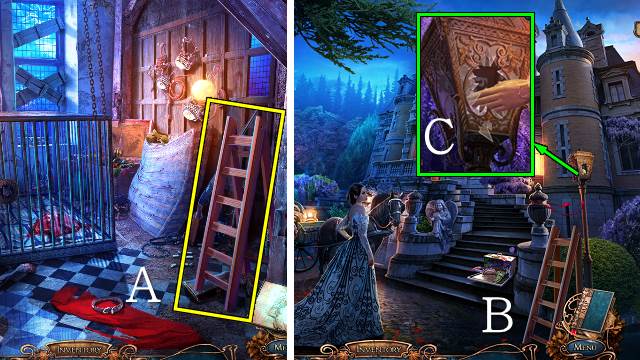
- Take the STEPLADDER (A).
- Go to the Castle Entrance.
- Put the STEPLADDER under the lamp (B).
- Take the FOX AMULET with the EMBROIDERED GLOVE (C).
- Go to the Kennels.
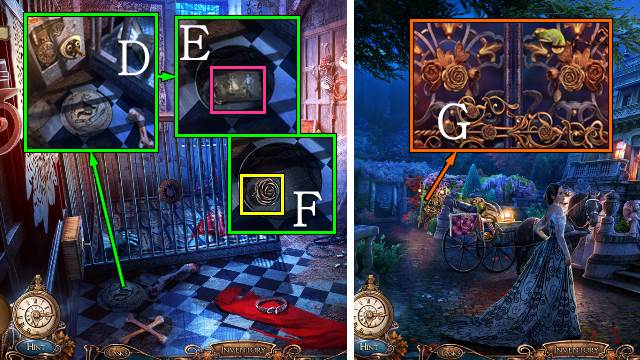
- Open the compartment with the FOX AMULET (D); take the Photo Clue (E).
- Take IRON FLOWER 2/2 (F).
- Go to the Castle Entrance.
- Open the gate with the IRON FLOWERS (G).
- Go through the gate.
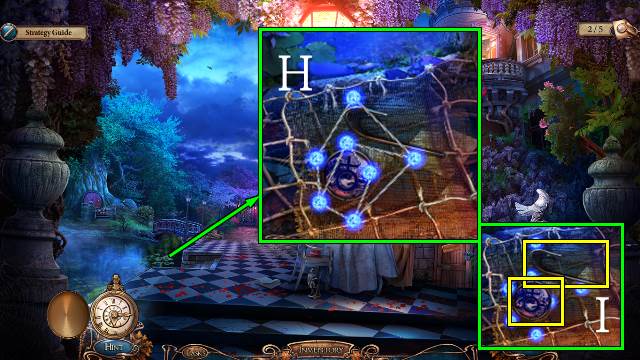
- Get the net with the HARPOON for a mini-game (H).
- Move the knots until no lines are crossing.
- Take the HOOK PART and EARTH MINIATURE (I).
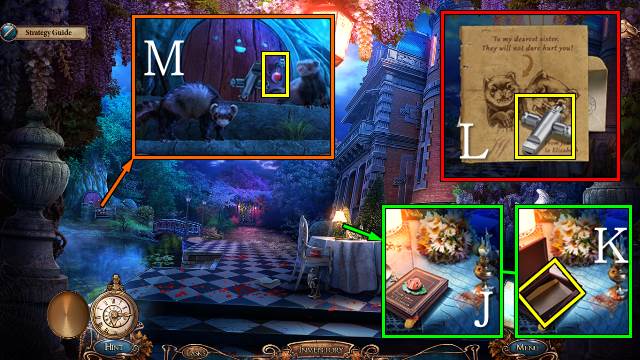
- Open the book with the LADYBUG AMULET (J); take the LETTER IN ENVELOPE (K).
- Access the LETTER IN ENVELOPE, open it and take the WHISTLE (L).
- Scare the ferrets with the WHISTLE; take the MARS MINIATURE and open the door (M).
- Go left.
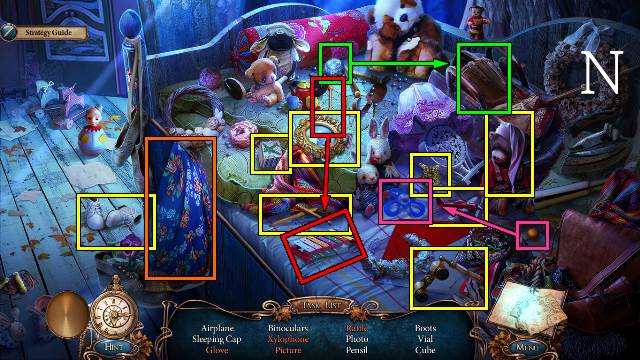
- Play the HOP (N).
- You receive the CHILDREN'S PHOTO.
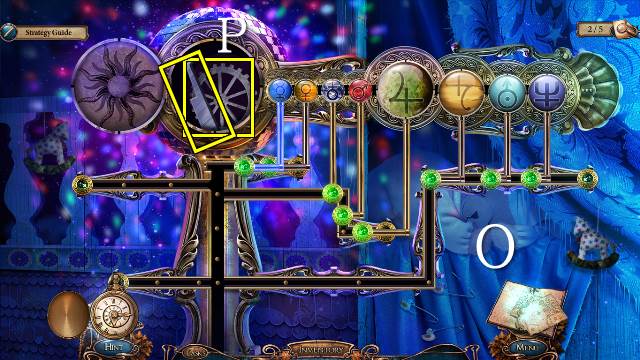
- Put the JUPITER MINIATURE, EARTH MINIATURE and MARS MINIATURE on the telescope for a mini-game (O).
- Put the planets in the correct orbit according to the solar system; correctly placed planets will light up green.
- Select a symbol and use the arrows to move it along the tracks; selecting the circle at the base of the symbol will flip it around.
- Strategy: place the planets from right to left; move the other planets out of the way to clear a path.
- Take the MASTER KEY and GEAR (P).
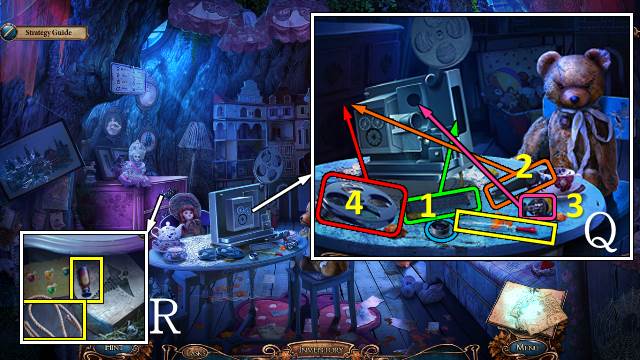
- Take the PIPETTE (Q); put the GEAR and lens on the camera for a mini-game.
- Restore the camera.
- You receive the Film Clue.
- Open the drawer with the MASTER KEY; take the ROPE and FLASK WITH A COVER (R).
- Walk down.
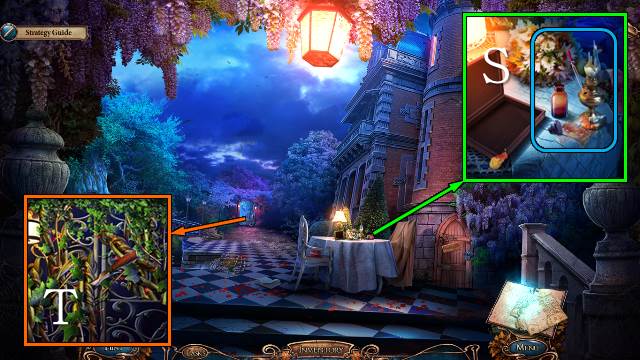
- Put the FLASK WITH A COVER on the table; transfer kerosene from the lamp with the PIPETTE and take the VIAL OF KEROSENE (S).
- Cut the vines with the MACHETE (T).
- Walk forward.
Chapter 4: The Mural
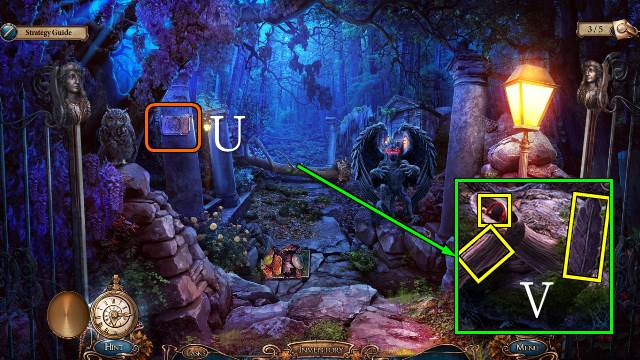
- Read the clue (U).
- Cut the branch with the MACHETE and take the STONE FEATHER, MASSIVE KEY and BRANCH (V).
- Walk down.
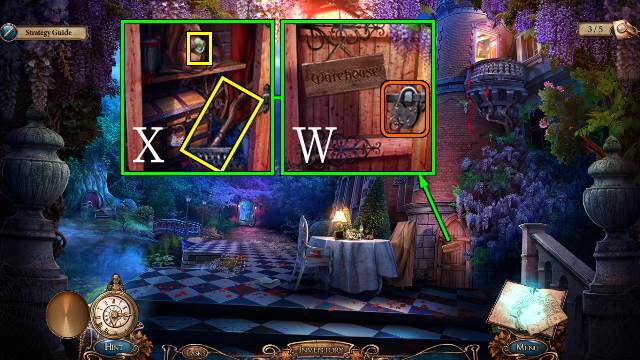
- Open the lock with the MASSIVE KEY (W); put the BRANCH on the rake and take the RAKE and NUT AMULET (X).
- Walk forward.
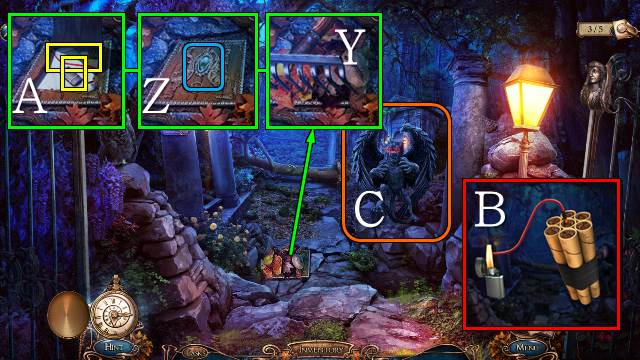
- Move the leaves with the RAKE (Y) and open the hatch with the NUT AMULET (Z): take the FUSE and LIGHTER (A).
- Access the DYNAMITE, put the FUSE on it and light it with the LIGHTER; you receive some EXPLOSIVES (B).
- Throw the EXPLOSIVES at the demon (C).
- Walk forward.
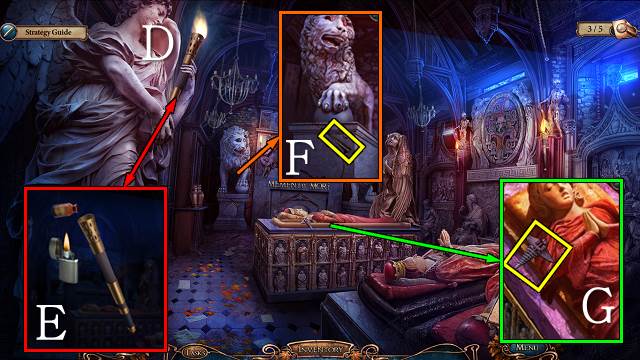
- Take the EXTINGUISHED TORCH (D).
- Access the EXTINGUISHED TORCH, pour kerosene from the VIAL OF KEROSENE in it and light it with the LIGHTER; you receive a LIT TORCH (E).
- Put the LIT TORCH in the holder.
- Take the NAIL (F).
- Take the MEDICINE AMULET (G).
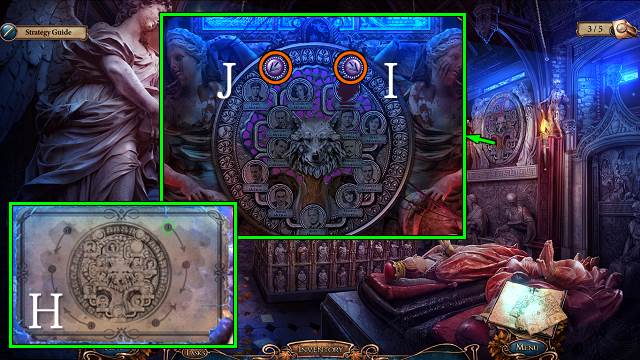
- Play the mini-game.
- Push the arrow buttons to rotate the plaque according to the clue you found on the road (H).
- Solution: I, I, J, I, J, J.
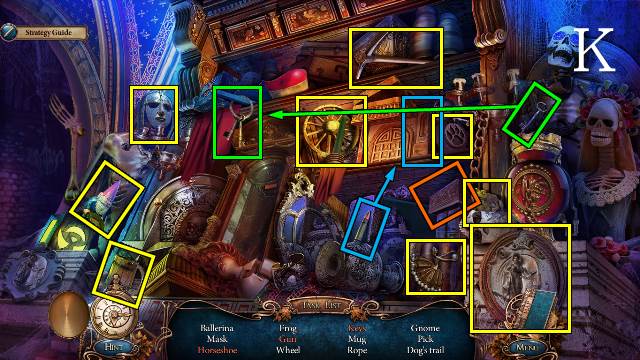
- Play the HOP (K).
- You receive a PICK.
- Go to the Treehouse.
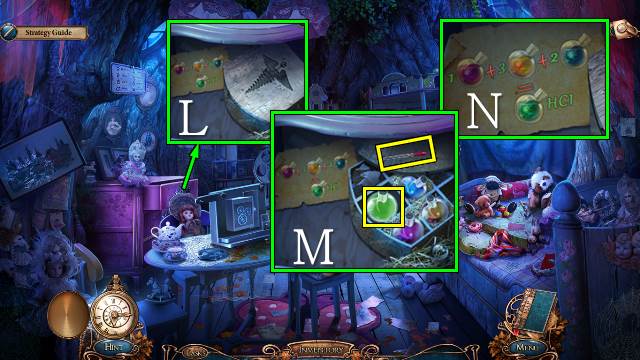
- Open the box with the MEDICINE AMULET (L); put the PIPETTE down for a mini-game (M).
- Use the pipette to add solutions to the empty flask as indicated (N).
- Solution: 1x purple, 3x yellow, 2x blue.
- Take the HYDROCHLORIC ACID and PIPETTE (M).
- Walk down.
- Melt the lock with the HYDROCHLORIC ACID (O); take the CROWBAR (P).
- Go to the Vault.
- Open the sarcophagus with the CROWBAR (Q); remove the ruby with the NAIL and take the RUBY (R).
- Break the pedestal with the PICK and put the RUBY on the lion; take the HOOK PART, MAN'S PHOTO and MURAL PIECE 3/4 (S).
- Walk down twice.
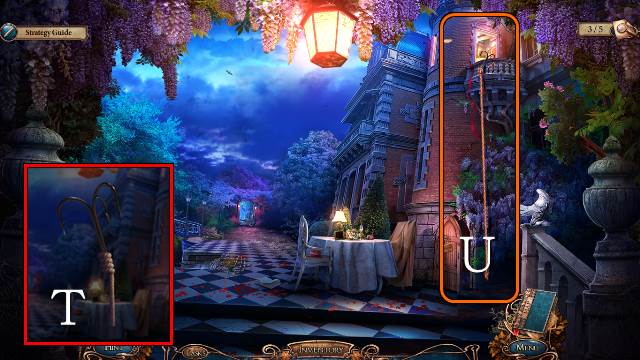
- Access the first HOOK PART and attach the other two parts and the ROPE to it; take the GRAPPLING HOOK (T).
- Throw the GRAPPLING HOOK over the balcony (U).
- Go right.
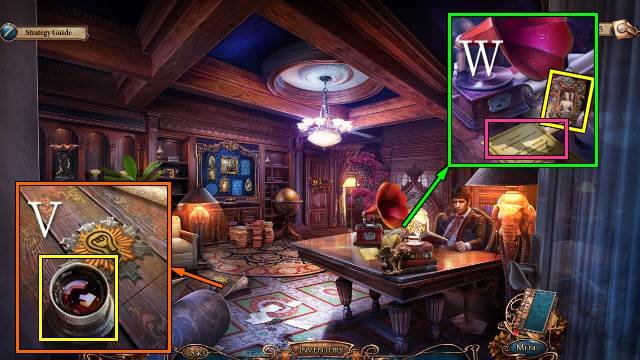
- Take the CAMERA LENS (V).
- Take ELIZABETH'S PHOTO and Disclaimer Clue (W).
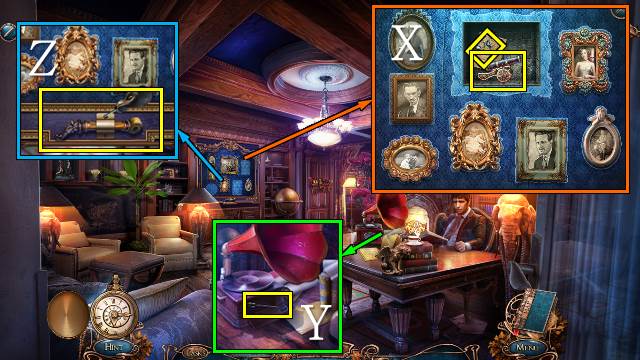
- Hang the MAN'S PHOTO, CHILDREN'S PHOTO and ELIZABETH'S PHOTO on the wall for a mini-game.
- Swap the pictures according to the outlines on the wall (X).
- Take the DECORATIVE BOOK and NOTE AMULET.
- Open the phonograph with the NOTE AMULET and take the SCREWDRIVER (Y).
- Remove the screws with the SCREWDRIVER and take the CAGE LEVER (Z).
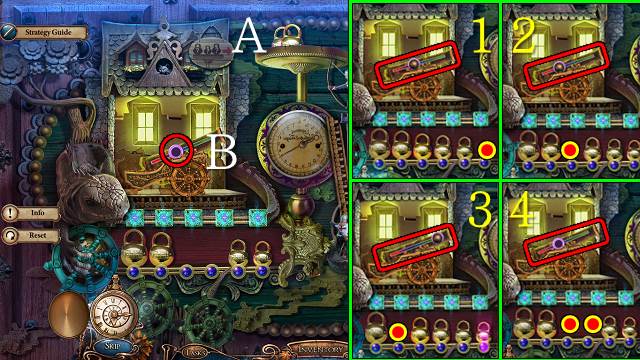
- Put the DECORATIVE BOOK on the door for a mini-game.
- Place weights on the scale (A) to change the angle on the cannon, move the cannonball to change its velocity (B) and shoot the ball into the four towers.
- Walk forward.
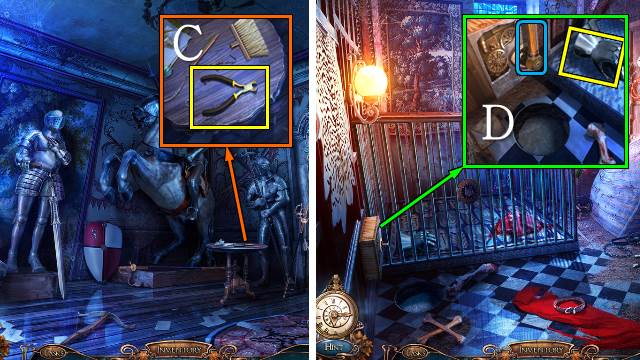
- Take the CLIPPERS (C).
- Go to the Kennels.
- Put the CAGE LEVER on the mechanism, pull it and take the IRON GLOVE (D).
- Walk down.
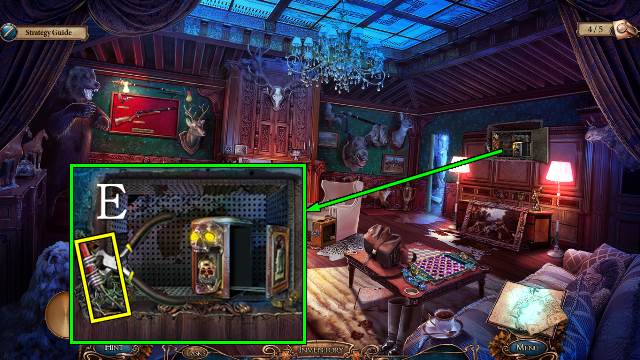
- Remove the wire with the CLIPPERS and take the HILT (E).
- Go to the Heraldic Armory.
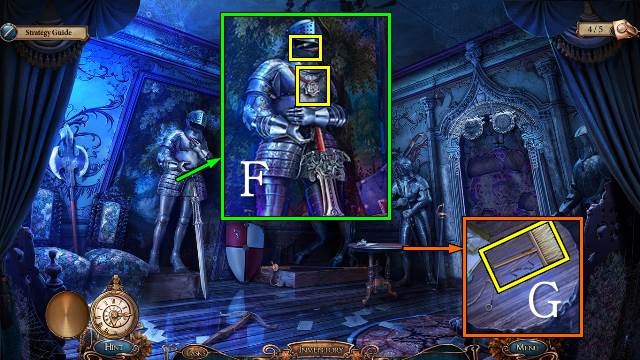
- Put the IRON GLOVE on the suit of armor and the HILT on the sword; take the STRAIGHT RAZOR and use it to cut the necklace to get the SILVER ROSE and CORD (F).
- Fix the brush with the CORD and take the DUST BROOM (G).
- Go to the Vault.
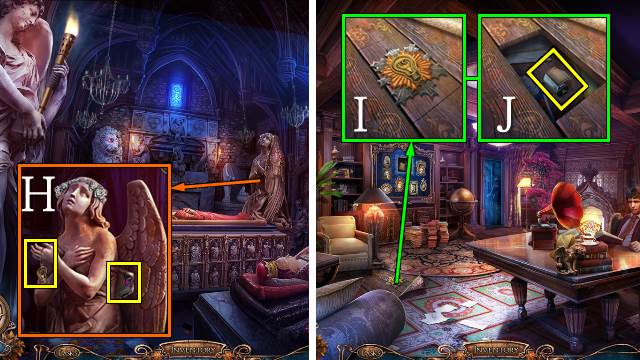
- Put the SILVER ROSE and STONE FEATHER on the angel; take the LIGHTBULB and MURAL PIECE 4/4 (H).
- Go to the Study.
- Open the hatch with the LIGHTBULB (I); take the FILM (J).
- Walk forward.
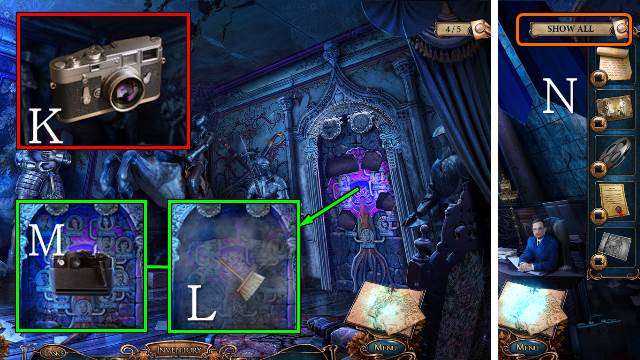
- Access the BROKEN CAMERA, put the CAMERA LENS and FILM on it and take the CAMERA (K).
- Clean the mural with the DUST BROOM (L), put the MURAL PIECES on it and take a picture with the CAMERA to get the Picture Clue (M).
- Select the 'Show All' button (N).
Chapter 5: Catherine's Diary
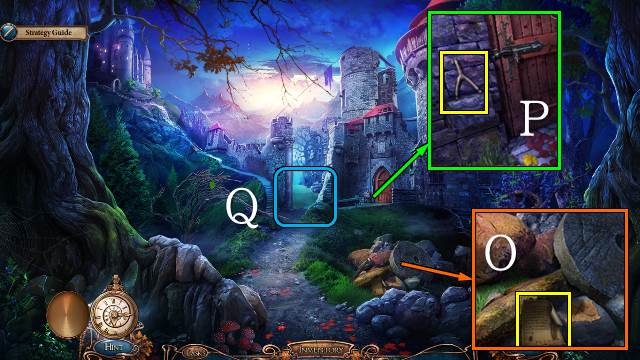
- Take CATHERINE'S DIARY PAGE 1/7 (O).
- Take the STICK (P).
- Try to walk forward (Q).
- Go left.
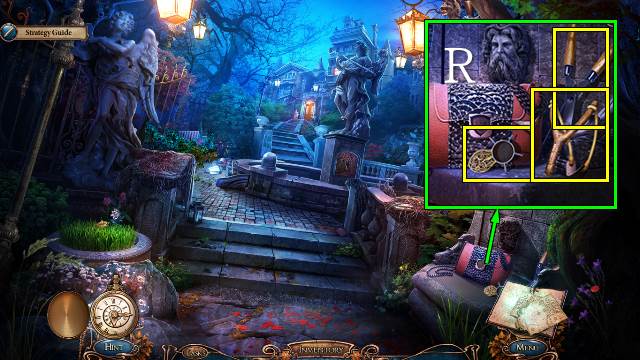
- Take the DULL SHEARS and MECHANICAL FLOWER BASE; put the STICK on the sling and take the SLINGSHOT (R).
- Walk down.
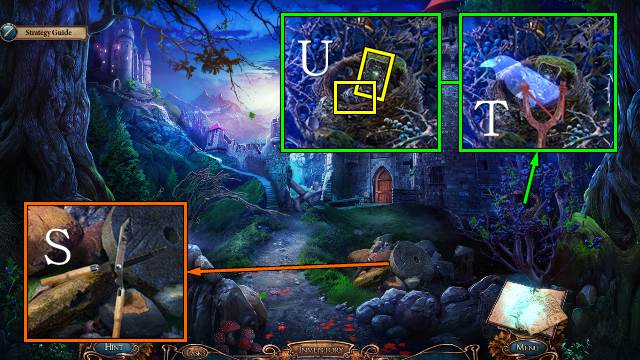
- Sharpen the DULL SHEARS on the whetstone; you get GARDENING SHEARS (S).
- Touch the skeleton and shoot the bird with the SLINGSHOT (T); take the AMPHORA AMULET and BUTTON (U).
- Go left.
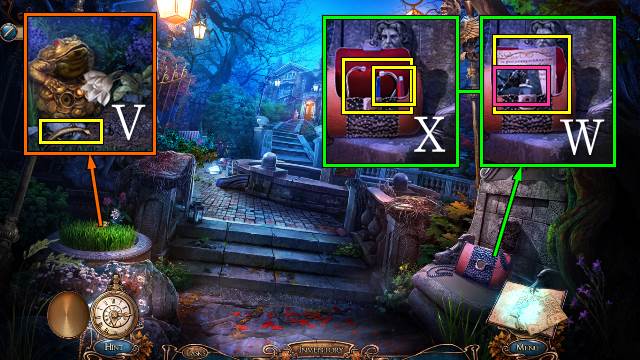
- Cut the grass with the GARDENING SHEARS; take the CASTLE DOOR HANDLE (V).
- Open the bag with the BUTTON; take the Picture Clue, CATHERINE'S DIARY PAGE 2/7 (W), MAGNET and STETHOSCOPE HEADSET (X).
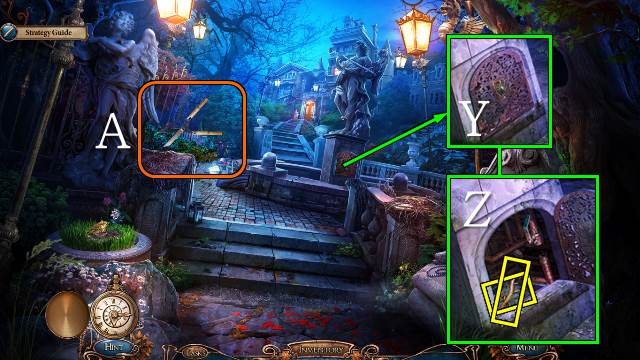
- Open the grid with the AMPHORA AMULET (Y); take the CASTLE DOOR HANDLE and GOLDEN KEY (Z).
- Cut the ivy with the GARDENING SHEARS (A).
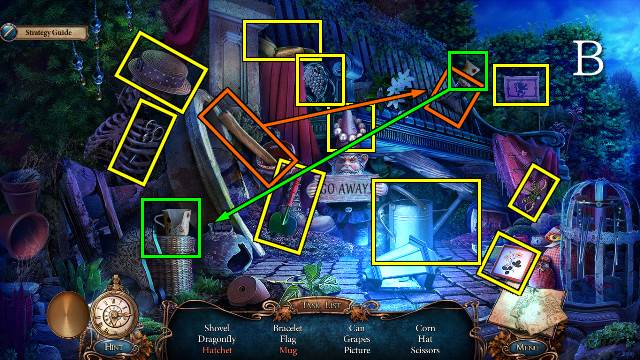
- Play the HOP (B).
- You receive the WATERING CAN.
- Walk down.
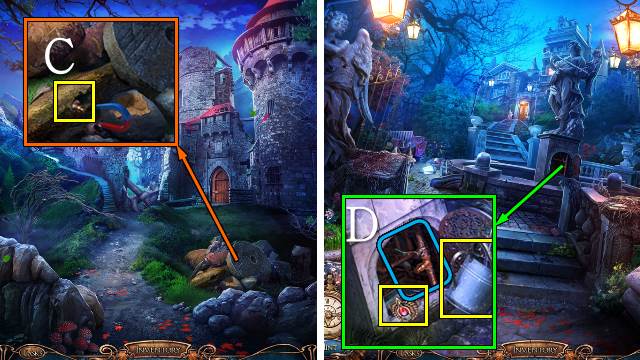
- Use the MAGNET and take the FOUNTAIN VALVE (C).
- Go left.
- Put the FOUNTAIN VALVE between the pipes and pull the lever; take the GRIFFIN BRACELET and fill the WATERING CAN to get a FULL WATERING CAN (D).
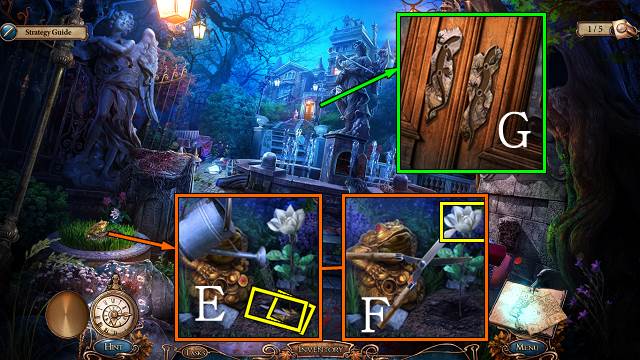
- Water the flower with the FULL WATERING CAN (E); cut the flower with the GARDENING SHEARS and take the PALETTE KNIFE, BRASS LEAF and BUD (F).
- Put the two CASTLE DOOR HANDLES on the door (G).
- Walk forward.
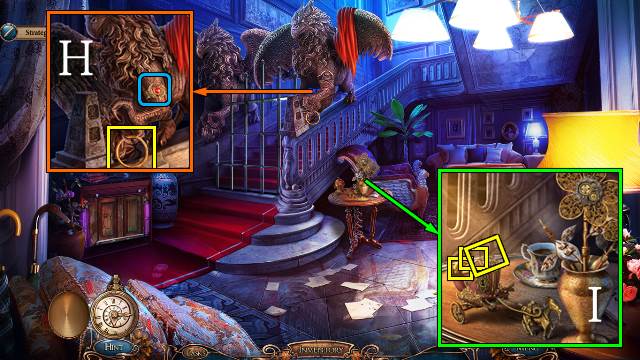
- Put the GRIFFIN BRACELET on the griffin; take the MANHOLE RING (H).
- Open the egg with the GOLDEN KEY; take the COIN, MECHANISM and RUNE 1/4 (I).
- Walk down.
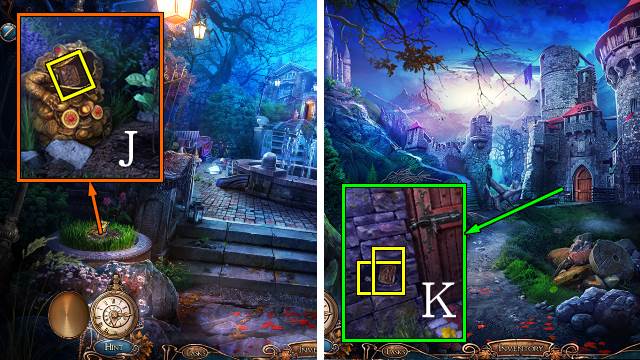
- Put the COIN on the frog and take RUNE 2/4 (J).
- Walk down.
- Remove the stone with the PALETTE KNIFE; take RUNE 3/4 and STETHOSCOPE PART (K).
- Go to the Vestibule.
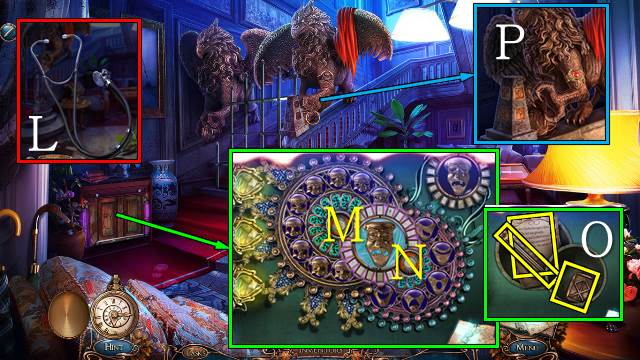
- Access the STETHOSCOPE HEADSET and attach the STETHOSCOPE PART to it; take the STETHOSCOPE (L).
- Put the STETHOSCOPE on the cabinet for a mini-game.
- Turn the dials to create the mask in the example.
- Solution 1: Mx8.
- Solution 2: Nx3.
- Solution 3: Mx1, Nx3.
- Take RUNE 4/4, CATHERINE'S DIARY PAGE 3/7 and the GLASS CUTTER BASE (O).
- Put the RUNES on the pillar (P).
- Walk forward.
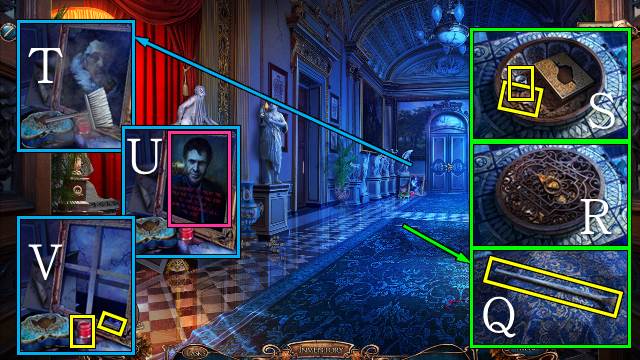
- Take the STEEL ROD (Q), remove the carpet and put the MANHOLE RING on the manhole cover (R); take the BLUE PAINT and PENKNIFE (S).
- Use the DUST BROOM and PENKNIFE on the painting (T) and take the Picture Clue (U); take the RED PAINT and DRAGON EYE (V).
- Go down to By the Old Tower.
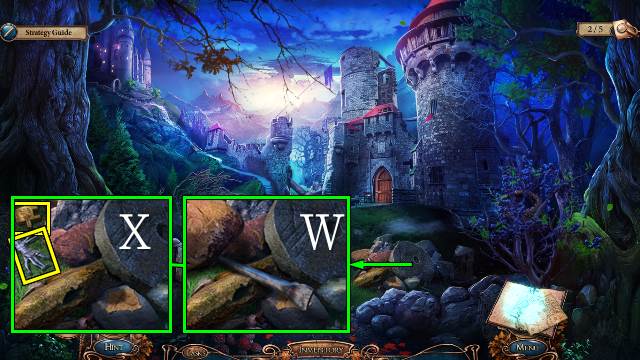
- Move the rock with the STEEL ROD (W); take the FORGED PATTERN and GLASS CUTTER PART (X).
- Go to the Vestibule.
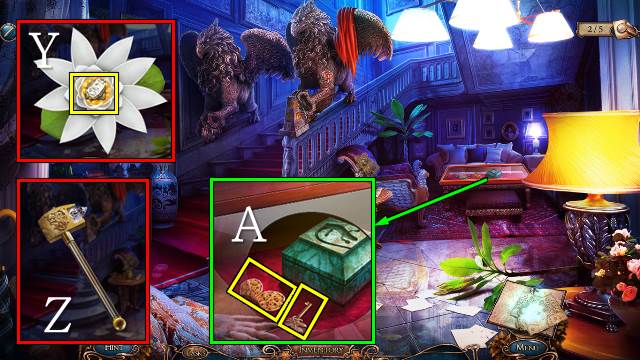
- Access the BUD and open it; take the DIAMOND PESTLE (Y).
- Access the GLASS CUTTER BASE and put the GLASS CUTTER PART and DIAMOND PESTLE on it; take the GLASS CUTTER (Z).
- Cut the glass with the GLASS CUTTER and take the PETALS and TWISTED KEY (A).
- Walk forward.
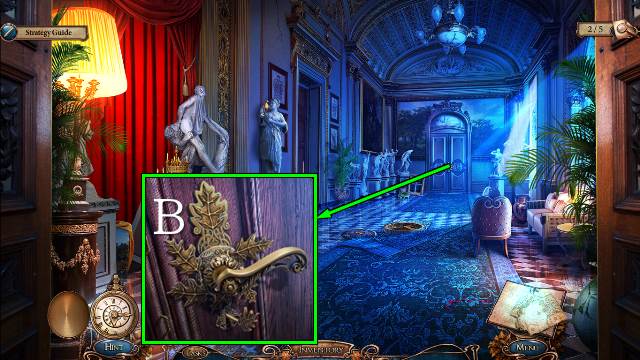
- Put the BRASS LEAF on the door and unlock it with the TWISTED KEY; turn the handle (B).
- Walk forward.
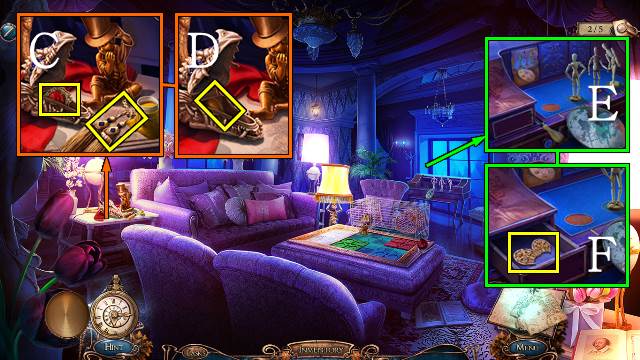
- Take the CURTAIN TIE; open the dragon with the DRAGON EYE and take the Pendant Clue (C).
- Take the PAINT SPOON (D).
- Open the compartment with the SCREWDRIVER (E); take the PETALS (F).
- Walk down.
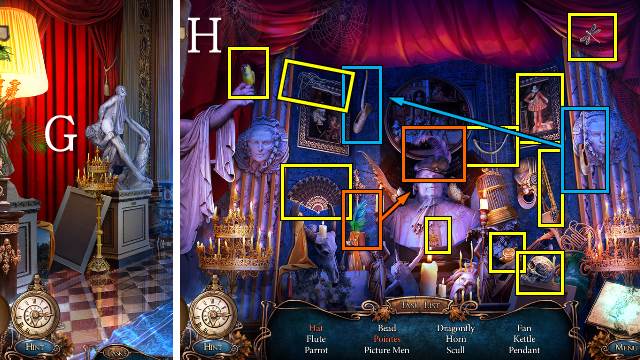
- Put the CURTIAIN TIE on the curtain (G).
- Play the HOP (H).
- You receive the FLUTE.
- Walk down.
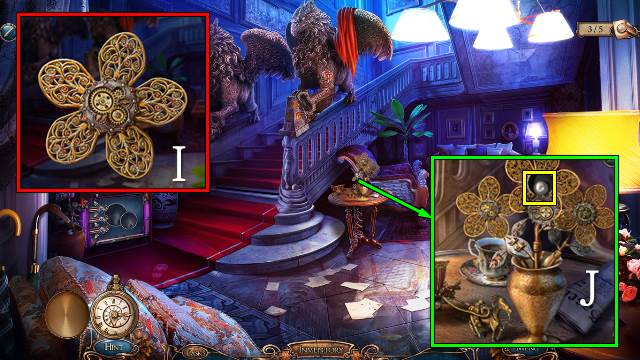
- Access the MECHANICAL FLOWER BASE and put the MECHANISM and two PETALS on it; take the MECHANICAL FLOWER (I).
- Put the MECHANICAL FLOWER on the stem; take the PEARL (J).
- Walk forward twice.
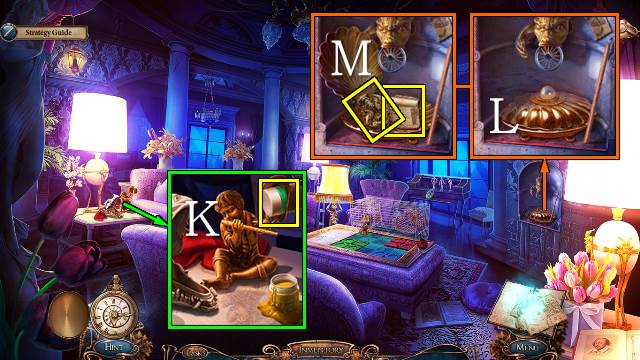
- Give the statuette back his FLUTE and take the GREEN PAINT (K).
- Put the PEARL on the shell (L); take CATHERINE'S DIARY PAGE 4/7 and the FISH HANDLE (M).
- Walk down.
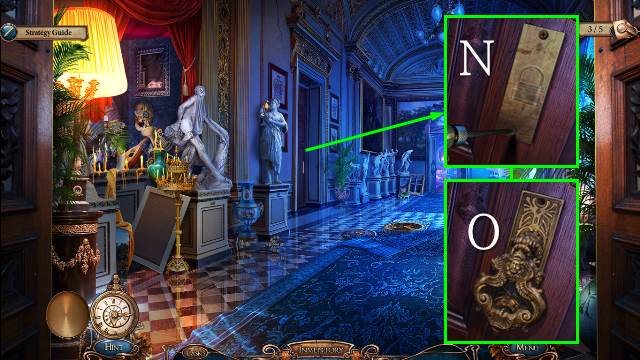
- Remove the screws with the SCREWDRIVER (N); put the FISH HANDLE on the door and pull the handle (O).
- Go left.
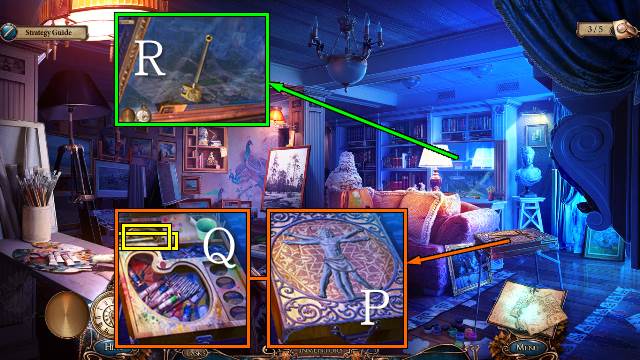
- Put the FORGED PATTERN on the box and open it (P); take the FISH FIN and BRUSH (Q).
- Cut the glass with the GLASS CUTTER (R).
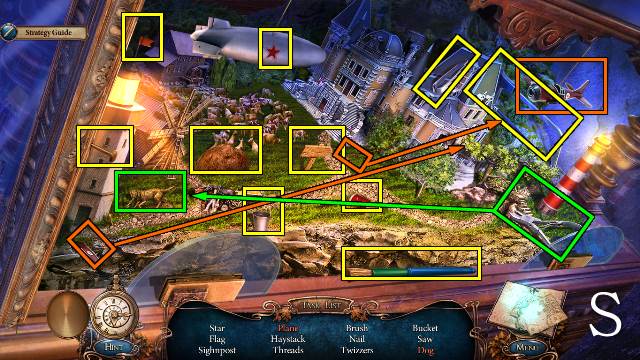
- Play the HOP (S).
- You receive the SAW.
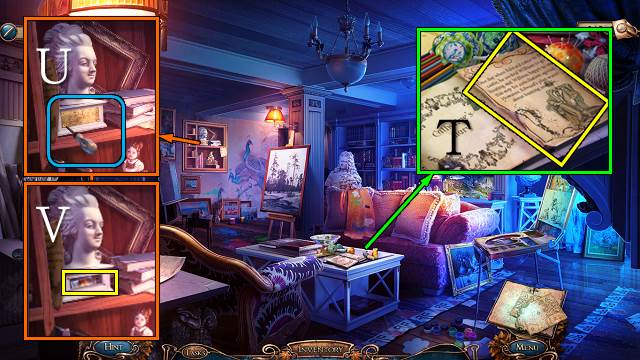
- Take CATHERINE'S DIARY PAGE 5/7 (T).
- Remove the screws with the SCREWDRIVER (U); take the PAINT SOLVENT (V).
- Go to the Guest Room.
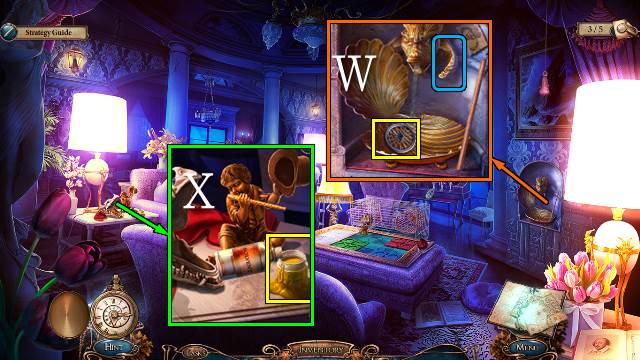
- Put the FISH FIN on the fish and pull it; take the TOY WHEEL (W).
- Pour the PAINT SOLVENT on the jar and take the YELLOW PAINT (X).
- Go to the Workshop.
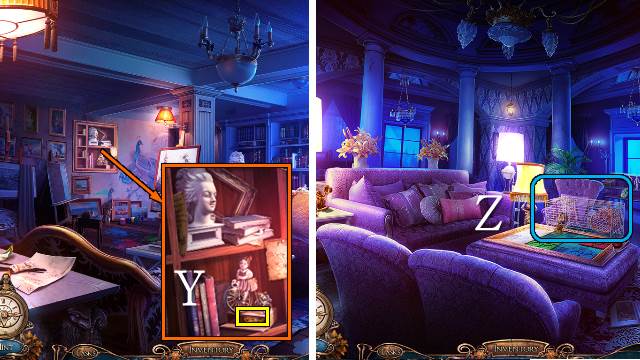
- Put the TOY WHEEL on the toy; take the COOKIES (Y).
- Go to the Guest Room.
- Give the COOKIES to the hamster for a mini-game (Z).
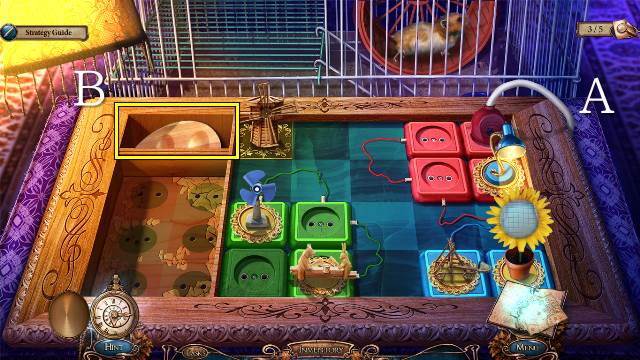
- Plug in the red plug to start the game (A).
- Connect the wires with the symbol plugs to make a logical circuit.
- Take the PALETTE (B).
- Go to the Workshop.
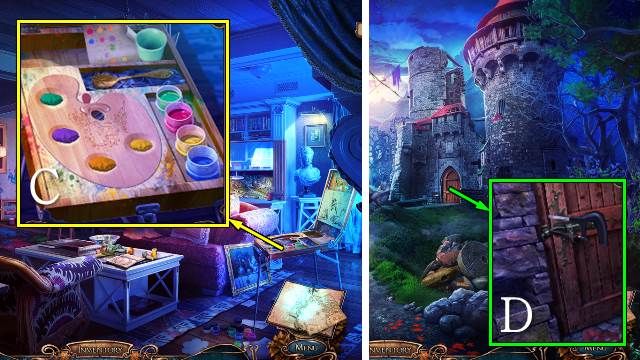
- Put the RED PAINT, BLUE PAINT, GREEN PAINT, YELLOW PAINT, PALETTE and PAINT SPOON in the box for a mini-game (C).
- Use the spoon to mix the paint according to the example.
- Take the PALETTE WITH PAINTS.
- Go to By the Old Tower.
- Cut through the latch with the SAW (D).
- Walk forward.
Chapter 6: Saving Elizabeth
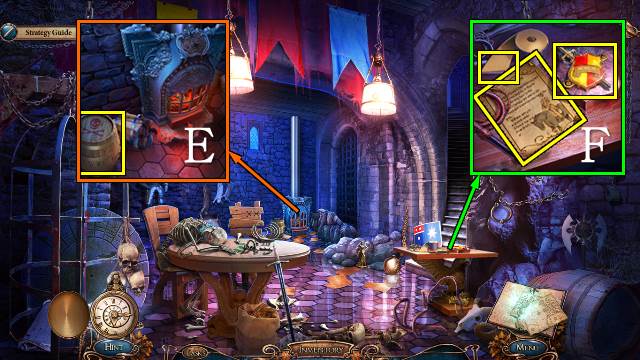
- Take the POWDER BARREL (E).
- Take CATHERINE'S DIARY PAGE 6/7 and cut a piece of SANDPAPER with the PENKNIFE and take it; remove the screws with the SCREWDRIVER and take the BADGE (F).
- Go to the Gallery.
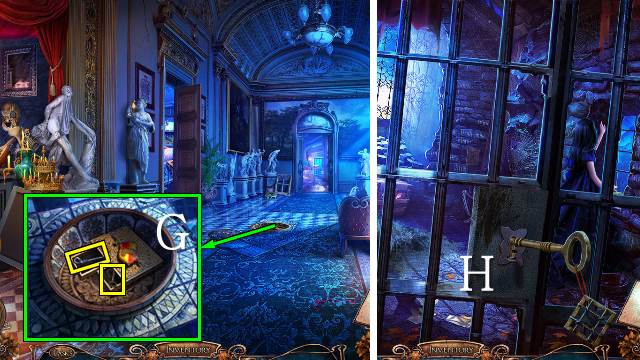
- Open the box with the BADGE; take the PROBING ROD and CELL KEY (G).
- Go to Inside the Tower and walk forward.
- Open the cell with the CELL KEY (H).
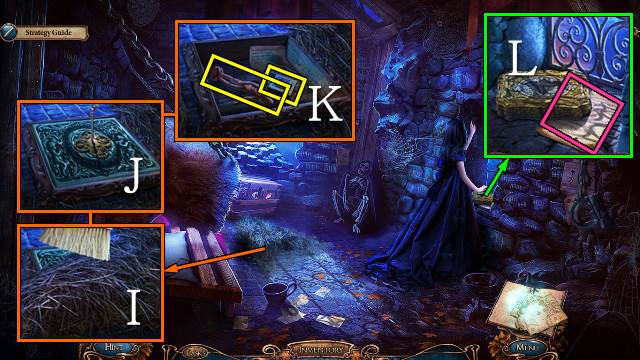
- Remove the hay with the DUST BROOM (I) and open the hatch with the PROBING ROD (J); take the MATCHES and WOODEN DOLL (K).
- Take the Note Clue (L).
- Walk down twice.
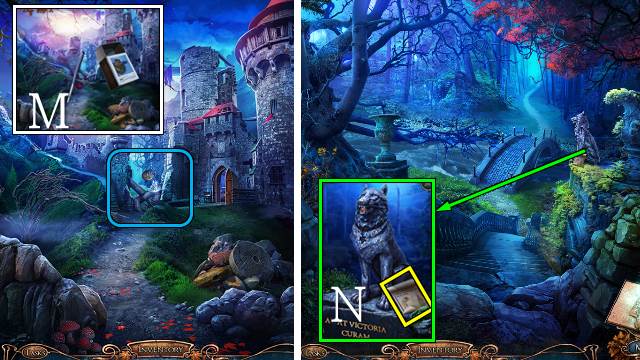
- Pour the contents of the POWDER BARREL over the obstruction and light them with the MATCHES (M).
- Walk forward.
- Take CATHERINE'S DIARY PAGE 7/7 (N).
- Go to the Workshop.
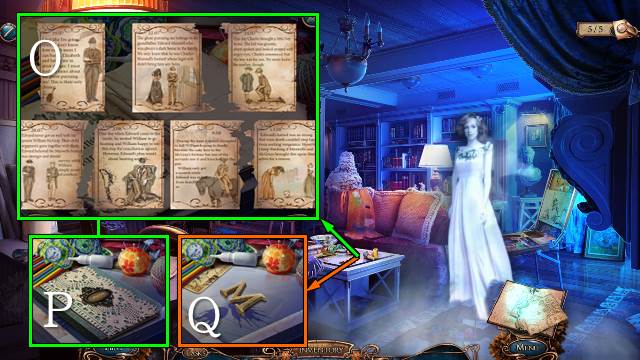
- Put CATHERINE'S DIARY PAGES on the diary for a mini-game.
- Order the pages according to date and torn edges (O).
- Take the Diary Clue (P).
- You receive the FAMILY AMULET BASE.
- Take the LETTER M (Q).
- Go to the Guest Room.
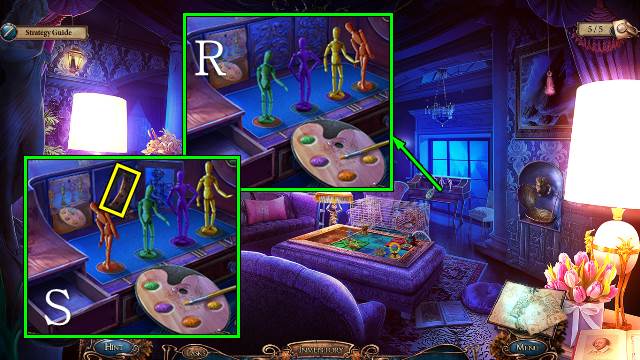
- Put the WOODEN DOLL, PALETTE WITH PAINTS and BRUSH down for a mini-game.
- Step 1: Paint the wooden dolls according to the example; match the color to the shape of the doll (R).
- Step 2: Rearrange the dolls in the shown order (S).
- Take the WOLF COLLAR.
- Go to the Way to Precipice.
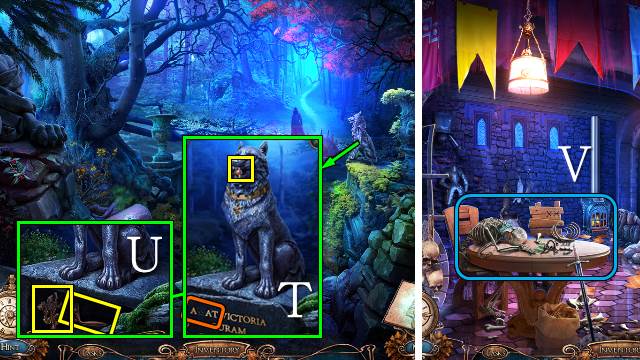
- Put the WOLF COLLAR on the wolf and take the SKELETON RING (T); put the LETTER M on the pedestal and take the OVEN HANDLE and GOLDEN WOLF (U).
- Go to the Inside the Tower.
- Put the SKELETON RING on the skeleton for a mini-game (V).
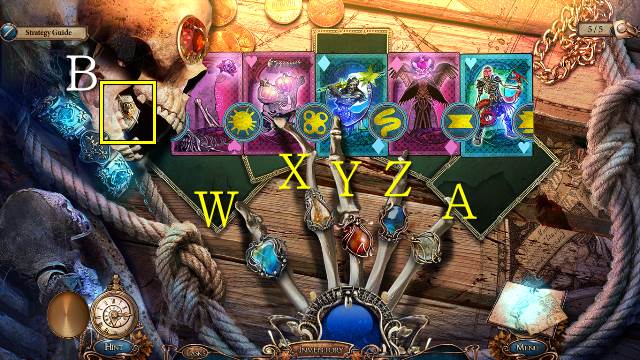
- Move the cards until the symbols on the edges line up; select a ring to turn a card over.
- Solution: Turn W, Y, A, swap Y/A, swap Z/A.
- Take the SHIELD AND SWORDS (B).
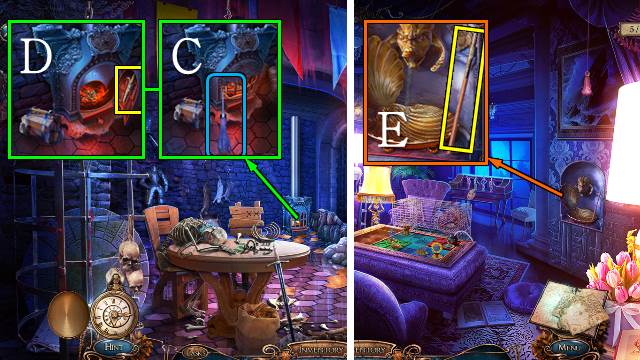
- Put the OVEN HANDLE on the oven and fix it with the SCREWDRIVER (C); take the POKER HOOK (D).
- Go to the Guest Room.
- Put the POKER HOOK on the stick and take the POKER (E).
- Go to Inside the Tower.
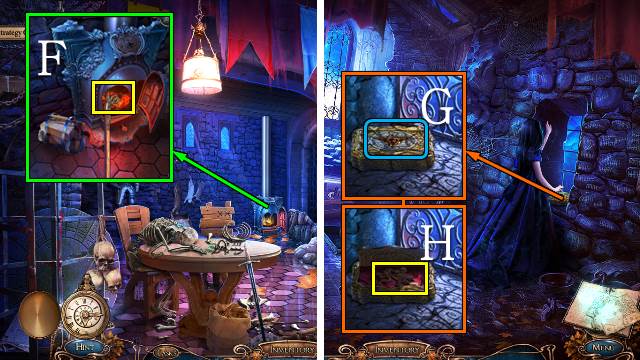
- Use the POKER on the fire and take the BAT AMULET (F).
- Walk forward.
- Open the box with the BAT AMULET (G); take the GOLDEN WOLF (H).
- Walk down twice.
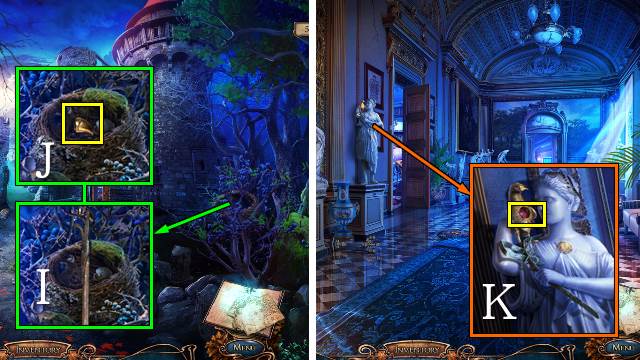
- Use the POKER (I); take the GOLDEN BEAK (J).
- Go to the Gallery.
- Put the GOLDEN BEAK on the parrot; take the RUBY HEART (K).
- Go to the Way to Precipice.
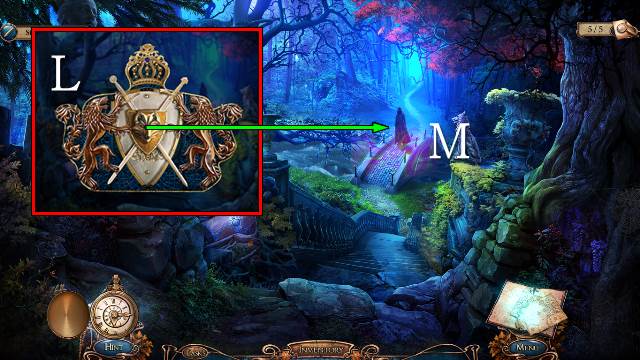
- Access the FAMILY AMULET BASE and put the SHIELD AND SWORDS and two GOLDEN WOLVES on it; take the FAMILY AMULET (L).
- Throw the FAMILY AMULET at the ghost (M).
- Walk forward.
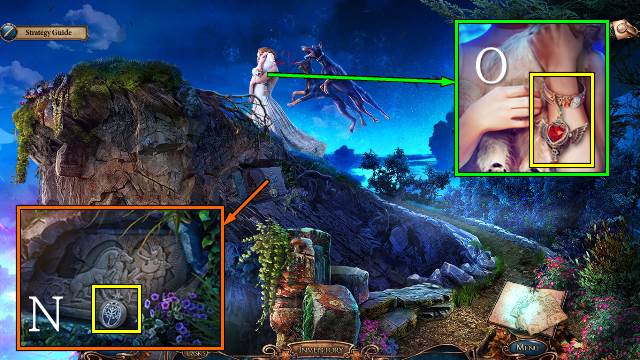
- Take the TREE AMULET (N).
- Put the RUBY HEART on the medallion and take ELIZABETH'S MEDALLION (O).
- Walk down.
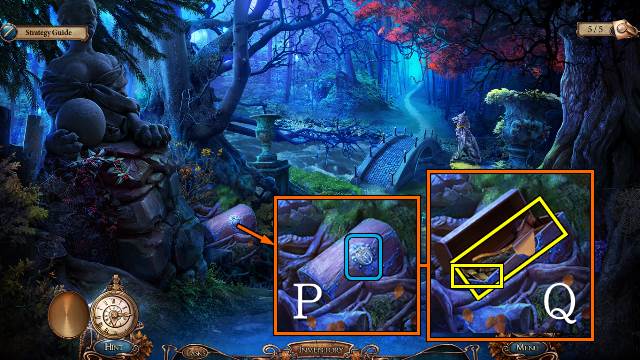
- Open the chest with the TREE AMULET (P); use the SANDPAPER on the wood and take the CROSSBOW STOCK and GOLDEN WREATH PART (Q).
- Go to the Gallery.
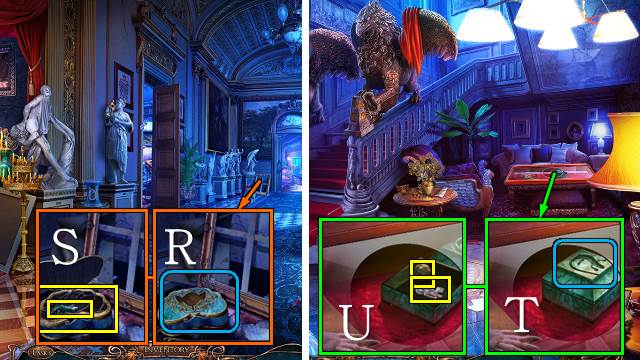
- Open the box with ELIZABETH'S MEDALLION (R); take the BOW STRING and GOLDEN LIZARD (S).
- Walk down.
- Open the box with the GOLDEN LIZARD (T); take the ROMAN SOLDIER and BALLED NET (U).
- Go to the Precipice.
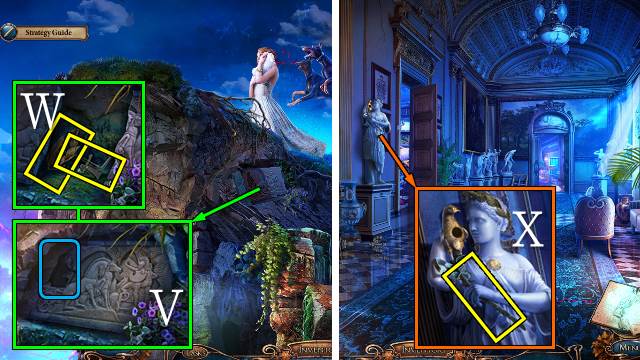
- Put the ROMAN SOLDIER on the plaque (V); put the GOLDEN WREATH PART next to the other and take the GOLDEN WREATH and TRIGGER (W).
- Go to the Gallery.
- Put the GOLDEN WREATH on the statue; take the BOW (X).
- Go to the Precipice.
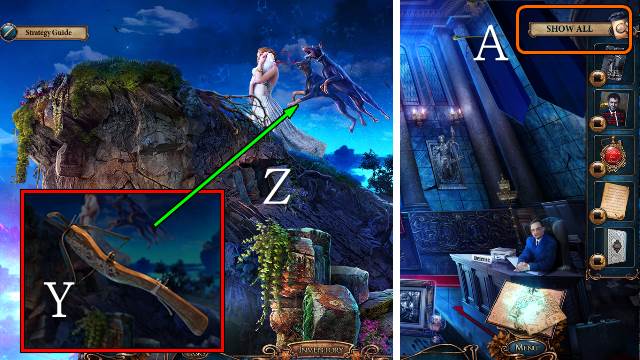
- Access the CROSSBOW STOCK and put the TRIGGER, BOW, BOWSTRING and BALLED NET on it; take the CROSSBOW (Y).
- Shoot the dogs with the CROSSBOW (Z).
- Select the 'Show All' button (A).
- Congratulations, you've just completed Grim Tales: The Vengeance.
Created at: 2014-06-13

