

Walkthrough Menu
- Chapter One: Jewelry Shop
- Chapter Two: Egypt
- Chapter Three: Alps
- Chapter Four: Seaside
- Chapter Five: Wild West
- Chapter Six: 50-th
- Chapter Seven: Road through the time
Chapter One: Jewelry Shop
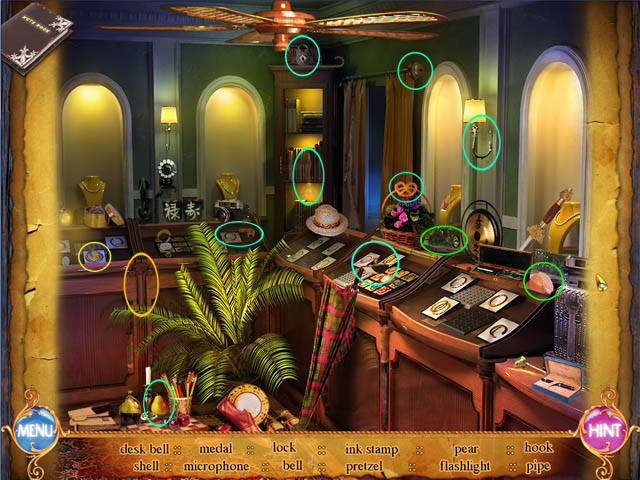
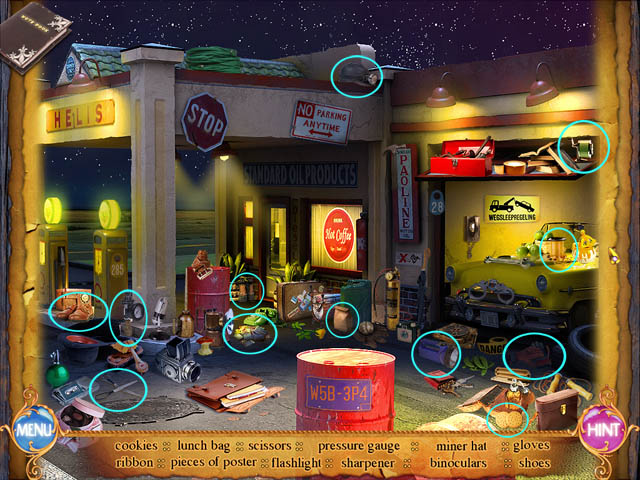
- Find all the items from the list to get a FLASHLIGHT.
- Click on the entrance to the workshop.
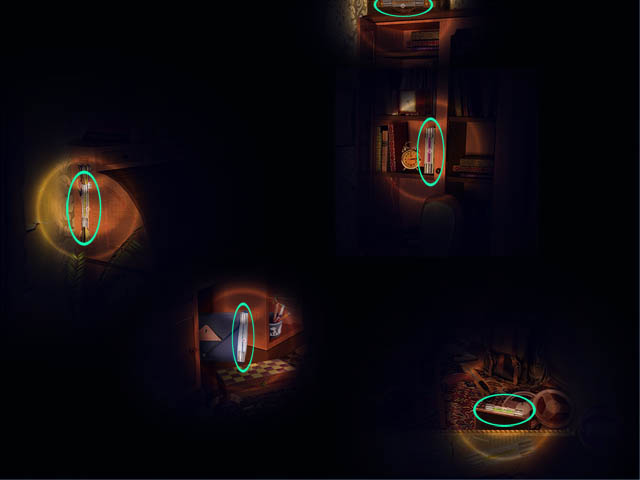
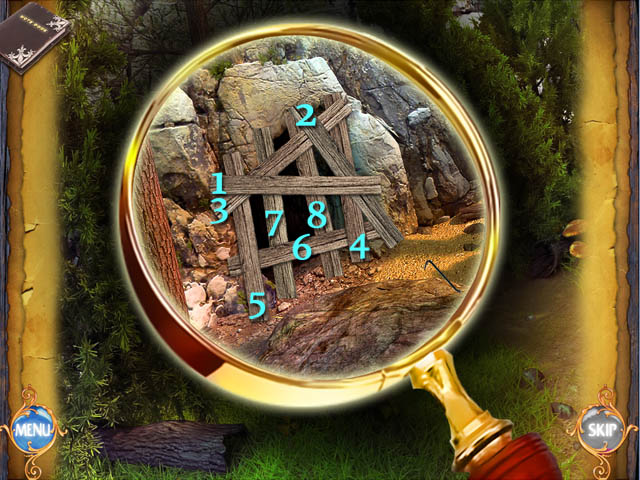
- Find 5 FUSES.
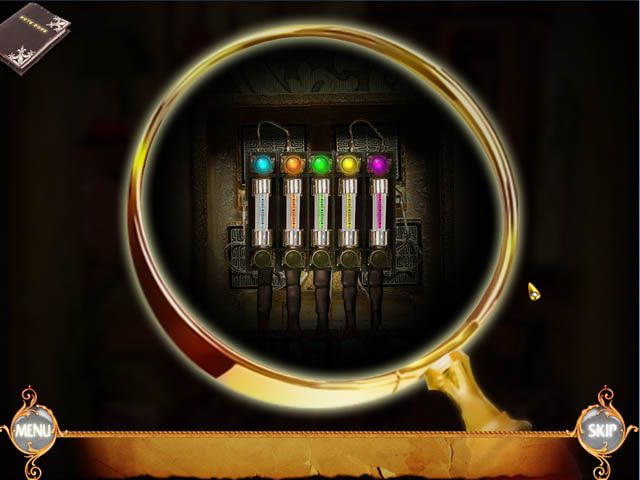
- Now you need to put these fuses in the right places as shown in the screenshot.
- Return again to the workshop.
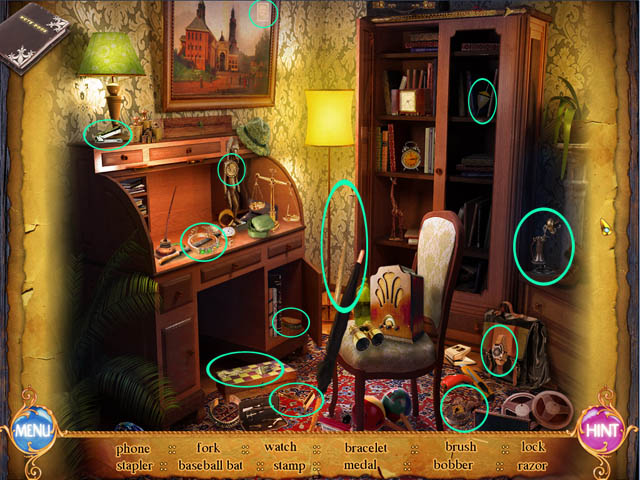
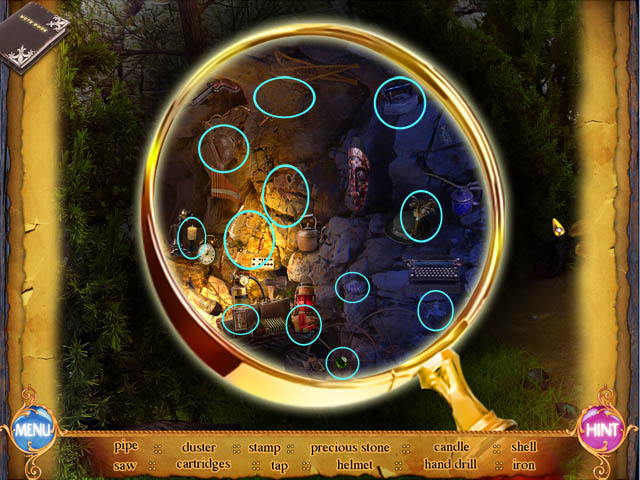
- We need to find 12 objects to get GRANDMA’S BRACELET.
Chapter Two: Egypt
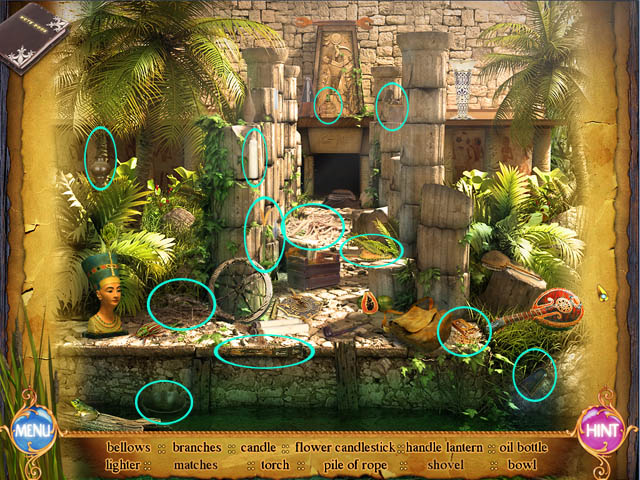
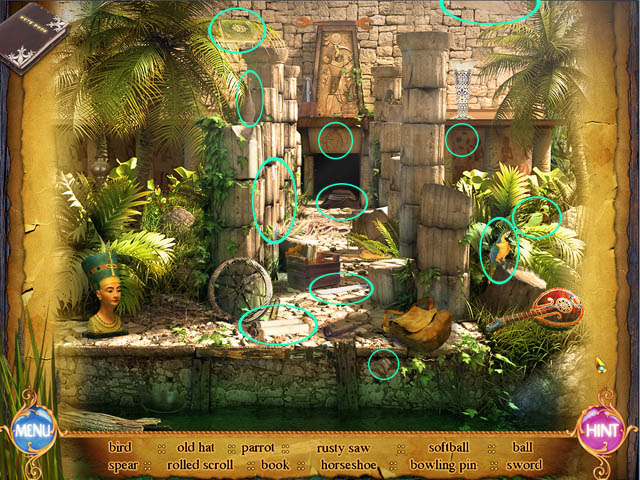
- Locate all the items from the list to illuminate the tomb.
- Click on the entrance to the tomb.
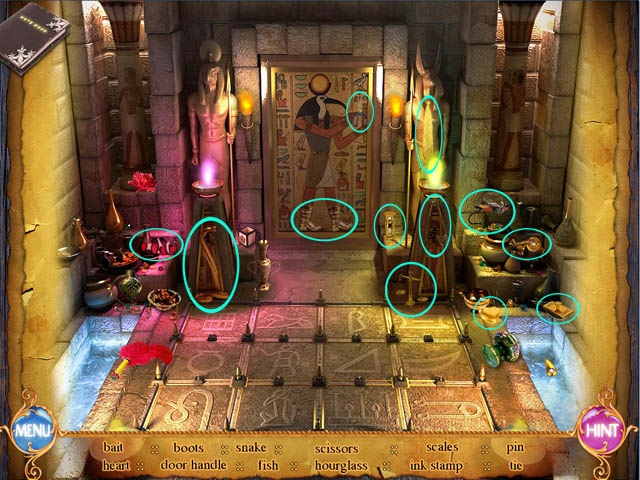
- Find 12 objects to get one part of the PAPYRUS, which will disable the trap on the floor.
- Return outside.
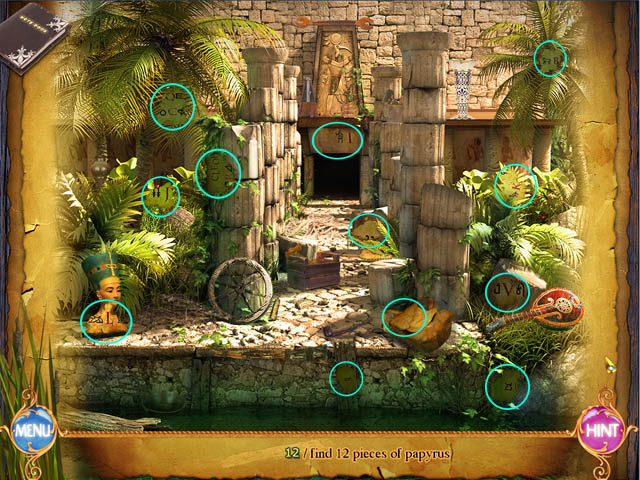
- Look for 12 pieces of PAPYRUS, and then complete the puzzle to get an Egyptian alphabet.
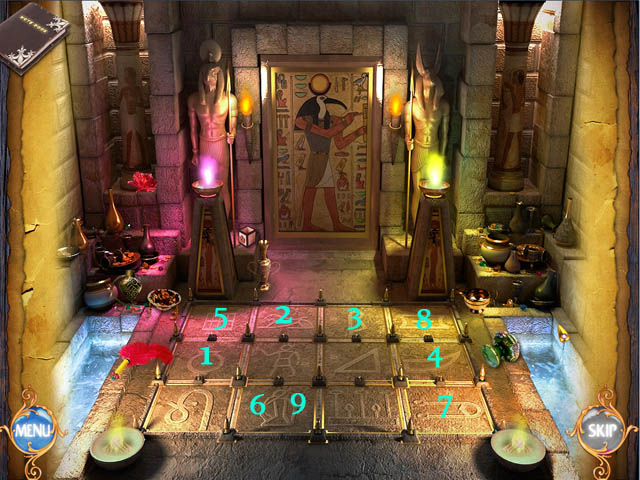
- Using this alphabet (which you can find in the notebook) enter the word “Cleopatra” by clicking on the blocks on the floor.
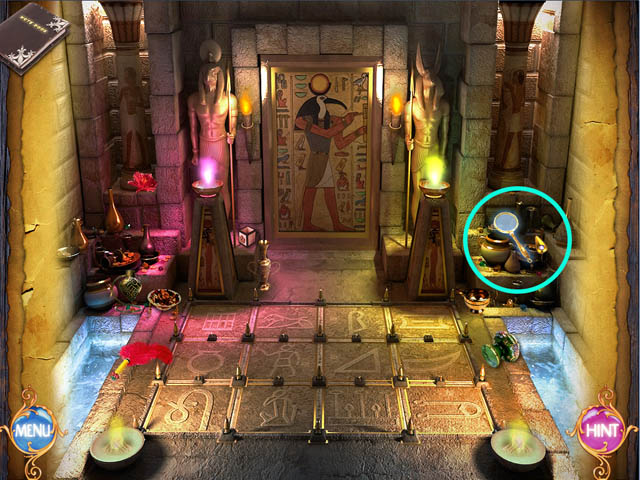
- The trap is disabled but the door of the tomb is still closed. Go to the right side of the tomb to find a MAGNIFYING GLASS. Click on it with the left mouse button.
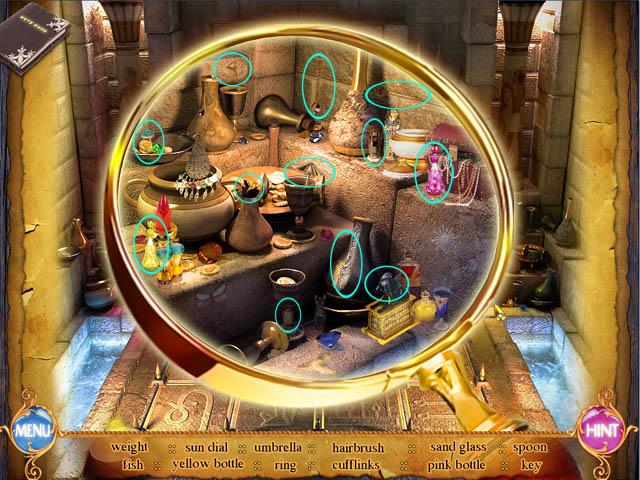
- Find all the items from the list.
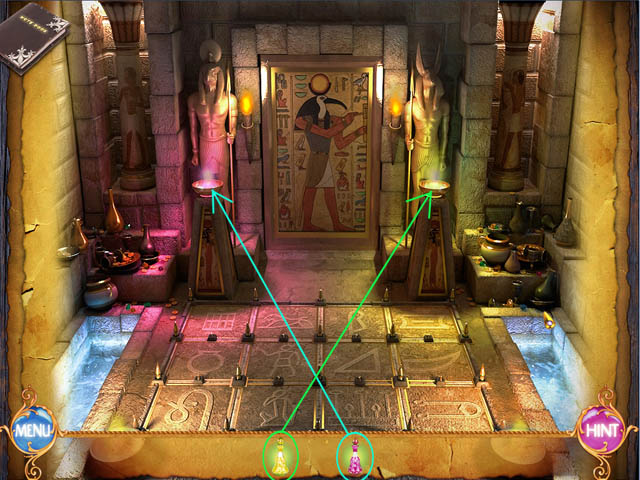
- Use these 2 BOTTLES on the fire from both sides of doors in the tomb.
- The door opens; click on it with the left mouse button.
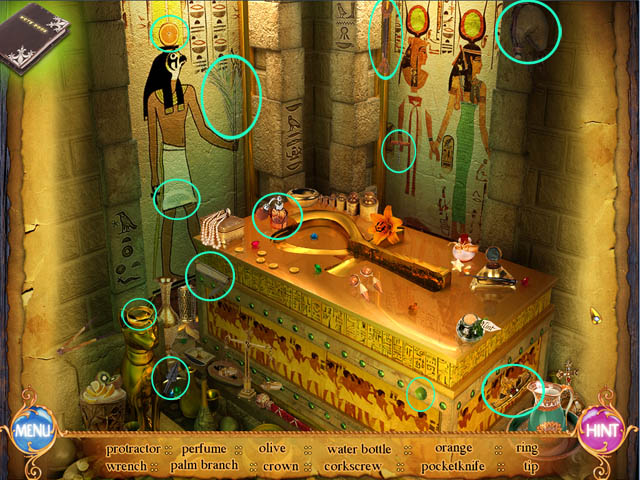
- Collect 12 objects to find AMULET.1/2.
- Go back outside.
- Find the items on the list to get AMULET 2/2.
- Go back to the tomb by clicking on the entrance.
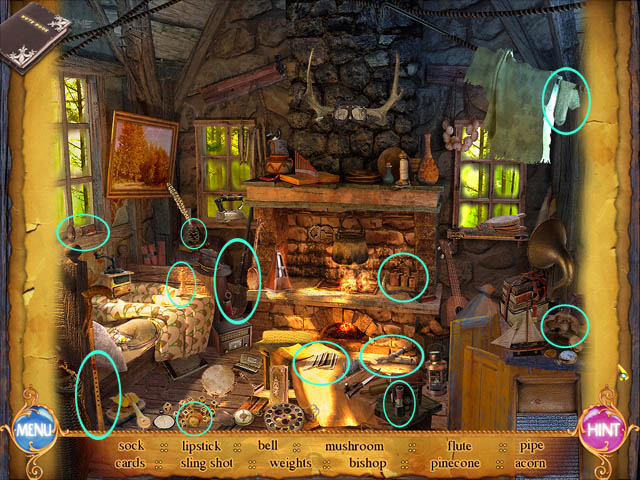
Chapter Three: Alps
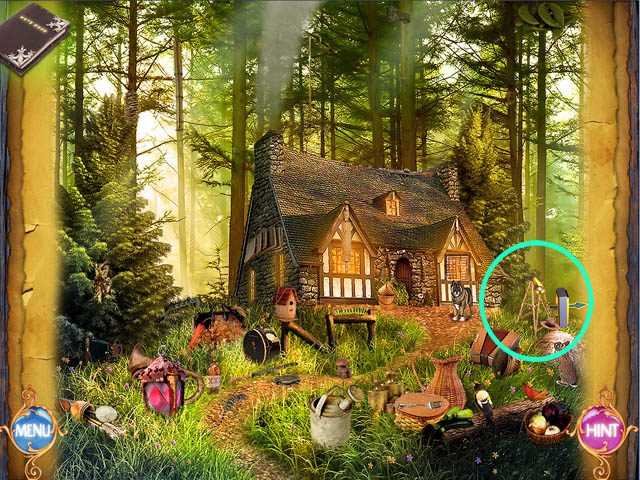
- Click the left mouse button to enter the house. You can`t come in. Then go to the right of the screen and go to a nearby forest glade.
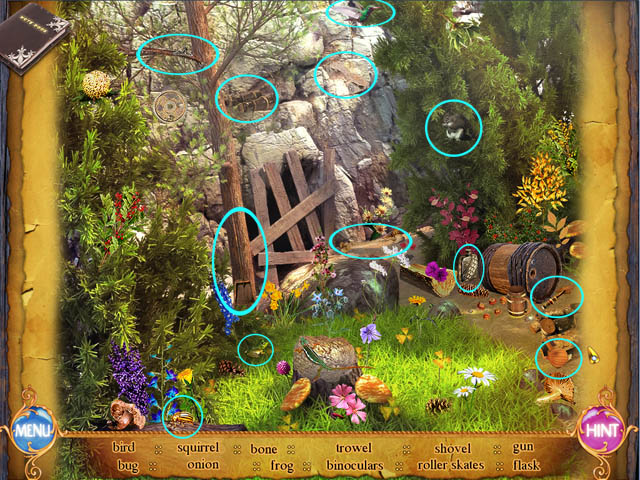
- Find all the items from the list to get a BONE, which you will give to the dog.
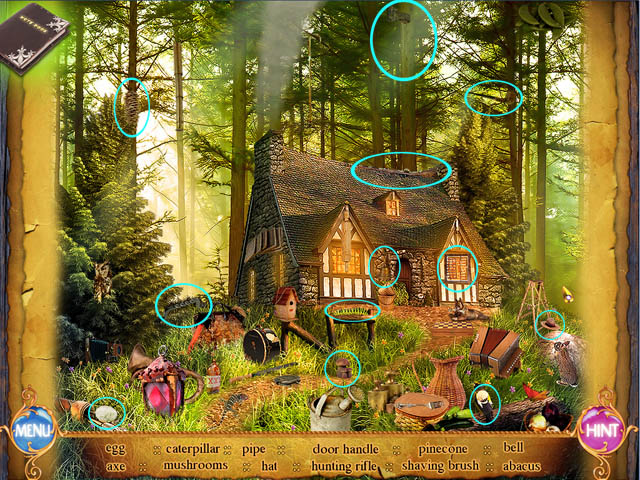
- Click the left mouse button on the door to enter the house. You can`t come in.
- Find all the items from the list to find the DOOR HANDLE.
- Click the left mouse button on the door of the house and come in.
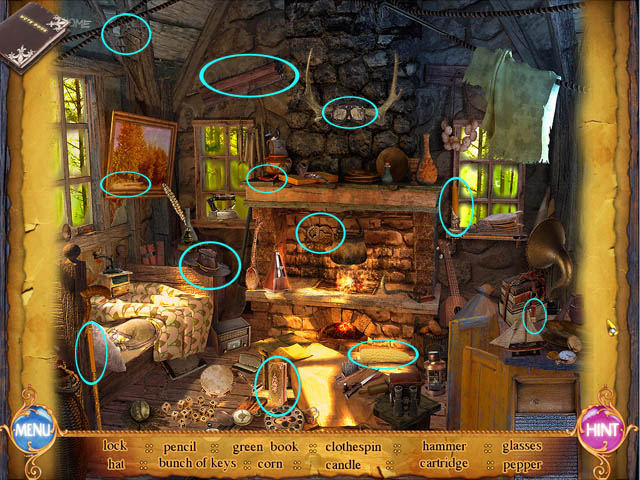
- Find 12 objects to find a BOOK WITH HEALING TEA RECIPE.
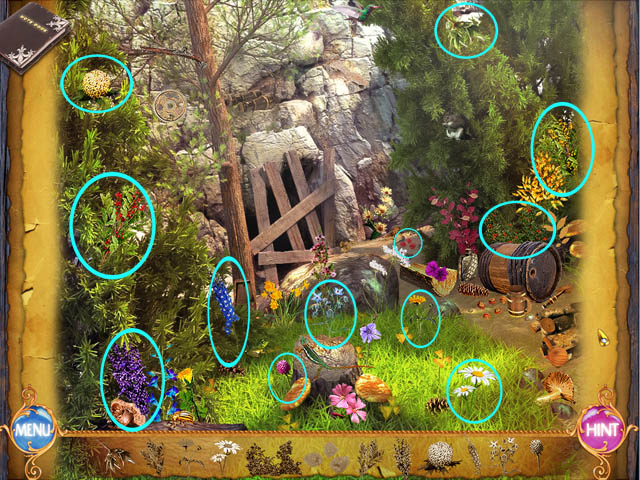
- Collect the 12 PLANTS needed to make the HEALING TEA.
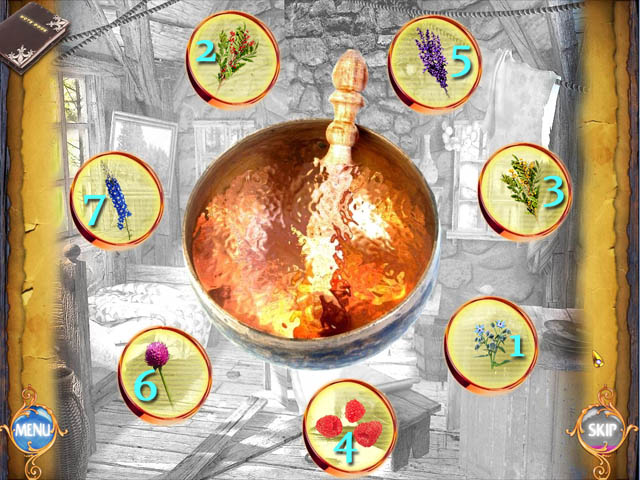
- Make a tea. To do this you need to add plants in the correct order.
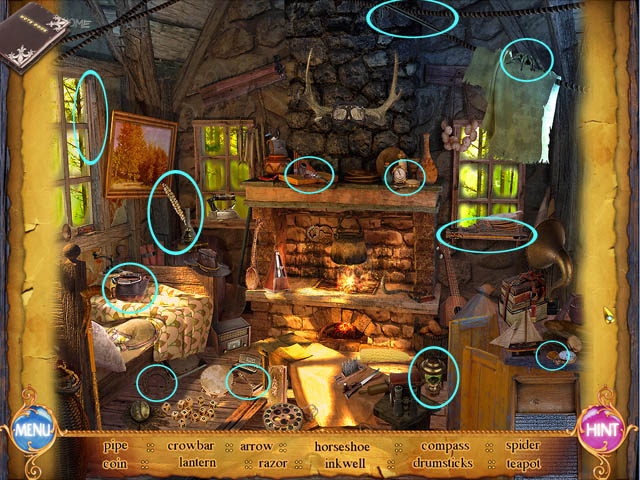
- Now we need to find 12 objects to get the CROWBAR with which we can open boarded cave.
- Remove the BOARDS with a CROWBAR in the right order.
- In the old cave find 12 objects and get an EMERALD.
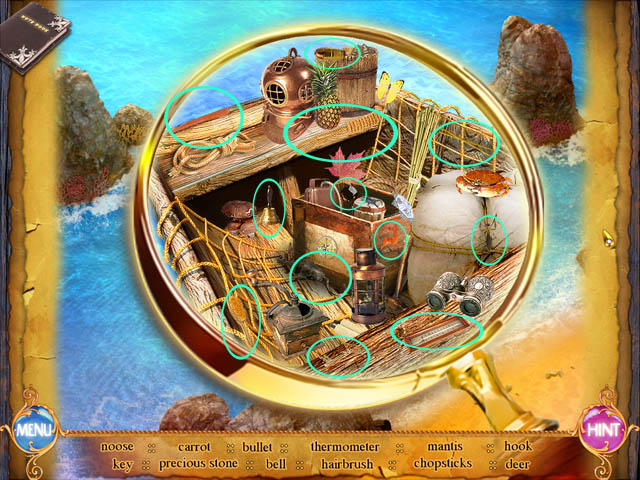
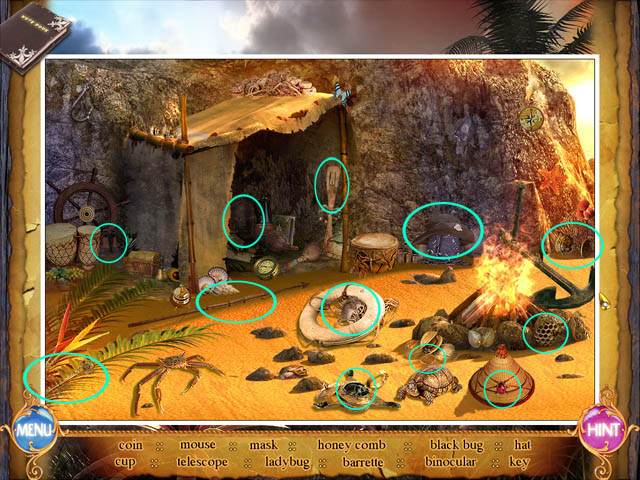
Chapter Four: Seaside
- You need to collect 12 pieces of a TENT.
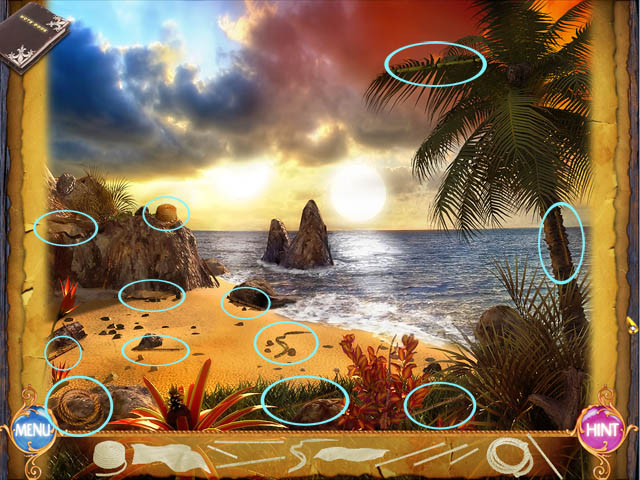
- Find all the items from the list to make a campfire.
- Click on the area with a tent and campfire.
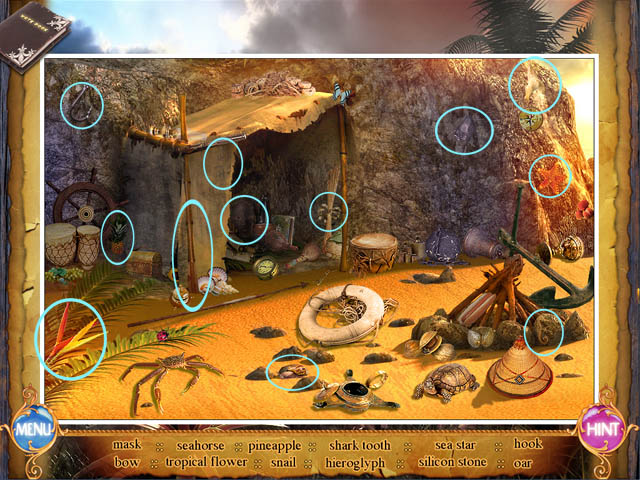
- Now we need to find 12 objects to get a SILICON STONE and make a fire.
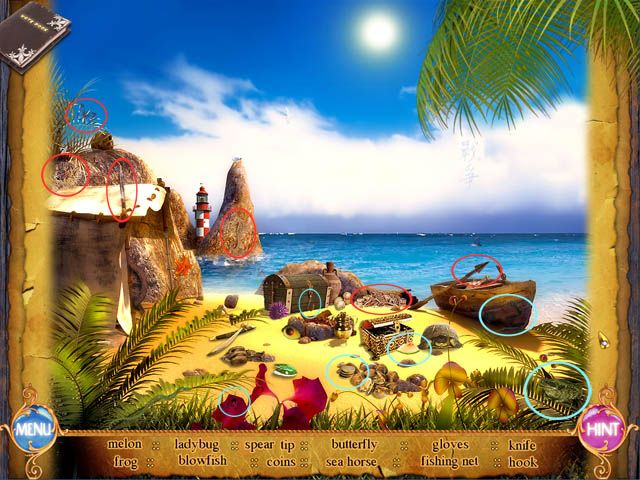
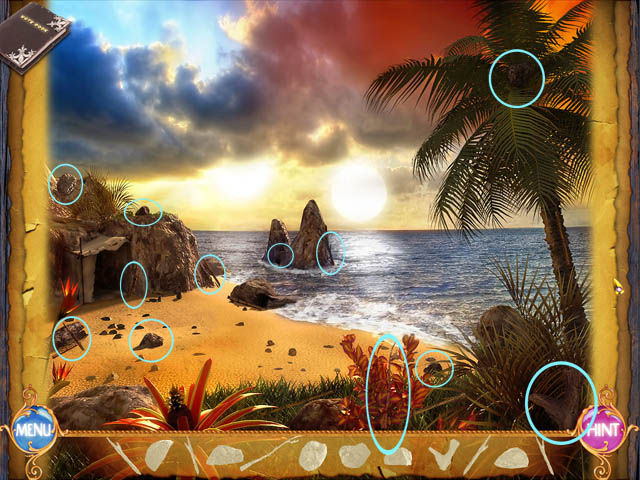
- Find all the items from the list to get the nets.
- Click on the boat with the left mouse button.
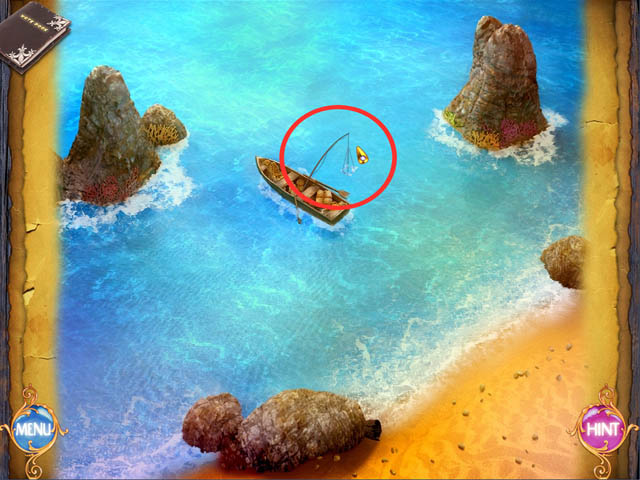
- Now we see a boat on the top. Choose one of the three sides to throw the net and press the button.
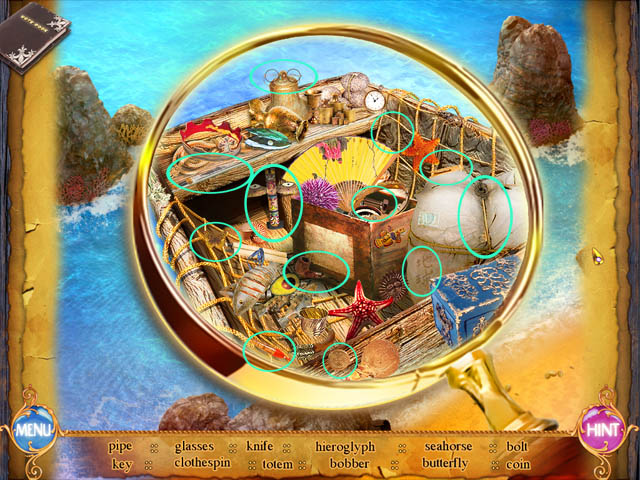
- Find all the items from the list.

- Throw a NET in another direction.
- Find all the items from the list.
- Throw a NET in the other direction.
- Find all the items from the list to get the emerald.
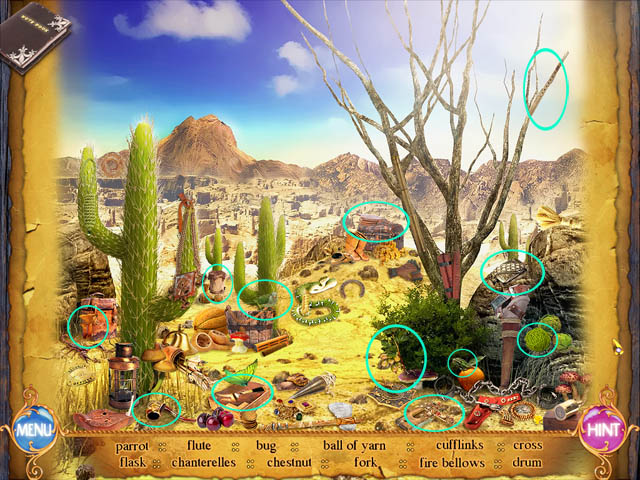
Chapter Five: Wild West
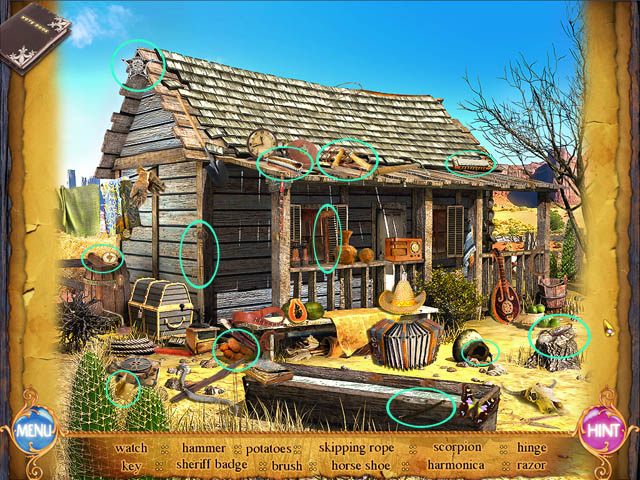
- Find 12 objects to get the KEY from the chest that is standing near the house.
- Direct the mouse on the chest and click the left mouse button.
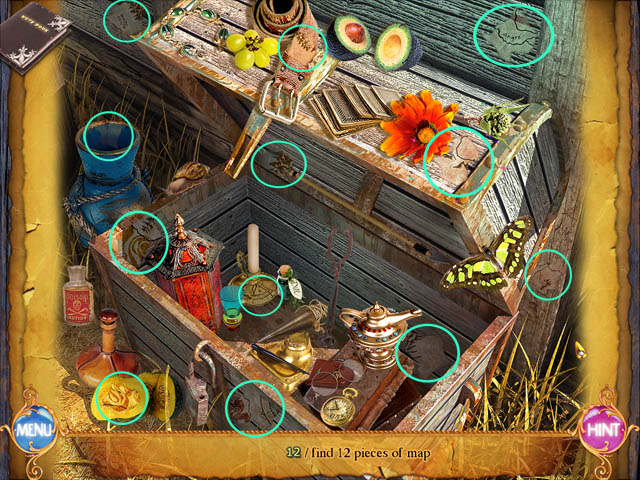
- Now you need to find 12 pieces of a MAP.
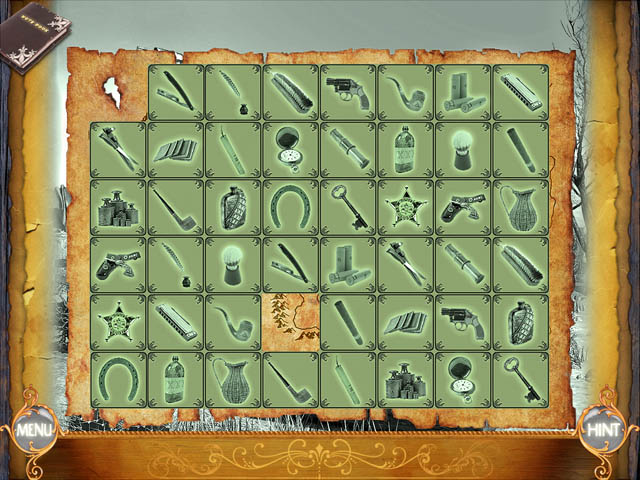
- Open the cards and find them a couple to see the map.
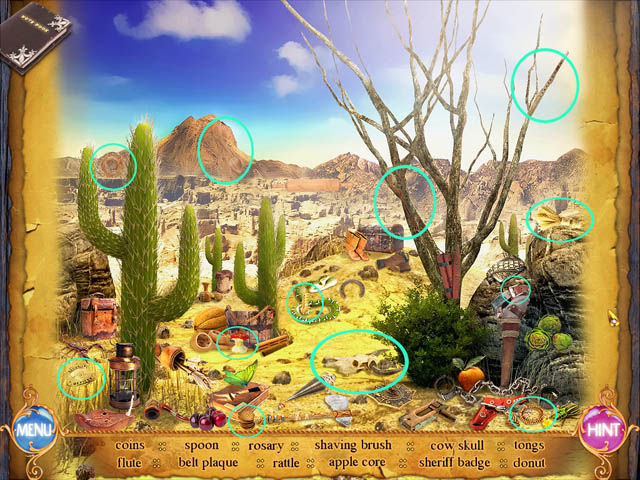
- Find all the items from the list to determine the place where the treasure is buried.
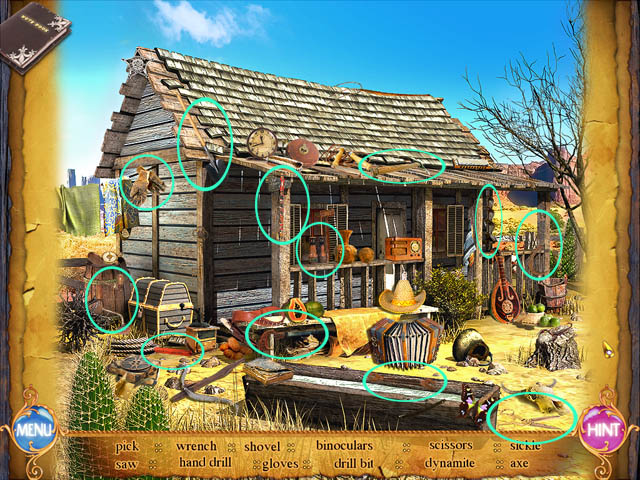
- Find 12 objects and obtain the TOOLS to dig up the treasure.
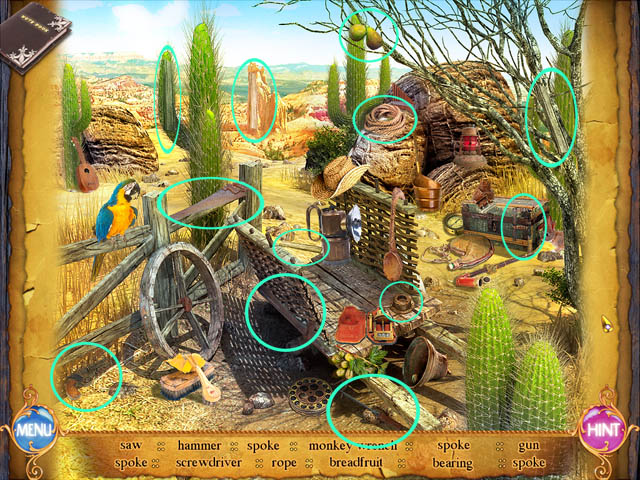
- Find all the items from the list to fix the wheel and carry tools.

- Insert spokes in the correct places to fix the wheel.
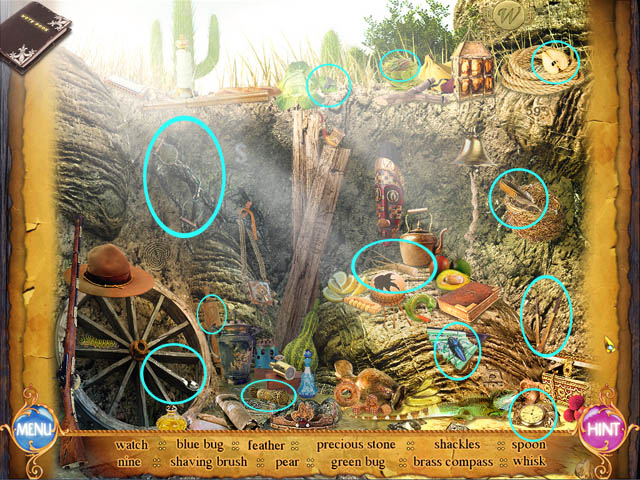
- Find 12 objects to get an EMERALD.
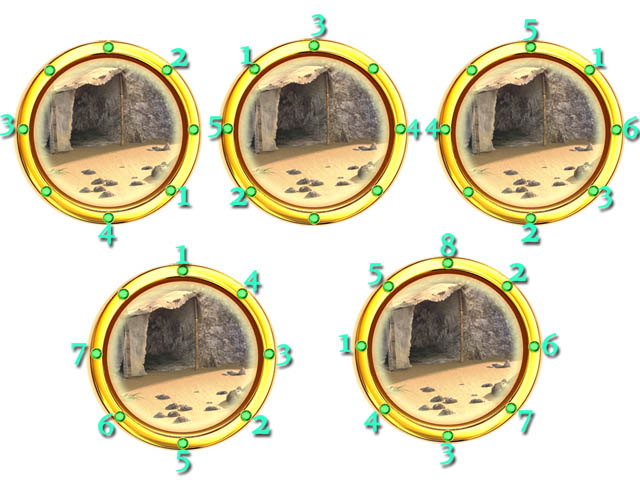
Chapter Six: 50-th
- Find 12 objects to get the pieces of poster and make a puzzle.
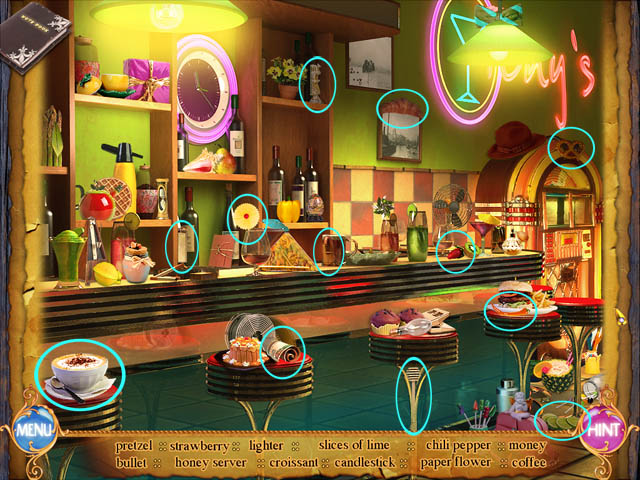
- Find all the items from the list.
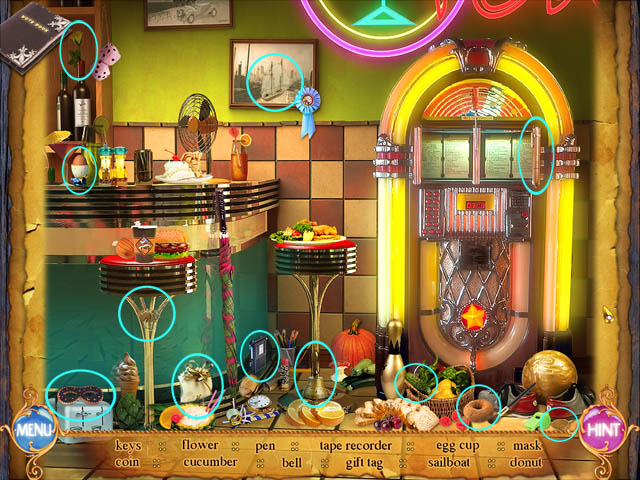
- Find all the items from the list to get a COIN. Push the red button on the jukebox and music will start playing.
- We must find 12 objects to get a LIGHT BULB.
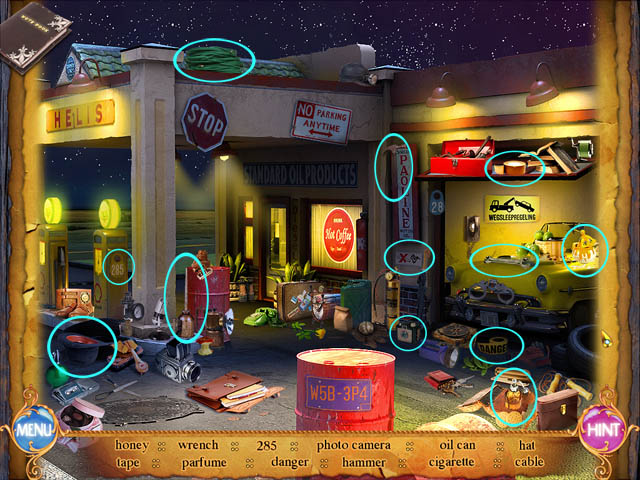
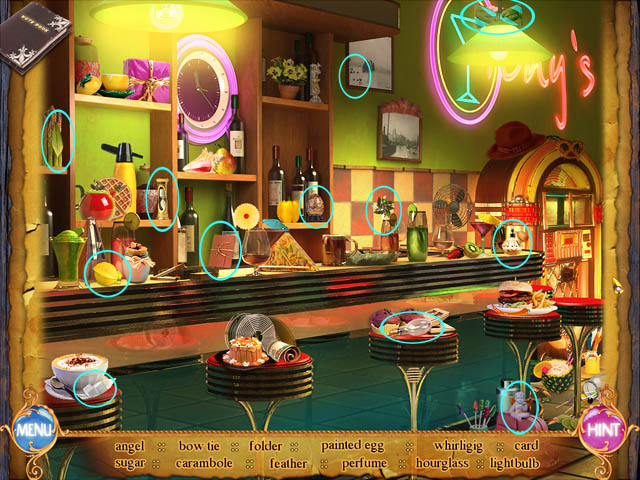
- Find all the items from the list to get a WRENCH.
- Click on the door and enter.
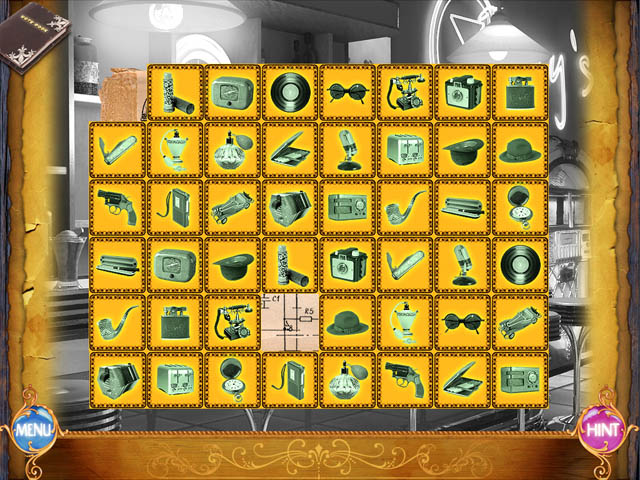
- Open the card and find them a couple to watch scheme.
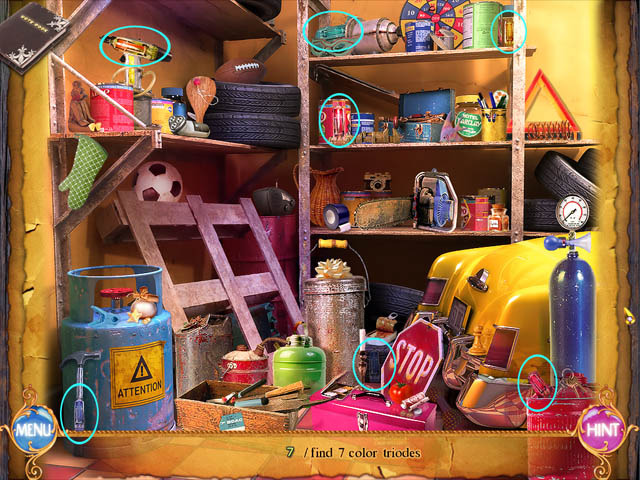
- Find 7 triodes.
- Find all the items from the list to get a SCREWDRIVER and fix the jukebox.
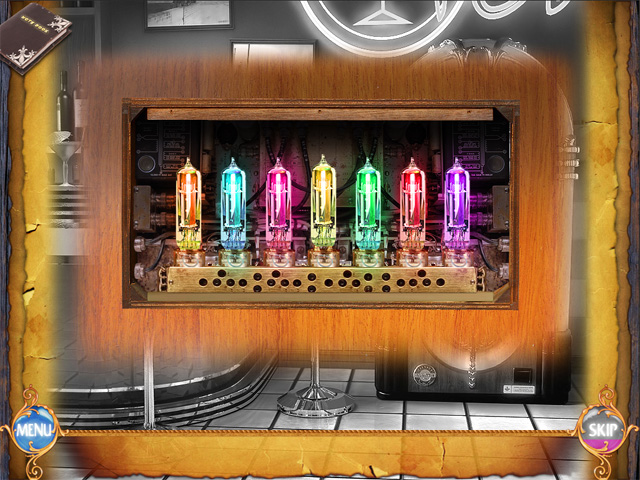
- Insert the triodes in the correct places.
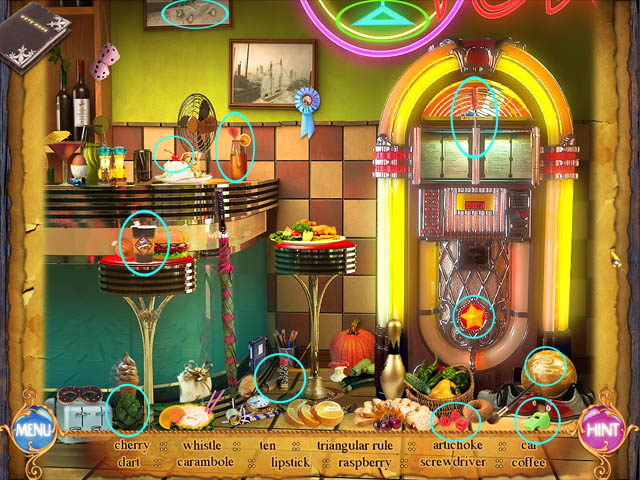
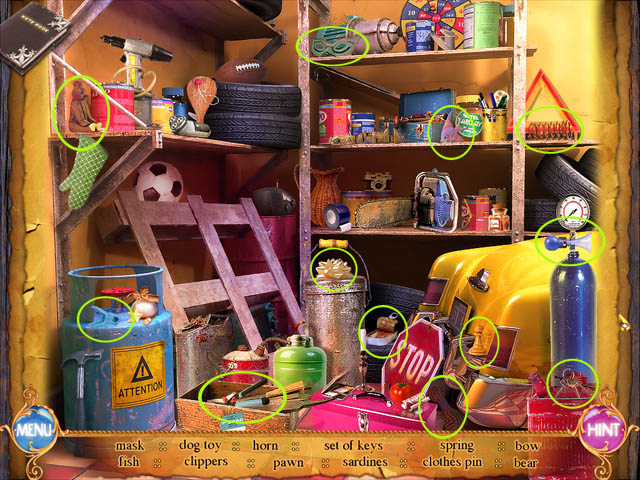
- Find 12 objects to get a FUNNEL.
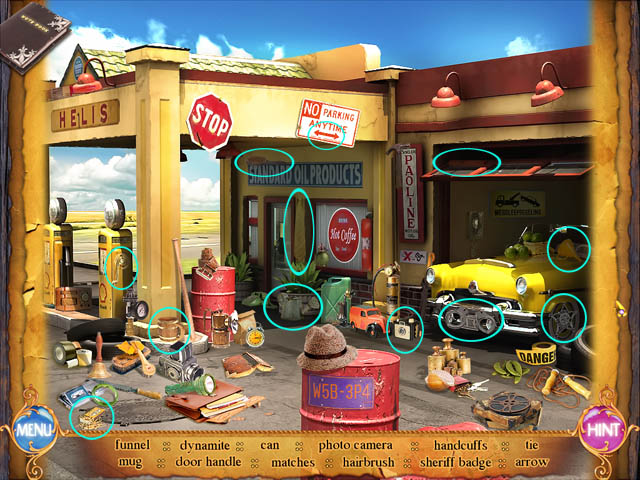
- Entrance to the garage and find 12 objects to get the CAR KEYS.
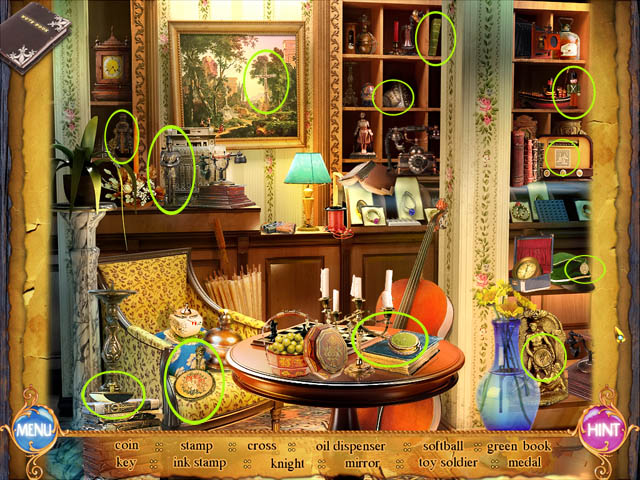
- Find all the items from the list to get the BOOK.

- Find all the items from the list to get the WATCH.
Chapter Seven: Road through the time
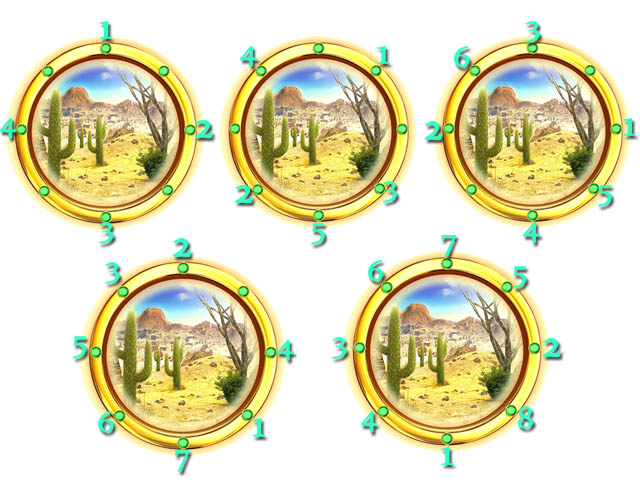
- Remember the order of the emission light and repeat it by pressing the green stones.
- Find all the items from the list to get a CUFFLINKS.
- Remember the order of the emission light and repeat it by pressing the green stones.
- Find all the items from the list to get a BARRETTE.
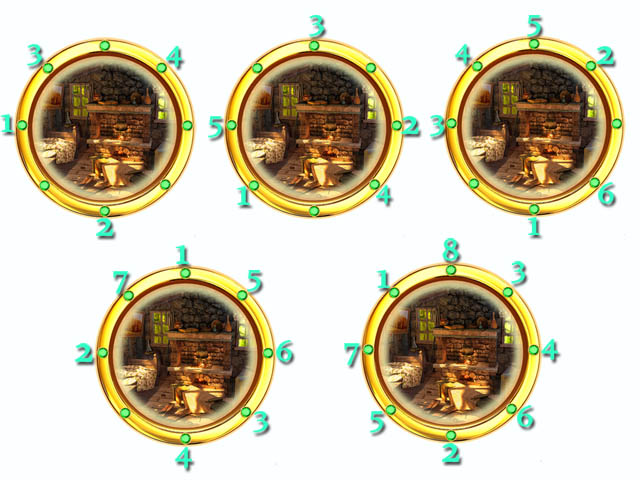
- Remember the order of the emission light and repeat it by pressing the green stones.
- Find all the items from the list to get a LIPSTICK.
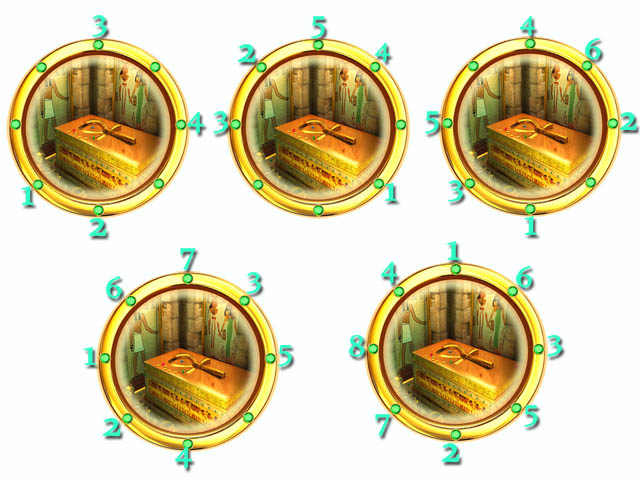
- Remember the order of the emission light and repeat it by pressing the green stones.

- Find all the items from the list to find a BUTTON.
Created at: 2010-12-16