WALKTHROUGH MENU
- GAMEPLAY
- INTRODUCTION
- CHAPTER 1-1
- CHAPTER 1-2
- CHAPTER 2-1
- CHAPTER 2-2
- CHAPTER 2-3
- CHAPTER 2-4
- CHAPTER 3-1
- CHAPTER 3-2
- CHAPTER 3-3
- CHAPTER 4-1
- CHAPTER 4-2
- CHAPTER 4-3
- CHAPTER 4-4
- CHAPTER 4-5
- CHAPTER 4-6
- CHAPTER 5-1
- CHAPTER 5-2
- CHAPTER 5-3
- CHAPTER 5-4
- CHAPTER 5-5
GAMEPLAY
General Tips
- The game is divided into five chapters. There are over 150 Hidden Object levels to play, several puzzles to solve and special items to look for.
- The game does not have a timer; you can play the game at your own leisure.
- There are several items to find in each scene. However, the items will only be revealed a few at a time. Once you find one item, another one will appear on the list.
- You get two hints per scene. You will get an additional hint after several minutes of being in a scene. Use your hints sparingly since it takes so long to get another one.
- To use a hint, just click on the hint button in the lower left side of the scene. Next, click on the name of the item you want to find. The game will show you the exact location of the item you chose.
- You will unlock the rooms that you’ve played in the game after a few levels have been played. You can access these rooms from the "Freeplay Mode" screen in the main menu.
- Along the way you will collect some items that will end up in a special room. These items can be accessed in the "View Collection" screen in the main menu.
- If you exit out of a scene before it is complete, the layout of your scene will be different when you return to the game. The scene will be the same, but the items will be placed differently.
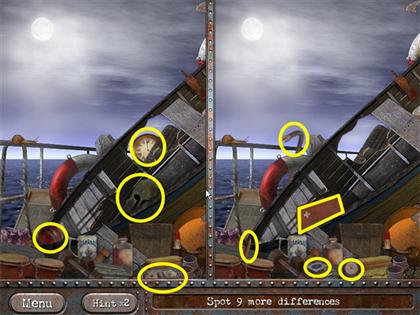
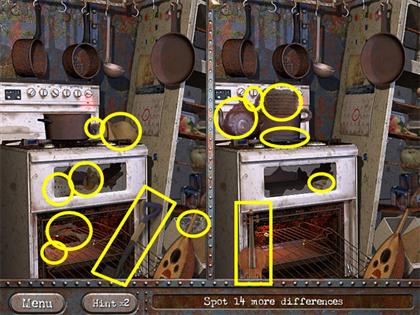
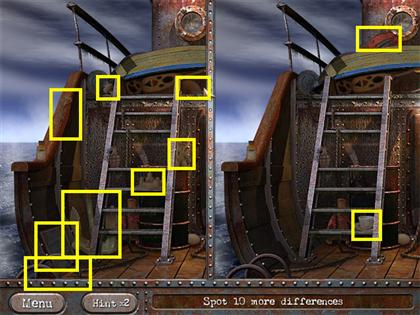
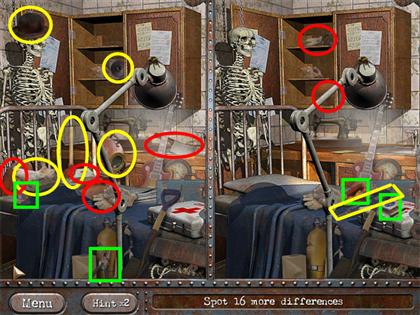
- If you exit out of a Find the Differences puzzle before it is complete, the number of differences you will be asked to find will increase once you return to the game.
Walkthrough
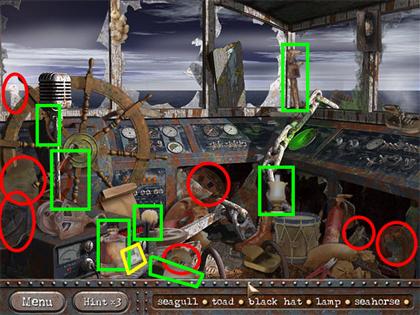
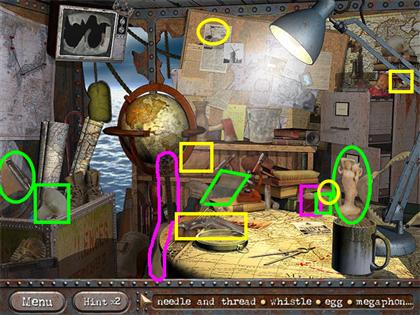
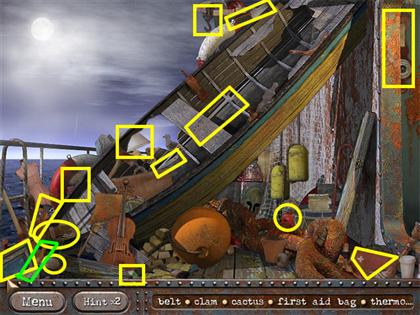
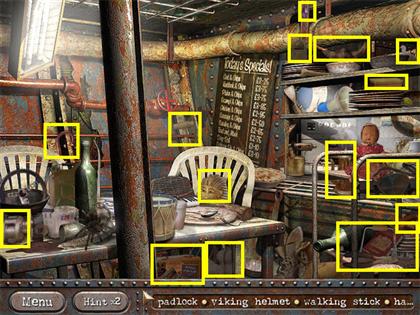
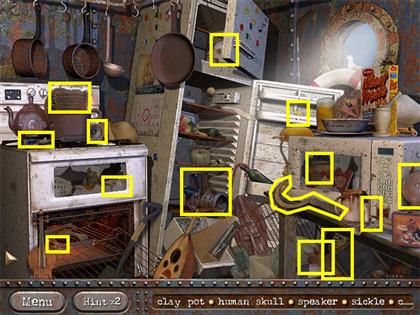
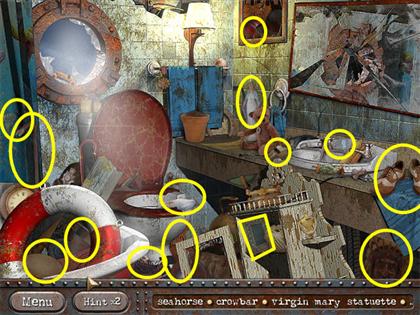
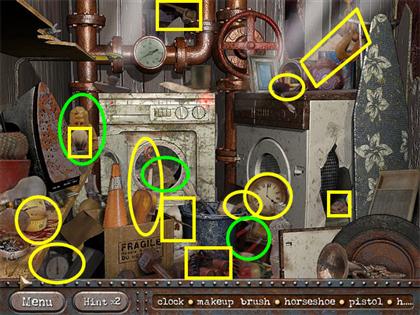
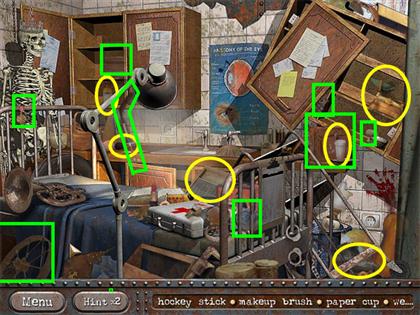
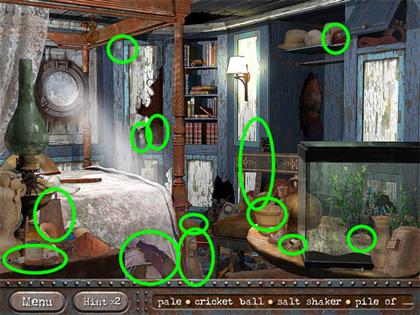
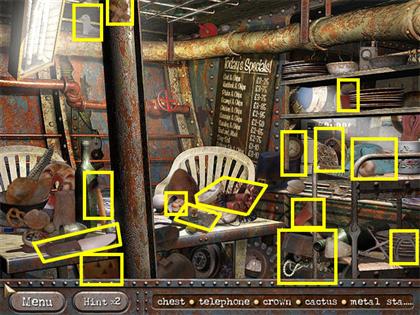
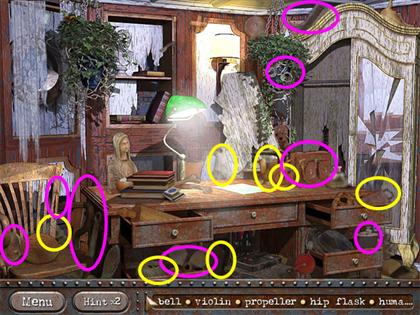
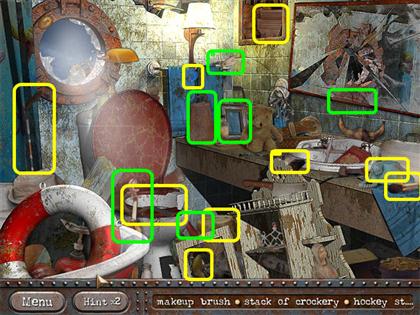
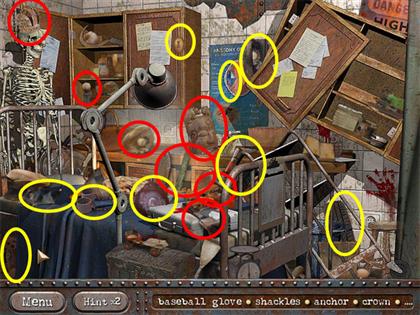
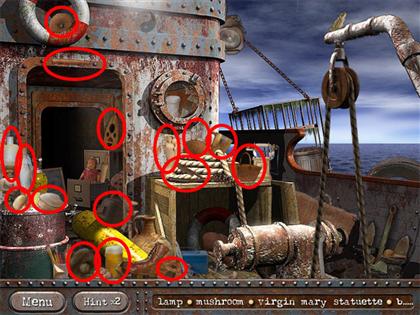
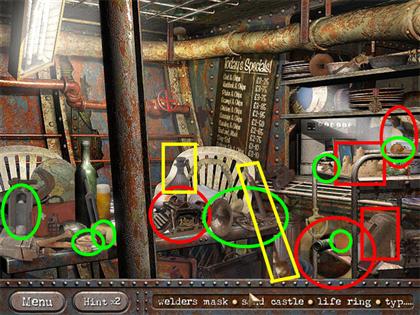
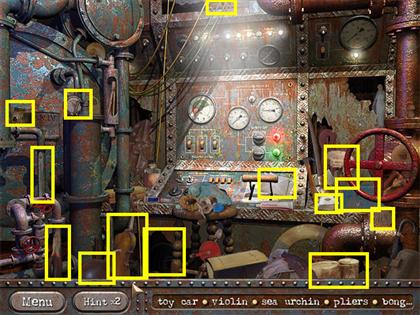
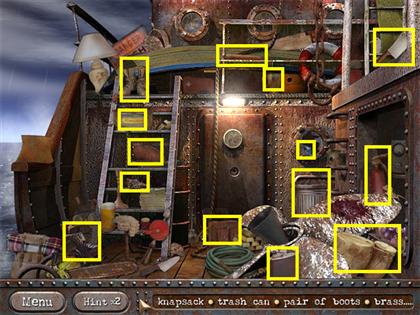
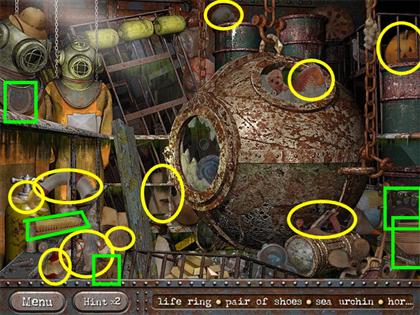
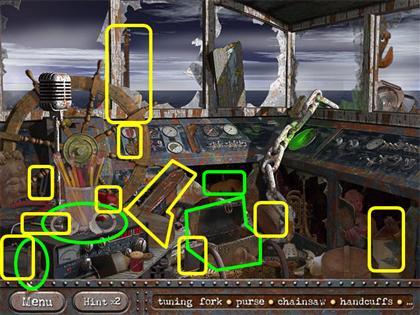
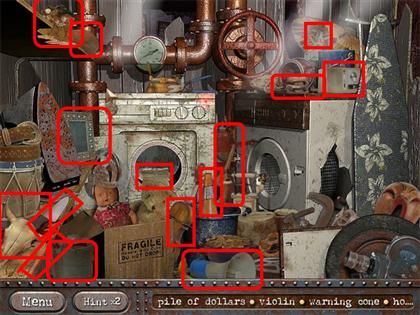
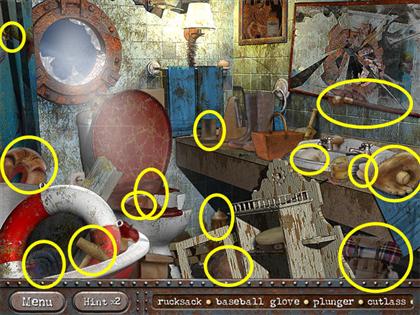
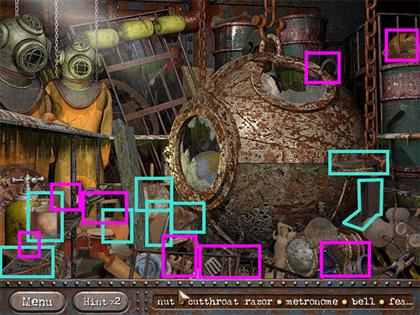
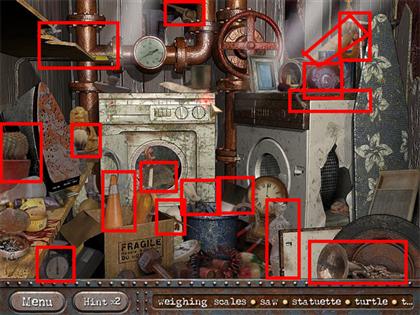
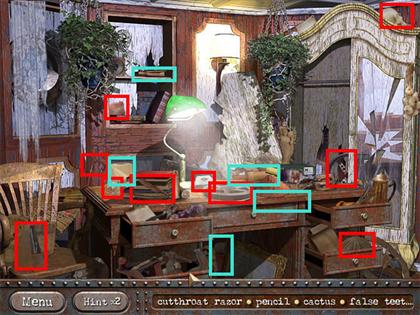
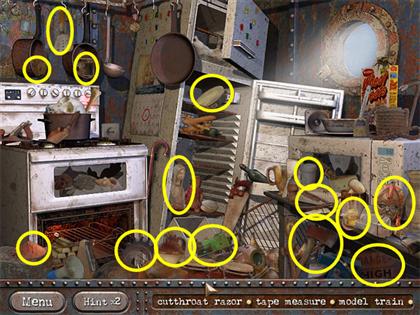
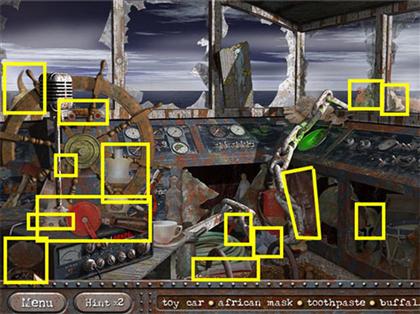
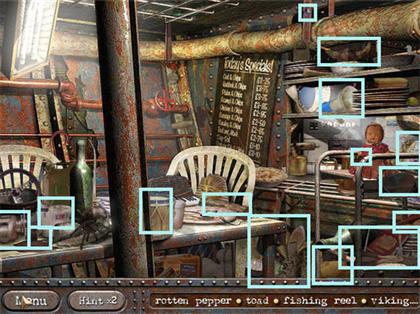
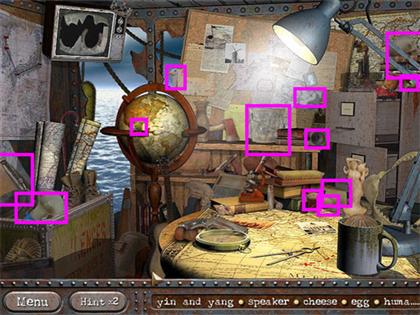
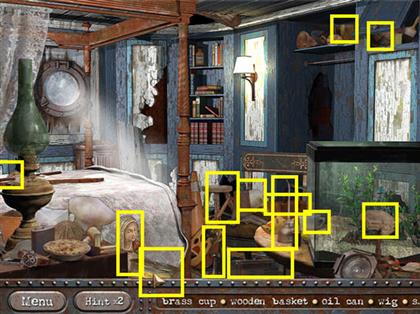
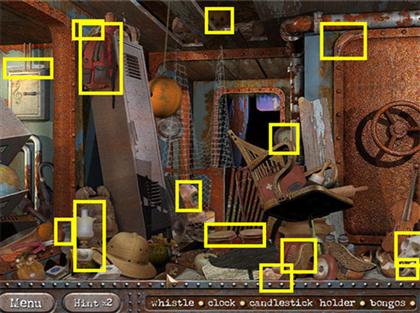
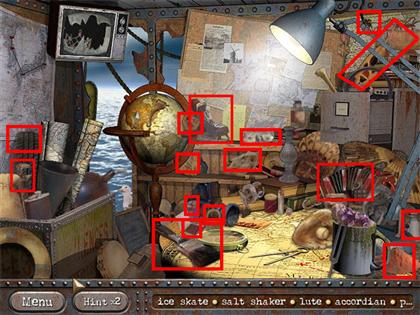
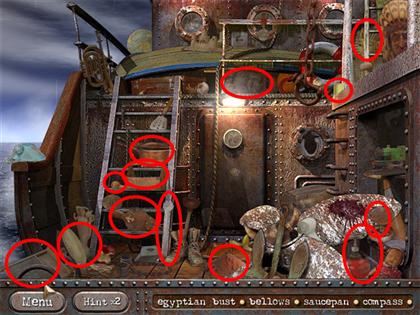
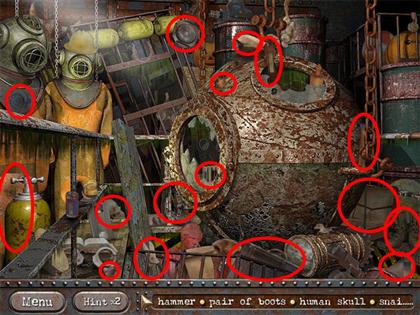
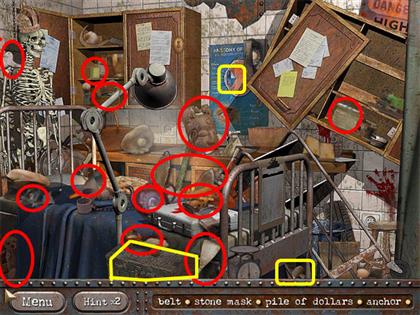
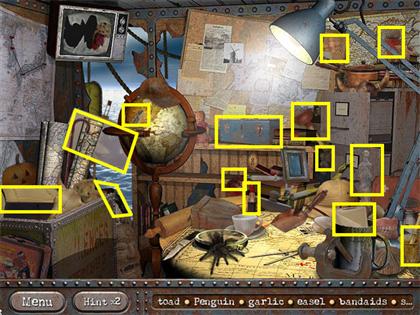
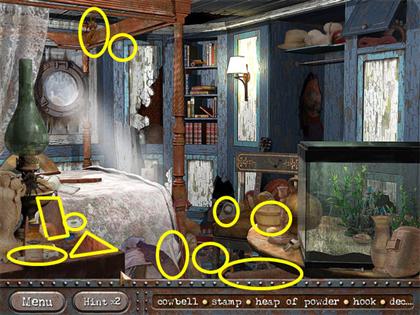
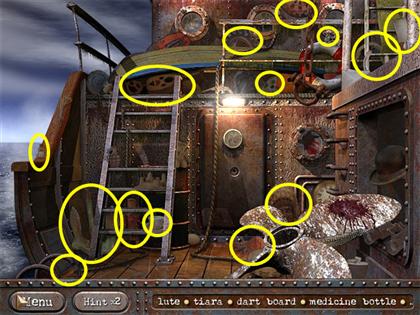
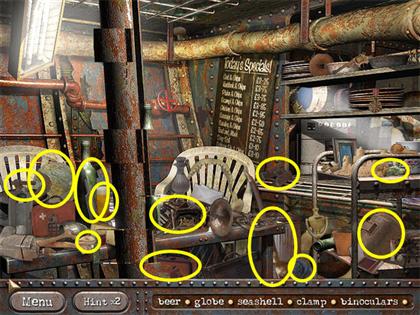
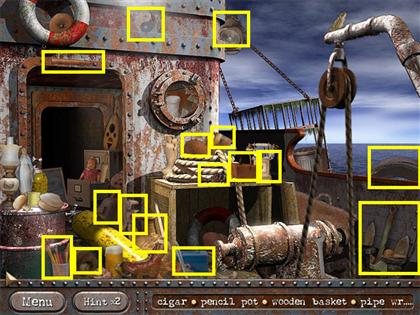
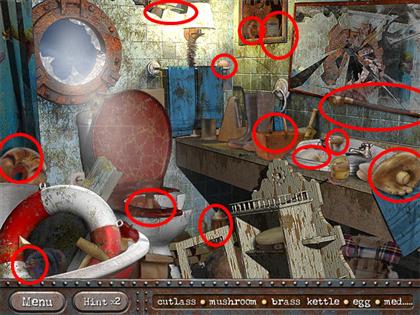
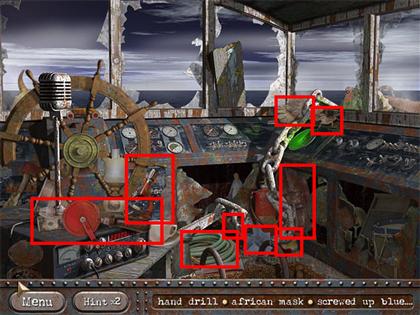
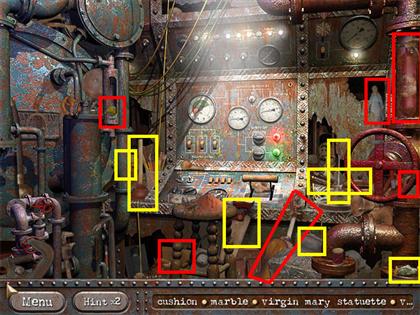
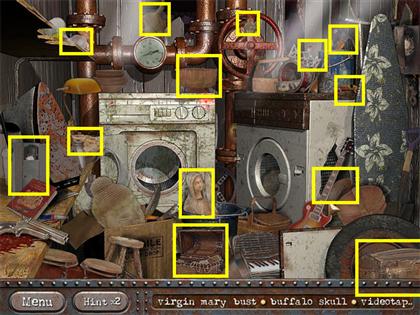
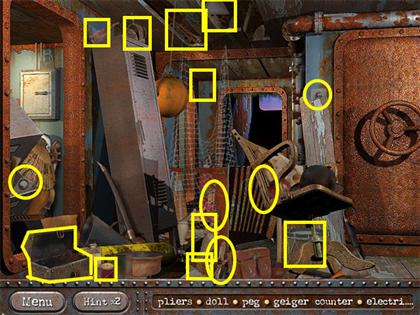
- The walkthrough will highlight all the items in every scene of the game. Please keep in mind that the list is random, so the solutions may not be the same for everyone.
- The solutions for the puzzles in the game should be the same for everyone.
INTRODUCTION
Lighthouse Key
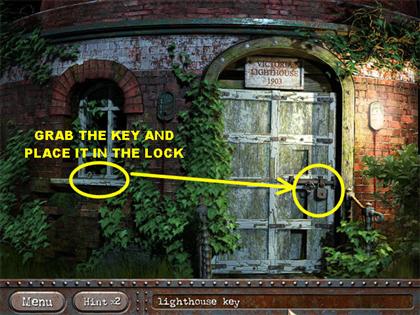
- Grab the lighthouse key that is on the window sill, and the key will go into inventory.
- Drag the key from the inventory box onto the lock on the door. Let go of the key once it is over the keyhole.
- The door will go into the lock, and you will be automatically taken to the next location.
Lighthouse
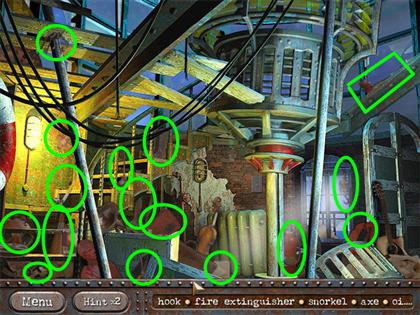
- When you first arrive at the scene, you will only have a spotlight to help you see in the scene. The game will ask you to find the light switch.
- The light switch is located in the middle of the scene. Click on the light switch and the lights will come on.
- Continue looking for the rest of the items in the scene.
Obtain Door Handle
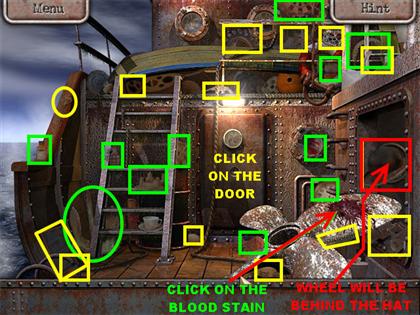
- Click on the blood stain that is on the rusty propeller.
- Click on the sparkly door, and it will tell you to look for the door handle.
- Continue searching for items on the list. The handle will appear under the boulder hat. However, you have to wait until the game asks you for the hat before you can collect the handle.
- Click on the door handle to pick it up. If you pick up the handle before you finish looking for the items on the list, the game will end that level automatically.
Place Door Handle
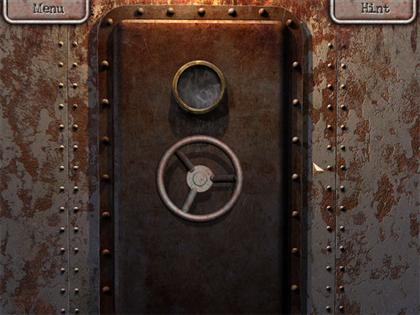
- Once you’re confronted with a close-up view of the door. Pick up the door handle from inventory and place it on the empty slot.
Edwin Margrave’s Cabin
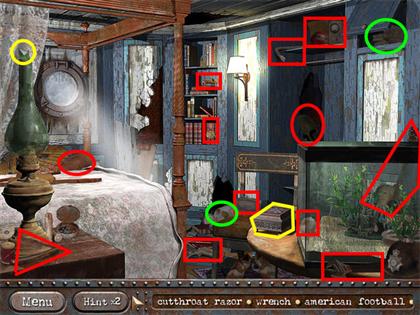
- Look for the items in the scene.
- If you get towards the end of the level, and you pick up the jewelry box before you finish finding all the items, the game will automatically end the level.
Place the Gem Stone
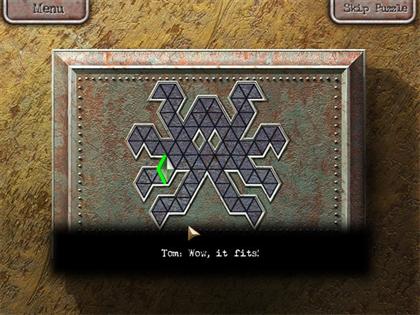
- Grab the green gem stone from inventory and place it on the jewelry box.
- If the gem is placed in the right spot, it will stay in place. If it’s in the wrong spot it will float away, just place it in a different spot if that happens.
- After you place the single gem you will be returned to another scene so you can find the hidden gems.
Find 10 Gem Stones
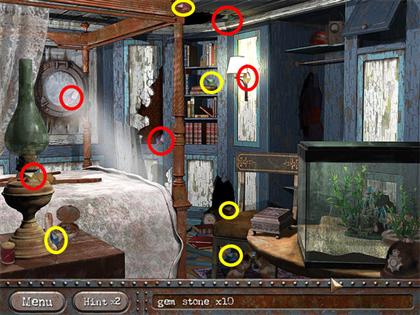
- Please look at the screenshot for the location of all the gems.
Octopus Inlay Puzzle
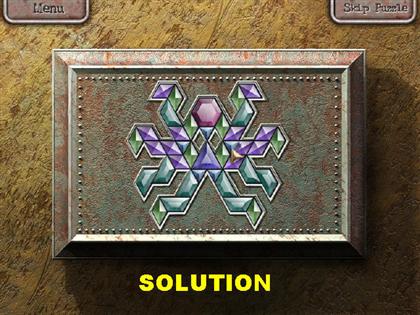
- The goal in this puzzle is to arrange all the stones on top of the jewelry box in the right spots.
- Drag stones from the surrounding area and place them in the appropriate slots on the box.
- If you wish to move a gem around, simply drag it to another spot.
- Please look at the screenshot for the solution to this puzzle.
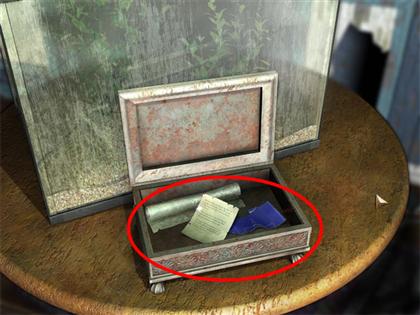
- Once the puzzle is complete, the jewelry box will open up. Click on the letter, the plastic sheet, and the blueprint that is inside.
CHAPTER 1-1
Bridge
Research Room
Port Deck
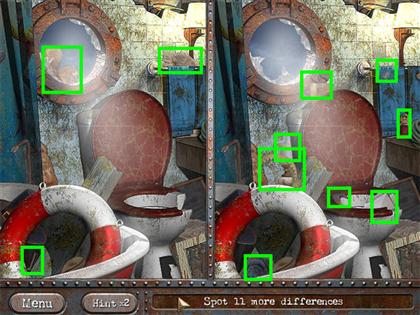
Spot 11 More Differences
Mess Hall
Galley
Keypad Puzzle
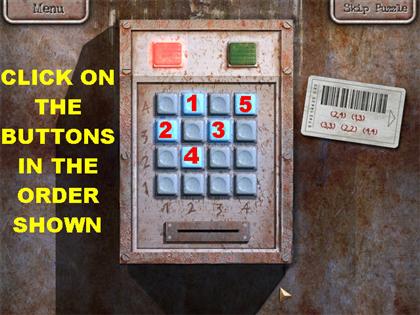
- Place the keycard in the slot that is at the bottom of the keypad.
- Once the keypad is activated, click the numbers on the pad according to the numbers that are marked on the side of the keycard.
- The first number in the parentheses refers to the columns; the second number refers to the rows on the keypad.
- When the numbers are entered correctly, the buttons will light up blue. If you entered a number incorrectly, the buttons will flash red and that will reset the puzzle.
- Here is the solution for this puzzle:(2, 4) 1st Row, 2nd Button (1, 3) 2nd Row, 1st Button (3, 3) 2nd Row, 3rd Button (2, 2) 3rd Row, 2nd Button (4, 4) 1st Row, 4th Button
- Once the buttons have been pushed correctly, the button on top will turn green and you will have access to the Artifact Room.
Artifact Room
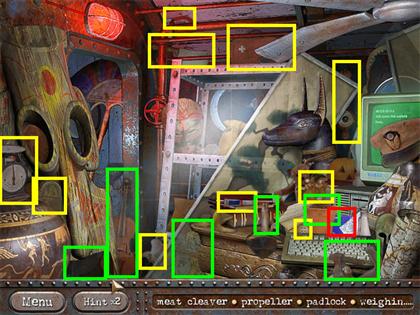
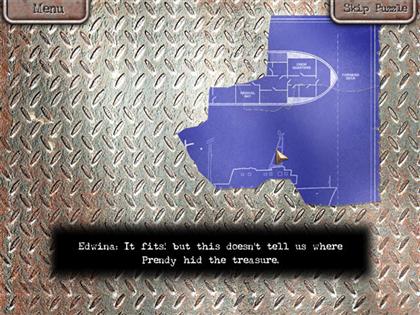
- Look for all the items in the scene. Towards the end of the level, pick up the blueprint piece that appears under the pot on the table.
- Once the level ends, connect the blueprint piece to the other one in the scene.
CHAPTER 1-2
Corridor
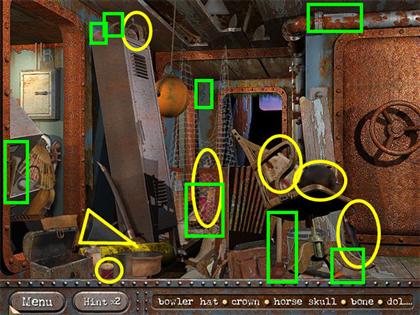
Diving Room
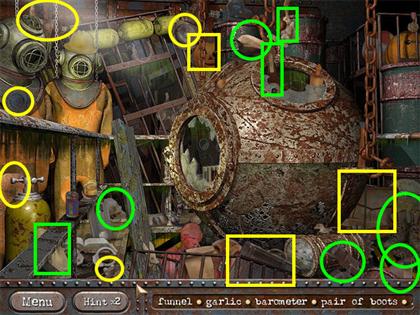
Sheet Music Puzzle
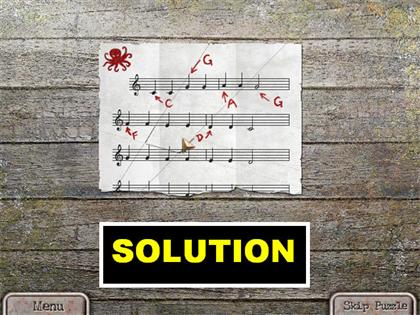
- All you have to do here is reassemble the puzzle by dragging the map pieces around until they snap in place.
- Once two pieces fit together, they will snap in place anywhere on the board.
- Please look at the screenshot for the solution.
Engine Room
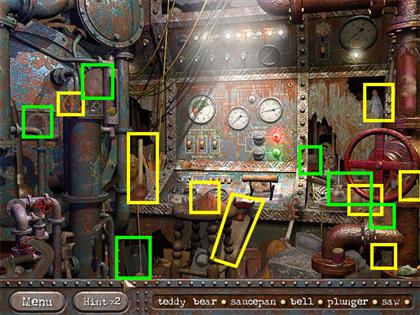
Spot the Differences
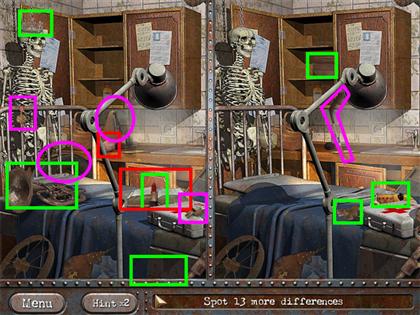
Forward Deck
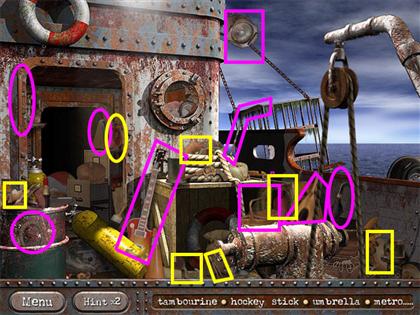
Bathroom
Utility Room
CHAPTER 2-1
Medical Bay
Edwin Margrave’s Cabin
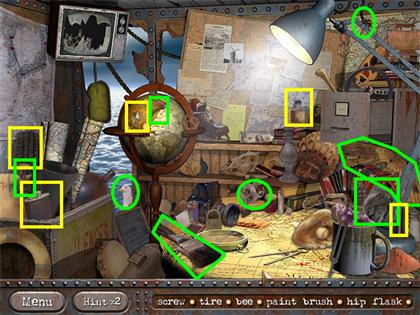
Research Room
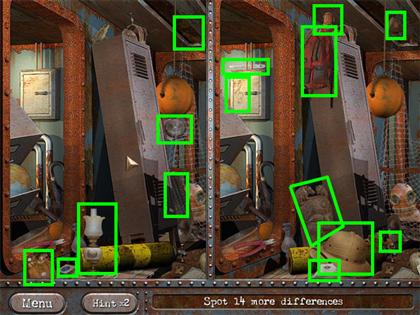
Spot 14 More Differences
Port Deck
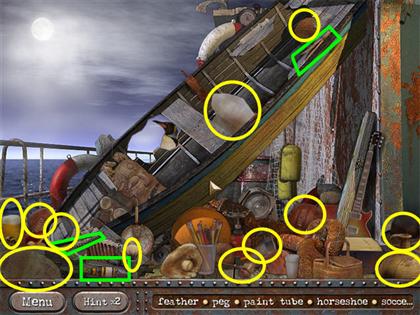
Rear Deck
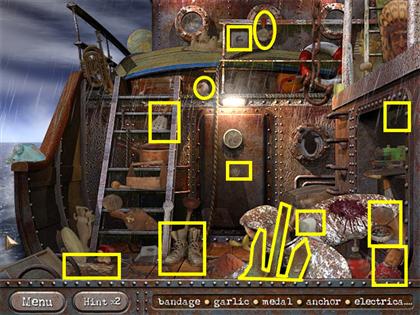
Captain’s Cabin
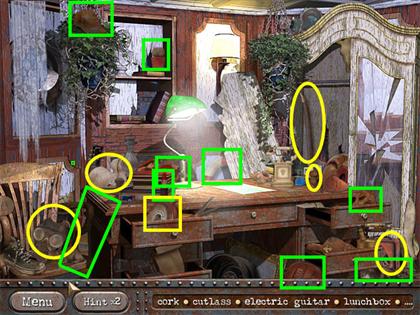
Jumbled Books Puzzle
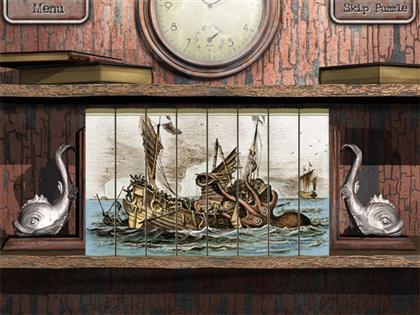
- The goal in this puzzle is to arrange the books in order.
- Click on any two pieces and they will swap places. Keep moving the books around until it resembles the picture in the screenshot.
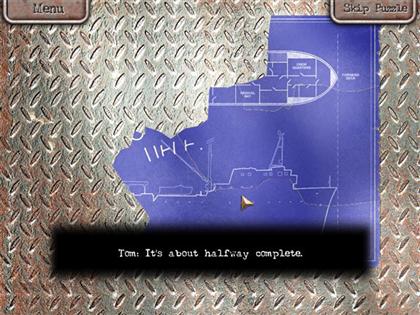
- Click on the blueprint that appears above the puzzle once it is complete.
- Place the blueprint of the map next to the other pieces.
CHAPTER 2-2
Mess Hall
Galley
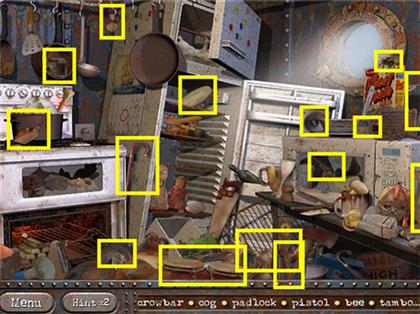
Engine Room
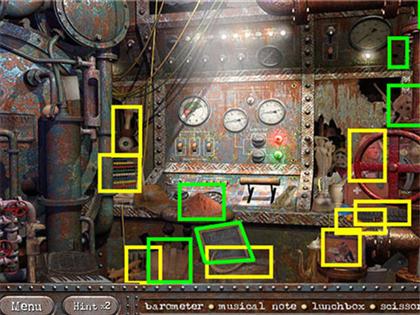
Spot 15 More Differences
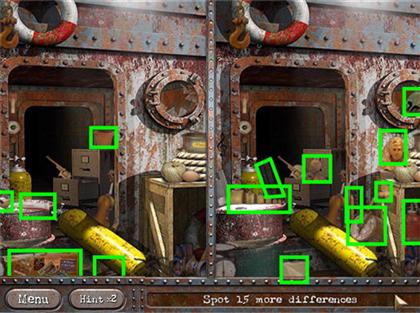
Diving Room
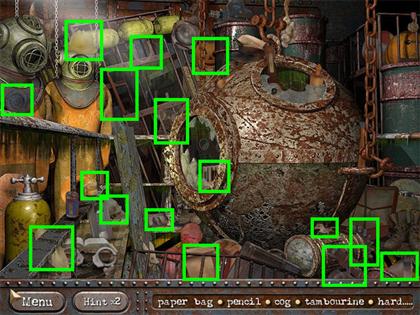
Utility Room
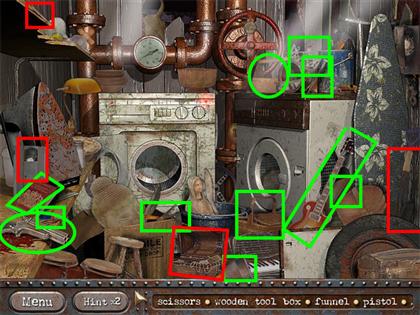
Artifact Room
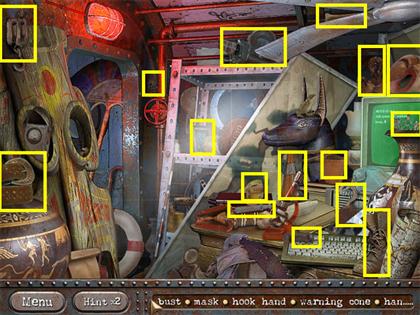
Sheet Music Puzzle – 1st Stone Piece
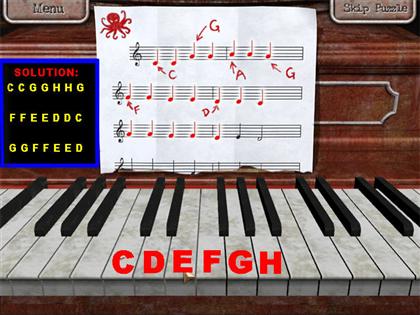
- The goal in this puzzle is to click on the piano keys in the right order.
- To start the puzzle, place the sheet music on the music stand and you will get a closer view of the piano.
- Each time you hit a correct note; the note will turn red and float upwards.
- If you hit an incorrect note, it will still turn red but it will float downwards instead, and the puzzle will reset itself.
- You will notice that some of the keys have red letters and others just have a red smudge on them. The red smudge represents the letters that are missing.
- The piano keys in the screenshot have been labeled C through H, from left to right. Please click on the keys in the following order:C C G G H H G F F E E D D C G G F F E E D
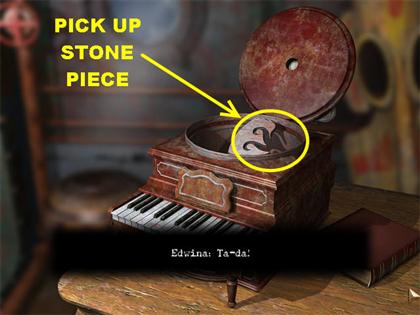
- Once the puzzle has been solved, click on the stone piece that appears inside the piano.
CHAPTER 2-3
Captain’s Cabin
Bathroom
Medical Bay
Spot 9 More Differences
Edwin Margrave’s Cabin
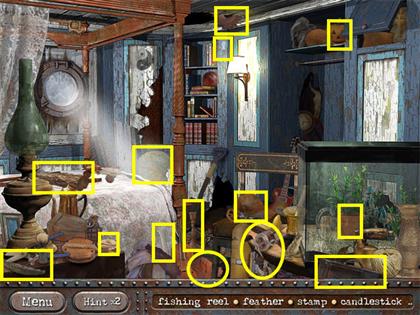
Corridor
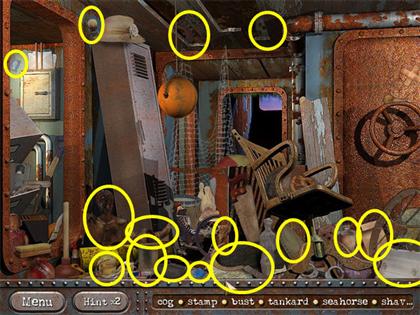
Research Room
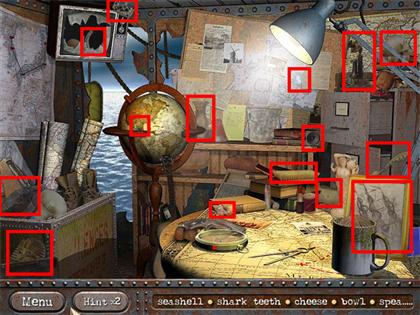
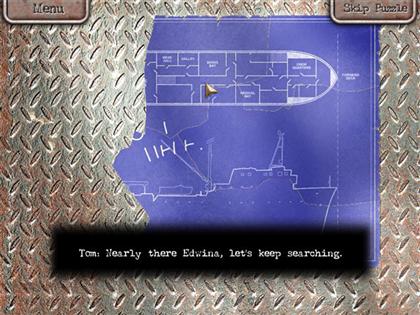
- Look for all the items in the scene. Pick up the blueprint that shows up towards the end of the level.
- Place the blueprint next to the other pieces on the board.
CHAPTER 2-4
Forward Deck
Mess Hall
Engine Room
Spot 14 More Differences
Rear Deck
Diving Room
Bridge
CHAPTER 3-1
Utility Room
Port Deck
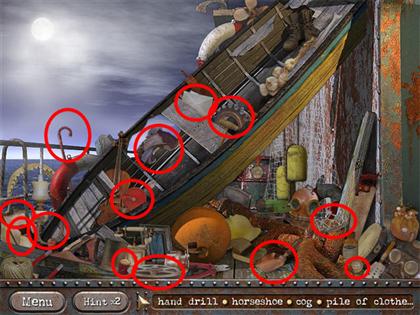
Captain’s Cabin
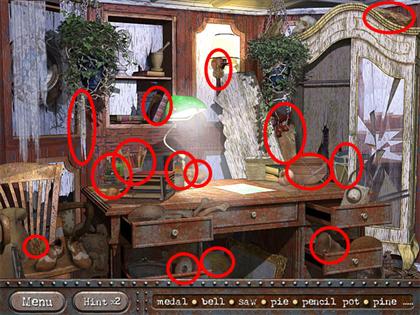
Jigsaw Puzzle
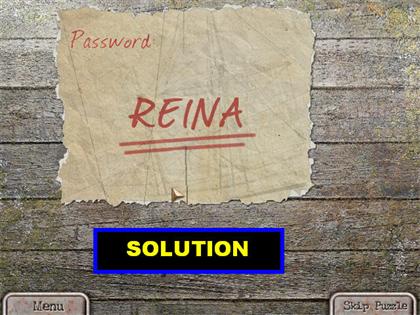
- Arrange the paper pieces until you form the word "Password" on top and "REINA" in the center of the page.
Artifact Room
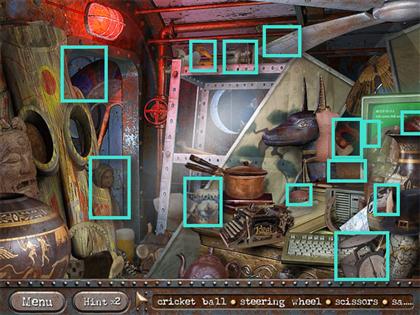
Corridor
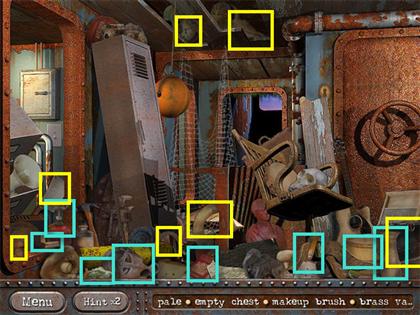
Research Room
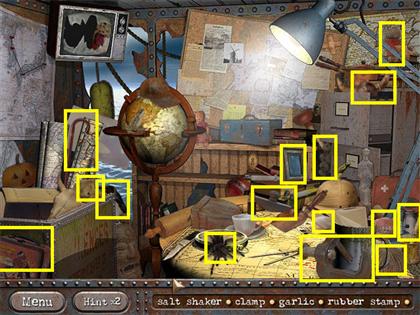
Egg Inlay Puzzle
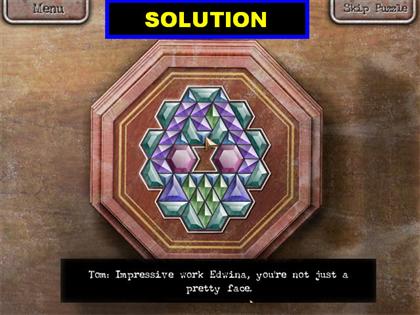
- Solve the puzzle box according to the picture in the screenshot.
- Grab the blueprint that appears inside of the box.
CHAPTER 3-2
Medical Bay
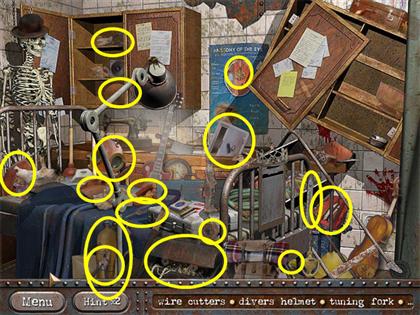
Forward Deck
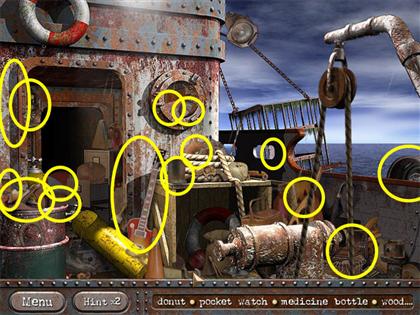
Bathroom
Spot 10 More Differences
Mess Hall
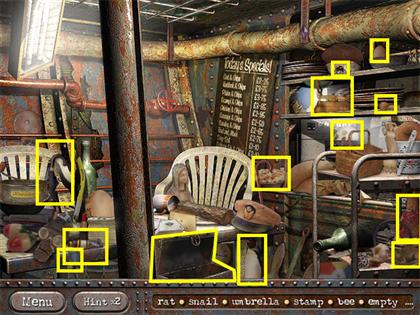
Bridge
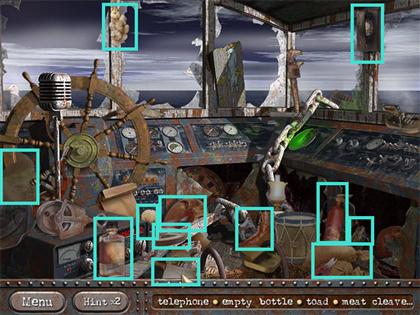
Galley
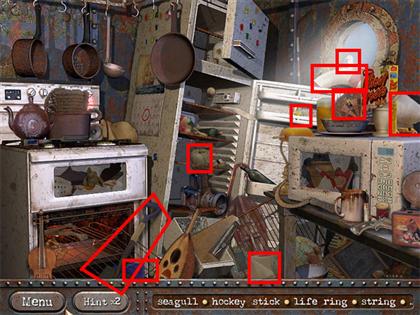
- Pick up the blueprint at the end of this level; it is in the lower left side of the scene.
Blueprint
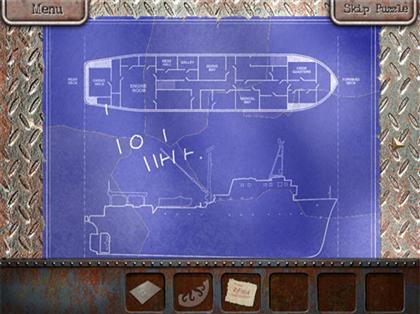
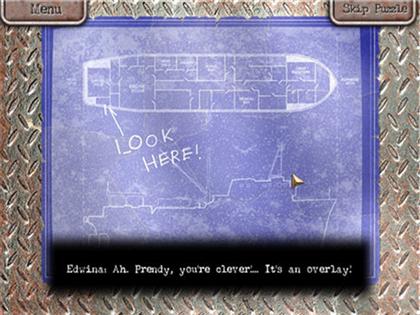
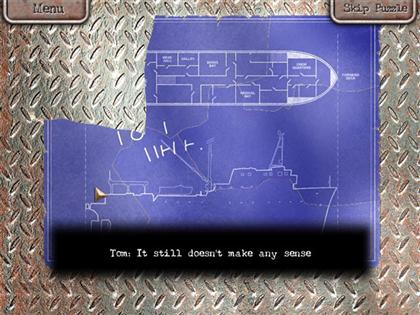
- Place the blueprint along with the other ones.
- Place the plastic sheet over the completed blueprint until you see, "LOOK HERE!" appear on the blueprint.
CHAPTER 3-3
Emergency Water Pump
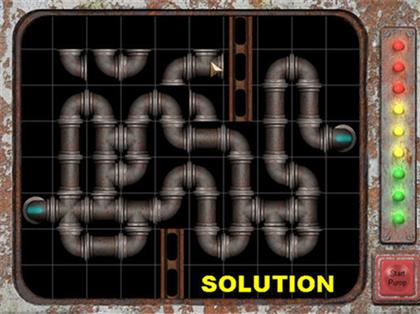
- The goal in this puzzle is to arrange the pipes in the correct order.
- Simply click on any two pieces, and they will swap positions. Make sure that you are placing pipes facing in the right direction.
- You can only move pieces around that already have a piece on them. In other words, you cannot place a piece that is on an empty grid.
- You do not have to use all the pipe pieces in the scene, but you do have to make sure that you have a solid connection from one end to the other.
- Click on the red Start Pump button in the lower right side. When you click on it, you will see some red "X’s" in the scene. The "X" represents all the pipe pieces that are not connected correctly. Go back and change those pieces around until you no longer see an "X."
- When you think you have all the pieces in the right places, click on the red Start Pump button. If your solution is correct, you will be able to move on to the next section.
- Please look at the screenshot for the solution.
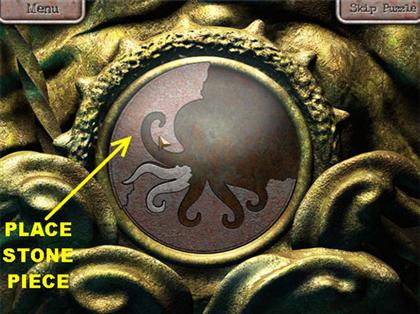
Secret Room
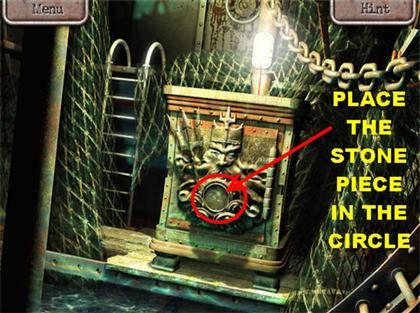
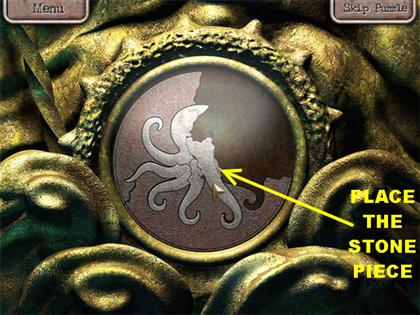
- You will be taken to a secret room. Click on the circle located in the middle of the artifact and you will get a closer view. Place the Piece of stone on the circle.
CHAPTER 4-1
Diving Room
Artifact Room
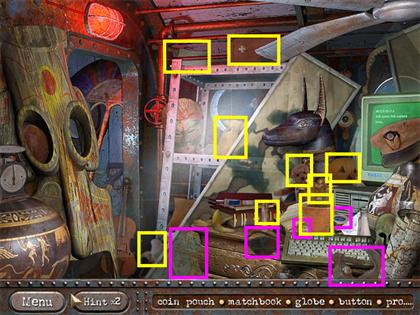
Engine Room
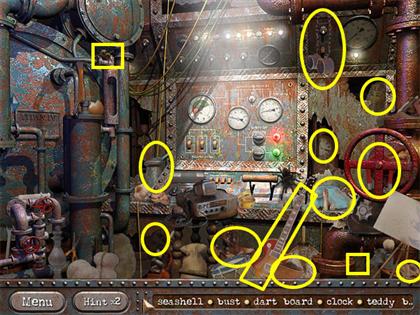
Spot 7 More Differences
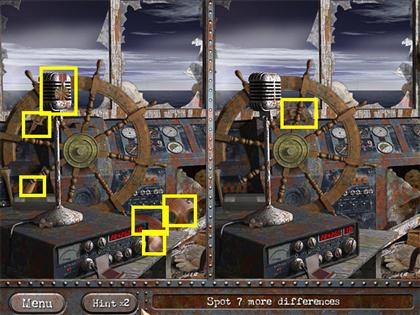
Medical Bay
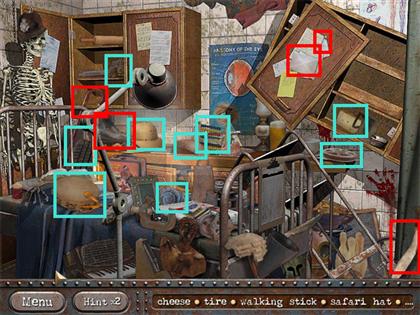
Forward Deck
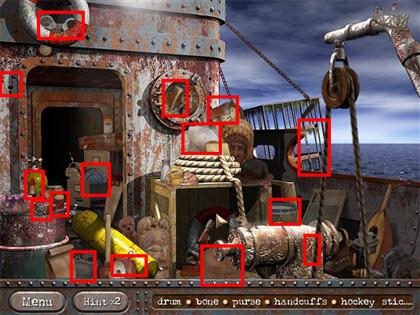
Port Deck – 2nd Stone Piece
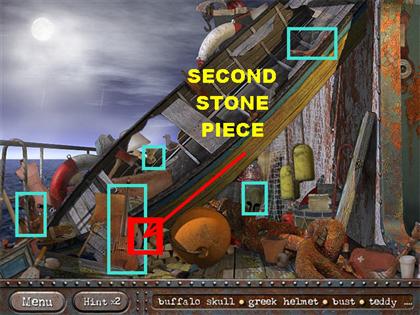
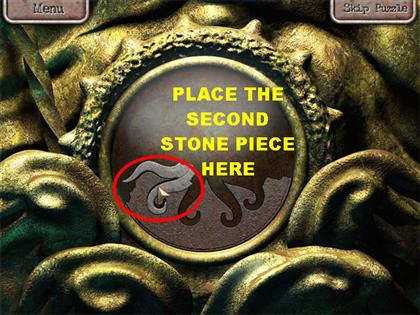
- The second stone piece will be in this location; it is hiding behind the violin.
- Place the second stone piece in the circle.
CHAPTER 4-2
Corridor
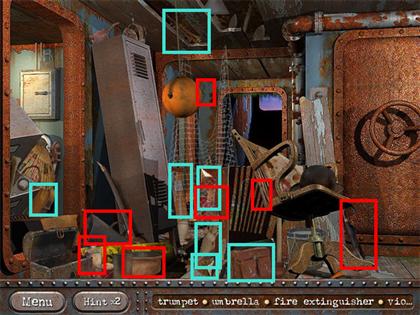
Utility Room
Captain’s Cabin
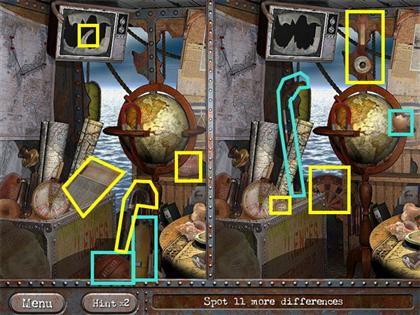
Spot 11 More Differences
Galley
Rear Deck
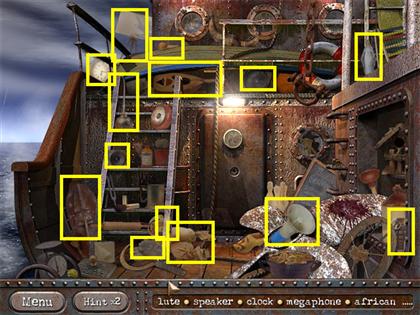
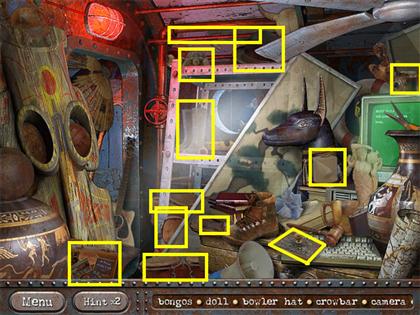
Artifact Room
Computer Mini-Game – 3rd Stone Piece
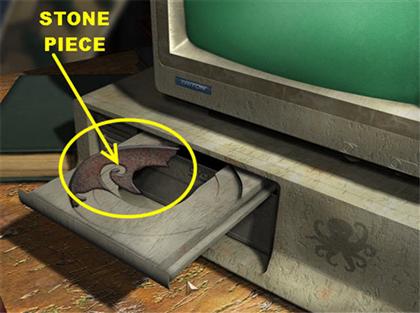
- Click on the button in the lower right side of the scene to turn on the computer.
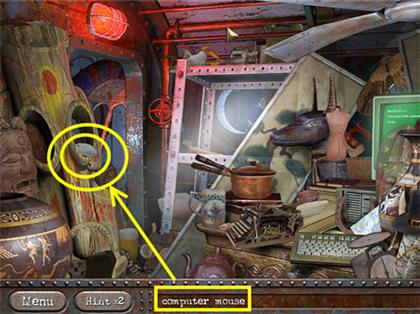
- You will need a mouse in order to use the computer. The game will take you back to the Artifact Room. Click on the mouse that is on the left side of the scene.
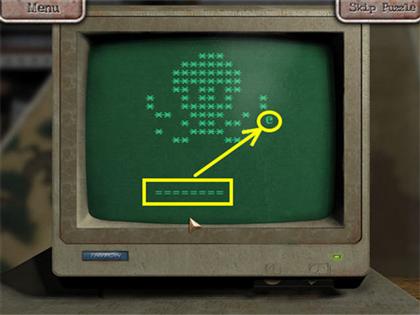
- Once the computer screen is in front of you again, place the code that is in your inventory onto the computer screen and it will activate a mini-game.
- The goal of the mini-game is to eliminate all the symbols that are on the screen.
- Use your mouse to control the bar that is at the bottom of the page. If you lose the ball, you will get another one.
- Once all the symbols have been eliminated, the CD drive will open revealing the third stone piece. Click on the stone piece to continue to the next section.
3rd Stone Piece Placement
CHAPTER 4-3
Bridge
Mess Hall
Research Room
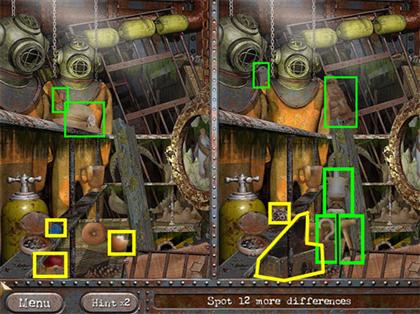
Spot 12 More Differences
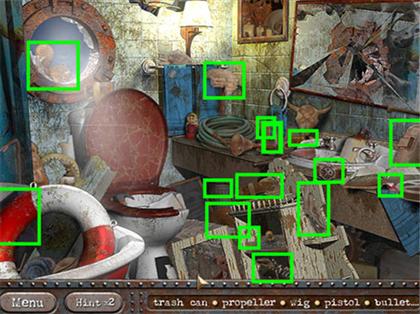
Bathroom
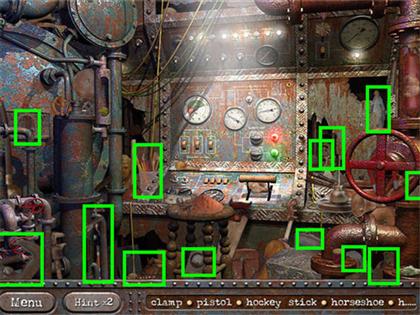
Engine Room
Forward Deck – 4th Stone Piece
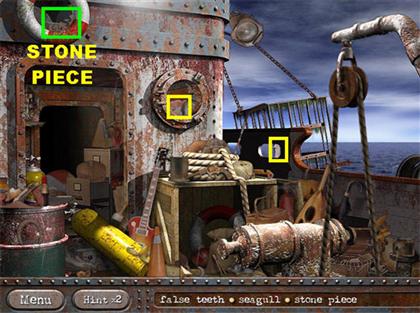
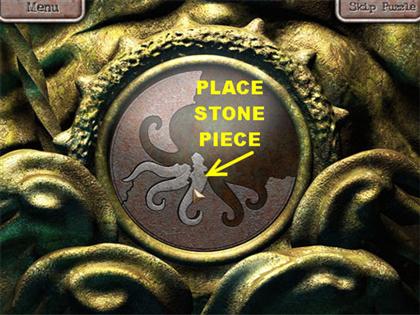
- You will only be asked to find three items in this scene. The stone piece is located in the upper left side of the scene.
- Place the stone piece next to the other stone pieces.
CHAPTER 4-4
Edwin Margrave’s Cabin
Corridor
Medical Bay
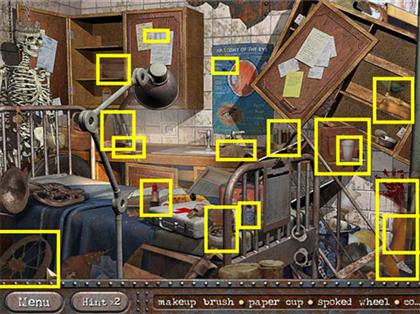
Spot 13 Differences
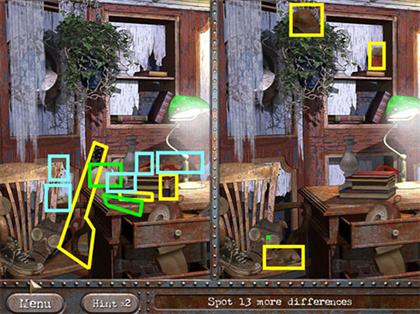
Port Deck
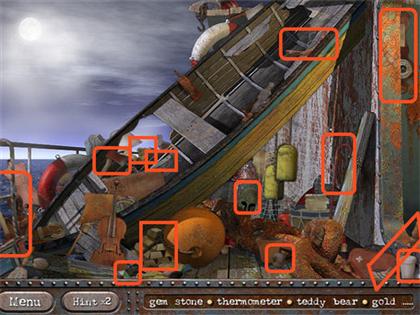
Mess Hall
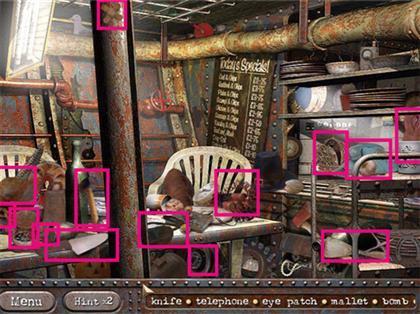
Bridge
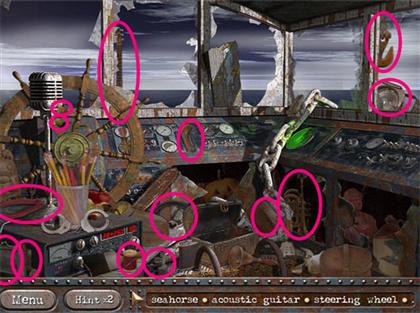
Fish Inlay Puzzle – 5th Stone Piece
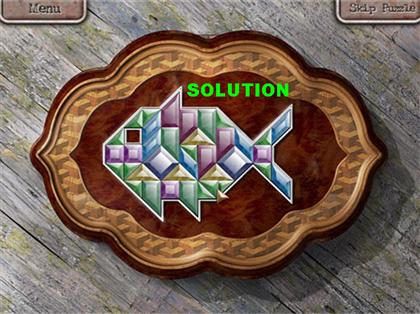
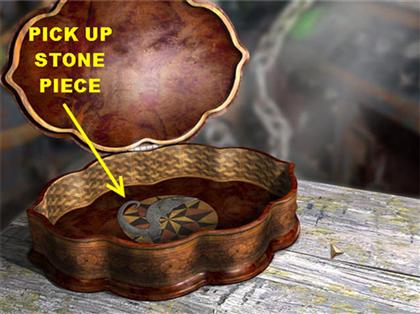
- Solve the fish inlay puzzle and then grab the stone piece that appears inside.
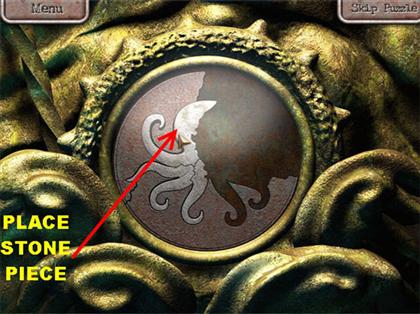
5th Stone Piece Placement
CHAPTER 4–5
Research Room
Rear Deck
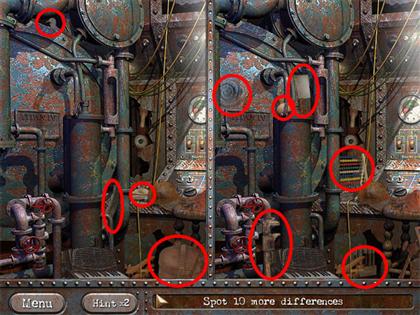
Spot 10 more Differences
Diving Room
Artifact Room
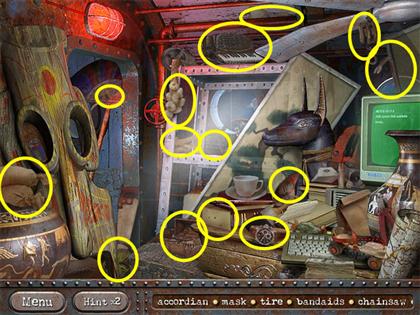
Medical Bay - 6th Stone Piece
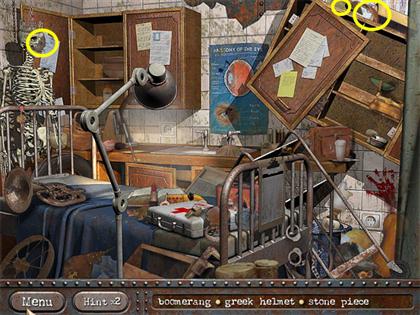
- Pick up the stone piece that is in the upper left corner of the scene. The stone piece is behind the skeleton’s head.
- Place the stone piece in the circle, once you’re back in the treasure vault.
Chapter 4-6
Bathroom
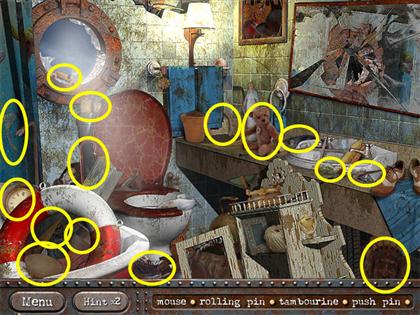
Edwin Margrave’s Cabin
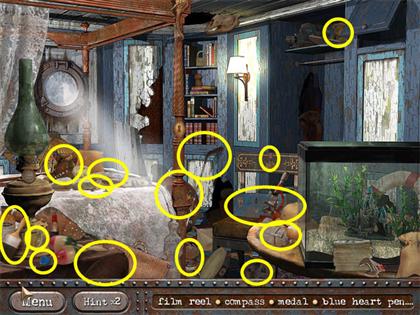
Forward Deck
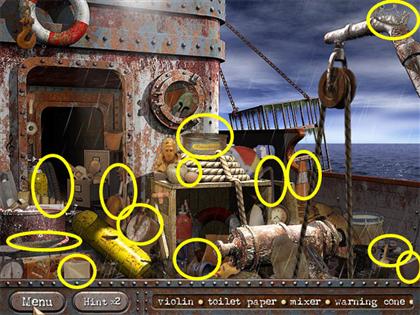
Spot 10 More Differences
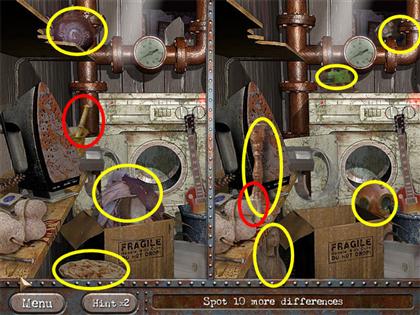
Captain’s Cabin
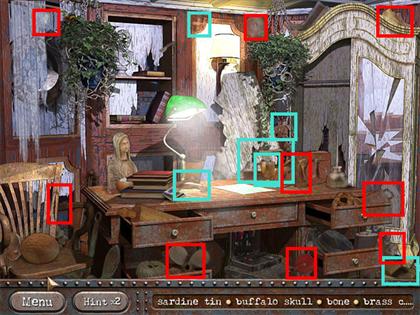
Galley
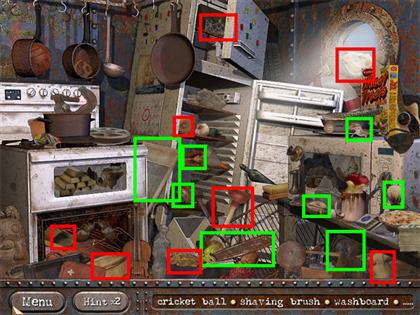
Artifact Room
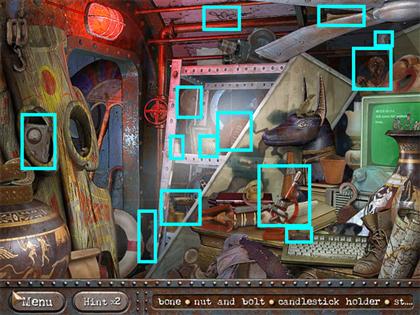
Aztec Artifact Puzzle – 7th Stone Piece
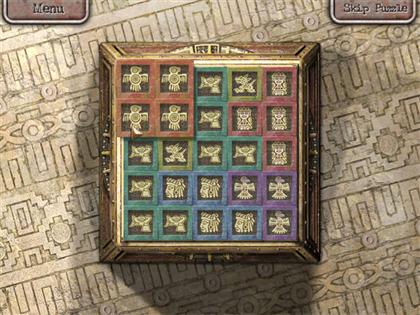
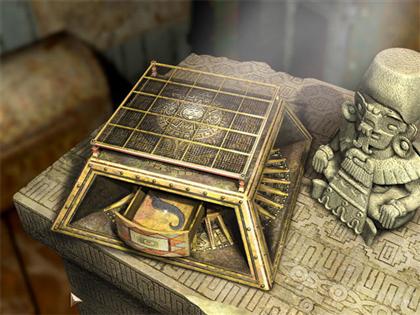
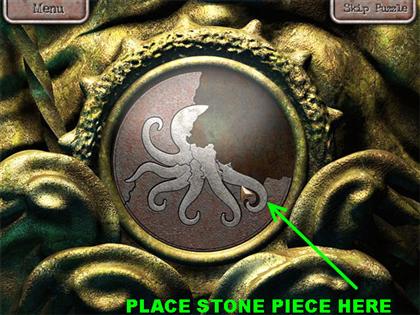
- The goal in this puzzle is to place all the pieces on top of the artifact without leaving any pieces out.
- Fit the pieces into the artifact box according to the screenshot.
- Collect the Stone Piece that appears inside of the box.
- Place the stone piece next to the other ones inside the circle.
CHAPTER 5-1
Bridge
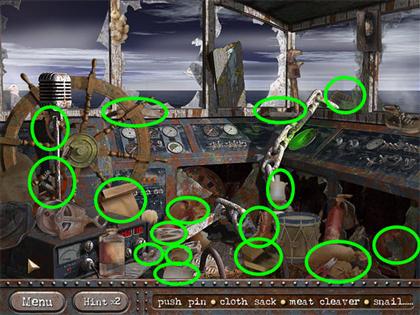
Port Deck
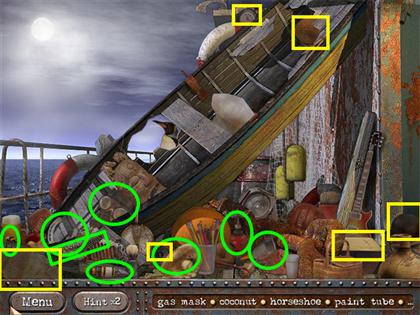
Engine Room
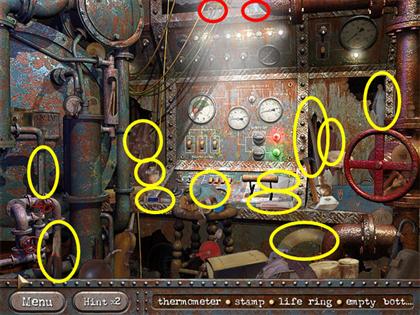
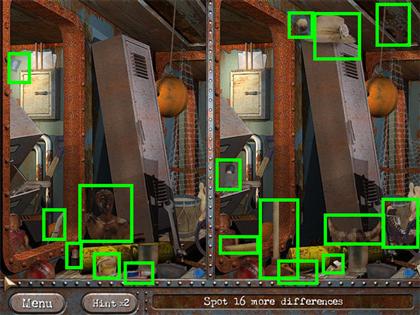
Spot 16 More Differences
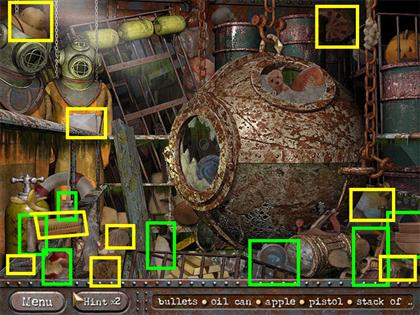
Diving Room
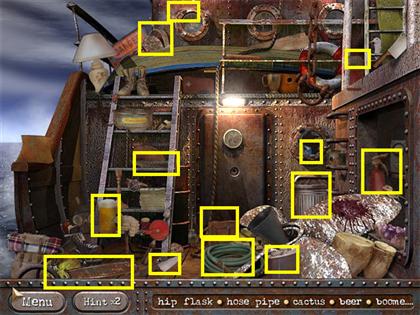
Rear Deck
Mess Hall – 8th Stone Piece
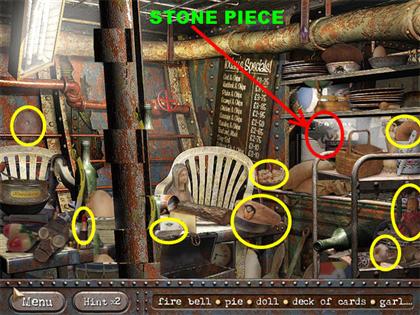
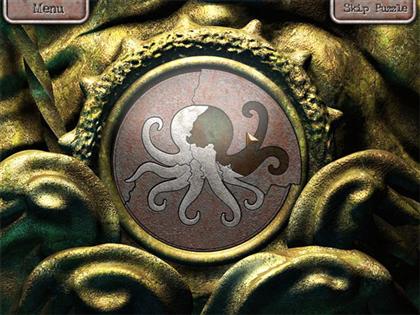
- Pick up the stone piece that appears at the end of the level. The stone piece is located on the right side of the scene, next to the picnic basket.
- Place the stone piece next to the others.
CHAPTER 5-2
Medical Bay
Research Room
Edwin Margrave’s Cabin
Spot 10 More Differences
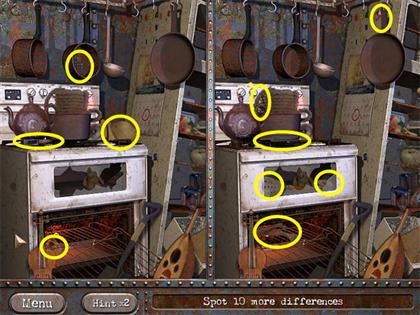
Engine Room
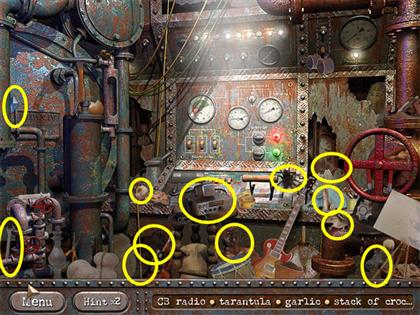
Bridge
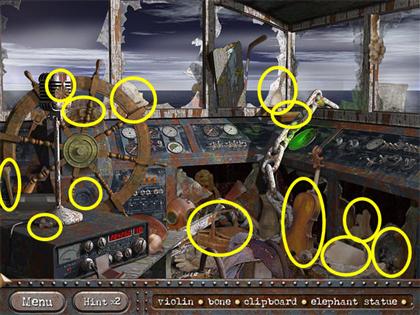
Captain’s Cabin
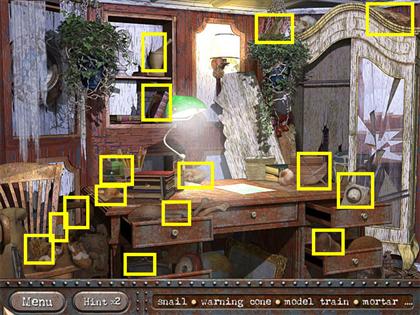
Star Inlay Puzzle – 9th Stone Piece
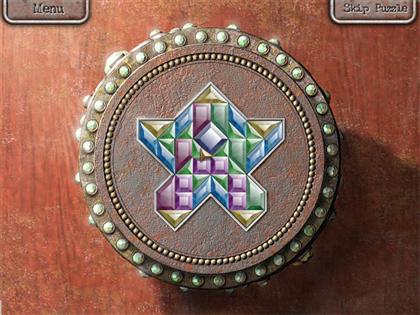
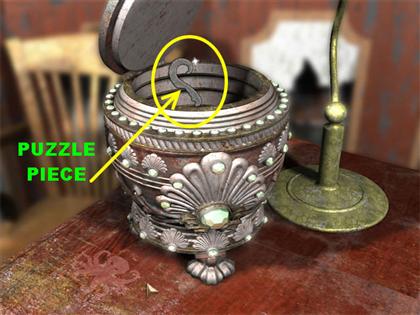
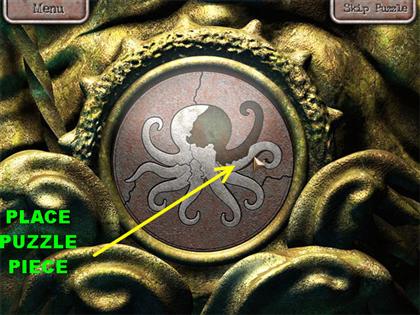
- Solve the puzzle box according to the picture in the screenshot.
- Pick up the stone piece that appears inside the box.
- Place the stone piece next to the others.
CHAPTER 5-3
Utility Room
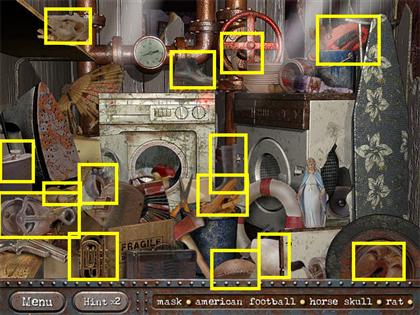
Galley
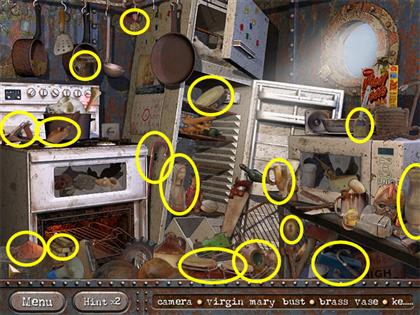
Artifact Room
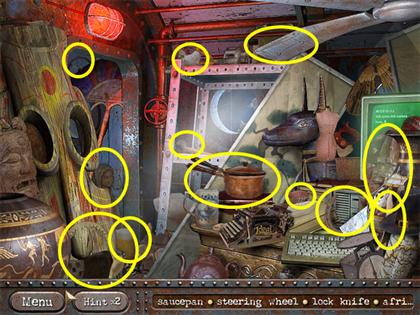
Spot 12 More Differences
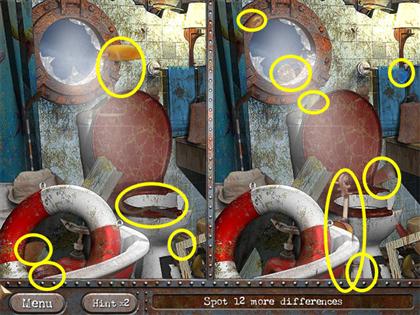
Port Deck
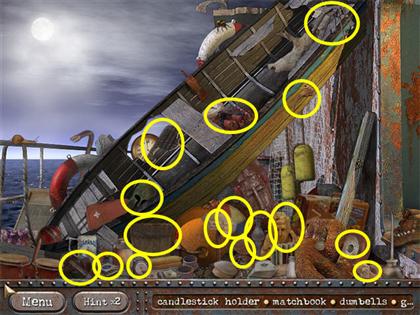
Corridor
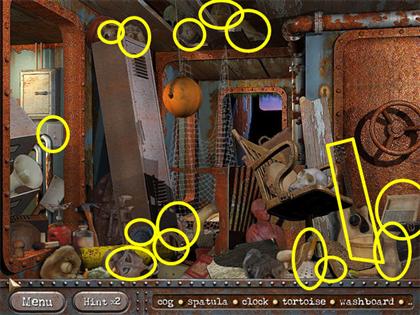
Engine Room
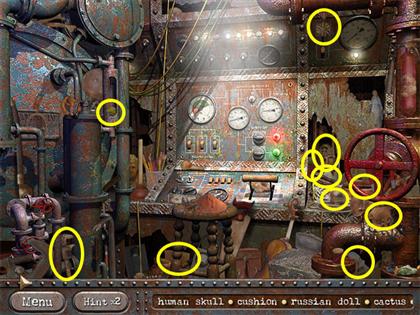
Candelabra
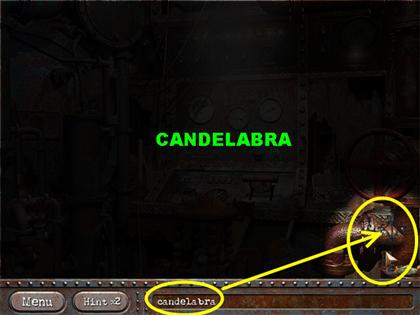
- Use the spotlight to help you locate the candelabra. Pick up the candelabra located in the lower right side of the scene.
Wire Puzzle
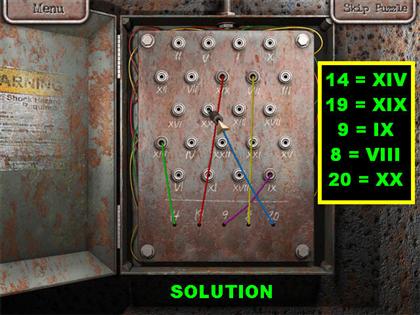
- The goal of this puzzle is to connect the wires according to the numbers attached to each wire.
- Grab any of the colored wires and place them on the matching number on the panel.
- The wires on the panel are labeled with Roman numerals. Here is the solution for this puzzle:Green 14 = XIV Red 19 = XIX Purple 9 = IX Yellow 8 = VIII Blue 20 = XX
- After the puzzle is completed, Tom disappears and Edwina gets a note that she needs to find the treasure before dawn or they will kill Tom.
CHAPTER 5-4
Rear Deck
Mess Hall
Forward Deck
Spot 16 More Differences
Edwin Margrave’s Cabin
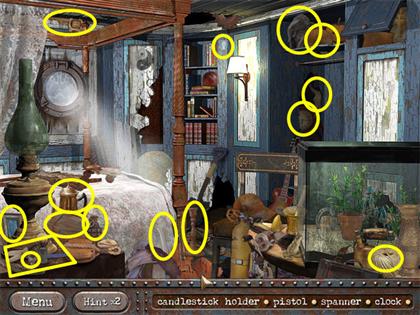
Research Room
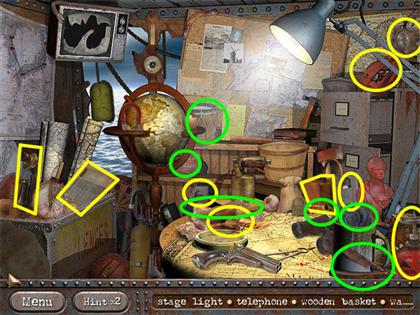
Diving Room – 10th Stone Piece
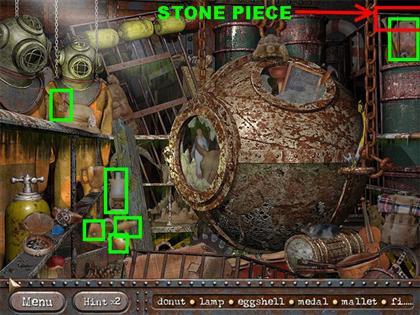
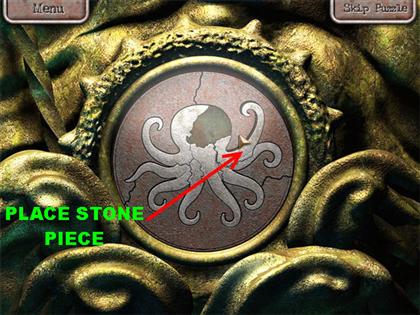
- Pick up the stone piece that is located in the upper right side of the scene.
- Place the stone piece next to the others in the circle.
CHAPTER 5-5
Bathroom
Bridge
Engine Room
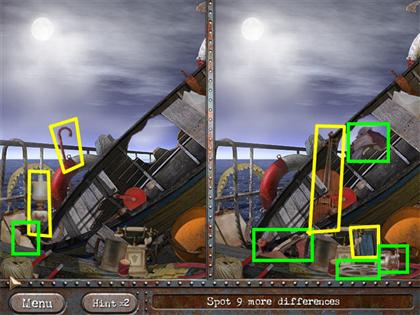
Spot 9 More Differences
Utility Room
Corridor
Captain’s Cabin – 11th Stone Piece
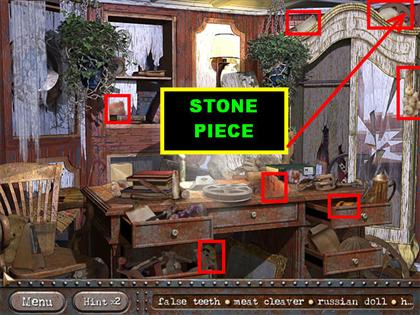
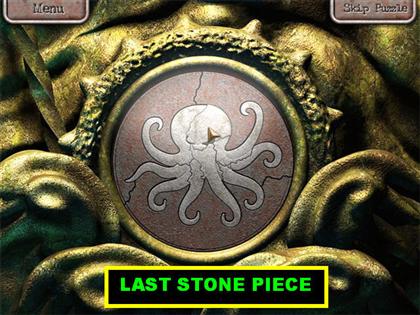
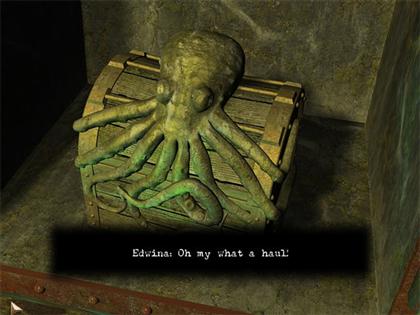
- Pick up the last stone piece that is in the upper right corner of the scene.
- Place the last stone piece next to the other pieces.
- Watch the ending scene.
Created at: 2009-06-27

