Walkthrough Menu
- General Tips
- Chapter 1: Checking In
- Chapter 2: Finding Alfred
- Chapter 3: Discovering the Chamber
- Chapter 4: Creating the Slides
- Chapter 5: Finding the Arms
General Tips
- This is the official guide for Mystery Crusaders: Resurgence of the Templars!
- This guide does not mention each time you have to zoom into a location; the screenshots show each zoom scene.
- Hidden-object puzzles are referred to as HOPs. This guide does not show screenshots of the HOPs, however, it is mentioned when a HOP is available and the inventory item collected.
- This guide gives step-by-step solutions for all puzzles that are not random. Please read the instructions in the game for each puzzle.
Chapter 1: Checking In
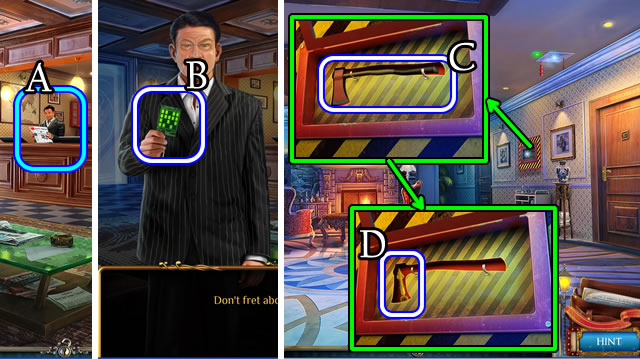
- Speak to the manager (A); take ROOM 313 KEY (B).
- Walk forward.
- Open, take the AXE (C) and CLOCK HAND (D).
- Walk down.
- Speak to the manager.
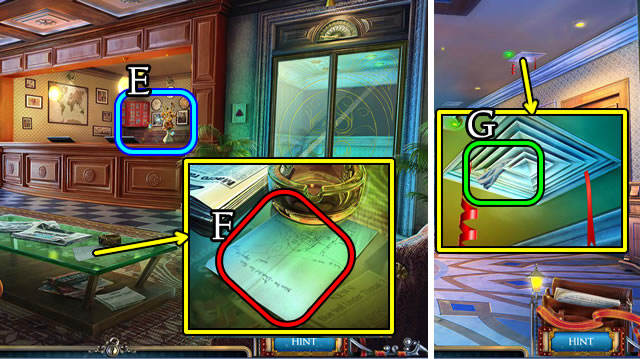
- Play the HOP (E) to receive a LIGHTER.
- Select the paper 2x (F) to receive PAPER.
- Walk forward.
- Place the PAPER (G); use the LIGHTER.
- Walk down.
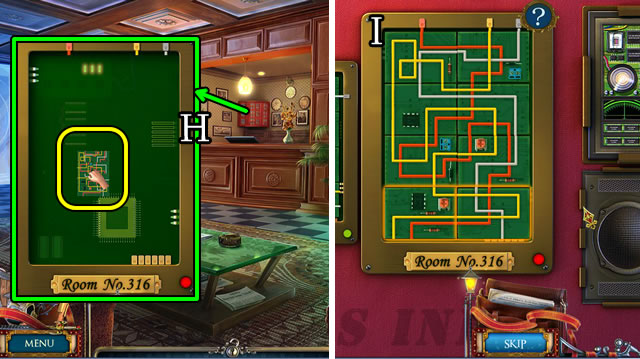
- Place ROOM 313 KEY (H).
- Solution (I).
- Take ROOM 316 KEY.
- Walk forward.
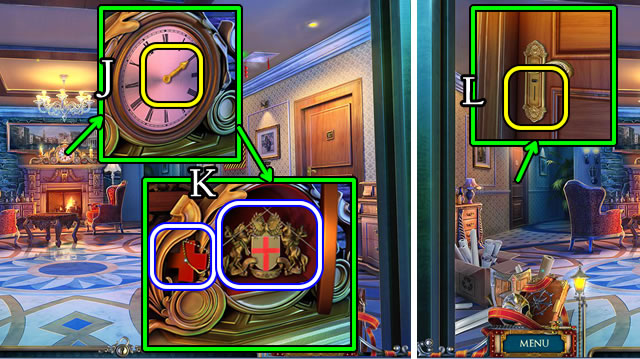
- Place the CLOCK HAND (J); take the TEMPLAR CREST and CROSS TRINKET (K).
- Use ROOM 316 KEY (L).
- Walk left.
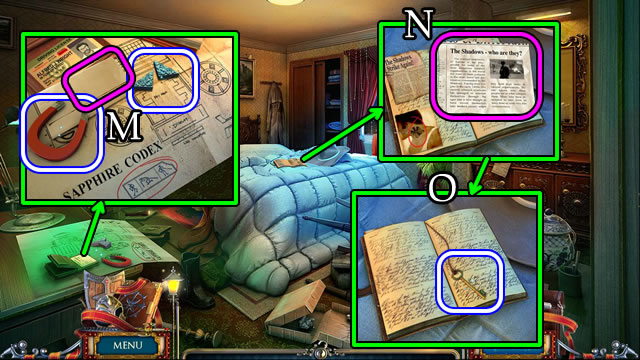
- Take the MAGNET, BUTTONS and letter (M).
- Take the clipping (N), turn the page and take the BRONZE KEY (O).
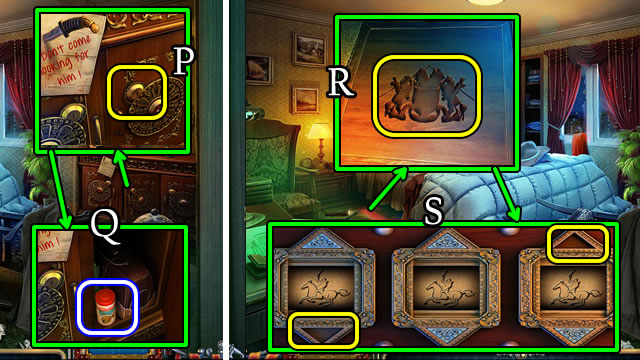
- Use the BRONZE KEY (P); take the FISH FOOD (Q).
- Place the TEMPLAR CREST (R) and BUTTONS (S).
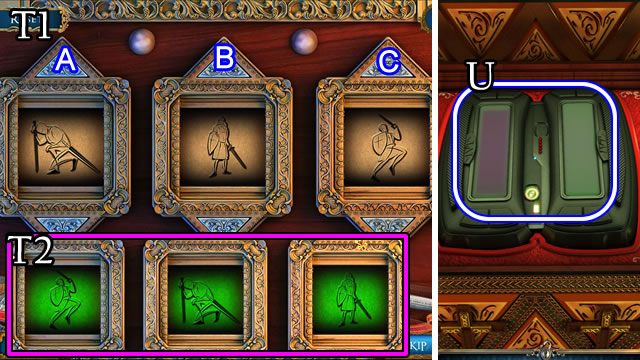
- Solution (T1-T2). Ax2-B-C.
- Take the COMMUNICATOR (U).
- Walk down. Walk right.
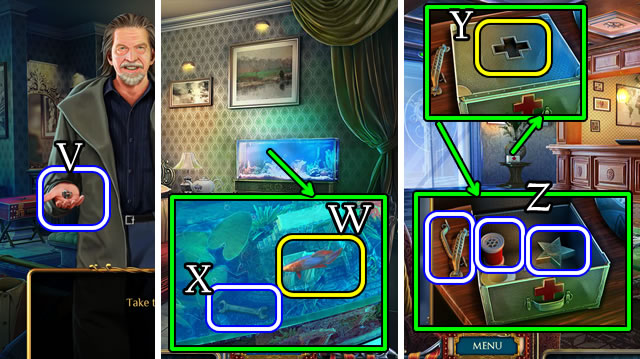
- Speak to Sir William.
- Select the COMMUNICATOR (Inventory) for a message.
- Speak to Sir William. Take the TEMPLAR RING (V).
- Use the FISH FOOD (W); take the WRENCH (X).
- Walk down 2x.
- Place the CROSS TRINKET (Y). Take the THREAD, STAR TOKEN and HANDLES (Z).
- Walk forward and left.
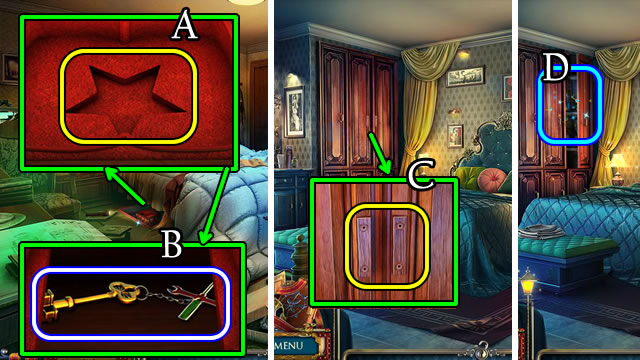
- Place the STAR TOKEN (A); take the TOOLBOX KEY (B).
- Walk down and right.
- Place the HANDLES (C) for a HOP (D). Receive LIGHTER FLUID.
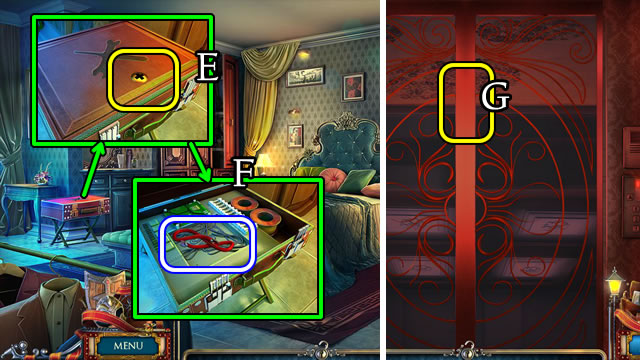
- Use the TOOLBOX KEY (E); take the WIRE (F).
- Walk down 2x.
- Use the AXE (G).
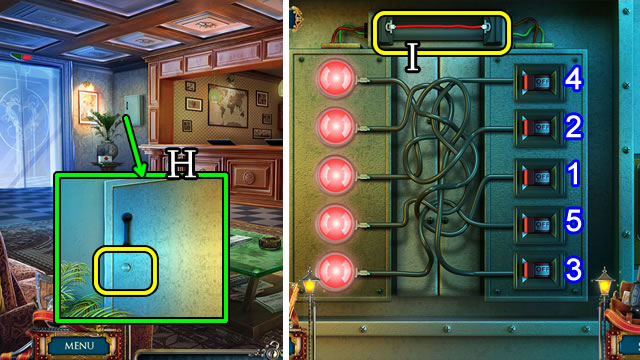
- Use the WRENCH (H); place the WIRE (I).
- Solution. 1-2-3-4-5.
- Walk left.
Chapter 2: Finding Alfred
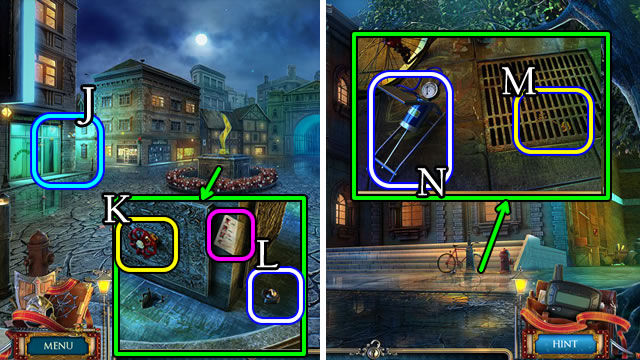
- Play the HOP (J); receive a VALVE.
- Place the VALVE (K); read the note and take NUMBERED BUTTONS 1/2 (L).
- Walk forward.
- Combine the THREAD and MAGNET for a MAGNET ON A STRING (Inventory).
- Use the MAGNET ON A STRING (M) to take CROSS KEYS 1/2.
- Take the FOOT PUMP (N).
- Walk right.
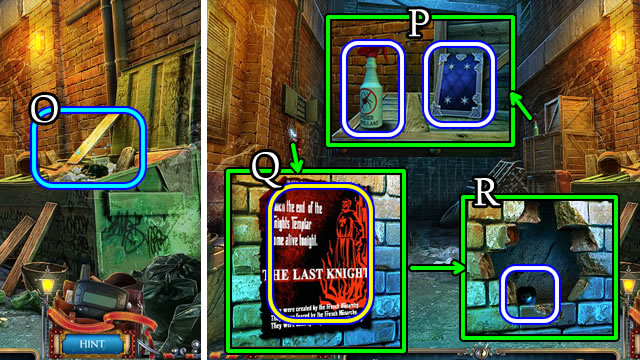
- Play the HOP (O); receive a COIN.
- Take the INSECTICIDE and BOOKS 1/3 (P).
- Select the theater notice 2x (Q); use the AXE; take NUMBERED BUTTONS 2/2 (R).
- Walk down.
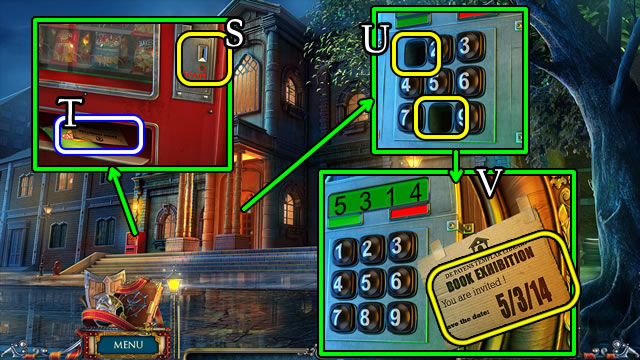
- Use the COIN (S). Take the NOTE (T).
- Place NUMBERED BUTTONS 2/2 (U) and the NOTE. Touch 5-3-1-4 (V).
- Walk forward.
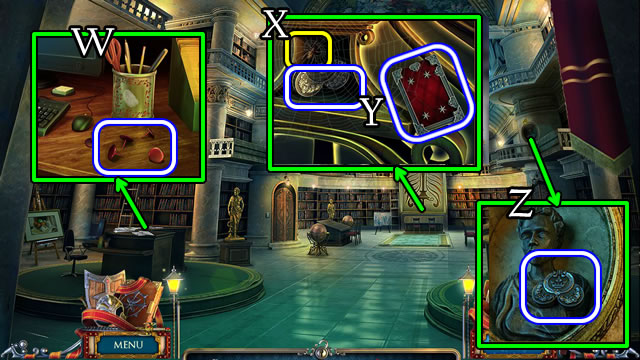
- Take the TACKS (W).
- Use the INSECTICIDE (X); take the FLOWER ORNAMENT and BOOKS 2/3 (Y).
- Grab the FLOWER ORNAMENT (Z).
- Walk down 2x.
- Combine both FLOWER ORNAMENTS for a FLOWER SYMBOL (Inventory).
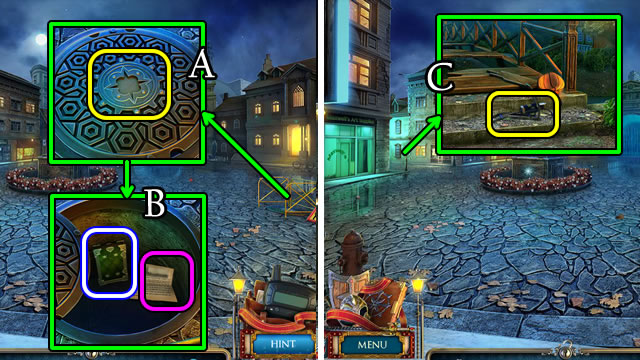
- Place the FLOWER SYMBOL (A). Take the note and BOOKS 3/3 (B).
- Use the FOOT PUMP; take the BASKETBALL (C).
- Return to the Alley.
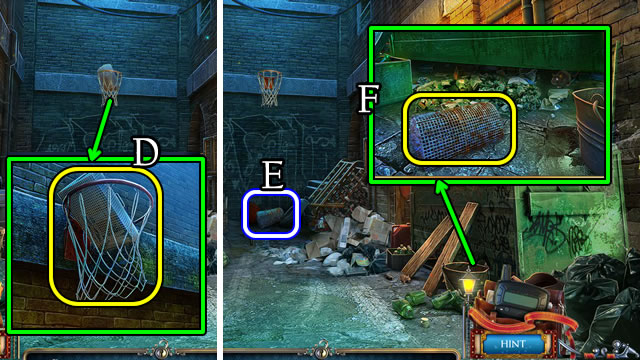
- Use the BASKETBALL (D); take the CAGE (E).
- Place the CAGE (F); take the caged MOUSE.
- Walk down and forward.
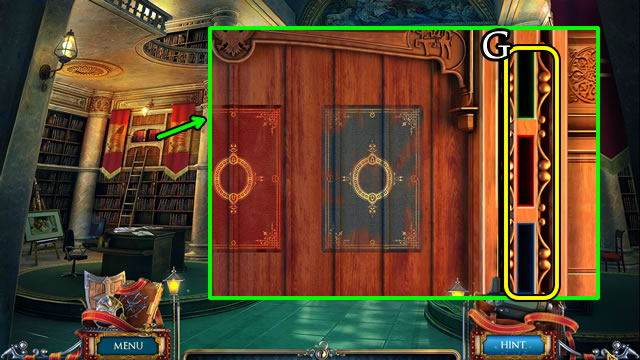
- Place the BOOKS 3/3 (G).
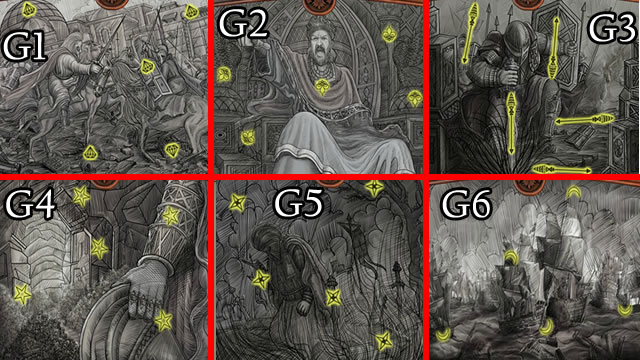
- Solution (G1-G2-G3-G4-G5-G6).
- Take the TAPE STRIP.
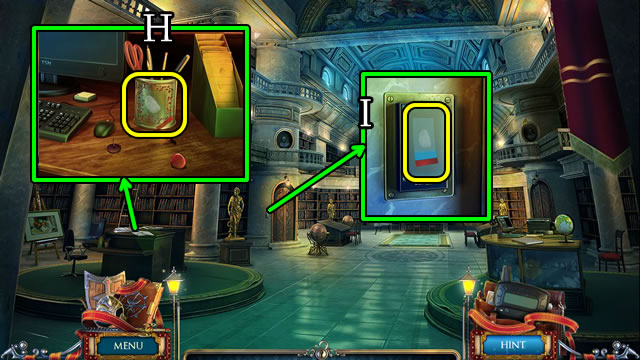
- Place the TAPE STRIP (H) to receive a FINGERPRINT STRIP.
- Place the FINGERPRINT STRIP (I).
- Walk left.
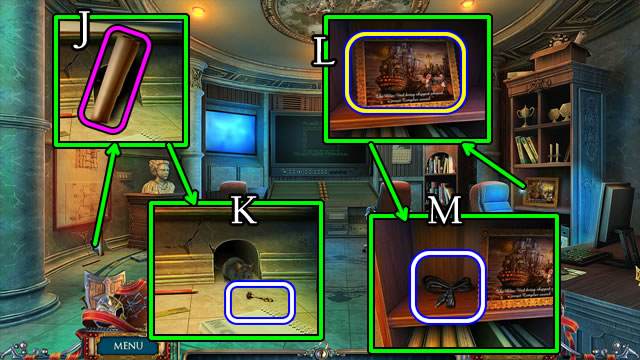
- Take the scroll (J); place the MOUSE; take CROSS KEYS 2/2 (K).
- Select the picture 2x (L); take the POWER CABLE (M).
- Walk down.
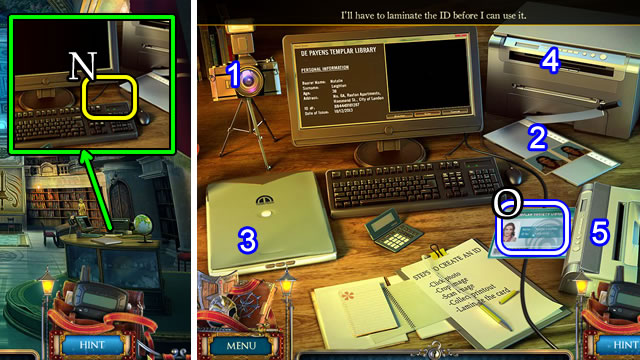
- Place the POWER CABLE (N).
- Use the devices 1-2-3-4-5.
- Take the ID CARD (O).
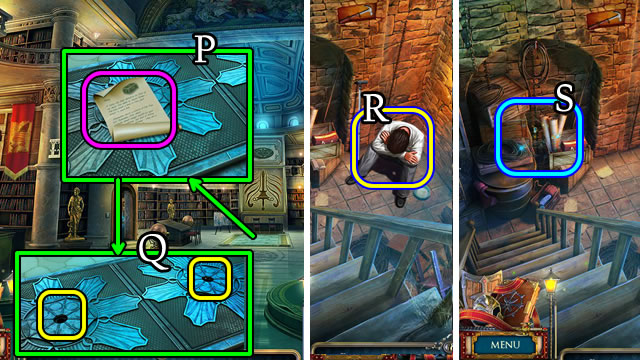
- Take the note (P). Use CROSS KEYS 2/2 (Q).
- Enter the Secret Chamber.
- Speak to Alfred (R) to activate a HOP (S). Receive a TEMPLAR SYMBOL.
- Walk down and left.
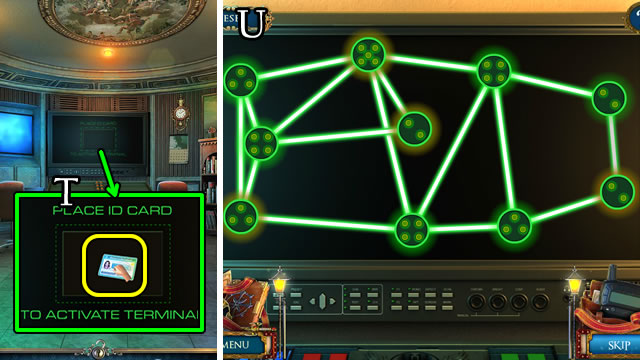
- Place the ID CARD (T).
- Solution (U).
- Combine the TEMPLAR SYMBOL and TEMPLAR RING for a TEMPLAR SOUVENIR (Inventory).
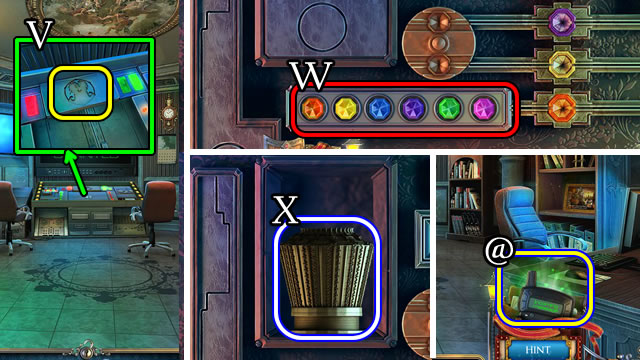
- Place the TEMPLAR SOUVENIR (V).
- Solution (W).
- Take the SAPPHIRE CODEX (X).
- Read the incoming message (@).
- Walk down 3x.
Chapter 3: Discovering the Chamber
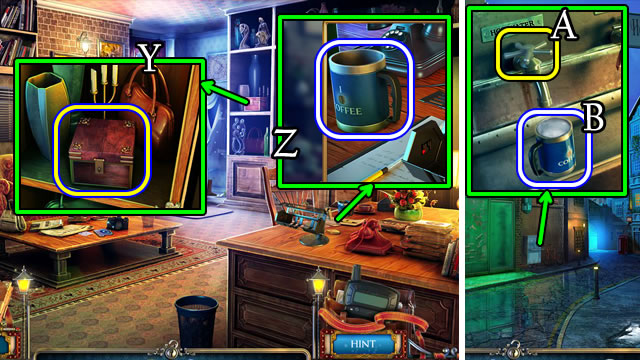
- Open the box (Y); take the FAUCET VALVE.
- Take the COFFEE MUG (Z).
- Walk down.
- Place the FAUCET VALVE (A) and COFFEE MUG. Take the HOT WATER (B).
- Walk left.
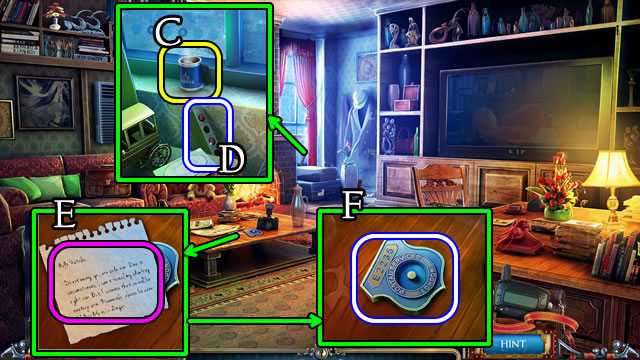
- Place the HOT WATER (C).
- Take the PANEL OF BUTTONS (D).
- Take the note (E) and POSTAL BADGE (F).
- Walk down.
- Combine the PANEL OF BUTTONS and TACKS for a PANEL WITH BUTTONS (Inventory).
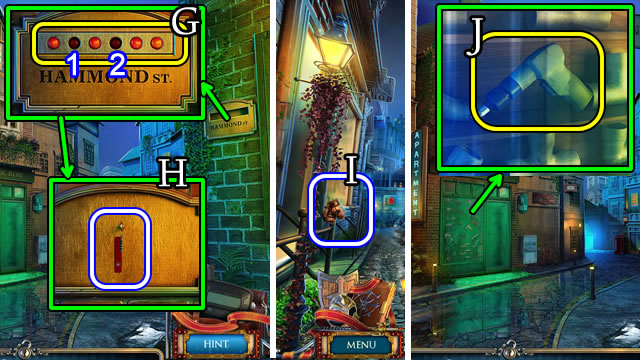
- Place the PANEL WITH BUTTONS (G); touch the buttons (1-2).
- Take the UTILITY KNIFE (H).
- Walk forward.
- Grab the BOXING GLOVES (I).
- Walk down.
- Use the BOXING GLOVES (J). Take the RIVET GUN.
- Walk left.
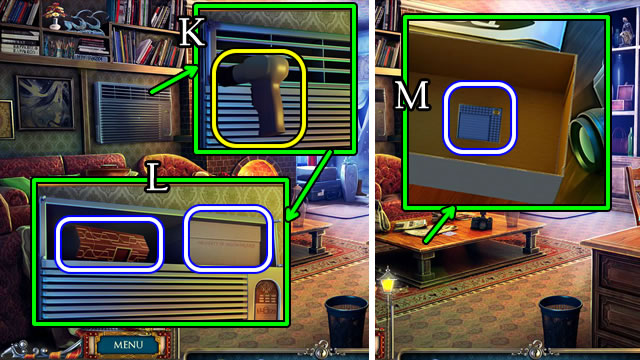
- Use the RIVET GUN (K).
- Take the CODED BOX and JASON'S BELONGINGS (L).
- Place JASON'S BELONGINGS. Uncover and take the BOX CHIP (M).
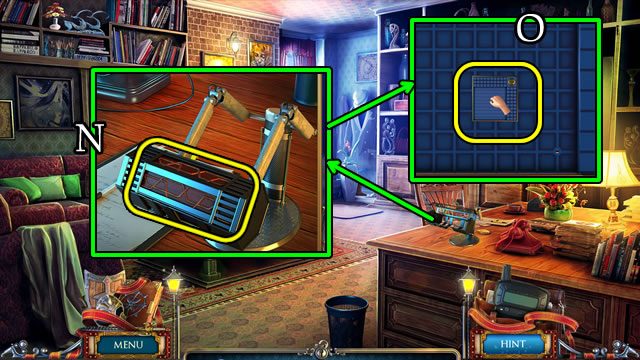
- Place the CODED BOX (N).
- Place the BOX CHIP (O).
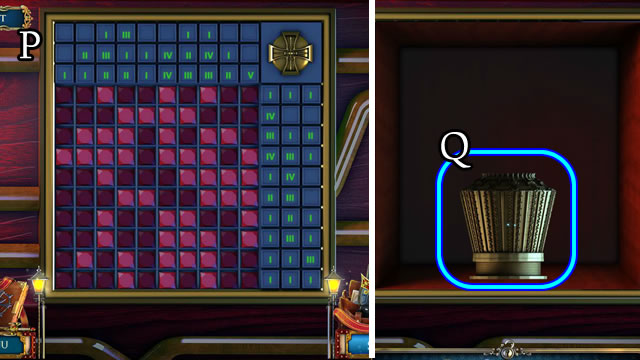
- Solution (P).
- Take the codex part (Q).
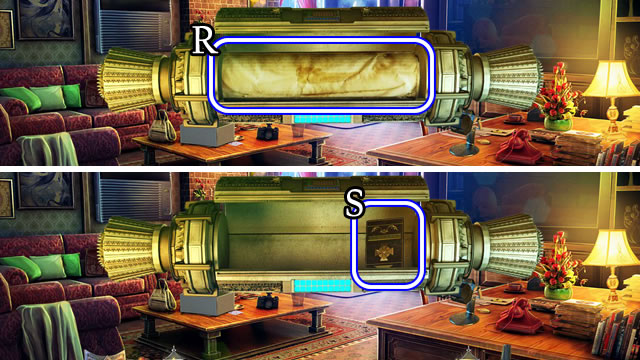
- Take the ROLLED MAP (R) and ACCESS CARD (S).
- Walk down and forward.
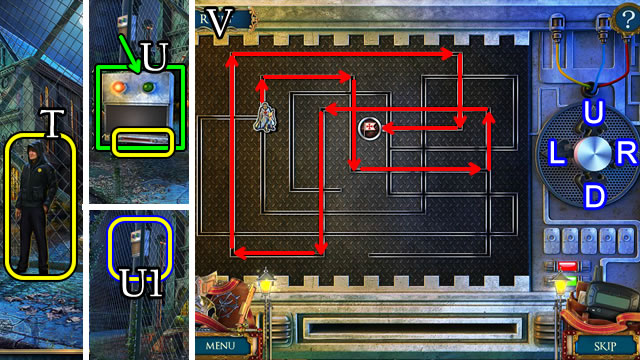
- Give the ACCESS CARD (T); speak to the guard.
- Use the ACCESS CARD (U).
- Select (U1).
- Solution (V): U-R-D-R-U-L-D-L-U-R-D-L.
- Walk forward.
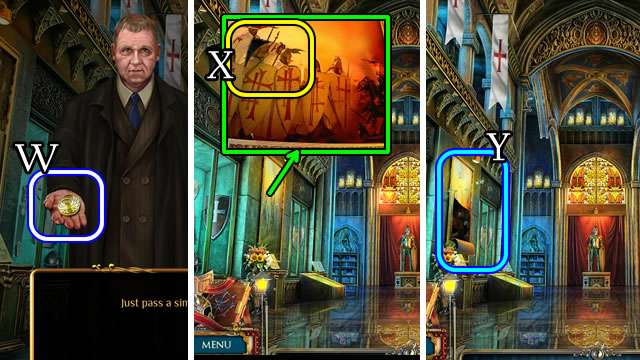
- Speak to the man; take the COINS (W).
- Use the UTILITY KNIFE (X).
- Play the HOP (Y) to receive CANNED MEAT.
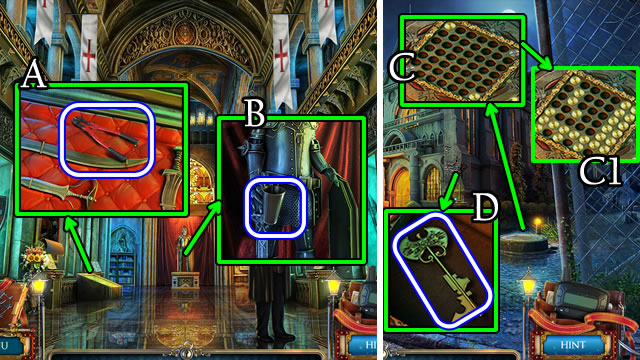
- Take the CHAIN CUTTER (A).
- Take the CONTAINER (B).
- Walk down.
- Place the COINS (C).
- Solution methods vary (C1).
- Take the GOLDEN KEY (D).
- Walk forward.
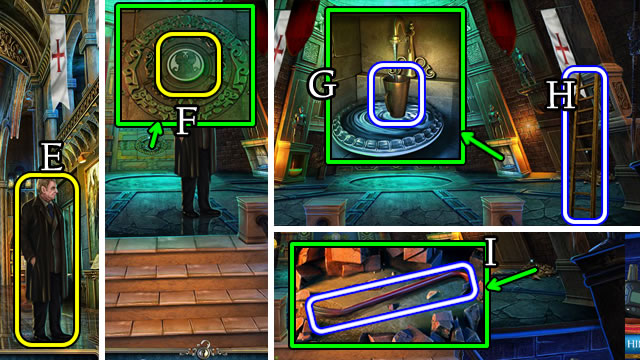
- Give the GOLDEN KEY (E).
- Place the TEMPLAR SOUVENIR (F).
- Place the CONTAINER (G); receive LIQUID SILVER.
- Take the LADDER (H).
- Uncover and take the CROWBAR (I).
- Walk down 2x.
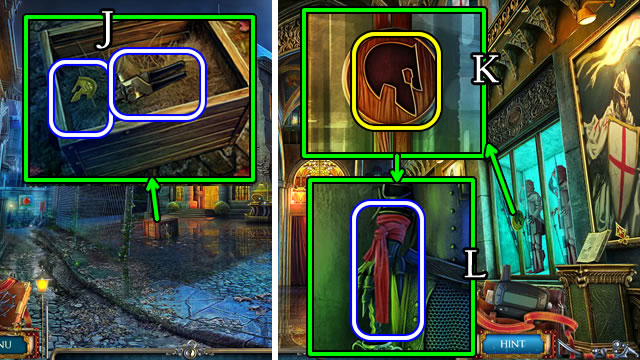
- Open the crate with the CROWBAR. Take the KNIGHT INSIGNIA and CAN OPENER (J).
- Walk forward.
- Place the KNIGHT INSIGNIA (K). Take the SCARF (L).
- Combine the CANNED MEAT and CAN OPENER to receive MEAT (Inventory).
- Walk down 3x.
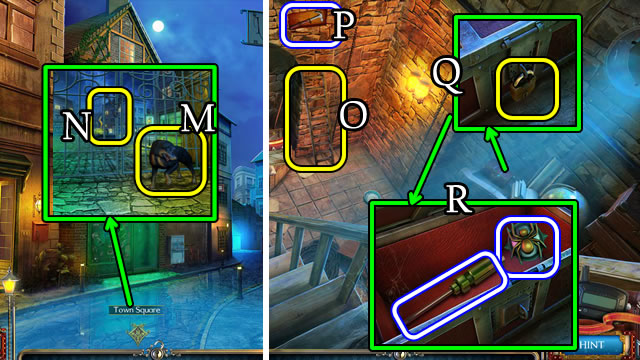
- Give the MEAT (M). Use the CHAIN CUTTER (N).
- Return to the Secret Chamber.
- Place the LADDER (O); take the HAMMER (P).
- Use the HAMMER (Q).
- Take the SPIDER MEDALLION and SCREWDRIVER (R).
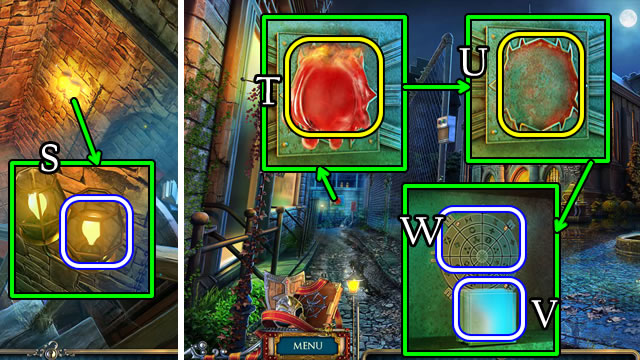
- Use the SCARF to receive a LIGHTBULB (S).
- Return to Templar Headquarters.
- Use the LIGHTER FLUID (T).
- Place the SPIDER MEDALLION (U).
- Take the GLASS SLIDES (V).
- Use the SCREWDRIVER to take a STENCIL (W).
- Read the incoming message.
- Walk down 2x.
Chapter 4: Creating the Slides
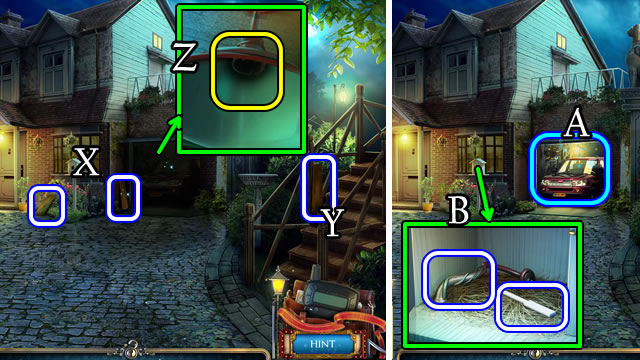
- Take PLANKS 1/5, PLANKS 2/5 (X) and PLANKS 3/5 (Y).
- Place the LIGHTBULB (Z) for a HOP (A). Receive AMMONIA.
- Open and take the RECORD PLAYER PART and PIANO KEYS 1/3 (B).
- Walk forward.
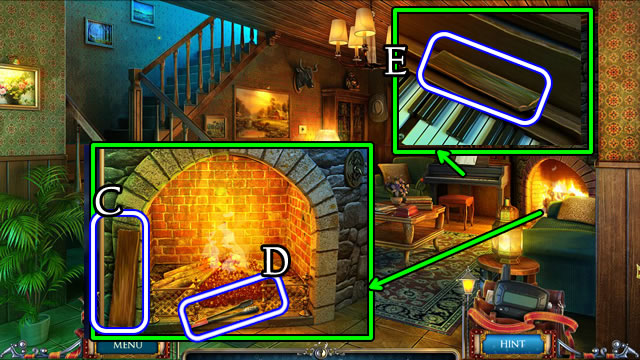
- Take PLANKS 4/5 (C) and the TONGS (D).
- Take PLANKS 5/5 (E).
- Walk left.
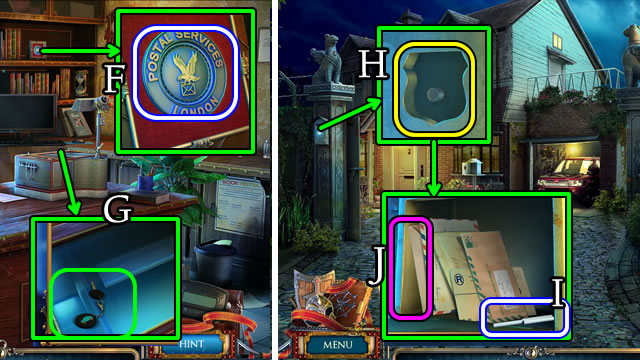
- Take the POSTAL BADGE (F).
- Grab the CAR KEY (G).
- Walk down 2x.
- Combine both POSTAL BADGE parts to receive a POSTAL BADGE (Inventory).
- Place the POSTAL BADGE (H).
- Take PIANO KEYS 2/3 (I).
- Uncover and take the note (J).
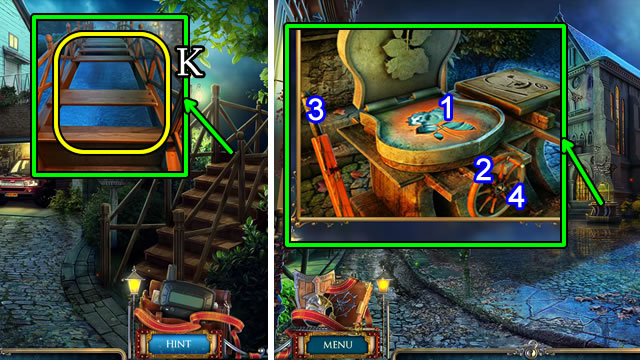
- Place PLANKS 5/5 (K).
- Return to Templar Headquarters.
- Pour the LIQUID SILVER (1), turn the wheel (2), pull the lever (3) and turn the wheel (4). Use the TONGS to receive a SILVER ROSE.
- Return to the Living Room.
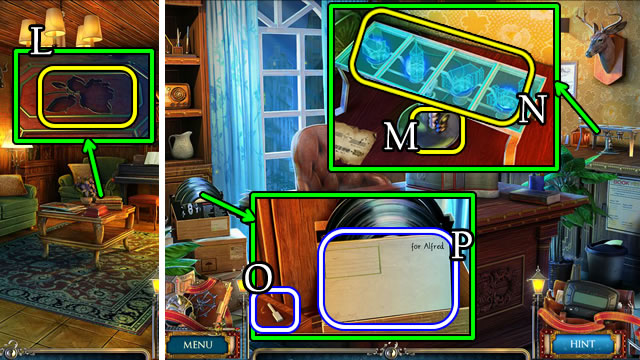
- Place the SILVER ROSE (L). Take the BURNER KNOB.
- Walk left.
- Combine the GLASS SLIDES and AMMONIA to receive TREATED SLIDES (Inventory).
- Place the BURNER KNOB (M). Place the TREATED SLIDES (N). Use the TONGS to receive IMAGE SLIDES.
- Take PIANO KEY 3/3 (O). Uncover and take the VINYL RECORD (P).
- Return to the Chamber Entrance.
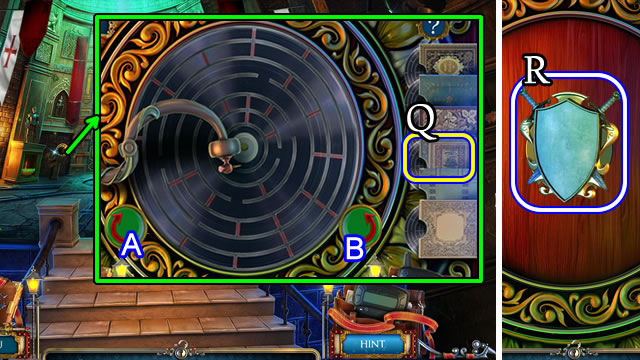
- Place the RECORD PLAYER PART and VINYL RECORD. Select a record (Q).
- Solution. Ax17-Bx6.
- Take the MYSTERIOUS KEY (R).
- Return to the Living Room.
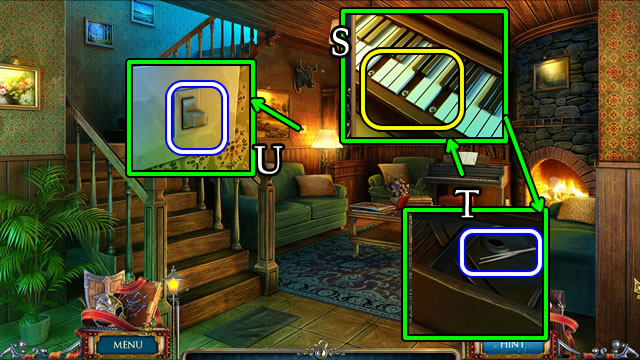
- Place PIANO KEYS 3/3 (S); take the TWEEZERS (T).
- Use the TWEEZERS to receive a LIGHT SWITCH (U).
- Walk left.
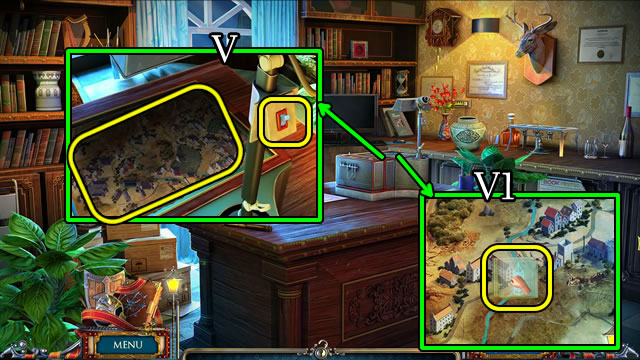
- Place the ROLLED MAP and LIGHT SWITCH (V).
- Place the IMAGE SLIDES (V1).
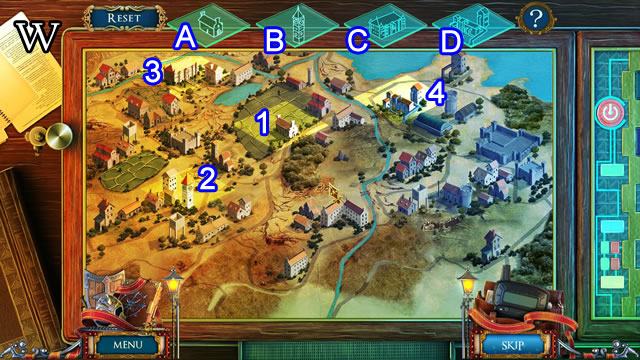
- Solution (W). A-1, B-2, C-3, D-4.
- Read the incoming message.
- Walk down.
Chapter 5: Finding the Arms
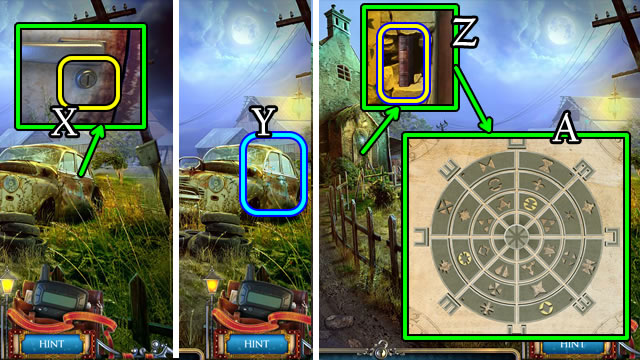
- Use the CAR KEY (X) to play a HOP (Y). Receive CHARCOAL.
- Select the book (Z); place the STENCIL and rotate 7x (A). Use the CHARCOAL; take the DIARY PAGE.
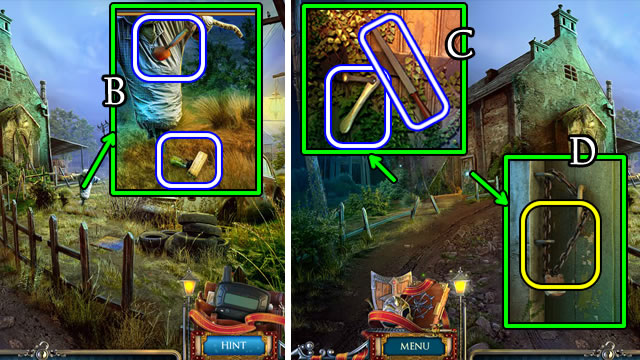
- Grab the GLASS CLEANER and TROWEL (B).
- Uncover and take the FILE and LEVER (C).
- Use the FILE (D).
- Walk forward.
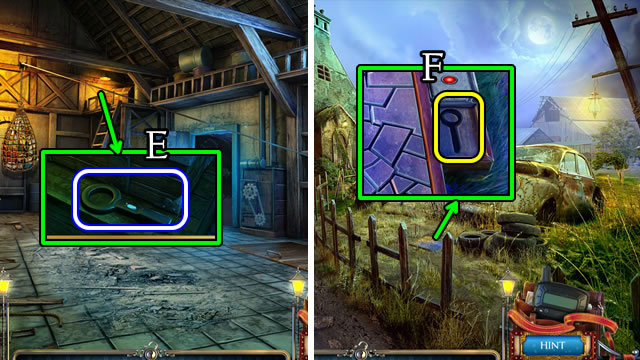
- Take the METAL DETECTOR (E).
- Walk forward.
- Place the METAL DETECTOR (F).
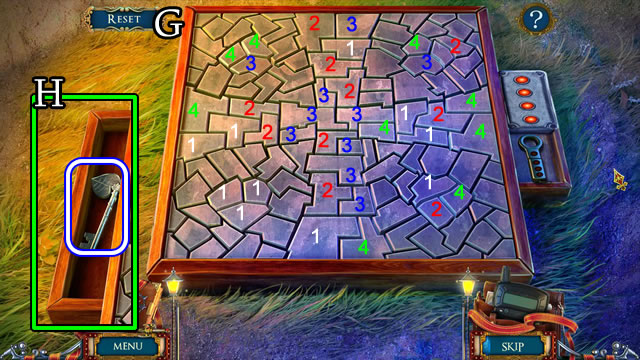
- Solution (G).
- Take the LEAF KEY (H).
- Walk forward.
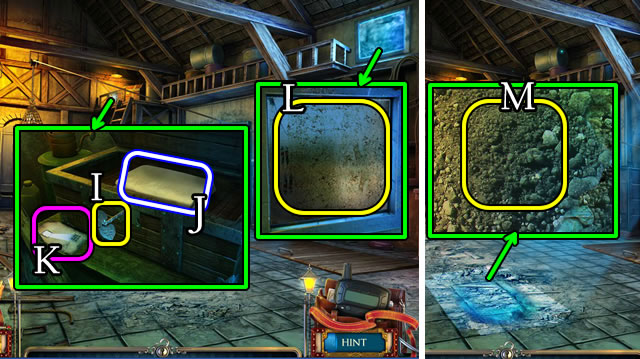
- Use the LEAF KEY (I), take the SCREEN (J) and read the note (K).
- Use the GLASS CLEANER (L) and place the SCREEN.
- Use the TROWEL (M) to uncover a puzzle.
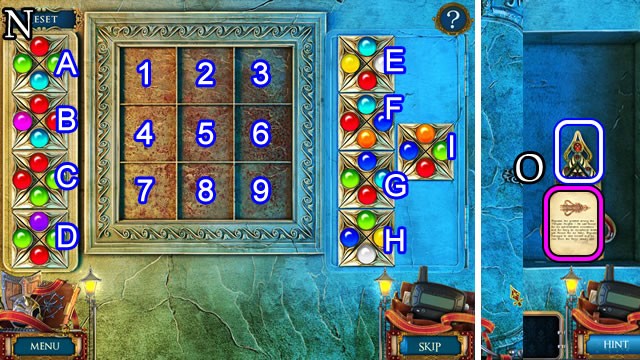
- Solution (N). 1-I, 2-D, 3-G, 4-B, 5-C, 6-A, 7-F, 8-H, 9-E.
- Take the note and REGINALD'S ARM (O).
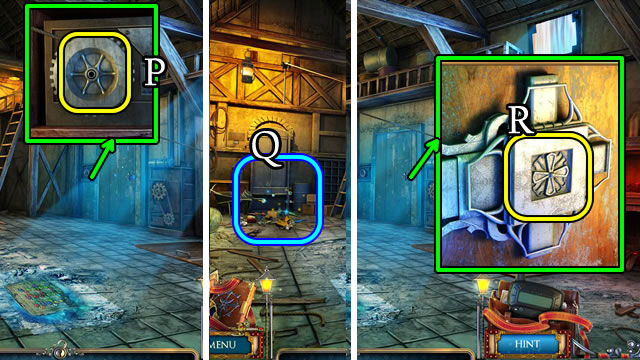
- Place the LEVER (P) to play the HOP (Q). Receive an AMULET.
- Place the AMULET (R).
- Walk forward.
- Walk right.
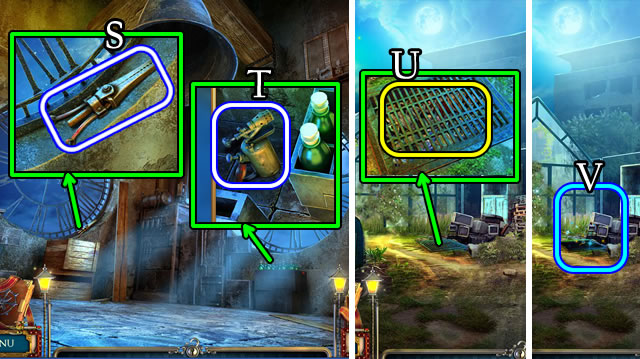
- Take the SEPARATOR TOOL (S).
- Take the BLOWTORCH (T).
- Walk down.
- Use the BLOWTORCH (U) for a HOP (V). Receive SHEARS.
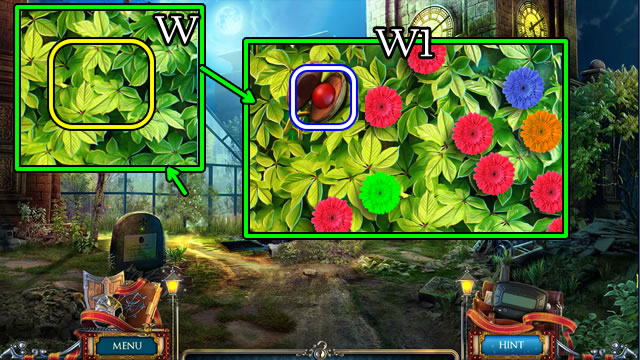
- Use the SHEARS (W) for a puzzle.
- Flower positions are random.
- Take the RUBY (W1).
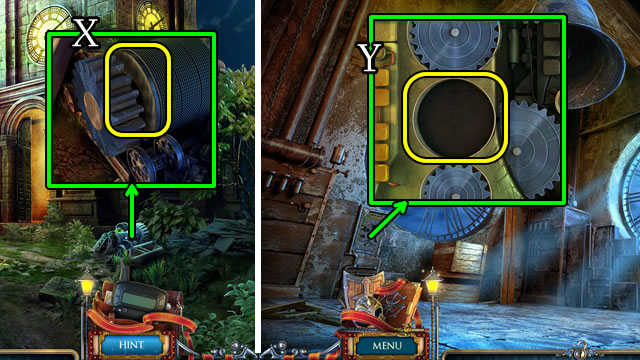
- Use the SEPARATOR TOOL (X); take the GEAR.
- Walk forward.
- Place the GEAR (Y).
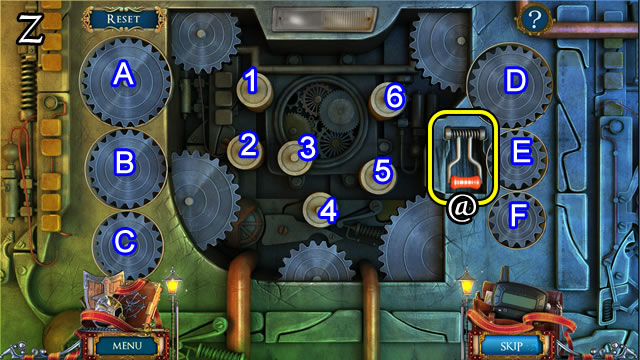
- Solution (Z). 1-D, 2-F, 3-E, 4-C, 5-B, 6-A.
- Lift the handle (@).
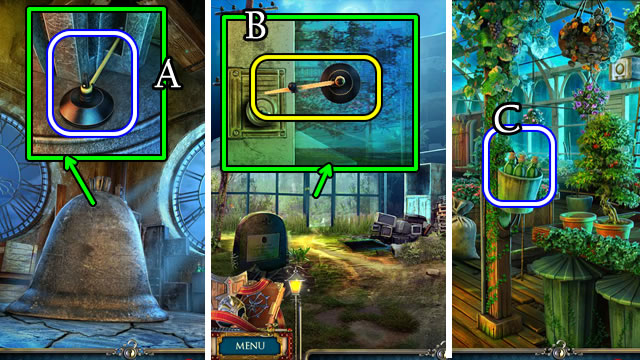
- Take the GLASS CUTTER (A).
- Walk down.
- Use the GLASS CUTTER (B).
- Walk left.
- Take the BOTTLES (C).
- Walk down and right.
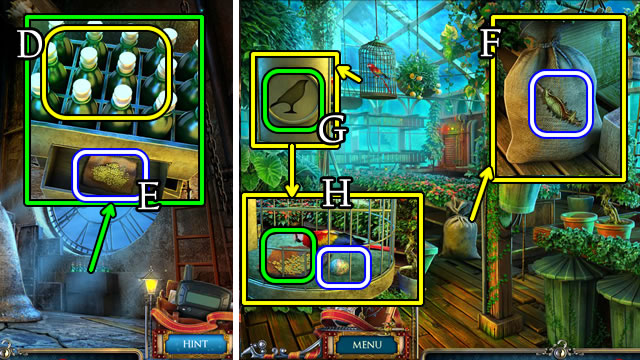
- Place the BOTTLES (D). Take the BIRDSEED (E).
- Walk down and left.
- Use the UTILITY KNIFE; take the GOLDEN BIRD (F).
- Place the GOLDEN BIRD (G). Give the BIRDSEED; take the MARBLE EGG (H).
- Walk down.
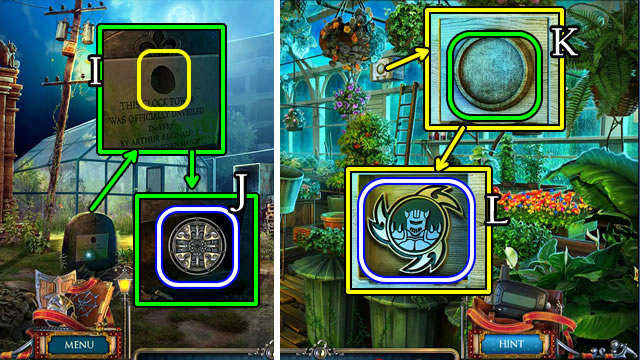
- Place the MARBLE EGG (I). Take the INSIGNIA (J).
- Walk left.
- Place the INSIGNIA (K). Take the KNIGHT EMBLEM (L).
- Walk down and right.
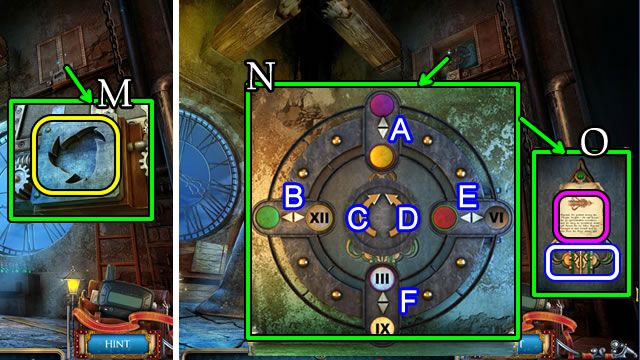
- Place the KNIGHT EMBLEM (M) to open a puzzle.
- Solution (N). C-B-C-B-C-B-F-D-A-E-F-B-D-A-B-F-E.
- Take the note and ARMAND'S ARM (O).
- Read the incoming message.
- Walk down.
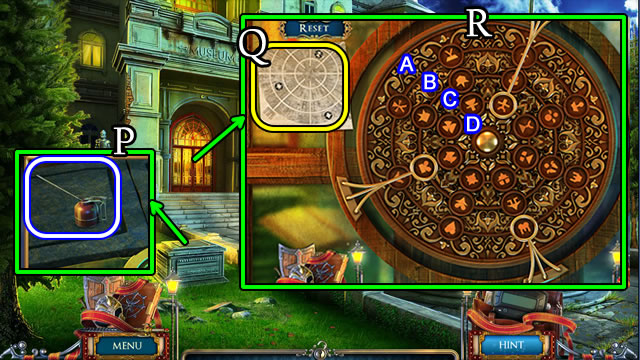
- Take the OILCAN (P).
- Place the DIARY PAGE (Q).
- Solution (R). Ax6-Bx7-Cx6-Dx7.
- Walk forward.
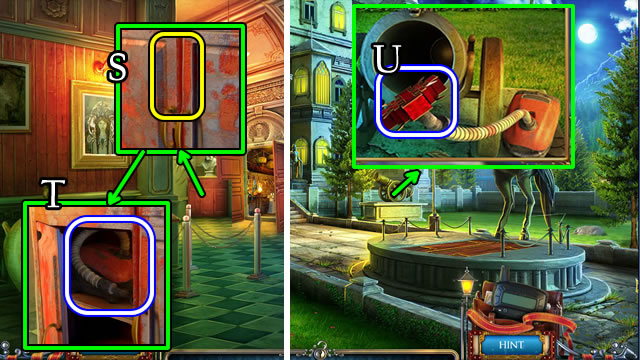
- Use the OILCAN (S); take the VACUUM CLEANER (T).
- Walk down.
- Use the VACUUM CLEANER to take the CROSS MEDALLION (U).
- Walk forward.
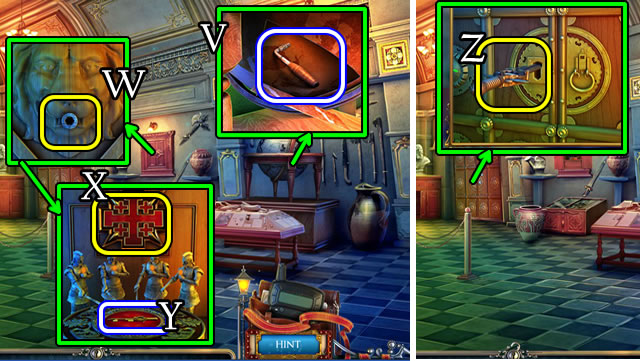
- Use the UTILITY KNIFE; take the HEX KEY (V).
- Use the HEX KEY (W).
- Place the CROSS MEDALLION (X). Take the SWORD KEY (Y).
- Use the SWORD KEY (Z).
- Walk forward.
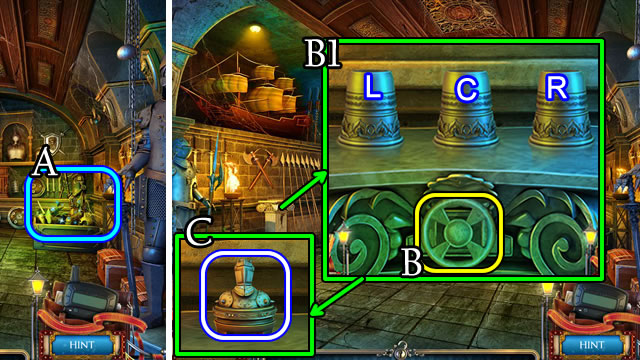
- Play the HOP (A); receive a MARBLE WHEEL.
- Place the MARBLE WHEEL (B) for a puzzle.
- Solution (B1). L-R-L.
- Take the KNIGHT FIGURINE (C).
- Walk down 2x.
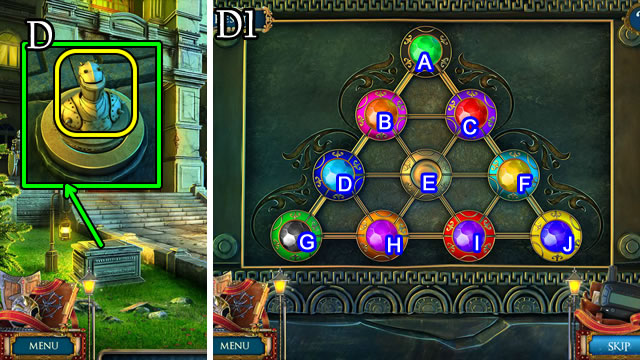
- Place the KNIGHT FIGURINE (D).
- Solution (D1). F-C-E-D-H-I-J-F-C-E-I-J-F-C-B-D-G-H-E-C-A-B-E-C-B-D-G-H-E-C-A-B-D-G-H-E-C-B-E.
- Take the SHIELD.
- Walk forward 2x.
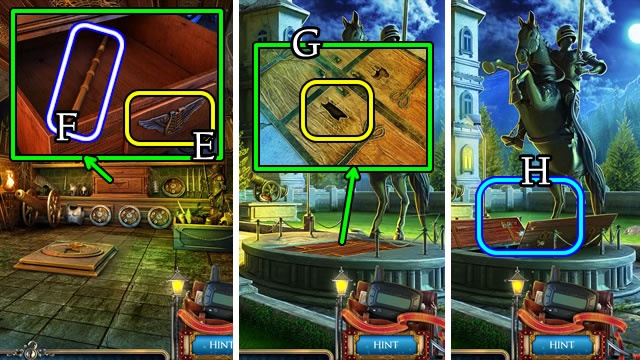
- Place the SHIELD (E); take the HOOK (F).
- Walk down 2x.
- Use the HOOK (G).
- Play the HOP (H) to receive a FLAME AMULET.
- Walk forward 2x.
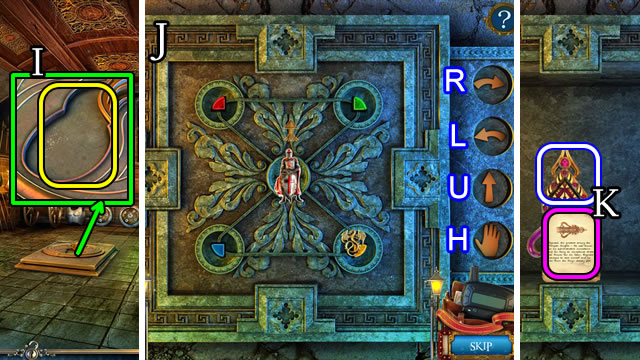
- Place the FLAME AMULET (I) for a puzzle.
- Solution (J). Lx3-U-H-Lx3-U-Lx3-U-H-Lx2-U-Lx3-U-H-Lx3-U-H-U-H-Rx3-U-Rx3-U-H-U-Lx3-U-Lx3-Ux2-Rx3-U-H-Rx3-U-H.
- Take the note and XAVIER'S ARM (K).
- Read the incoming message.
- Walk down 2x.
- Speak to the man.
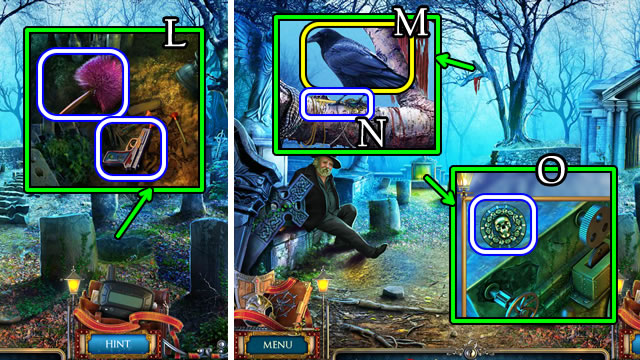
- Uncover and take the DUSTER and TOY GUN (L).
- Use the TOY GUN (M); take the KEY (N).
- Grab the SKULL AMULET (O).
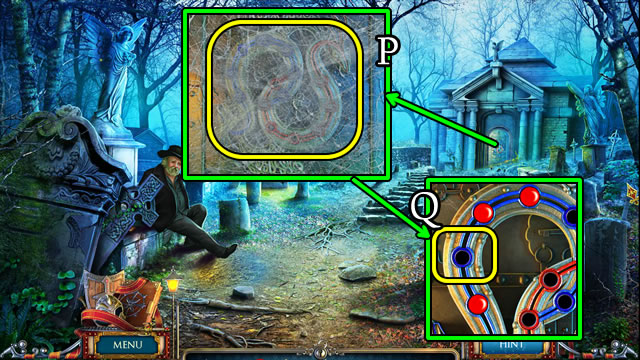
- Use the DUSTER (P).
- Place the RUBY (Q).
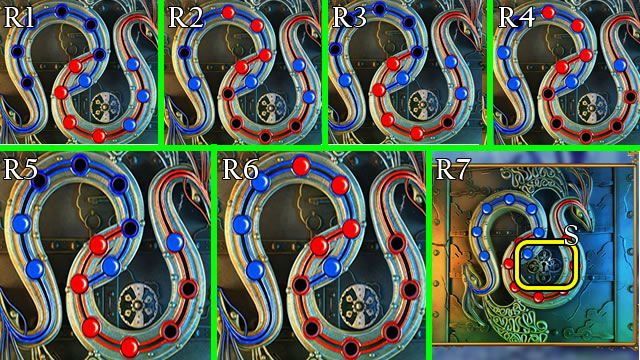
- Solution. R1-R2-R3-R4-R5-R6-R7.
- Use the KEY (S).
- Walk right.
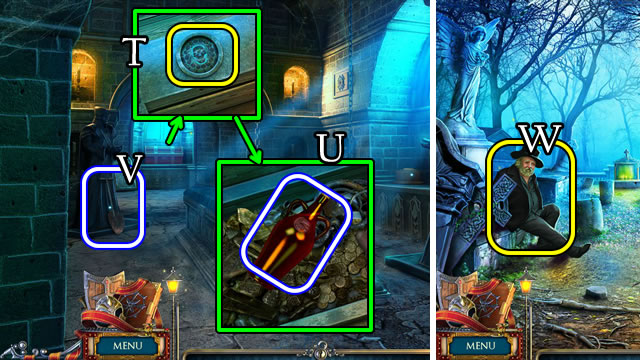
- Place the SKULL AMULET (T).
- Uncover and take the BOTTLE OF WINE (U).
- Grab the SHOVEL (V).
- Walk down.
- Give the BOTTLE OF WINE (W).
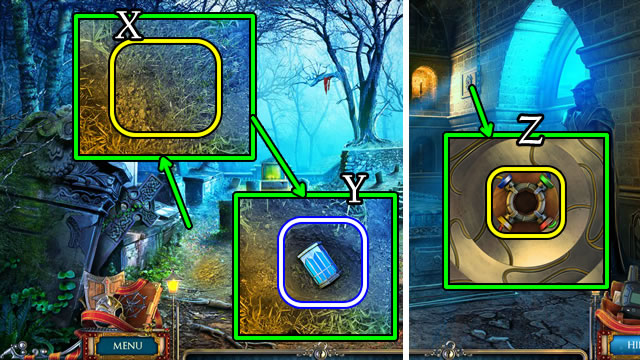
- Use the SHOVEL (X).
- Take the POWER SOURCE (Y).
- Walk right.
- Place the POWER SOURCE (Z).
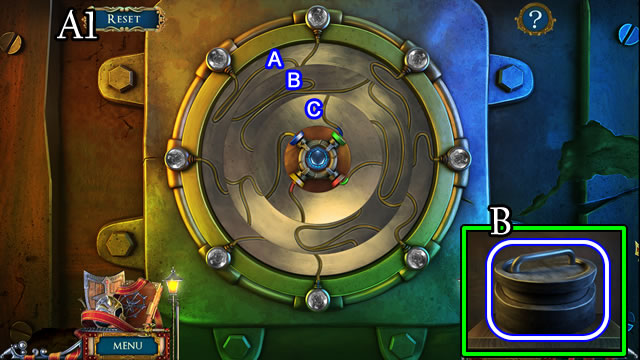
- Solution (A1). Ax6-Bx5-Cx6.
- Take the TOMB KEY (B).
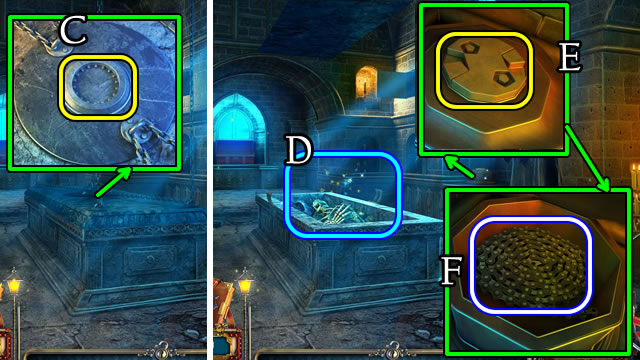
- Place the TOMB KEY (C).
- Play the HOP (D); receive a HANDLE.
- Place the HANDLE (E); take the CHAIN (F).
- Walk down.
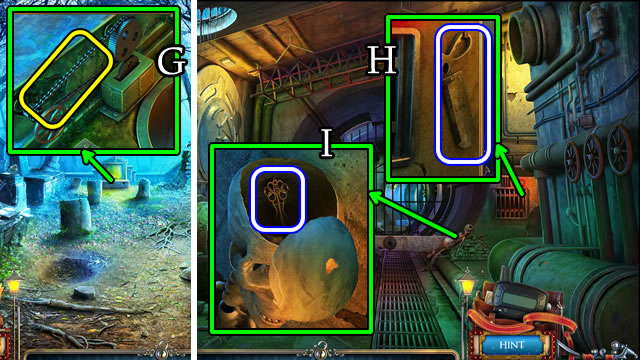
- Place the CHAIN (G). Climb down.
- Take the BONE SAW (H).
- Use the BONE SAW; take the CYLINDRICAL KEY (I).
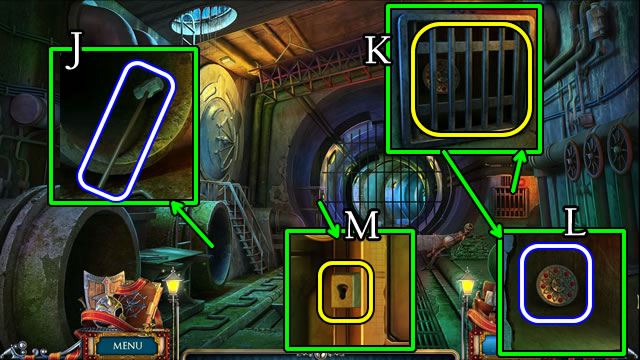
- Grab the SLEDGEHAMMER (J).
- Use the SLEDGEHAMMER (K); take the TEMPLAR TALISMAN (L).
- Use the CYLINDRICAL KEY (M).
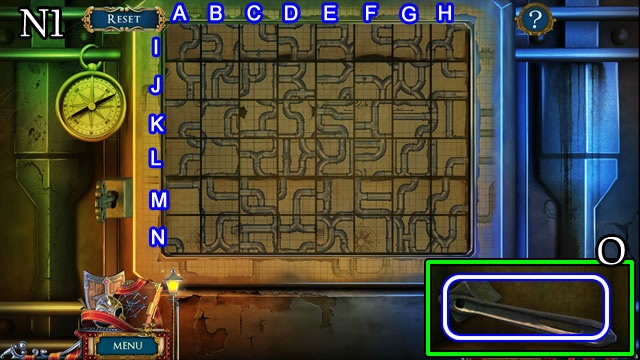
- Solution (N1). J-N, B-F, K-N, M-N, I-N, C-D, E-F.
- Take the ADJUSTABLE WRENCH (O).
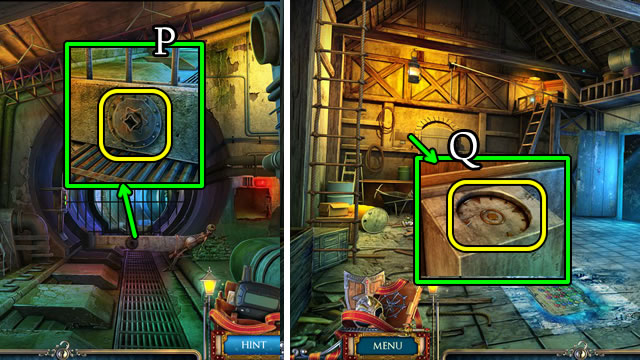
- Use the ADJUSTABLE WRENCH (P).
- Walk forward.
- Place the TEMPLAR TALISMAN (Q) for a puzzle.
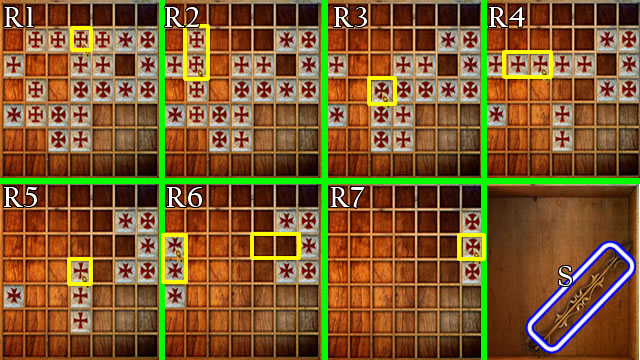
- Solution. R1-R2-R3-R4-R5-R6-R7.
- Take the GOLDEN ARROW (S).
- Walk down the stairs.
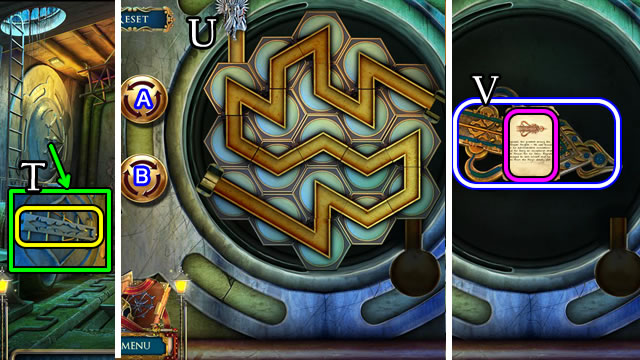
- Place the GOLDEN ARROW (T).
- Solution. Arrange the pipes (U). Rotate Ax2-Bx2-Ax3-Bx3-Ax2-Bx4-A-B-Ax4-Bx2-Ax2.
- Take the note and PHILIP'S ARM (V).
- Read the incoming message.
- Climb the ladder.
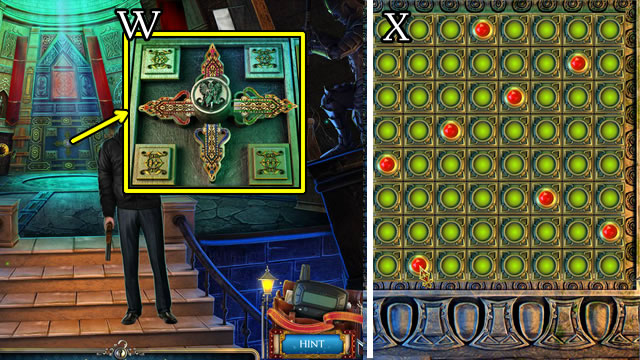
- Place PHILIP'S ARM, XAVIER'S ARM, ARMAND'S ARM and REGINALD'S ARM (W).
- Solution (X).
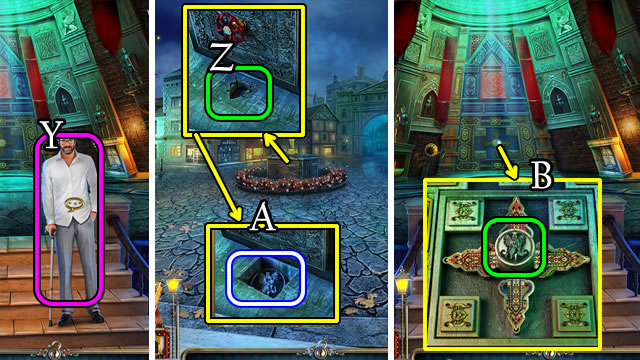
- Speak to Alfred (Y) to receive the SPECIAL KEY SYMBOL.
- Walk down 4x.
- Combine the MYSTERIOUS KEY and SPECIAL KEY SYMBOL for a SPECIAL KEY (Inventory).
- Place the SPECIAL KEY (Z). Take the TEMPLAR TALISMAN (A).
- Return to the Chamber Entrance.
- Place the TEMPLAR TALISMAN (B).
- Congratulations! You have completed playing Mystery Crusaders: Resurgence of the Templars.
Created at: 2015-10-18

