Walkthrough Menu
- General Tips
- Chapter 1: The Glowing Amulet
- Chapter 2: Ayana's Dream Catcher
- Chapter 3: A Cure for Jesse
- Chapter 4: The Shaman's Tepee
- Chapter 5: The Lost City
- Chapter 6: The Underground Shrine
- Chapter 7: The Golden Compass
- Chapter 8: Spirit Wolf
General Tips
- This is the official guide for Myths of the World: Spirit Wolf.
- The guide will not mention each time you have to zoom into a scene; the screenshots will show each zoom scene.
- We will use the acronym HOP for Hidden-object puzzles. Interactive objects will be color-coded and some will be numbered. Please follow the numbers in sequence.
- HOPs may be random: our lists may vary from yours.
- Use the binoculars in the bottom right of the screen to zoom into areas indicated by a binoculars icon.
Chapter 1: The Glowing Amulet
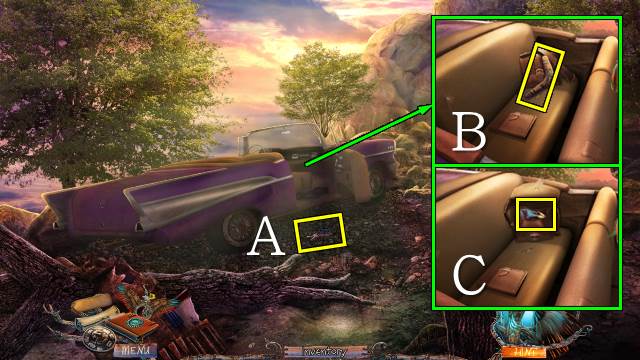
- Take the TRUNK KEYS (A).
- Take the BOOMERANG (B); open the bag and take the BATTERIES (C).
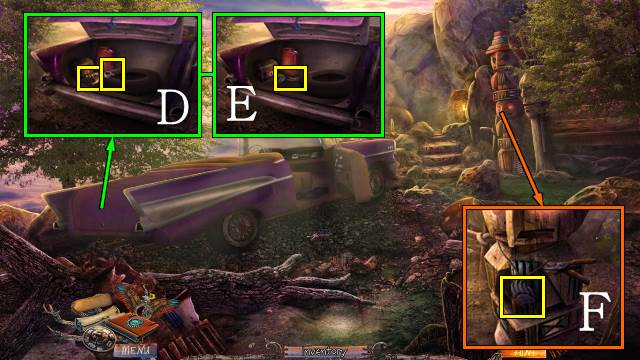
- Open the trunk with the TRUNK KEYS and take the DUCT TAPE and the Binoculars (D); move the tire and take the GARDEN SHEARS (E).
- Cut the string with the GARDEN SHEARS and take the WOODEN BEAR PAW (F).
- Walk forward.
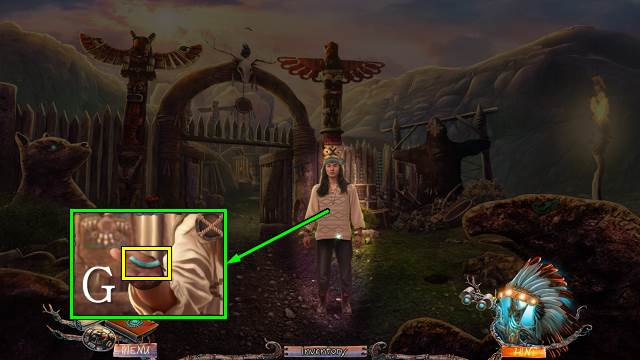
- Talk to Jesse; take the CROW TILE (G).
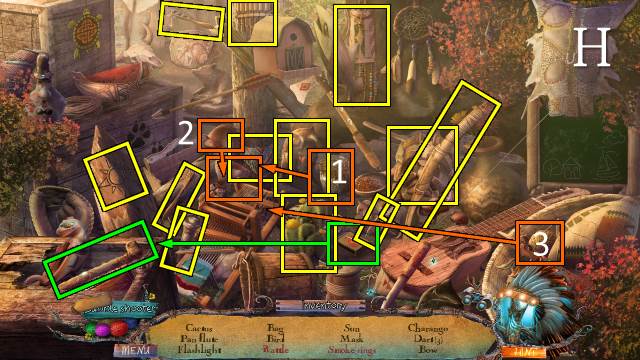
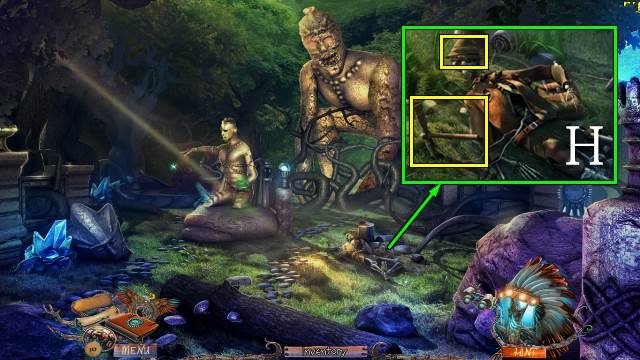
- Play the HOP (H).
- You receive the FLASHLIGHT.
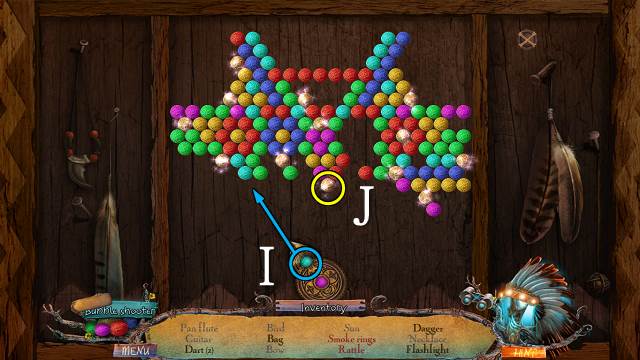
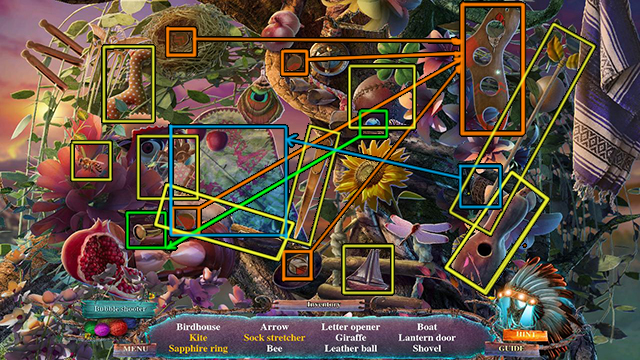
- Instead of HOPS, you can choose to play bubble shooter games.
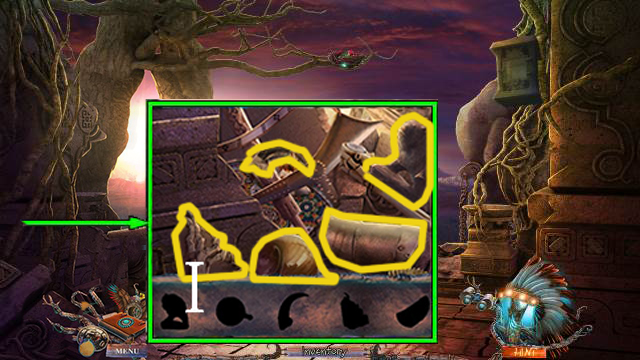
- Shoot the bubbles to create groups of three or more of the same color (I).
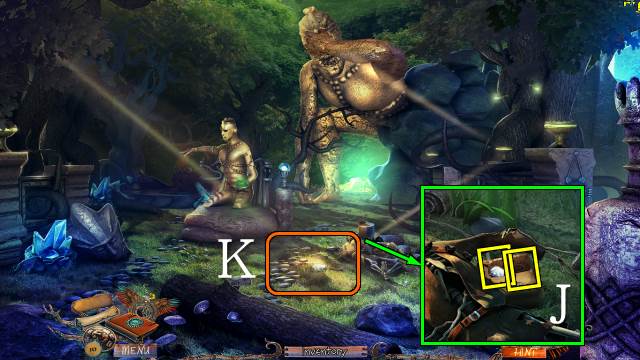
- For every three gold bubbles you remove from the board (J), a HOP item will be removed from the list.
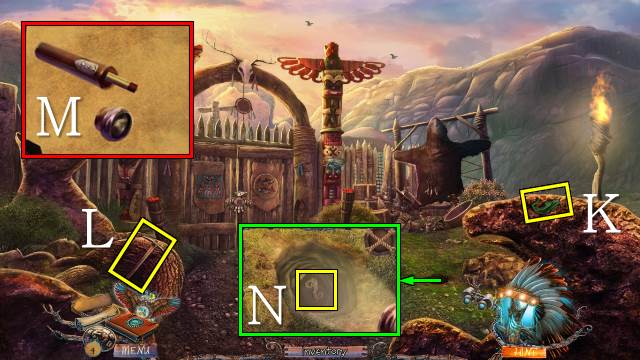
- Take the WOODEN FISH (K) and PICKAXE (L).
- Access the FLASHLIGHT and put the BATTERIES in it (M); take the FLASHLIGHT WITH BATTERIES.
- Light the hole with the FLASHLIGHT WITH BATTERIES; take the WOODEN LIZARD (N).
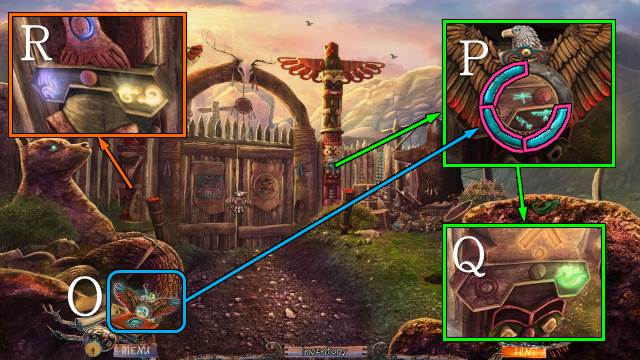
- Access your Amulet (O) and put the CROW TILE on it.
- Use the Amulet on the symbols and select the three symbols (P); put the WOODEN FISH on the totem pole (Q).
- Put the WOODEN BEAR PAW and WOODEN LIZARD on the other totem pole (R).
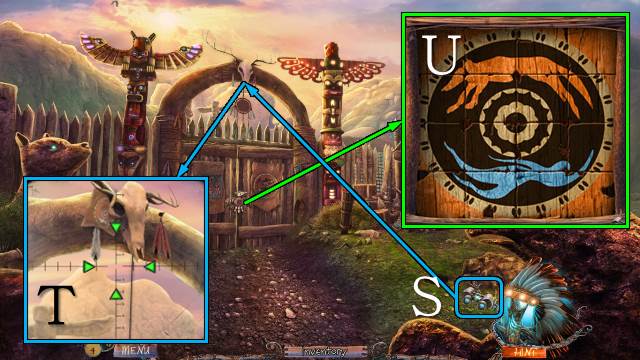
- Use the Binoculars on the skull for a mini-game (S).
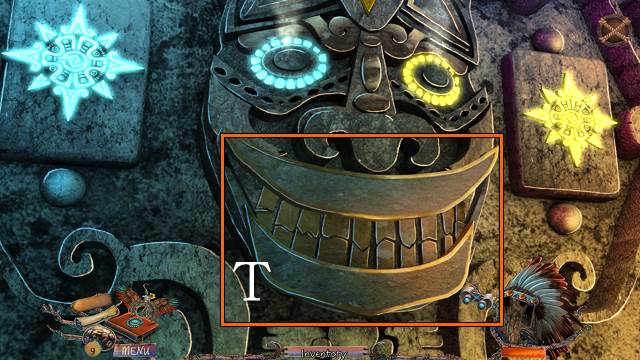
- Focus the binoculars by moving the arrows until they're all green (T).
- Play the mini-game on the gate.
- Swap the tiles around to make a complete picture (U).
- Walk forward.
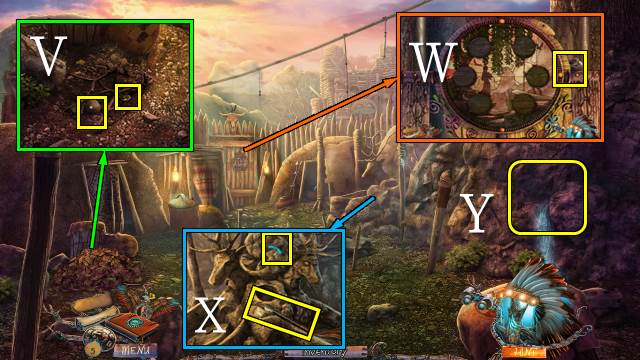
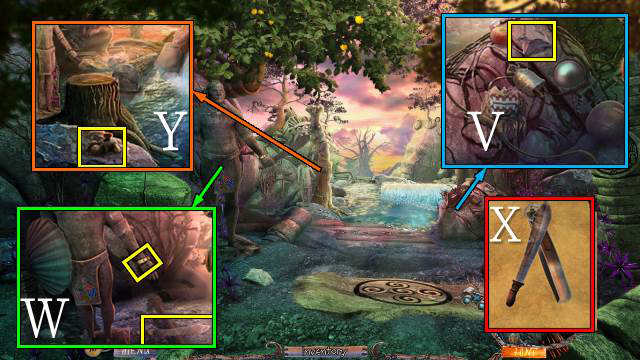
- Move the leaves and take the LEATHER THREAD and PUZZLE PIECES 1/6 (V).
- Take FLINT 1/2 (W).
- Take the DRUMSTICK and DEER TILE (X).
- Break the rock with the PICKAXE (Y).
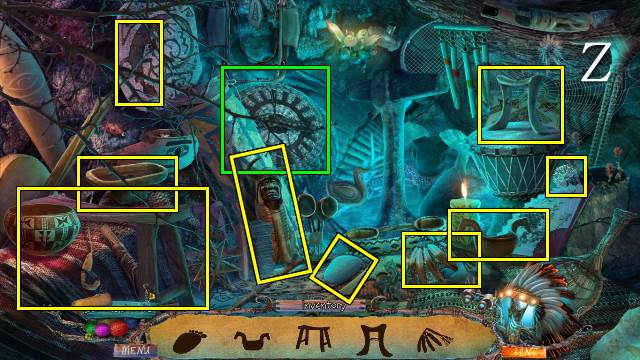
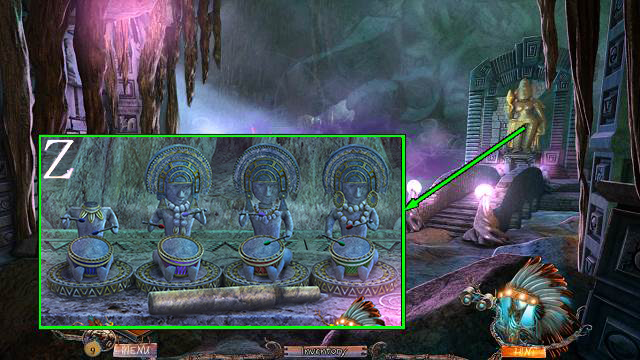
- Play the HOP (Z).
- You receive some LEATHER.
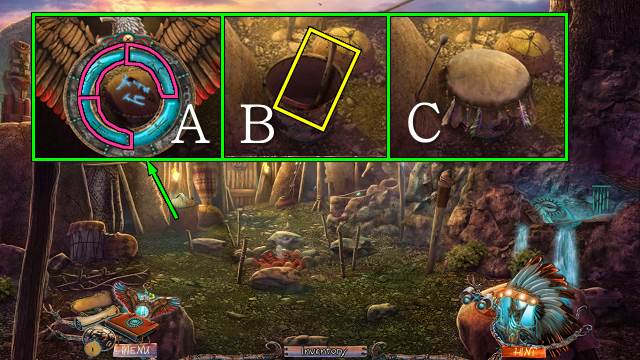
- Put the DEER TILE on the Amulet, use it on the symbols and select the three symbols (A).
- Open the basket and take the SICKLE (B); put the LEATHER and LEATHER THREAD on the basket and hit it with your DRUMSTICK (C).
- Go right.
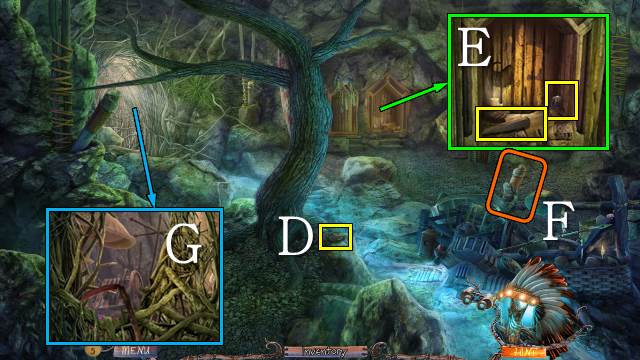
- Take PUZZLE PIECES 2/6 (D).
- Take the WEDGE and FLINT 2/2 (E).
- Light the torch with your FLINT (F).
- Cut the roots with the SICKLE (G).
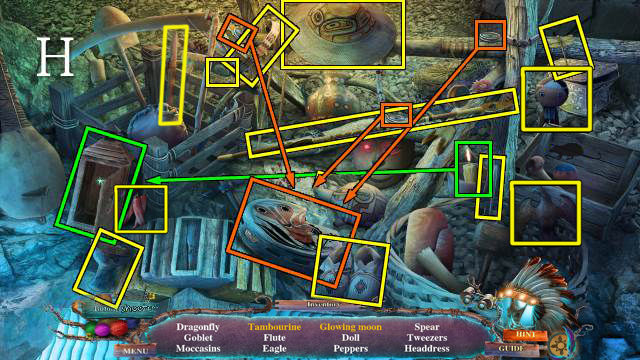
- Play the HOP (H).
- You receive the TWEEZERS.
- Go left.
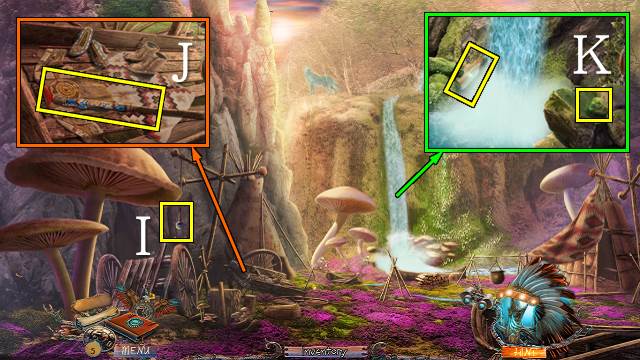
- Take the RATTLE DRUM (I).
- Take the CANE (J).
- Take the ROCK and MESSAGE IN A BOTTLE (K).
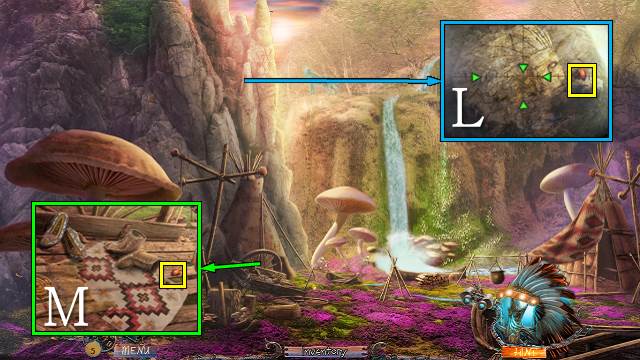
- Use the Binoculars on the rock and play the mini-game as before (L); use the BOOMERANG.
- Knock over the boot and take the RED GEM (M).
- Walk down.
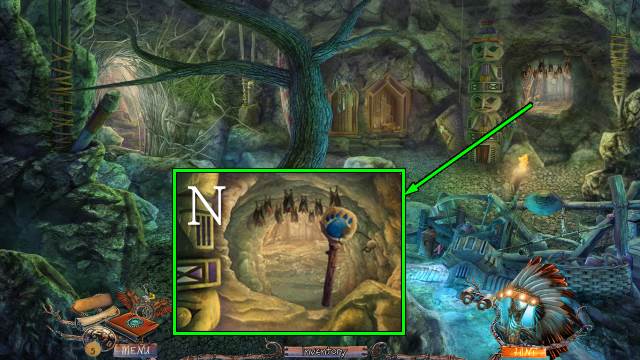
- Scare off the bats with the RATTLE DRUM (N).
- Walk forward.
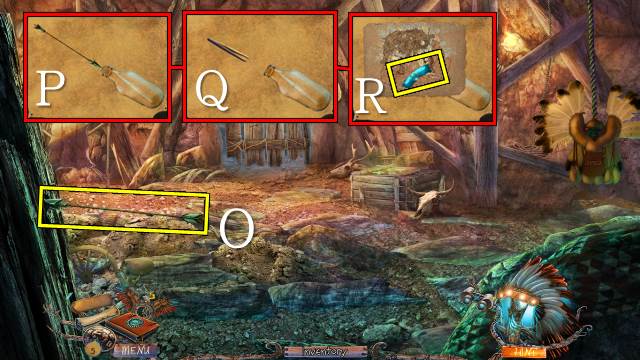
- Take the ARROW (O).
- Access the MESSAGE IN A BOTTLE and remove the cork with the ARROW (P) and the message with the TWEEZERS (Q); take the CRAB TILE and EMPTY BOTTLE (R).
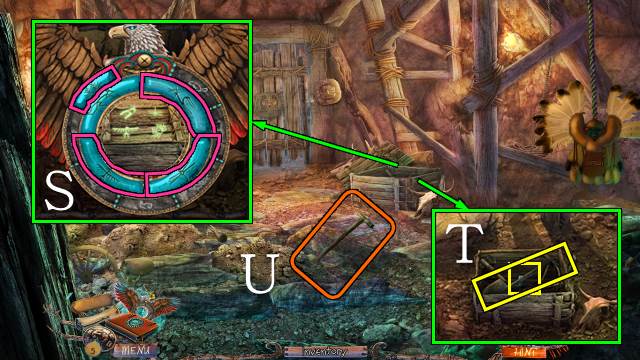
- Put the CRAB TILE on the Amulet and use it on the crate; select the four symbols (S).
- Open the crate with the WEDGE and ROCK; take the SHOVEL and LIZARD TILE (T).
- Use the SHOVEL three times (U).
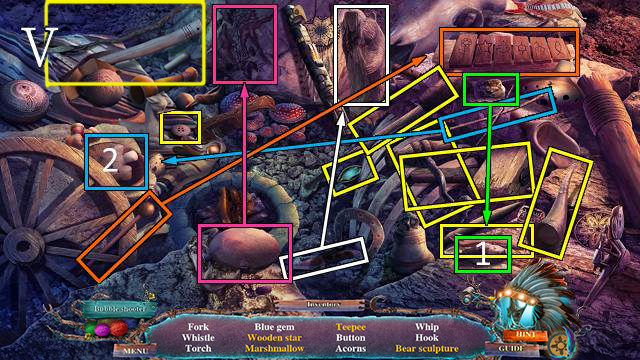
- Play the HOP (V).
- You receive the BLUE GEM.
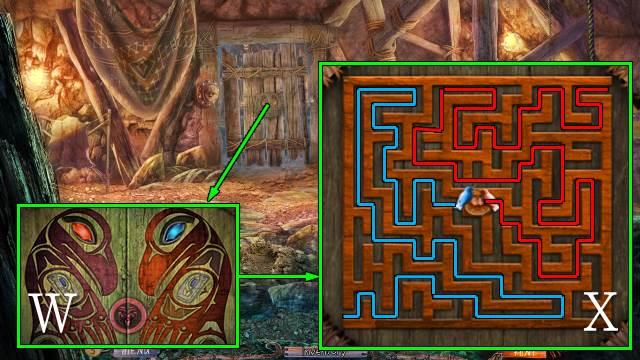
- Use the BLUE GEM and RED GEM on the door for a mini-game (W).
- Use the blue arrows to move the blue bird and the red arrows to move the red bird to the center (X).
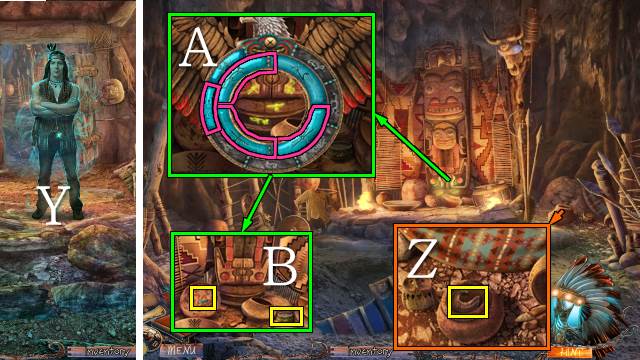
- Talk to Misu (Y).
- Walk forward.
- Take the NICHE PIECE (Z).
- Put the LIZARD TILE on the Amulet and use it on the symbols; select the four symbols (A).
- Take the BOWL OF LARD and SCORPION TILE (B).
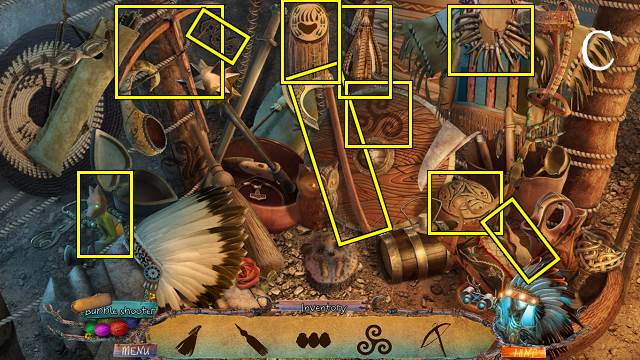
- Play the HOP (C).
- You receive the FOUNTAIN PIECE.
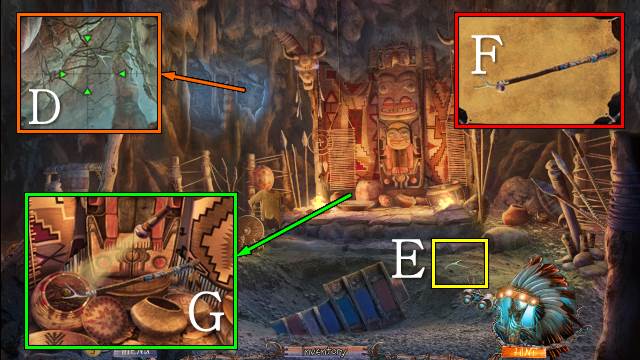
- Use the Binoculars in the distance and play the mini-game as before (D); use the BOOMERANG.
- Take the ANTLERS (E).
- Access the CANE and put the ANTLERS and DUCT TAPE on it; take the LONG HOOK (F).
- Open the basket, use the FLASHLIGHT and take PUZZLE PIECES 3/6 with the LONG HOOK (G).
- Walk down twice.
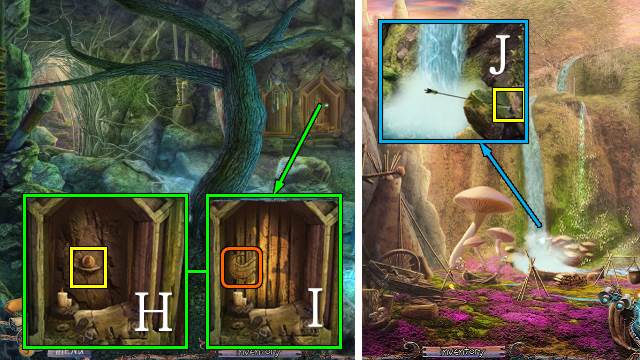
- Put the NICHE PIECE in the niche (H); take PUZZLE PIECES 4/6 (I).
- Walk left.
- Remove PUZZLE PIECES 5/6 with the ARROW (J).
- Walk down twice.
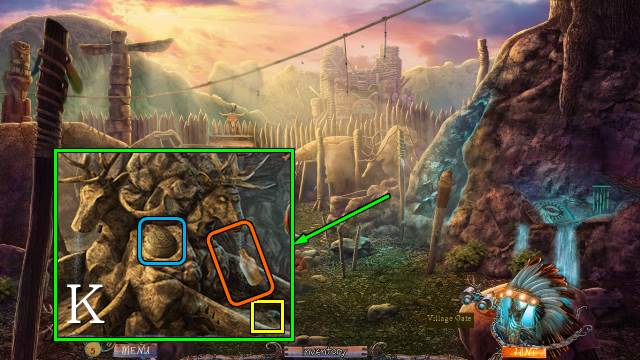
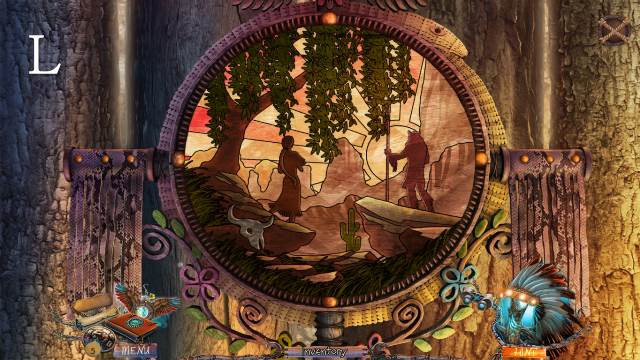
- Put the FOUNTAIN PIECE on the fountain and take PUZZLE PIECES 6/6; fill the EMPTY BOTTLE to receive a BOTTLE OF WATER (K).
- Put the PUZZLE PIECES on the door for a mini-game.
- Drag and drop the discs into place; select a disc to turn it (L).
- Walk forward.
Chapter 2: Ayana's Dream Catcher
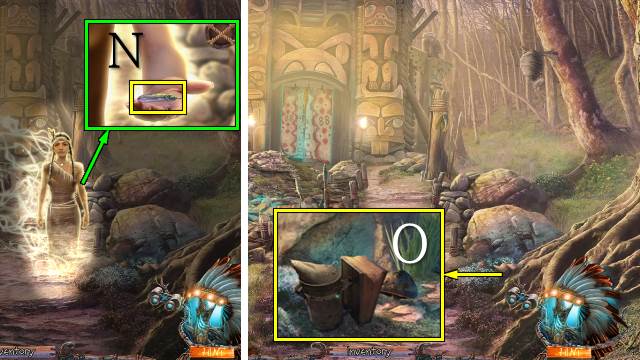
- Talk to Ayana; take the BLUE GEM FEATHER (N).
- Take the EMPTY BEE SMOKER (O).
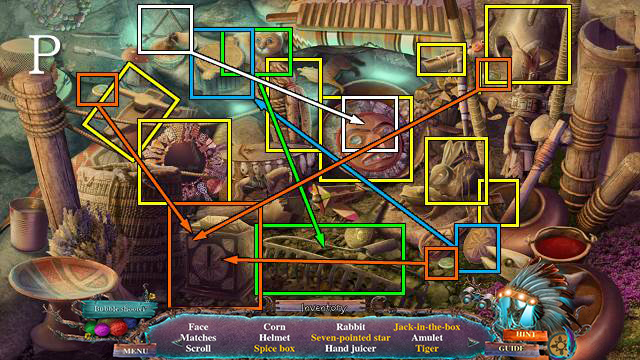
- Play the HOP (P).
- You receive the MATCHES.
- Walk forward.
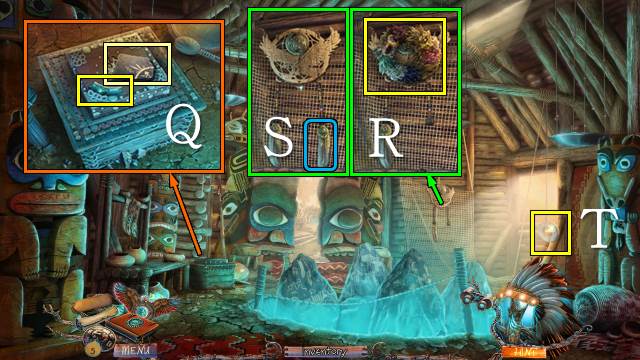
- Take the Story Tile and RABBIT TILE (Q).
- Take the DRY HERBS (R); put the BLUE GEM FEATHER on the dream catcher (S).
- Take the STONE WEIGHT (T).
- Walk forward.
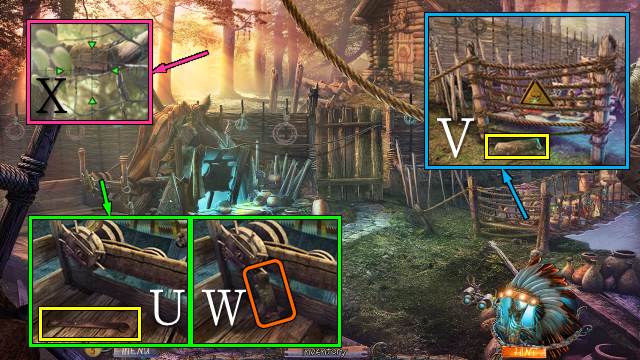
- Take the DECORATIVE HANDLE (U) and grease the mechanism with the BOWL OF LARD to receive an EMPTY BOWL; try to turn the wheel.
- Take the SMALL LOG (V).
- Put the SMALL LOG under the mechanism (W).
- Look through the Binoculars and play as before (X).
- Walk forward.
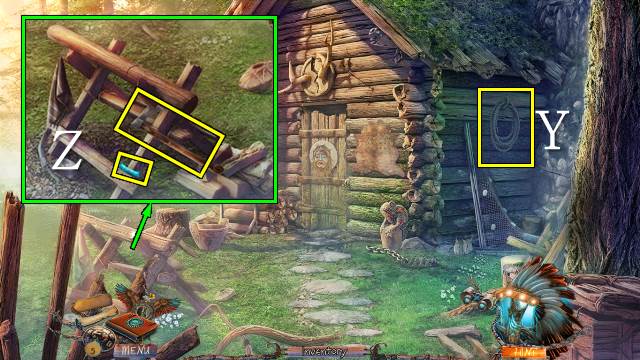
- Take the ROPE (Y).
- Put the DECORATIVE HANDLE on the blade to receive the TOMAHAWK; take the BAT TILE (Z).
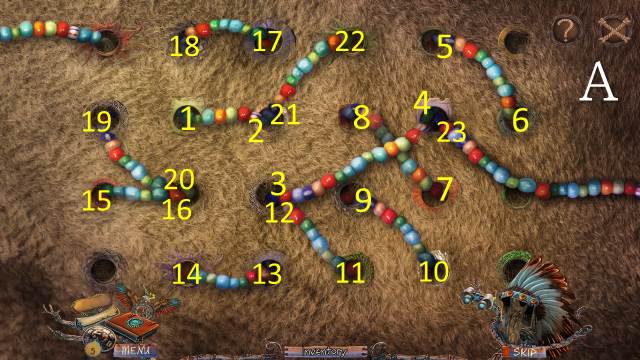
- Play the mini-game on the wall.
- Remove the string of beads by pulling it through the holes in the right order (A).
- You receive the BEADS.
- Walk down.
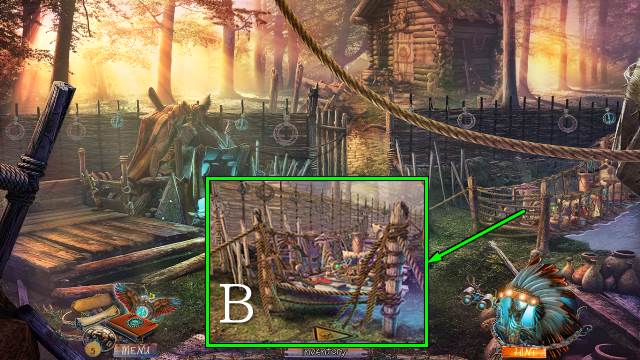
- Cut the ropes three times with the TOMAHAWK (B).
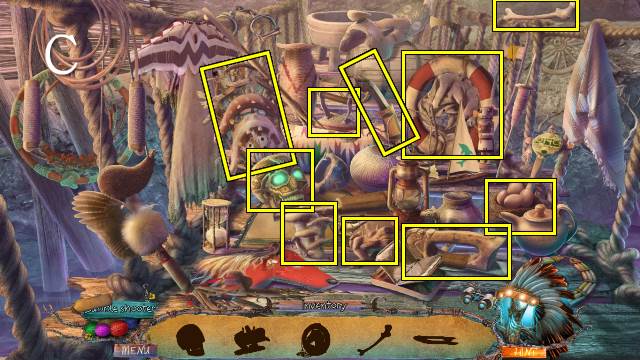
- Play the HOP (C).
- You receive the LEATHER HOLSTER.
- Walk forward.
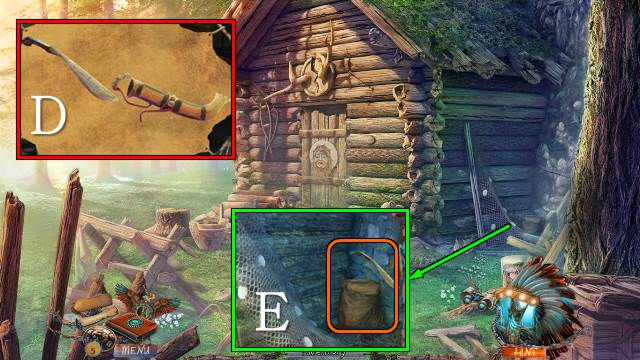
- Access the LEATHER HOLSTER and take the SHARP KNIFE (D).
- Cut off some BURLAP CLOTH with the SHARP KNIFE (E); use the EMPTY BOWL to get a BOWL OF CLAY DUST.
- Go to the Village Garden.
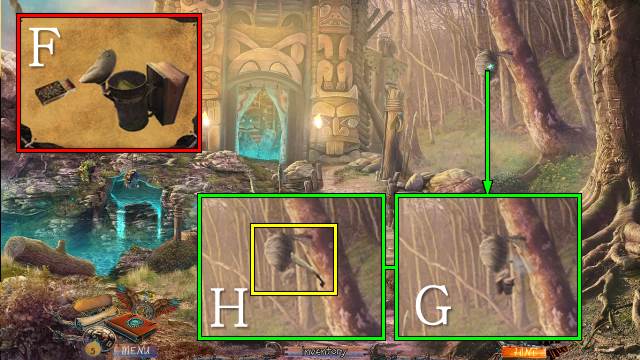
- Access the EMPTY BEE SMOKER, open it and put the BURLAP CLOTH in it; light it with the MATCHES to receive a FILLED BEE SMOKER (F).
- Use the FILLED BEE SMOKER (G) and SHARP KNIFE (H) on the nest; take the CHUNK OF WAX.
- Go to the area Outside the Lodge.
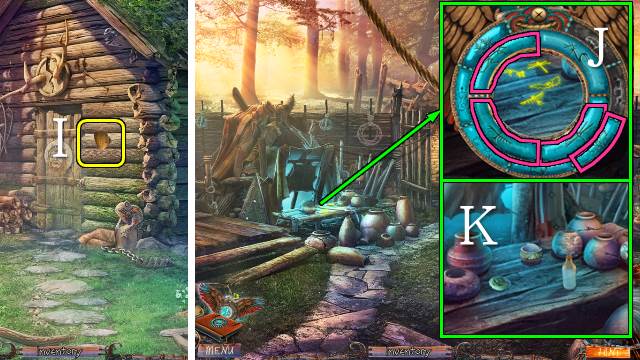
- Use the CHUNK OF WAX on the paw print to get a WOLF PAW MOLD (I).
- Walk down.
- Put the RABBIT TILE, BAT TILE and SCORPION TILE on the Amulet; select the four symbols (J).
- Put the BOTTLE OF WATER, BOWL OF CLAY DUST and WOLF PAW MOLD on the table; pour the water in the bowl, put the clay on the mold and take the WOLF PAW (K).
- Walk down.
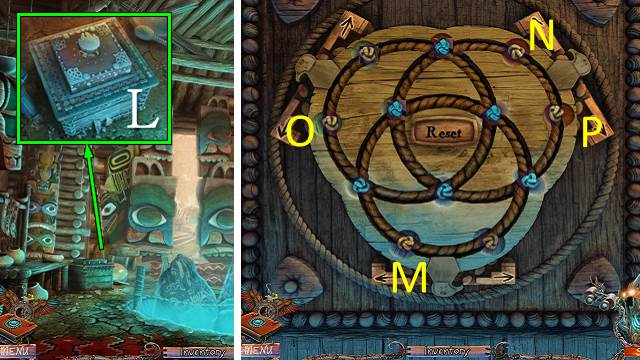
- Put the WOLF PAW on the chest (L).
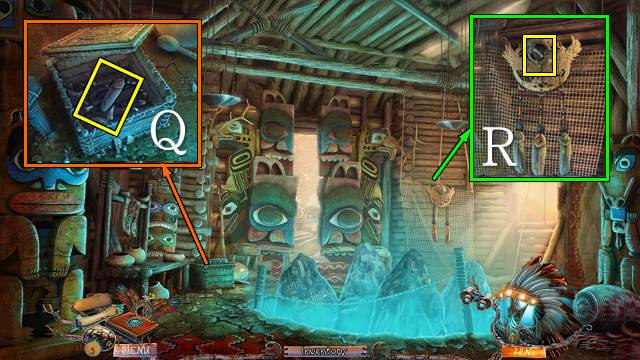
- Access the chest for a mini-game.
- Use the arrows to turn the circles until all blue knots are on an intersection.
- Solution: M, N, N, O, O, M, P.
- Take the RED GEM FEATHER (Q).
- Put the BEADS and RED GEM FEATHER on the dream catcher; take the MUSTANG TILE (R).
Chapter 3: A Cure for Jesse
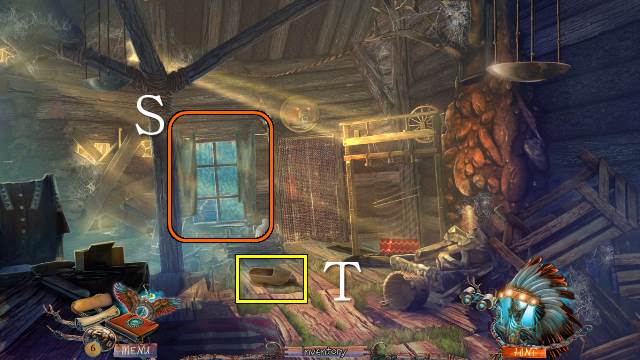
- Walk forward.
- Open the curtains (S).
- Take the WOODEN CLOG (T).
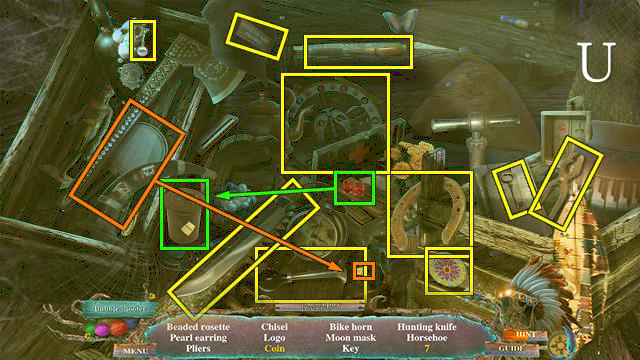
- Play the HOP (U).
- You receive the PLIERS.
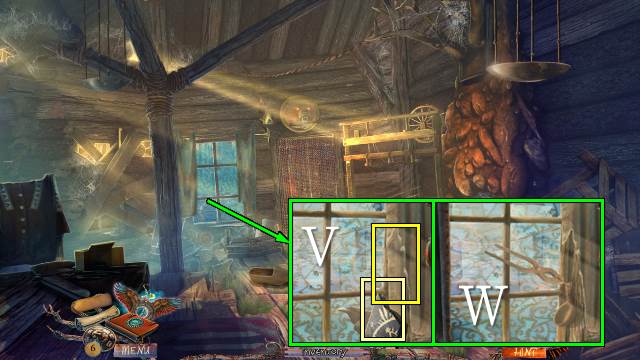
- Take the Story Tile and pull off a PIECE OF CLOTH (V); remove NAIL 1/4 with the PLIERS and take the LADLE (W).
- Walk forward.
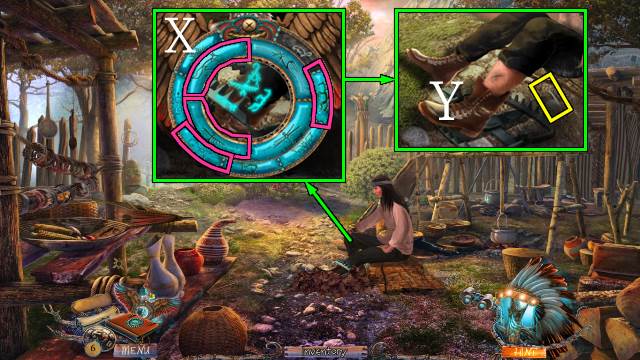
- Put the MUSTANG TILE on the Amulet and use it on Jesse's leg; select the four symbols (X).
- Release Jesse's leg and roll up his trouser leg; move the sand and take NAIL 2/4 (Y).
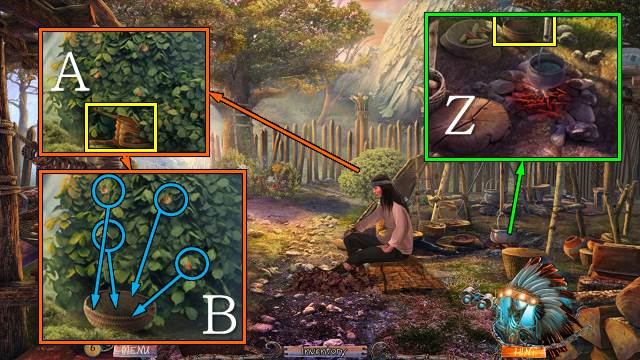
- Take the BASKET (Z).
- Move the leaves and take the BROKEN BELLOWS (A); put the BASKET under the shrub, drag the hazelnuts into it and take the BASKET WITH NUTS (B).
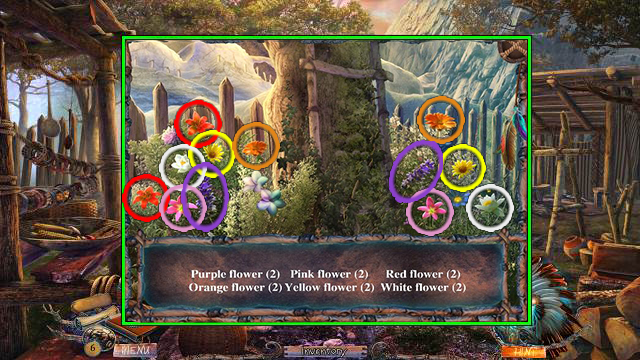
- Play the mini-HOP (C).
- You receive some LAVENDER.
- Walk forward.
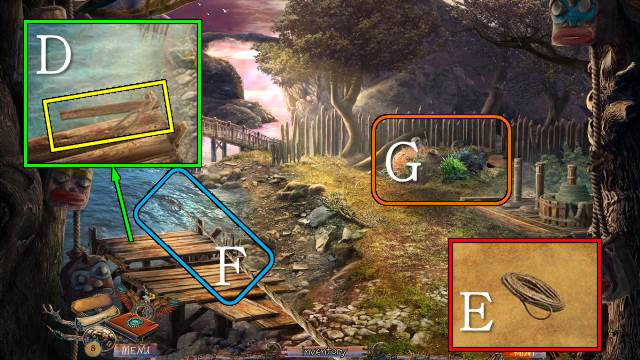
- Remove NAIL 3/4 with the PLIERS and take LADDER PART 1/2 (D).
- Access the ROPE and turn it into a LASSO (E).
- Retrieve the LOOM WHEEL with the LASSO (F).
- Move the shrubs three times (G).
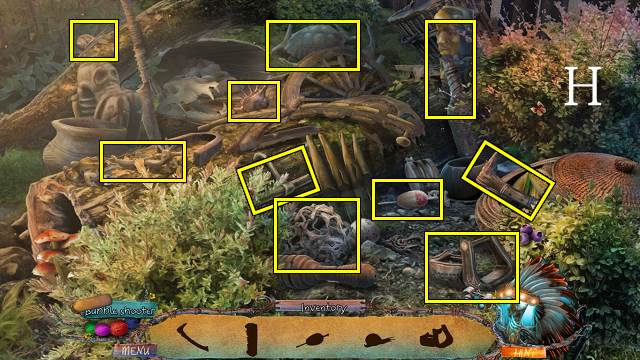
- Play the HOP (H).
- You receive the MEAT HOOK.
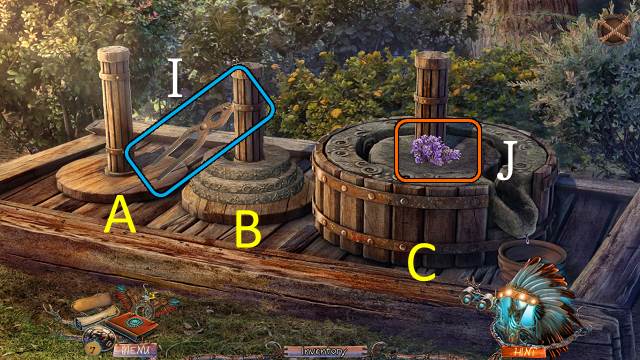
- Remove NAIL 4/4 with the PLIERS (I) and put the STONE WEIGHT and LAVENDER (J) on the press for a mini-game.
- Move the stone rings to the peg on the right; you can only move one weight at a time, and you can only stack smaller weights on bigger ones.
- Solution: B-A, B-C, A-C, B-A, C-B, C-A, B-A, B-C, A-C, A-B, C-B, A-C, B-A, B-C, A-C.
- You receive the LAVENDER OIL.
- Walk down twice.
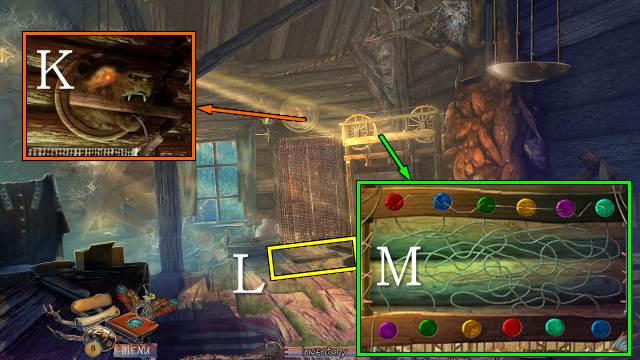
- Open the bear's mouth with the MEAT HOOK (K).
- Take LADDER PART 2/2 (L).
- Put the LOOM WHEEL on the loom and access it for a mini-game (M).
- Put the colored discs in the holes at the top to complete the pattern.
- Then follow the threads on the loom and put a disc of the same color on the other end of the thread.
- You receive a NEEDLE.
- Walk forward.
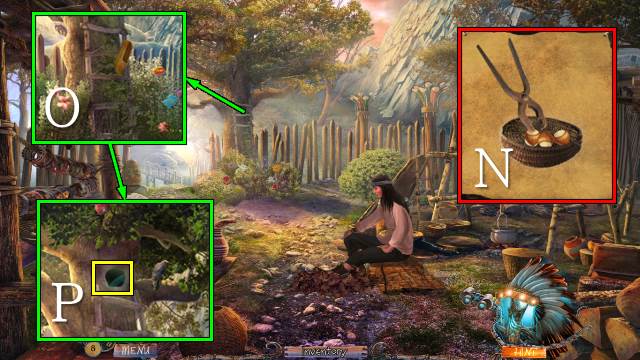
- Access the BASKET WITH NUTS and crack them with the PLIERS; take the NUTS (N).
- Put the LADDER PARTS and NAILS on the ladder, and nail them in place with the WOODEN CLOG (O); give the NUTS to the bird and take the BEAVER TILE (P).
- Walk forward.
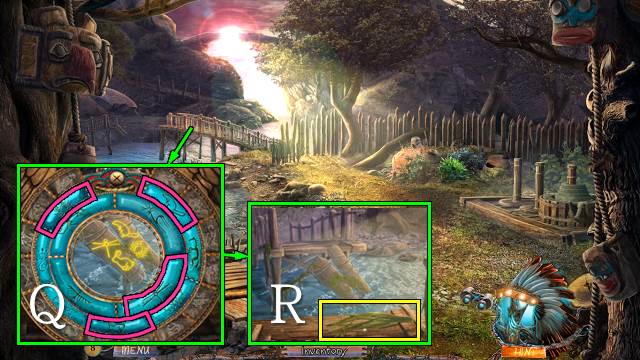
- Put the BEAVER TILE on the Amulet and use it on the bridge; select the four symbols (Q).
- Take the SEAWEED (R).
- Walk down.
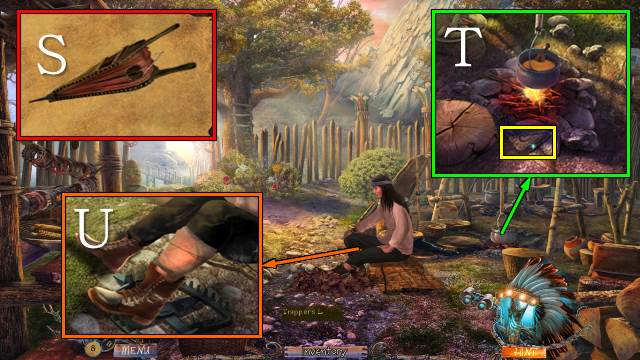
- Access the BROKEN BELLOWS and fix it with the NEEDLE; take the BELLOWS (S).
- Use the BELLOWS on the fire, put the LAVENDER OIL, DRY HERBS and SEAWEED in the pot and take the STONE FRAGMENT; stir with the LADLE and dip the PIECE OF CLOTH in the potion to get a SOAKED BANDAGE (T).
- Put the SOAKED BANDAGE on Jesse's leg (U).
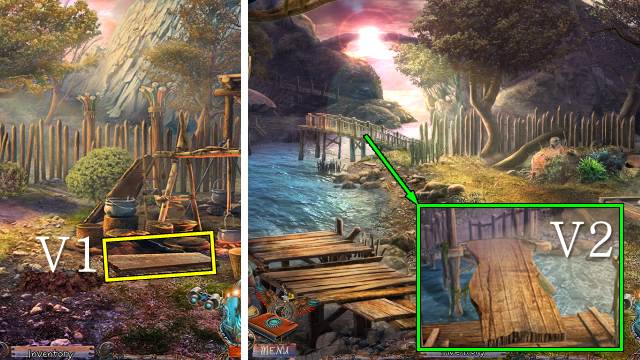
- Take the STURDY BOARD (V1).
- Walk forward.
- Put the STURDY BOARD across the gap (V2).
- Go left.
Chapter 4: The Shaman's Tepee
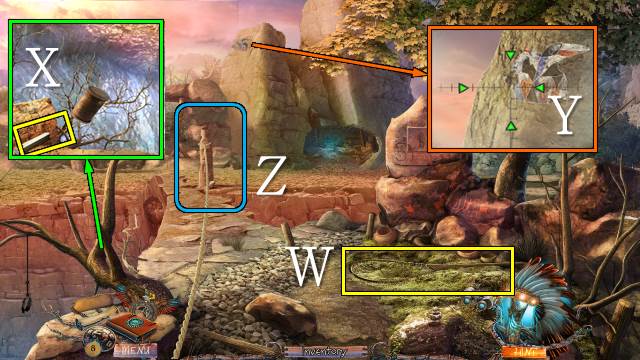
- Take the TORN LANDING NET (W).
- Take the CHALK (X).
- Look through the Binoculars and play as before (Y).
- Throw the LASSO across the bridge twice (Z).
- Move forward for a mini-game.
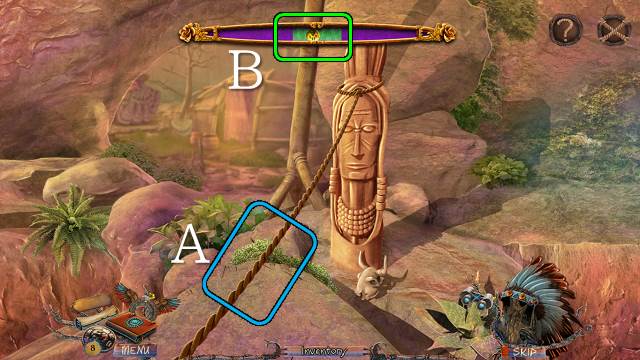
- Pull the rope (A) when the ball passes the green area (B); do this three times.
- Walk forward.
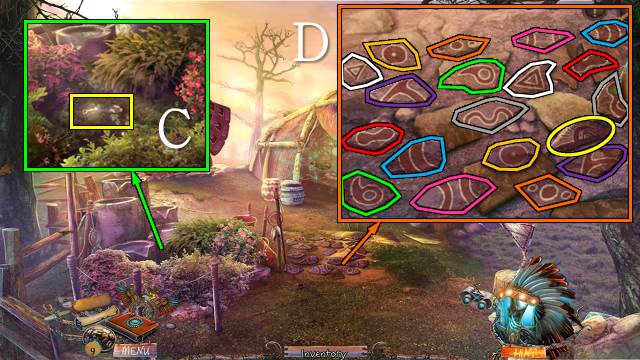
- Take the Story Tile; move the shrubs until you can take SILVER FEATHER 1/2 (C).
- Play the mini-game.
- Select pairs of matching tiles (D).
- Take the STONE PIECE.
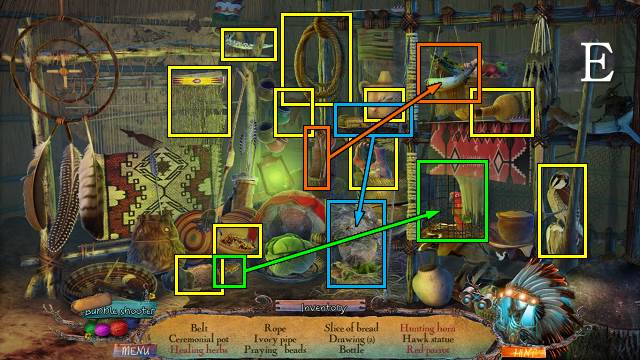
- Play the HOP (E).
- You receive the BREAD.
- Walk forward.
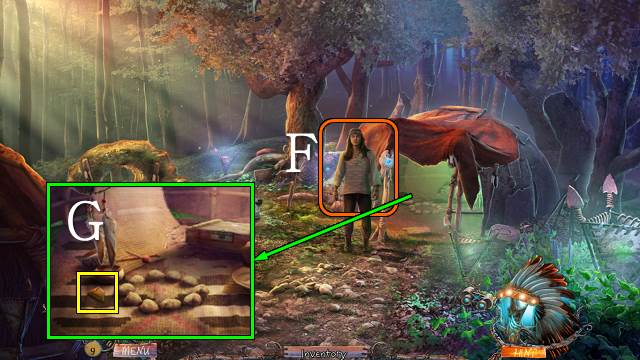
- Talk to Jesse (F).
- Take the BROKEN KEY (G).
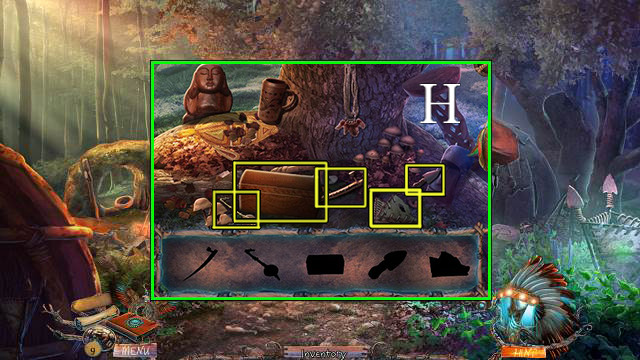
- Move the leaves and play the mini-HOP (H).
- You receive the SMALL CHEST.
- Walk down twice.
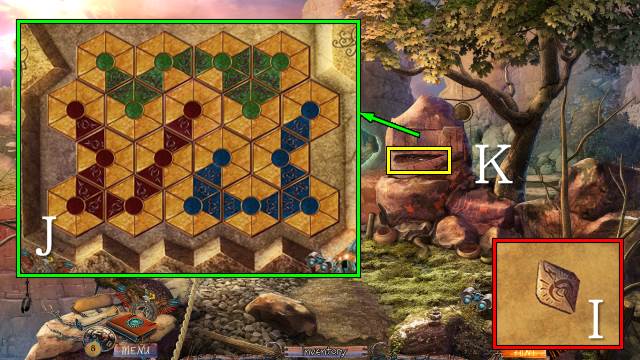
- Access the STONE FRAGMENT and put the STONE PIECE on it; take the CARVED STONE SYMBOL (I).
- Put the CARVED STONE SYMBOL on the rock for a mini-game.
- Move the tiles around to make unbroken strings of colored segments (J).
- Take the BEAD NECKLACE (K).
- Walk down.
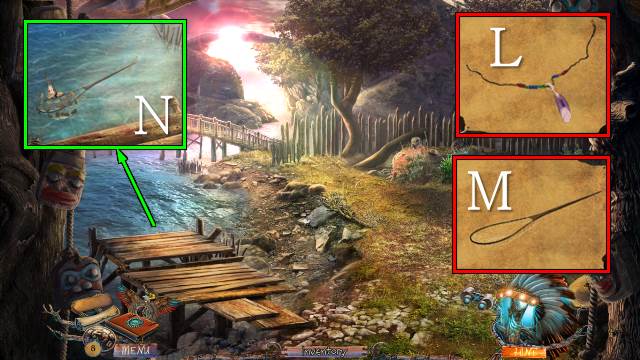
- Access the BEAD NECKLACE, untie it and take SILVER FEATHER 2/2, the NECKLACE BEADS and SINEW ROPE (L).
- Access the TORN LANDING NET and fix it with the SINEW ROPE; take the LANDING NET (M).
- Throw the BREAD in the water and catch a FISH with the LANDING NET (N).
- Go left and right.
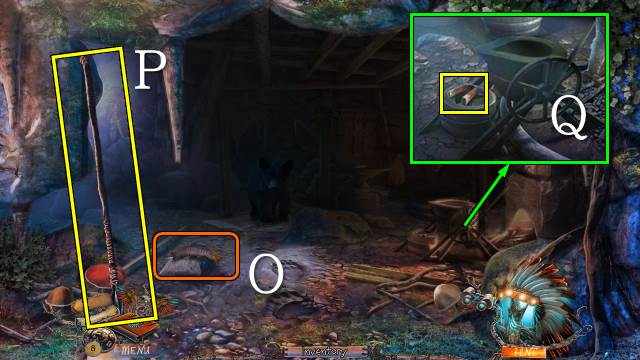
- Throw the FISH into the cave (O).
- Take the SPEAR (P).
- Take the MAGNET (Q).
- Walk down.
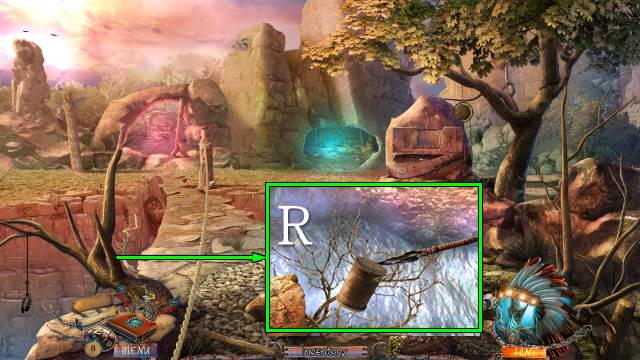
- Retrieve the METAL BOX with the SPEAR (R).
- Walk forward.
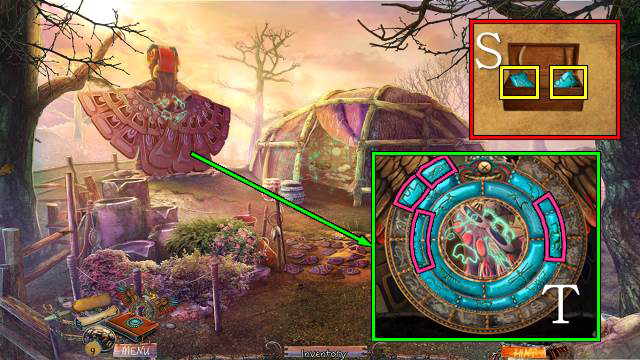
- Access the SMALL CHEST, open it and take the BEAR TILE and EAGLE TILE (S).
- Put the BEAR TILE and EAGLE TILE on the Amulet and use it on the totem pole; select the four symbols (T).
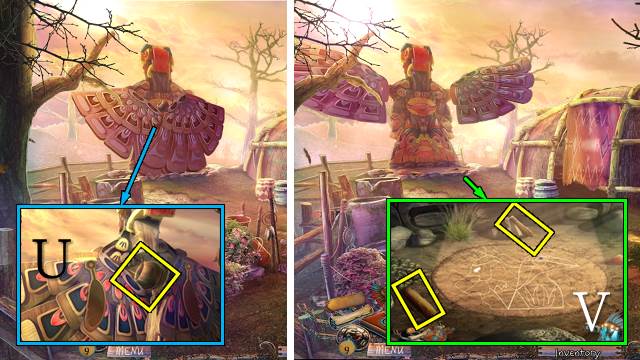
- Take the MORTAR and put the SILVER FEATHERS on the totem pole (U).
- Take the PESTLE and EAR OF CORN (V).
- Walk forward.
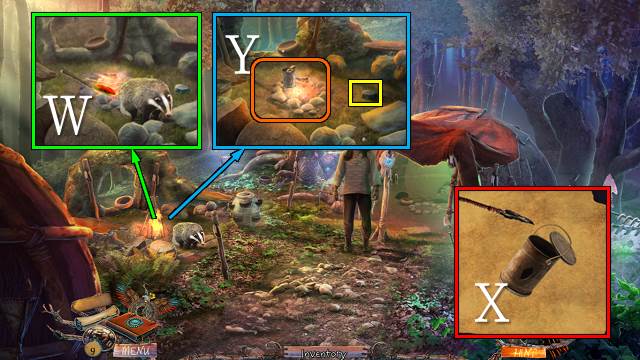
- Throw the EAR OF CORN on the fire (W).
- Access the METAL BOX and pierce it with the SPEAR; take the PIERCED METAL BOX (X).
- Take the COAL and a GLOWING EMBER with the PIERCED METAL BOX (Y).
- Go to the Bear's Cave.
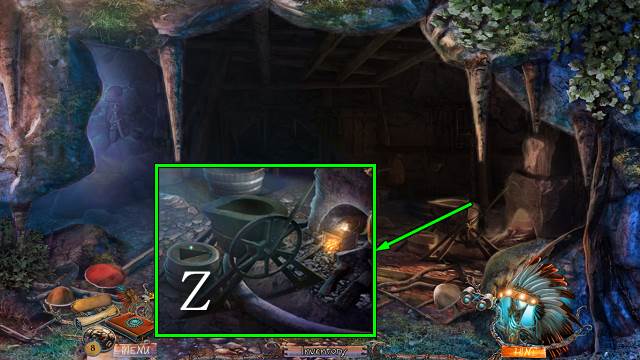
- Light the fire with the GLOWING EMBER (Z).
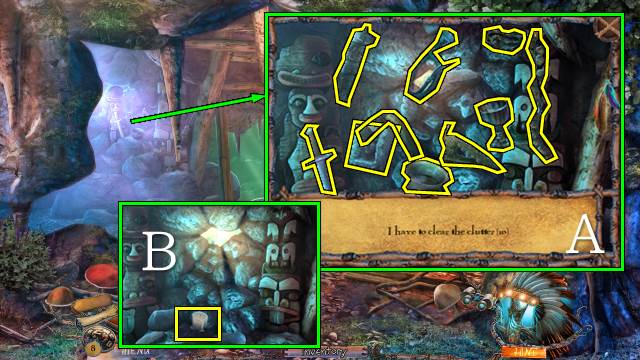
- Play the mini-HOP (A).
- Take the CANDLE (B).
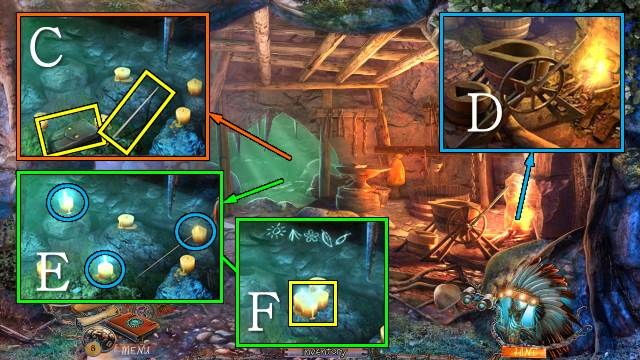
- Take the POUCH and TAPER (C).
- Light the TAPER in the fire to get a LIT STICK (D).
- Put the CANDLE down and light three candles with the LIT STICK (E); take the BLUE CANDLES (F).
- Go to the Shaman's Tepee.
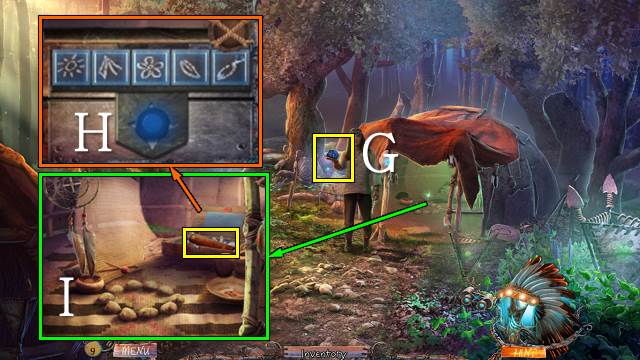
- Give the BLUE CANDLES to Jesse.
- Take the BLUE STONE (G).
- Move the tiles according to the code from the Bear's Cave (H); open the box and take the DYNAMITE STICK (I).
- Walk down.
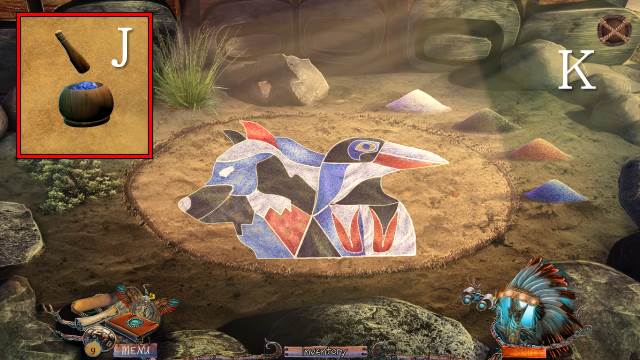
- Access the MORTAR and put the PESTLE in it; grind the CHALK to get WHITE POWDER, the COAL to get RED POWDER and the BLUE STONE to get the BLUE POWDER (J).
- Put the BLUE POWDER, BLACK POWDER and WHITE POWDER on the sand for a mini-game.
- Color the drawing according to the example from your journal (K).
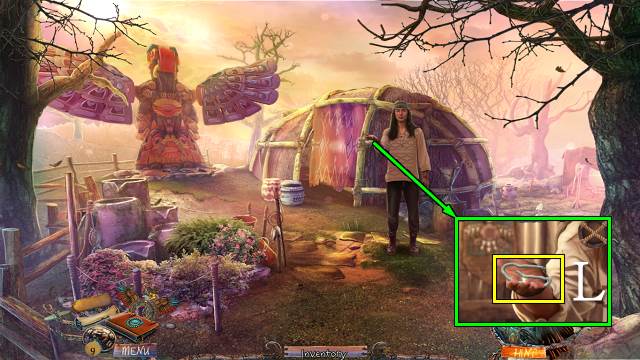
- Take the WICK (L).
- Go to the Bear's Cave.
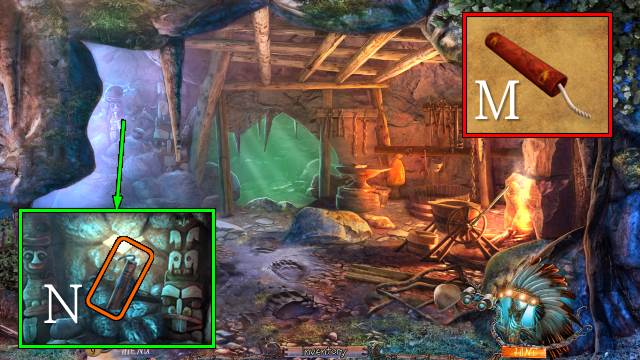
- Access the DYNAMITE STICK and attach the WICK to it; take the DYNAMITE (M).
- Put the DYNAMITE among the rocks and light it with the LIT STICK (N).
- Go left.
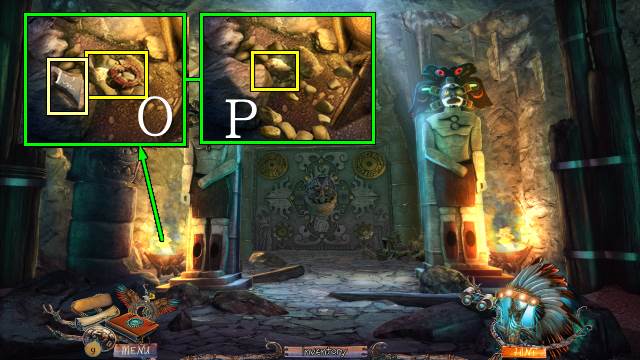
- Take the Story Tile and ALTARPIECE 1/2 (O); drag-and-drop the stones aside until you can take the GOLD NUGGET (P).
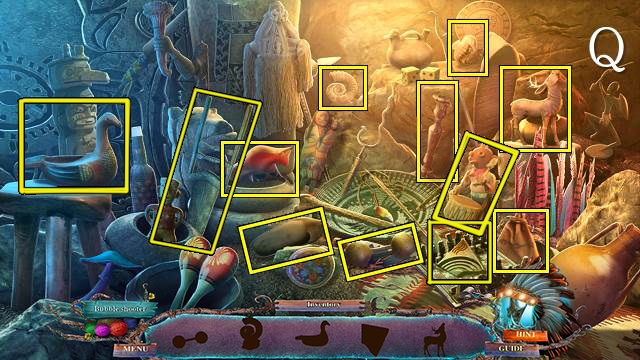
- Play the HOP (Q).
- You receive BROKEN KEY 2/2.
- Walk down.
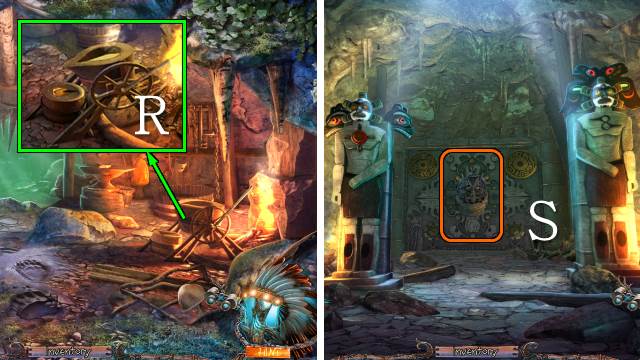
- Put the BROKEN KEY into the mold and the GOLD NUGGET into the crucible; tip the crucible to receive a GOLDEN KEY (R).
- Go left.
- Put the GOLDEN KEY on the gate for a mini-game (S).
- Match the upper teeth to the bottom teeth (T).
- Walk forward.
Chapter 5: The Lost City
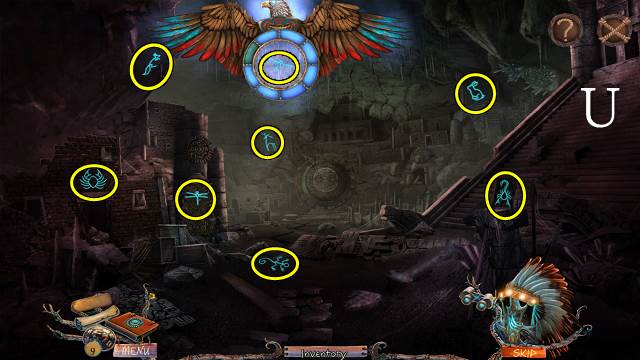
- Find the symbols with your Amulet (U).
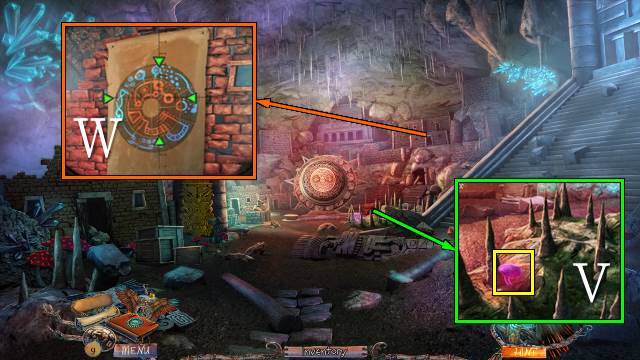
- Take the PURPLE MUSHROOM (V).
- Use your Binoculars and play as before (W).
- Go right.
- Push the three tiles (X).
- Play the mini-HOP (Y).
- You receive a STONE VALVE.
- Take the STONE LEVER (Z).
- Walk down and left.
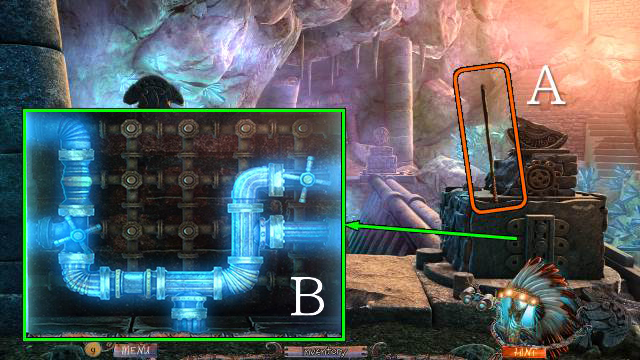
- Open the panel with the SPEAR (A).
- Put the STONE VALVE on the mechanism for a mini-game (B).
- Connect all pipes.
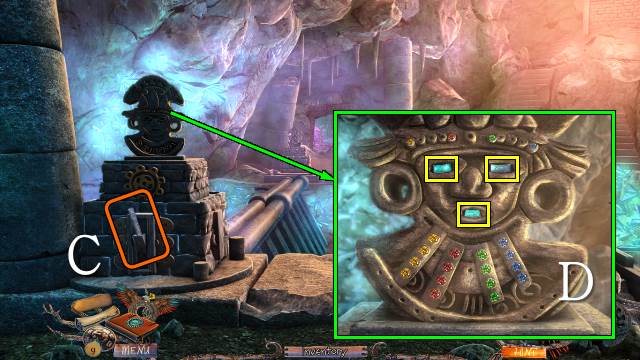
- Put the STONE LEVER in the holder (C).
- Take the Story Tile and put the NECKLACE BEADS on the statue for a mini-game.
- Move the beads into columns; yellow, red, green blue from left to right (D).
- Take the MOUSE TILE, WOLF TILE and SHELL TILE (D).
- Pull the lever (C).
- Walk forward.
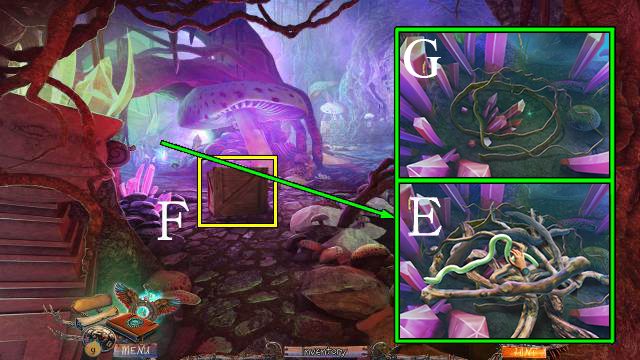
- Take SMALL CRATE 1/2 (E).
- Move the sticks one by one (E), until you can take the VINES (G); only the stick currently on top can be moved.
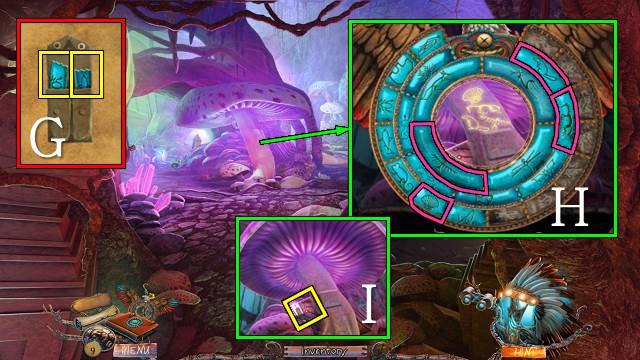
- Access the POUCH, open it and take the FROG TILE and SALMON TILE (G).
- Put the FROG TILE, SALMON TILE, MOUSE TILE, WOLF TILE and SHELL TILE on the Amulet and use it on the mushroom; select the four symbols (H).
- Take STAINED GLASS PIECE 1/2 (I).
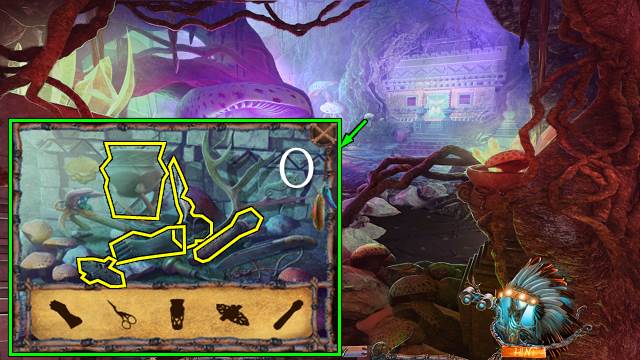
- Play the mini-HOP (J).
- You receive a HAMMER HANDLE.
- Go to the Lake Shore.
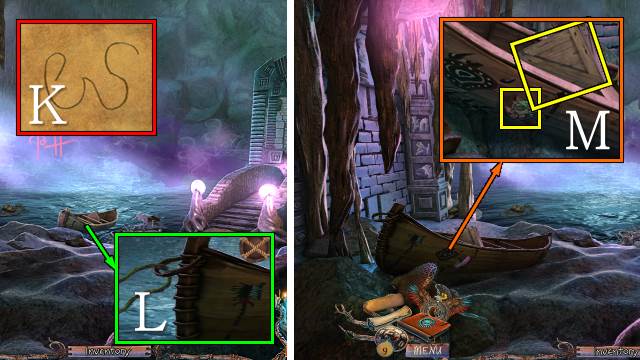
- Access the VINES and twist them into a VINE ROPE (K).
- Attach the VINE ROPE to the boat (L).
- Pull the boat ashore.
- Take SMALL CRATE 2/2 and STAINED GLASS PIECE 2/2 (M).
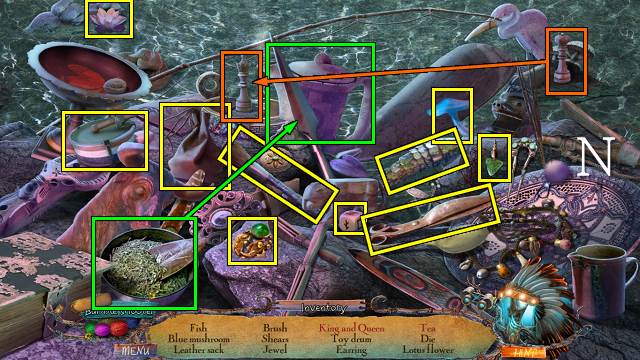
- Play the HOP (N).
- You receive the BLUE MUSHROOM.
- Walk down.
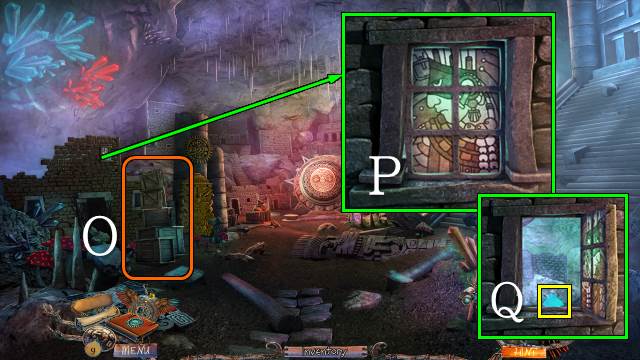
- Put the crate on top of the others and put your SMALL CRATES on top (O).
- Put the STAINED GLASS PIECES on the window for a mini-game.
- Turn the tiles until they make an image (P).
- Take the CRYSTAL (Q).
- Go left and forward.
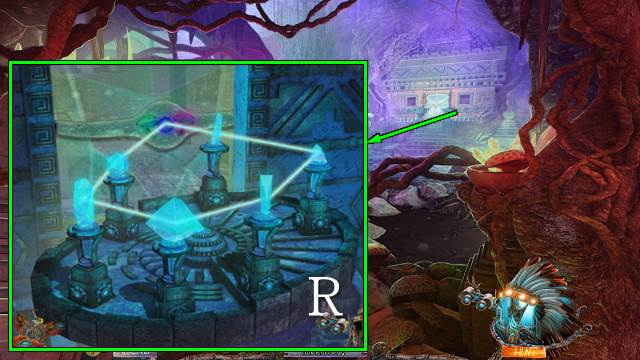
- Put the BLUE MUSHROOM, PURPLE MUSHROOM and CRYSTAL on the altar for a mini-game.
- Swap the crystals to make a ring of light (R).
- Walk forward.
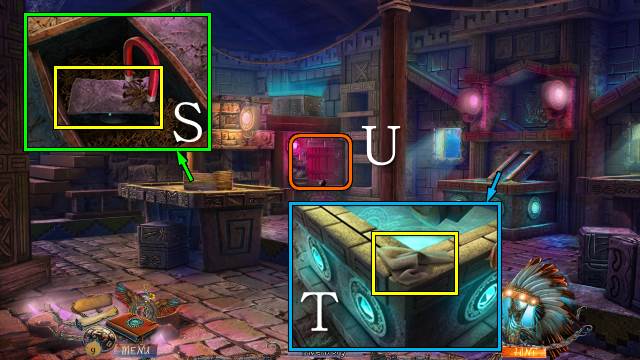
- Move the nails with the MAGNET four times and take the HAMMERHEAD (S).
- Take the RAG (T).
- Open the hatch (U).
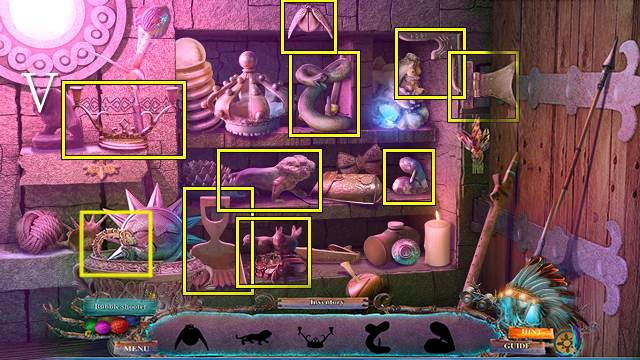
- Play the HOP (V).
- You receive ALTARPIECE 2/2.
- Walk down twice.
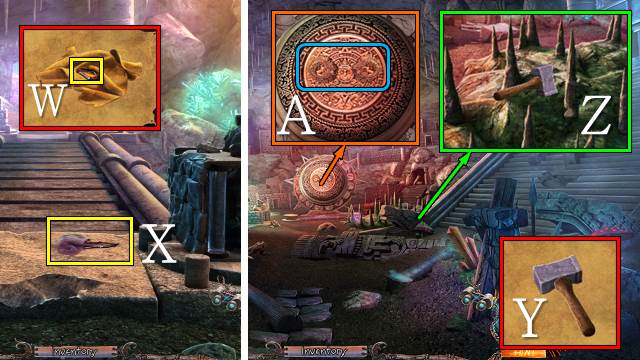
- Access the OLD RAG, open it and take the CARABINER and RAG (W).
- Take the OBSIDIAN SPEARHEAD with the RAG (X).
- Walk down.
- Access the HAMMER HANDLE and attach the HAMMERHEAD to it; take the HAMMER (Y).
- Use the HAMMER twice to knock over a STALAGMITE; pick it up (Z).
- Put the ALTARPIECES on the altar for a mini-game (A).
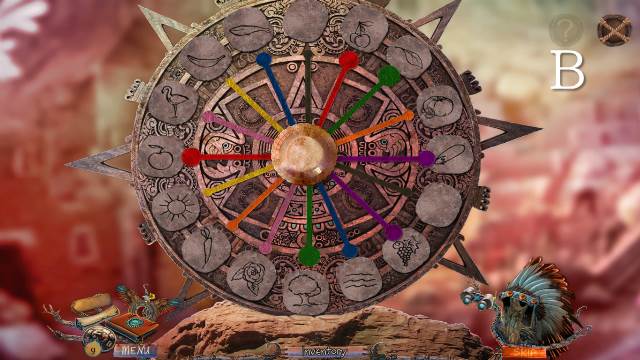
- Move the spokes to images of items with a matching color (B).
- You receive a PLATE.
- Go to the Mushroom Farm.
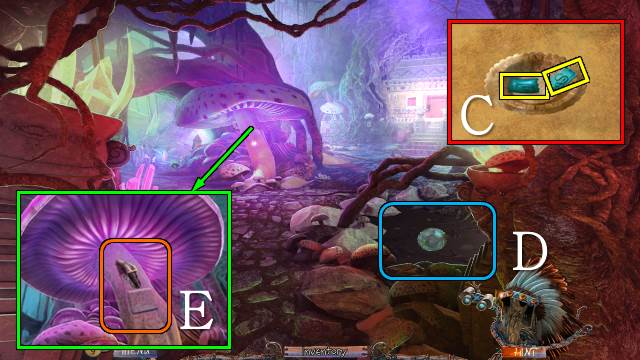
- Access the PLATE and take the RATTLESNAKE TILE, MANTIS TILE and GOLDEN PLATE (C).
- Take some TAR with the GOLDEN PLATE (D).
- Open the mushroom with the OBSIDIAN SPEARHEAD to receive the STONE DISK (E).
- Walk forward.
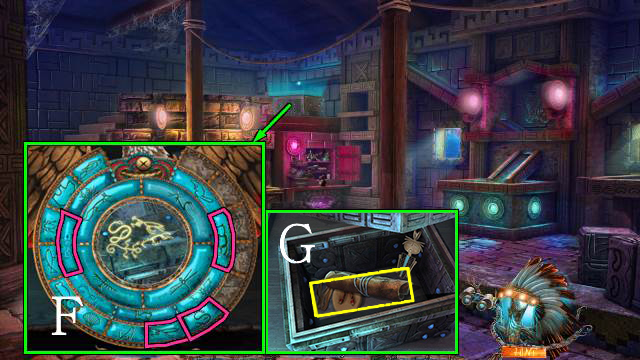
- Put the RATTLESNAKE TILE and MANTIS TILE on the Amulet and use it on the box; select the four symbols (F).
- Open the box with the STONE DISK; take the ROLLED-UP LEATHER (G).
- Go to the Lake Shore.
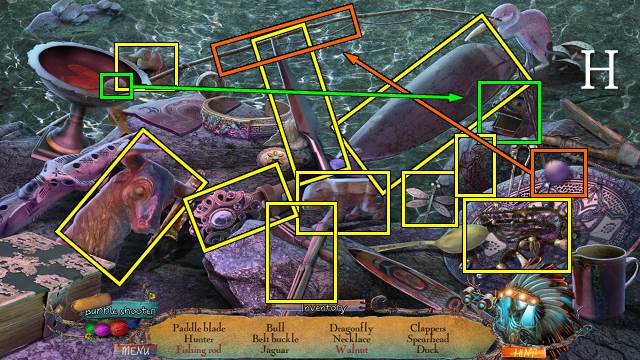
- Play the HOP (H).
- You receive the PADDLE BLADE.
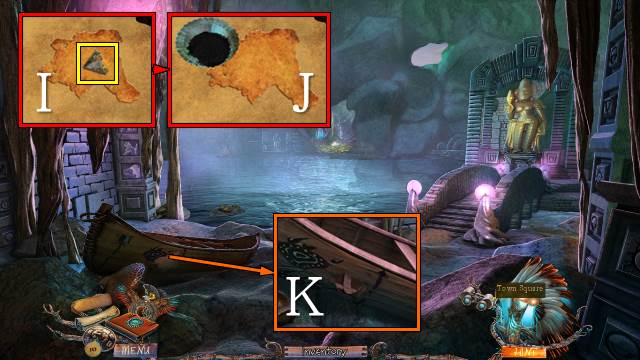
- Access the ROLLED-UP LEATHER, cut the PIECE OF STRING with the OBSIDIAN SPEARHEAD and take the MOSAIC PIECE (I); put the TAR on the leather to get STICKY LEATHER (J).
- Put the STICKY LEATHER on the boat (K).
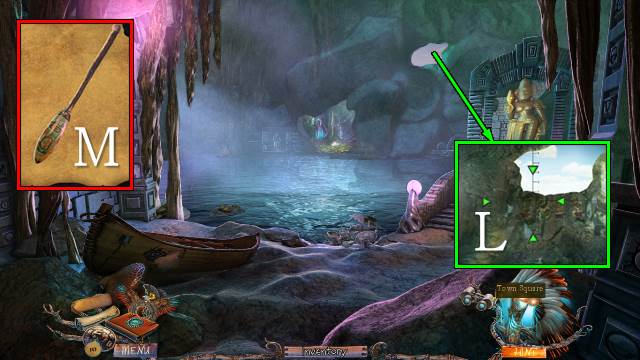
- Use your Binoculars and play as before (L).
- Access the SPEAR HANDLE; put the PADDLE BLADE and PIECE OF STRING on it to get a KAYAK PADDLE (M).
- Put the KAYAK PADDLE in the boat and put the boat in the water.
- Go forward.
Chapter 6: The Underground Shrine
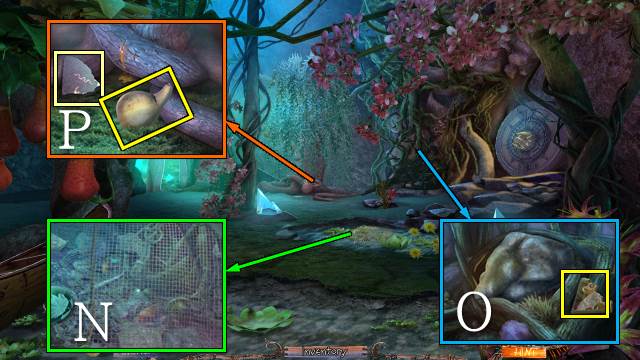
- Take the FISHING NET (N).
- Take the MOSAIC PART (O).
- Take the Story Tile and GOURD (P).
- Go left.
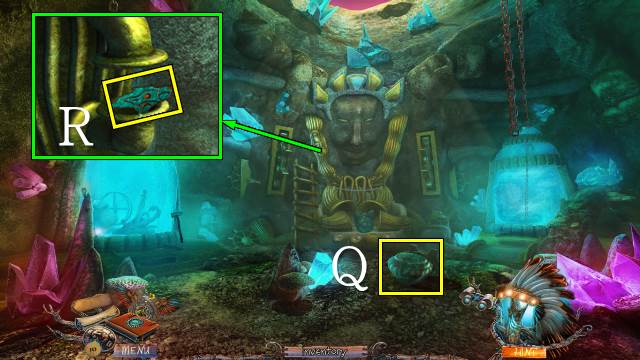
- Take the CRYSTAL BOWL (Q).
- Take the WOLF HEAD (R).
- Walk down.
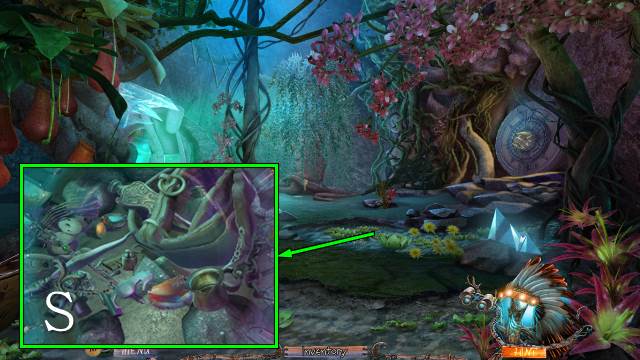
- Put the CRYSTAL BOWL in the water (S).
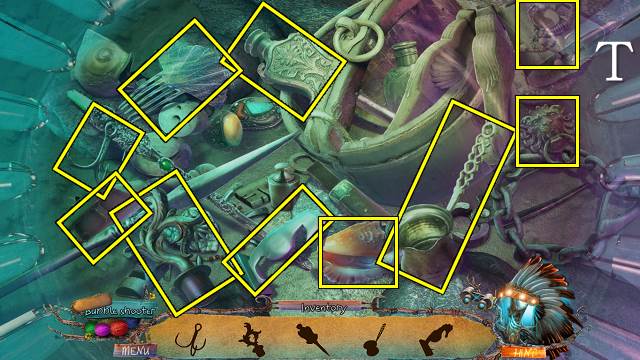
- Play the HOP (T).
- You receive a WEIGHT.
- Go left.
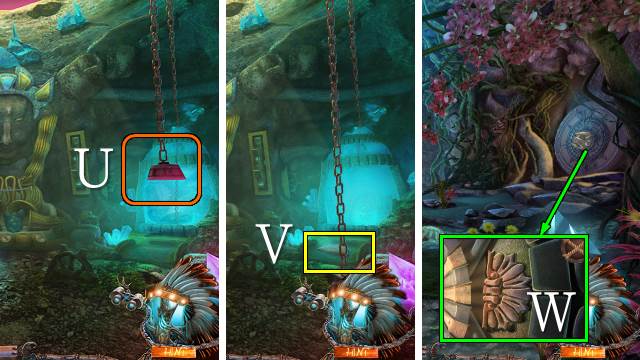
- Hang the WEIGHT from the right chain (U).
- Take the SHRINE DOOR KEY (V).
- Walk down.
- Put the SHRINE DOOR KEY on the door (W).
- Open the door and go right.
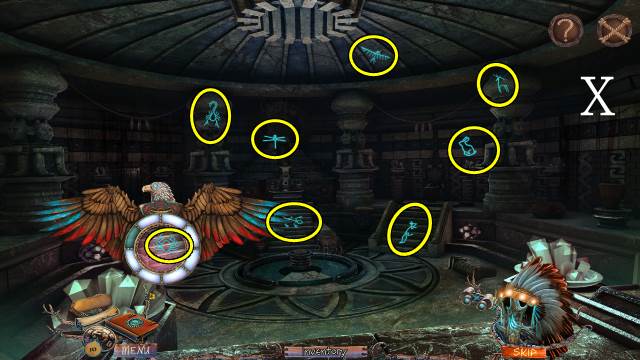
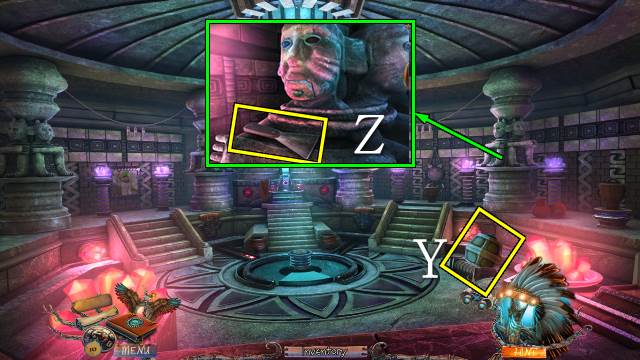
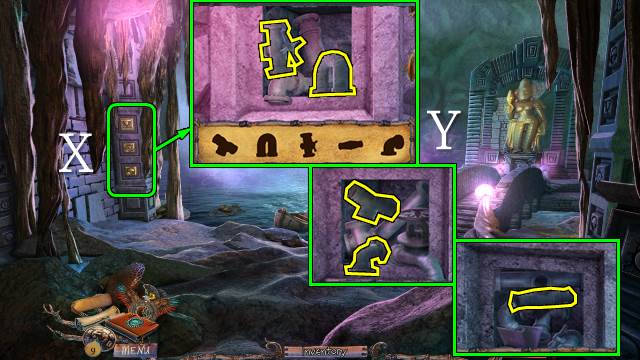
- Find the symbols with your Amulet (X).
- Take the HEAVY WEIGHT (Y).
- Take the SCRAPER (Z).
- Walk down.
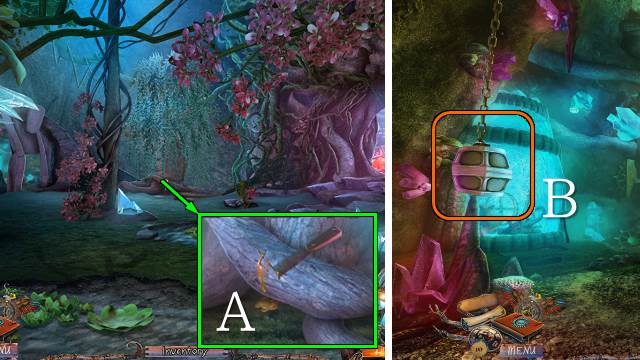
- Get some SAP with the SCRAPER (A).
- Go left.
- Hang the HEAVY WEIGHT from the left chain (B).
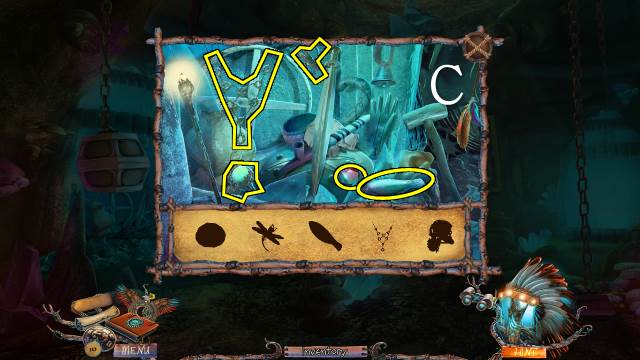
- Play the mini-HOP (C).
- You receive the FOUNTAIN CRYSTAL.
- Go down and right.
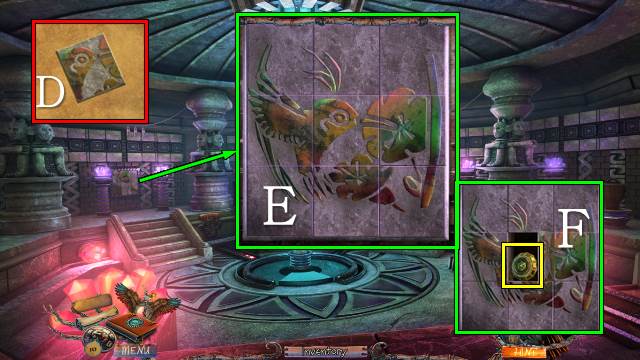
- Access the MOSAIC PIECE; put the SAP and MOSAIC PIECE on it to get a MOSAIC TILE (D).
- Put the MOSAIC TILE on the mosaic for a mini-game.
- Restore the mosaic by swapping the pieces (E).
- Take the SARCOPHAGUS KEY (F).
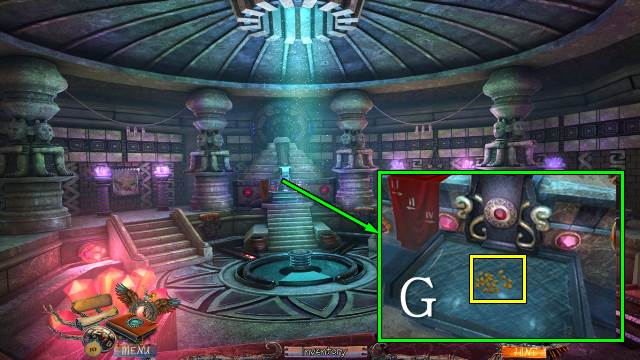
- Put the FOUNTAIN CRYSTAL on the fountain; take the DRIED CORN SEEDS (G).
- Walk down.
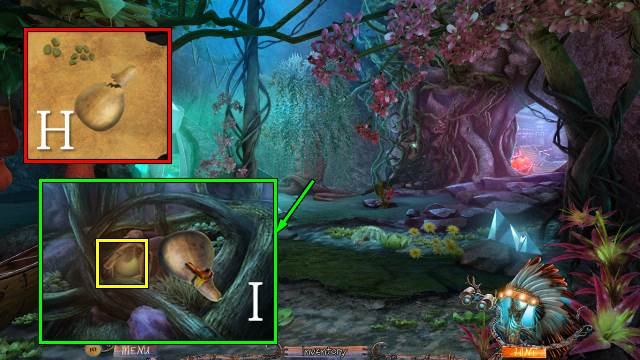
- Access the GOURD and open it, put the DRIED CORN SEEDS in it and close it with the SAP; take the RATTLE (H).
- Remove the stones with the STALAGMITE and try to take the orb; scare the spider with the RATTLE and take the GOLDEN ORB (I).
- Go right.
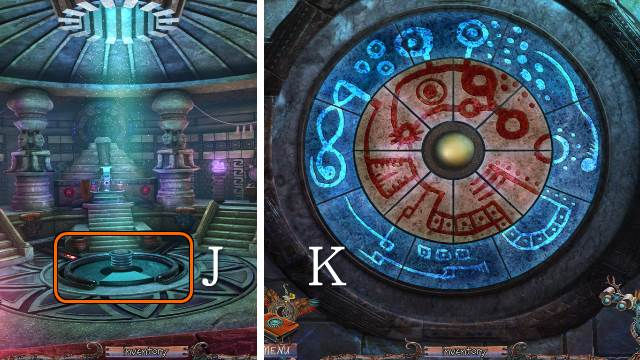
- Put the GOLDEN ORB on the floor for a mini-game (J).
- Swap adjacent tiles to make two rings forming one consecutive image (K).
- Go into the Crypt.
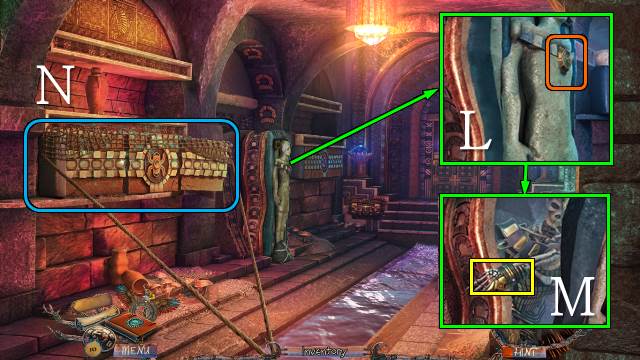
- Open the sarcophagus with the SARCOPHAGUS KEY (L); take the GOLDEN ARM BRACER (M).
- Dislodge the stones with the FISHING NET (N).
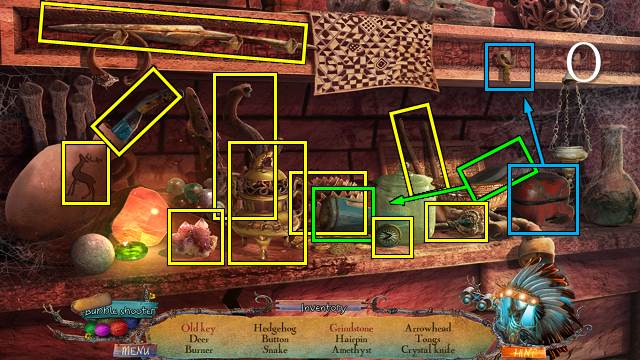
- Play the HOP (O).
- You receive a GOLDEN DISC.
- Go to the Resonating Cave.
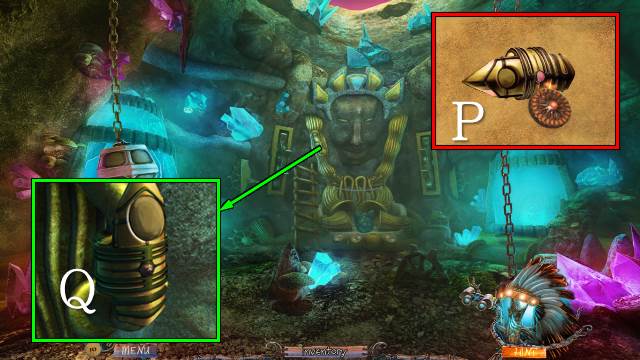
- Access the GOLDEN ARM BRACER and take STONE TOKEN 1/3 and the ARM BRACER (P).
- Put the ARM BRACER on the broken pipe (Q).
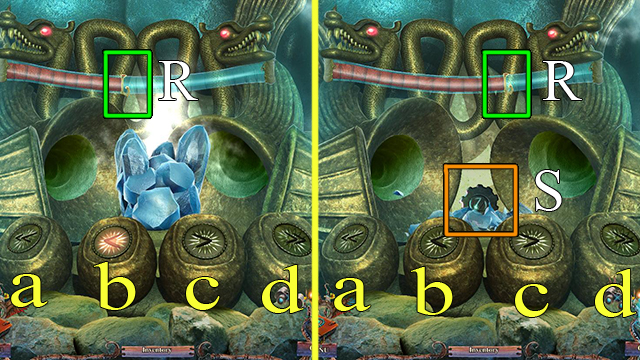
- Put the GOLDEN DISC on the statue for a mini-game.
- Use the arrows to move the liquid to the mark (R).
- Solution: First part: D, B, C, B. Second part: C, C, B, C, B, C, B.
- Take the TOKEN (S).
- Go to the Crypt.
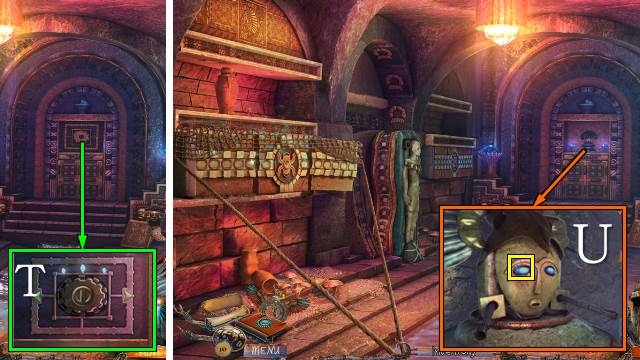
- Take the Story Tile; put the TOKEN on the door for a mini-game.
- Turn the knob 3 left, 2 right, 4 left (T).
- Take the EYE (U).
- Walk down.
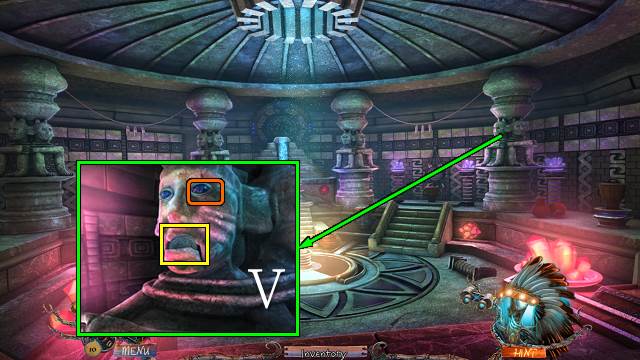
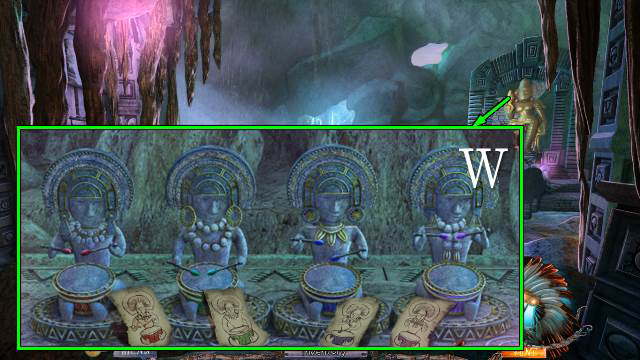
- Put the EYE on the statue; take the ALTAR KEY (V).
- Go to the Lake Shore.
- Put the ALTAR KEY on the altar.
- Swap pieces of the statues until they resemble the example in your diary (W).
- Go to the Pyramid Entrance.
Chapter 7: The Golden Compass
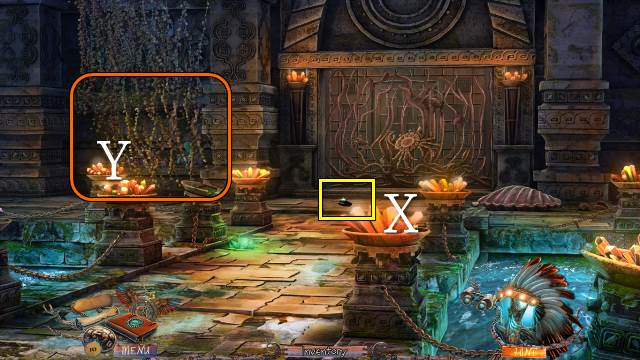
- Take the METAL PINCHER (X).
- Cut the vines with the METAL PINCHER (Y).
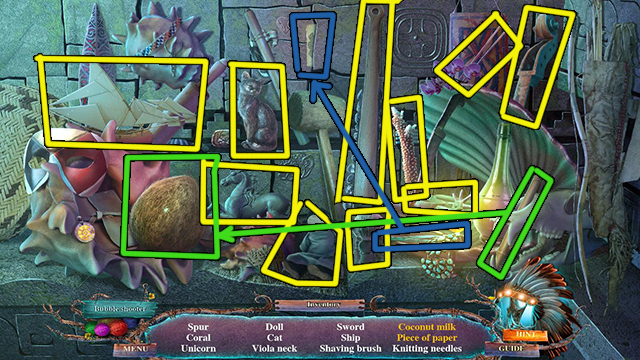
- Play the HOP (Z).
- You receive some CORAL.
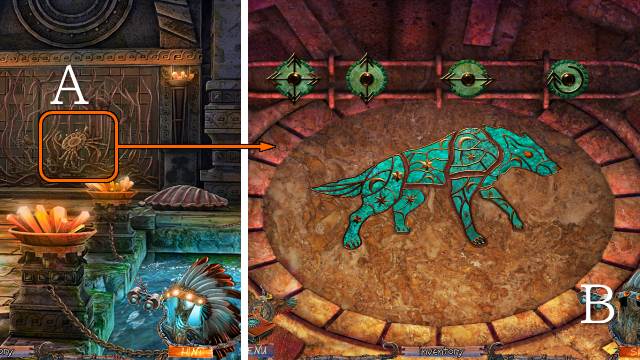
- Put the WOLF HEAD on the crab for a mini-game (A).
- Use the sliders to move and rotate the pieces according to the arrows, until a wolf is formed (B).
- Walk forward.
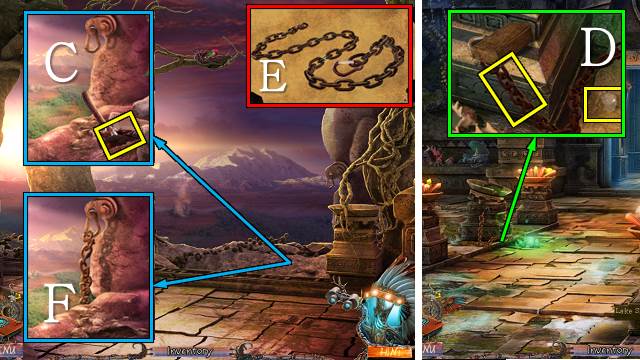
- Move the brick with the CORAL three times; take the BRICK (C).
- Walk down.
- Smash the hook twice with the BRICK; take the CHAIN and SALT (D).
- Walk forward.
- Access the CHAIN and attach the CARABINER to it; take the CHAIN WITH CARABINER (E).
- Hang the CHAIN WITH CARABINER from the hook (F).
- Walk forward.
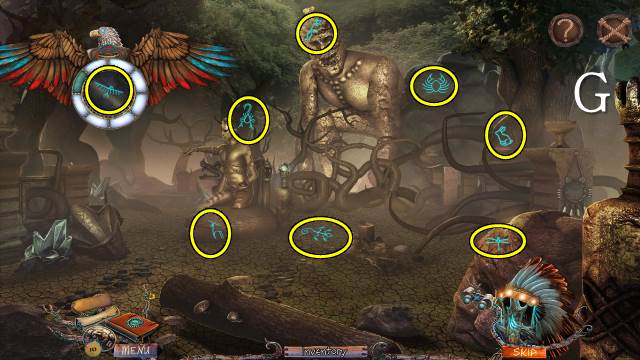
- Find the symbols with your Amulet (G).
- Take the PITH HELMET and OLD PICKAXE (H).
- Walk down.
- Use the OLD PICKAXE on the crystals three times; play the mini-HOP (I). You receive a TALON.
- Walk forward.
- Move the skeleton's arm and open the bag with the TALON; take the SMALL MIRROR and RUBBER (J).
- Put the SMALL MIRROR under the beam of light (K).
- Walk forward.
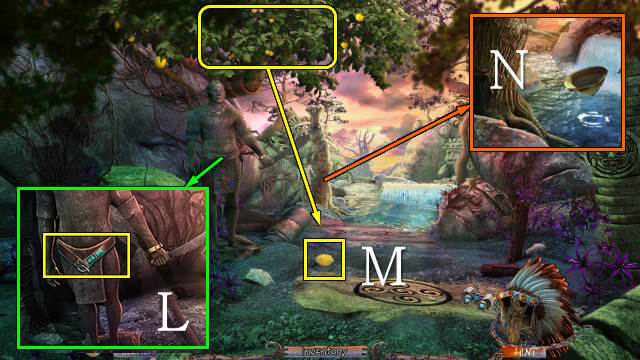
- Open and take the BELT (L).
- Shake the tree three times and take the LEMON (M).
- Fill the PITH HELMET to get a PITH HELMET WITH WATER (N).
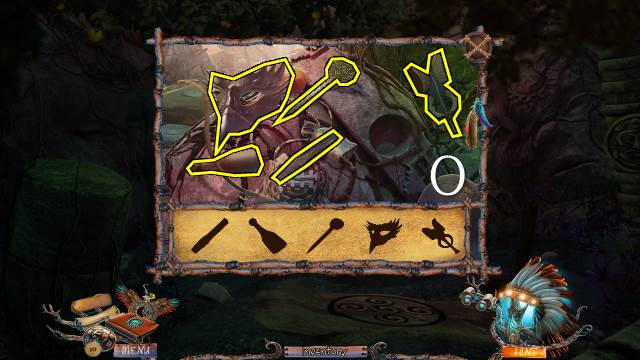
- Play the mini-HOP (O).
- You receive a CHISEL.
- Go to the Pyramid Entrance.
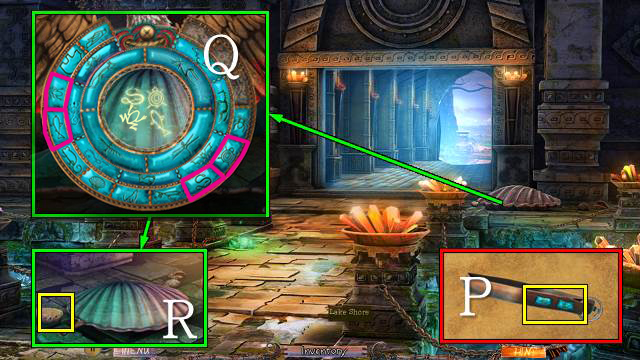
- Access the BELT and take the TURTLE TILE, TARANTULA TILE and LEATHER BELT (P).
- Put the TURTLE TILE and TARANTULA TILE on the Amulet and use it on the shell; select the four symbols (Q).
- Open the shell with the CHISEL; take the LARGE SHELL and SPONGE (R).
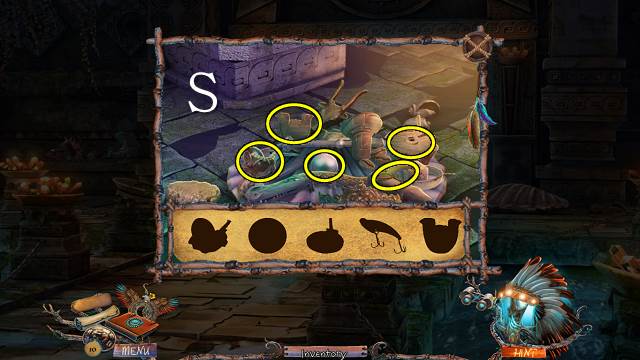
- Play the mini-HOP (S).
- You receive the LARGE PEARL.
- Walk forward.
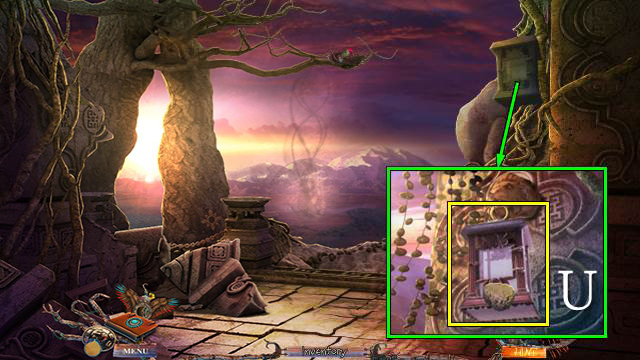
- Put the SALT, LEMON and SPONGE on the lantern; take the BROKEN LANTERN (U).
- Walk forward twice.
- Put the LARGE PEARL on the rock and take the LION'S MANE (V).
- Give the LARGE SHELL to the warrior and take the DULL SWORD and BRACELET 1/3 (W).
- Access the DULL SWORD and polish it with the LEATHER BELT; take the SWORD (X).
- Chop down the tree with the SWORD; take the PEBBLES (Y).
- Walk forward.
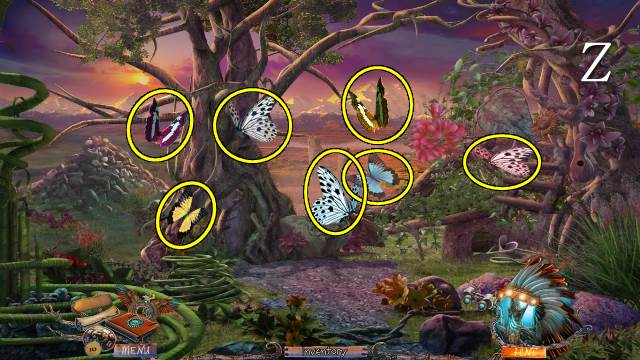
- Move the butterflies one by one (Z).
- Play the HOP (A).
- You receive the LANTERN DOOR.
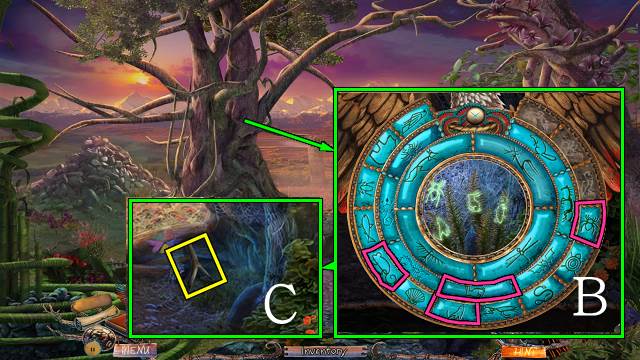
- Use the Amulet on the tree; select the four symbols (B).
- Move the cobwebs until you can take the Y-SHAPED STICK (C).
- Go to the Pyramid Exit.
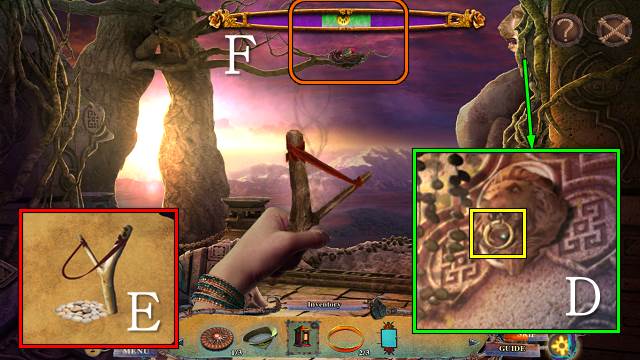
- Put the LION'S MANE on the lion; take BRACELET 2/3 (D).
- Access the V-STICK, and put the RUBBER and PEBBLES on it; take the SLINGSHOT (E).
- Shoot the SLINGSHOT at the nest when the ball is in the green zone (F).
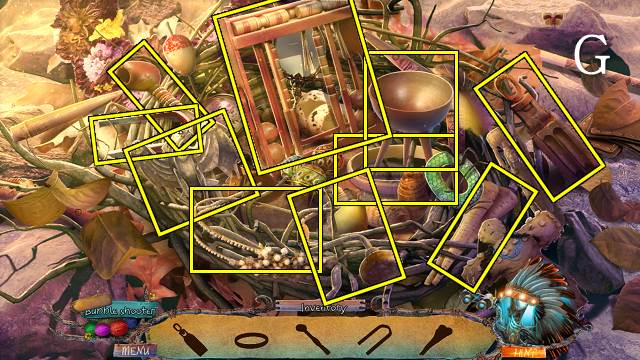
- Play the HOP (G).
- You receive BRACELET 3/3.
- Walk forward.
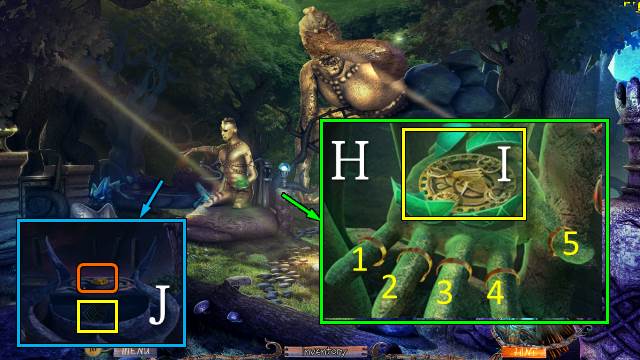
- Put the BRACELETS on the hand for a mini-game (H).
- Release all fingers; selecting one finger may move others.
- Solution: 4, 2, 3, 1.
- Open the crystal and take the GOLDEN COMPASS (I).
- Put the GOLDEN COMPASS on the altar; take the STONE PUZZLE PIECE (J).
- Walk forward twice.
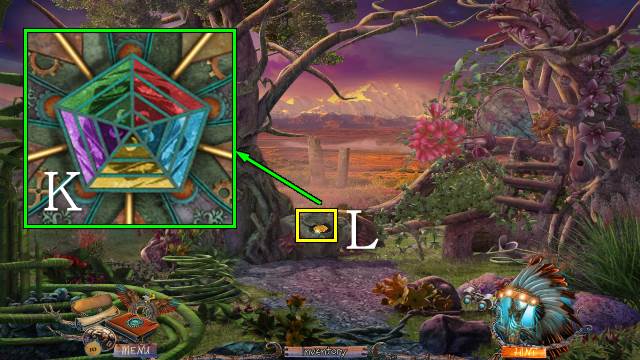
- Put the STONE PUZZLE PIECE on the puzzle for a mini-game.
- Create triangles of one color on the pentagon according to the example in your journal (K).
- Take the POLLEN (L).
- Walk down twice.
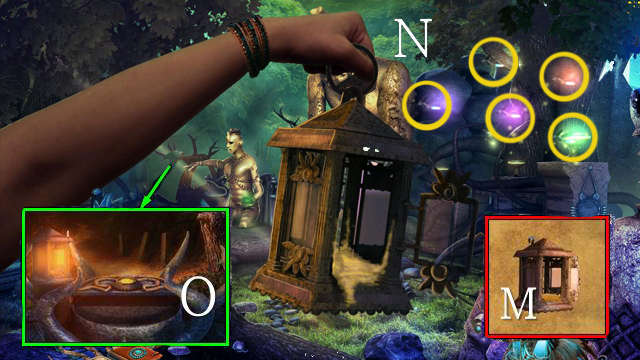
- Access the BROKEN LANTERN, put the LANTERN DOOR on it and the POLLEN in it; you receive a LANTERN WITH BAIT (M).
- Use the LANTERN WITH BAIT on the fireflies and catch five flies (N); you receive the LIT LANTERN.
- Put the LIT LANTERN by the altar (O).
Chapter 8: Spirit Wolf
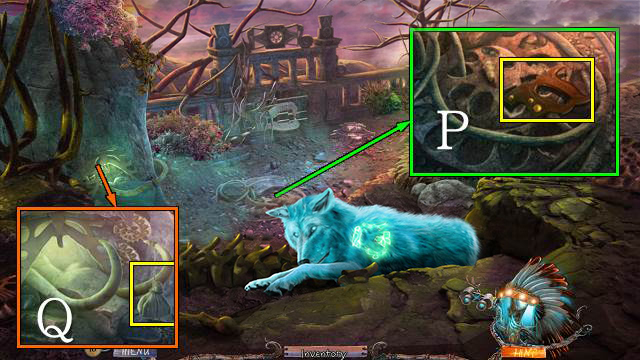
- Move the sand and take the SAW HANDLE (P).
- Take the LEATHER POUCH (Q).
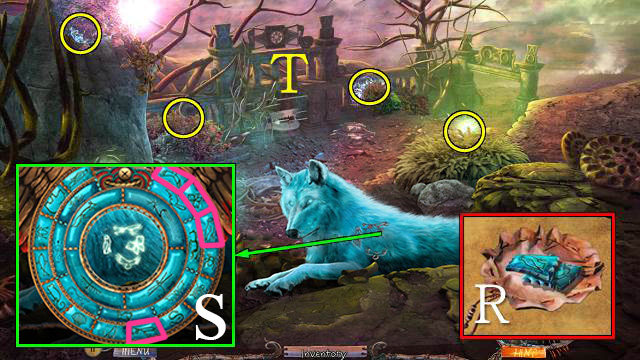
- Open the LEATHER POUCH and take the OWL TILE, BUTTERFLY TILE and HAWK TILE (R).
- Put the OWL TILE, BUTTERFLY TILE and HAWK TILE on the Amulet and use it on the wolf; select the four symbols (S).
- Catch the four essence orbs (T).
- Walk forward.

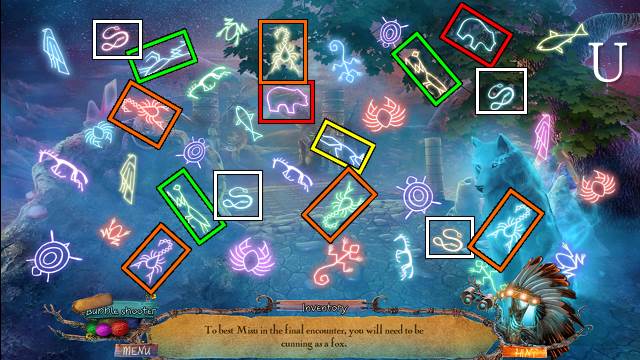
- Look through the Binoculars and play as before (X).
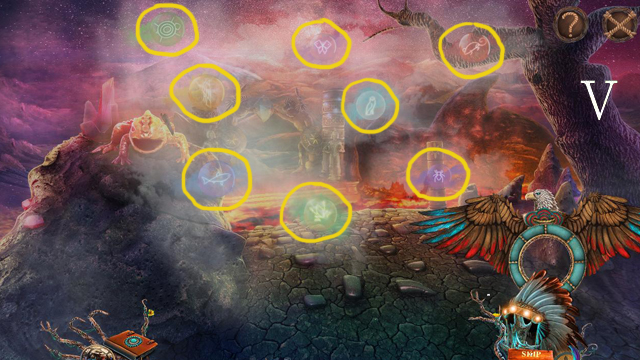
- Speak to the wolf. Find the symbols referred to in the riddles. The number in brackets shows how many of each to find (U).
- Pop the orbs with your amulet (V).
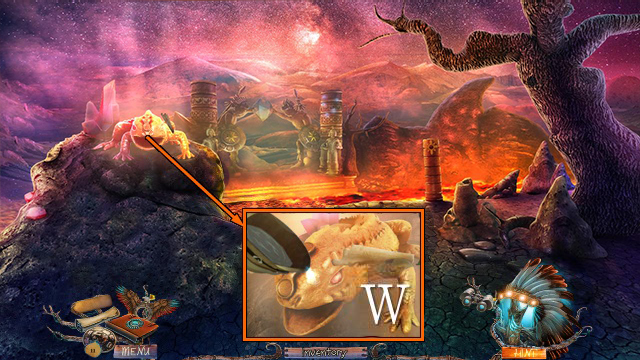
- Pour the PITH HELMET WITH WATER over the salamander (W); put the SAW HANDLE on the blade and receive the SAW.
- Walk down.
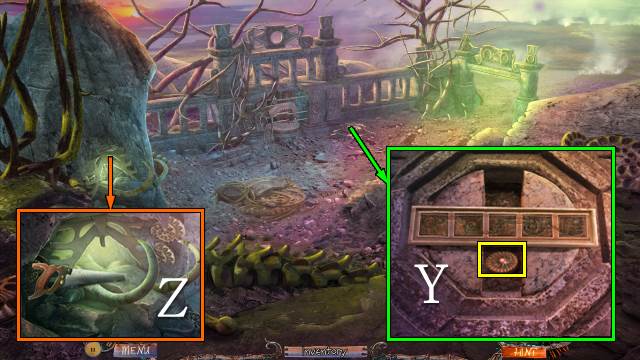
- Change the tiles to get the pattern from your journal; take STONE TOKEN 2/3 (Y).
- Remove a TUSK with the SAW (Z).
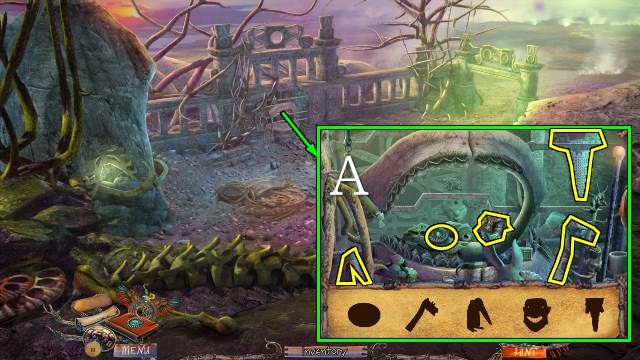
- Put the TUSK between the jaws for a mini-HOP (A).
- You receive STONE TOKEN 3/3.
- Walk forward.
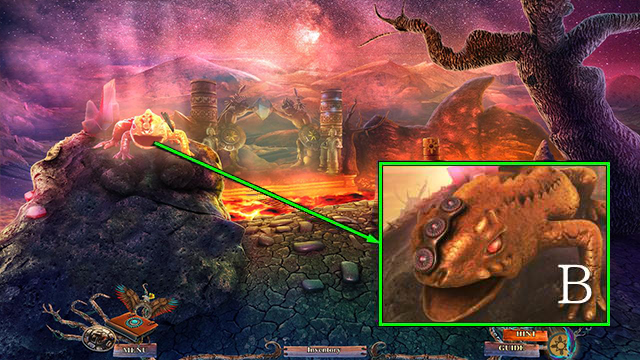
- Put the STONE TOKENS on the salamander (B).
- Access the bridge for a mini-game.
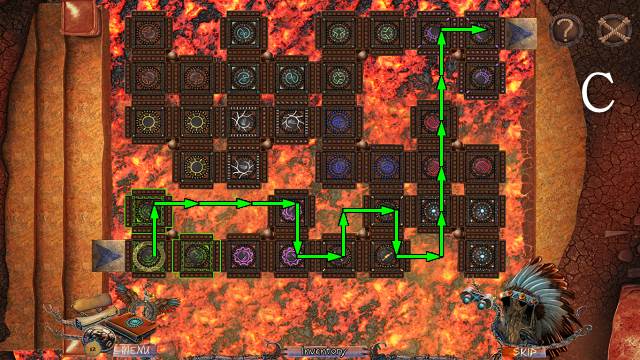
- Make your way across to the top right; note that tiles change in between moves, so try and avoid the lava (C).
- Walk forward.
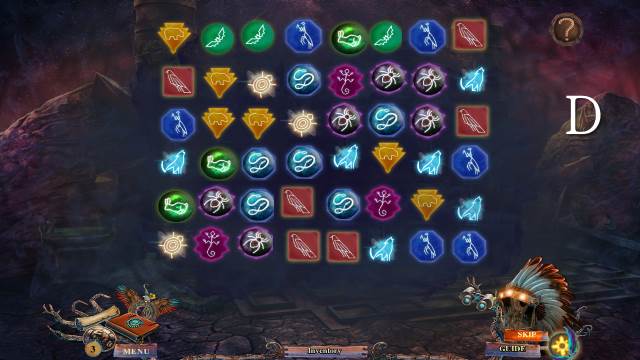
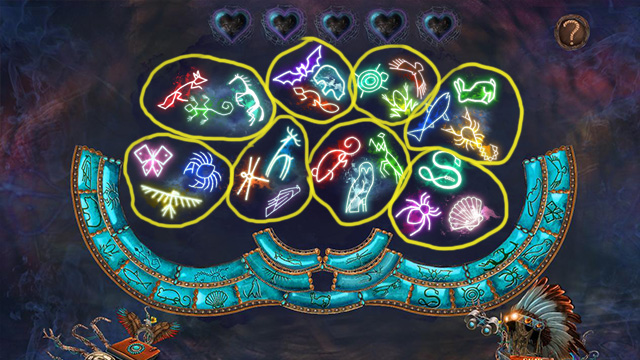
- Turn over tiles to find groups of three identical images (D).
- The symbols will appear from the fog in turn; you need to select the Amulet tiles matching three images shown is lit up.
- Select five correct groups of tiles; if you make a mistake your progress will be set back.
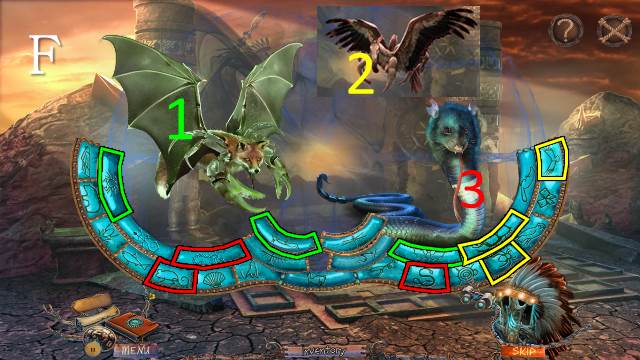
- Select the tiles of the three animals used to create the creature (F).
- Congratulations, you have completed Myths of the World: Spirit Wolf!
Created at: 2014-02-21

