Walkthrough Menu
- General Tips
- Chapter 1: the Case
- Chapter 2: The Prison
- Chapter 3: Repairing the Pump
- Chapter 4: Chinatown
- Chapter 5: The Lab
General Tips
- This is the official guide for New York Mysteries: High Voltage!
- This guide does not mention each time you have to zoom into a location; the screenshots show each zoom scene.
- Hidden-object puzzles are referred to as HOPs. This guide does not show screenshots of the HOPs, however, it is mentioned when a HOP is available and the inventory item collected.
- This guide gives step-by-step solutions for all puzzles that are not random. Please read the instructions in the game for each puzzle.
Chapter 1: The Case
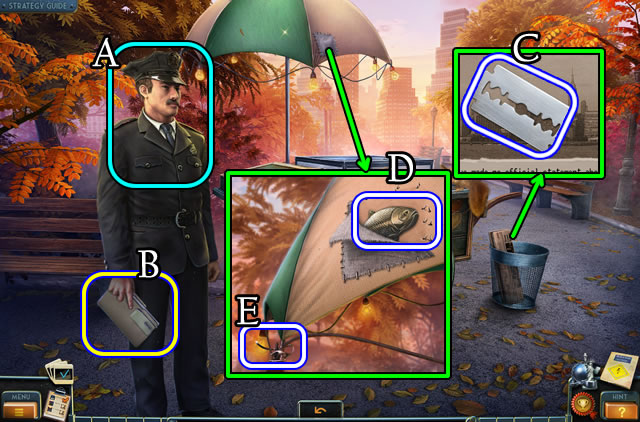
- Walk forward; speak to the officer (A); take the Journal (B).
- Select the newspaper 2x; take the RAZOR BLADE (C).
- Use the RAZOR BLADE; uncover and take the FISH FIGURINE FRAGMENT (D).
- Unwrap (E) and take the WIRE.
- Select the WIRE 4x to get a LOCK PICK (Inventory).
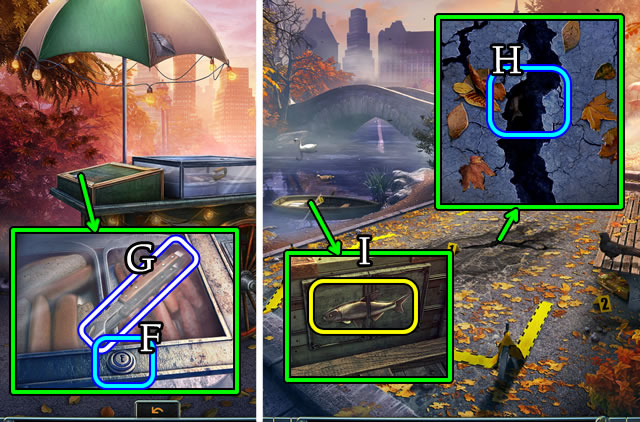
- Use the LOCK PICK (F); take the TONGS (G).
- Walk down.
- Use the TONGS to retrieve a FISH FIGURINE FRAGMENT (H).
- Place both FISH FIGURINE FRAGMENTS (I).
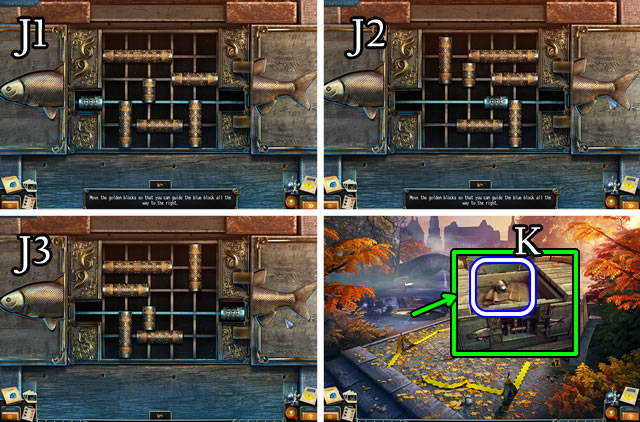
- Solution (J1-J2-J3).
- Take the OILCAN (K).
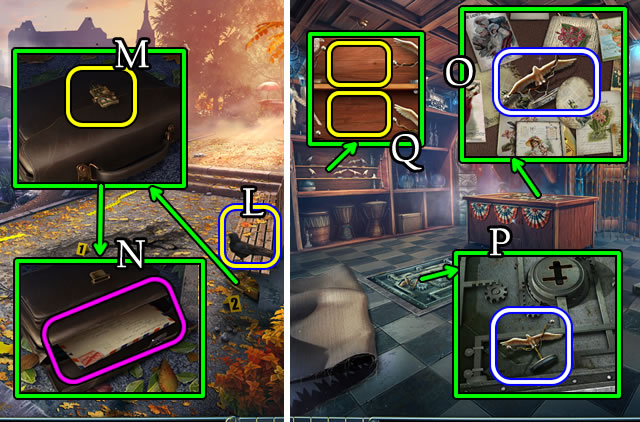
- Move the bird (L); move the leaves; use the OILCAN (M); open; take and open the envelope (N).
- Uncover the EAGLE FIGURINE (O).
- Lift the carpet; take the EAGLE FIGURINE (P).
- Place each EAGLE FIGURINE (Q).
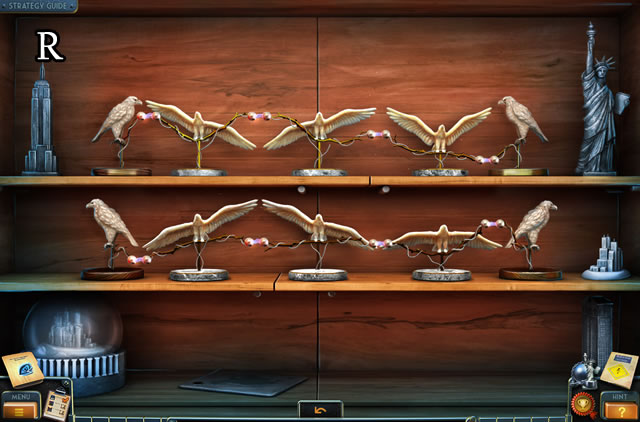
- Solution (R).
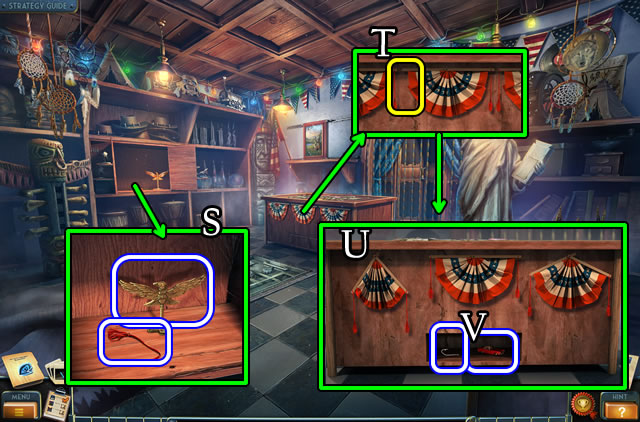
- Take the EAGLE KEY and STRING (S).
- Place the STRING (T).
- Solution (U).
- Take the TOY CAR and HOOK (V).
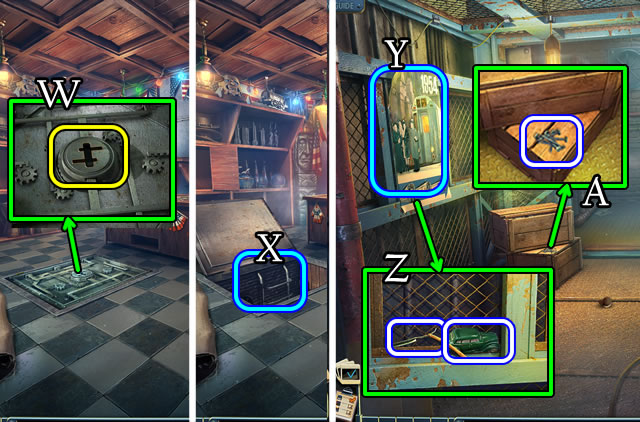
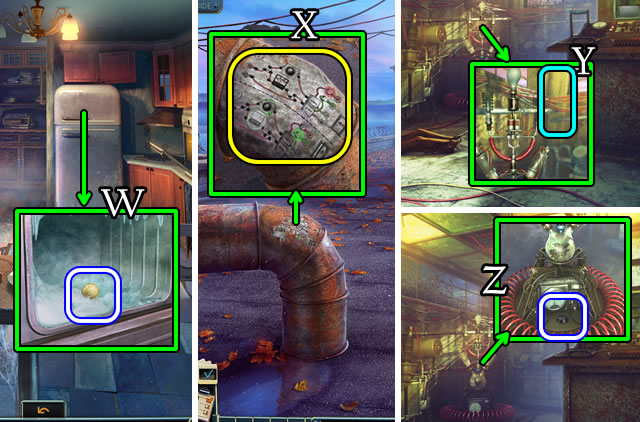
- Use the EAGLE KEY (W); walk down (X).
- Remove (Y); take the RAZOR and TOY CAR (Z).
- Take the NAILS (A).
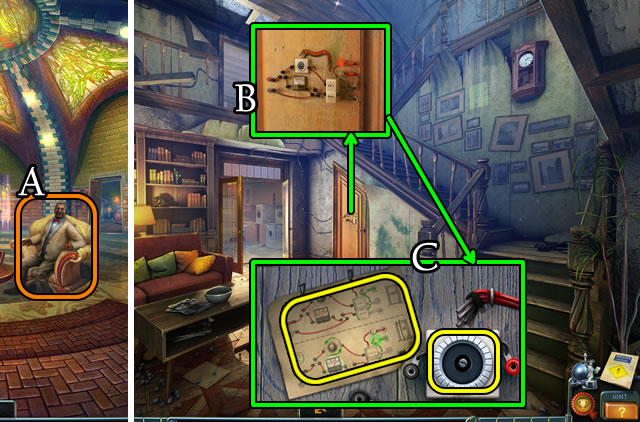
- Walk up.
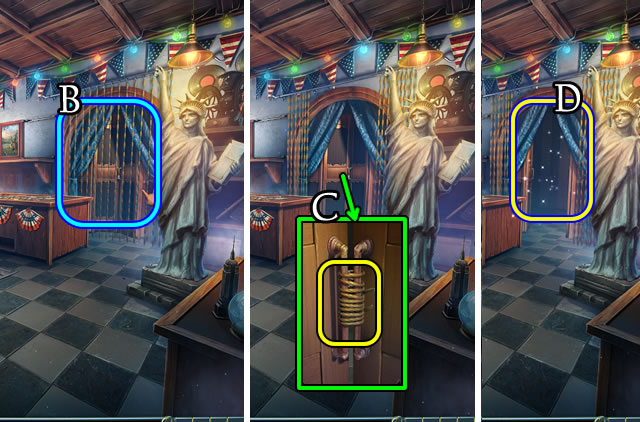
- Move (B); use the RAZOR (C) to play a HOP (D); receive a KEY CARD.
- Walk down.
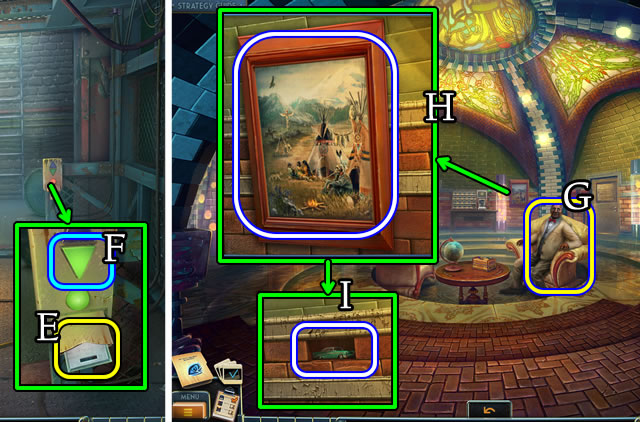
- Place the KEY CARD (E). Press (F).
- Walk forward.
- Speak to Dr. Bishop (G); receive a BUSINESS CARD HOLDER.
- Take the PICTURE (H) and TOY CAR (I).
- Walk down; press the control; walk forward.
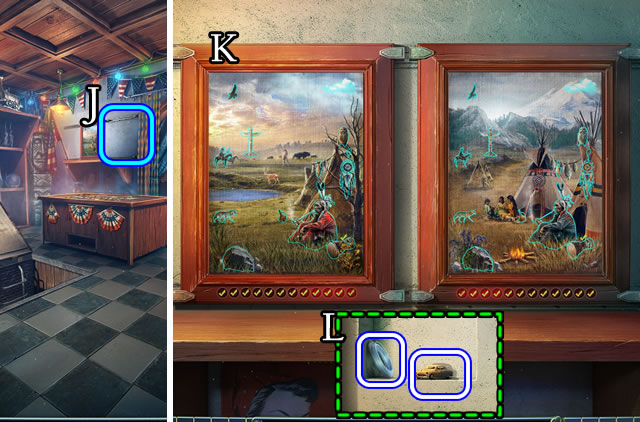
- Place the PICTURE (J).
- Solution (K).
- Take the FISHING LINE and TOY CAR (L).
- Return to the Hall.
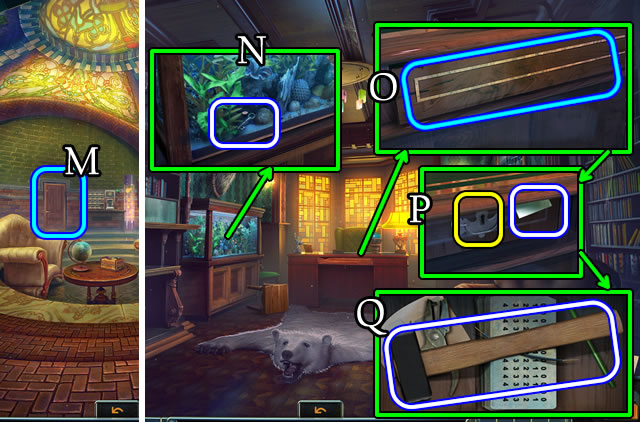
- Open (M); walk left.
- Combine the HOOK and FISHING LINE for a HOOK ON FISHING LINE (Inventory).
- Use the HOOK ON FISHING LINE to retrieve a KEY (N).
- Remove (0). Take the STENCIL; use the KEY (P).Take the HAMMER (Q).
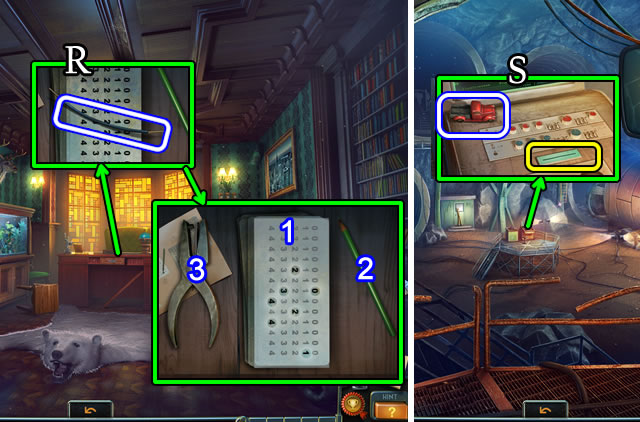
- Take the WIRE (R).
- Place the STENCIL (1); select (2), then (3); receive a PUNCH CARD.
- Walk down, then right.
- Take the TOY CAR; use the PUNCH CARD (S).
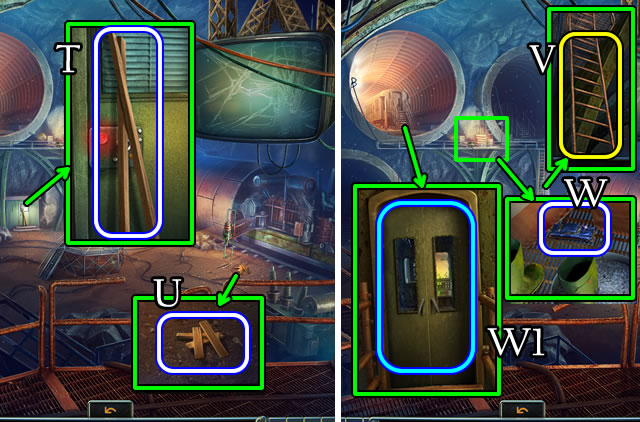
- Take the LONG PLANKS (T) and SHORT PLANKS (U).
- Combine the LONG PLANKS, SHORT PLANKS and NAILS. Use the HAMMER to receive a LADDER (Inventory).
- Place the LADDER (V).
- Grab the TOY CAR (W).
- Open (W1), select the controls.
Chapter 2: The Prison
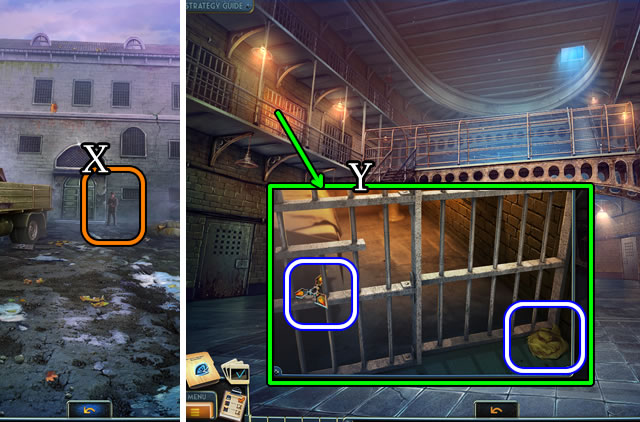
- Open the BUSINESS CARD HOLDER to find a PASS (Inventory).
- Give the PASS (X).
- Walk forward.
- Take STAR FRAGMENT 1/5 and the RAG (Y).
- Walk down.
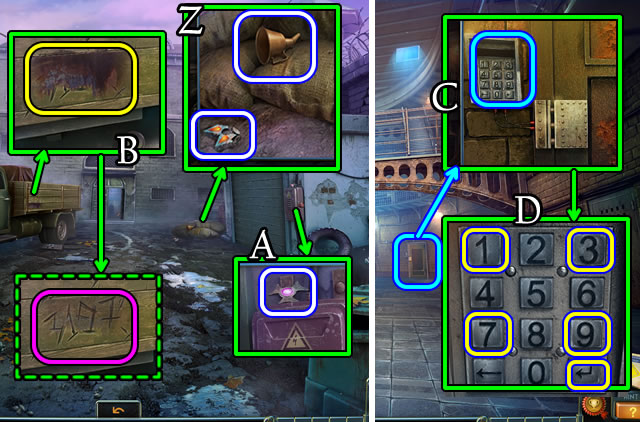
- Take the STAR FRAGMENT 2/5 and FUNNEL (Z).
- Take STAR FRAGMENT 3/5 (A).
- Use the RAG (B).
- Walk forward.
- Select (C). Press 3-1-9-7 and arrow key (D).
- Walk right.
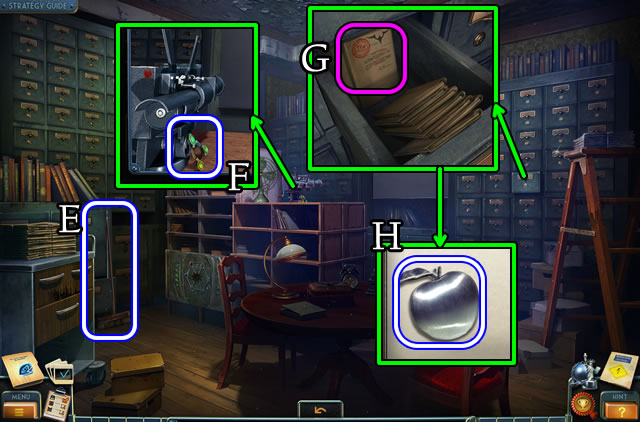
- Take the PUSH BROOM (E).
- Take STAR FRAGMENT 4/5 (F).
- Open and take the file (G) and IRON APPLE (H).
- Walk down 4x, then left.
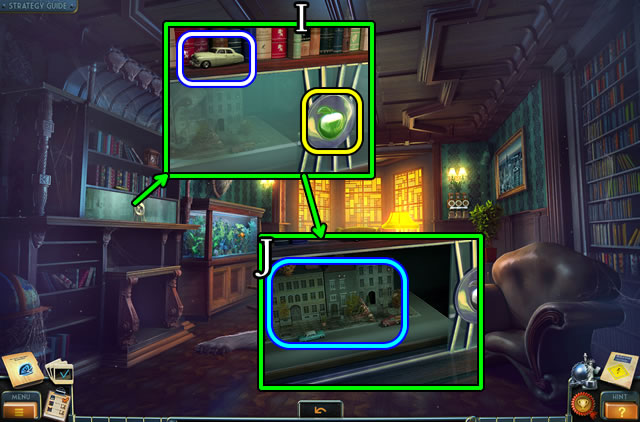
- Take the TOY CAR; place the IRON APPLE (I). Select (J).
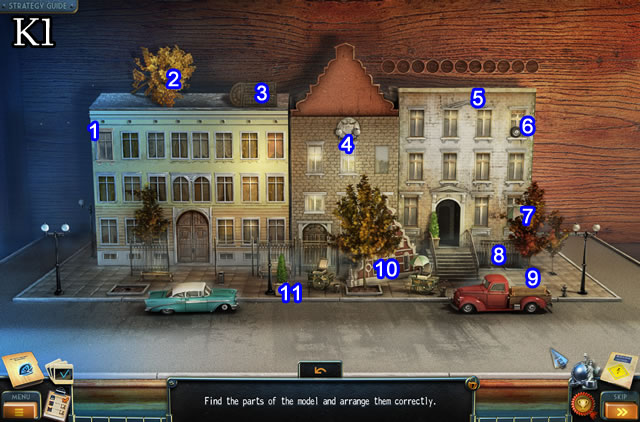
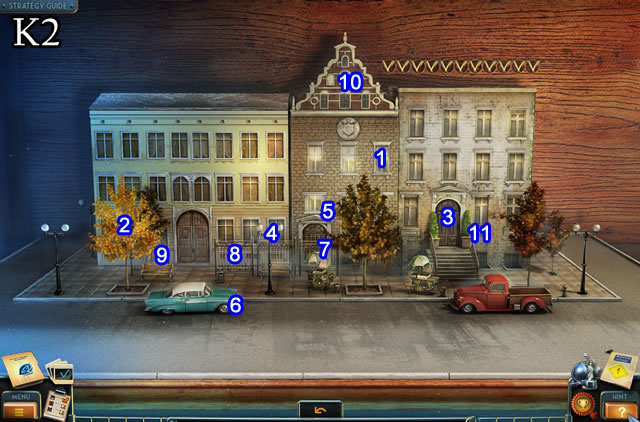
- Solution (K1-K2).
- Take the EMPTY FILM REEL and EAGLE FIGURINE.
- Return to the Archives.
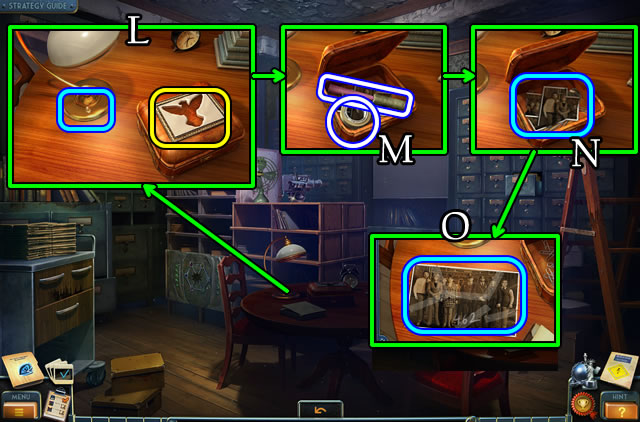
- Turn on the lamp; place the EAGLE FIGURINE (L).
- Take the LEVER HANDLE and TAPE (M).
- Select each picture fragment (N); use the TAPE.
- Select (O).
- Walk down 2x.
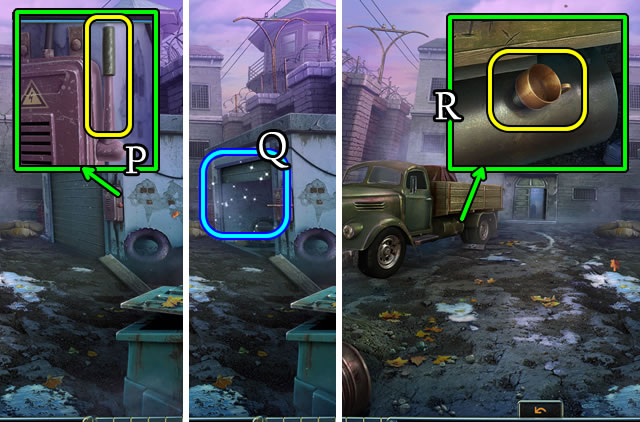
- Place (P) then select the LEVER HANDLE to play a HOP (Q). Receive a JERRY CAN.
- Remove the cap; place the FUNNEL (R); use the JERRY CAN.
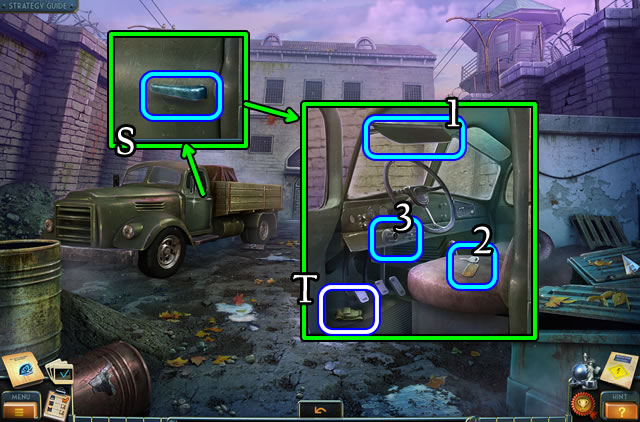
- Open (S).
- Take the TOY CAR (T). Lower (1); place (2) in (3) and select.
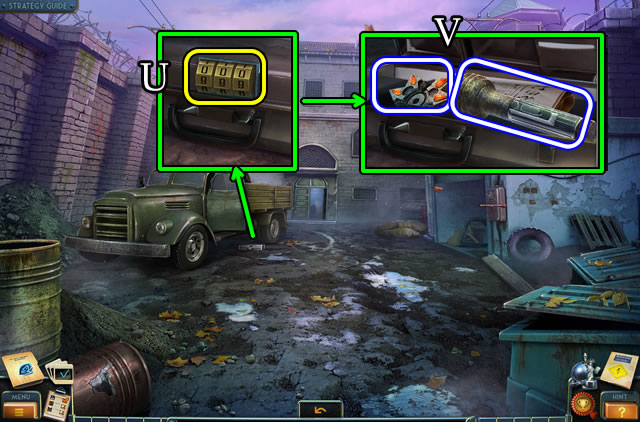
- Select (U). Enter 4-6-2.
- Take STAR FRAGMENTS 5/5 and the FLASHLIGHT (V).
- Walk forward, then right.
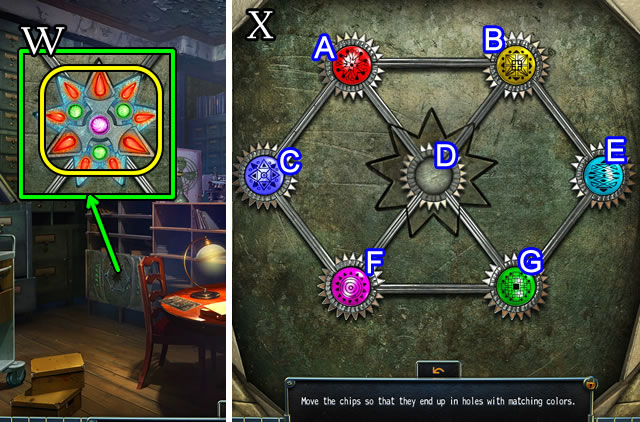
- Assemble the STAR FRAGMENTS 5/5 for a STAR (Inventory).
- Place the STAR (W).
- Solution (X). G-C-A-B-E-F-G-C-A-B-E-F-G-C-A-B-D.
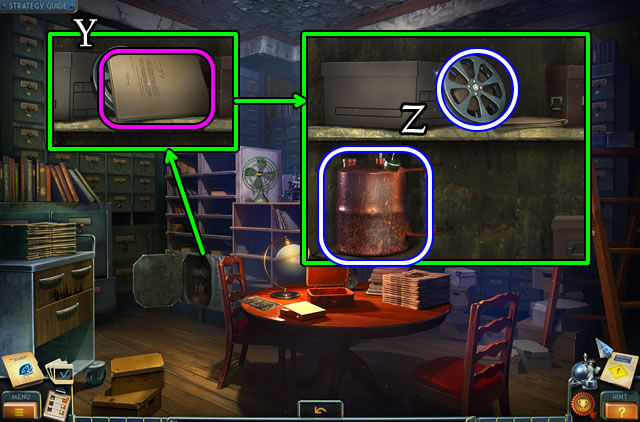
- Take the file (Y).
- Take the LOADED FILM REEL and BLOWTORCH PART (Z).
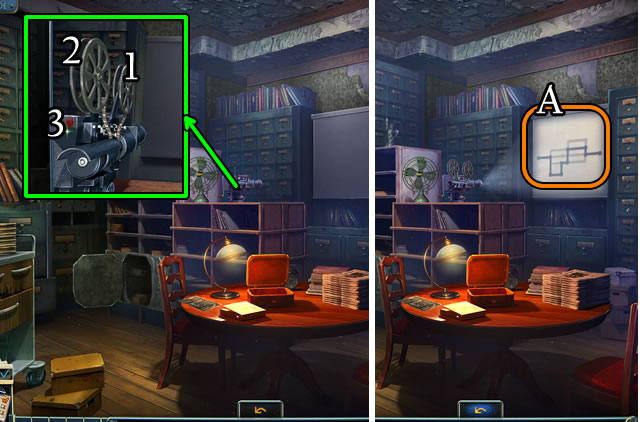
- Place the EMPTY FILM REEL (1) and LOADED FILM REEL (2). Select (3).
- Note (A).
- Walk down 2x.
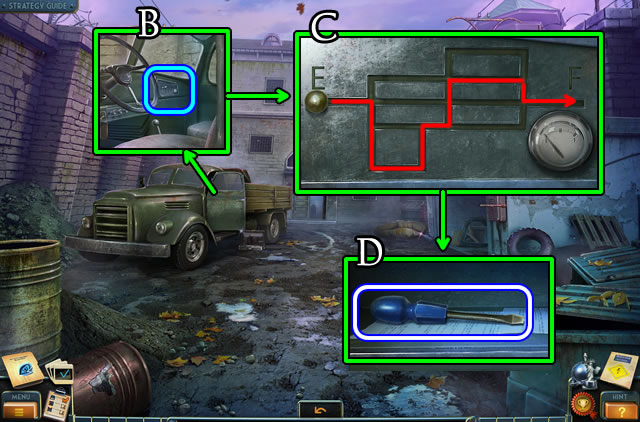
- Select (B).
- Solution (C).
- Take the SCREWDRIVER (D).
- Walk forward.
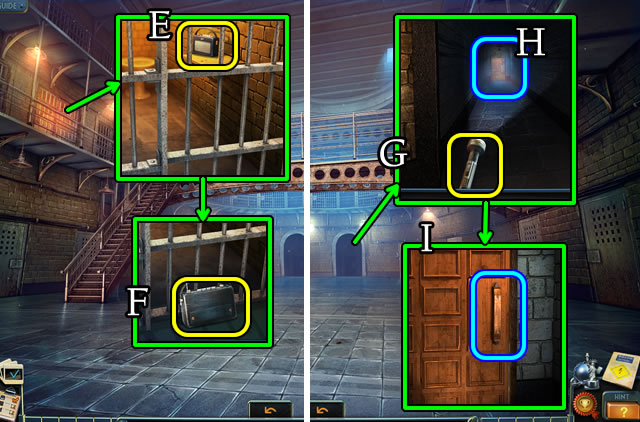
- Use the PUSH BROOM (E) and SCREWDRIVER (F). Open to take BATTERIES.
- Combine the BATTERIES and FLASHLIGHT for a working FLASHLIGHT (Inventory).
- Place the FLASHLIGHT (G); select (H); open (I) and walk forward.
- Select the scene to receive a MEDALLION.
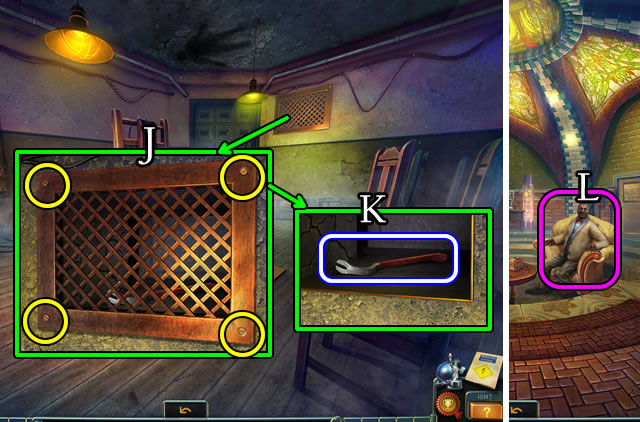
- Use the SCREWDRIVER 4x (J); remove; take the CROWBAR (K).
- Walk down 4x. Speak to Dr. Bishop (L).
- Walk down.
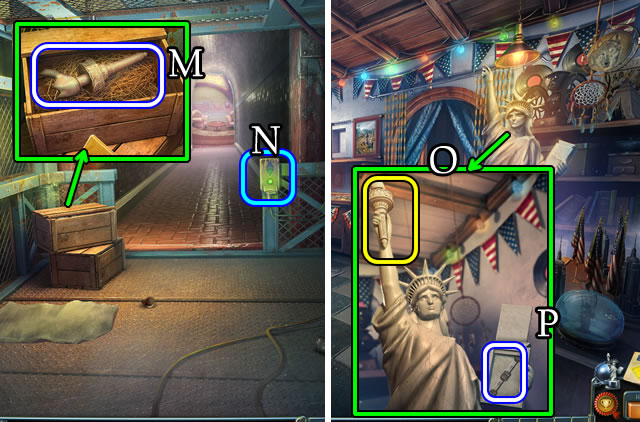
- Use the CROWBAR; take the TORCH (M).
- Select the control (N); walk forward.
- Place the TORCH (O); take the BAR (P).
- Return to the Study.
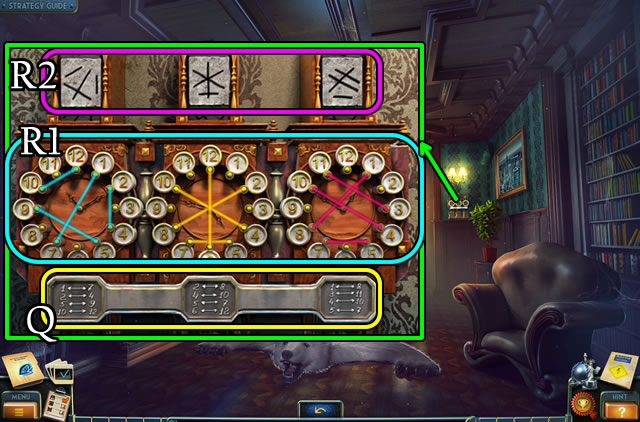
- Place the BAR (Q).
- Solution (R1-R2).
- Take the MAGNET and BLOWTORCH PART.
- Walk down, right, then forward 3x.
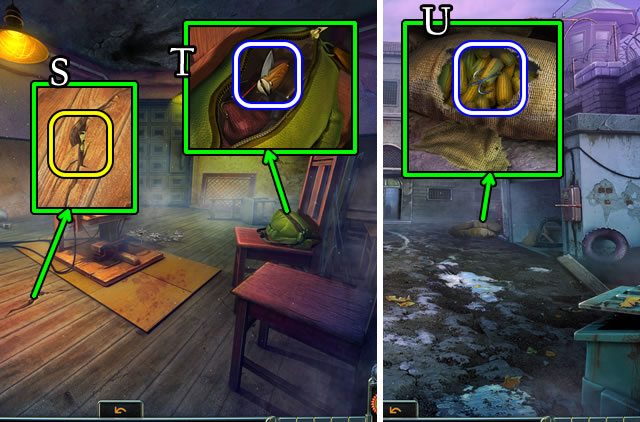
- Use the MAGNET (S) to get a ZIPPER PULL TAB.
- Place the ZIPPER PULL TAB; pull; take the JACKKNIFE (T).
- Walk down 2x.
- Use the JACKKNIFE; open; take the GRAPPLING HOOK (U).
- Walk forward.
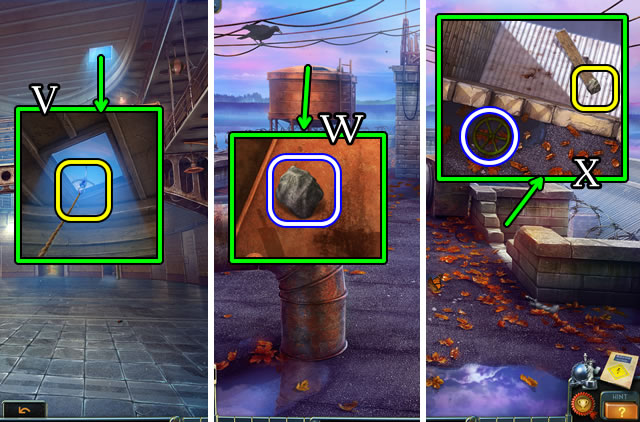
- Place the GRAPPLING HOOK (V); climb the rope.
- Take the STONE (W).
- Drop the STONE; take a HANDWHEEL (X).
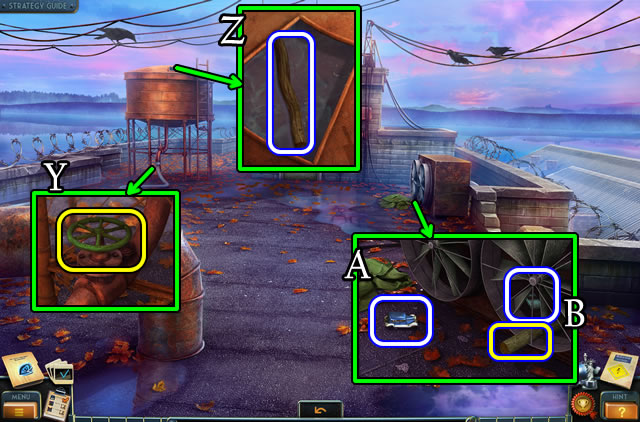
- Place and select the HANDWHEEL (Y); take the STICK (Z).
- Lift the coat; take the TOY CAR (A).
- Place the STICK; take the TOY CAR and STICK (B).
- Walk down 4x.
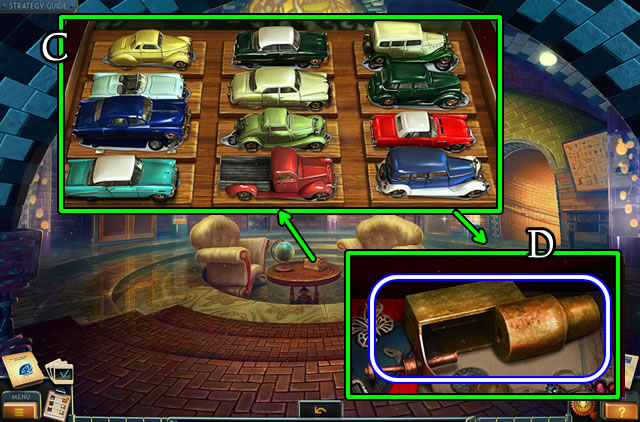
- Place 10 TOY CARS (C); take the BLOWTORCH PART (D).
- Return to the Roof.
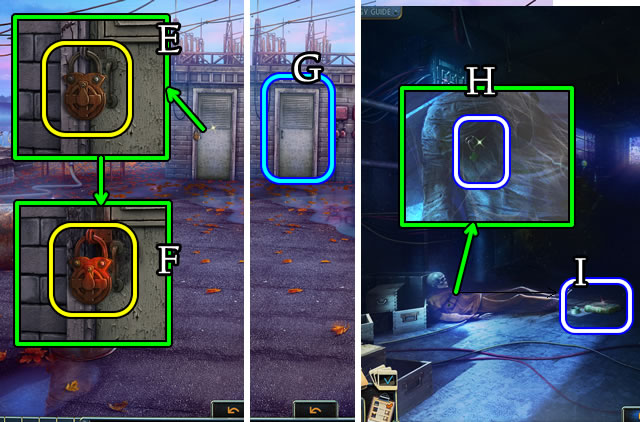
- Combine the BLOWTORCH PARTS for a BLOWTORCH (Inventory).
- Use the BLOWTORCH (E) and HAMMER (F); select (G).
- Take the MED STATION KEY (H) and PIPE (I).
- Walk down 2x.
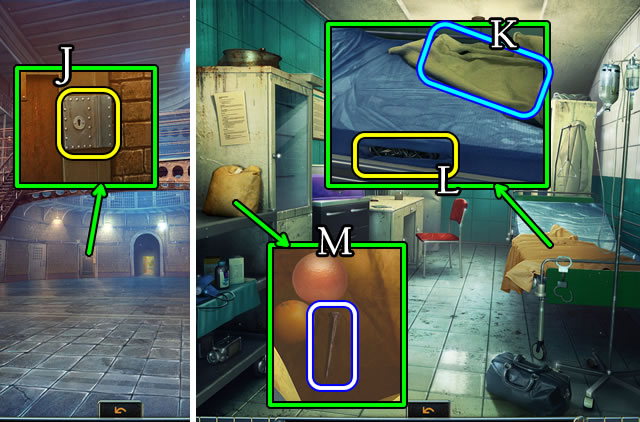
- Place and select the MED STATION KEY (J); walk left.
- Move (K); use the JACKKNIFE (L); take the WIRE.
- Open and uncover the NAIL (M).
- Walk down, climb up and walk forward.
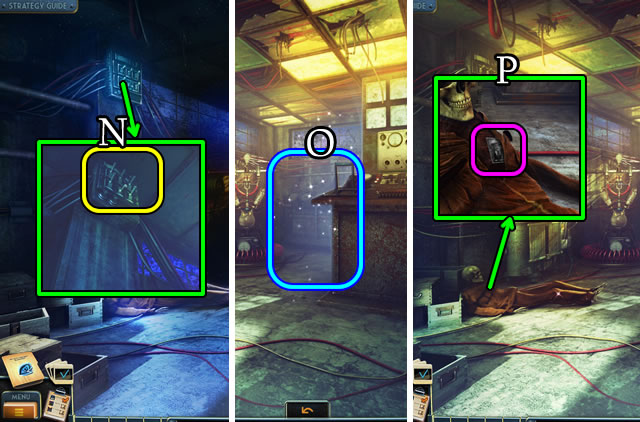
- Combine the PIPE, STICK and WIRE for a PIPE AND STICK (Inventory).
- Use the PIPE AND STICK (N); play the HOP (O) for a SWITCH.
- Select the photograph (P).
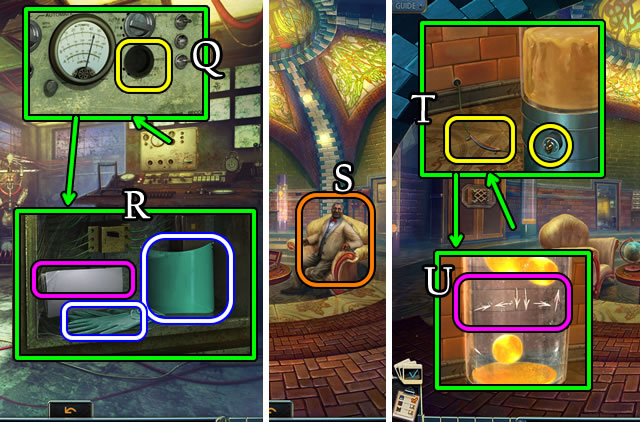
- Place the SWITCH (Q); take the CHANDLIER PART and RUBBER GLOVES; read the note (R).
- Walk down 5x; speak to Dr. Bishop (S); receive a PUNCH CARD.
- Place the WIRE; use the RUBBER GLOVES; turn the knob (T). Note (U).
- Walk left.
Chapter 3: Repairing the Pump
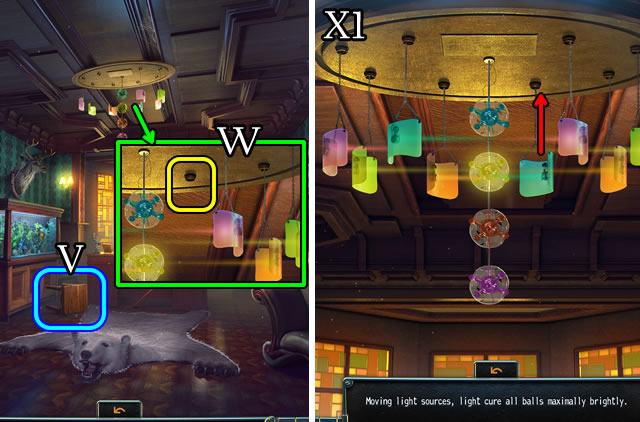
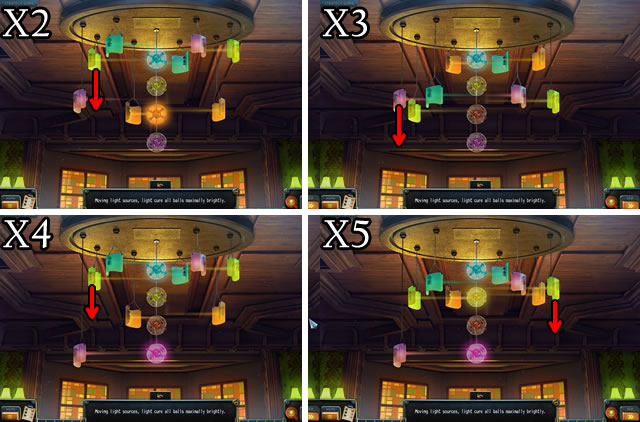
- Move (V); place the CHANDELIER PART (W).
- Solution, part one. (X1).
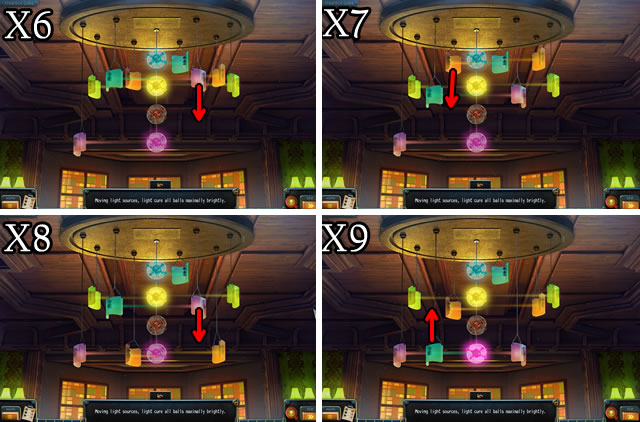
- Solution, part two. (X2-X3-X4-X5).
- Solution, part three. (X6-X7-X8-X9).
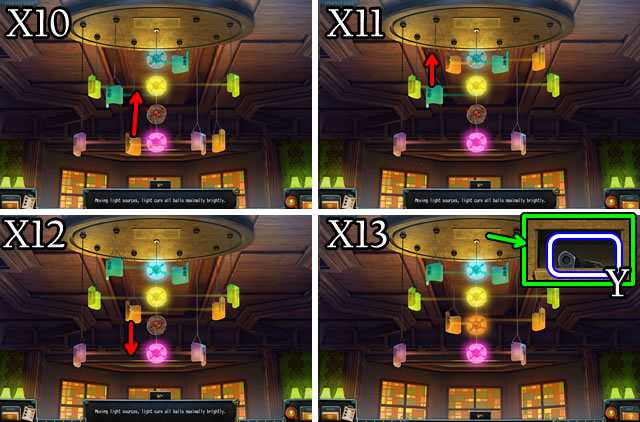
- Solution, part four (X10-X11-X12-X13).
- Take the MAGNETIC KEY (Y).
- Walk down, then right.
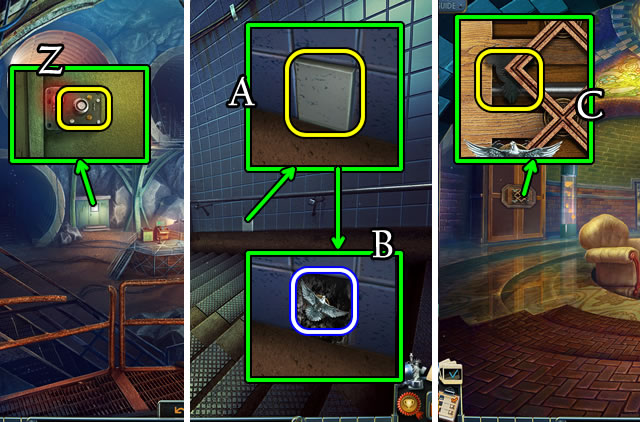
- Use the MAGNETIC KEY (Z); enter the Hallway.
- Use the NAIL and HAMMER (A); take the PIGEON FIGURINE (B).
- Walk down 2x.
- Place the PIGEON FIGURINE (C).
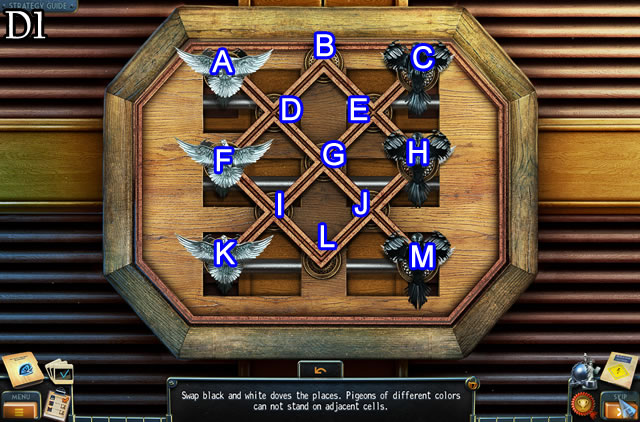
- Solution (D1). H-B, M-G, G-E, F-L, L-J, J-M, K-I, I-L, E-H.
- B-E, A-D, D-F, F-I, E-B, B-D, D-A, H-B, L-J, I-L, B-F, C-E.
- E-B, J-H, L-J, F-I, I-K, B-F, J-C.
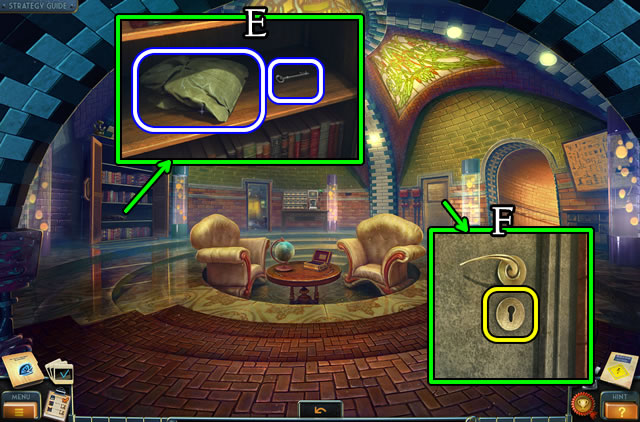
- Take the KEY and PROTECTIVE SUIT (E).
- Use the KEY (F), then enter.
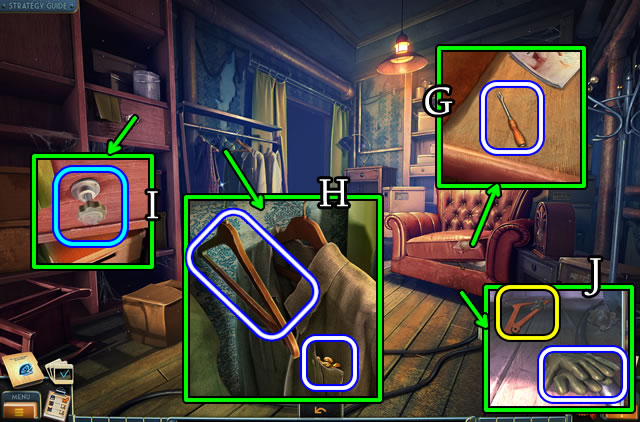
- Lift the cushion; take the NAIL PULLER (G).
- Take the YELLOW PEBBLES and HANGER (H).
- Select the knob (I).
- Take the GLOVES; use the HANGER to get the KNOB (J).
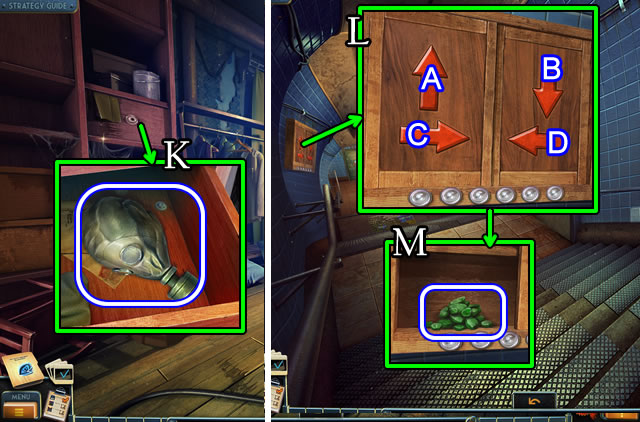
- Attach the KNOB; take the GAS MASK (K).
- Return to the Hallway.
- Select (L).
- Solution. C-D-B-B-C-A.
- Take the GREEN PEBBLES (M).
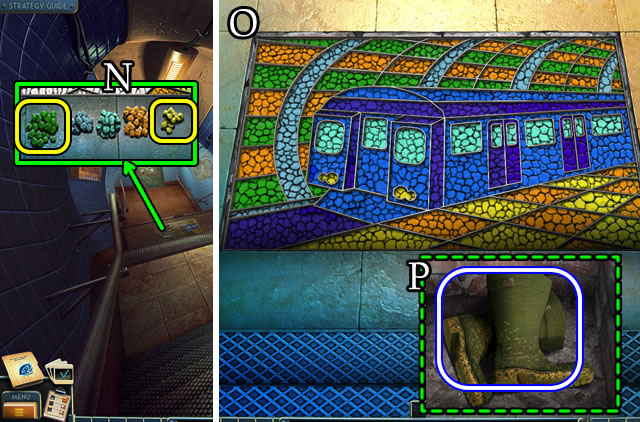
- Place the YELLOW PEBBLES and GREEN PEBBLES (N).
- Solution (O).
- Take the BOOTS (P).
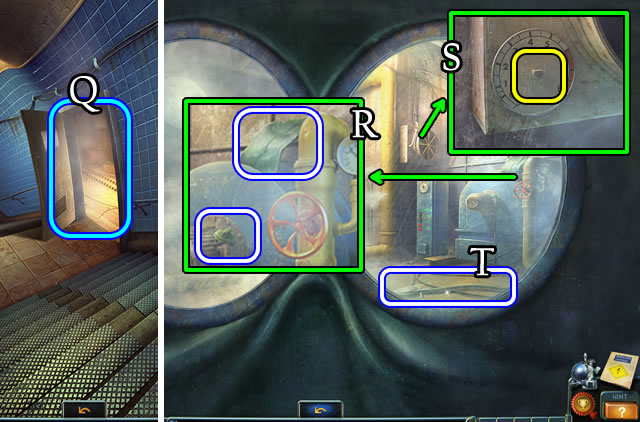
- Combine the PROTECTIVE SUIT, GLOVES, GAS MASK and BOOTS for a HAZMAT SUIT (Inventory).
- Open and place the HAZMAT SUIT (Q).
- Take the PIECE OF METAL and KNOB (R).
- Place, then select the KNOB (S).
- Grab the SHOVEL (T).
- Walk down.
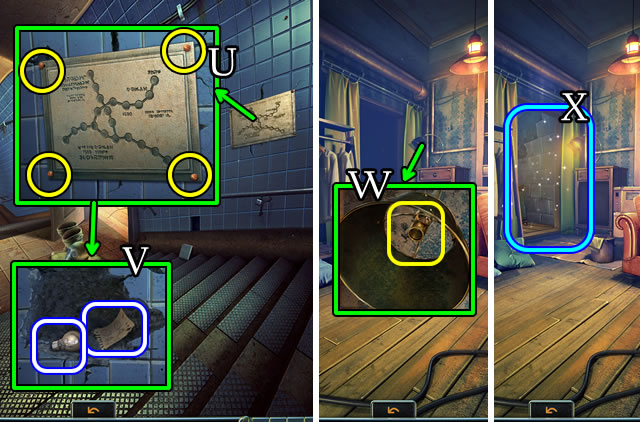
- Use the NAIL PULLER 4x (U); remove; take the LIGHTBULB and DIAGRAM (V).
- Walk down 2x and right.
- Place the LIGHTBULB (W) to play a HOP (X). Receive a DRILL BIT.
- Walk down and enter the tunnel.
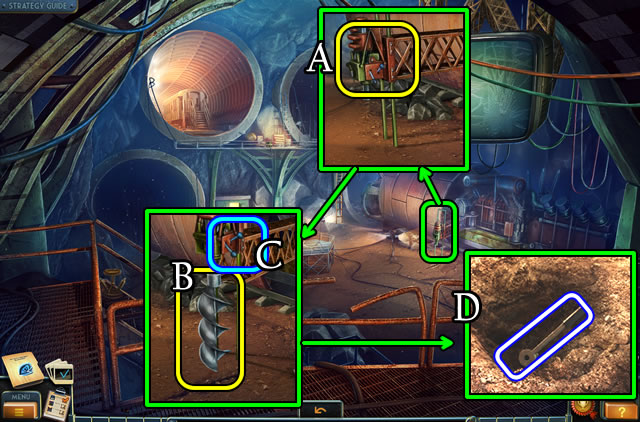
- Select (A), attach the DRILL BIT (B); flip (C); use the SHOVEL; take the MONKEY WRENCH (D).
- Return to the Pump Room.
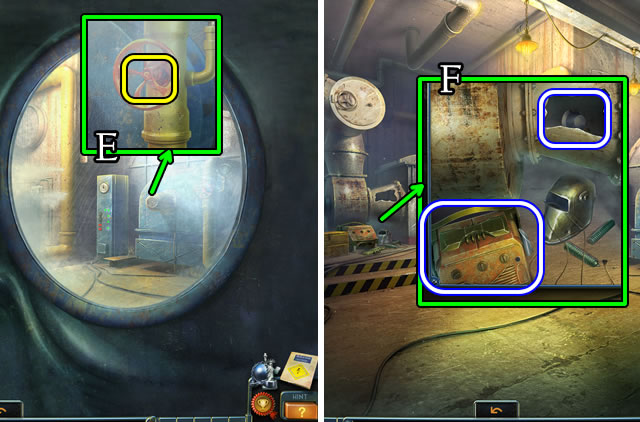
- Use the MONKEY WRENCH (E).
- Take the WELDING DEVICE PARTS and KNOB (F).
- Walk down.
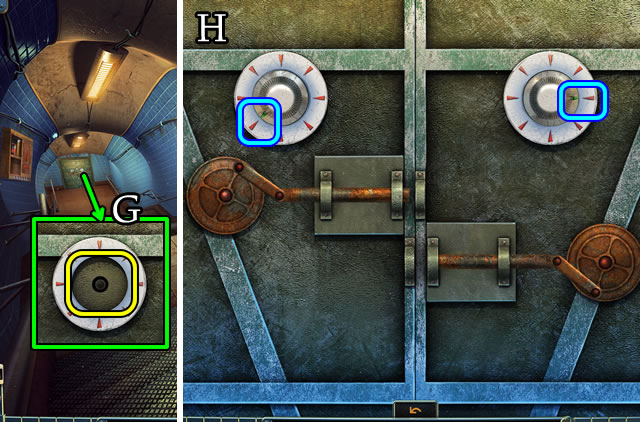
- Place the KNOB (G).
- Solution (H).
- Walk forward.
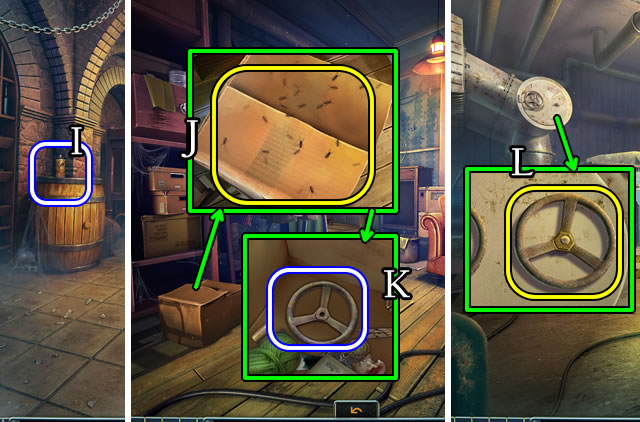
- Grab the INSECT REPELLANT (I).
- Walk down 3x, then right.
- Use the INSECT REPELLANT (J).
- Open and uncover the HANDWHEEL (K).
- Return to the Pump Room.
- Attach and turn the HANDWHEEL (L).
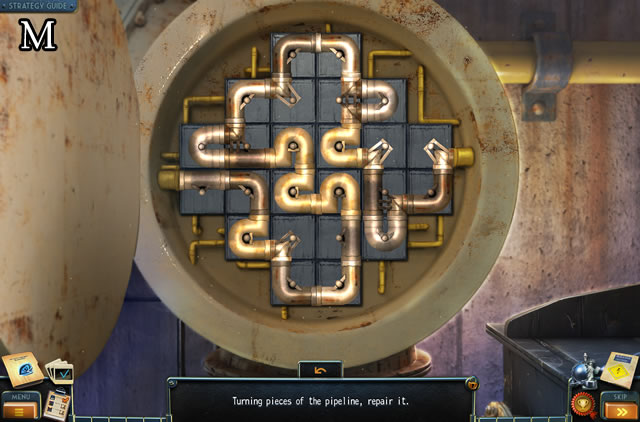
- Solution (M).
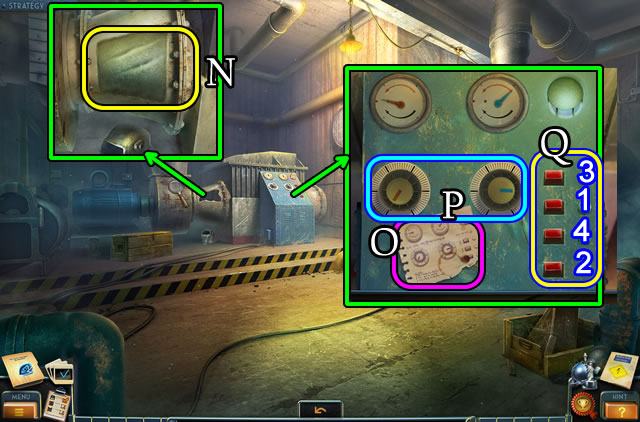
- Attach the WELDING DEVICE PARTS to get a WELDING DEVICE (Inventory).
- Place the PIECE OF METAL (N); use the WELDING DEVICE.
- Place the DIAGRAM (O); set (P); press (Q) 1-2-3-4.
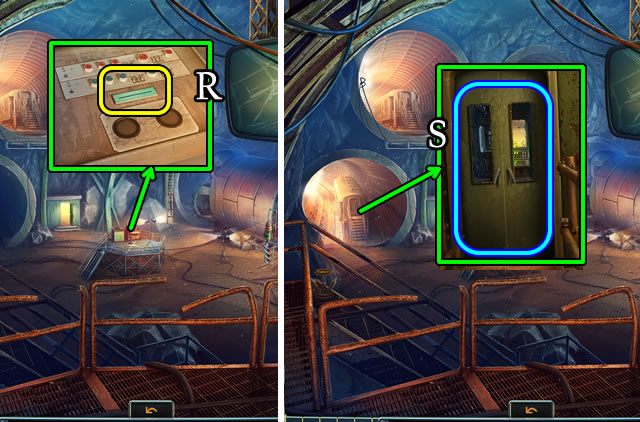
- Insert the PUNCH CARD (R).
- Open (S) and flip the control.
Chapter 4: Chinatown
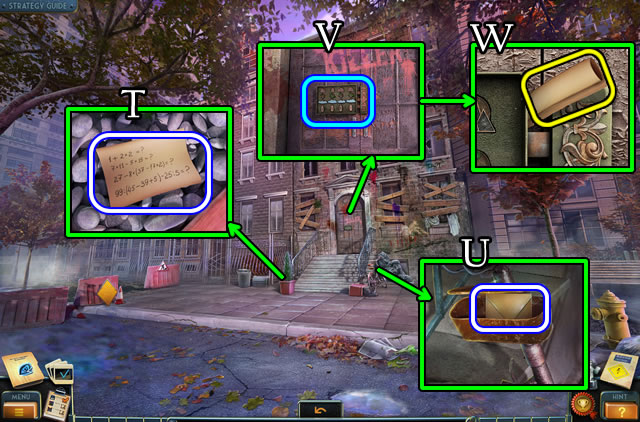
- Uncover and take the NOTE (T).
- Open and take ENVELOPE 1/5 (U).
- Select (V) and place the NOTE (W).
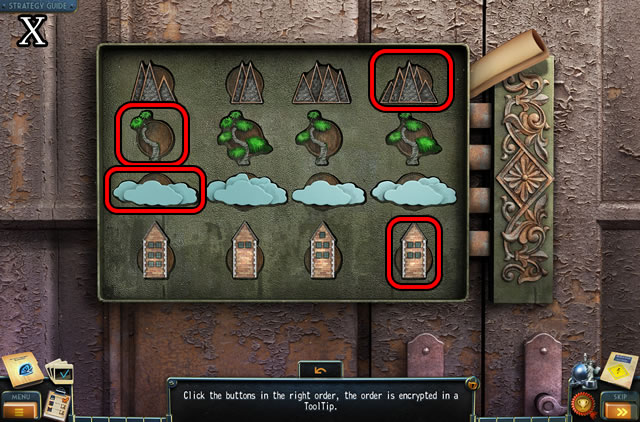
- Solution (X).
- Walk right.
- Climb the stairs; open the door; walk left.
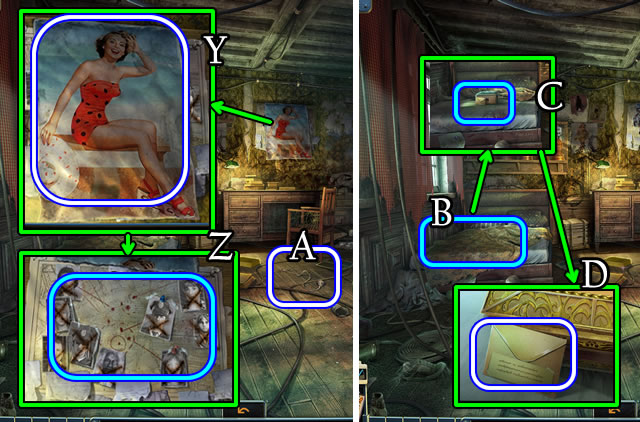
- Take the POSTER (Y).
- Select (Z).
- Grab the CORD (A).
- Move (B); Select (C) and take ENVELOPE 2/5 (D).
- Walk down.
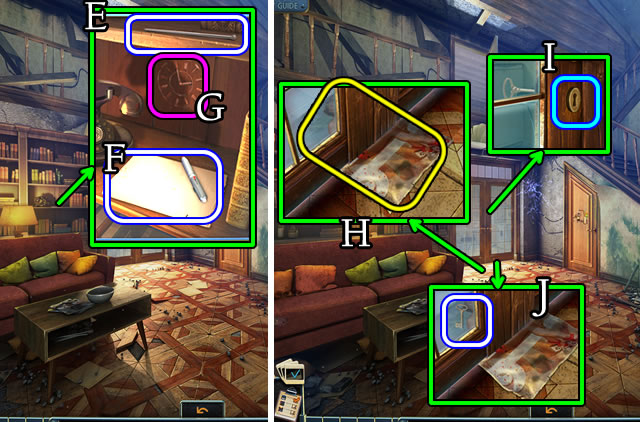
- Take the PIN (E) and PEN AND PAPER (F). Note (G).
- Place the POSTER (H).
- Use the PIN (I); select (J); take the KEY.
- Use the KEY; walk left.
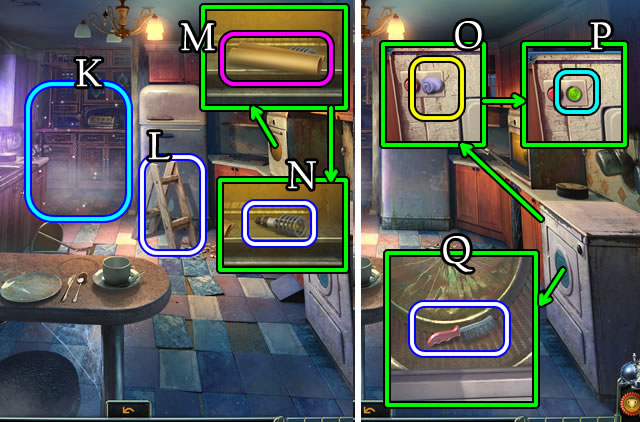
- Play the HOP (K) to receive a PITCHER.
- Grab the STEPLADDER (L).
- Open; take the note (M); take the BULB (N).
- Use the JACKKNIFE (O); press (P); take the METAL BRUSH (Q).
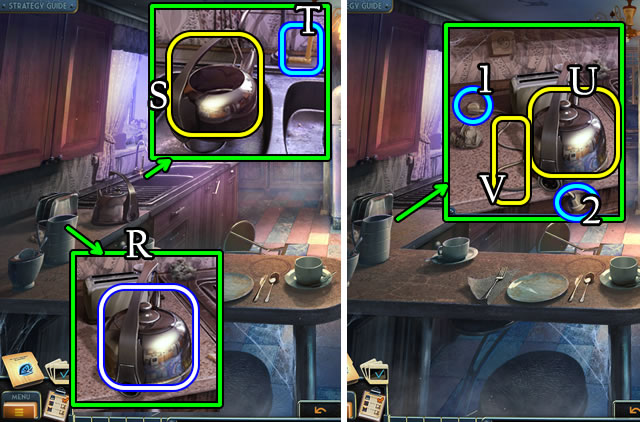
- Take the EMPTY KETTLE (R).
- Place the EMPTY KETTLE (S); pull (T); get a KETTLE OF WATER.
- Place the KETTLE OF WATER (U) and ELECTRIC CORD (V). Select (1-2); take the KETTLE OF HOT WATER.
- Open; use the KETTLE OF HOT WATER; take the COIN (W).
- Return to the Rooftop.
- Use the METAL BRUSH (X). Place the PEN AND PAPER for a NOTE WITH DIAGRAM.
- Walk forward.
- Place the BULB (Y). Take the SWITCH (Z).
- Return to the Hall; speak with Dr. Bishop (A); receive ENVELOPE 3/5.
- Return to the house Hall.
- Select (B); place the NOTE WITH DIAGRAM and SWITCH (C).
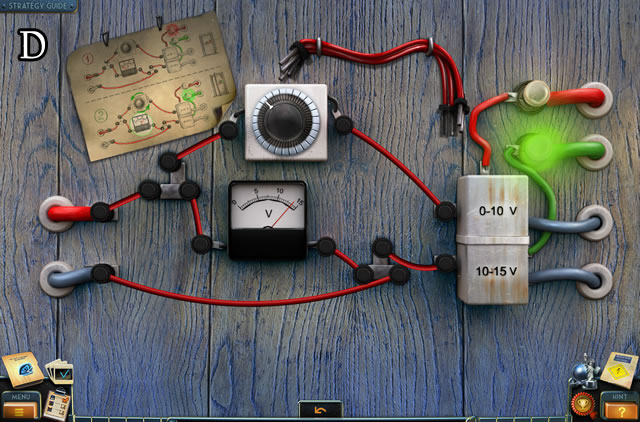
- Solution (D).
- Walk right.
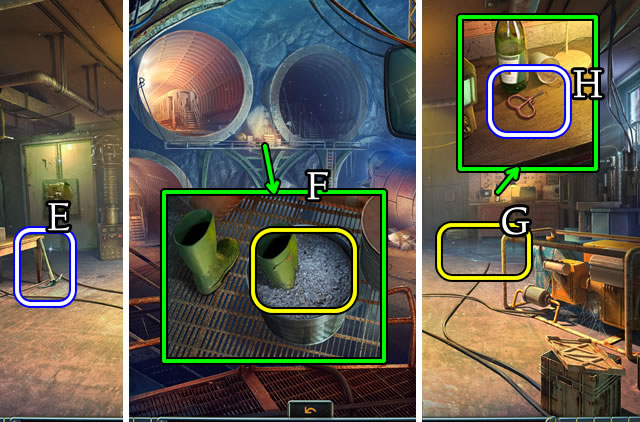
- Take the PICKAXE (E).
- Walk down 3x.
- Use the PICKAXE (F); take the RUBBER BOOTS.
- Return to the Cellar.
- Place the RUBBER BOOTS (G); take the CORKSCREW (H).
- Return to the Wine Cellar.
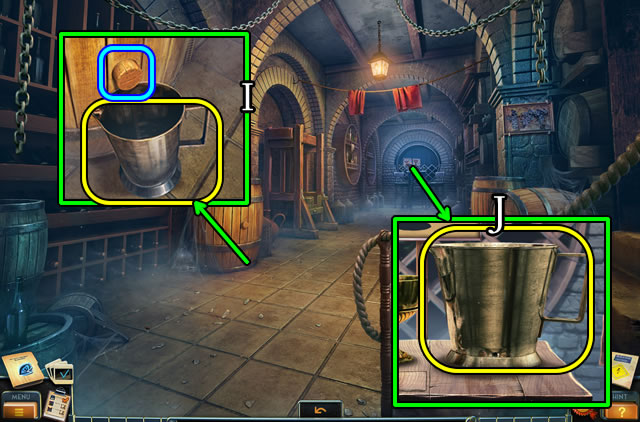
- Place the PITCHER; use the CORKSCREW (I). Take the PITCHER OF WINE.
- Place the PITCHER OF WINE (J).
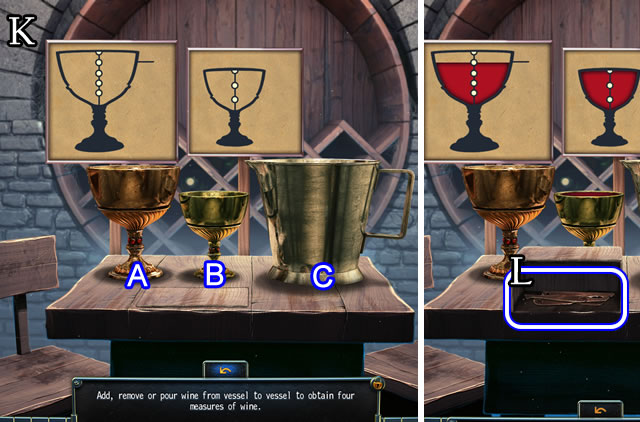
- Solution (K). C-A, A-B, B-C, A-B, C-A, A-B.
- Take the LOCKPICK SET (L).
- Return to Hugo's Room.
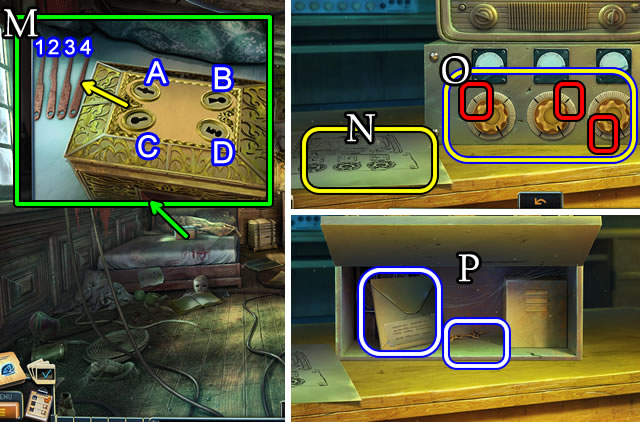
- Use the LOCKPICK SET (M).
- Solution. 1-C, 2-A, 3-D, 4-B.
- Take the NOTE.
- Walk down, then right.
- Place the NOTE (N).
- Solution (O).
- Take the ENVELOPE 4/5 and HAND OF A CLOCK (P).
- Walk down.
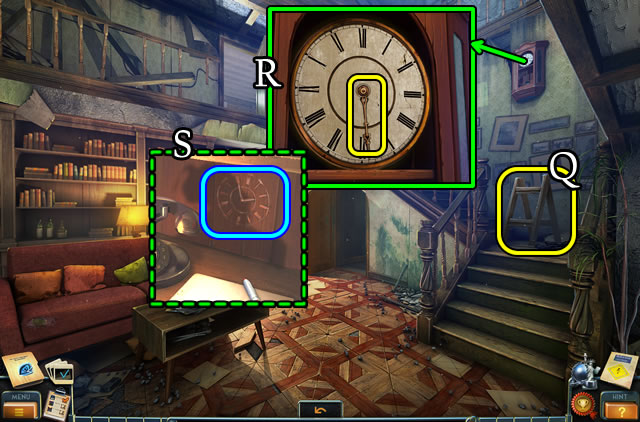
- Place the STEPLADDER (Q). Place the HAND OF A CLOCK (R).
- Solution (S).
- Take ENVELOPE 5/5.
- Walk up the stairs.
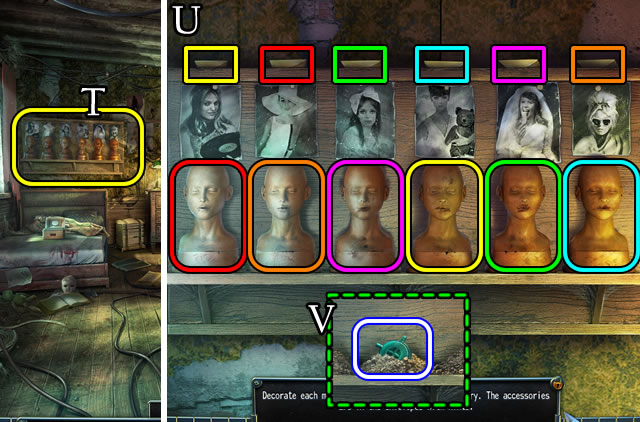
- Place ENVELOPE 5/5 (T).
- Solution (U).
- Take the TUNING MECHANISM (V).
- Walk down and right.
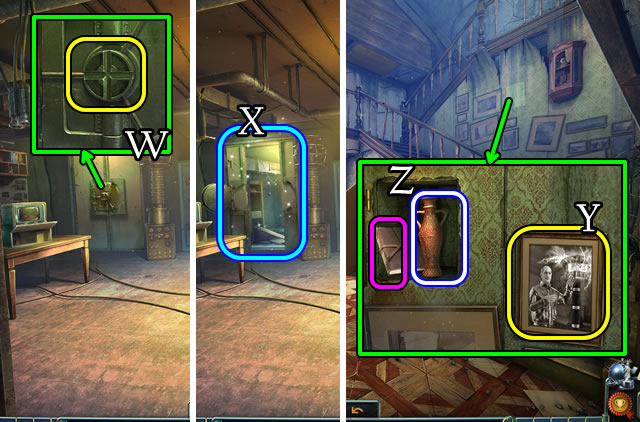
- Place the TUNING MECHANISM (W) to play a HOP (X). Receive SAMUEL'S PHOTO.
- Walk down.
- Place SAMUEL'S PHOTO (Y); take the BOTTLE and folder (Z).
- Return to the Wine Cellar.
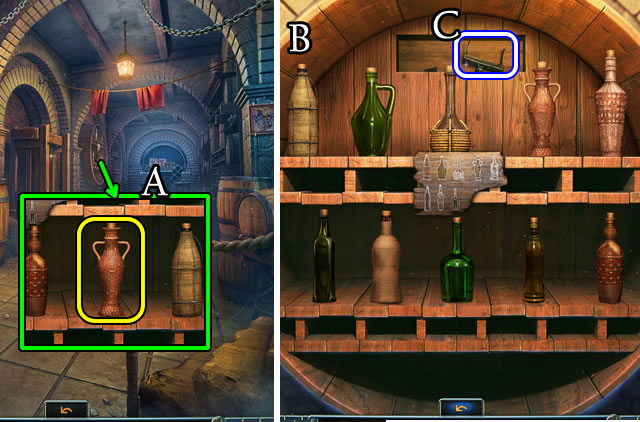
- Place the BOTTLE (A).
- Solution (B).
- Take the note and HAND SWITCH (C).
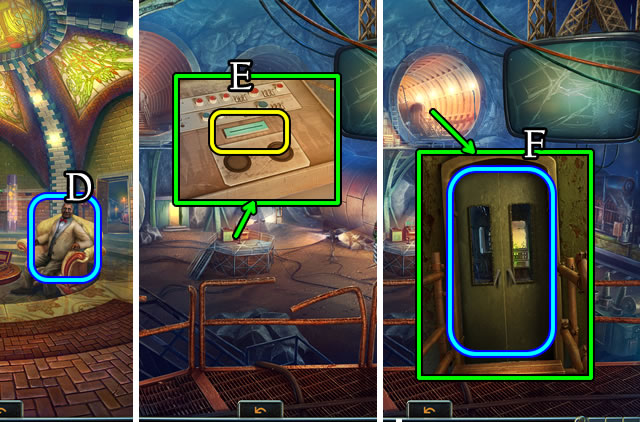
- Return to the Hall; speak with Dr. Bishop (D); receive a PUNCH CARD.
- Enter the Intersection.
- Use the PUNCH CARD (E).
- Open (F) and flip the controls.
Chapter 5: The Lab
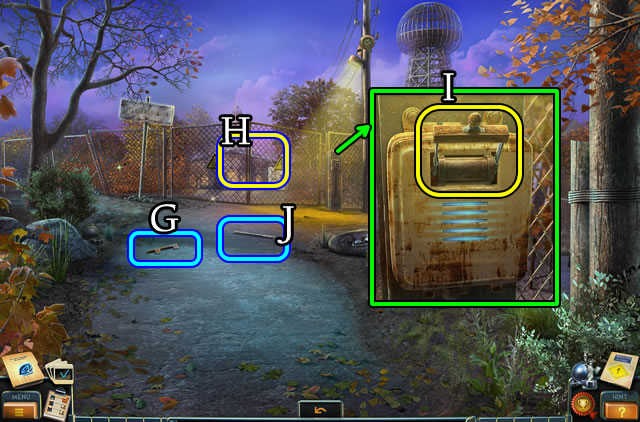
- Select (G) and place (H) the metal rod.
- Place, then select the HAND SWITCH (I).
- Select (J) and place (H) the metal rod.
- Open the gates and walk forward.
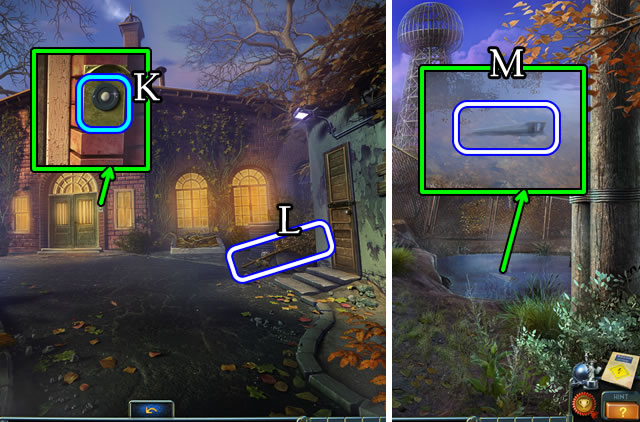
- Ring the doorbell (K); take the FISHING ROD (L).
- Walk down.
- Use the FISHING ROD to receive a SAW (M).
- Walk forward.
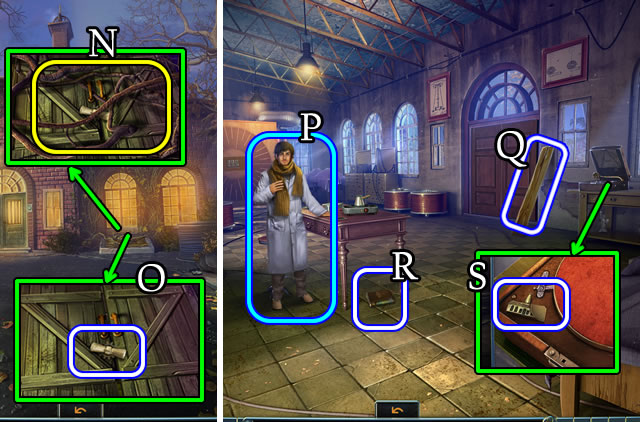
- Use the SAW (N); take the HANDLE (O); open the doors; speak with William (P).
- Take the LONG PLANK (Q), BOOK (R) and FIGURINE PART (S).
- Return to Hugo's Room.
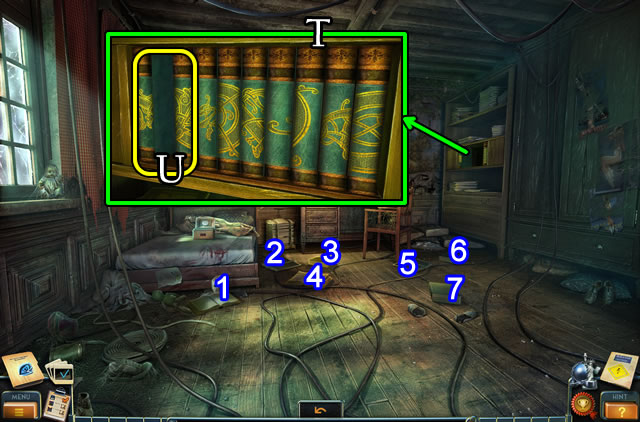
- Select (1-7) and place (T) the books. Add the BOOK (U).
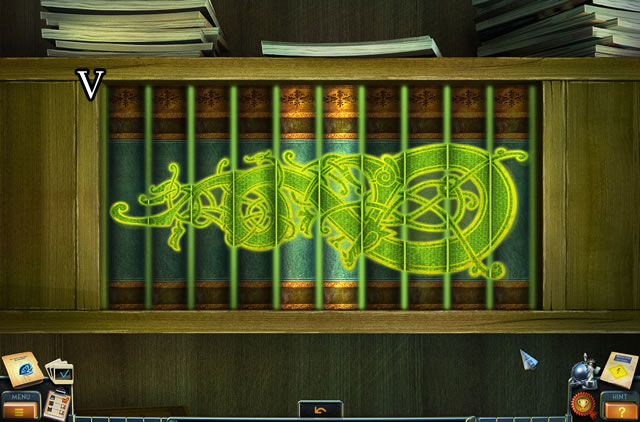
- Solution (V).
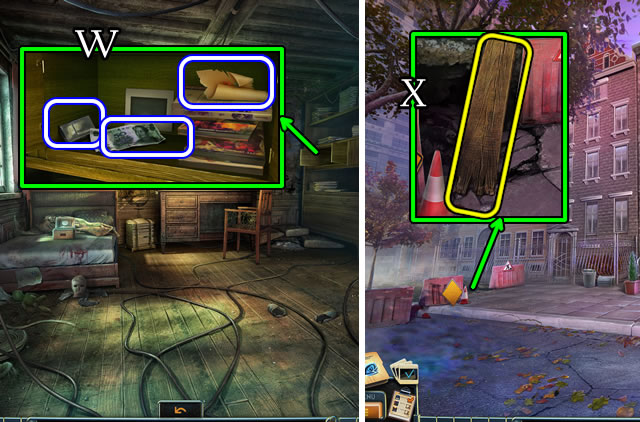
- Take the LIGHTER, BANKNOTES and NOTE (W).
- Walk down 2x, place the LONG PLANK (X).
- Walk left, then right.
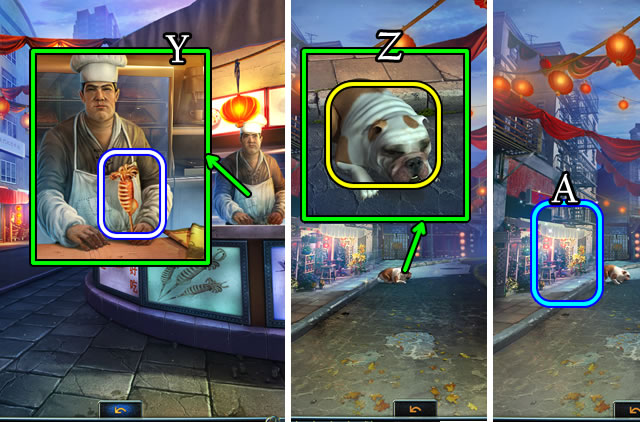
- Give the BANKNOTES; take the SQUID KEBAB (Y).
- Walk down.
- Give the SQUID KEBAB (Z) to play the HOP (A). Receive a FEVER PILL.
- Return to the Laboratory.
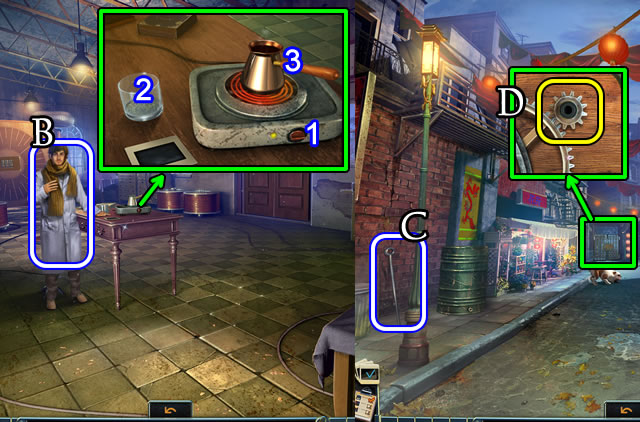
- Turn (1); place the FEVER PILL (2); select (3); take the FEVER MEDICINE.
- Give the FEVER MEDICINE (B); receive a BELL.
- Return to Chinatown.
- Grab the GAFFING HOOK (C).
- Place the HANDLE (D).
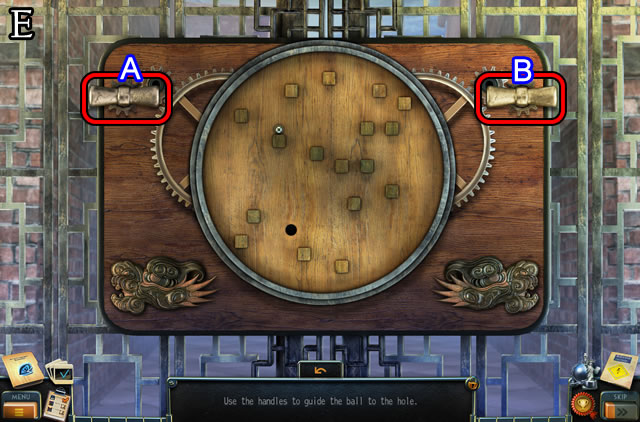
- Solution (E). A-B-Ax2-Bx3-Ax2-Bx4-Ax3-Bx3.
- Walk left; speak with the boy.
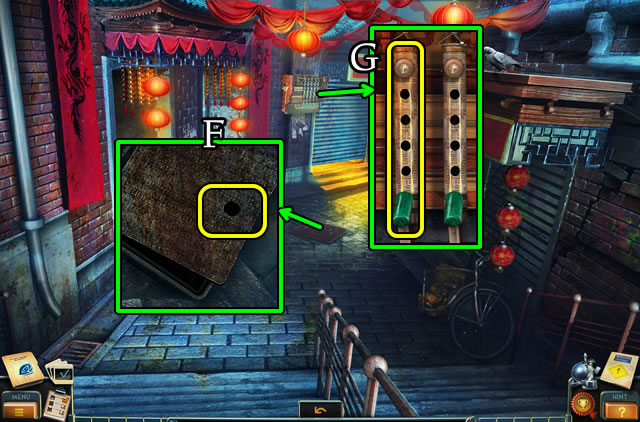
- Use the GAFFING HOOK (F); take the HOSE.
- Place the BELL (G).
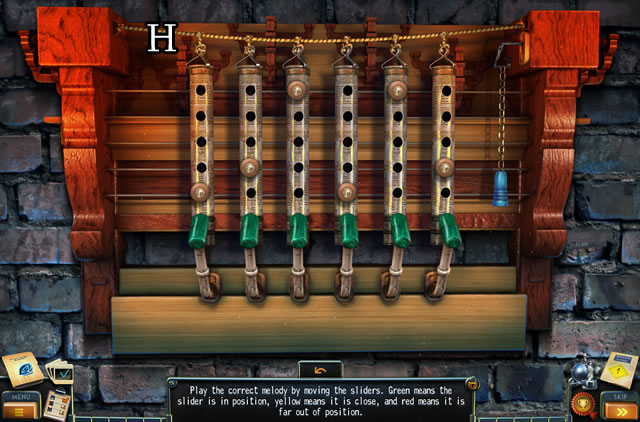
- Solution (H).
- Walk left; speak to the man.
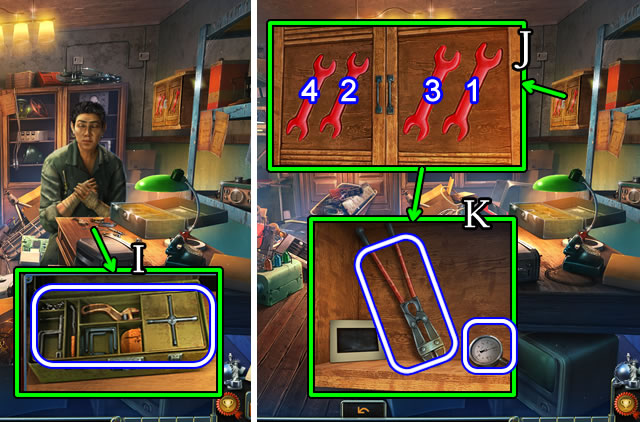
- Place the tools; receive a WRENCH; take the TOOL BOX (I).
- Place the WRENCH (J).
- Solution. 1-2-3-4.
- Take the REINFORCED CLIPPERS and DEVICE PART (K).
- Walk down 2x, then right.
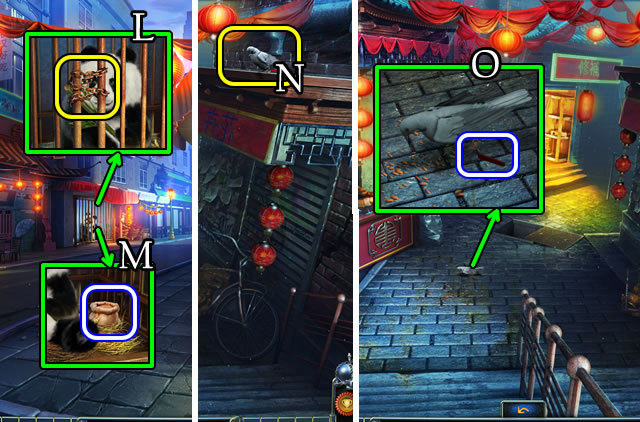
- Use the REINFORCED CLIPPERS (L); take the GRAIN (M).
- Walk down, then left.
- Place the GRAIN (N); take the FAUCET HANDLE (O).
- Walk down.
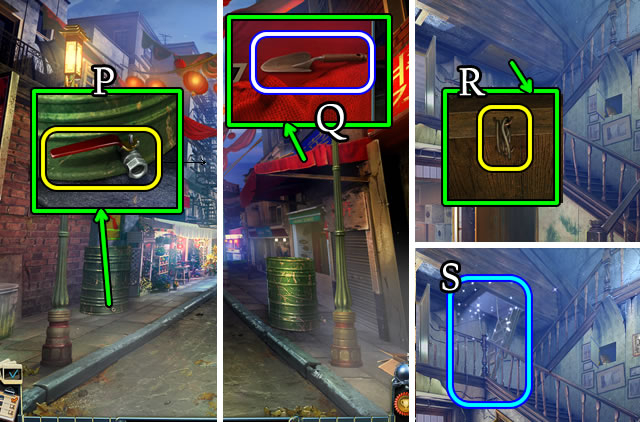
- Place then select the FAUCET HANDLE (P); select the barrel.
- Take the TROWEL (Q).
- Walk down, then right.
- Use the REINFORCED CLIPPERS (R); open to play a HOP (S); receive a WINE PRESS HANDLE.
- Return to the Wine Cellar.
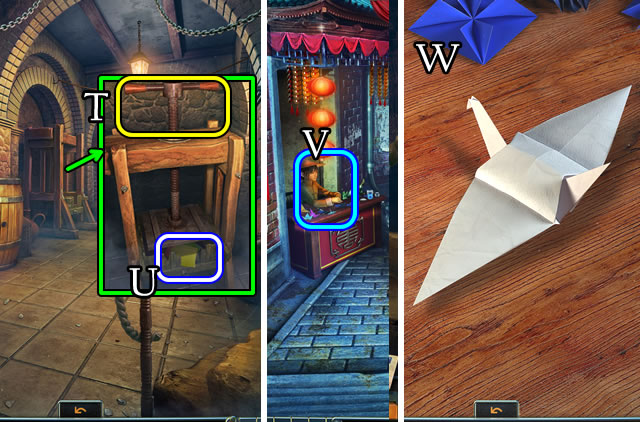
- Place and select the WINE PRESS HANDLE (T); take the COLORED PAPER (U).
- Return to Near the Workshop.
- Give the COLORED PAPER (V).
- Solution (W).
- Receive a WHEEL.
- Walk left.
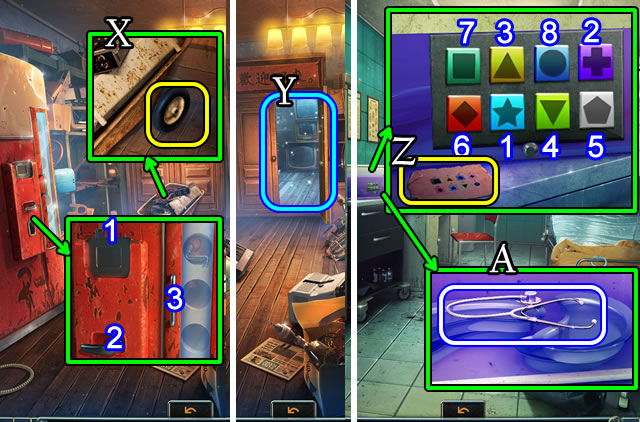
- Place the COIN (1), turn (2), open (3); take the GRAMOPHONE HANDLE.
- Place the WHEEL (X); select the wheelbarrow for a HOP (Y). Receive a FIGURINE PART.
- Return to the Med Station.
- Place the NOTE (Z).
- Solution. (1-8).
- Take the STETHOSCOPE (A).
- Return to the Cellar.
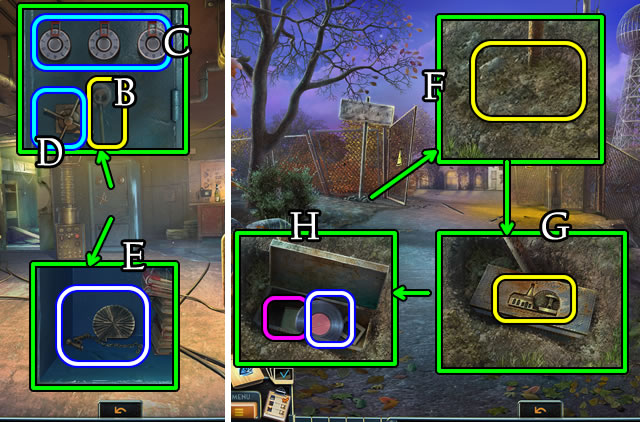
- Place the STETHOSCOPE (B).
- Solution (C). 9-5-3.
- Open (D); take FIGURINE PART (E).
- Return to the Road to the Lab.
- Combine the FIGURINE PARTS for a FIGURINE (Inventory).
- Use the TROWEL (F); place the FIGURINE (G); open; take the VINYL RECORD and note (H).
- Walk forward 2x.
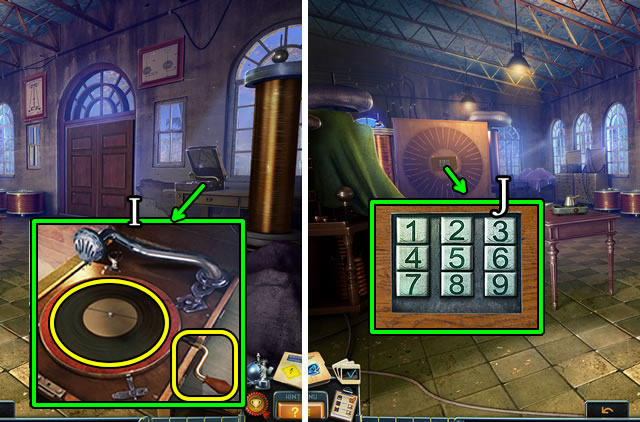
- Place the VINYL RECORD and GRAMOPHONE HANDLE (I). Select the handle and place the needle.
- Solution (J). 5-2-7-1-3.
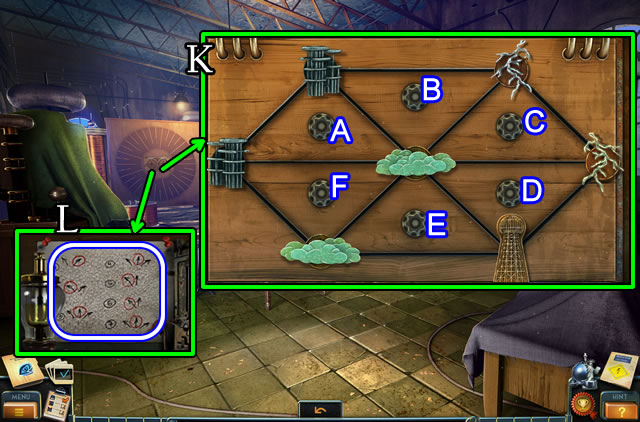
- Solution (K). A-Ex2-Cx2-F.
- Take the MAP (L). Speak to William.
- Walk down and left.
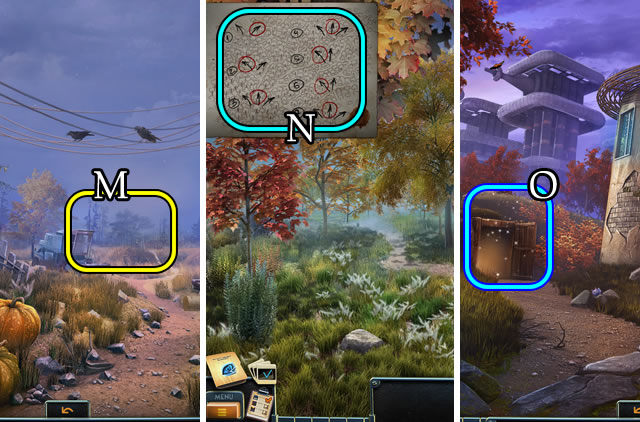
- Place the MAP (M).
- Solution (N). R-L-F-F-L-L-F.
- Play the HOP (O); receive a JERRY CAN.
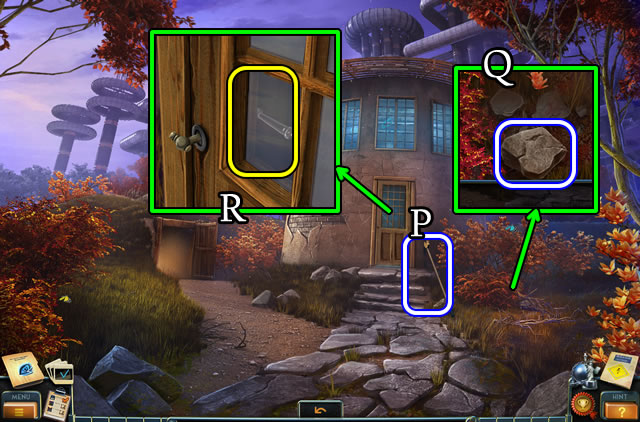
- Grab the FRUIT PICKER (P).
- Uncover and take the STONE (Q).
- Use the STONE (R). Select the lever and walk forward.
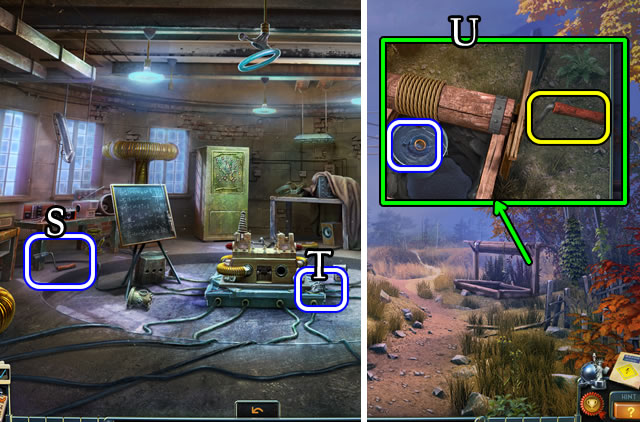
- Take the CRANK HANDLE (S) and METAL NUGGET (T).
- Walk down 2x.
- Place and select the CRANK HANDLE. Take the INSULATING TAPE (U).
- Walk down and forward. Open the doors and walk right.
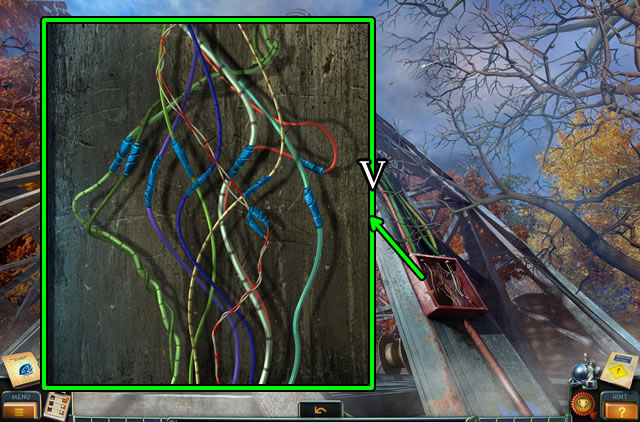
- Use the INSULATING TAPE.
- Solution (V).
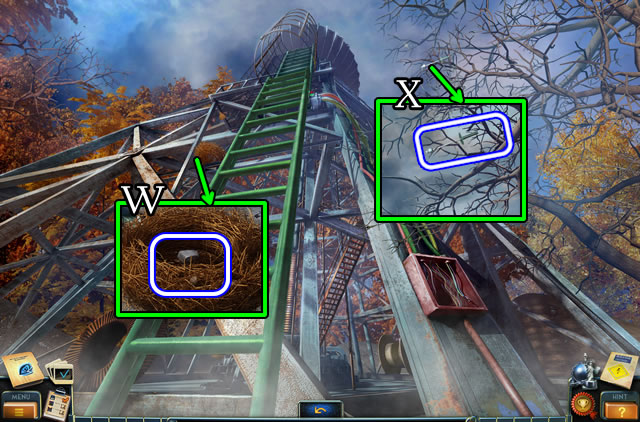
- Take the CHALK (W).
- Use the FRUIT PICKER to take the ELECTRODE (X).
- Climb the ladder.
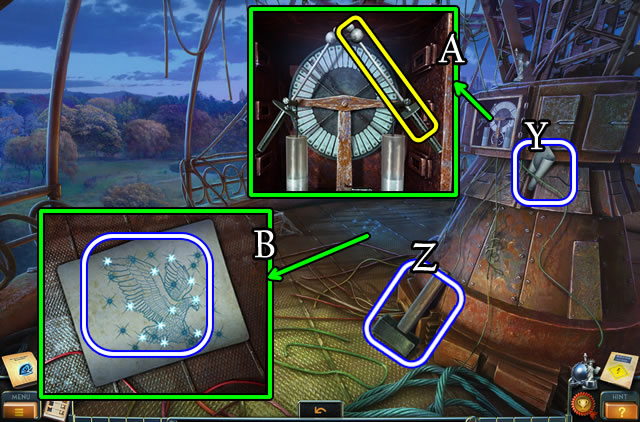
- Grab the TEMPLATE (Y) and SLEDGEHAMMER (Z).
- Place the ELECTRODE (A).
- Place the TEMPLATE and use the CHALK. Take the DIAGRAM (B).
- Walk down 3x.
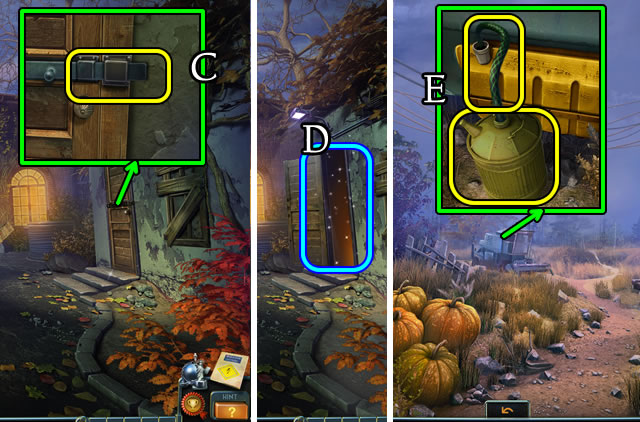
- Use the SLEDGEHAMMER (C) to play the HOP (D). Receive a ROPE.
- Walk left.
- Remove the cap; place the JERRY CAN and HOSE (E). Receive a FULL JERRY CAN.
- Walk forward 2x and speak to William.
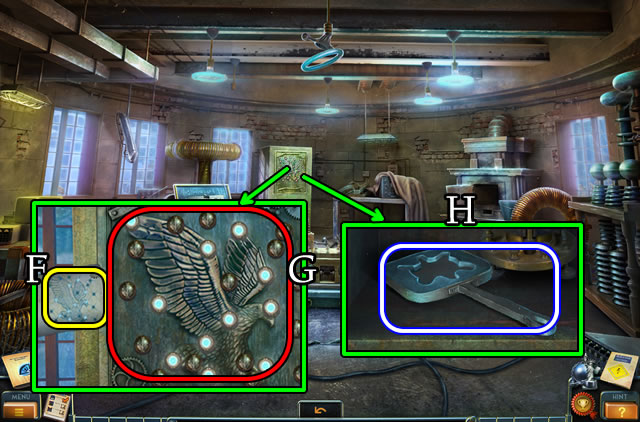
- Place the DIAGRAM (F).
- Solution (G).
- Take the MOLDING FORM (H).
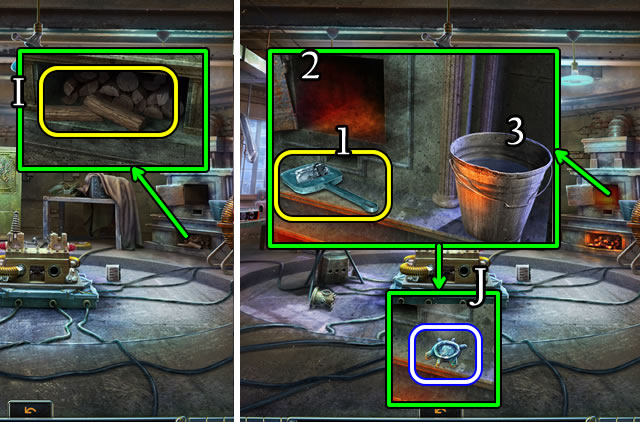
- Use the FULL JERRY CAN and the LIGHTER (I).
- Place the MOLDING FORM and METAL NUGGET (1). Place in (2), then (3). Take the DEVICE PART (J).
- Return to the Tower.
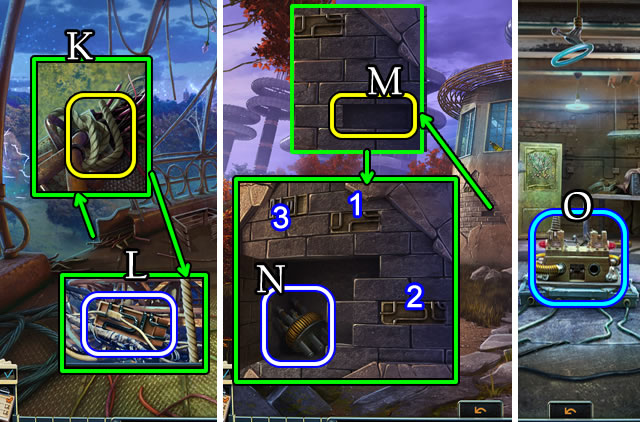
- Place the ROPE (K); take the STONE WITH DRAWING (L).
- Return to the Abandoned Substation Yard.
- Place the STONE WITH DRAWING (M).
- Solution. 2-3-1.
- Take the DEVICE PART (N).
- Walk forward.
- Place the TOOL BOX (O).
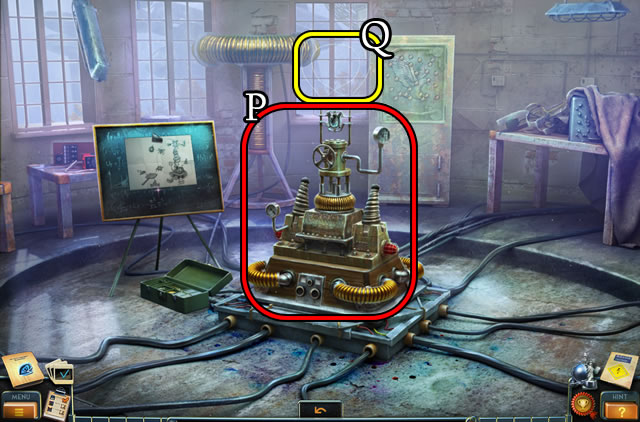
- Combine the pieces and the DEVICE PARTS according to the scheme (P).
- Place the MEDALLION (Q).
- Congratulations. You have completed New York Mysteries: High Voltage.
Created at: 2015-07-05

