

Walkthrough Menu
- General Tips
- Chapter 1: Windton Street
- Chapter 2: Harrowstead Road
- Chapter 3: Town Square
- Chapter 4: Museum Outside
- Chapter 5: Suburban Street
General Tips
- This is the official guide for Shadowplay: Harrowstead Mystery.
- This guide will not mention each time you have to zoom into a location; the screenshots will show each zoom scene.
- Hidden-object puzzles are referred to as HOPs. This guide will not show HOP solutions. It will identify the location of the HOP and the inventory item acquired.
- This guide will show solutions for non-random puzzles. Please read the in-game instructions for each puzzle.
- In this game, you will sometimes have to select the new scene to trigger dialog, cut-scenes, or tasks prior to interacting with the scene.
Chapter 1: Windton Street
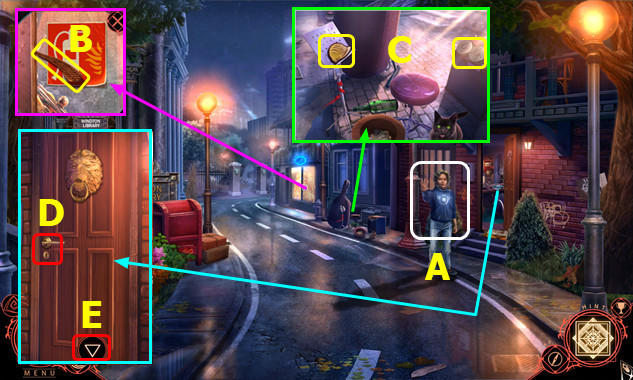
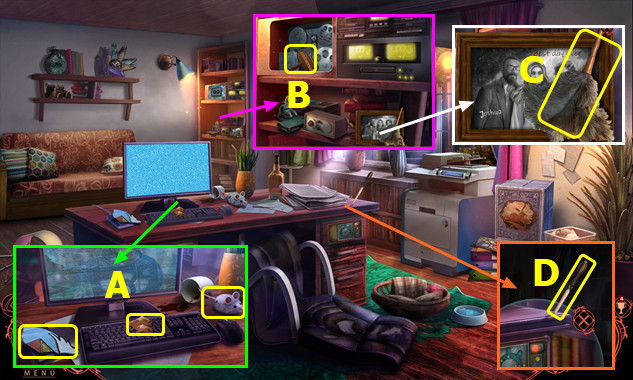
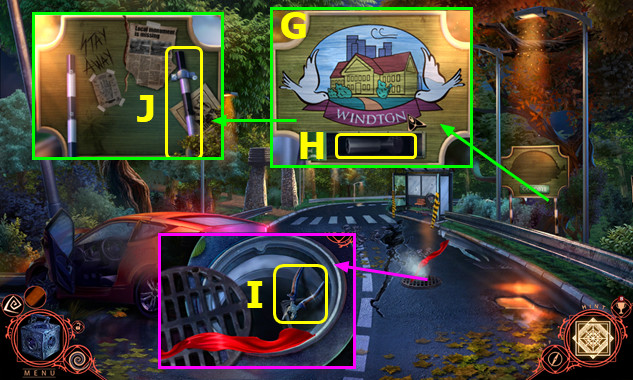
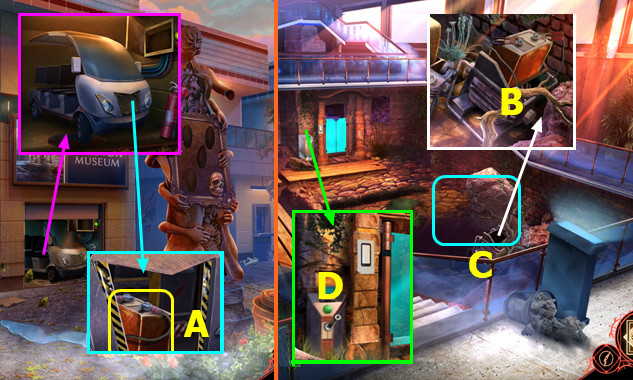
- Talk (A).
- Remove sign; take ROAD IMAGE (B).
- Remove items; take HELMET EMBLEM and TAPE EMBLEM (C).
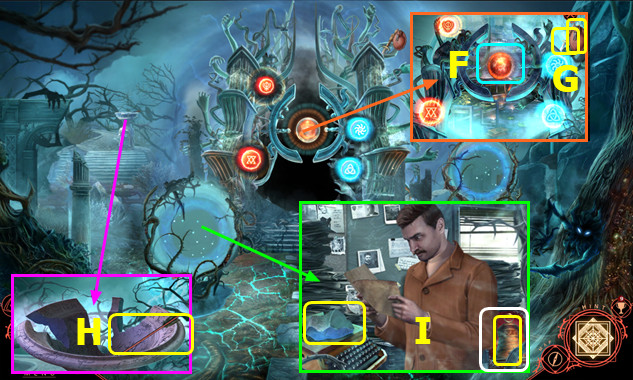
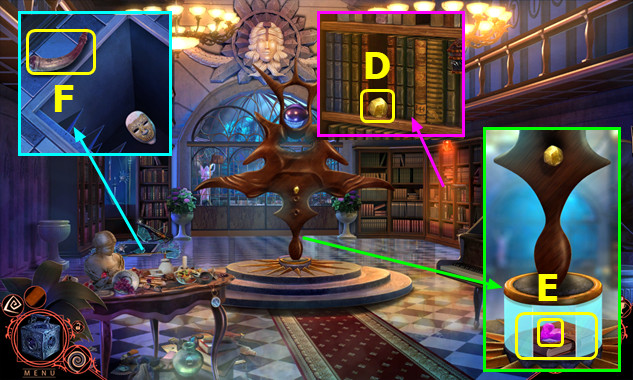
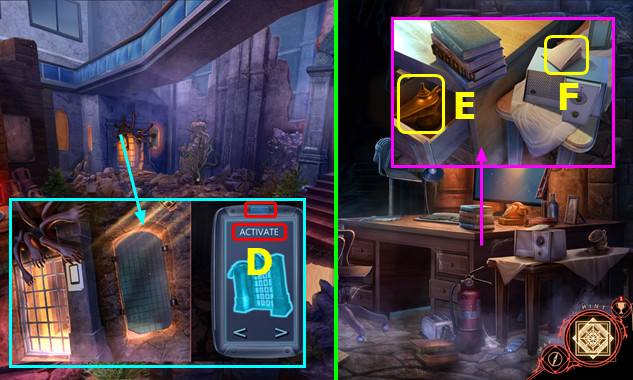
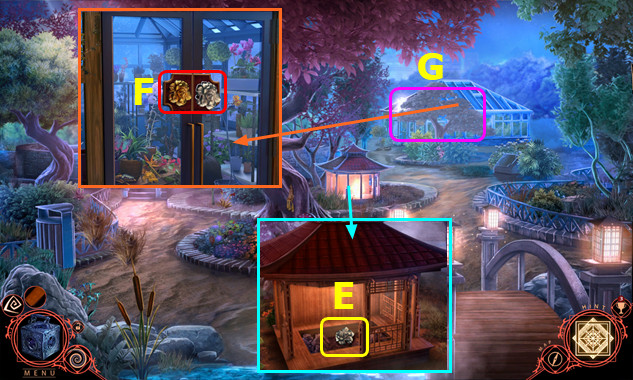
- Select (D); pan down (E).
- Unroll paper and take UMBRELLA (F); turn over mat; take SPARE KEY (G).
- Use SPARE KEY; select handle (H).
- Open lid; use UMBRELLA; take TRIANGLE INSET (I).
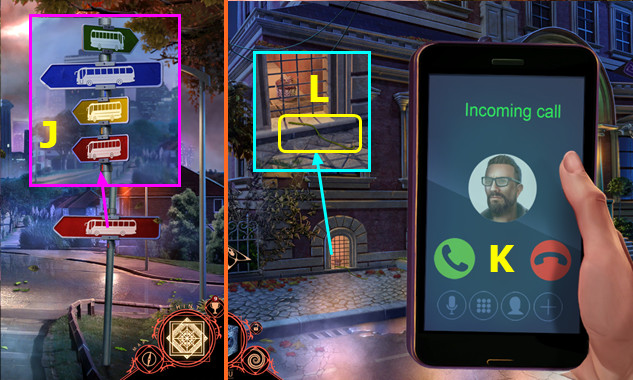
- Talk (J).
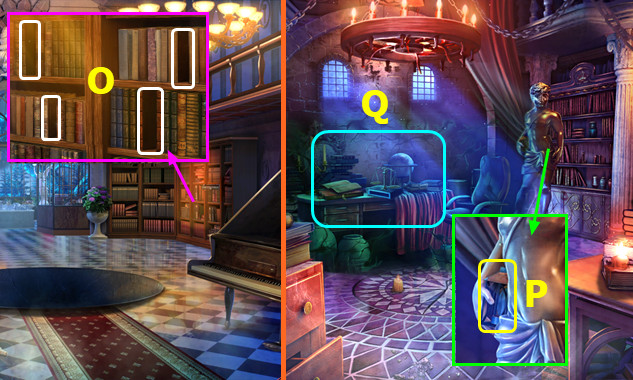
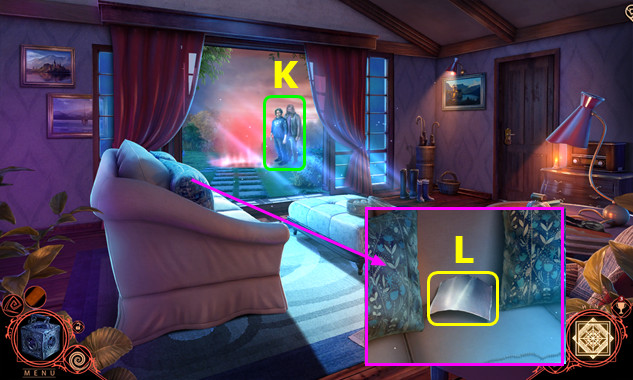
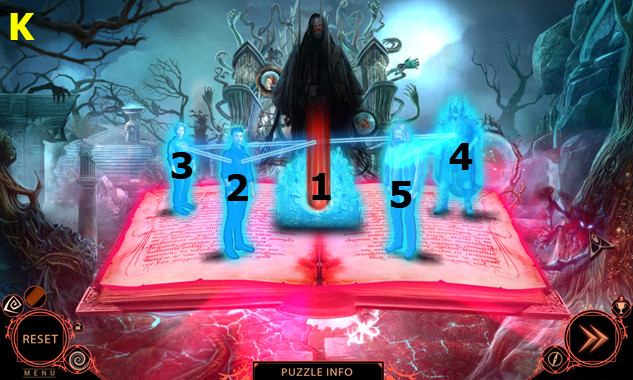
- HELMET EMBLEM on TRIANGLE INSET; select 1-4 (K); take FIREMAN EMBLEM.
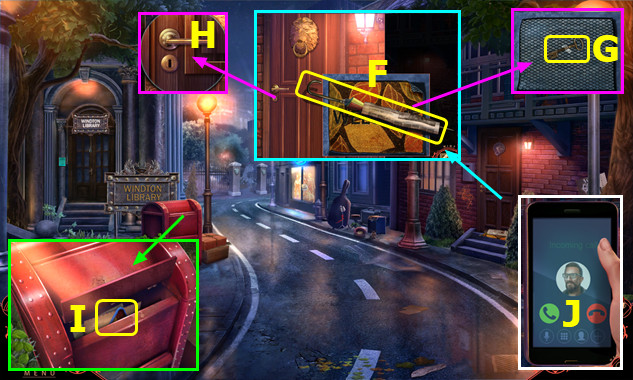
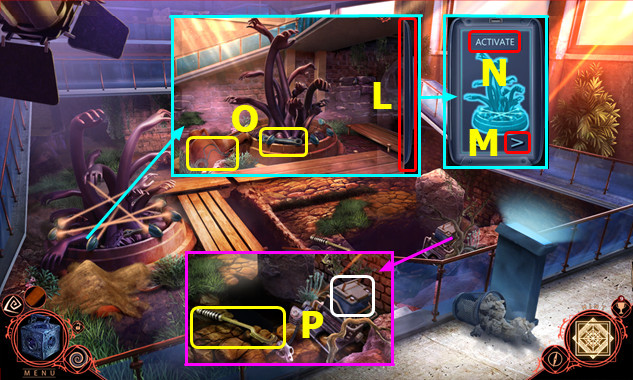
- Select; place FIREMAN EMBLEM; take SAFETY HAMMER (L).
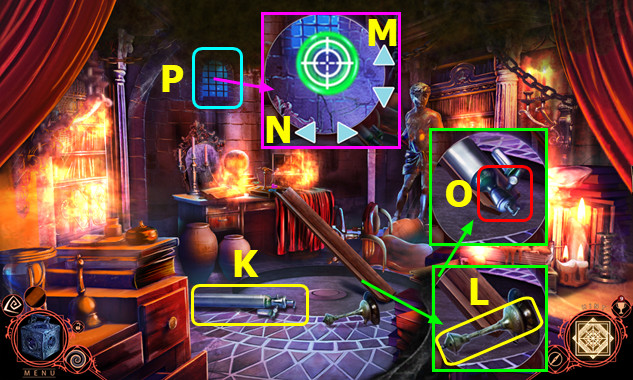
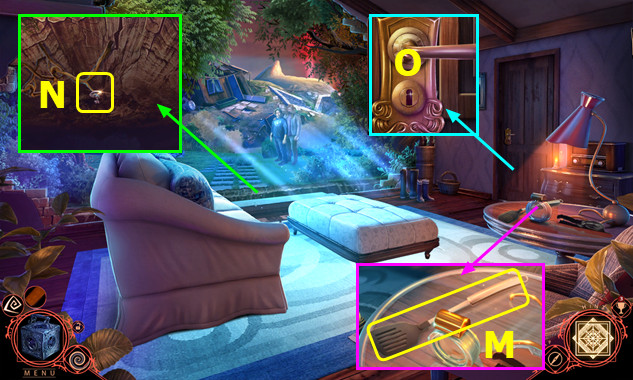
- Remove sign; use SAFETY HAMMER (M).
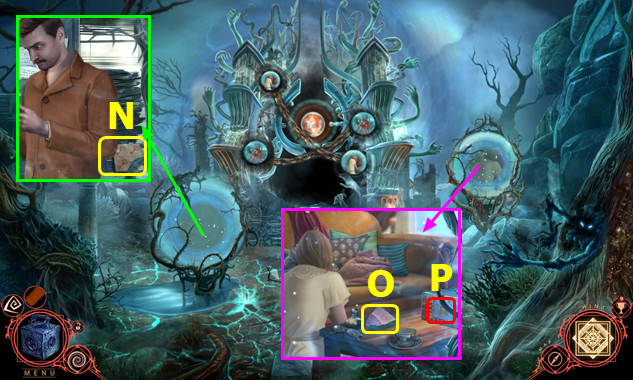
- Play HOP; earn FIRE EXTINGUISHER (N).
- Use FIRE EXTINGUISHER (O).
- Take CRUMPLED PAPER (P).
- Open CRUMPLED PAPER; take 1/2 ROTATING DIAL.
- Go right.
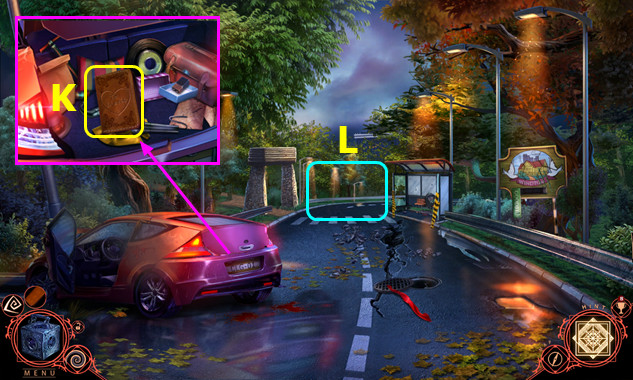
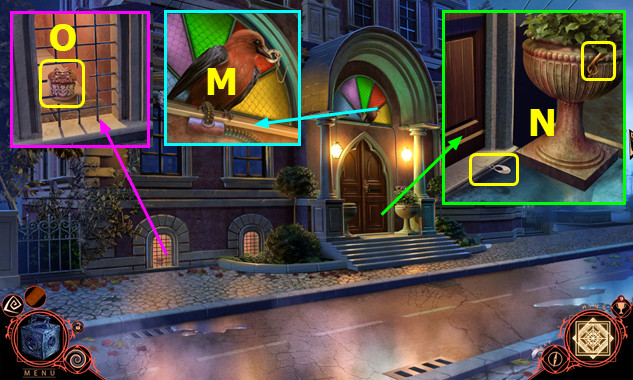
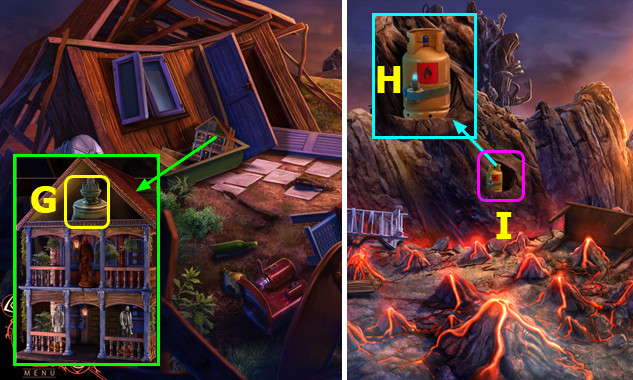
- Take 1/5 IMAGE FRAGMENTS, MOUNTAIN IMAGE, and WIND-UP MOUSE (A).
- Place TAPE EMBLEM; take HARROWSTEAD SIGN (B).
- Take DUSTER (C).
- Take LETTER OPENER (D).
- Take UV LAMP (E).
- Read comic; take BUTTON (F).
- Place and select BUTTON (G).
- Remove items; take HOUSE IMAGE (H).
- Walk down.
- Use LETTER OPENER; take WIND-UP KEY (I).
- WIND-UP KEY on WIND-UP MOUSE.
- Use TOY MOUSE; take 2/2 ROTATING DIALS (J).
- Go right.
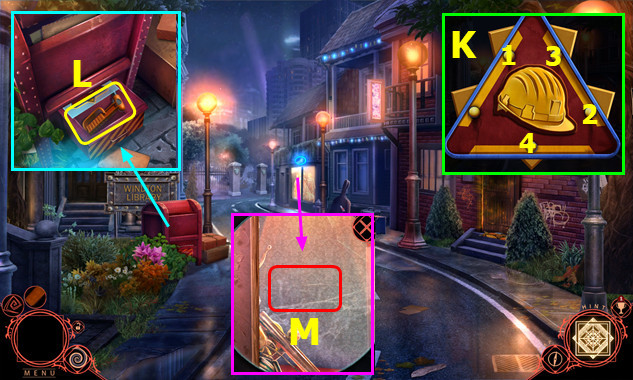
- Place ROTATING DIALS (K).
- Solution (L).
- Take WINDMILL IMAGE (M).
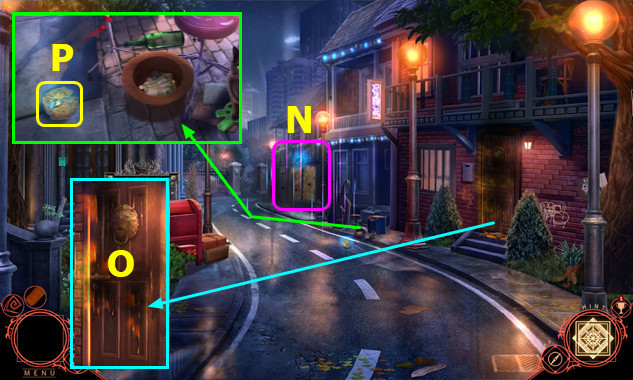
- Place MOUNTAIN IMAGE, HOUSE IMAGE, ROAD IMAGE, HARROWSTEAD SIGN, and WINDMILL IMAGE; remove items and take PICTURE STACK (N).
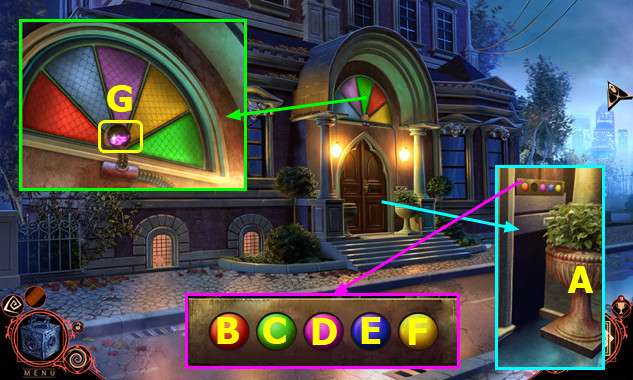
- Select (O).
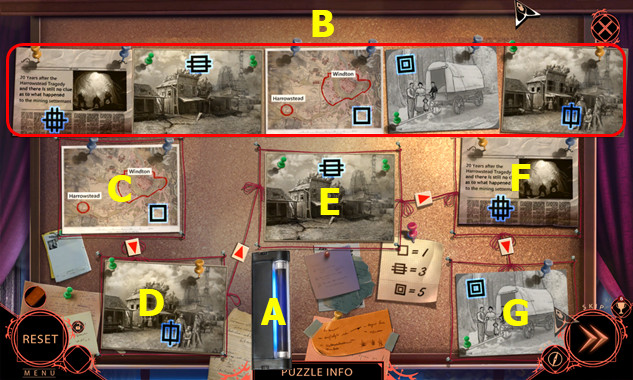
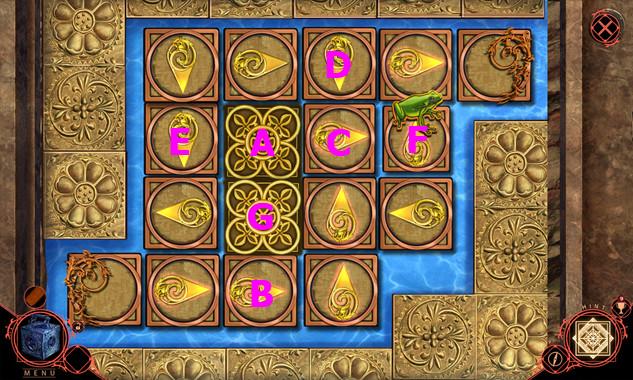
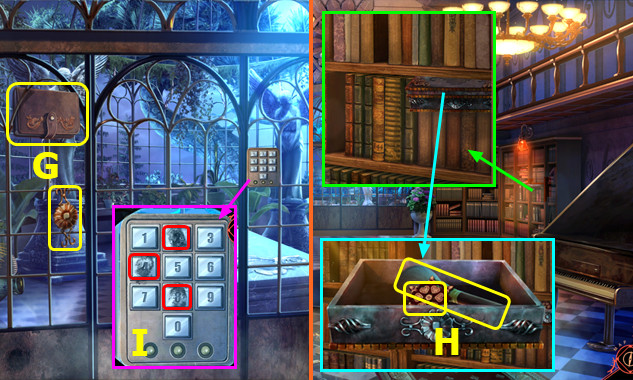
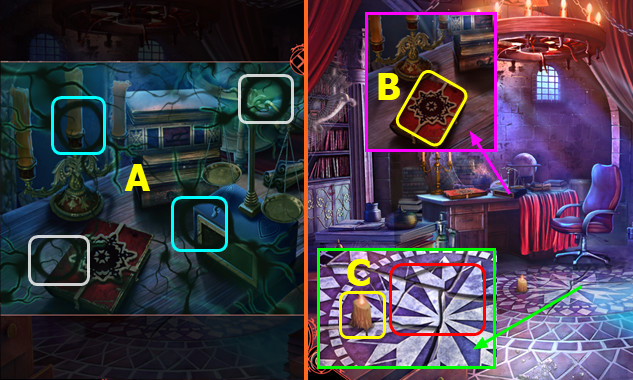
- Place PICTURE STACK and UV LAMP on board; drag (A) across (B).
- Place images as shown (C-D-E-F-G); take BROKEN KEY and LIBRARY CODE.
- Walk down.
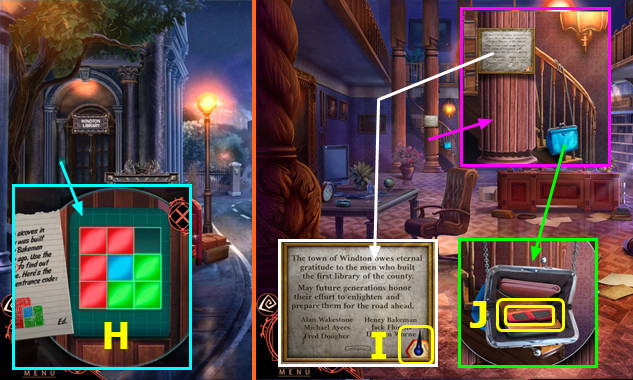
- Place LIBRARY CODE; solution (H).
- Go left.
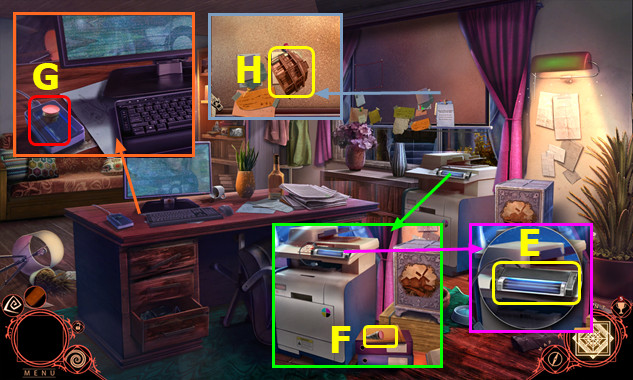
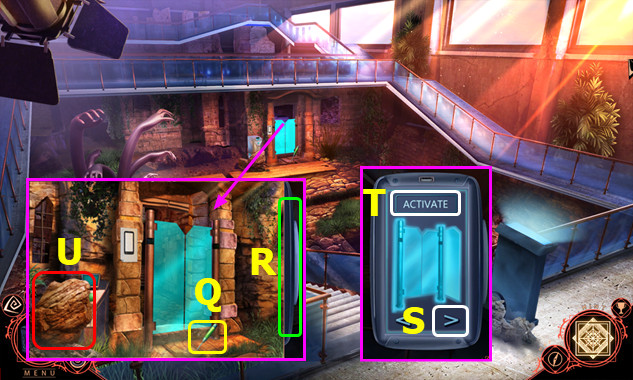
- Use DUSTER; take RED SWITCH (I).
- Open; take BOX CUTTER and EXTERNAL HARD DRIVE (J).

- Take PAPERWEIGHT (K).
- Move book; take ENVELOPE EMBLEM (L).
- Read items; take 2/5 IMAGE FRAGMENTS (M).
- Walk down.
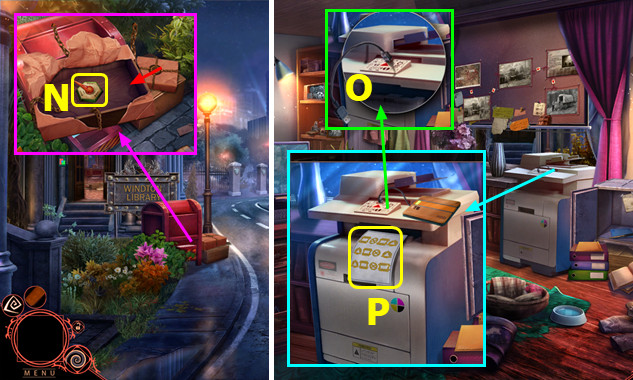
- Select and place ENVELOPE EMBLEM; remove items and take GREEN SWITCH (N).
- Go right.
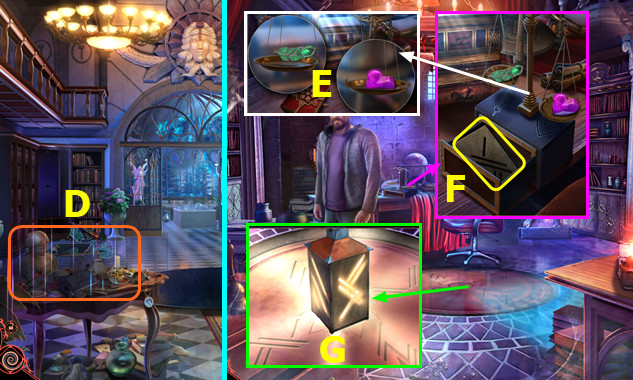
- Place EXTERNAL HARD DRIVE (O).
- Take DESK CODE (P).
- Walk down, left.
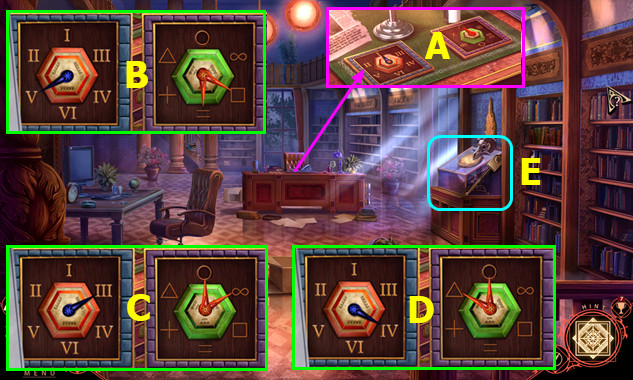
- Place RED SWITCH and GREEN SWITCH; select (A).
- Place DESK CODE; solution (B-C-D).
- Play HOP; earn KEY PART (E).
- KEY PART on BROKEN KEY; earn KEY.
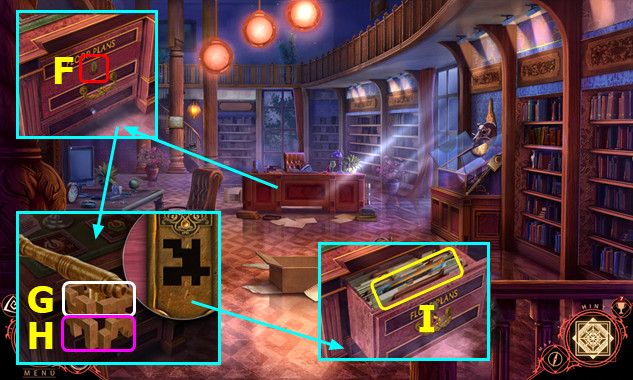
- Use KEY (F).
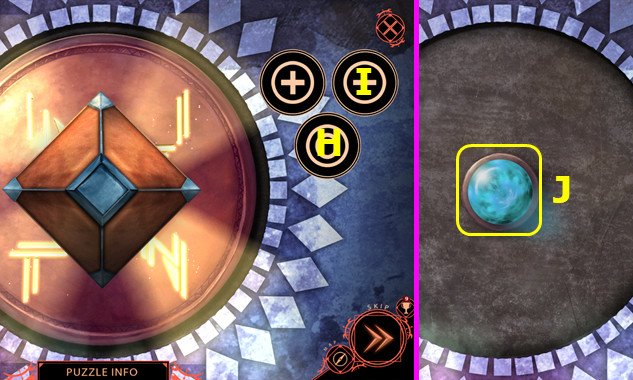
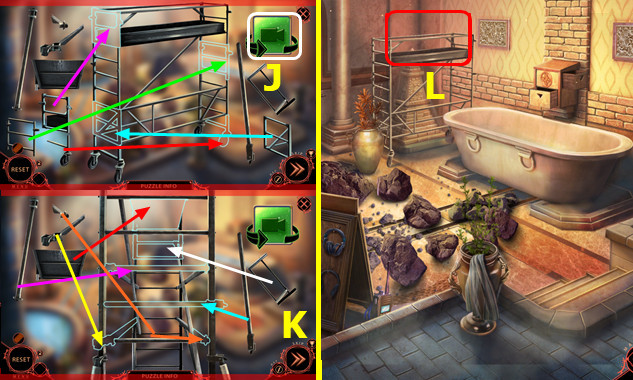
- Select Gx2-Hx2.
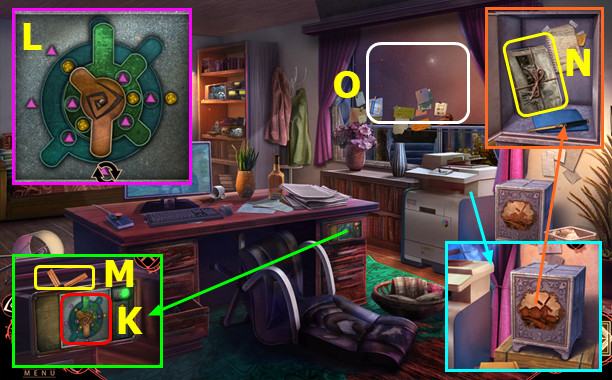
- Select 3x; earn FLOOR PLAN (I).
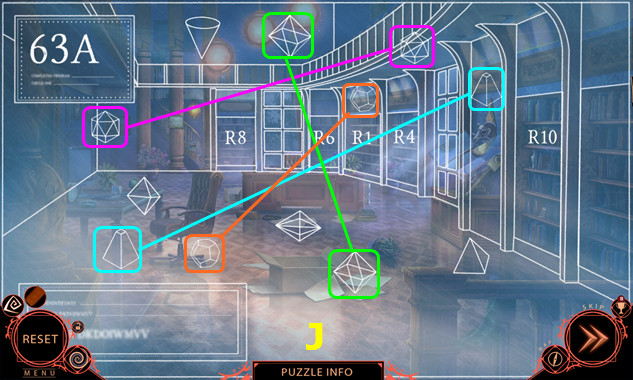
- Use FLOOR PLAN on scene.
- Solution (J).

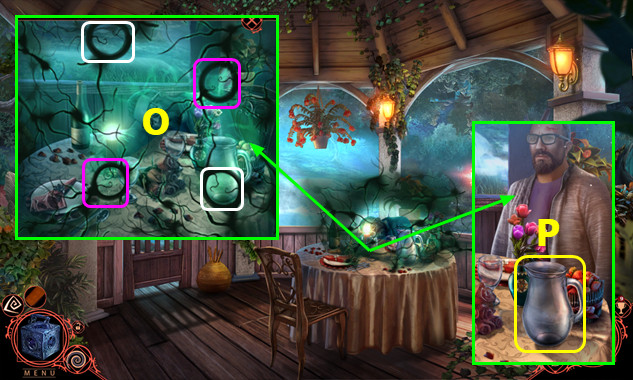
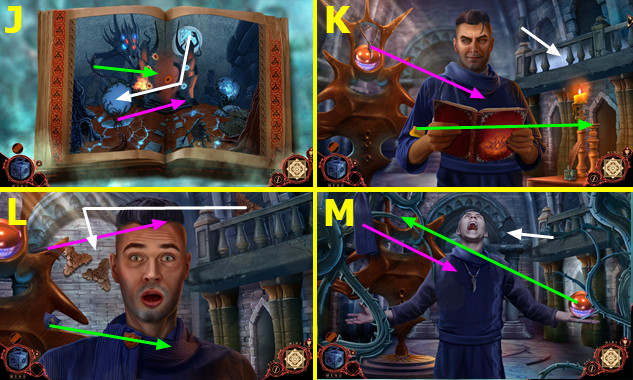
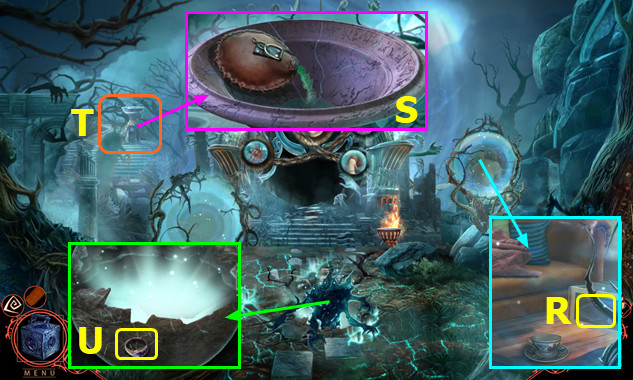
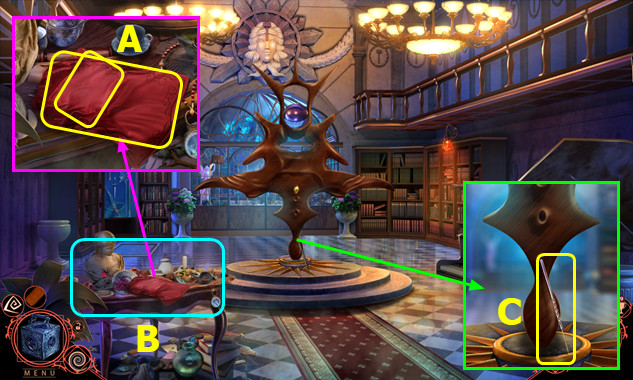
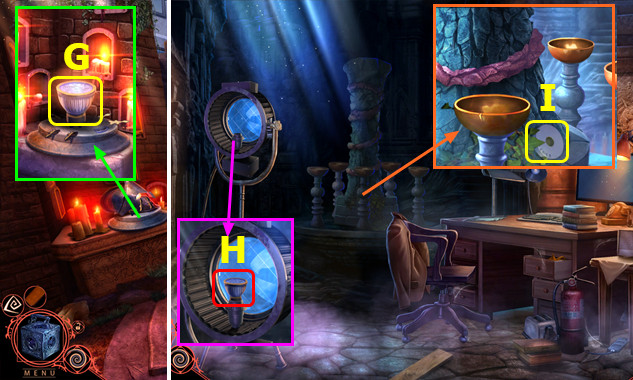
- Remove books 3x; use PAPERWEIGHT (K).
- Select diary; play HOP; take LAMP (L).
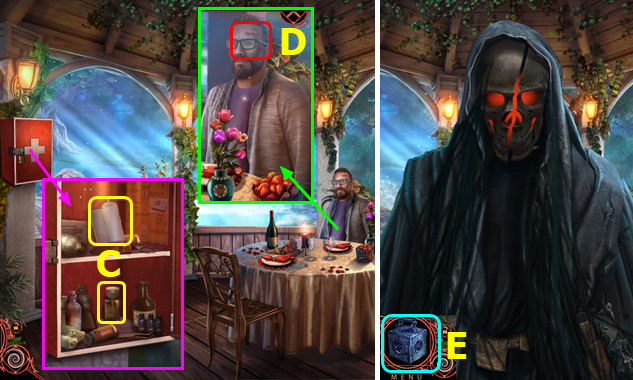
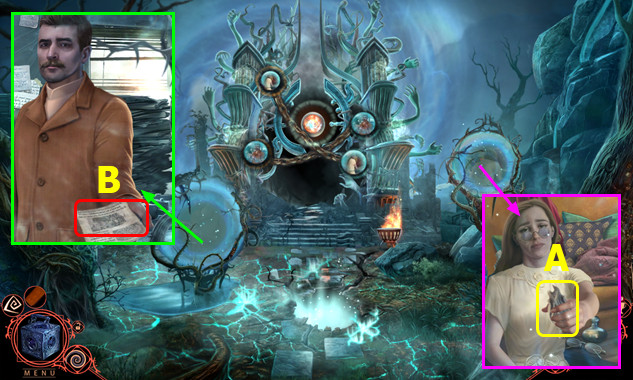
- The LAMP now is on the user interface (M).
- Talk (N).
- Walk down and forward.
Chapter 2: Harrowstead Road
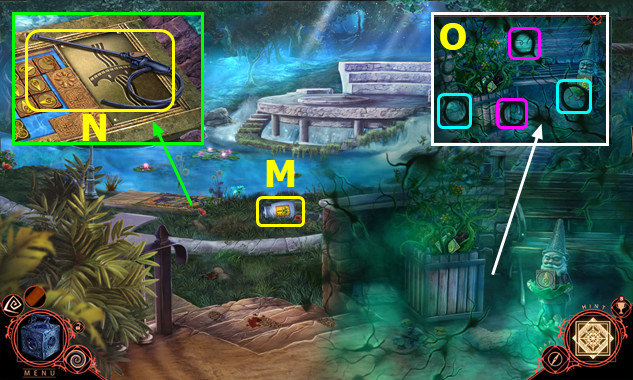
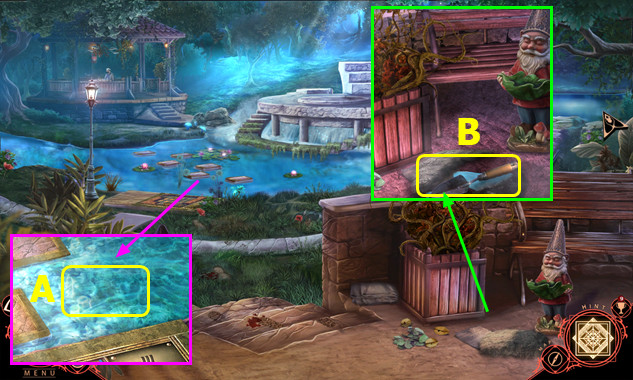
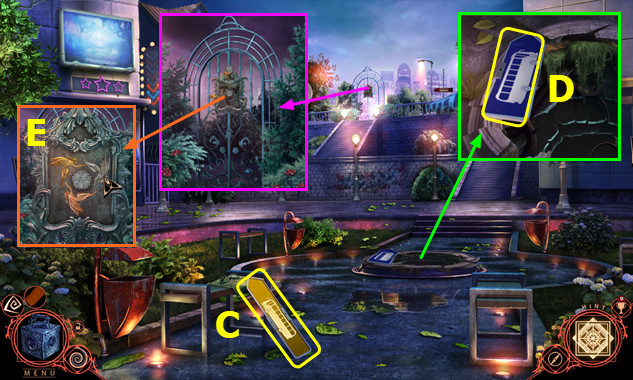
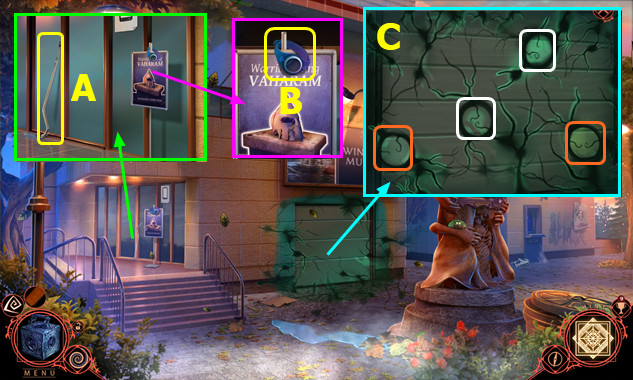
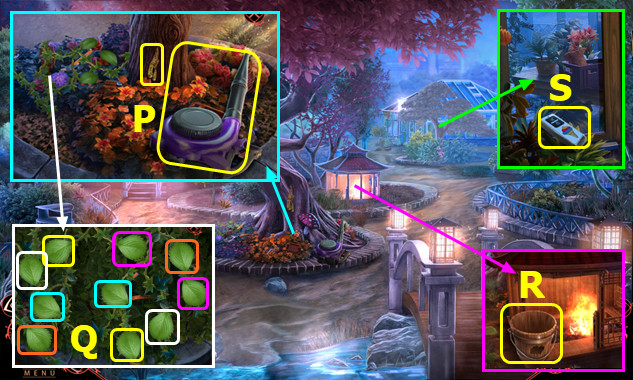
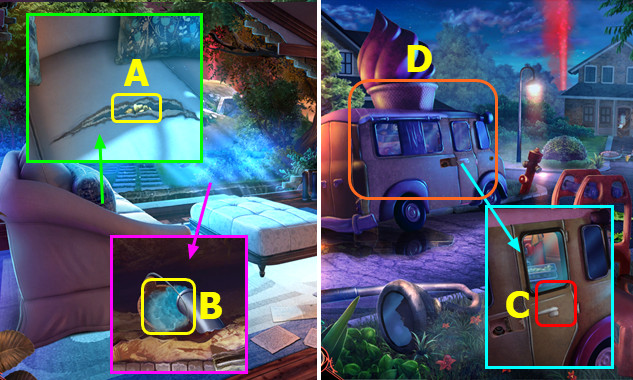
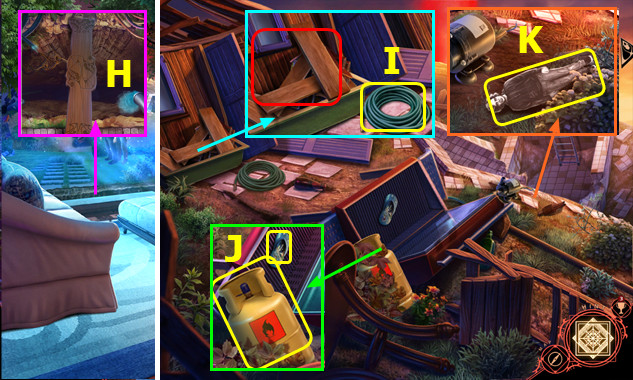
- Take 3/5 IMAGE FRAGMENTS and HERBICIDE HANDLE (A).
- Take 4/5 IMAGE FRAGMENTS (B).
- Select (C).
- Use LAMP; select pairs (D).
- Remove tape; take 1/3 BRIDGE TILE (E).
- Use BOX CUTTER; remove items; take 5/5 IMAGE FRAGMENT (F).
- Place IMAGE FRAGMENTS; solution (G); take MANHOLE TOOL (H).
- Use MANHOLE TOOL; take PLIERS (I).
- Use PLIERS; earn METAL POLE (J).
- Place/select METAL POLE; remove items; take JOSH'S NOTEBOOK (K).
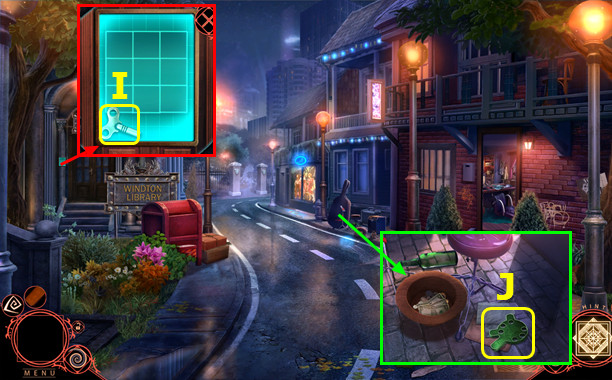
- Read JOSH'S NOTEBOOK; take TOWN MAP.
- Use TOWN MAP on scene; play HOP (L).
- Go forward.
- Take HERBICIDE CANISTER (M).
- Take HERBICIDE HOSE (N).
- HERBICIDE HANDLE and HERBICIDE HOSE on HERBICIDE CANISTER; earn HERBICIDE.
- Use LAMP; select pairs (O).
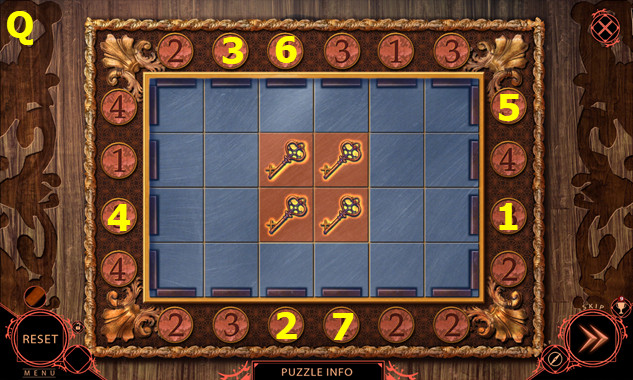
- Use HERBICIDE; take 2/3 and 3/3 BRIDGE TILES (P).
- Place BRIDGE TILES (Q).
- Solution (A-B)-(C-D)-(E-C)-(F-E)-(G-F).
- Go left.
- Use LAMP; select pairs (O).
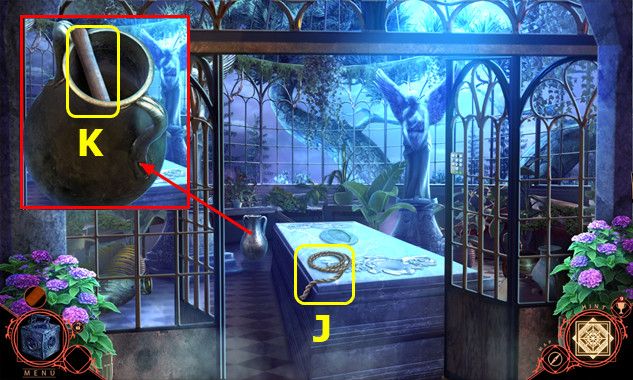
- Take PITCHER (P).
- Walk down.
- Use PITCHER; earn FULL PITCHER (A).
- Use FULL PITCHER; take SPADE (B).
- Go left.
- Use SPADE and open cabinet; move items; take GAUZE and IODINE BOTTLE (C).
- Use IODINE BOTTLE and GAUZE (D).
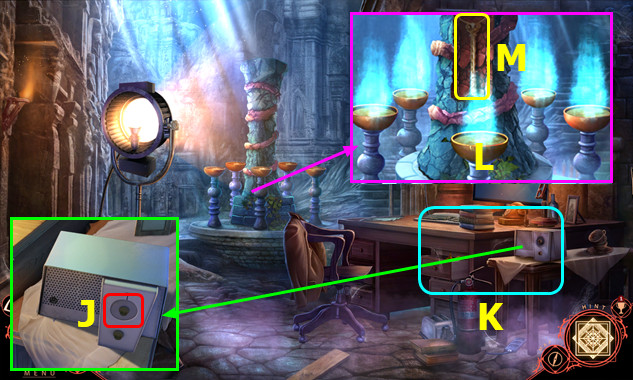
- Select LAMP (E).
- Try to go forward 2x.
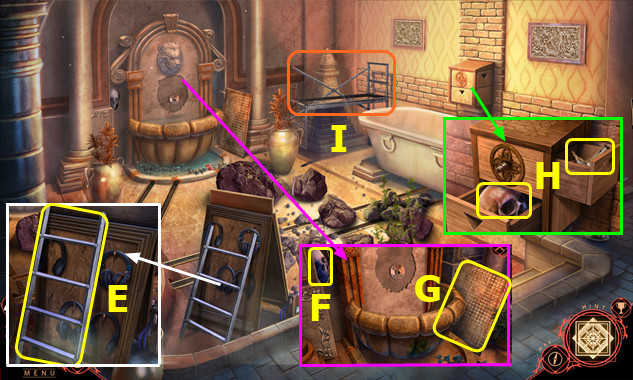
- Select (F); take FULL FLASK and DAGGER (G).
- Remove items; take ARROW (H).
- Take 1/3 STONE ELEMENTS and BELL; select book (I).
- Open book; restore items (J-M).
- Take METAL BUTTON (N).
- Move items; take 2/3 STONE ELEMENTS (O).
- Place METAL BUTTON (P).
- Solution 1-7 (Q).
- Take 3/3 STONE ELEMENTS (R).
- Place STONE ELEMENTS and FULL FLASK (S).
- Play HOP; earn PURIFYING FLASK (T).
- Use PURIFYING FLASK; take NINA'S RING (U).
- Give NINA'S RING; take FLINT STATUE (A).
- DAGGER on FLINT STATUE; earn FLINT AND STEEL.
- Use FLINT AND STEEL; read newspaper (B).
- Go forward.
Chapter 3: Town Square
- Take 1/3 STREET SIGNS (C).
- Take 2/3 STREET SIGNS (D).
- Restore 3 fairies (E).
- Go forward.
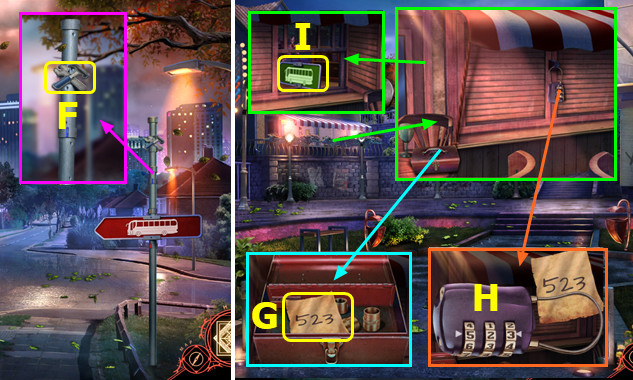
- Take TOOLBOX EMBLEM (F).
- Walk down.
- Use TOOLBOX EMBLEM; remove items; take RESTAURANT CODE (G).
- Place RESTAURANT CODE; enter 5-2-3 (H).
- Take 3/3 STREET SIGNS (I).
- Go forward.
- Place STREET SIGNS; solution (J).
- Go left.
- Talk (K).
- Take STRING (L).
- Use BELL (M).
- Take EARRING and HOOK (N).
- EARRING and STRING on ARROW; earn IMPROVISED GRABBER.
- Select grate; use IMPROVISED GRABBER; earn ORNAMENTAL BOX (O).
- Turn ORNAMENTAL BOX over; take GREEN BUTTON.
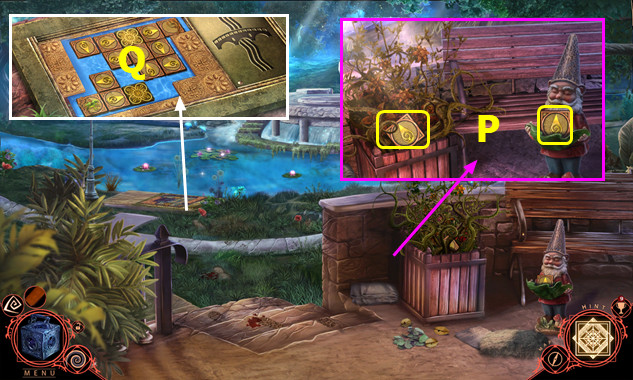
- Move planter (A).
- Place green button; Fx4-B-Dx2-Cx4.
- Take ORNAMENTAL EYE (G).
- Turn over ORNAMENTAL BOX; place ORNAMENTAL EYE.

- Solution (H).
- Remove lid; take MANSION KEY (I).
- Use MANSION KEY (J).
- Go forward.
- Take SILK CLOTH and 1/4 LEATHER BOOKS (A).
- Play HOP; earn NECKLACE (B).
- Take METAL NEEDLE (C).
- METAL NEEDLE on NECKLACE; earn 1/2 STATUE JEWELS.
- Take 2/2 STATUE JEWELS (D).
- Place STATUE JEWELS; take HEART JEWEL and 2/4 LEATHER BOOKS (E).
- Take POWDER HORN (F).
- Go forward.
- Take 3/4 LEATHER BOOKS and ORNAMENT (G).
- Walk down.
- Place ORNAMENT; open box; take BOOK EMBLEM and BRUSH (H).
- Go forward.
- Use POWDER HORN and BRUSH; select 4-2-8 (I).
- Take ROPE (J).
- HOOK and SILK CLOTH on ROPE; take HOOK ON A ROPE.
- Take HAMMER (K).
- Walk down.
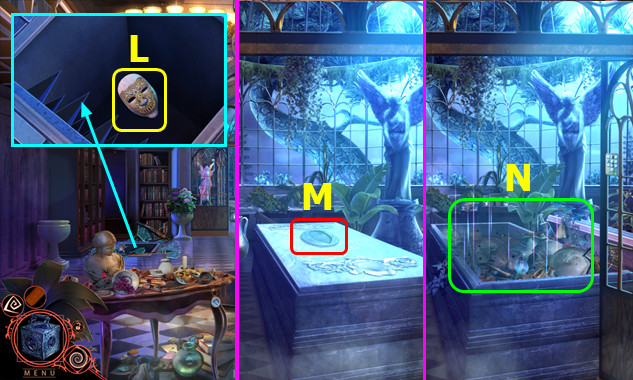
- Use HOOK ON A ROPE; earn DEATH MASK (L).
- Go forward.
- Place DEATH MASK (M).
- Play HOP; earn 4/4 LEATHER BOOKS (N).
- Walk down.
- Place LEATHER BOOKS (O).
- Go right.
- Use HAMMER; earn BROKEN LANTERN (P).
- Select (Q).
- Use LAMP; select pairs (A).
- Place BOOK EMBLEM; read book; earn 1/2 LANTERN PLATES (B).
- Take CANDLE; use HAMMER (C); remove all floor pieces.
- Walk down.
- Play HOP; earn FEATHER JEWEL (D).
- Go right.
- Place FEATHER JEWEL and HEART JEWEL (E).
- Take 2/2 LANTERN PLATES (F).
- Open BROKEN LANTERN; add CANDLE and LANTERN PLATES; earn GLOWING LANTERN.
- Place GLOWING LANTERN (G).
- Select Hx8-Ix2.
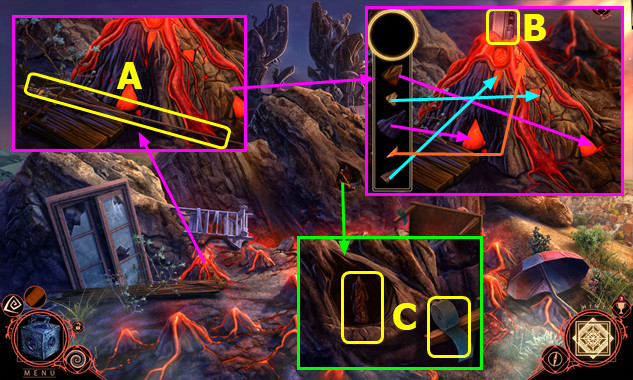
- Read note; take VAHARAM'S ORB (J).
- Take OXYGEN GAS TANK (K).
- Take STANDING PIPE; place OXYGEN GAS TANK (L).
- Select Mx4-Nx4.
- Use STANDING PIPE (O).
- Select (P).
- Go right.
Chapter 4: Museum Outside
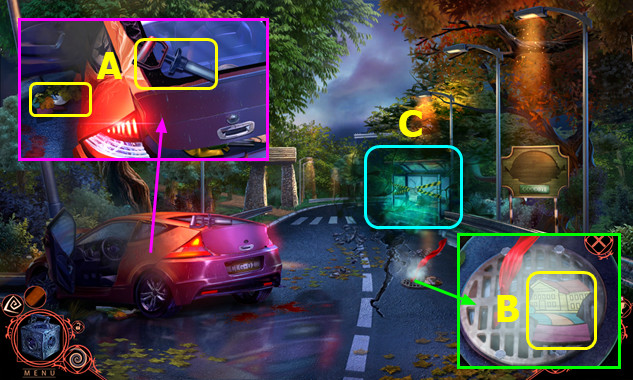
- Take STEEL CANE (A).
- Take ID BRACELET (B).
- Use LAMP; select pairs (C).
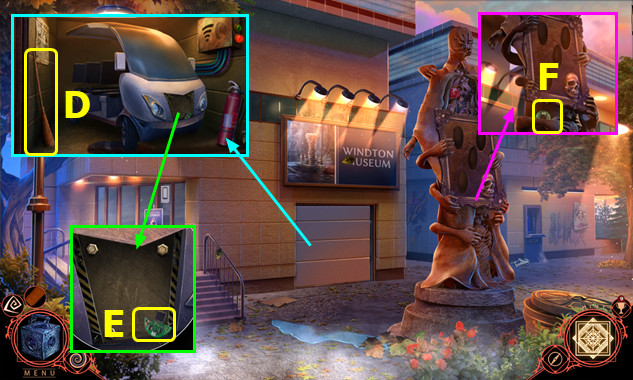
- Open garage; take BROOM (D).
- Take 1/2 BRACELET TAGS (E).
- Take 2/2 BRACELET TAGS (F).
- BRACELET TAGS on ID BRACELET.
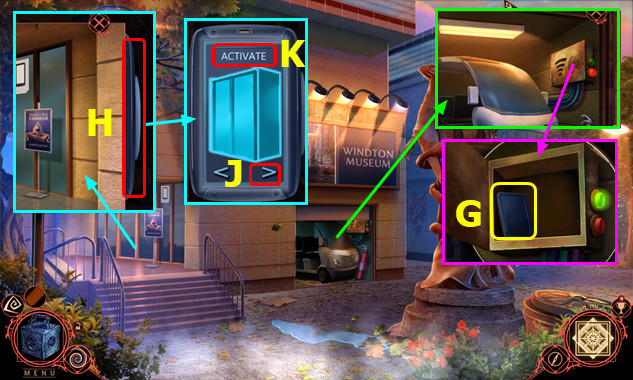
- Use ID BRACELET; take controller (G).
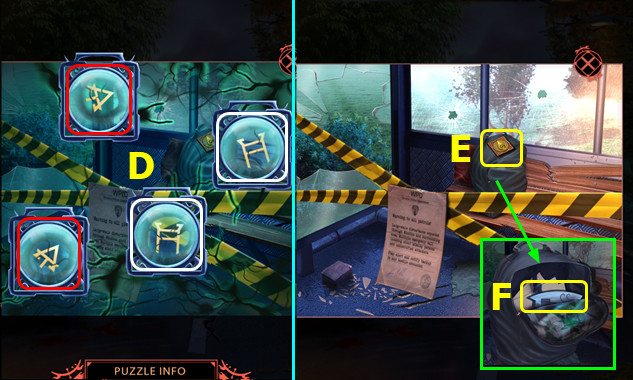
- Select controller (H).
- Select Jx3-K.
- Go left.
- Select controller (L); select M-N.
- Use BROOM; take WIRES and WRENCH (O).
- Take KHOPESH; select battery (P).
- Take ICE PICK (Q).
- Select controller (R); select Sx3-T.
- Use STEEL CANE (U).
- Walk down.
- Use WRENCH; remove cover; take BATTERY (A).
- Go left.
- Place BATTERY and WIRES (B).
- Play HOP; earn CRANK (C).
- Place; select CRANK (D).
- Go forward.
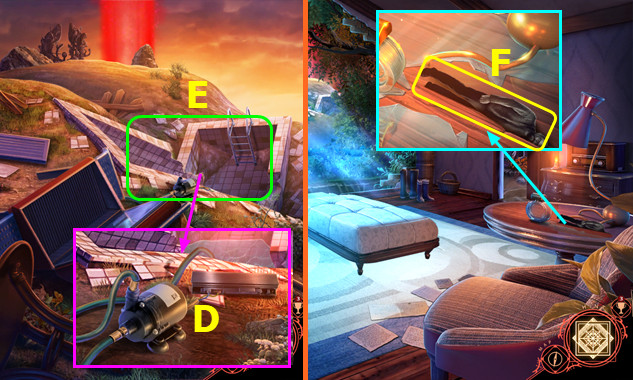
- Take 1/3 SCAFFOLDING PARTS (E).
- Use ICE PICK; earn 1/4 SKULLS (F).
- Take 2/3 SCAFFOLDING PARTS (G).
- Open drawers; take 2/4 SKULLS and 3/3 SCAFFOLDING PARTS (H).
- Place SCAFFOLDING PARTS (I).
- Restore items; select (J).
- Restore items (K).
- Go forward (L).
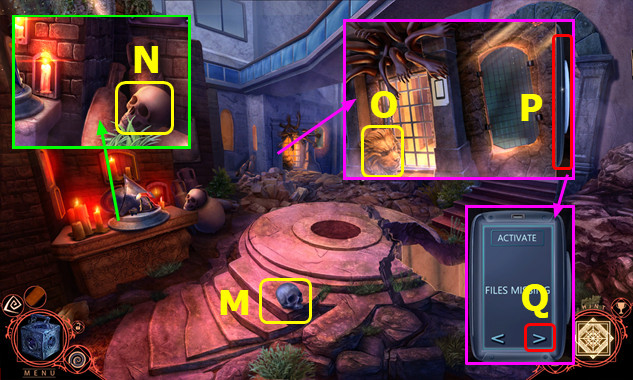
- Take 3/4 SKULLS (M).
- Take 4/4 SKULLS (N).
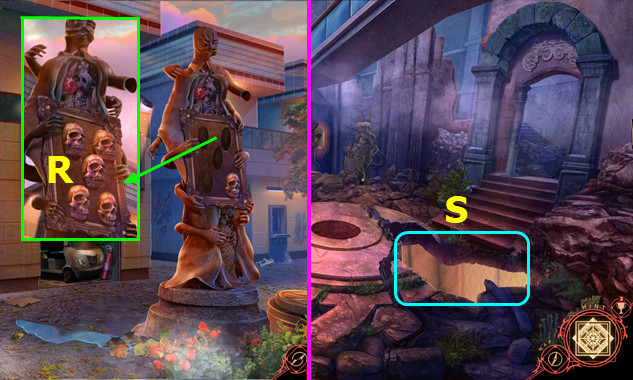
- Take LION HEAD (O); select controller (P).
- Select Qx3.
- Walk down 2x.
- Place SKULLS (R).
- Play HOP; earn STONE VALVE.
- Go left, forward.
- Enter (S).
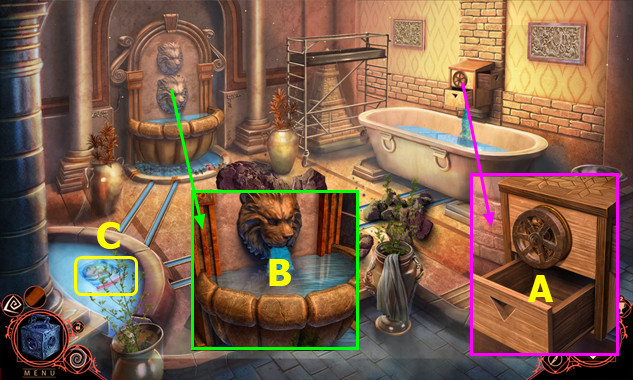
- Place/select STONE VALVE (A).
- Place LION HEAD (B).
- Take PLASTIC BAG (C).
- Open PLASTIC BAG; remove items; take USB DRIVE.
- Go forward.
- Place USB DRIVE; select (D).
- Go forward.
- Use KHOPESH; take OIL LAMP (E).
- Open paper; take HELMET MOUTH GUARD (F).
- Walk down.
- Place HELMET MOUTH GUARD; take HALOGEN LIGHT (G).
- Go forward.
- Remove cover; place HALOGEN LIGHT (H).
- Take DIAL KEY (I).
- Place DIAL KEY (J).
- Play HOP; earn OIL VIAL (K).
- OIL VIAL in OIL LAMP; take FULL OIL LAMP.
- Use FULL OIL LAMP and VAHARAM'S ORB (L).
- Take VAHARAM'S SCEPTER (M).
- VAHARAM'S ORB on VAHARAM'S SCEPTER.
Chapter 5: Suburban Street

- Take CHAIN SAW (A).
- Take SPARK PLUG and TOY FISHING ROD (B); remove lid.
- Solution (D-F)-(E-C-E)-(F-D-C-C-E); take HAND PUMP.
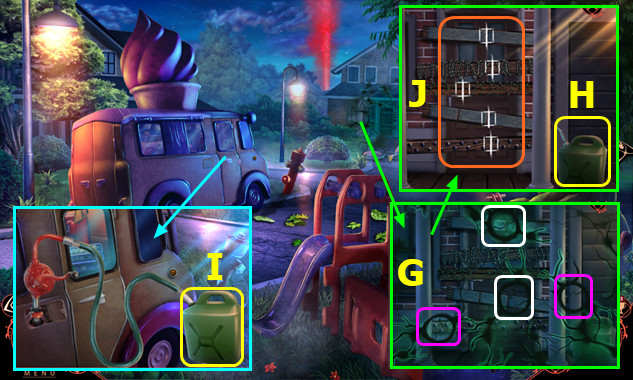
- Use LAMP; select pairs (G).
- Take FUEL CANISTER (H).
- Open cover; use HAND PUMP and FUEL CANISTER; earn FULL FUEL CANISTER (I).
- SPARK PLUG and FULL FUEL CANISTER on CHAINSAW.
- Use CHAIN SAW; select 5 places to saw (J); select door.
- Go forward.
- Use VAHARAM'S SCEPTER (K).
- Take TIN PLATE (L).
- Take SPATULA (M).
- Use TOY FISHING ROD; earn DOOR KEY (N).
- Use DOOR KEY (O).
- Go right.
- Take LEAF BLOWER; use SPATULA; earn SAP SPATULA (P).
- Select pairs (Q); take GARDEN SHEARS.
- Take BUCKET (R).
- SAP SPATULA and TIN PLATE on BUCKET.
- Take DOOR REMOTE (S).
- Walk down.
- Use GARDEN SHEARS; take GOLDEN FLOWER (A).
- Use BUCKET; earn FULL BUCKET (B).
- Walk down.
- Use DOOR REMOTE (C).
- Play HOP; earn CLEANER (D).
- Go forward, right.
- Use FULL BUCKET; take SILVER FLOWER (E).
- Use CLEANER; place GOLDEN FLOWER and SILVER FLOWER; open door (F).
- Play HOP; earn LONG PLANK (G).
- Walk down.
- Place LONG PLANK (H).
- Go forward.
- Remove 3 planks; take HOSE (I).
- Use LEAF BLOWER; take GAS CANISTER and FRIDGE MAGNET (J).
- Take BOY FIGURINE (K).
- Go forward.
- Take HARPOON ARROW (A).
- Restore pieces; take BATTERY (B).
- Remove items; take MONSTER FIGURINE and DUCT TAPE (C).
- Walk down.
- Place HOSE and BATTERY (D).
- Play HOP; earn HARPOON GUN (E).
- HARPOON ARROW on HARPOON GUN.
- Walk down.
- Use FRIDGE MAGNET; earn MAN FIGURINE (F).
- Go forward.
- Place BOY FIGURINE, MONSTER FIGURINE, and MAN FIGURINE; take BURNER (G).
- BURNER and DUCT TAPE on GAS CANISTER; take RIGGED CANISTER.
- Go forward.
- Place HARPOON GUN (I).
- Use VAHARAM'S SCEPTER; select 1-5 (J).
- Select 1-5 (K).
- Congratulations! You have completed Shadowplay: Harrowstead Mystery!
Created at: 2019-07-07