

Walkthrough Menu
- General Tips
- Chapter 1: Wilford School
- Chapter 2: The Third Floor
- Chapter 3: The Gardens
- Chapter 4: The Basement
General Tips
- This is the official guide for Spirit of Revenge: A Test of Fire.
- This guide will not show when you have to zoom into a location; the screenshots will show each zoom scene.
- Hidden-object puzzles are referred to as HOPs. This guide will not show screenshots of the HOPs, however, it will mention when an HOP is available and the inventory item you'll collect from it.
- Use the Map to fast travel to a location.
Chapter 1: Wilford School
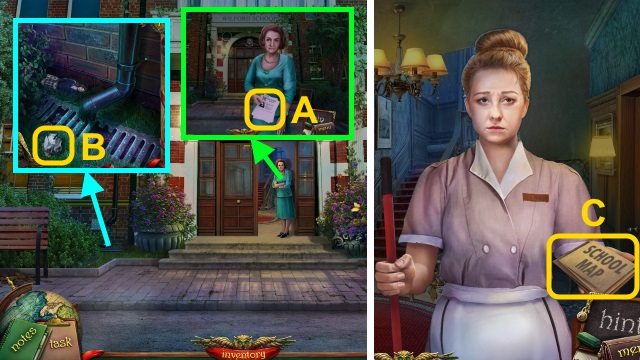
- Talk to the Principal; take the papers (A).
- Take the PAPER BALL (B).
- Open the PAPER BALL; take the note.
- Walk forward.
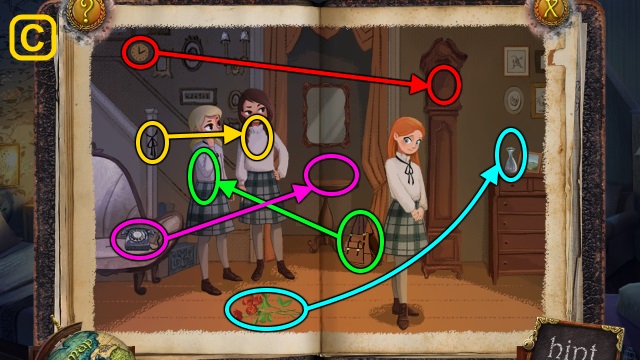
- Take the Map (C).
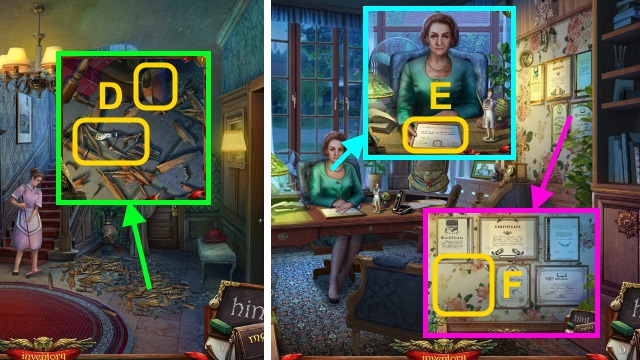
- Move the debris; take the PRUNER and PORTRAIT PIECE (D).
- Walk left.
- Talk to the Principal; take the CERTIFICATE (E).
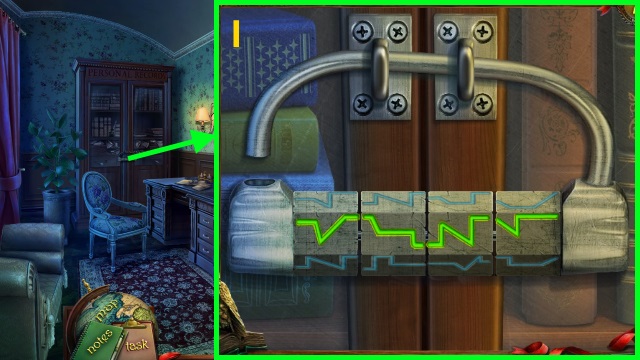
- Place the CERTIFICATE for a mini-game (F).
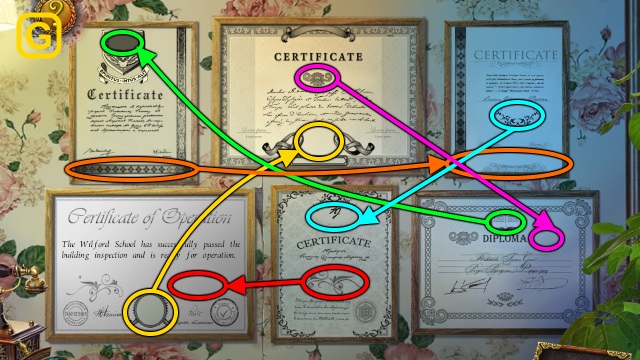
- Solution (G).
- Take the CARVING PIECE.
- Walk down, then right.
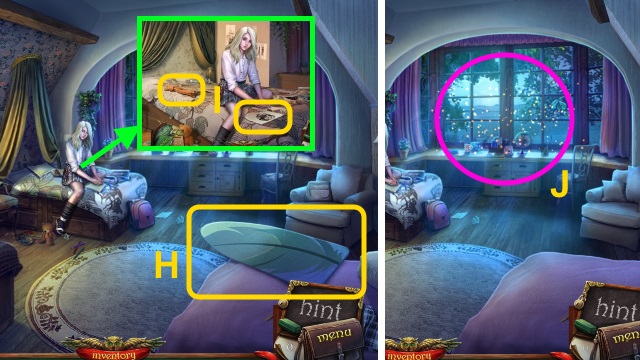
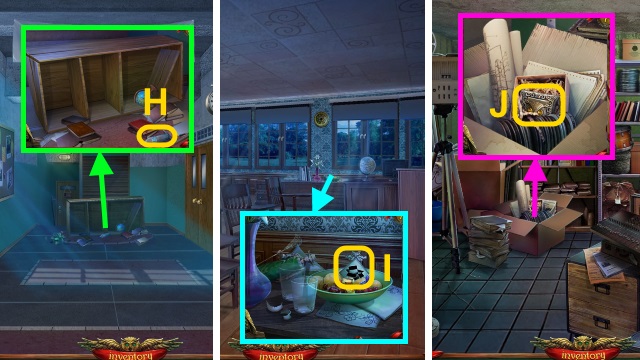
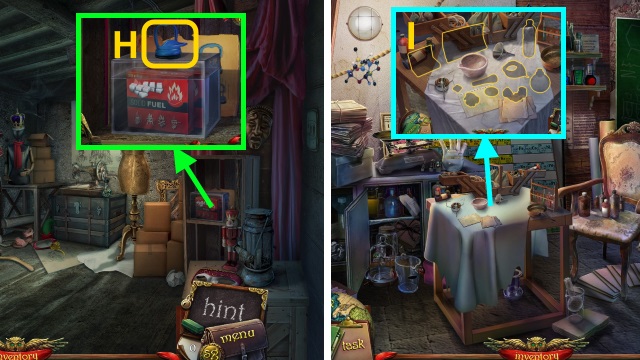
- Take the IRONING BOARD (H).
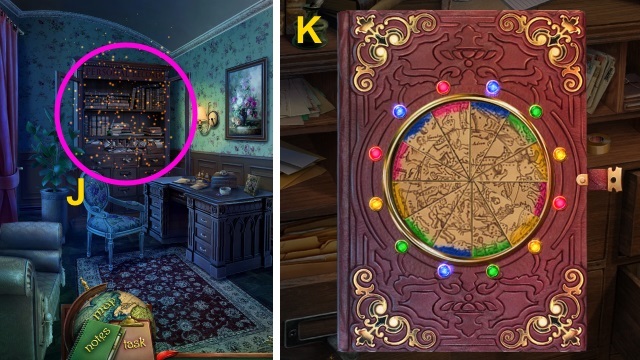
- Talk to Susie; take the drawing and ROPE (I).
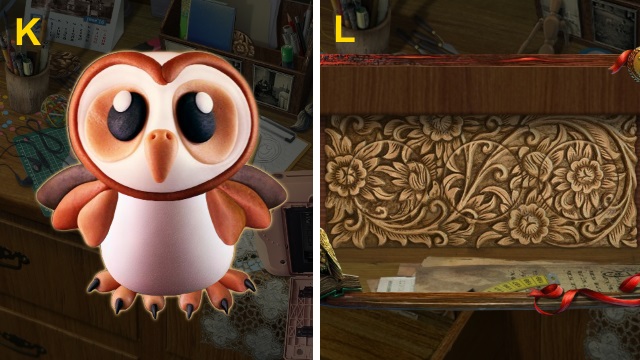
- Play the HOP; receive the CLUE PIECE (J).
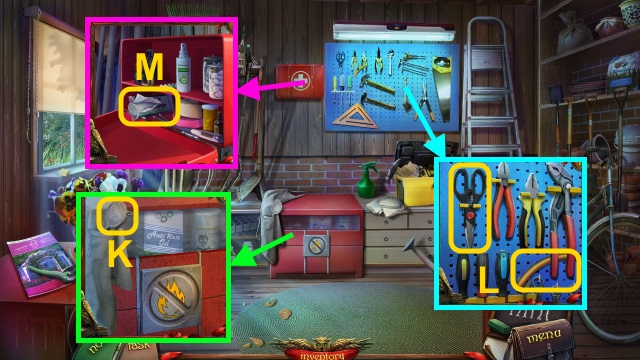
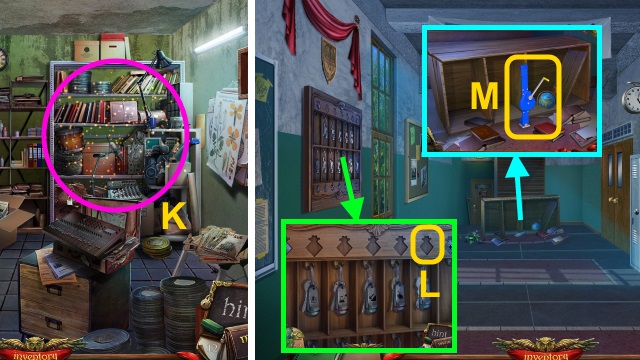
- HOP mini-game solutions (K-L).
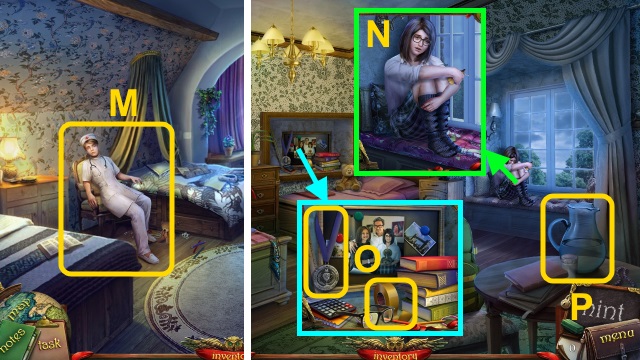
- Talk to the Nurse (M).
- Walk down, forward, then right.
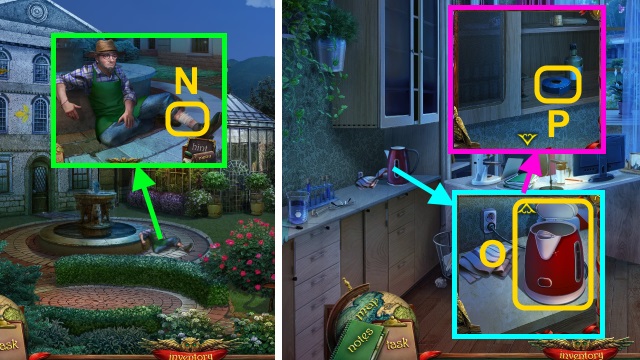
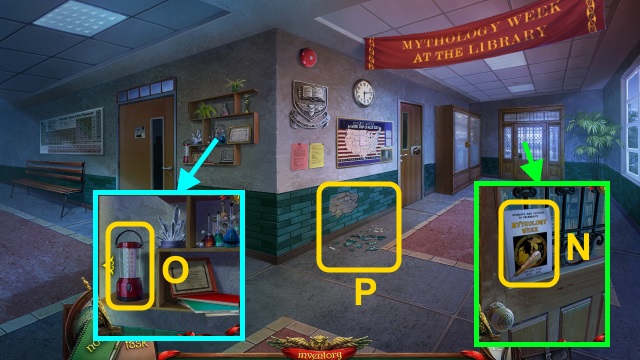
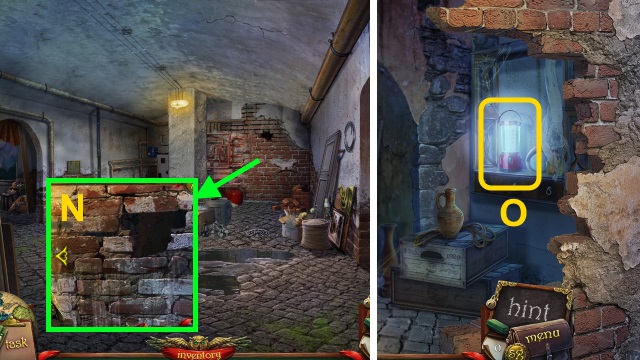
- Talk to Betty (N); receive the WOMAN'S FIGURINE.
- Take the MEDAL and TAPE (O).
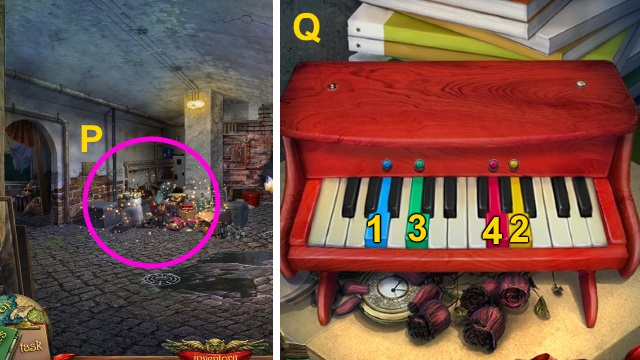
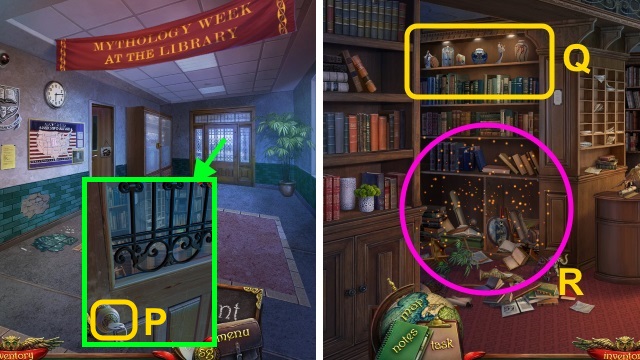
- Take the WATER JUG (P).
- Walk down, forward, then down.
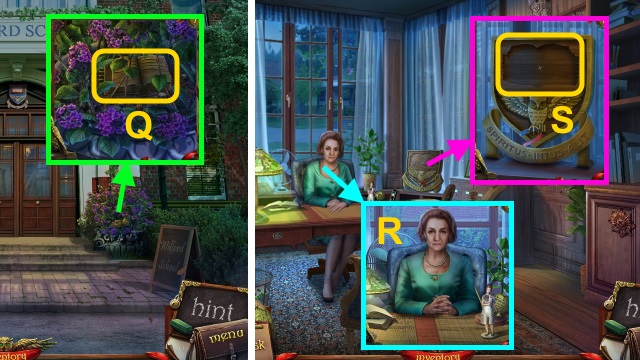
- Use the PRUNER; take the BRASS BOOK (Q).
- Walk forward, then left.
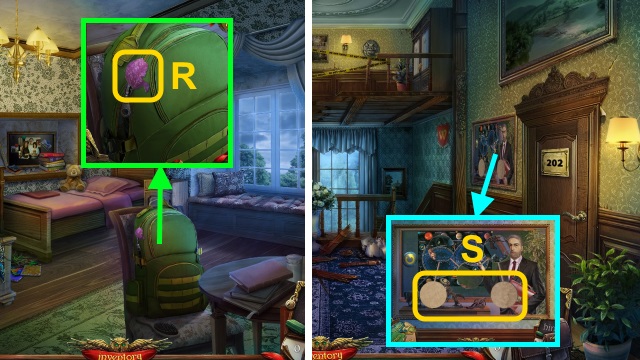
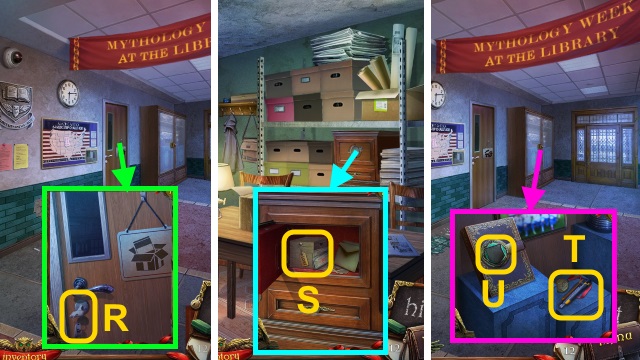
- Talk to the Principal (R).
- Place the BRASS BOOK (S); receive the MAGNET.
- Combine the MAGNET and ROPE; take the MAGNET ON ROPE.
- Walk down twice.
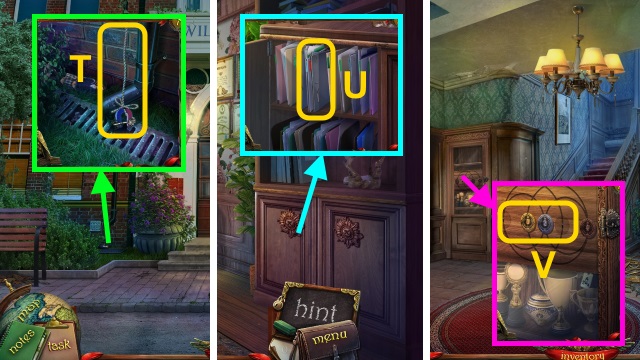
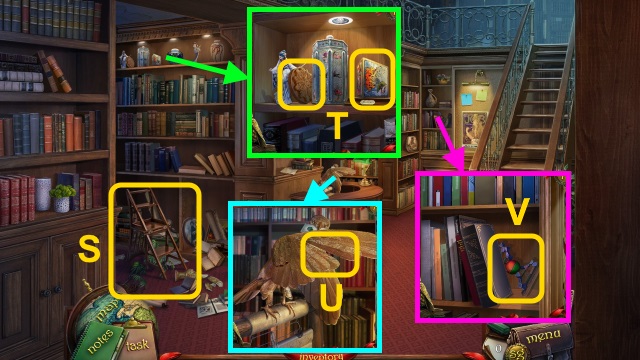
- Use the MAGNET ON ROPE (T); receive the CABINET KEY.
- Walk forward, then left.
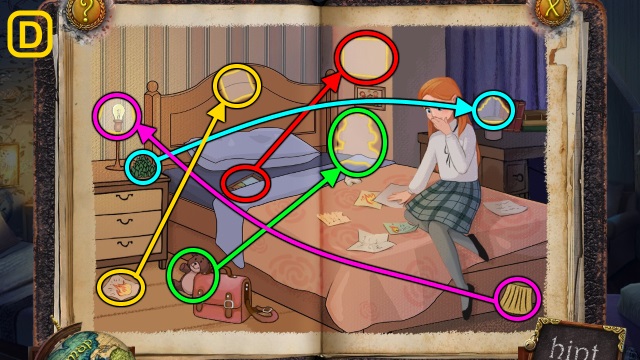
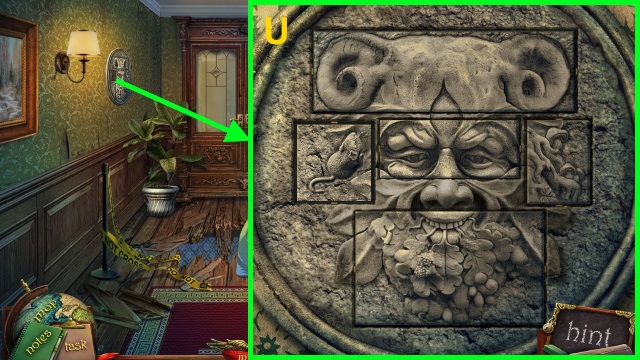
- Use the CABINET KEY. Read the file (U); take MEGAN'S FAMILY PHOTO. Take the MEDAL.
- Walk down.
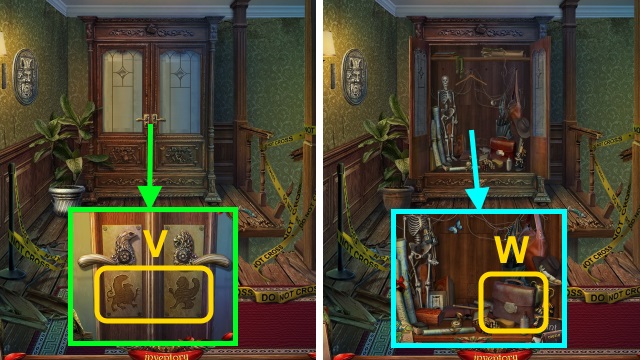
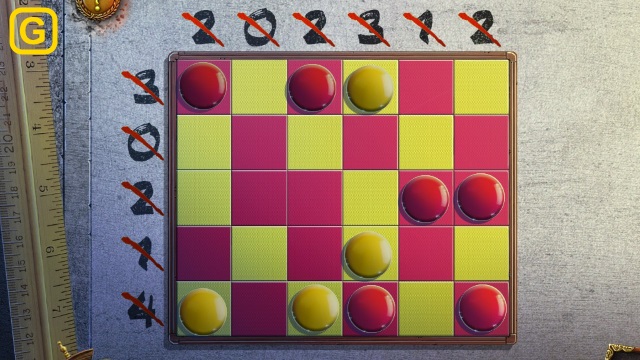
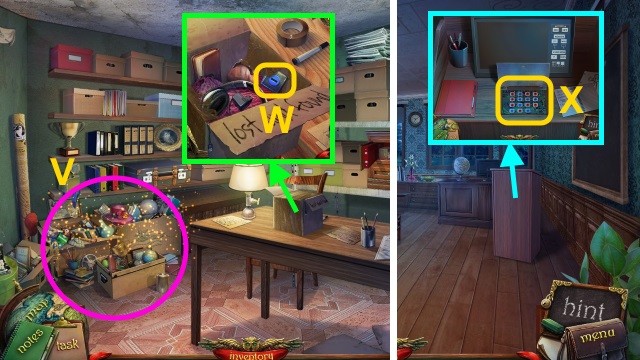
- Place the 2 MEDALS for a mini-game (V).
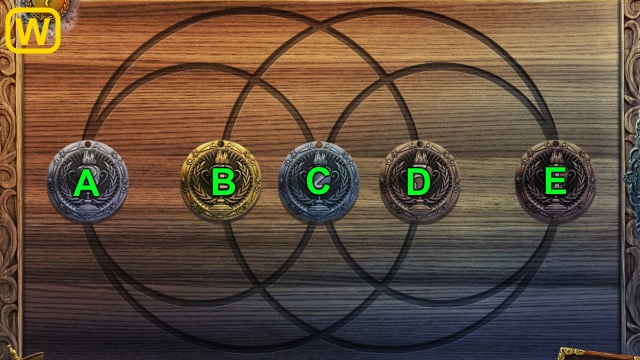
- Solution (W): (E-C)-(C-A)-(A-D)-(B-E)-(E-C)-(C-A)-(C-E).
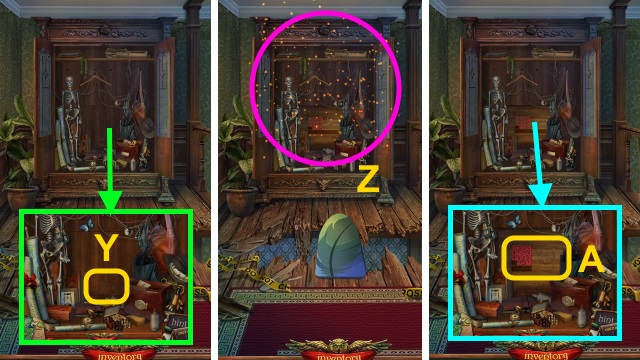
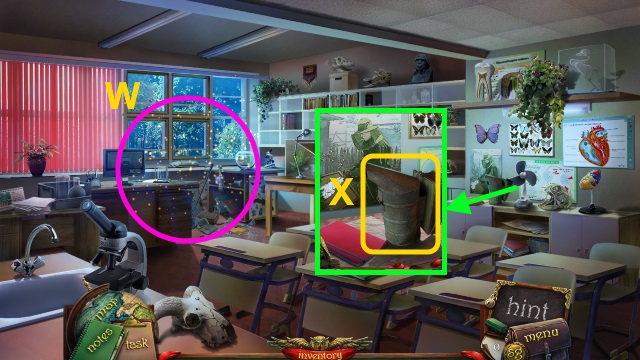
- Take the STORAGE KEY and BETTY'S MUSIC BOX.
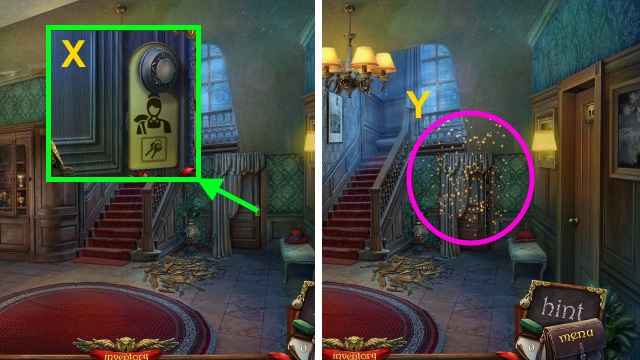
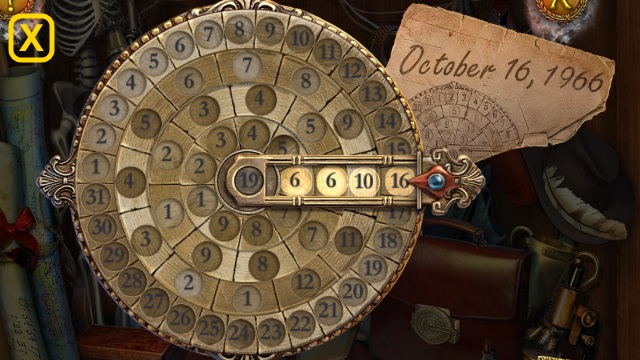
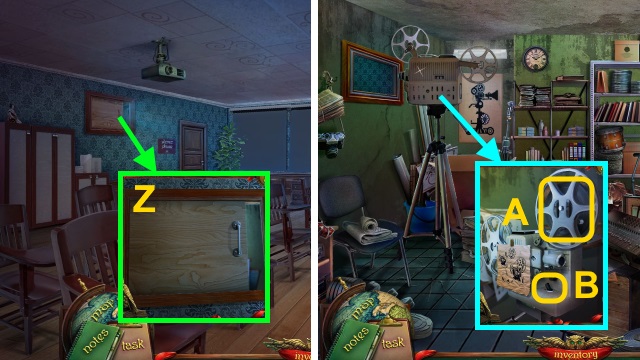
- Use the STORAGE KEY (X).
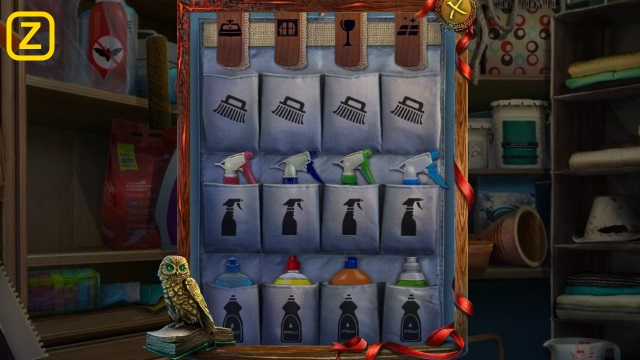
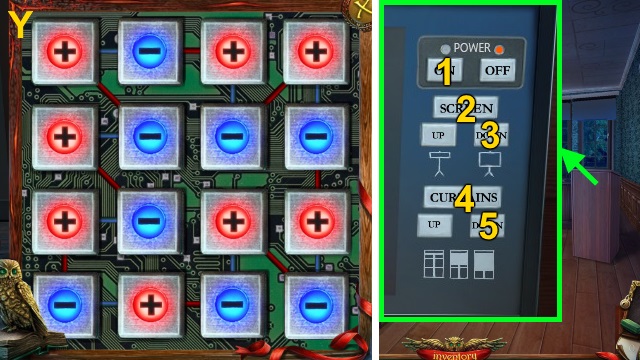
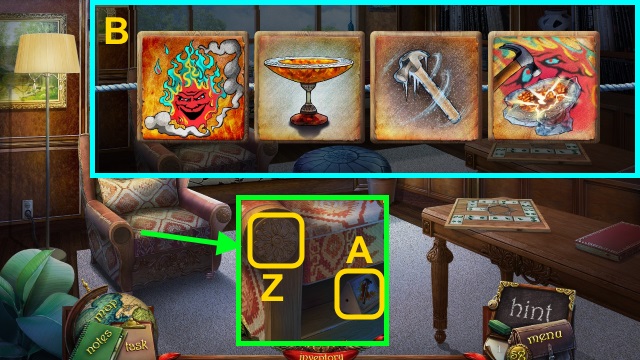
- Play the HOP; receive the ROOM KEYS (Y).
- HOP mini-game solution (Z).
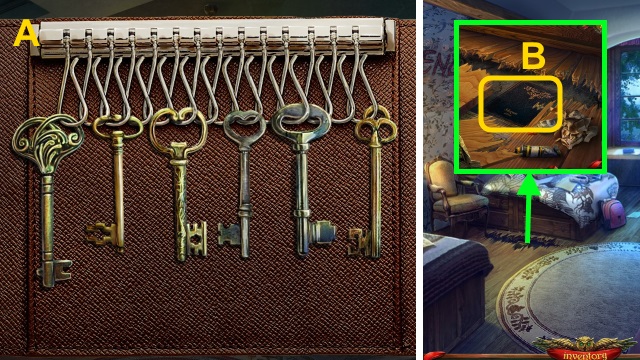
- Examine the ROOM KEYS for a mini-game; solution (A).
- Walk right.
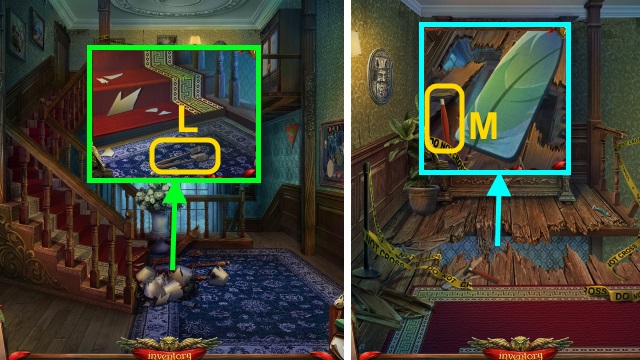
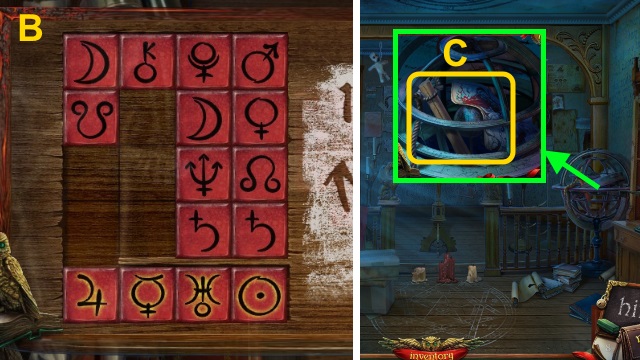
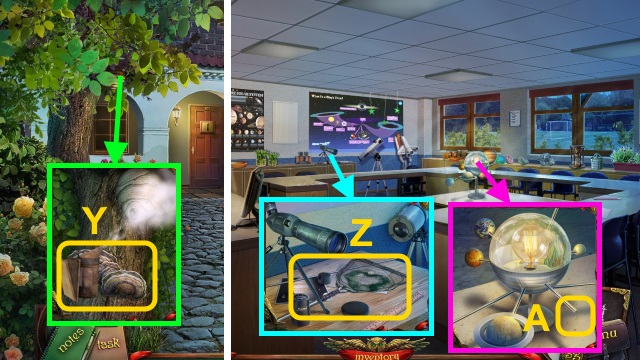
- Move the plank; take the GIRL'S DIARY (B).
- Read the GIRL'S DIARY for a mini-game.
- Solution (C-D).
- Take the PAINTBRUSH.
- Walk down, then forward.
Chapter 2: The Third Floor
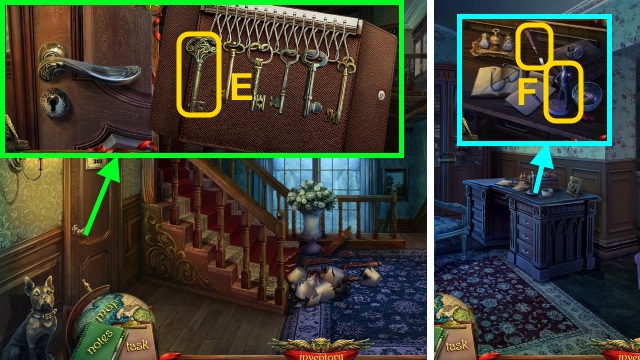
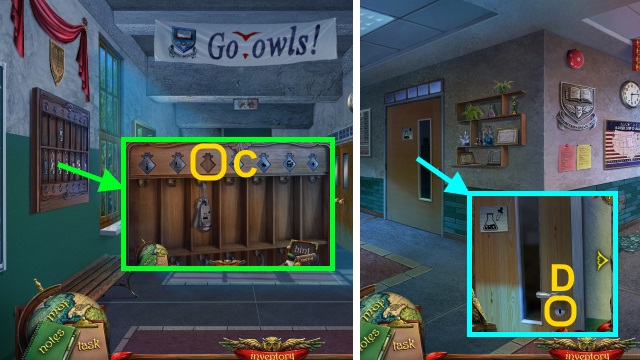
- Use the ROOM KEYS; use the key (E) on the lock.
- Walk left.
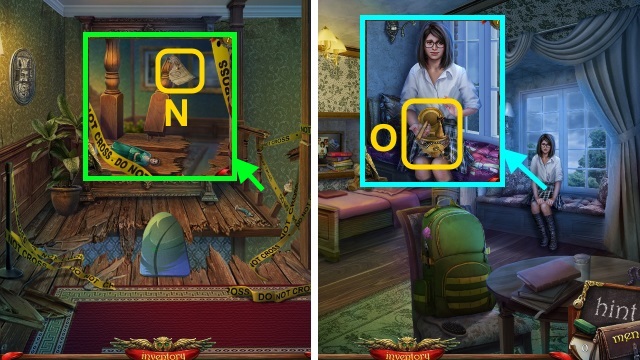
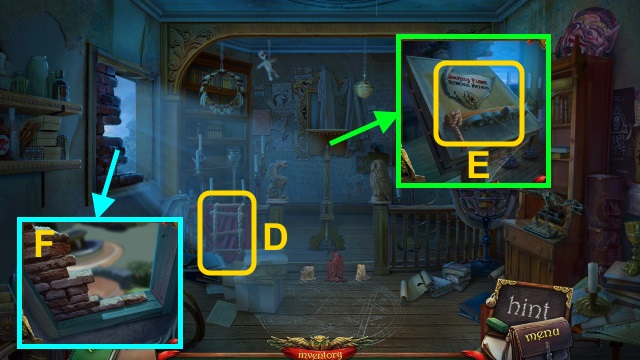
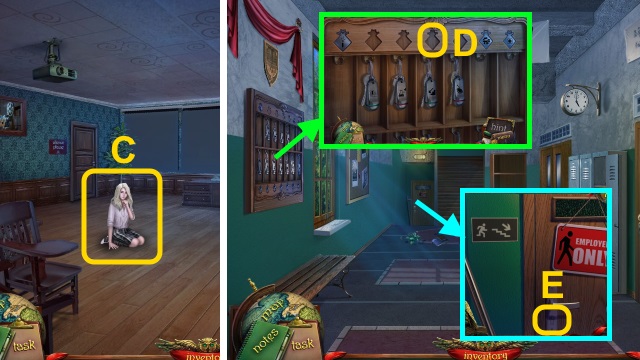
- Take PALETTE KNIFE and MAN'S FIGURINE (F).
- Take the TOWEL (G).
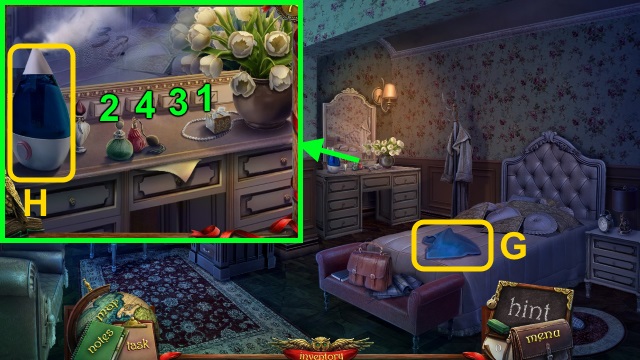
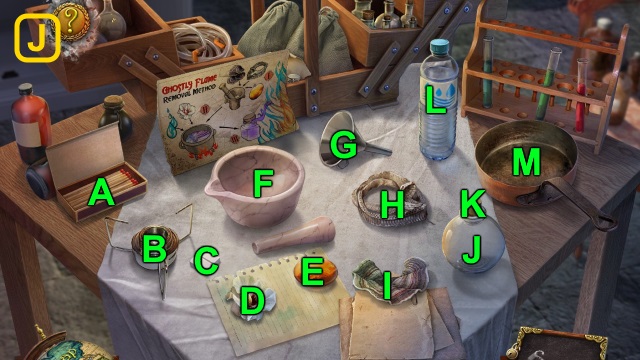
- Pour the WATER JUG for a mini-game (H).
- Solution (1-4).
- Take the note and WARDROBE KEY.
- Examine the lock for a mini-game; solution (I).
- Play the HOP; receive the PACKAGE (J).
- HOP mini-game solution (K).
- Open the PACKAGE; take the WINDING KEY and note.
- Combine BETTY'S MUSIC BOX and the WINDING KEY. Place the MAN'S FIGURINE and WOMAN'S FIGURINE; take BETTY'S MUSIC BOX.
- Walk down.
- Use the TOWEL; take the ICE TONGS (L).
- Go upstairs.
- Take the HAMMER (M); place the IRONING BOARD.
- Use the ICE TONGS (N); receive the CLUE SCRAP (1/2).
- Walk down, then right.
- Give BETTY'S MUSIC BOX; take the CLUE SCRAP (2/2) (O).
- Combine the CLUE PIECE and CLUE SCRAP (2/2); use the TAPE. Take the CLUE PIECE.

- Play the HOP; receive the OWL EMBLEM PIECE (P).
- HOP mini-game solution (Q).
- Use the PALETTE KNIFE (R); open the backpack. Take the PORTRAIT PIECE.
- Walk down.
- Place the 2 PORTRAIT PIECES for a mini-game (S).

- Solution (T).
- Read the journal; take the BAG CODE.
- Go upstairs.
- Place the CARVING PIECE and CLUE PIECE for a mini-game; solution (U).
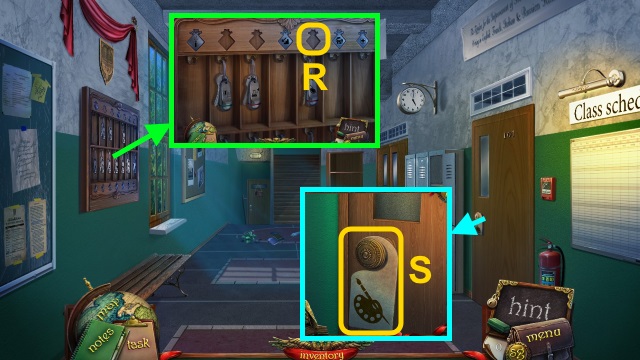
- Take the WARDROBE KEY.
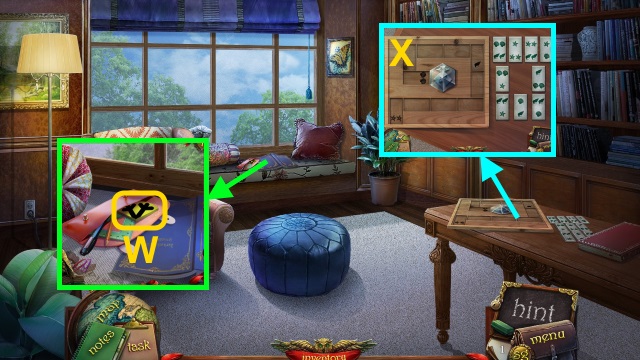
- Place the 2 WARDROBE KEYS (V).
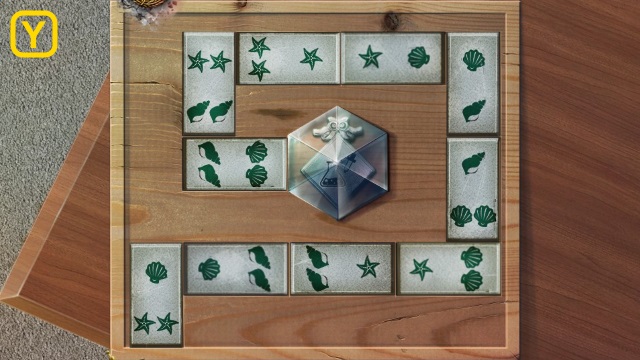
- Examine the bag (W); use the PAINTBRUSH and BAG CODE for a mini-game.
- Solution (X).
- Take the OWL EMBLEM.
- Combine the OWL EMBLEM and OWL EMBLEM PIECE; take the OWL EMBLEM.
- Examine the wall (Y); place the OWL EMBLEM.
- Play the HOP; receive the CHALK (Z).
- Examine the wall (A); use the CHALK for a mini-game.
- Solution (B).
- Walk forward.
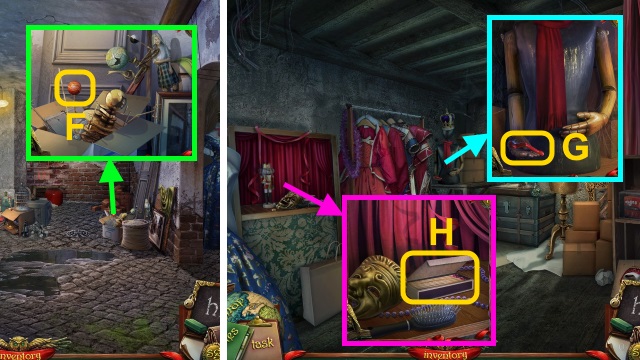
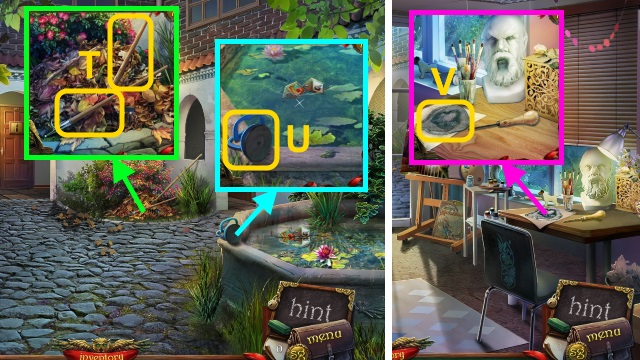
- Take the LADDER STEP and PAPER (C).
- Take the ROPE LADDER (D).
- Take the RECIPE and LADDER STEP (E).
- Combine the ROPE LADDER and 2 LADDER STEPS; receive the ROPE LADDER.
- Use the HAMMER and ROPE LADDER (F).
Chapter 3: The Gardens
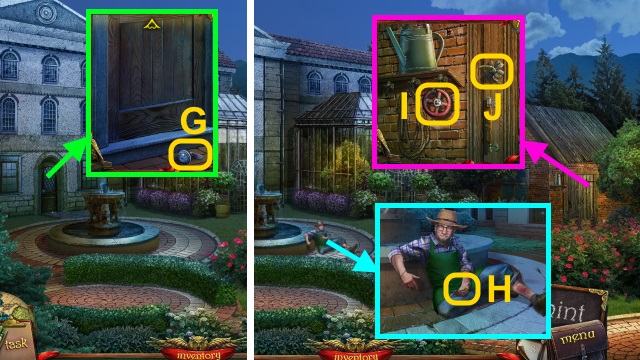
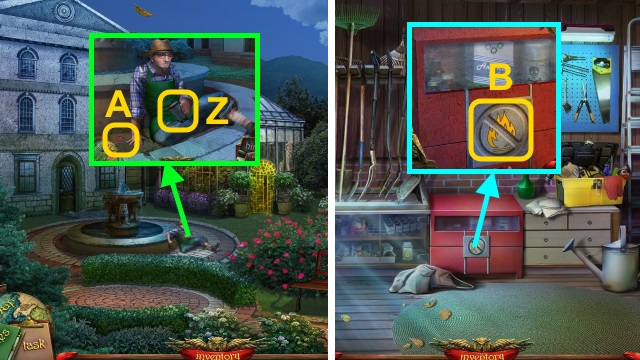
- Scroll down; take the LOCKER HANDLE (G).
- Talk to the Gardener; take the GARDEN HOUSE KEY (H).
- Take the VALVE (I); use the GARDEN HOUSE KEY (J).
- Walk right.
- Take the STRAINER (K).
- Take the HOSE PIECE and SCISSORS (L).
- Open the kit. Open the bandage (M); take the BANDAGE WITH ANTISCEPTIC.
- Walk down.
- Use the BANDAGE WITH ANTISCEPTIC (N).
- Walk forward twice.
- Take the EMPTY KETTLE (O); scroll up.
- Open the cabinet; take the ADHESIVE TAPE (P).
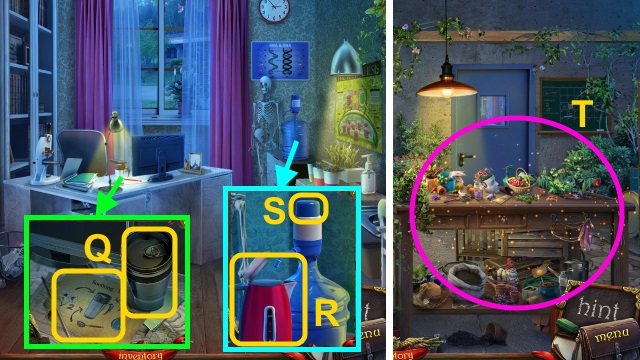
- Take the MUG and RECIPE (Q).
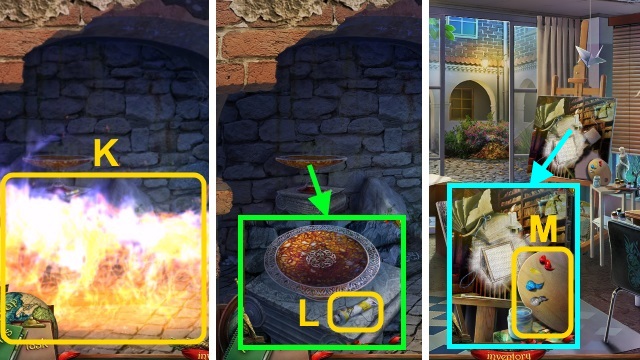
- Place the EMPTY KETTLE (R); press the button 3x (S). Receive the FULL KETTLE.
- Walk down.
- Play the HOP; receive the EMPTY OIL CAN (T).
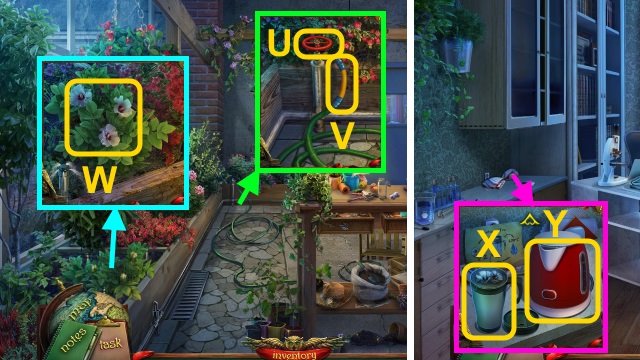
- Place the VALVE (U); turn it. Use the SCISSORS; use the HOSE PIECE and ADHESIVE TAPE (V). Turn the valve.
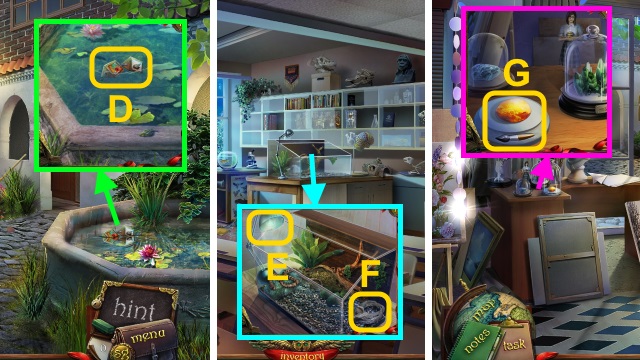
- Take the MEDICINAL FLOWERS (W).
- Open the MUG; use the RECIPE, STRAINER, and MEDICINAL FLOWERS; take the CUP WITH FLOWERS.
- Walk forward.
- Place the CUP WITH FLOWERS (X). Place the FULL KETTLE (Y); press the button. Pour the kettle; place the lid. Take the CUP WITH TEA.
- Walk down twice.
- Give the CUP WITH TEA (Z); take the FORBIDDEN SYMBOL (A).
- Walk right.
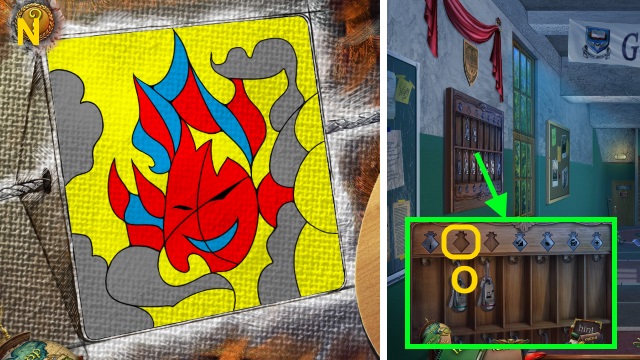
- Place the FORBIDDEN SYMBOL for a mini-game (B).
- Solution (C): Ax2.
- Solution (D).
- Take the OIL.
- Open the EMPTY OIL CAN; pour the OIL. Place the lid; take the OIL CAN.
- Walk down.
- Open the window; use the OIL CAN (E).
- Go left.
- Place the LOCKER HANDLE; examine the locker for a mini-game (F).
- Solution (G).
- Take the JACK HANDLE.
- Take the WATER BOTTLE (H).
- Walk right.
- Take the ARCHIVE KEY TAG (I).
- Walk left.
- Take the SYMBOL (J).
- Play the HOP; receive the JACK BASE (K).
- Combine the JACK BASE and JACK HANDLE; take the JACK.
- Walk down twice.
- Place the ARCHIVE KEY TAG (L); receive the ARCHIVE KEY.
- Use the JACK (M).
- Walk forward.
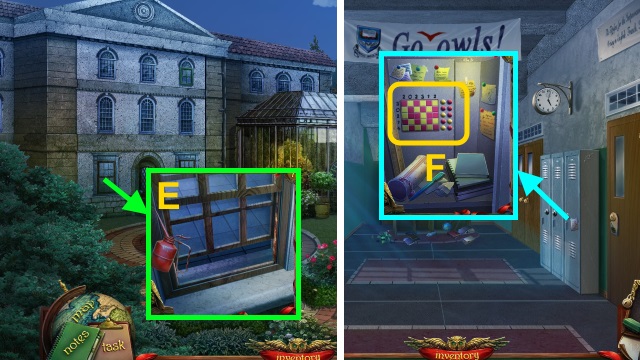
- Take the METAL FEATHER and flyer (N).
- Scroll right; take the LANTERN (O).
- Examine the wall for a mini-game (P).
- Solution (Q).
- Take the CABINET KEY.
- Use the ARCHIVE KEY (R).
- Walk forward.
- Place the CABINET KEY; turn it. Examine the box (S); take the TROPHY.
- Walk down.
- Place the TROPHY. Take the BOX CUTTER (T); place the SYMBOL (U). Play the HOP; receive the RECIPE.
- Walk forward.
- Play the HOP; receive the FILM (V).
- Examine the FILM; take MEGAN'S FILM.
- Use the BOX CUTTER; take the MINUS TILE (W).
- Walk down twice, then right.
- Open the cover; examine the circuitry (X). Place the MINUS TILE for a mini-game.
- Solution (Y).
- Press the buttons (1-5).
- Open the door (Z).
- Walk left.
- Place MEGAN'S FILM (A); flip the switch (B).
Chapter 4: The Basement
- Talk to Susie (C); receive the BASEMENT KEY TAG.
- Walk down.
- Place the BASEMENT KEY TAG (D); receive the BASEMENT KEY.
- Use the BASEMENT KEY (E).
- Walk left.
- Take MARS (F).
- Walk right.
- Take the VALVE (G).
- Take the MATCHES (H).
- Walk down, then left.

- Take the PESTLE (I).
- Move the bottle; take the RECIPE PART and CORKED BOTTLE (J).
- Take the SLEDGEHAMMER (K).
- Walk down.
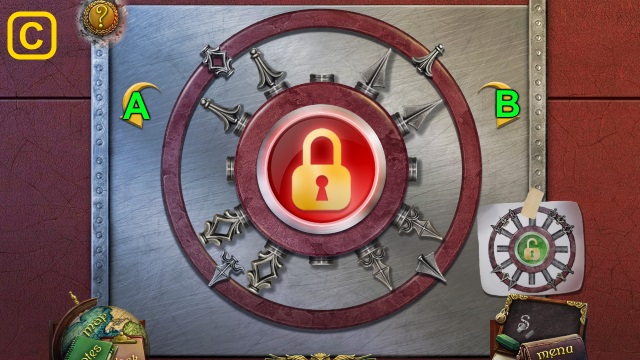
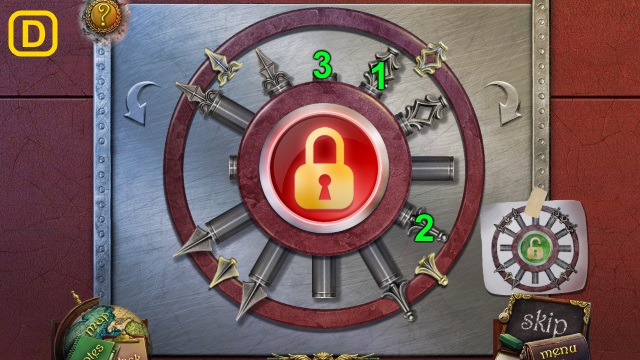
- Place the VALVE for a mini-game (L).
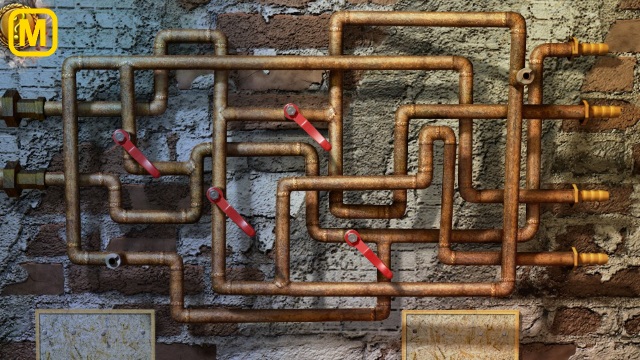
- Solution (M).
- Scroll right; use the SLEDGEHAMMER (N).
- Walk forward.
- Place the LANTERN (O).
- Walk down.
- Play the HOP; receive the ART ROOM KEY TAG (P).
- HOP mini-game solution (Q).
- Walk down.
- Place the ART ROOM KEY TAG (R); receive the ART ROOM KEY.
- Use the ART ROOM KEY (S).
- Enter the art room; walk forward.
- Take the STICK and PIKE POLE (T).
- Take the SUCTION CUP (U).
- Walk down.
- Take the NET (V); place the STICK. Take the SHAVINGS.
- Walk forward twice.
- Play the HOP; receive the BRUSH TOKEN (W).
- Take the EMPTY BEE SMOKER (X).
- Combine the EMPTY BEE SMOKER, SHAVINGS, and MATCHES; receive the BEE SMOKER.
- Walk down.
- Use the BEE SMOKER; take the MUSHROOM (Y).
- Walk right.
- Place the NET; take the BUTTERFLY NET (Z).
- Place MARS for a mini-game (A).
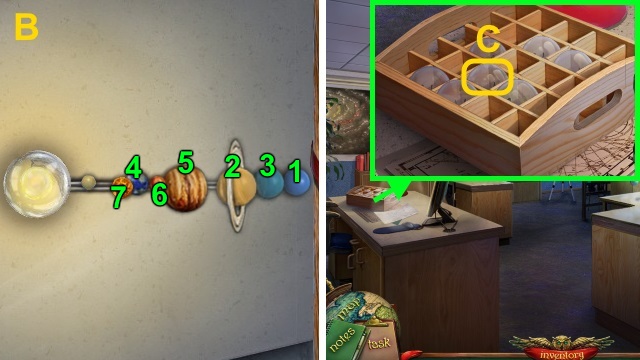
- Solution (B).
- Take the RECIPE PART.
- Combine the RECIPE, 3 RECIPE PARTS, and TAPE; take the RECIPE.
- Examine the desk for a mini-game; solution (C).
- Take the LIGHT BULB.
- Walk down.
- Use the BUTTERFLY NET (D); receive the ARTIFACT.
- Walk left.
- Place the LIGHT BULB (E). Use the PIKEPOLE (F); receive the SNAKESKIN.
- Walk down twice.
- Place the BRUSH TOKEN; take the OPAL (G).
- Walk down, left, then right.
- Place the SUCTION CUP (H); open the case. Open the box; take the SOLID ALCOHOL.
- Walk down, then left.
- Place the SOLID ALCOHOL, PESTLE, CORKED BOTTLE, MATCHES, WATER BOTTLE, MEDICINAL FLOWER, OPAL, MUSHROOM, SNAKESKIN, and RECIPE for a mini-game (I).
- Solution (J): (E-F)-(I-F)-(H-F)-(C-B)-(A-B)-(M-B).
- (L-M)-(D-M)-(F-M)-(K)-(G-J)-(M-J)-(K-J).
- Take the ANTI-FIRE POTION.
- Walk down, then forward.
- Use the ANTI-FIRE POTION (K).
- Take the PAINT TUBE (L).
- Walk down twice, then enter the art room.
- Use the PAINT TUBE for a mini-game (M).
- Solution (N).
- Take the LIBRARY KEY TAG.
- Walk down.
- Place the LIBRARY KEY TAG (O); receive the LIBRARY KEY.
- Walk forward.
- Use the LIBRARY KEY (P).
- Walk right.
- Examine the shelf (Q). Play the HOP; receive the STEPLADDER (R).
- Place the STEPLADDER (S).
- Take the ARTIFACT PIECE and WOODEN BUTTON (T).
- Place the METAL FEATHER (U); take the DOMINO.
- Move the book; take the DNA MODEL (V).
- Walk right.
- Take the SNOWFLAKE SIGN (1/2) (W).
- Place the DOMINO for a mini-game (X).
- Solution (Y).
- Take the CHEMISTRY ROOM KEY TAG.
- Place the WOODEN BUTTON (Z); take the ARTIFACT PIECE (A).
- Combine the ARTIFACT and 2 ARTIFACT PIECES for a mini-game.
- Solution (B); examine the ARTIFACT.
- Walk down three times.
- Place the CHEMISTRY ROOM KEY TAG (C); take the CHEMISTRY ROOM KEY.
- Walk forward.
- Use the CHEMISTRY ROOM KEY (D).
- Walk left.
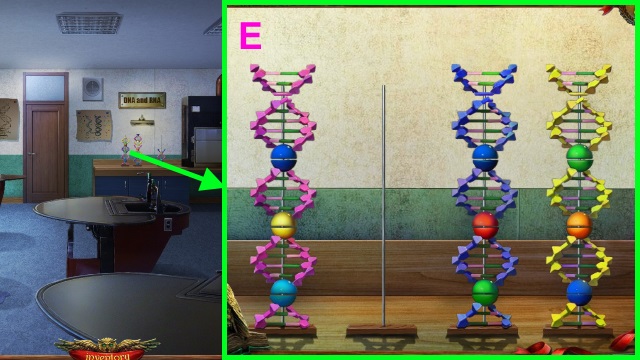
- Place the DNA MODEL for a mini-game.
- Solution (E).
- Take the STRAIGHT WIRE.
- Examine the STRAIGHT WIRE; take the WIRE HOOK.
- Use the WIRE HOOK (F); take the SNOWFLAKE SIGN (2/2) (G).
- Take the SAFETY GLOVES (H).
- Walk forward.
- Place the SNOWFLAKE SIGN (2/2) (I).
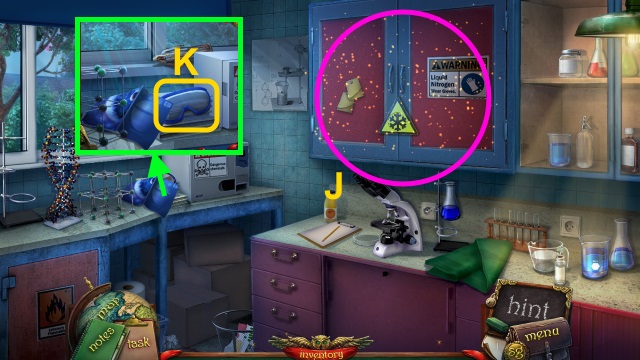
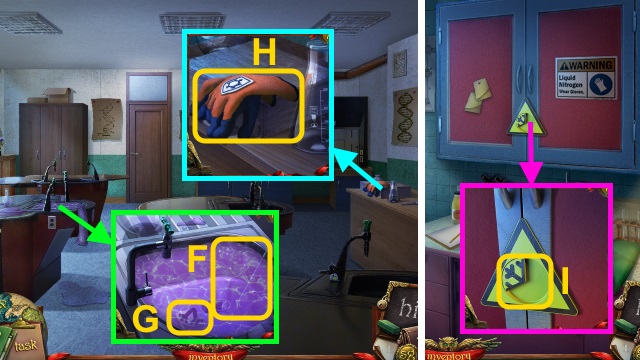
- Play the HOP; receive the NITROGEN CYLINDER (J).
- Move the book; take the SAFETY GOGGLES (K).
- Combine the NITROGEN CYLINDER, SAFETY GLOVES, and SAFETY GOGGLES.
- Walk down three times, left, then forward.
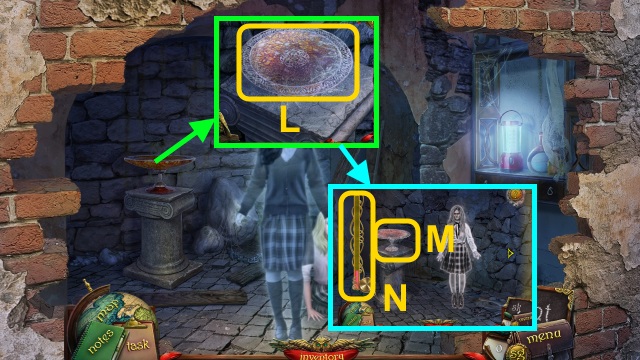
- Use the NITROGEN CYLINDER and SLEDGEHAMMER for a mini-game (L).
- Solution: dodge the ghost and hit the bowl (M) until the meter fills (N).
- Congratulations! You have completed Spirit of Revenge: A Test of Fire.
Created at: 2017-02-12