Walkthrough Menu
- General Tips
- Chapter 1: Elizabeth's Request
- Chapter 2: Oxford Castle
- Chapter 3: The Graveyard
- Chapter 4: Outside the Castle
- Chapter 5: Perche Castle
- Chapter 6: Saving Edward
General Tips
- This is the official guide for Spirit of Revenge: Elizabeth's Secret.
- This guide will not show when you have to zoom into a location; the screenshots will show each zoom scene.
- Hidden-object puzzles are referred to as HOPs. This guide will not show screenshots of the HOPs, however, it will mention when an HOP is available and the inventory item you'll collect from it.
- Use the Map to fast travel to a location.
Chapter 1: Elizabeth's Request
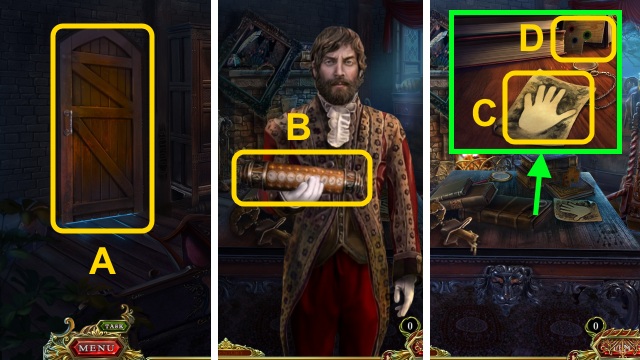
- Open the door (A).
- Take the SECRET MESSAGE TUBE (B).
- Take the paper (C) and DIVIDED PUNCH CARD (D).
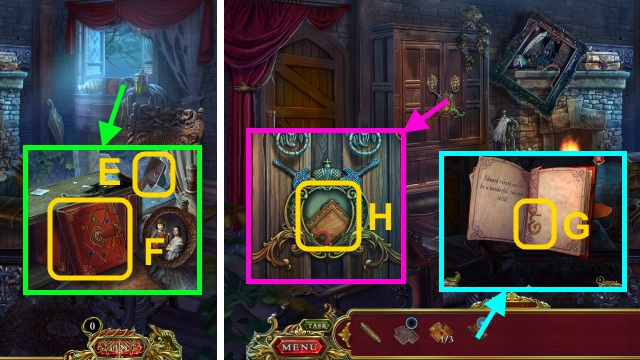
- Move the curtain; take the PUNCH CARD PIECES (1/3) (E) and DIARY (F).
- Flip through the DIARY; take the LETTER E (G).
- Take the PUNCH CARD PIECES (2/3) (H); place the LETTER E.
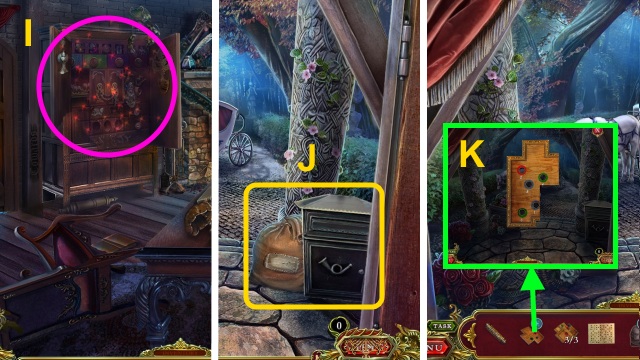
- Play the HOP to receive the DECIPHERING TABLE (I).
- Walk left.
- Move the bucket and dresser; take the SACK and PUNCH CARD PIECES (3/3) (J).
- Place the PUNCH CARD PIECES (3/3) on the DIVIDED PUNCH CARD for a mini-game (K).
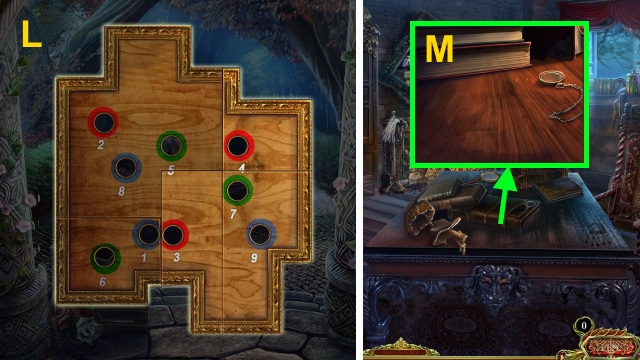
- Solution (L).
- You receive the PUNCH CARD.
- Walk down.
- Place the SECRET MESSAGE TUBE, DECIPHERING TABLE, and PUNCH CARD for a mini-game (M).
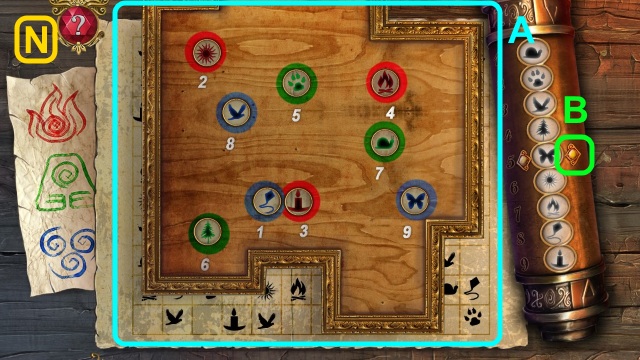
- Solution (N): A, Bx5.
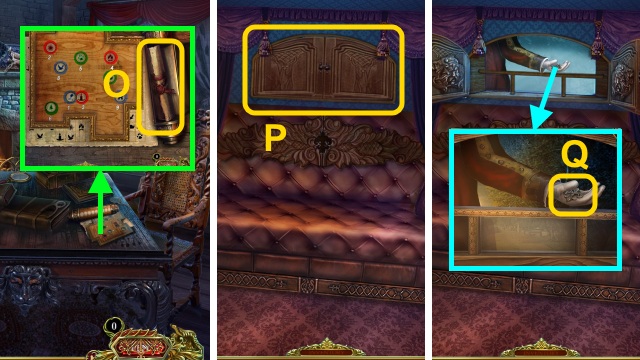
- Read the letter (O); play the HOP to receive the Bag.
- Walk left.
- Open the door (P).
- Take the FLEUR-DE-LIS (Q).
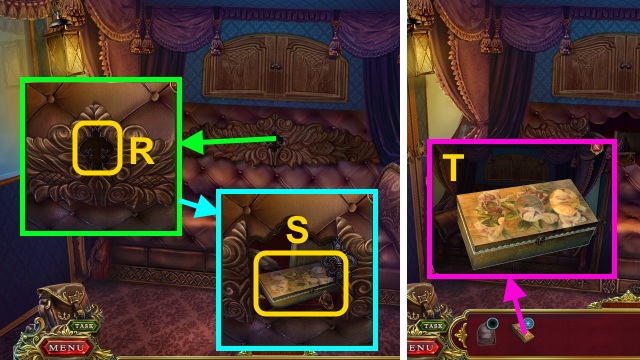
- Place the FLEUR-DE-LIS (R); take the SECRET BOX (S).
- Examine the SECRET BOX for a mini-game (T).
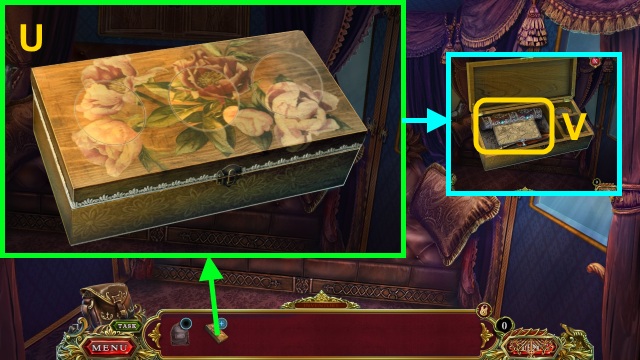
- Solution (U).
- Open the scroll; examine it for a mini-game (V).
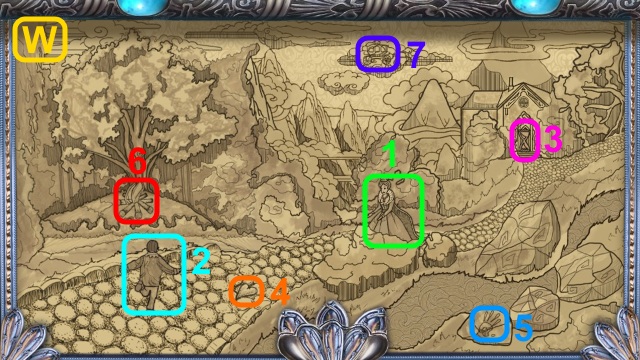
- Solution (W).
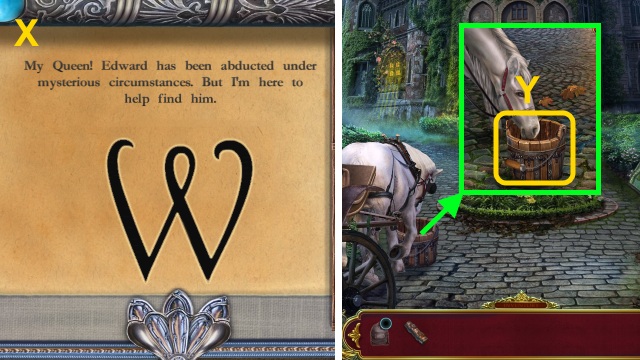
- Solution (X).
- You receive the MESSAGE.
- Take the BUCKET (Y).
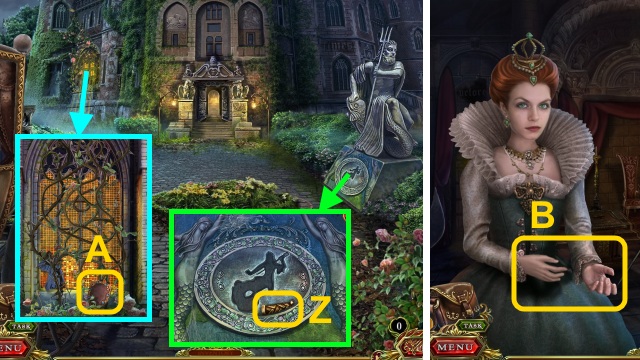
- Take the PHARAOH'S BEARD (Z).
- Take the GOLDEN SHIELD (A).
- Walk forward.
- Give the MESSAGE (B).
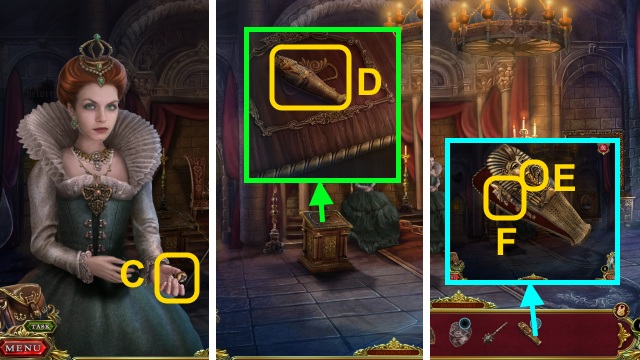
- Take the RING WITHOUT CROSS (C); you receive the GOLDEN MACE.
- Take the SARCOPHAGUS CASE (D).
- Place the PHARAOH'S BEARD on the SARCOPHAGUS CASE (E); take the GOLDEN KNIGHT (F).
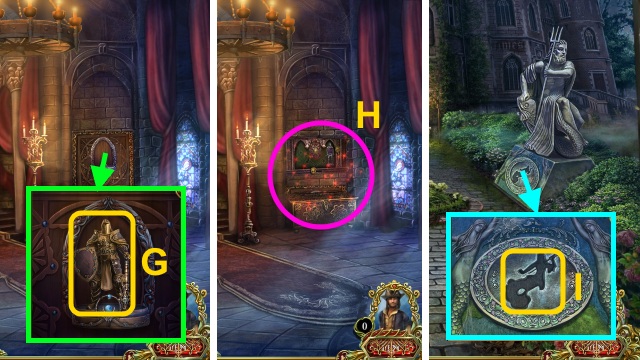
- Place the GOLDEN KNIGHT, GOLDEN MACE, and GOLDEN SHIELD (G).
- Play the HOP to receive the NEPTUNE FIGURINE (H).
- Walk down.
- Place the NEPTUNE FIGURINE (I).
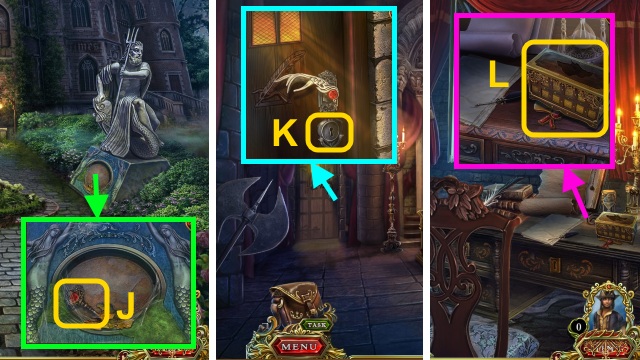
- Take the SCRIBE'S OFFICE KEY (J).
- Walk forward.
- Use the SCRIBE'S OFFICE KEY (K).
- Walk left.
- Take the LOCKED BOX and SCRIBE EMBLEM (L).
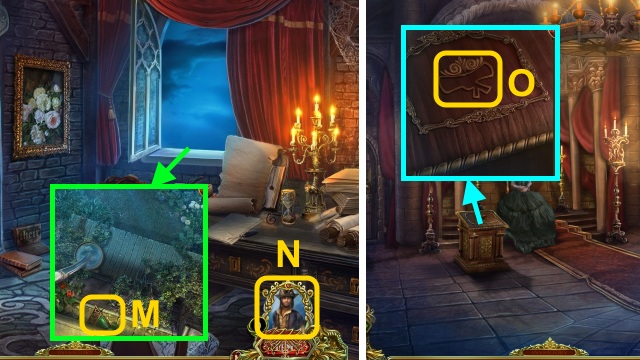
- Take the ARROW (M); give Francis the BUCKET (N).
- You receive the BUCKET OF WATER.
- Walk down.
- Place the SCRIBE EMBLEM (O).
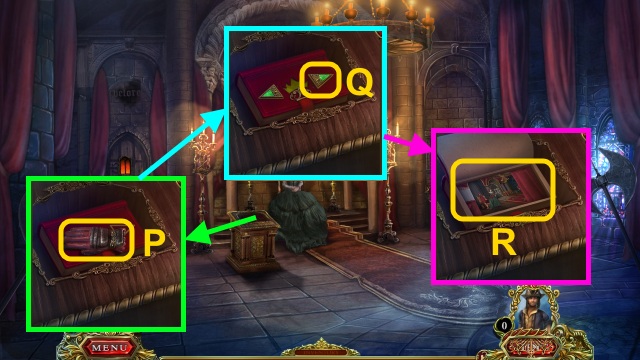
- Take the GLOVE (P).
- Place the ARROW (Q); press it four times.
- Examine the book for a mini-game (R).
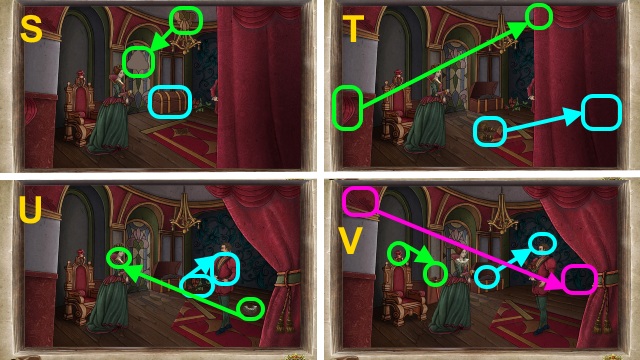
- Solution (S-V).
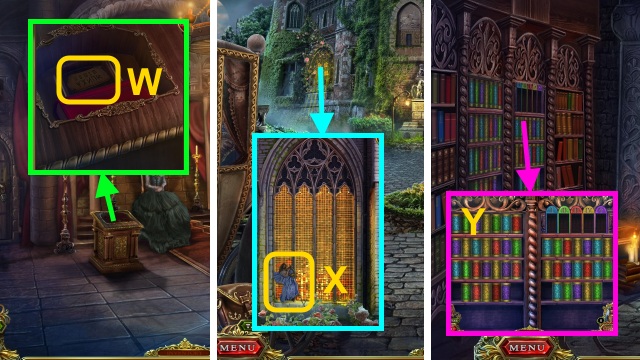
- Take the SHEET WITH SYMBOLS (W).
- Walk down.
- Use the GLOVE; take ORPHEUS (X).
- Walk forward, then left.
- Place the SHEET WITH SYMBOLS for a mini-game (Y).
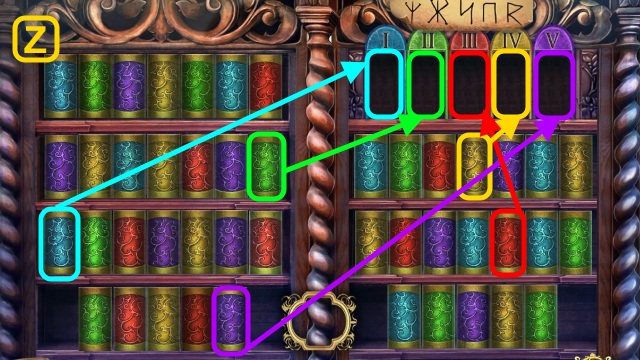
- Solution (Z).
- Examine behind the bookshelf.
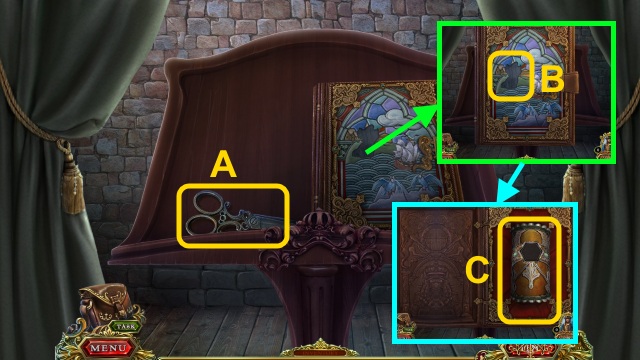
- Take the SCISSORS (A).
- Place ORPHEUS (B); take the SCROLL (C).
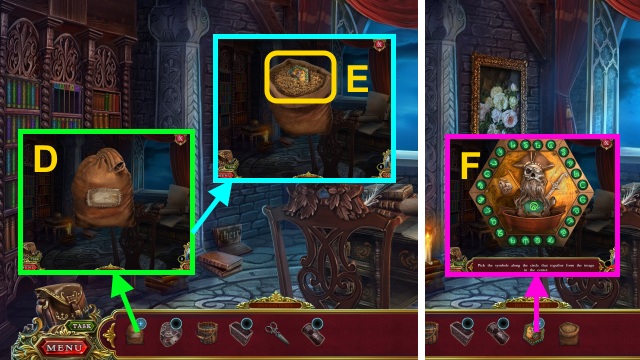
- Use the SCISSORS on the SACK (D); open it.
- Take the SCROLL TOKEN and SACK (E).
- Examine the SCROLL TOKEN for a mini-game (F).
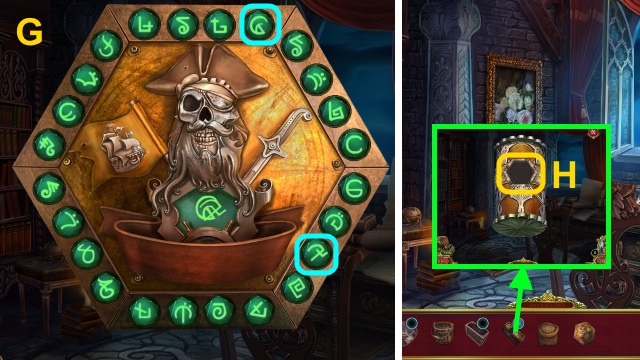
- Solution (G).
- You receive the SCROLL TOKEN.
- Place the SCROLL TOKEN on the SCROLL (H); you receive the BOX KEY.
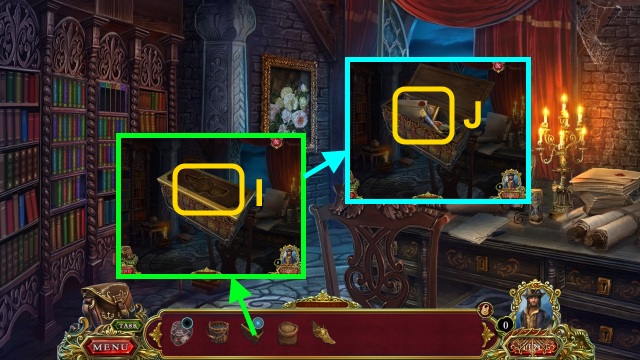
- Place the BOX KEY on the LOCKED BOX (I); take the letter and MAP (J).
- Walk down twice.
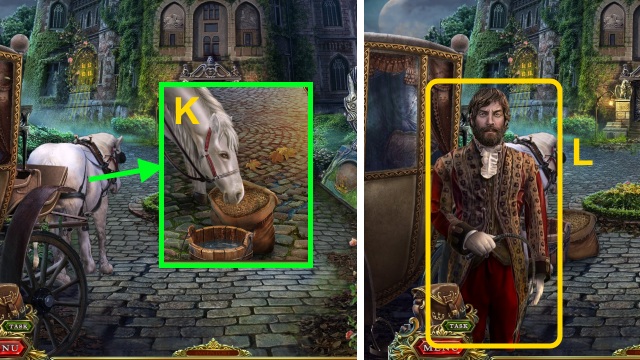
- Place the BUCKET OF WATER and SACK (K).
- Give the MAP (L).
Chapter 2: Oxford Castle
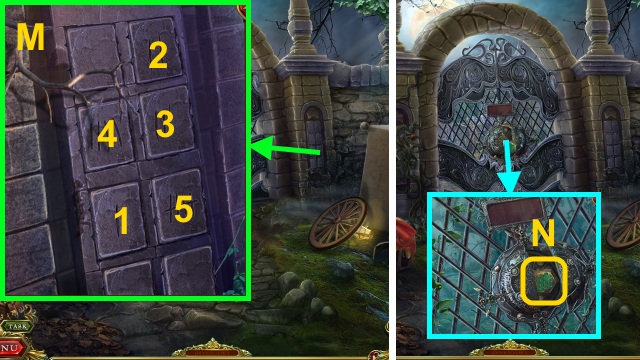
- Examine the stones for a mini-game (M).
- Solution (1-5).
- Take the SCROLL TOKEN (N).
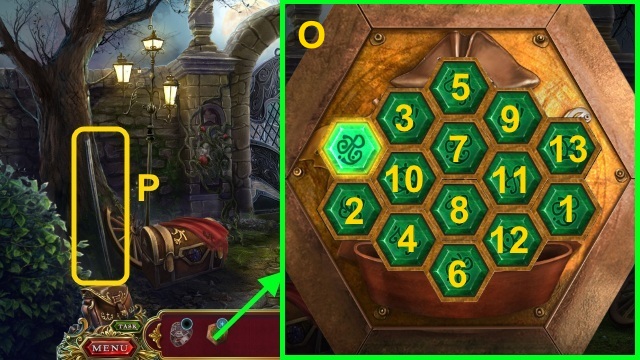
- Examine the SCROLL TOKEN for a mini-game.
- Solution (O).
- You receive the SCROLL TOKEN.
- Take the STICK (P).
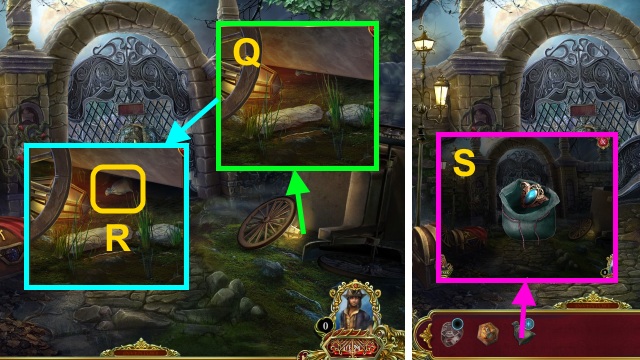
- Give Francis the STICK (Q); take the POUCH (R).
- Open the POUCH; take the CHEST KEY (S).
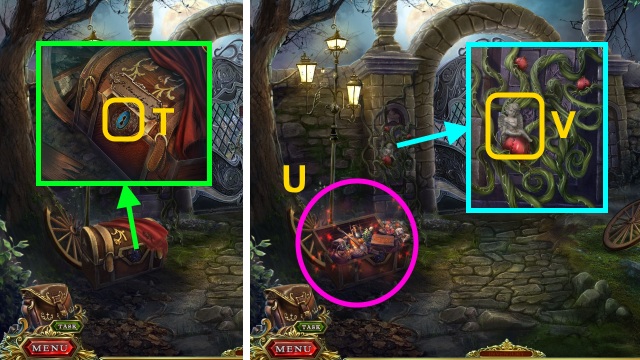
- Use the CHEST KEY (T).
- Play the HOP to receive the GARDEN SHEARS (U).
- Take the CHERUB (V); use the GARDEN SHEARS for a mini-game.
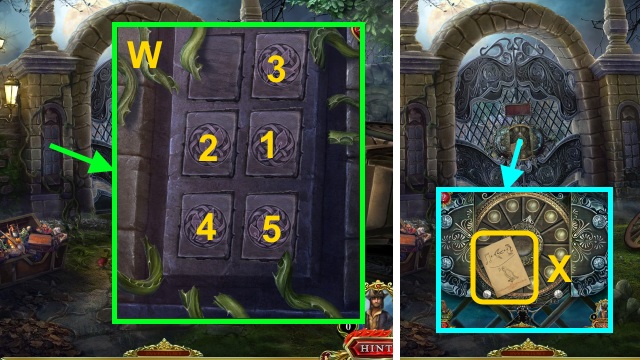
- Solution (W).
- Read the note for a mini-game (X).
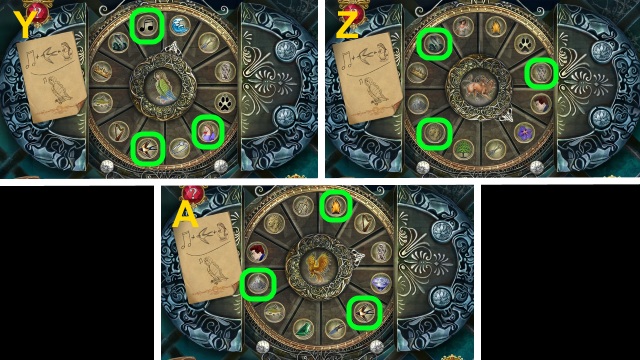
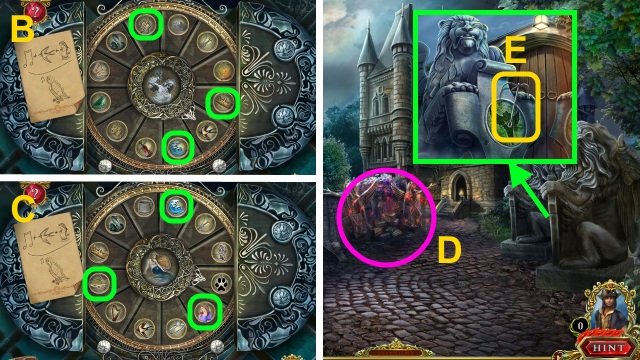
- Solution (Y-C).
- Walk forward.
- Play the HOP to receive the BIRD BODY (D).
- Take the HOOK (E).
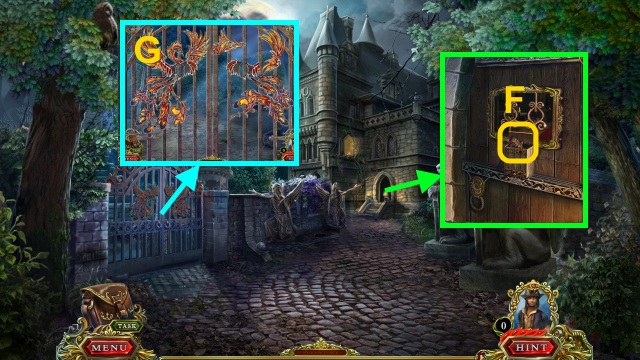
- Open the door; take the PHOENIX HEAD (F).
- Place the PHOENIX HEAD for a mini-game (G).
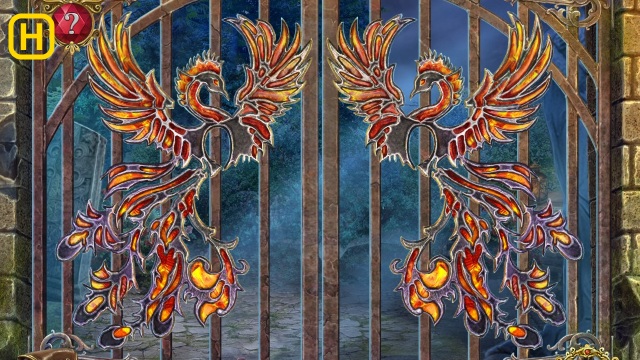
- Solution (H).
- Walk left.
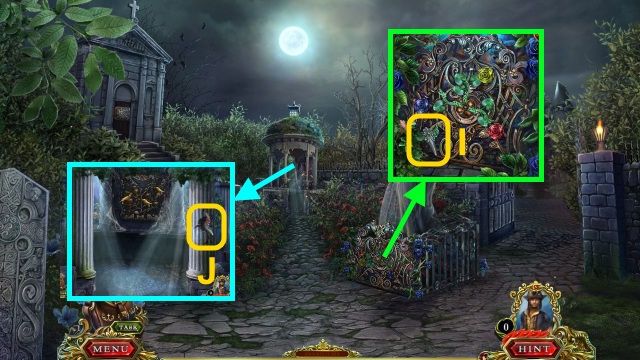
- Take the GREEN LION TOKEN (I).
- Take the RED LION TOKEN (J).
- Walk down, then right.
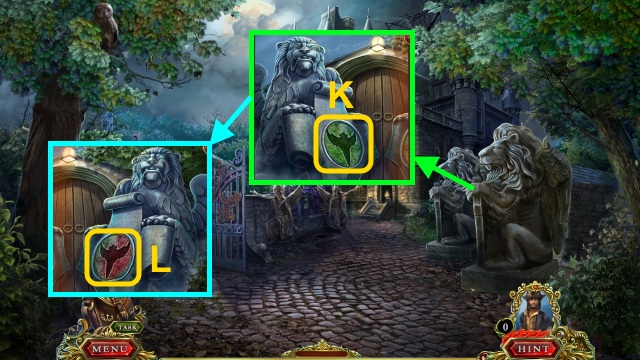
- Place the GREEN LION TOKEN (K); scroll right.
- Place the RED LION TOKEN for a mini-game (L).
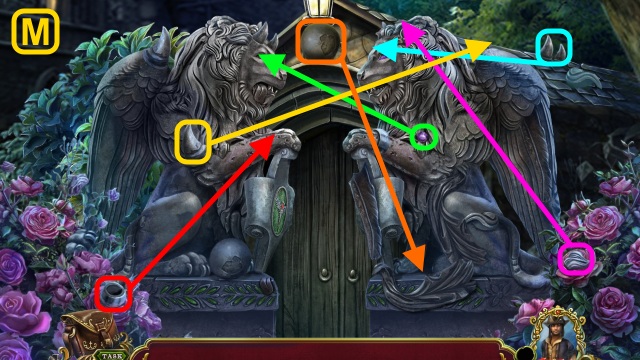
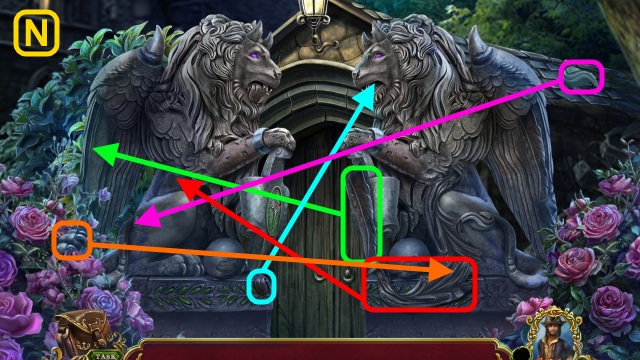
- Solution (M, N).
- Walk right.
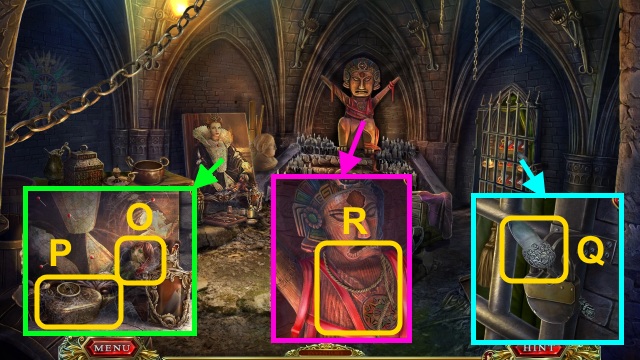
- Take the RED-HAIRED DOLL (O) and OIL CAN (P).
- Take the SPATULA (Q).
- Take the ROPE (R).
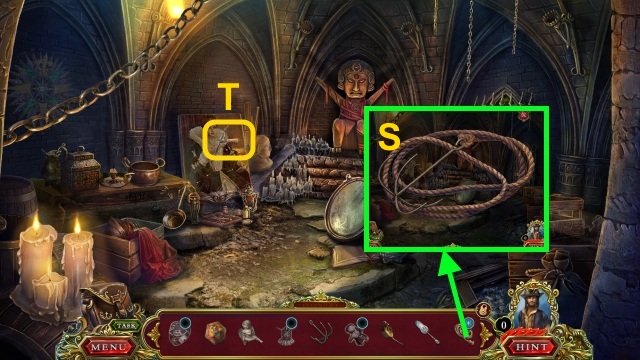
- Place the HOOK on the ROPE to make the HOOK ON ROPE (S).
- Take the KNIFE (T).
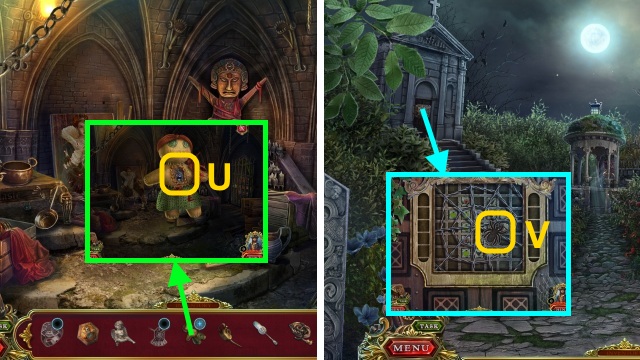
- Use the KNIFE on the RED-HAIRED DOLL; take the METAL SPIDER (U).
- Walk down, then left.
- Place the METAL SPIDER for a mini-game (V).
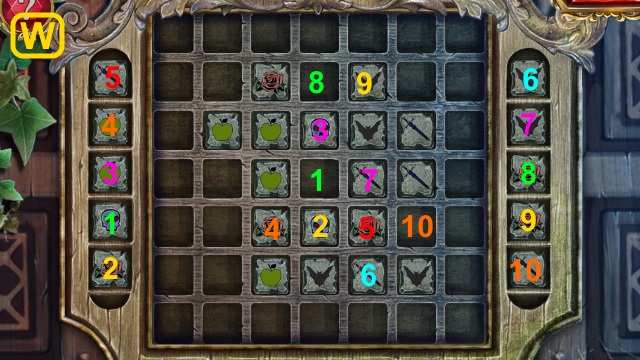
- Solution (W).
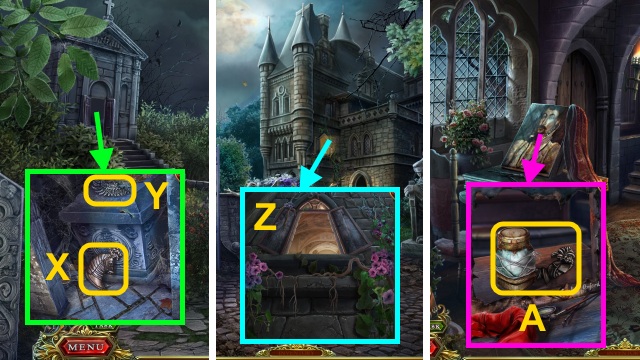
- Take the MURAL PIECES (1/2) (X) and WING (1/2) (Y).
- Walk right.
- Give the HOOK ON ROPE to Francis (Z).
- Take the MURAL PIECES (2/2) and TURPENTINE (A).
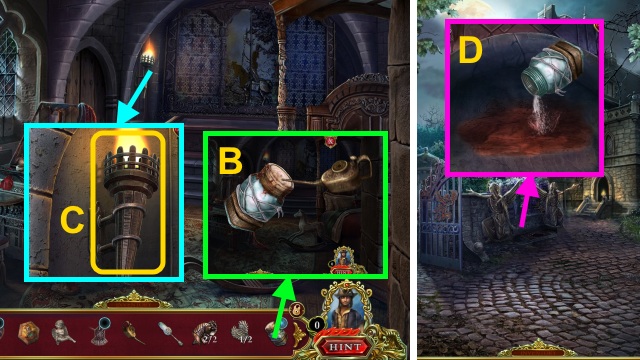
- Use the OIL CAN on the TURPENTINE to receive the TURPENTINE (B).
- Take the BURNING TORCH (C).
- Walk down.
- Use the TURPENTINE and SPATULA (D).
- Go up.
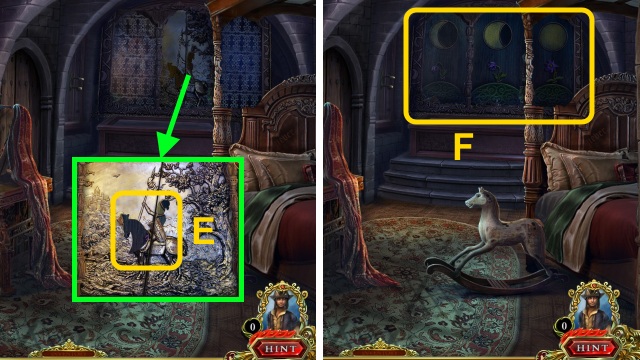
- Place the MURAL PIECES (2/2) (E).
- Examine the wall for a mini-game (F).

- Solution (G).
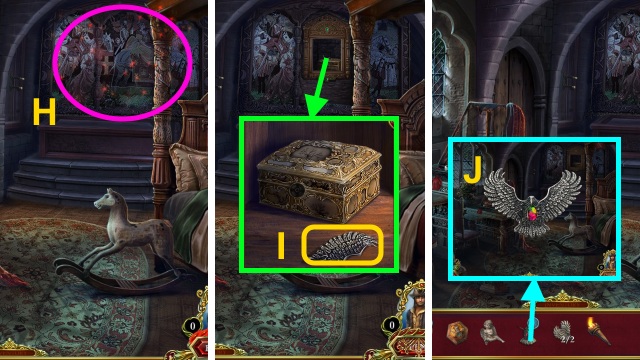
- Play the HOP (H).
- Take the WING (2/2) (I).
- Place the WING (2/2) on the BIRD BODY to receive the BIRD (J).
- Walk down, then left.
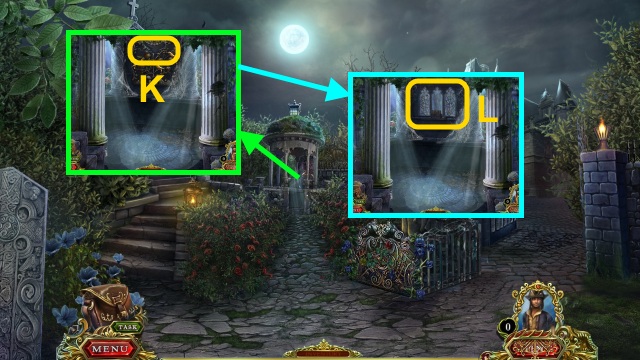
- Place the BIRD (K).
- Examine the wall for a mini-game (L).
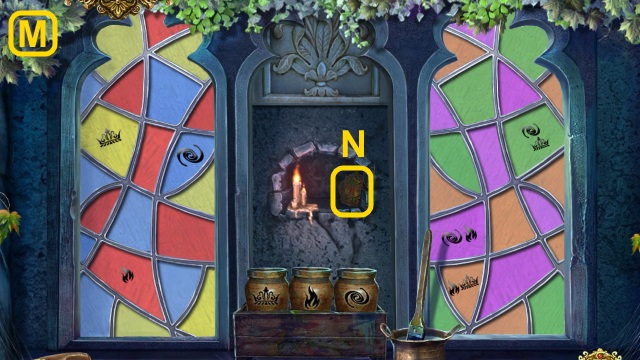
- Solution (M).
- Take the IDOL AMULET (N).
- Walk down, then right twice.
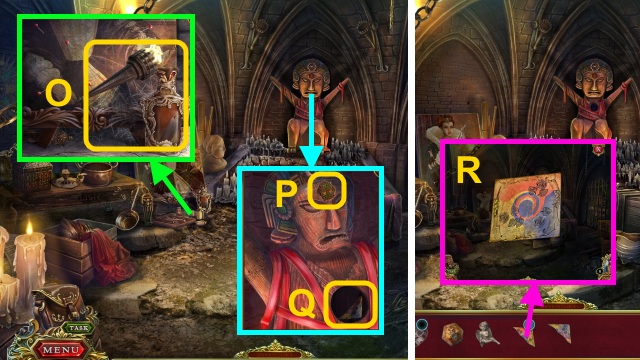
- Use the BURNING TORCH to receive the CLUE HALF 1 (O).
- Place the IDOL AMULET (P); take the CLUE HALF 2 (Q).
- Place the CLUE HALF 2 on the CLUE HALF 1 to make the NOTE WITH CLUE (R).
- Walk down, then left.
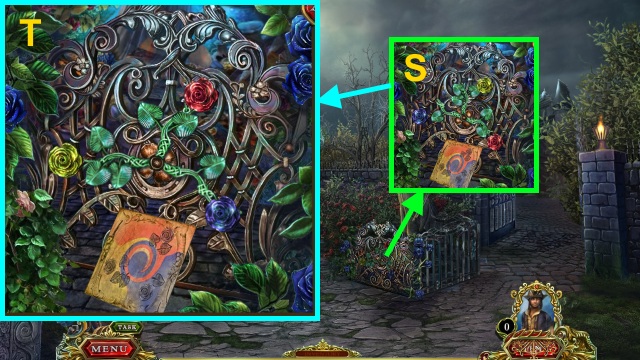
- Examine the fence for a mini-game (S).
- Solution (T).
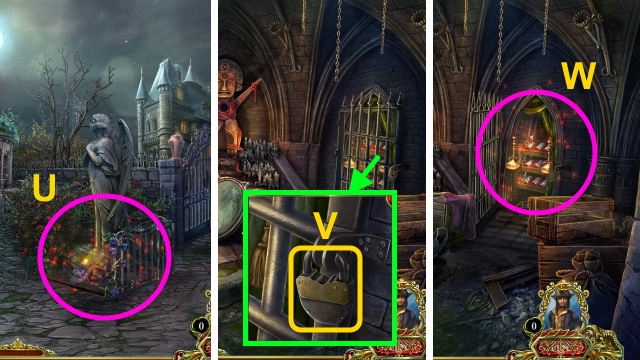
- Play the HOP to receive the HAMMER (U).
- Walk right twice.
- Give Francis the HAMMER (V).
- Play the HOP to receive the SCROLL (W).
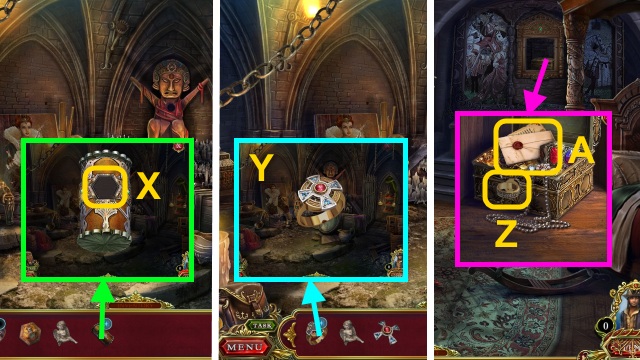
- Place the SCROLL TOKEN on the SCROLL (X); you receive the RING CROSS.
- Place the RING CROSS on the RING WITHOUT CROSS to receive the COUNT'S RING (Y).
- Walk down, then up.
- Use the COUNT'S RING (Z); read the letter (A).
Chapter 3: The Graveyard
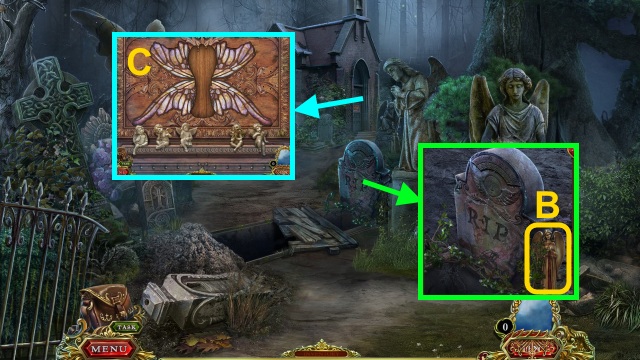
- Take the ANGEL FIGURINE (B).
- Place the ANGEL FIGURINE and CHERUB for a mini-game (C).
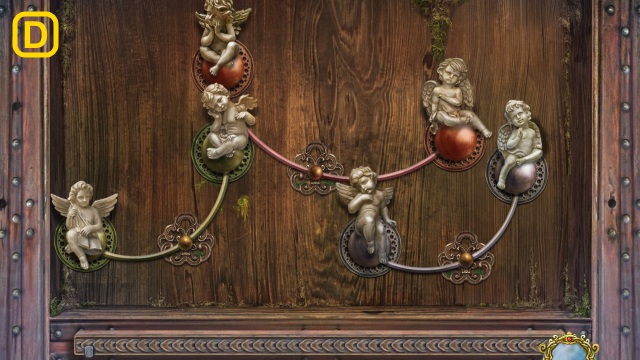
- Solution (D).
- Walk forward.
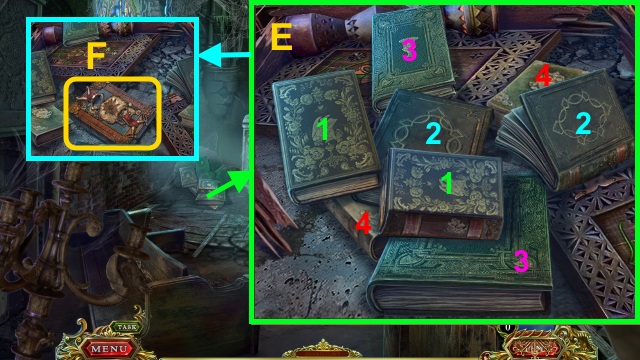
- Examine the books for a mini-game; solution (E).
- Take the OLD BOOK (F).
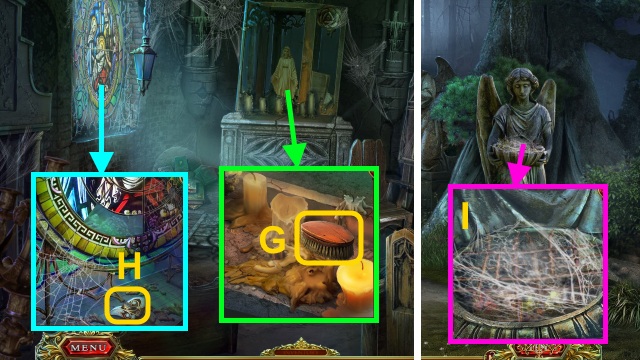
- Take the BRUSH (G).
- Take the WING PATTERN (H).
- Walk down.
- Use the BRUSH for a mini-game (I).
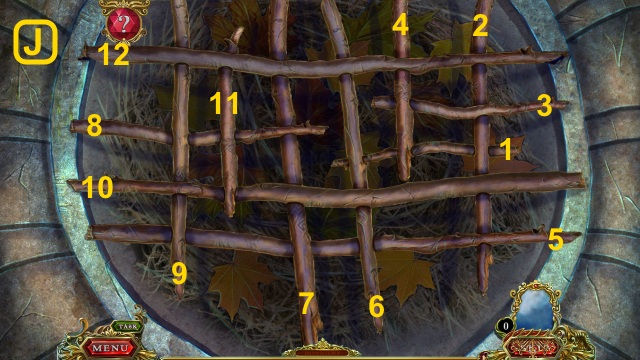
- Solution (J).
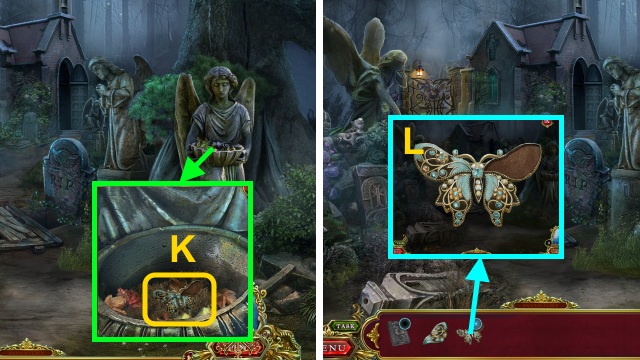
- Move the LEAVES; take the BROKEN MOTH EMBLEM (K).
- Place the WING PATTERN on the BROKEN MOTH EMBLEM to make the MOTH EMBLEM (L).
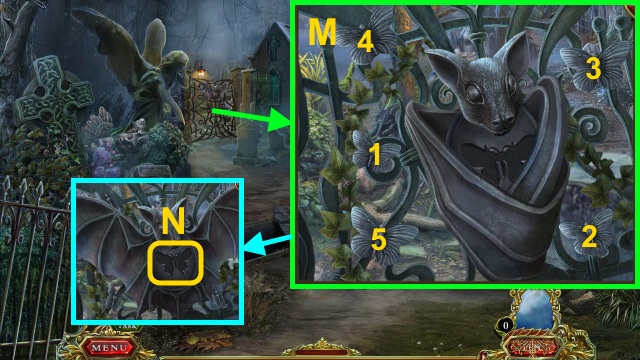
- Press the moths in order (M); place the MOTH EMBLEM (N).
- Walk left.
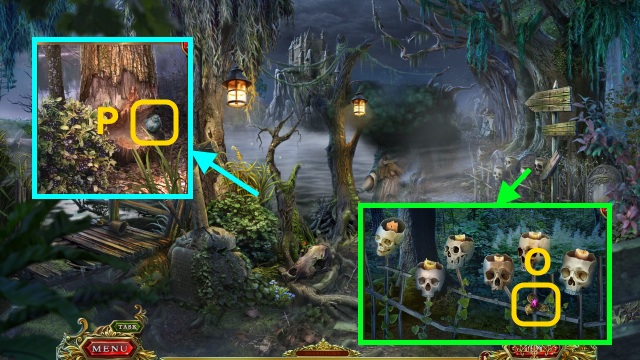
- Take the GOLDEN FLOWER (1/3) (O).
- Move the grass; take the DOVE (P).
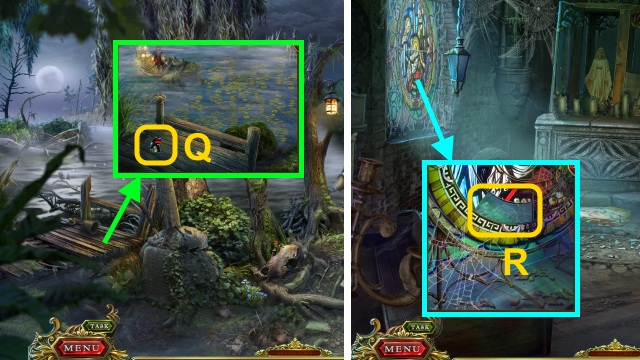
- Take the DISK SEGMENT (Q).
- Walk down, then right.
- Place the DISK SEGMENT for a mini-game (R).

- Solution (S).
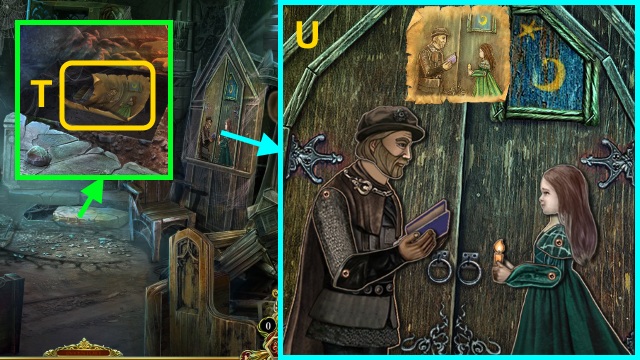
- Take the drawing and PAINTING BRUSH (T).
- Examine the cupboard for a mini-game; solution (U).
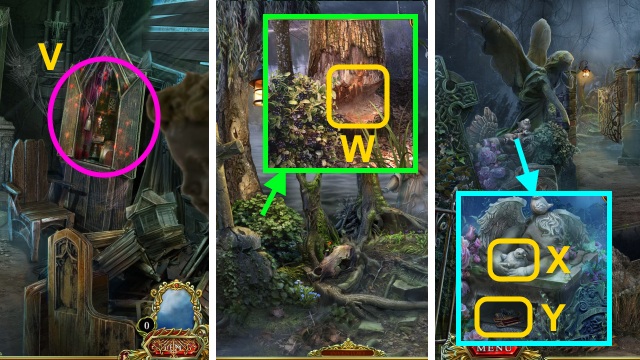
- Play the HOP to receive the LITTLE BELL (V).
- Walk down, then left.
- Use the PAINTING BRUSH to receive the BRUSH IN RESIN (W).
- Walk down.
- Use the BRUSH IN RESIN; place the DOVE (X).
- Take the MATCHES (Y).
- Walk left.
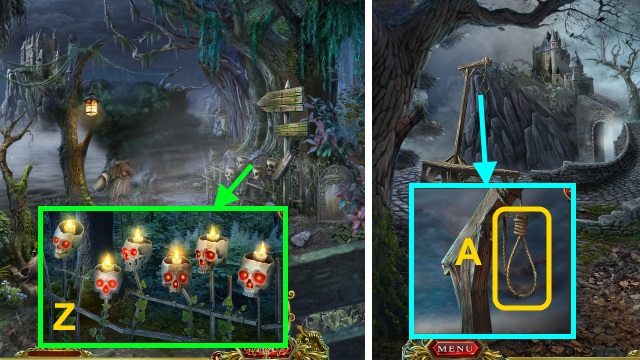
- Use the MATCHES (Z); light the skulls.
- Walk forward.
- Examine the rope; take the ROPE WITH NOOSE (A).
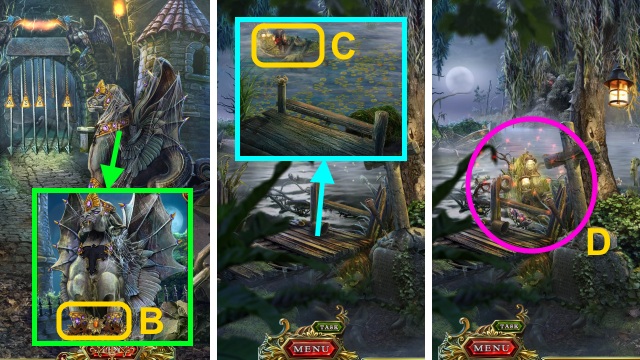
- Take the GOLDEN WREATH (B).
- Walk down.
- Use the ROPE WITH NOOSE (C).
- Play the HOP to receive the AXE (D).
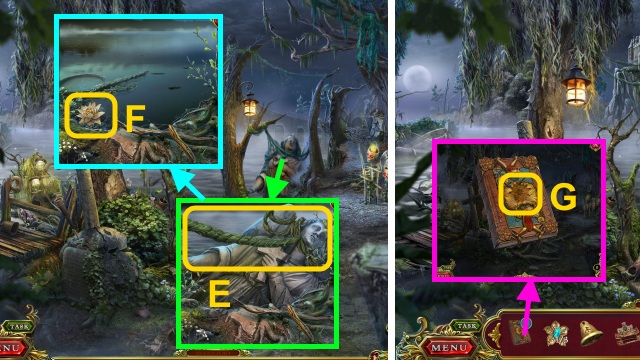
- Use the AXE (E); take the WATER LILY (F).
- Place the WATER LILY on the OLD BOOK for a mini-game (G).
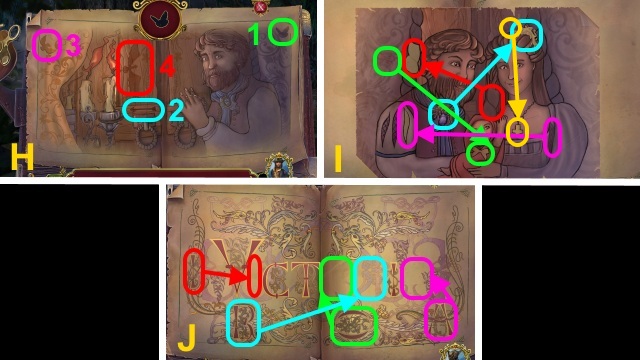
- Solution (H-J).
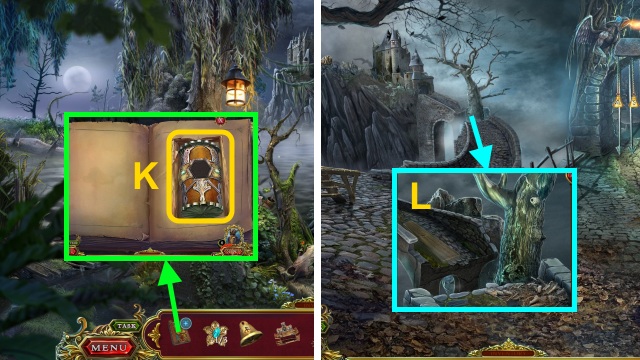
- Take the SCROLL (K).
- Walk forward.
- Give Francis the ROPE WITH NOOSE (L).
- Cross the plank.
Chapter 4: Outside the Castle
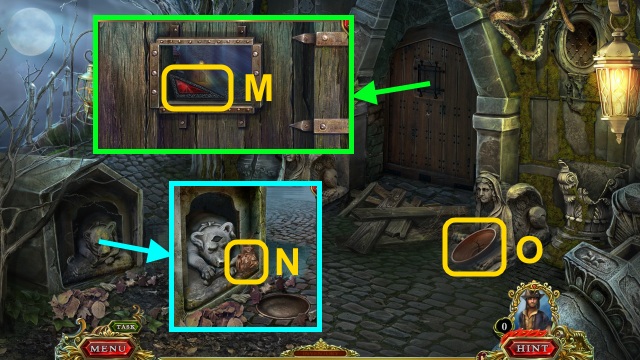
- Take the TRIANGLE (M).
- Take the CLAY (N).
- Take the CRACKED SAUCER (O).
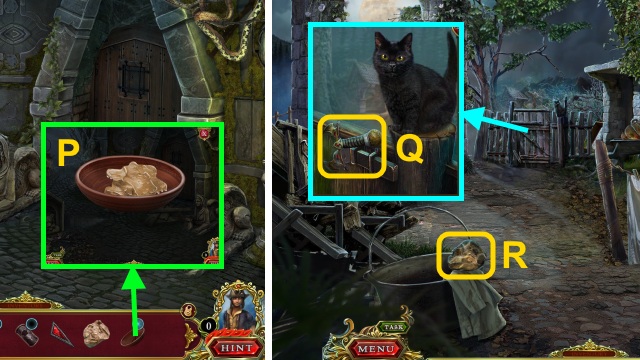
- Use the CLAY on the CRACKED SAUCER to make the SAUCER WITH RAW CLAY (P).
- Walk left.
- Take the DAGGER HANDLE (Q).
- Take the STONE (R).
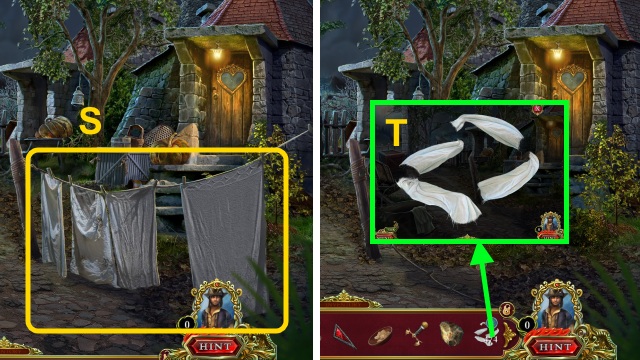
- Take the SHEETS (1/4)-(4/4) (S).
- Examine the SHEETS (4/4) (T); tie them to make the MAKESHIFT ROPE.
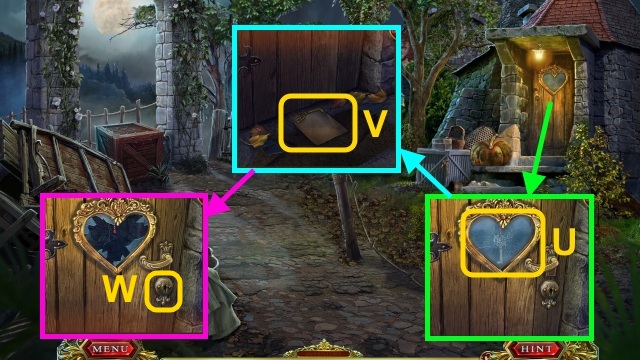
- Use the STONE (U); examine the key.
- Scroll down.
- Pull the paper (V); take the KEY.
- Scroll up; use the KEY (W).
- Walk right.
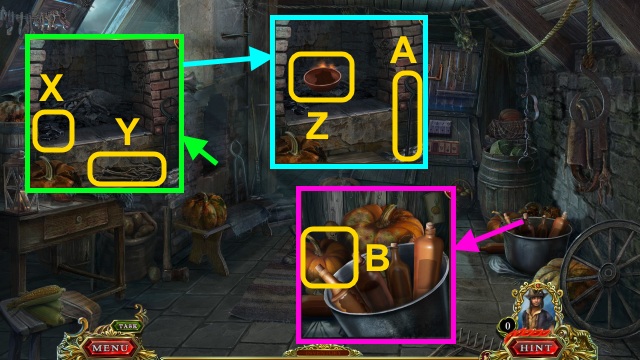
- Take the CHARCOAL (X); place the firewood in the fireplace (Y).
- Use the MATCHES; place the SAUCER WITH RAW CLAY (Z).
- Use the tongs to take the SAUCER (A).
- Take the PUMPKIN (B).
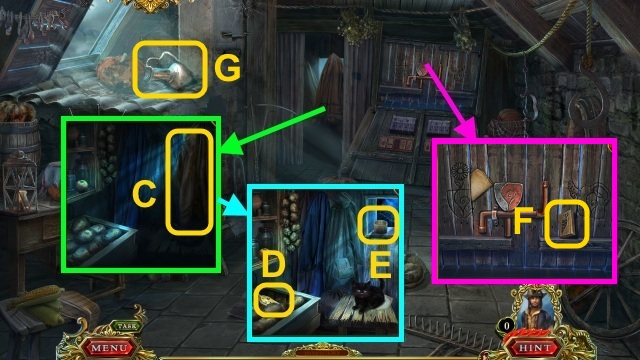
- Move the coat (C).
- Move the potatoes; take the OIL (D) and CANDLE (E).
- Take the DOMINO CHIP (1/2) (F).
- Take the JUG (G).
- Walk down three times.
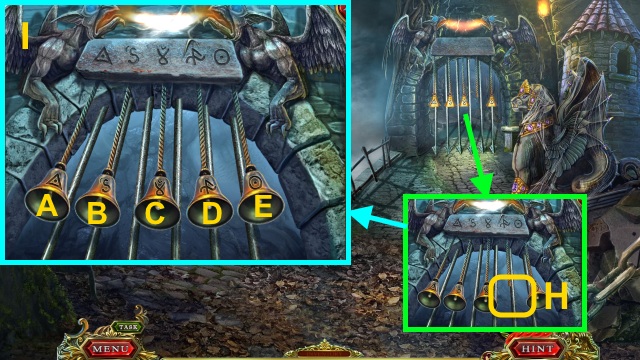
- Place the LITTLE BELL for a mini-game (H).
- Solution (I): A, D, B, E, A, C, D, B, E, D, A, C.
- Walk right.
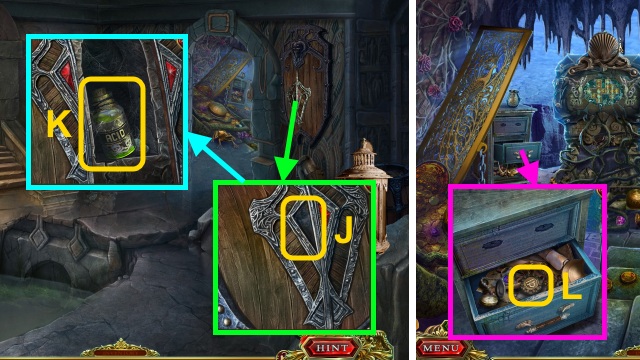
- Place the TRIANGLE (J); take the ACID (K).
- Walk forward.
- Move the treasures; take the LIBRA (L).
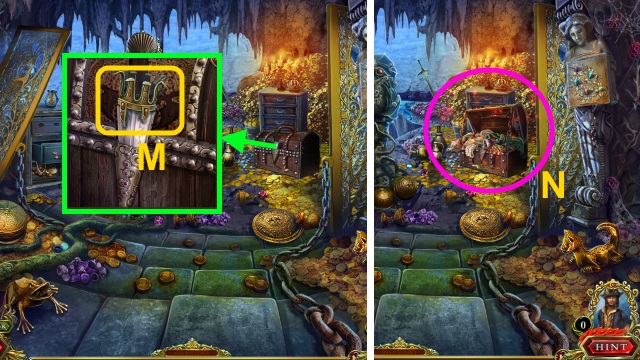
- Take the FIREBIRD CROWN (M); place the DAGGER HANDLE.
- Play the HOP to receive the SEAL BASE (N).
- Walk down.
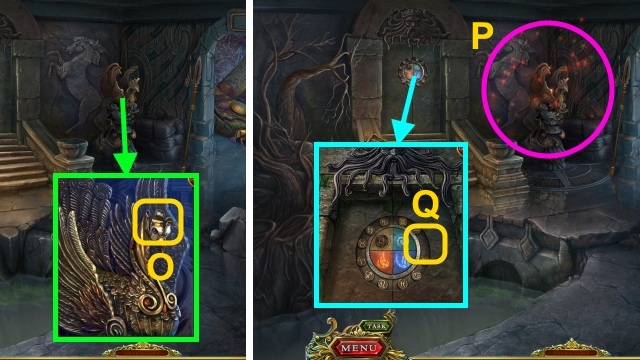
- Place the FIREBIRD CROWN (O).
- Play the HOP to receive the COLLAR DETAIL (P).
- Place the LIBRA for a mini-game (Q).
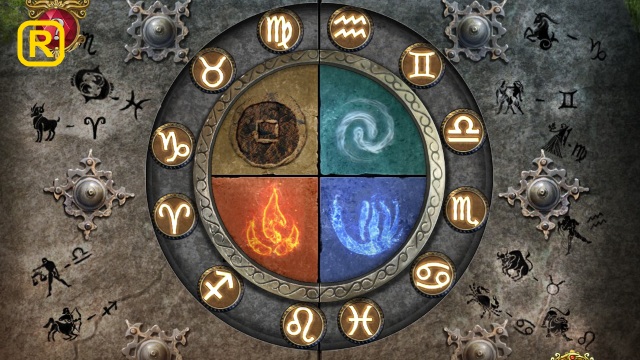
- Solution (R).
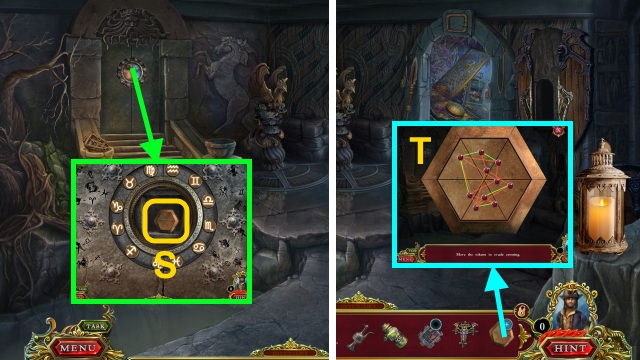
- Take the TALISMAN (S).
- Examine the TALISMAN for a mini-game (T).
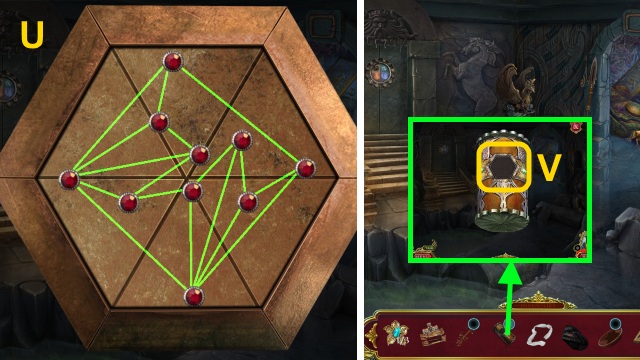
- Solution (U).
- You receive the SCROLL TOKEN.
- Place the SCROLL TOKEN on the SCROLL (V); you receive the LEATHER GLOVES.
- Walk down.
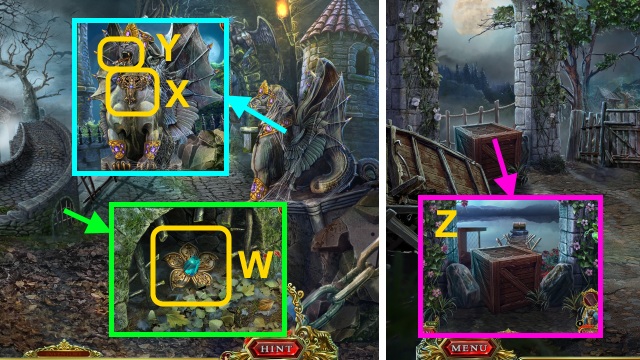
- Use the ACID; take the GOLDEN FLOWER (2/3) (W).
- Place the COLLAR DETAIL (X); take the CABINET HANDLE (Y).
- Walk left twice.
- Give Francis the LEATHER GLOVES (Z).
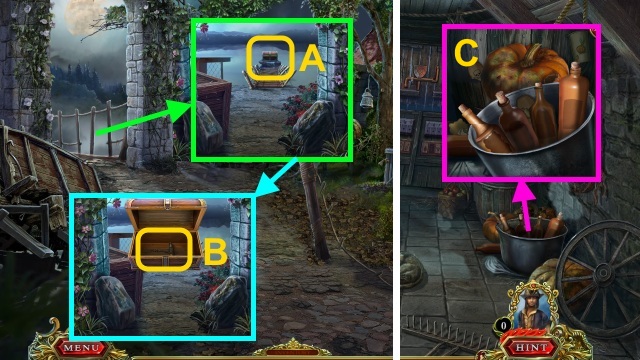
- Open the chest (A); take the CORKSCREW (B).
- Walk down, then right.
- Examine the bottles for a mini-game (C).
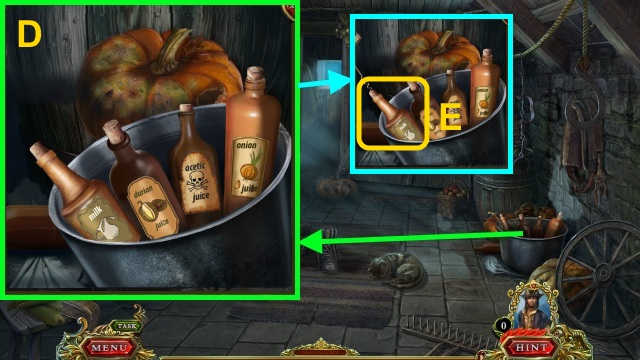
- Solution (D).
- Use the CORKSCREW; take the BOTTLE OF MILK (E).
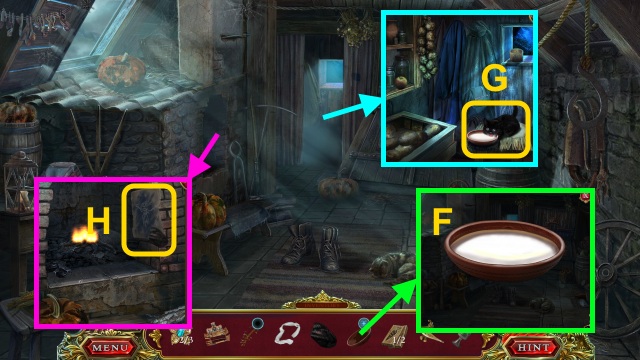
- Pour the BOTTLE OF MILK into the SAUCER to make the SAUCER OF MILK (F).
- Give the SAUCER OF MILK; take the KITTEN and PAPER (G).
- Use the PAPER and CHARCOAL (H); take the FIREPLACE TRACING.
- Walk down.
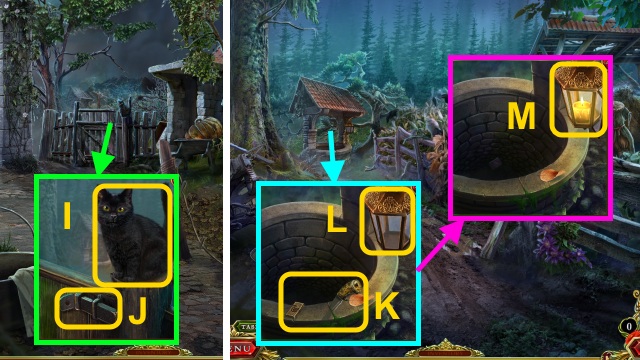
- Give the KITTEN (I); open the gate (J).
- Walk left.
- Take the KNIFE and DOMINO CHIP (2/2) (K); open the lantern (L).
- Place the CANDLE; use the MATCHES (M).
- Give Francis the MAKESHIFT ROPE; you receive the TALISMAN.
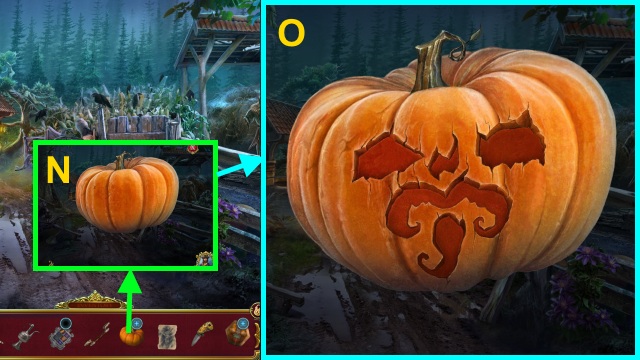
- Use the KNIFE on the PUMPKIN for a mini-game (N).
- Solution (O).
- Take the SCARECROW HEAD.
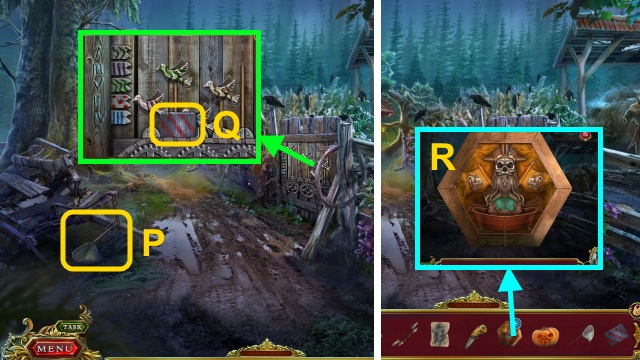
- Take the BUTTERFLY NET (P).
- Take the SEAL PART (Q).
- Examine the TALISMAN for a mini-game (R).
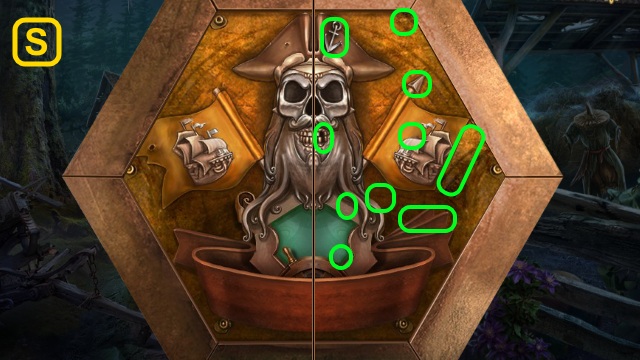
- Solution (S).
- You receive the SCROLL TOKEN.
- Walk down, then right.
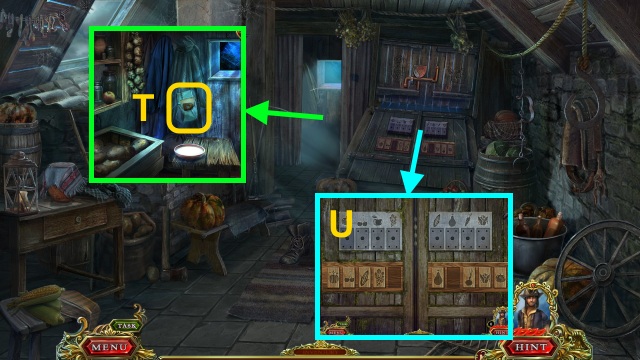
- Use the KNIFE; take the LETTER P (T).
- Place the DOMINO CHIP (2/2) for a mini-game (U).
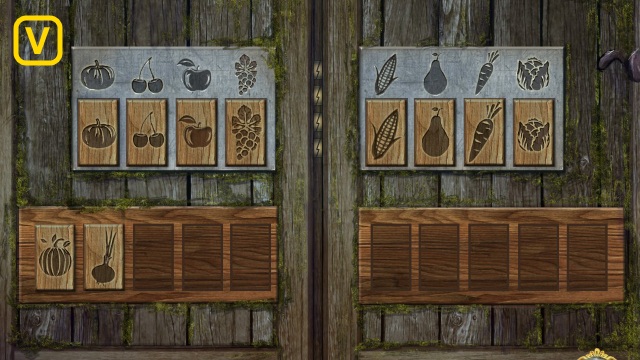
- Solution (V).
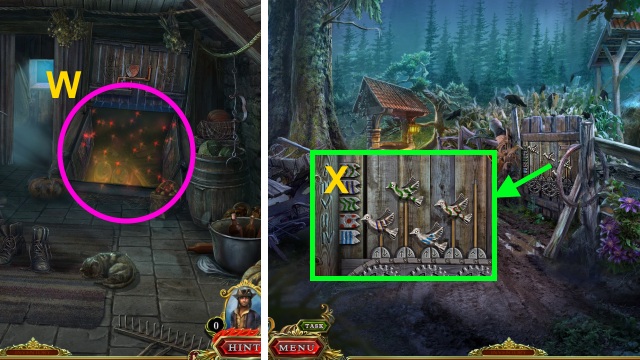
- Play the HOP to receive the LITTLE BIRD (W).
- Walk down, then left.
- Place the LITTLE BIRD for a mini-game (X).
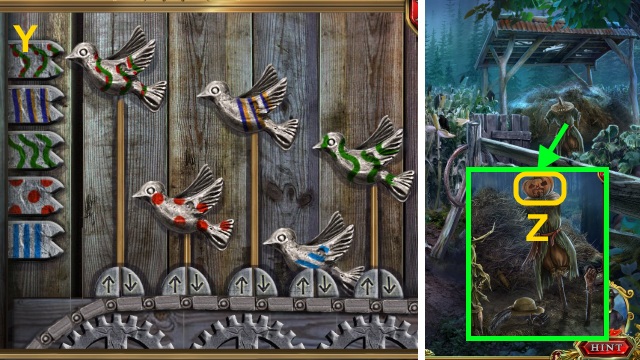
- Solution (Y).
- Place the SCARECROW HEAD (Z); assemble the scarecrow.
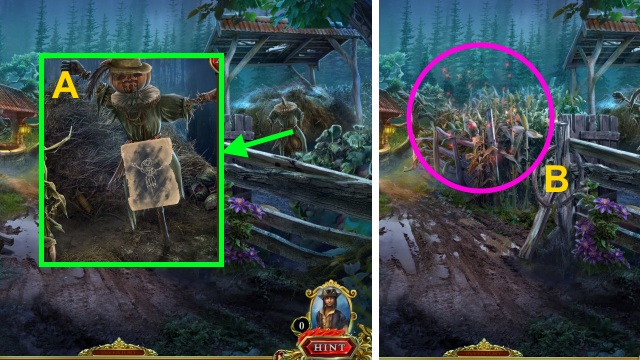
- Give the FIREPLACE TRACING; arrange the arms (A).
- Play the HOP to receive the SHOVEL (B).
- Walk down three times, then right twice.
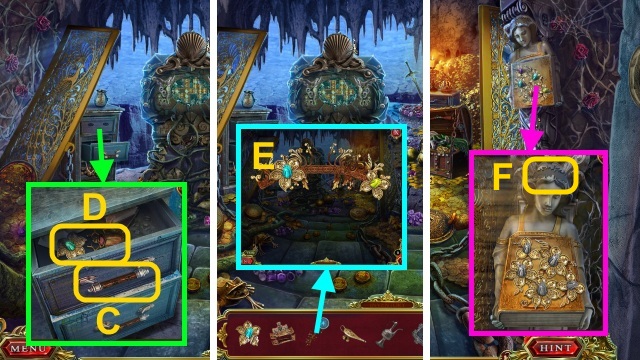
- Place the CABINET HANDLE; open the drawer (C).
- Take the GOLDEN FLOWER (3/3) and SCARAB (D).
- Place the GOLDEN FLOWER (3/3) on the GOLDEN WREATH (E).
- Place the GOLDEN WREATH for a mini-game (F).
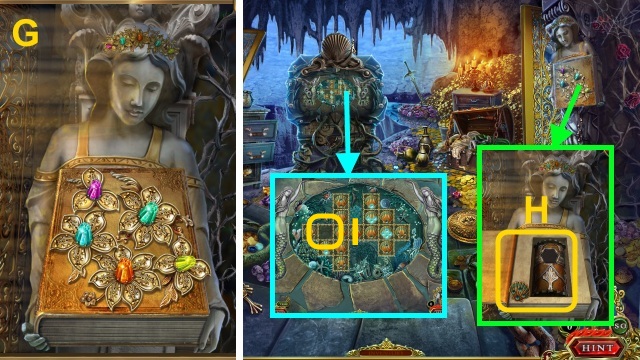
- Solution (G).
- Take the SHELL and SCROLL (H).
- Place the SHELL for a mini-game (I).
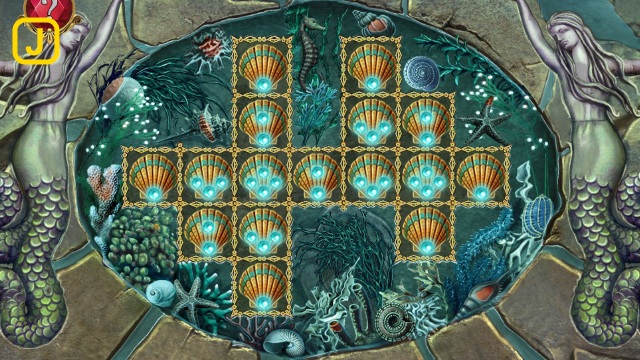
- Solution (J).
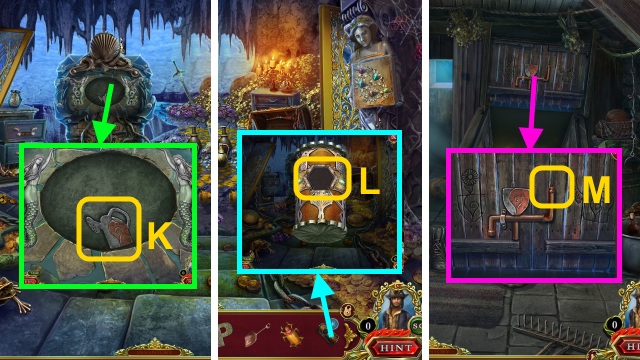
- Take the WATERING CAN TOKEN (K).
- Place the SCROLL TOKEN on the SCROLL (L); you receive the SKULLS (1/4).
- Walk down twice, left twice, then right.
- Place the WATERING CAN TOKEN for a mini-game (M).
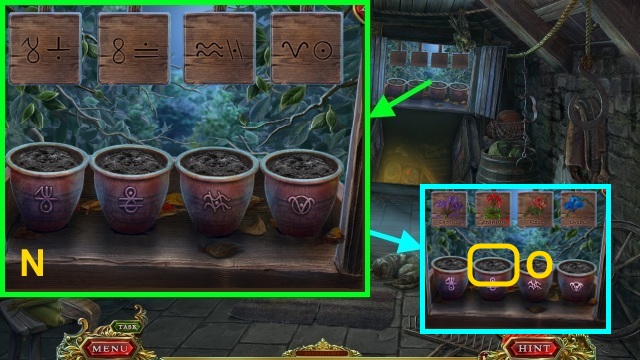
- Solution (N).
- Use the SHOVEL; take the FAMILY CREST PART (O).
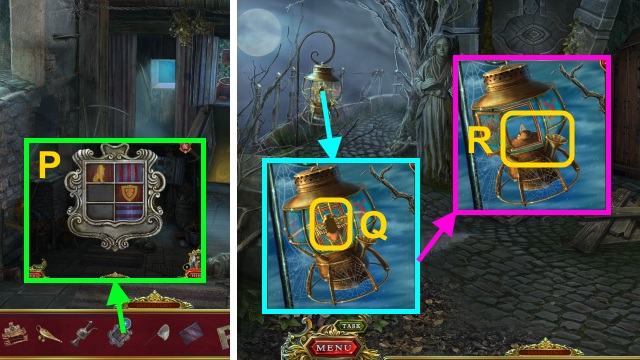
- Place the SEAL PART and FAMILY CREST PART on the SEAL BASE to make the SEAL (P).
- Walk down twice.
- Place the SCARAB (Q); use the OIL and MATCHES (R).
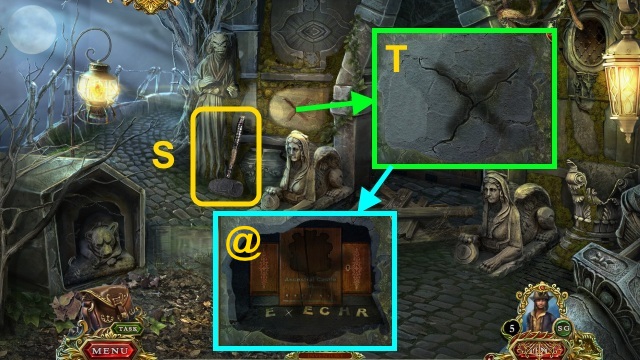
- Take the SLEDGEHAMMER (S).
- Use the SLEDGEHAMMER (T); place the LETTER P and SEAL for a mini-game (@).
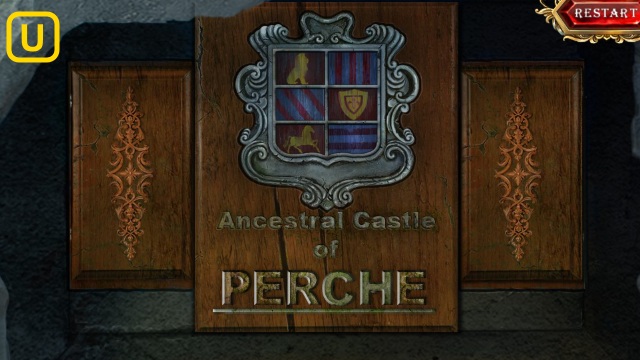
- Solution (U).
- Walk right.
Chapter 5: Perche Castle
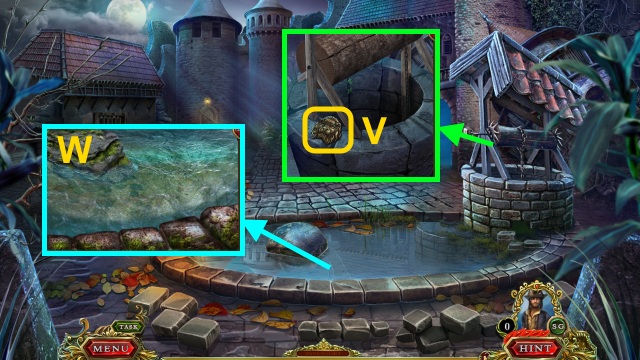
- Take the LION HEAD (1/3) (V).
- Use the JUG to receive the JUG OF WATER (W).
- Walk right.
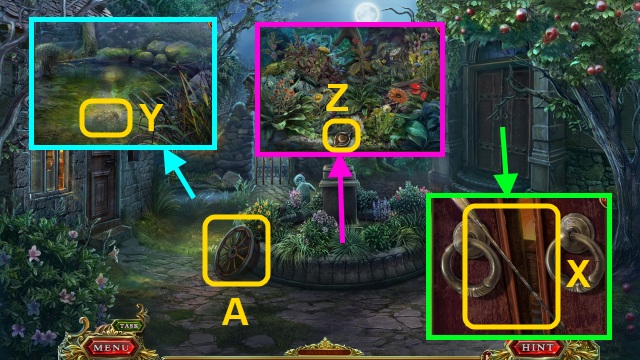
- Take the ARROW (X).
- Examine the water; use the BUTTERFLY NET to take the LION HEAD (2/3) (Y).
- Take the CYCLOPS' EYE (Z).
- Take the WHEEL (A).
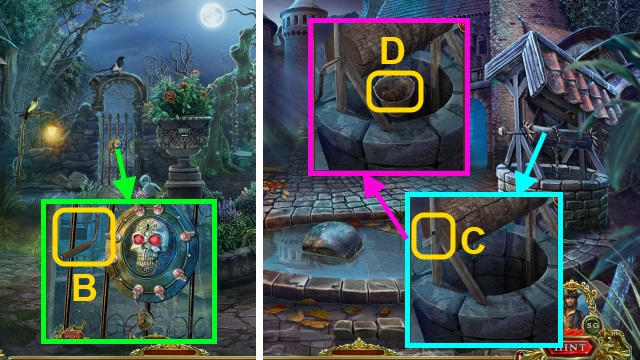
- Take the WELL HANDLE (B).
- Walk down.
- Place the WELL HANDLE (C); turn it.
- Take the SAW HANDLE (D).
- Walk down.
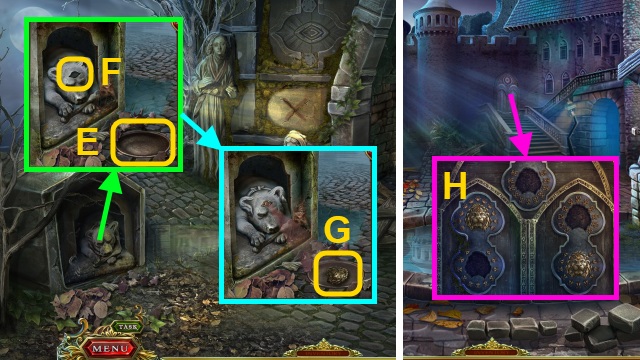
- Pour the JUG OF WATER (E); place the CYCLOPS' EYE (F).
- Take the LION HEAD (3/3) (G).
- Walk right.
- Place the LION HEAD (3/3) for a mini-game (H).
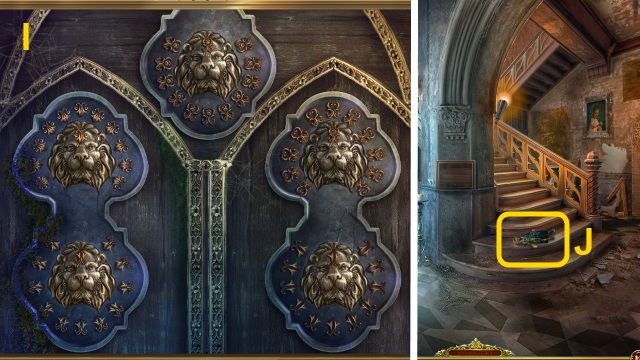
- Solution (I).
- Walk forward.
- Take the BURNED DOLL (J).
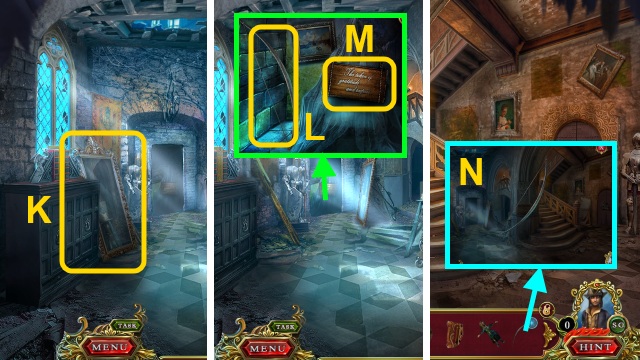
- Move the mirror (K).
- Take the BOW (L); move the sign and cloth (M).
- Combine the ARROW and BOW to make the BOW AND ARROW (N).
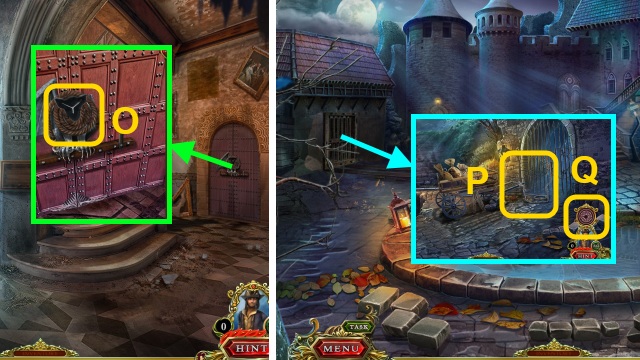
- Take the THICK ROPE (O).
- Walk down.
- Place the THICK ROPE (P); give Francis the WHEEL (Q).
- Walk forward.
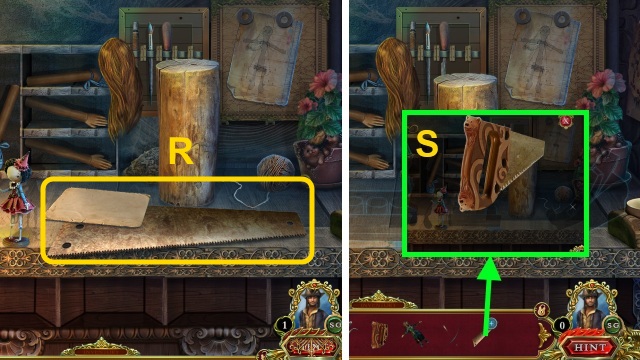
- Take the note and SAW BLADE (R).
- Combine the SAW HANDLE and SAW BLADE to make the SAW (S).
- Walk down, then forward twice.
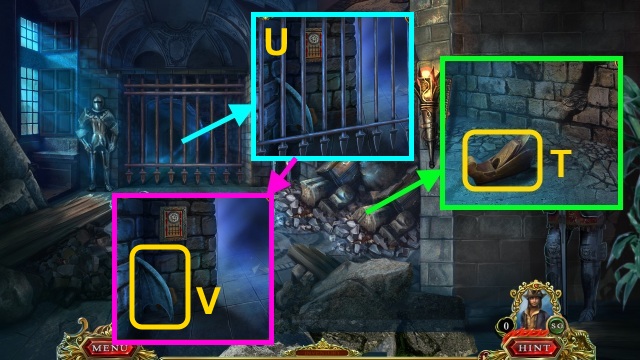
- Move the debris; take the PLANER (T).
- Give Francis the BOW AND ARROW (U); take the GARGOYLE'S WING and TALISMAN (V).
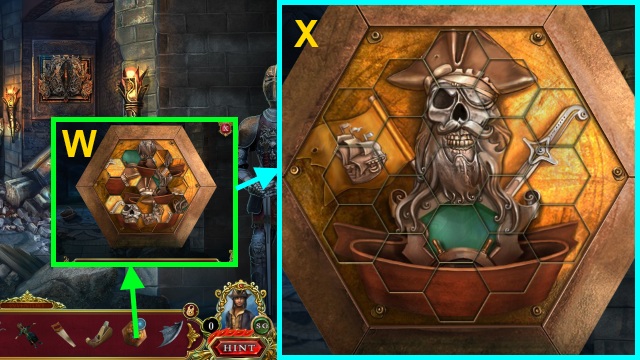
- Examine the TALISMAN for a mini-game (W).
- Solution (X).
- You receive the SCROLL TOKEN.
- Walk down.
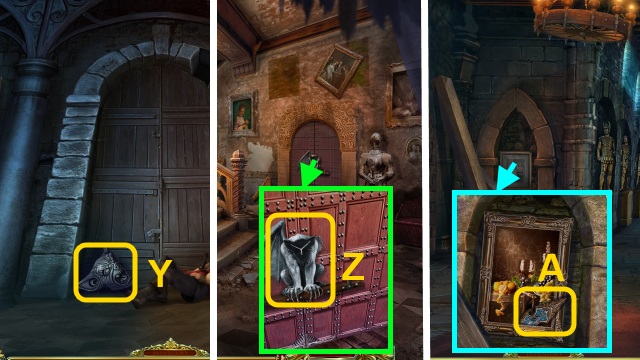
- Take the GARGOYLE'S HEAD (Y).
- Walk down.
- Place the GARGOYLE'S WING and GARGOYLE'S HEAD (Z).
- Walk right.
- Take the ENGRAVING FRAGMENT (A); move the painting.
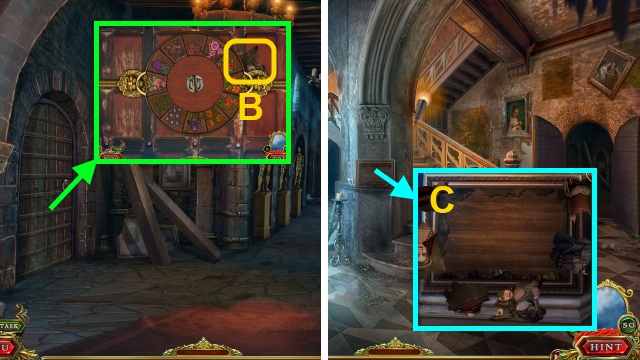
- Take the CANVAS SCRAP (B).
- Walk down.
- Examine the frame for a mini-game (C).
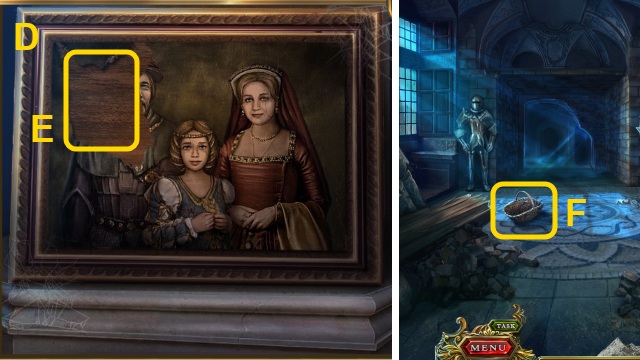
- Solution (D).
- Place the CANVAS SCRAP (E).
- Walk left.
- Take the BASKET (F).
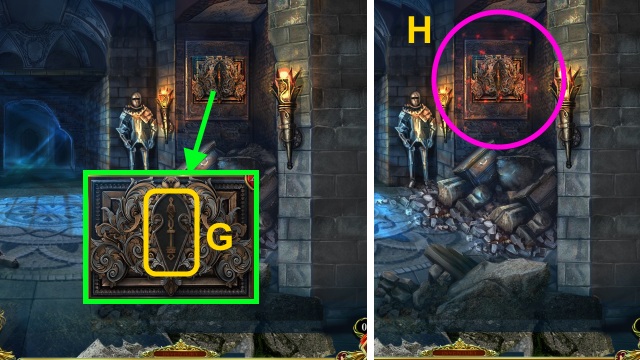
- Place the ENGRAVING FRAGMENT (G).
- Play the HOP to receive the SWORD (H).
- Walk down, then right.
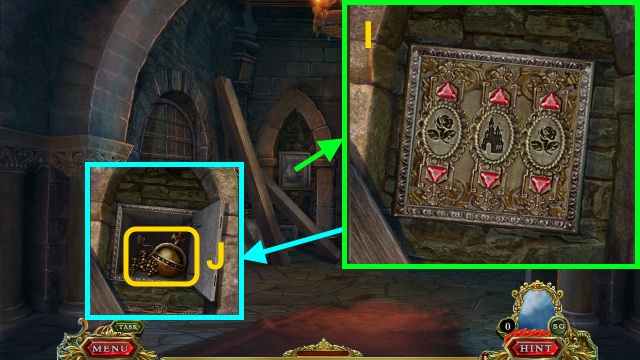
- Enter the code (I); take the GRAPES and ORB (J).
- Walk down.
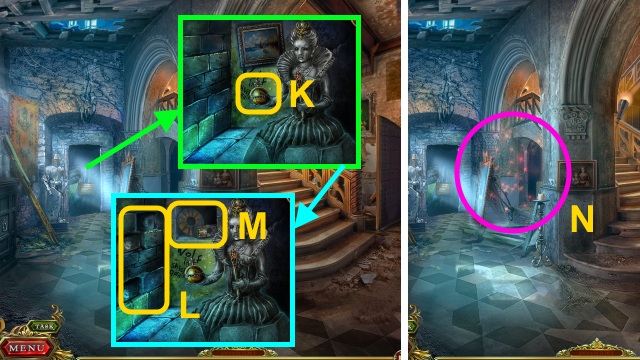
- Examine the statue; place the ORB (K).
- Press the bricks (L); take the SCROLL and KEY HANDLE (M).
- Play the HOP to receive the HELMET (N).
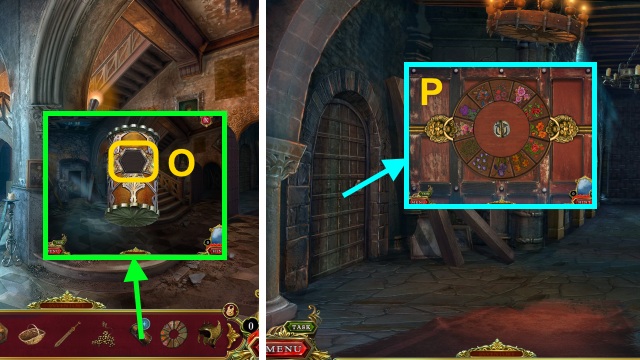
- Place the SCROLL TOKEN on the SCROLL (O).
- You receive the SKULLS (2/4).
- Walk right.
- Place the KEY HANDLE for a mini-game (P).
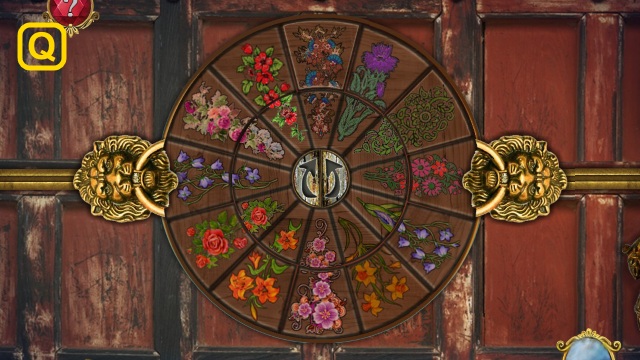
- Solution (Q).
- Walk left.
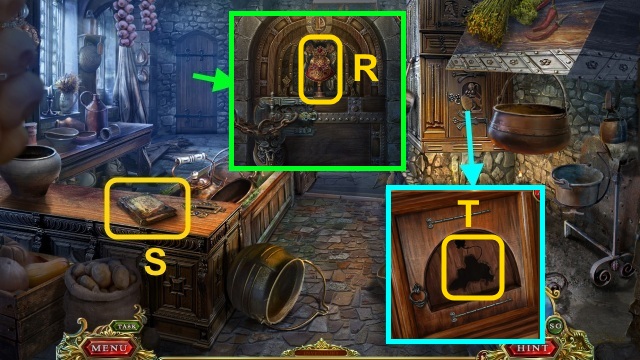
- Take the CACHE ELEMENT (R).
- Take the RECIPE BOOK (S).
- Place the GRAPES (T).
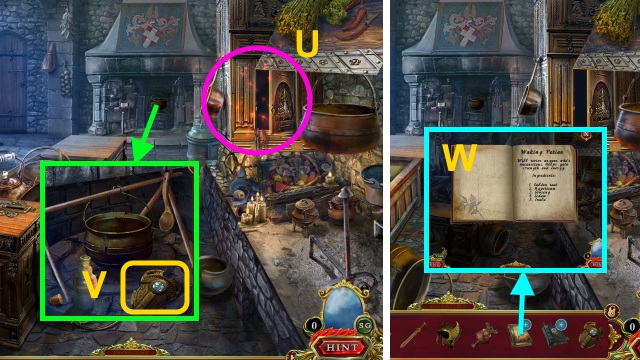
- Play the HOP to receive the BOOK OF HERBS (U).
- Take the SHIELD (V).
- Open the RECIPE BOOK; take the WAKING TINCTURE RECIPE (W).
- Walk down.
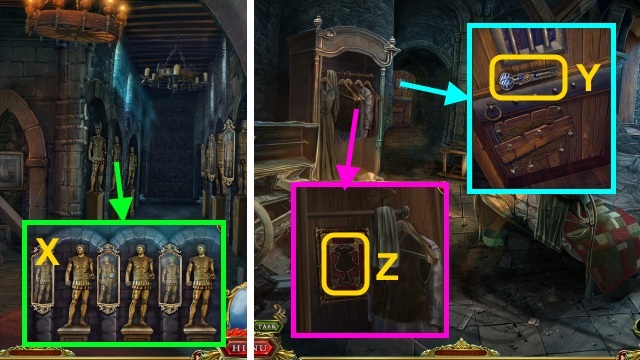
- Place the SWORD, HELMET, and SHIELD (X).
- Walk right.
- Take the LEVER HANDLE (Y).
- Move the clothes; place the CACHE ELEMENT (Z).
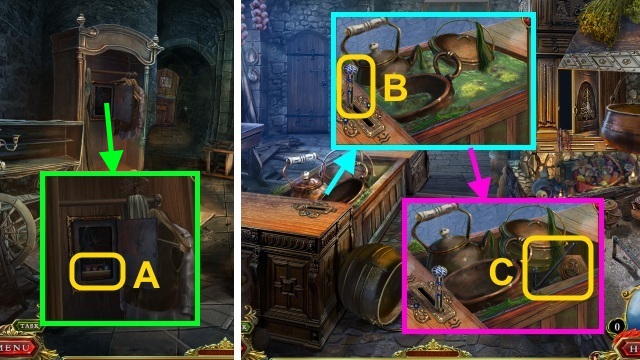
- Take the PAINT (A).
- Walk down, then left.
- Place the LEVER HANDLE (B); pull it.
- Take the CROWBAR and TALISMAN (C).
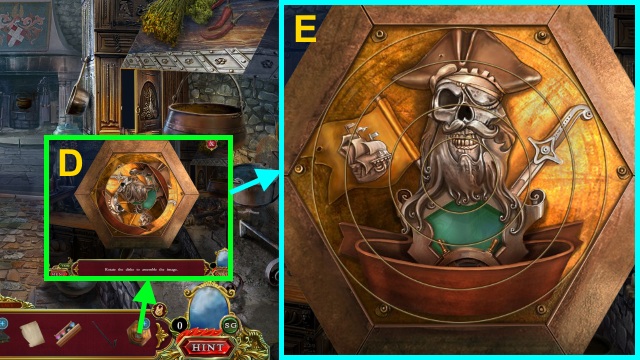
- Examine the TALISMAN for a mini-game (D).
- Solution (E).
- You receive the SCROLL TOKEN.
- Walk down, then right.
Chapter 6: Saving Edward
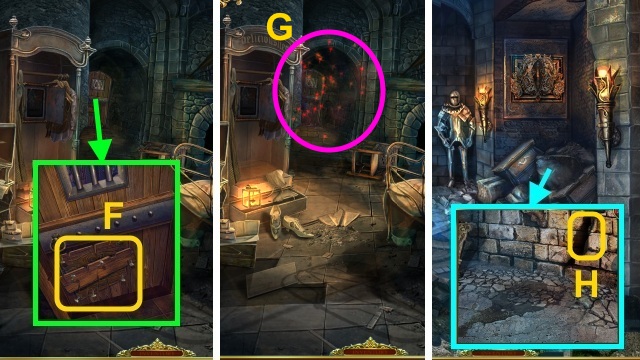
- Use the CROWBAR (F).
- Play the HOP to receive the TONGS (G).
- Walk down twice, then left.
- Use the TONGS to take the GIRL FIGURINE (H).
- Walk down, right, then left.
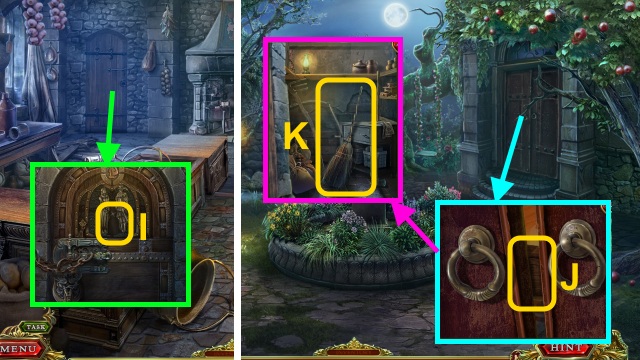
- Place the GIRL FIGURINE (I).
- Walk forward.
- Use the SAW (J).
- Take the BROOM (K).
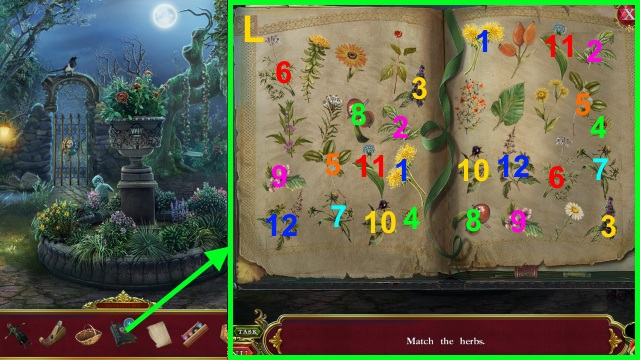
- Examine the BOOK OF HERBS for a mini-game.
- Solution (L).
- You receive the OPEN BOOK OF HERBS.
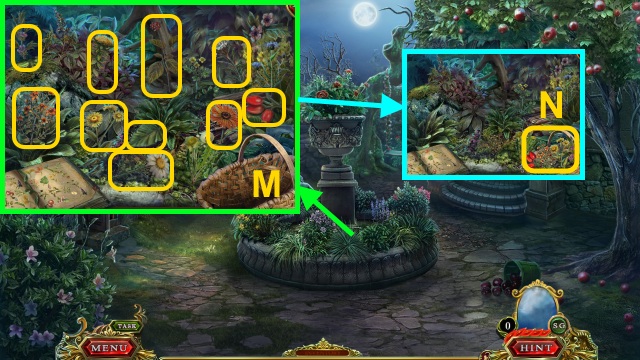
- Place the OPEN BOOK OF HERBS and BASKET; gather the herbs (M).
- Take the BASKET OF HERBS (N).
- Walk left.
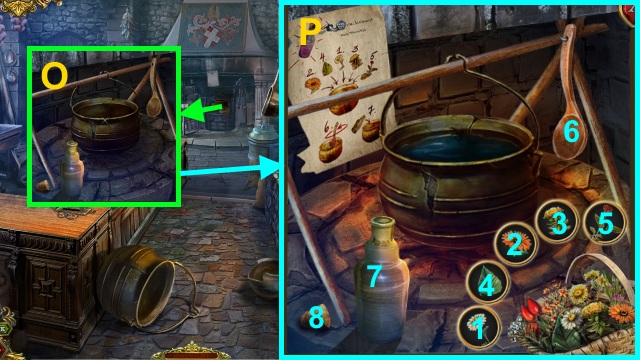
- Use the JUG Of WATER, MATCHES, BASKET OF HERBS, and WAKING TINCTURE RECIPE for a mini-game (O).
- Solution (P).
- You receive the WAKING TINCTURE.
- Walk down three times.
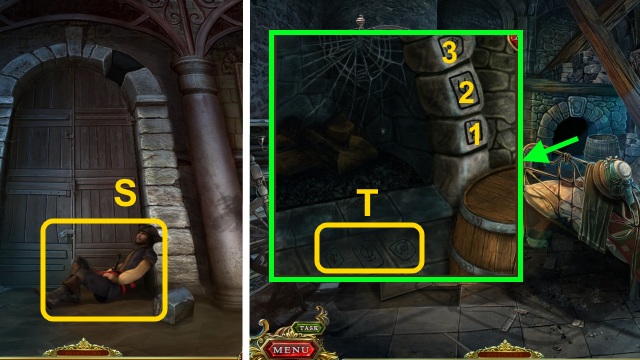
- Use the WAKING TINCTURE (S).
- Walk down, then right twice.
- Use the BROOM (T); press the symbols (1-3).
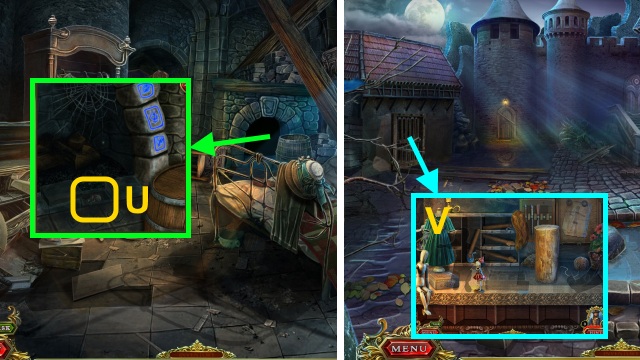
- Take the SKULLS (3/4) (U).
- Walk down, left, forward, then down.
- Place the BURNED DOLL, PLANER, and PAINT for a mini-game (V).
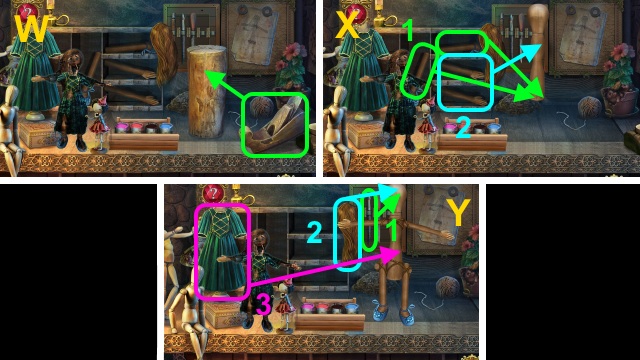
- Solution (W-Y).
- You receive VICTORIA'S DOLL.
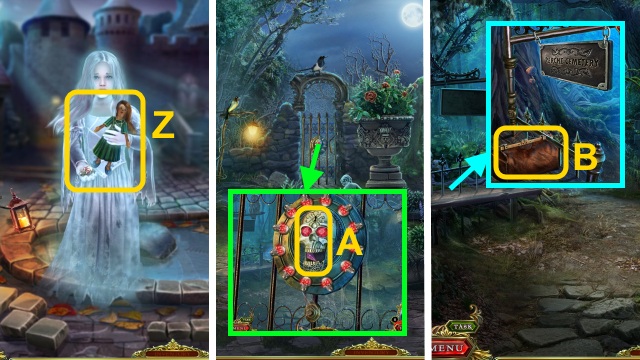
- Give VICTORIA'S DOLL; take the SKULLS (4/4) (Z).
- Walk right.
- Place the SKULLS (4/4); use the key (A).
- Walk forward.
- Take the TRAVEL BAG (B).
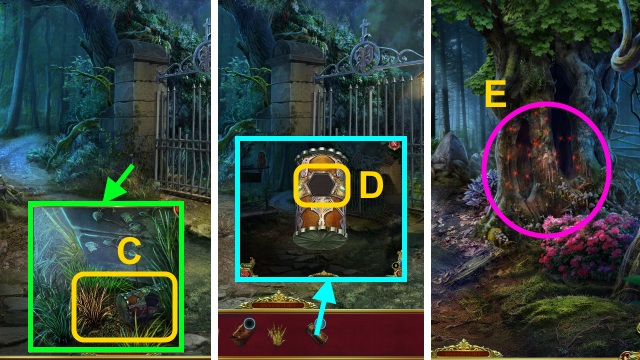
- Move the grass; take the HISTORY SCROLL and DRIED HERBS (C).
- Place the SCROLL TOKEN on the HISTORY SCROLL (D).
- You receive the PATTERN CHIP (1/3).
- Walk forward.
- Play the HOP to receive the PATTERN CHIP (2/3) (E).
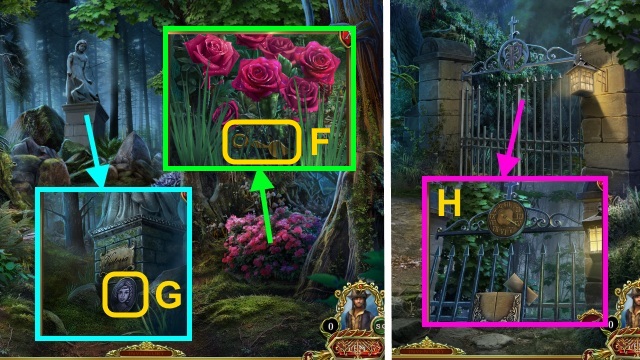
- Take the CLOCK HAND (F).
- Take the TOMBSTONE PORTRAIT (G).
- Walk down.
- Give FRANCIS the CLOCK HAND (H).
- Walk right.
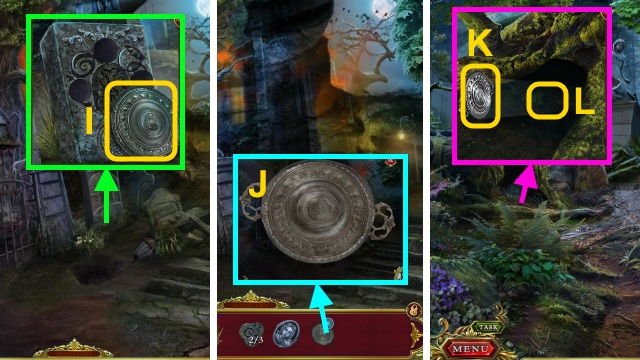
- Take the UNPOLISHED TRAY (I).
- Use the DRIED HERBS on the UNPOLISHED TRAY to receive the TRAY (J).
- Walk down, then forward.
- Place the TRAY (K); take the TRAVEL BAG KEY (L).
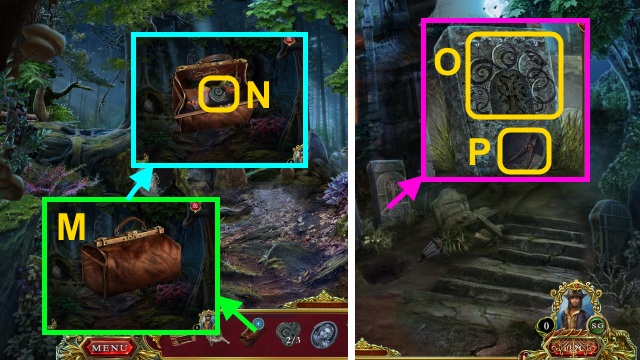
- Use the TRAVEL BAG KEY on the TRAVEL BAG (M); Take the PATTERN CHIP (3/3) (N).
- Walk down, then right.
- Place the PATTERN CHIP (3/3) (O); take the GARDEN SHEARS (P).
- Walk down, then forward.
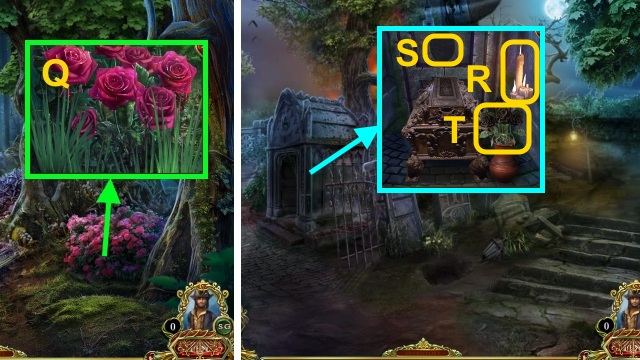
- Use the GARDEN SHEARS (Q); take the FRESH FLOWERS.
- Walk down, then right.
- Use the MATCHES (R); place the TOMBSTONE PORTRAIT (S).
- Remove the flowers; place the FRESH FLOWERS (T).
- Congratulations! You have completed Spirit of Revenge: Elizabeth's Secret.
Created at: 2015-07-24

