Walkthrough Menu
- General Tips
- Chapter 1: The Prison
- Chapter 2: Saving the Queen
- Chapter 3: Family Secrets
- Chapter 4: The King's Chambers
- Chapter 5: Isa's Castle
General Tips
- This is the official guide for Spirits of Mystery: Family Lies.
- This guide will not show when you have to zoom into a location; the screenshots will show each zoom scene.
- There are multiple ways to play through this game; this guide shows one way the game can be played.
- Hidden-object puzzles are referred to as HOPs. This guide will not show screenshots of the HOPs, however, it will mention when an HOP is available and the inventory item you'll collect from it.
- Use the Map to fast travel to a location.
Chapter 1: The Prison
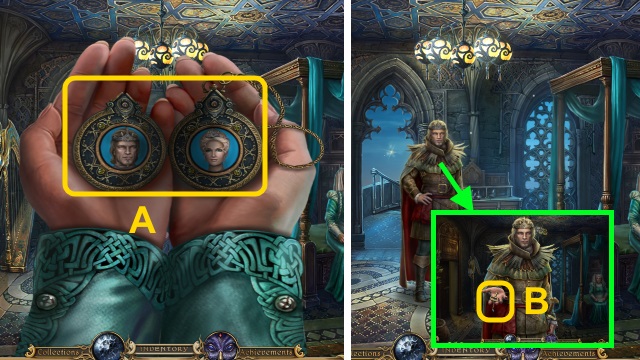
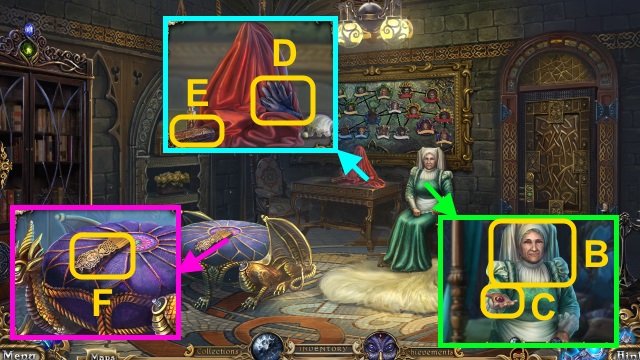
- Examine the room; examine the locket (A).
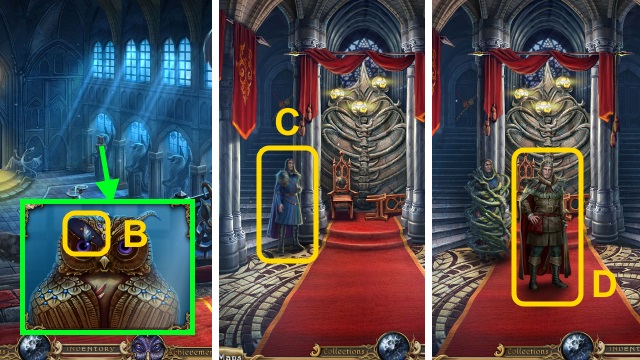
- Talk to the King; take the KEY (B).
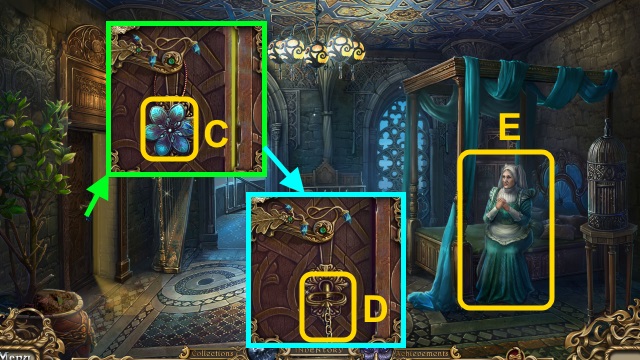
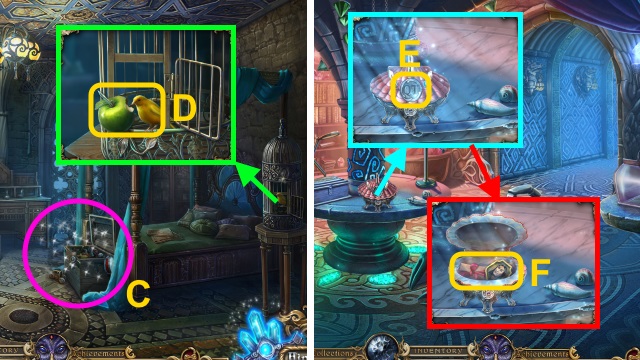
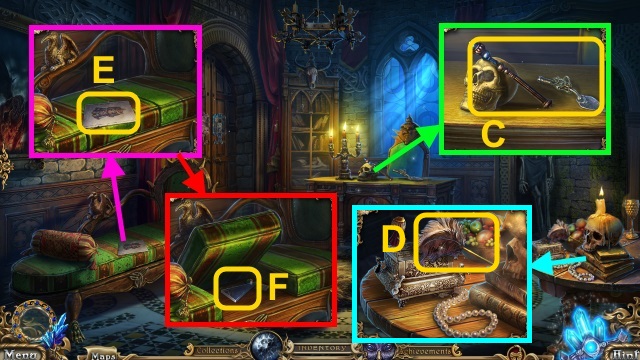
- Take the FLOWER BUTTON (C).
- Use the KEY (D).
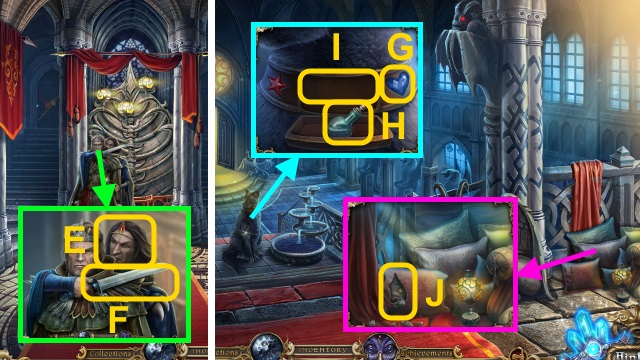
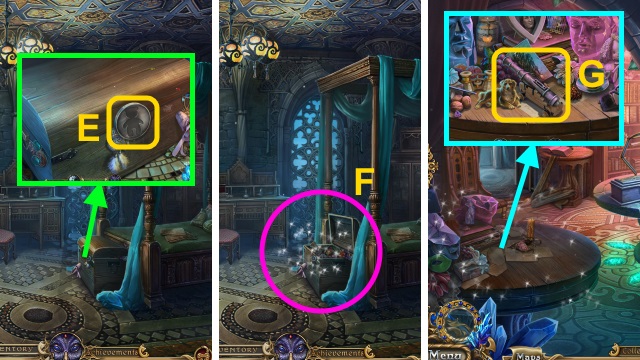
- Talk to Nanny (E).
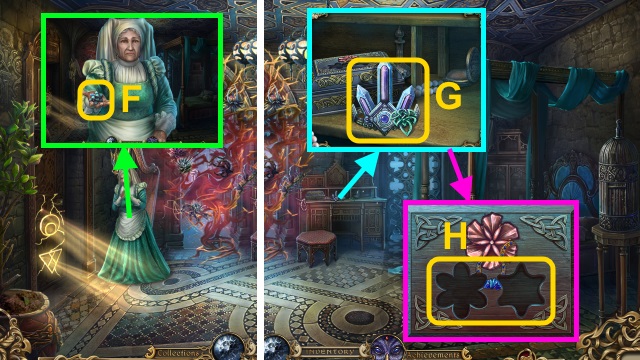
- Talk to Nanny; take the FLOWER BUTTON (F).
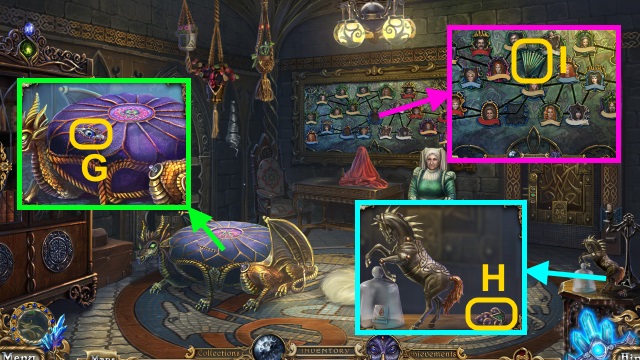
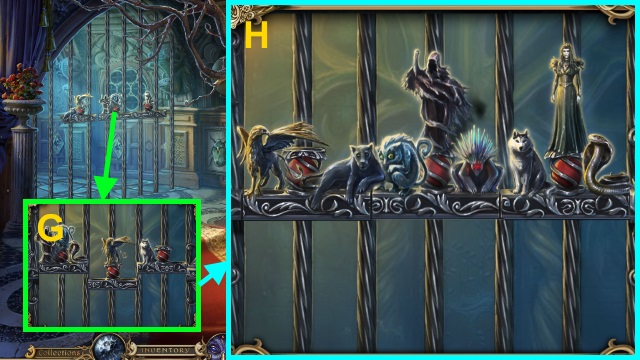
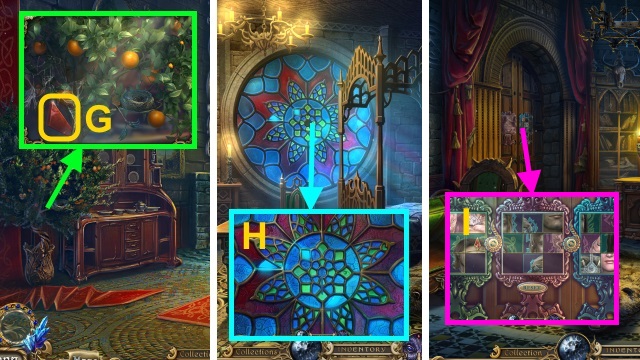
- Take the GREEN SYMBOL and Tiara (G); examine the box.
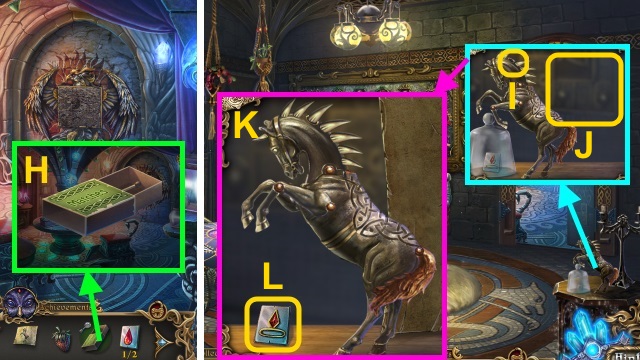
- Place the 2 FLOWER BUTTONS for a mini-game (H).
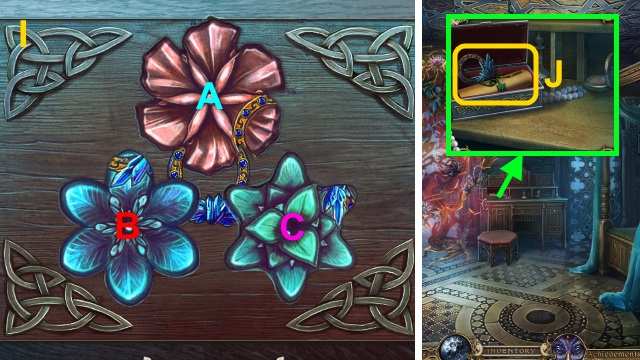
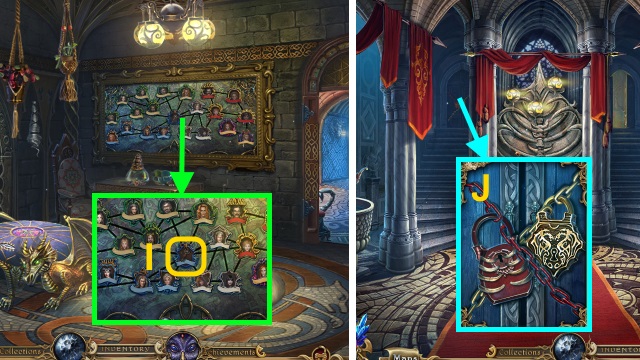
- Solution (I): Cx2-A.
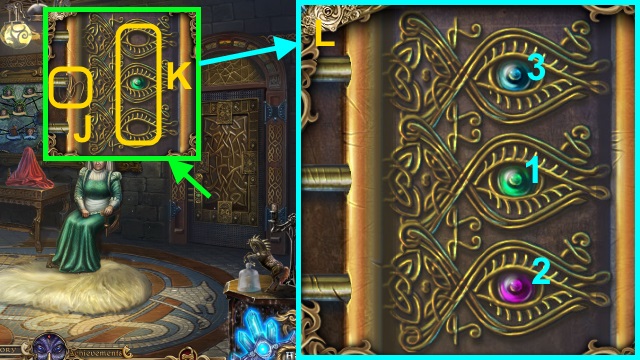
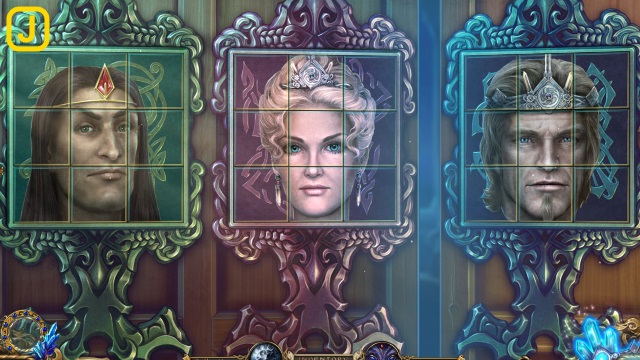
- Read the note; take the Amulet (J).
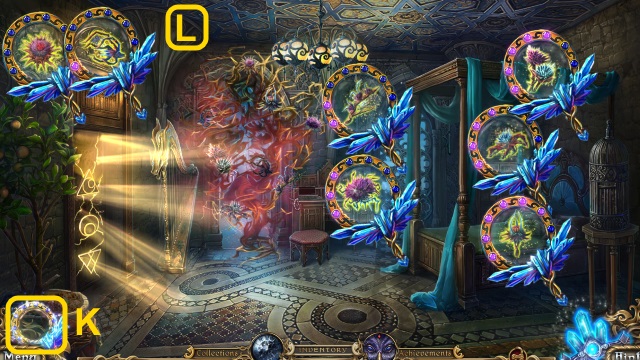
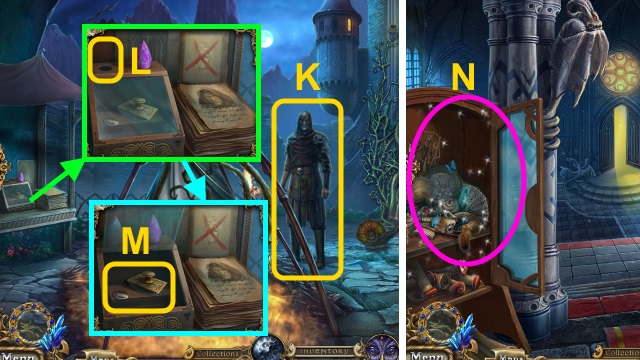
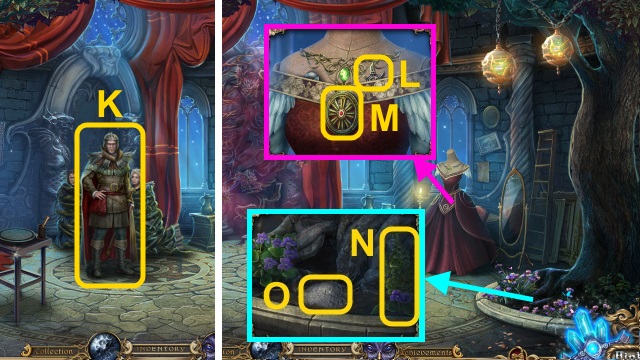
- Use the Amulet (K); find the thorns (L).
- Walk forward.
- Select 'Try to run away.'
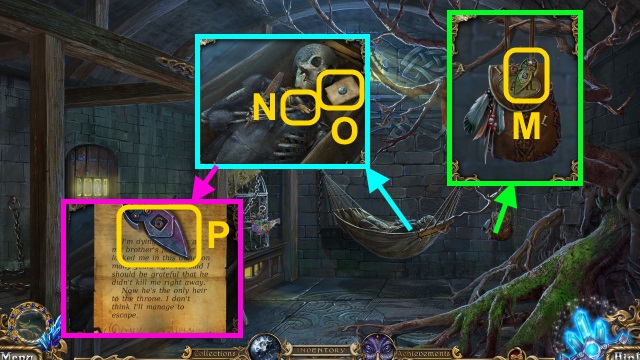
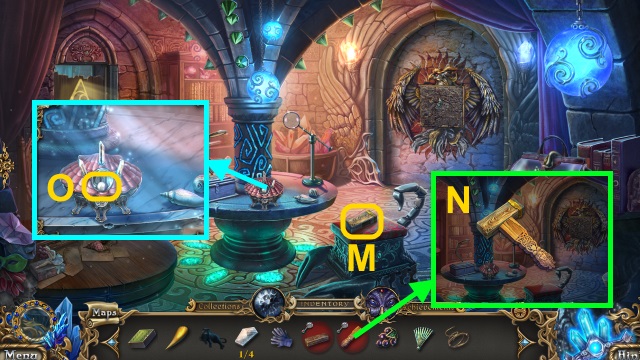
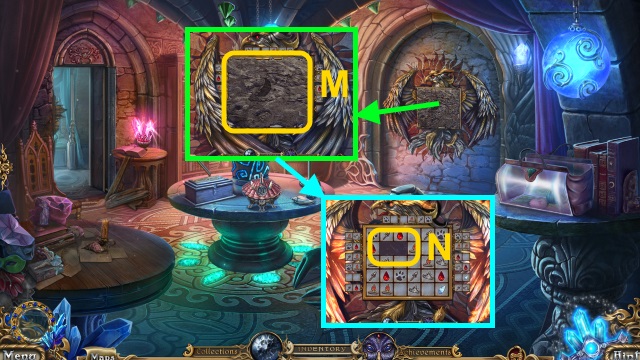
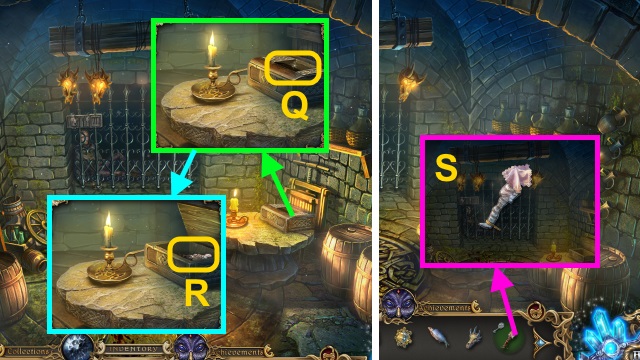
- Take the LOCK PART (M).
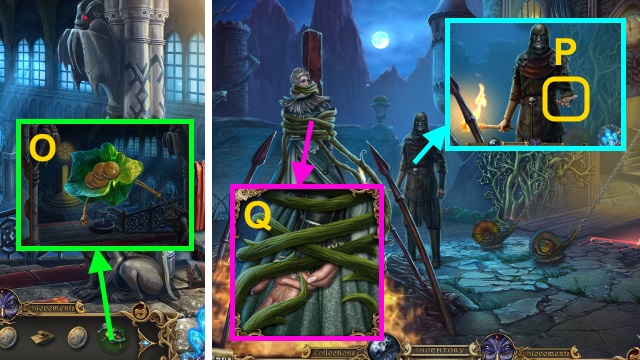
- Take the WING (N); read the note (O).
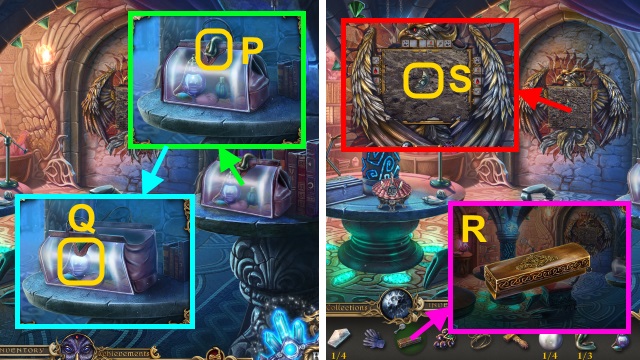
- Take the LOCK PART (P).
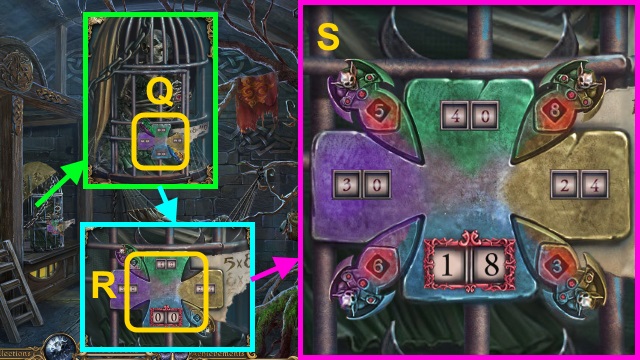
- Examine the lock (Q); place the 2 LOCK PARTS for a mini-game (R).
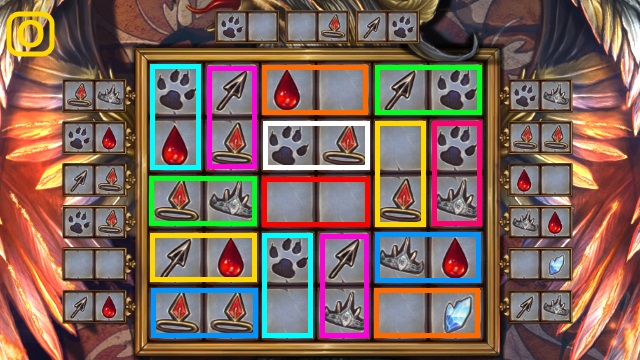
- Solution (S).
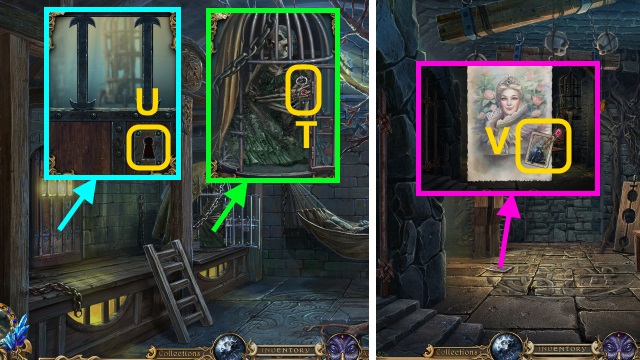
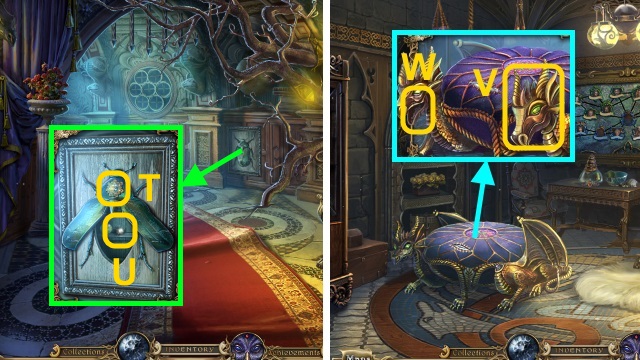
- Take the PRISON KEY (T).
- Examine the door; use the PRISON KEY (U).
- Walk left.
- Examine the picture 2x; take the CLIP and PLAYING CARD (1/2) (V).
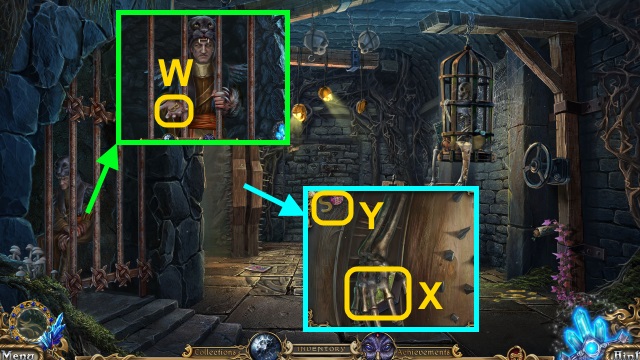
- Talk to Basil; take the LETTER B (W).
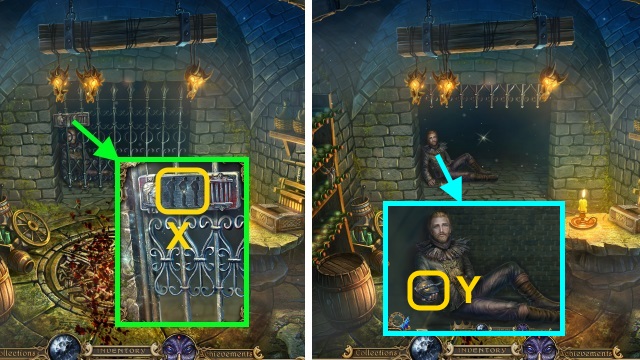
- Open the door; take the EMPTY MATCHBOX (X) and LETTER S (Y).
- Walk down.
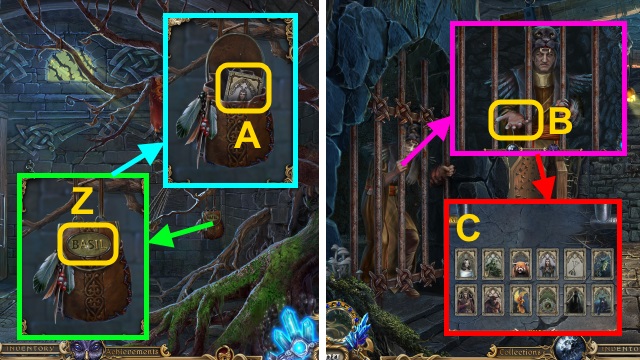
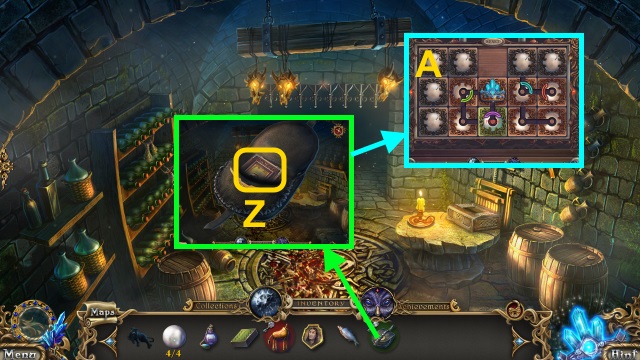
- Place the letters; place the LETTER B and LETTER S (Z).
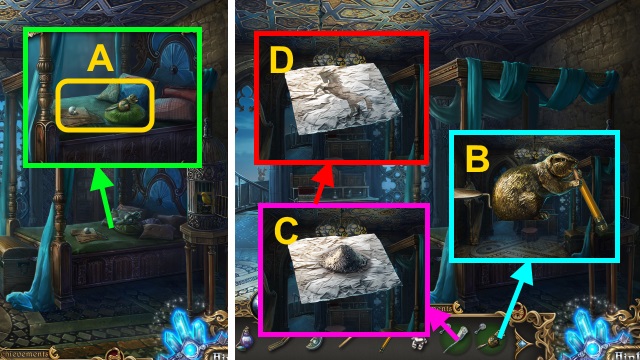
- Take the PLAYING CARD (2/2) (A).
- Walk left.
- Give the PLAYING CARD (2/2) for a mini-game (B); solution is random (C).
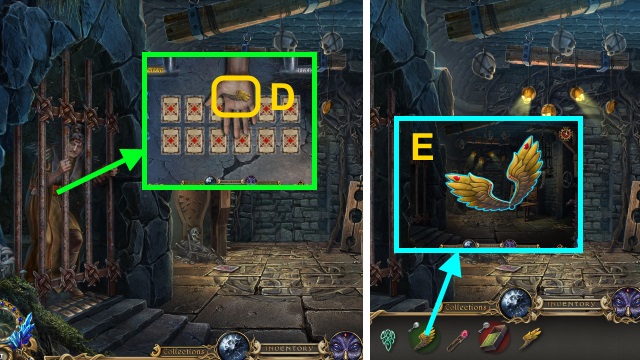
- Take the WING (D).
- Combine the 2 WINGS; take the WINGS (E).
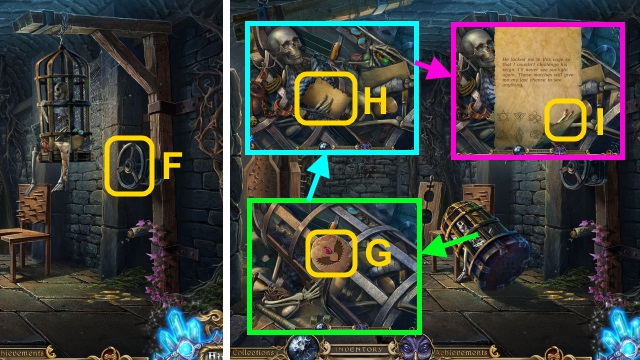
- Turn the wheel (F).
- Place the WINGS (G).
- Read the note (H); take the MATCHES (I).
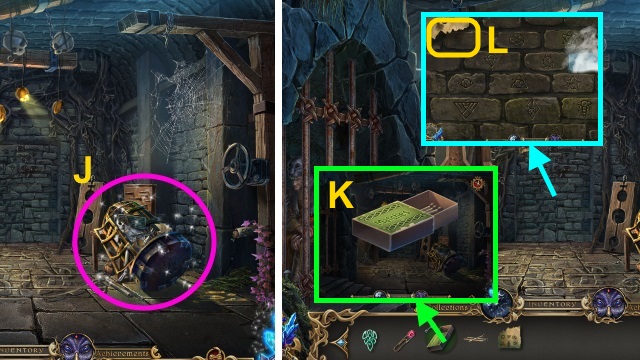
- Play the HOP; receive the SECRET CODE (J).
- Combine the EMPTY MATCHBOX and MATCHES (K); take the MATCHES.
- Examine the wall; place the SECRET CODE (L).
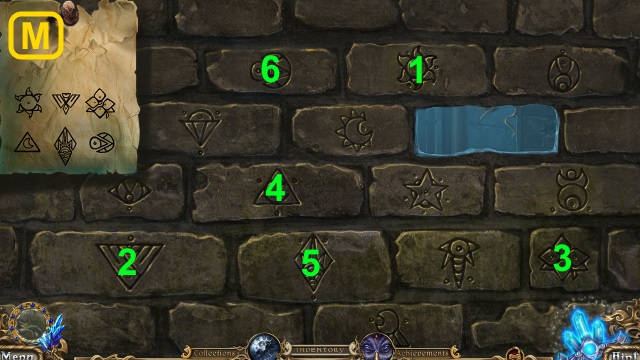
- Select the symbols (M).
- Walk forward.
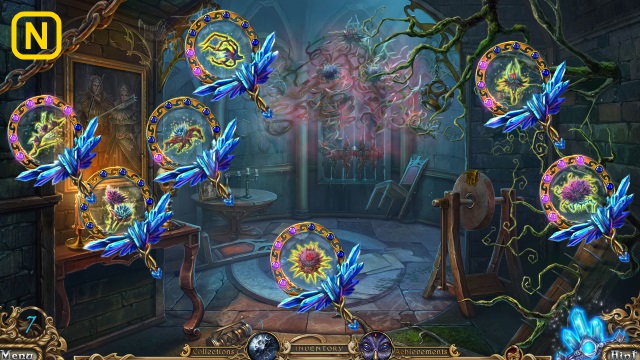
- Use the Amulet; find the thorns (N).
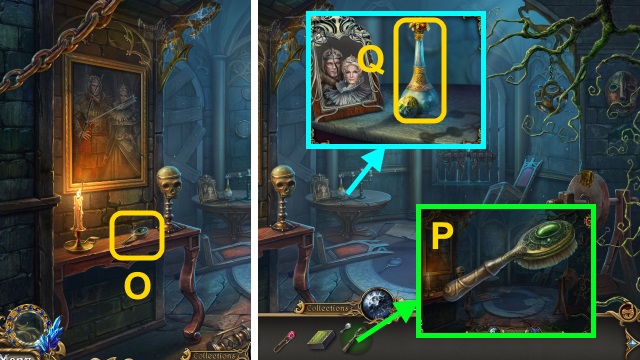
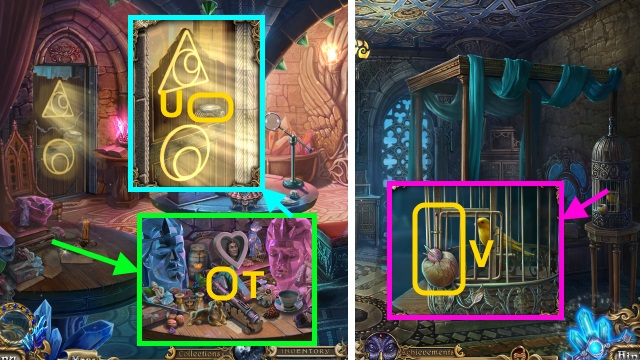
- Take the BRUSH (O).
- Examine the BRUSH (P); remove the handle.
- Take the FILE HANDLE.
- Take the EMPTY VASE (Q).
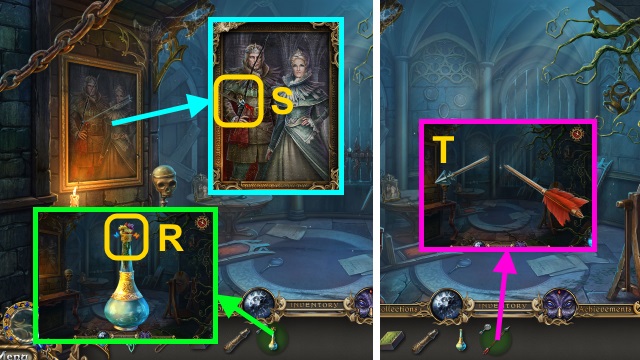
- Examine the EMPTY VASE; remove the flowers (R).
- Take the EMPTY VASE.
- Take the ARROW (S).
- Break the ARROW (T); take the ARROWHEAD.
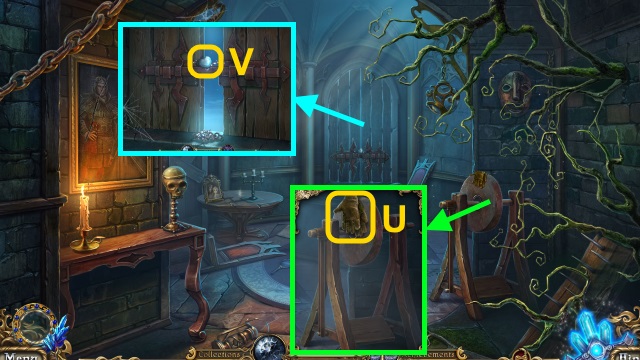
- Take the GARDEN GLOVES (U).
- Examine the window; take the HEART (V).
- Walk down.
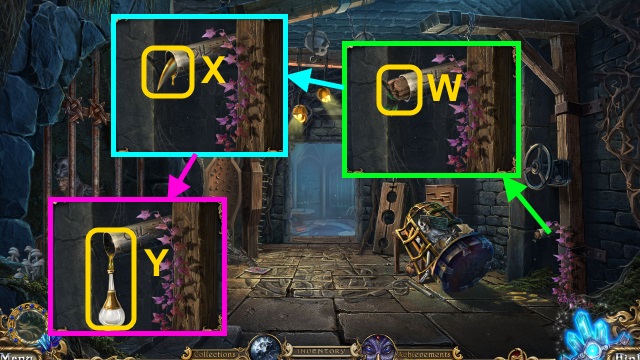
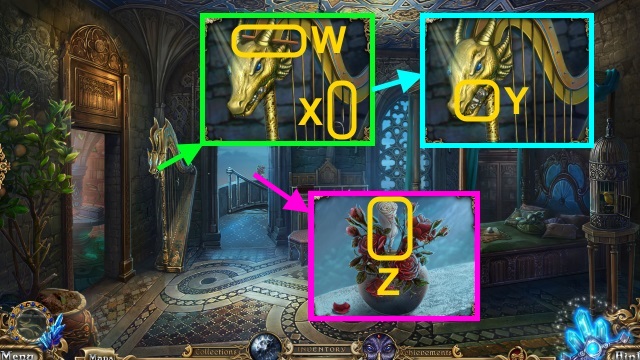
- Use the ARROWHEAD (W).
- Take the PANGOLIN CLAW (X).
- Use the EMPTY VASE (Y); receive the VASE WITH OIL.
- Walk down.
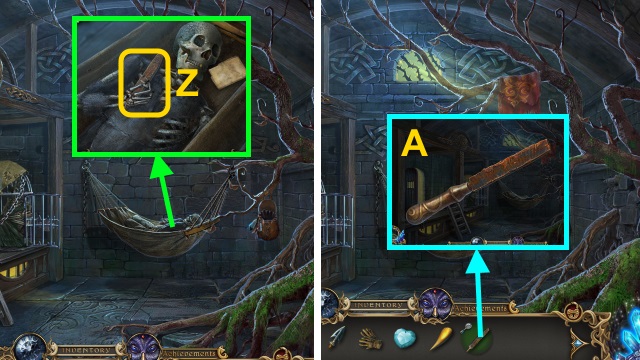
- Use the VASE WITH OIL (Z); receive the DULL FILE.
- Combine the DULL FILE and FILE HANDLE (A); take the DULL FILE.
- Walk left, then forward.
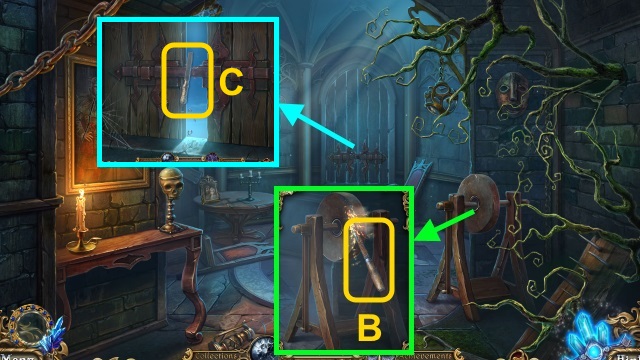
- Use the DULL FILE (B); receive the SHARP FILE.
- Use the SHARP FILE (C).
- Walk forward.
Chapter 2: Saving the Queen
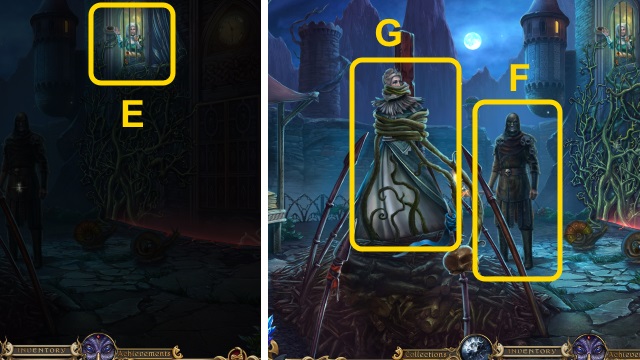
- Examine Nanny (E).
- Talk to the executioner (F).
- Talk to the Queen (G).
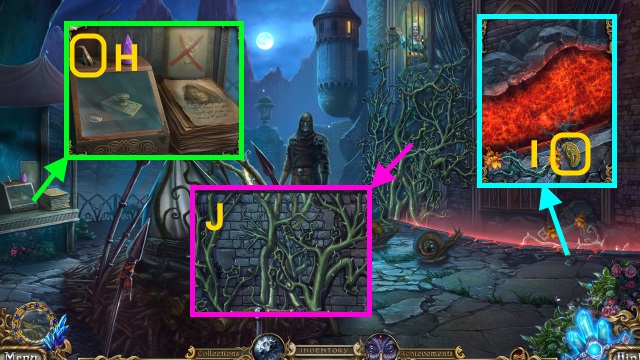
- Take the EYEBROW (H).
- Use the PANGOLIN CLAW (I); receive the GEAR (1/2).
- Use the GARDEN GLOVES for a mini-game (J).
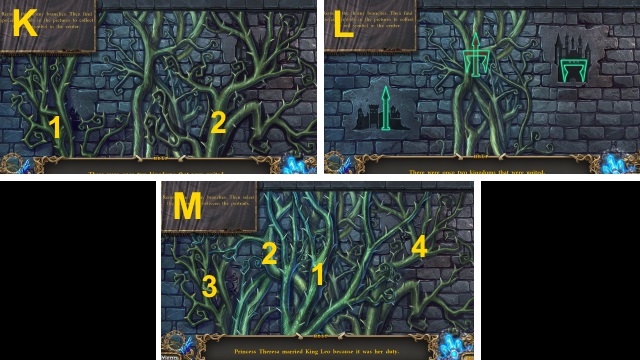
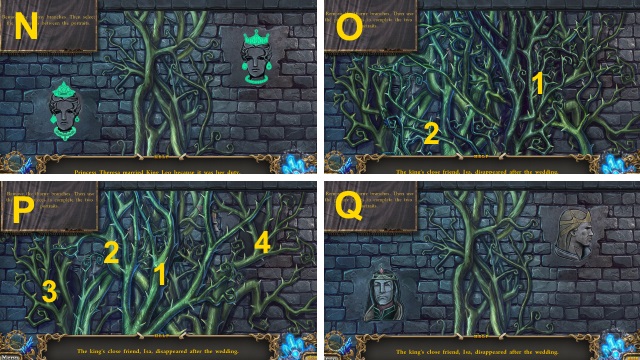
- Solution (K-Q).
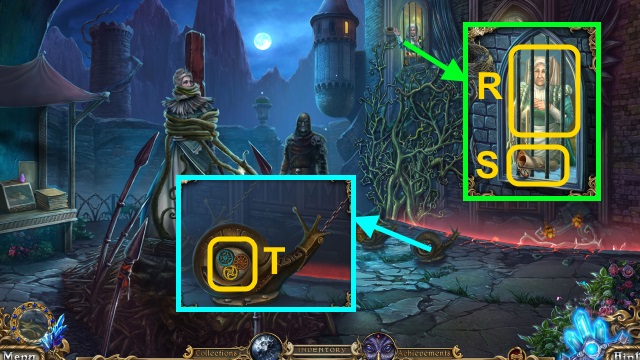
- Talk to Nanny (R).
- Take the Map and GEAR (2/2) (S).
- Place the GEAR (2/2) (T).
- Walk right.
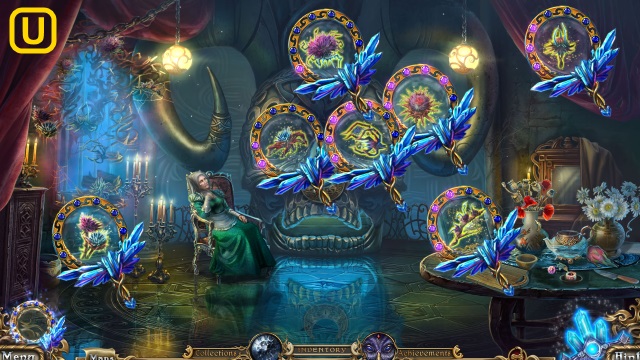
- Use the Amulet; find the thorns (U).
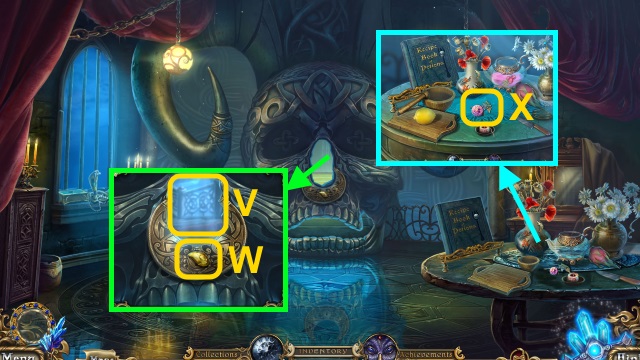
- Examine the opening (V); take the EYE (W).
- Take the CADUCEUS (X).
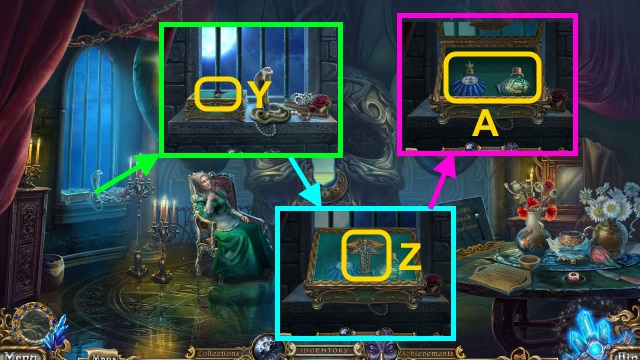
- Examine the box (Y); place the CADUCEUS (Z).
- Take the SMELLING SALTS and MINT ESSENCE (A).
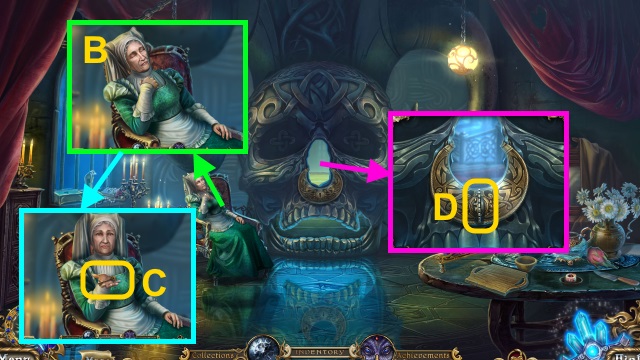
- Use the SMELLING SALTS (B).
- Take the SKULL KEY (C).
- Use the SKULL KEY (D).
- Walk forward.
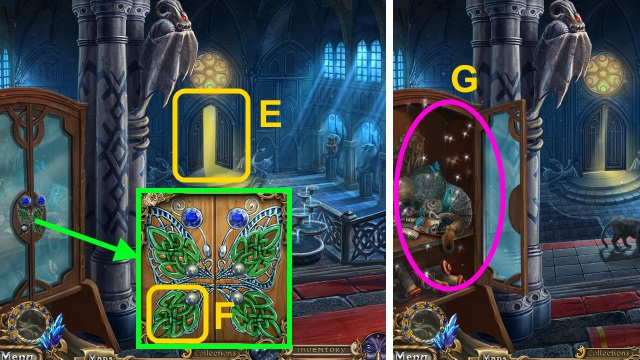
- Examine the door (E).
- Place the GREEN SYBMBOL (F); arrange the symbols.
- Play the HOP; receive the DECORATIVE FORK (G).
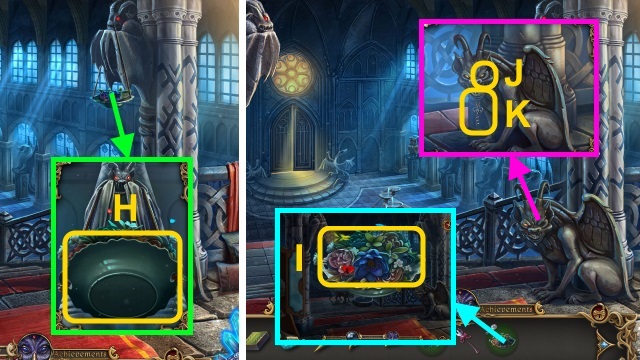
- Take the DISH (H).
- Examine the DISH; remove the flowers (I).
- Take the DISH.
- Place the EYE (J); take the CORKSCREW (K).
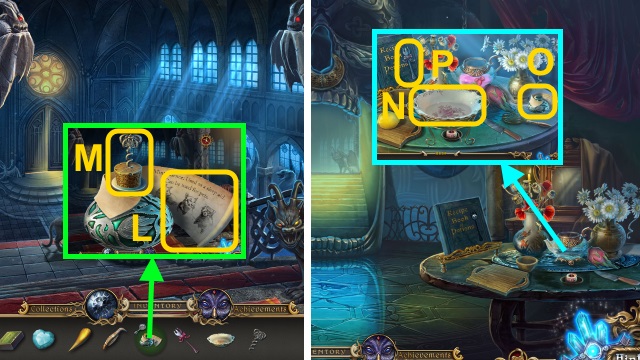
- Examine the MINT ESSENCE; read the note (L).
- Use the CORKSCREW (M); take the MINT ESSENCE.
- Walk down.
- Place the DISH (N), MINT ESSENCE (O), and DECORATIVE FORK (P) for a mini-game.
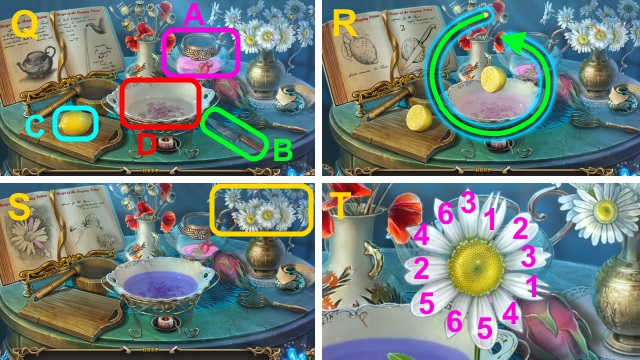
- Solution (Q): (A)-(B-C)-(C).
- Solution (R-T); repeat (T)x3.
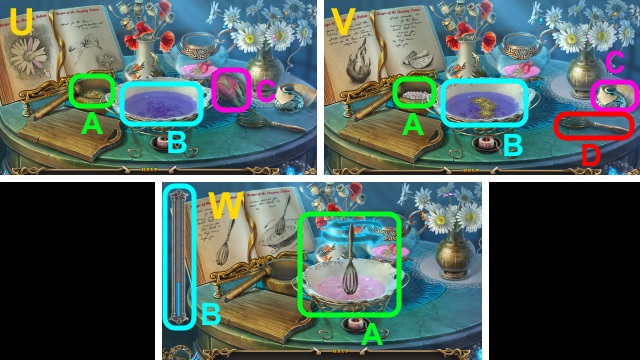
- Solution (U): (A-B)-(Cx5).
- Solution (V): (A-B)-(C-B)-(D-B).
- Solution (W): Stir the mixture (A) until the meter (B) is full (B).
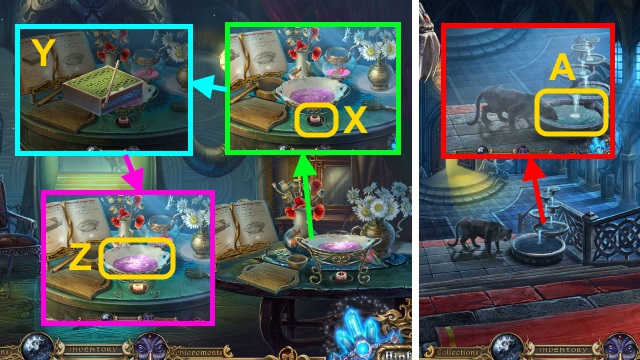
- Use the MATCHES (X); light the match (Y).
- Take the SLEEPING ELIXIR (Z).
- Walk forward.
- Pour the SLEEPING ELIXIR (A).
- Take the CRYSTAL; place the EYEBROW (B).
- Receive the PHOENIX CREST.
- Walk forward.
- Examine Isa (C).
- Talk to the King (D).
- Talk to Isa (E); select 'Agree to save your mother.'
- Take the KNIFE (F).
- Place the HEART (G).
- Take the BLOOD CLOTTER (H).
- Examine the collar; enter a name (I).
- Examine the collar again; receive the PANTHER.
- Use the PANTHER; take the COIN (J).
- Walk down twice.
- Talk to the executioner (K).
- Place the CRYSTAL (L).
- Take the INK BLOTTER and COIN (M).
- Walk right, then forward.
- Play the HOP; receive the COIN POUCH (N).
- Combine the COIN POUCH and 2 COINS (O); take the COIN POUCH.
- Walk down twice.
- Give the COIN POUCH (P).
- Use the KNIFE (Q).
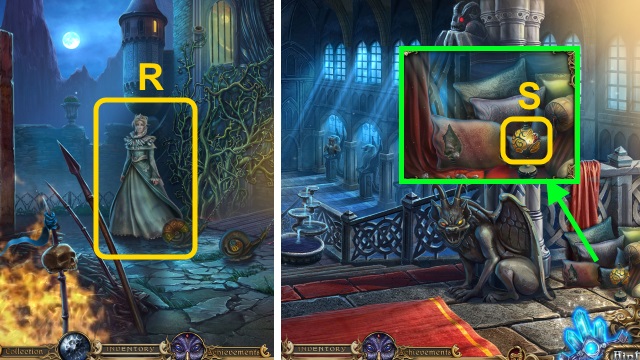
- Talk to the Queen (R); select 'Go with your mother.'
- Walk right, then forward.
- Use the INK BLOTTER; take the HORN (S).
- Walk forward.
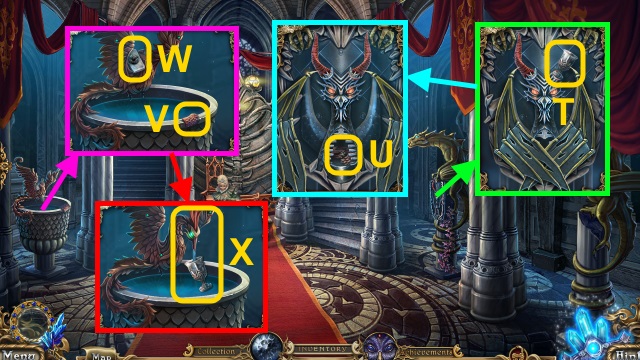
- Take the EMPTY CUP (T); place the HORN.
- Take the PHOENIX HEAD (U).
- Take the SNAKE SEGMENT (V) and SHELL (1/4) (W).
- Place the PHOENIX HEAD and PHOENIX CREST; use the EMPTY CUP (X).
- Receive the CUP OF WATER.
- Walk down twice.
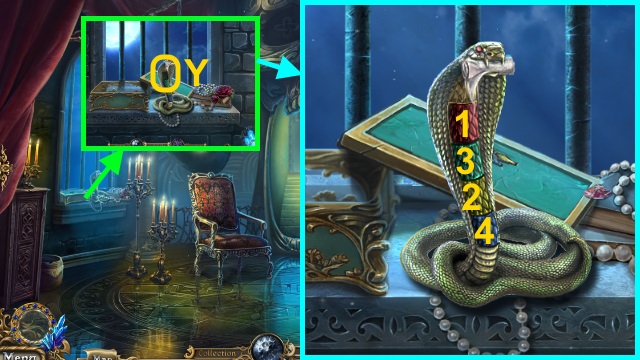
- Place the SNAKE SEGMENT (Y).
- Select the parts (1-4).
- Receive the BANDAGE.
- Walk forward twice.
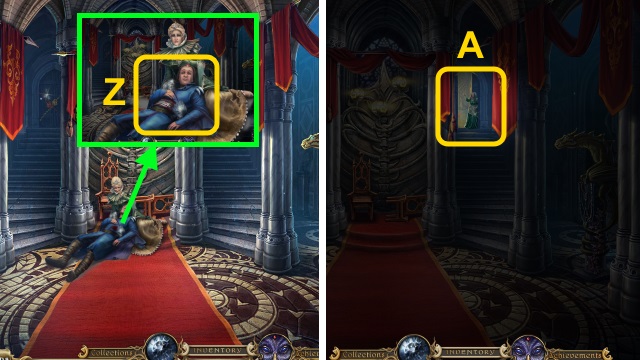
- Talk to the Queen; use the BLOOD CLOTTER and BANDAGE (Z); give the CUP OF WATER.
- Examine Nanny (A).
- Walk right.
Chapter 3: Family Secrets
- Talk to Nanny (B); select 'Yes.'
- Take the EYE (1/2) (C).
- Take the GARDEN GLOVES (D) and RUSTY BRUSH (E).
- Take the WOODEN HANDLE (F).
- Use the PANTHER; use the CLIP (G).
- Receive the EYE (2/2).
- Take the BERRY EMBLEM (H).
- Take the FAN (I).
- Take the SET OF STRINGS (J); place the EYE (2/2) for a mini-game (K).
- Solution (L).
- Walk right.
- Take the AXE PART (M).
- Combine the WOODEN HANDLE and AXE PART (N); take the WOODEN AXE.
- Take the PEARL (1/4) (O).
- Take the FIGURINE (1/3) (P); place the FAN.
- Take the RUST REMOVER (Q).
- Combine the RUSTY BRUSH and RUST REMOVER (R); take the CLEAN BRUSH.
- Take the HALF-MOON (S).
- Take the SHELL (2/4) (T).
- Take the SHELL (3/4) (U); use the WOODEN AXE 2x.
- Walk left.
- Remove the apple; take the MATCH (V).
- Take the DULL PENCIL (W); place the SET OF STRINGS (X).
- Take the TEDDY BEAR EMBLEM (Y).
- Use the GARDEN GLOVES; take the PAPER FLOWER (Z).
- Take the PEARL and PENCIL SHARPENER (A).
- Combine the PENCIL SHARPENER and DULL PENCIL (B).
- Receive the SHARP PENCIL.
- Open the PAPER FLOWER; take the GUNPOWDER (C).
- Use the SHARP PENCIL; take the HORSE PICTURE (D).
- Place the TEDDY BEAR EMBLEM (E).
- Play the HOP; receive the STRAWBERRY EMBLEM (F).
- Walk left.
- Use the GUNPOWDER and MATCHES (G); play the HOP.
- Receive the DOMINO (1/2).
- Combine the MATCHES and MATCH (H); take the MATCHES.
- Walk down.
- Place the PANGOLIN CLAW (I) and HORSE PICTURE (J).
- Pose the horse (K); take the DOMINO (2/2) (L).
- Walk right.
- Use the CLEAN BRUSH (M); place the DOMINO (2/2) for a mini-game (N).
- Solution (O).
- Walk forward.
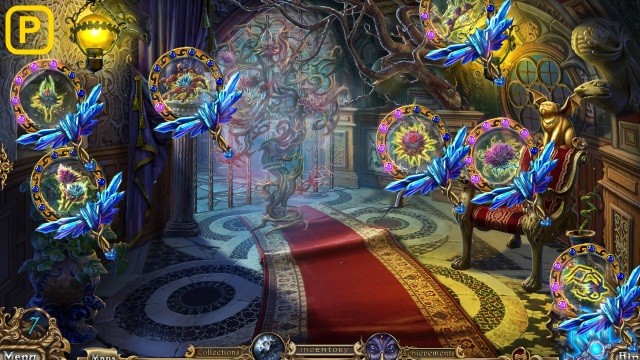
- Use the Amulet; find the thorns (P).
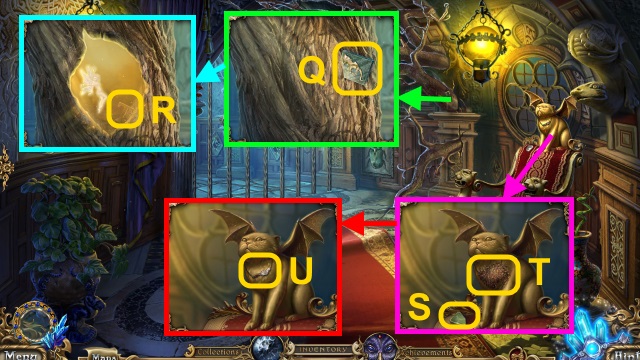
- Take the DRAGON TILE (Q).
- Use the WOODEN AXE; take the INITIAL T (R).
- Take the SHELL (4/4) (S); use the CLEAN BRUSH (T).
- Take the PRISONER EMBLEM (U).
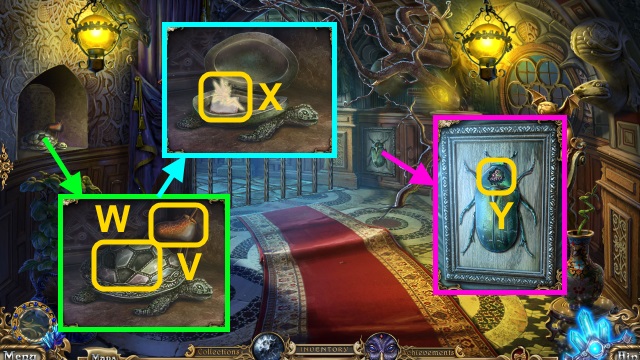
- Take the GIRAFFE (V); place the SHELL (4/4) (W).
- Take the FAIRY and HANDKERCHIEF (X).
- Take the BERRY EMBLEM (Y).
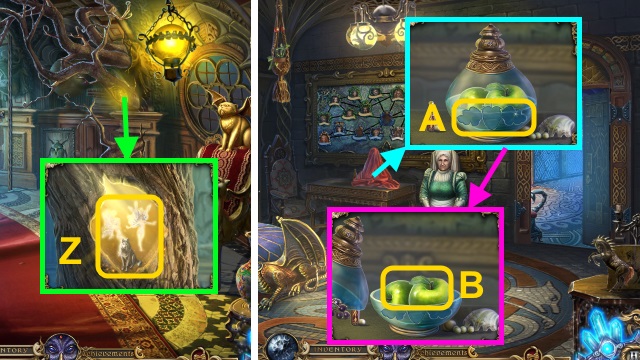
- Place the FAIRY; take the FIGURINE (2/3) (Z).
- Walk down twice.
- Remove the cloth; place the 2 BERRY EMBLEMS and STRAWBERRY EMBLEM (A).
- Take the FRESH APPLE (B).
- Walk right, then left.
- Play the HOP; receive the FIGURINE (3/3) (C).
- Place the FRESH APPLE (D); take the INITIAL Q.
- Walk left.
- Place the INITIAL T and INITIAL Q (E).
- Take ISA'S PORTRAIT; read the letter (F).
- Walk right.
- Place the FIGURINE (3/3) for a mini-game (G).
- Solution (H).
- Walk forward.
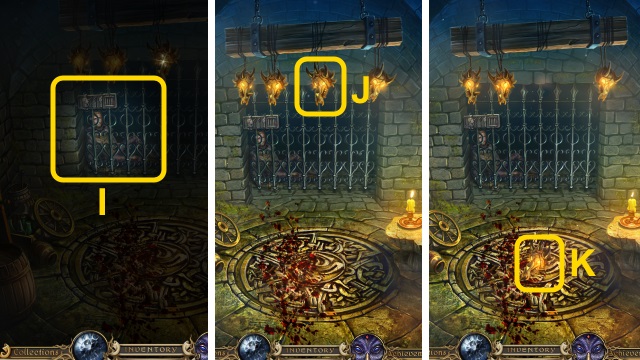
- Examine the cell (I).
- Examine the skull (J).
- Take the DRAGON SKULL (K).
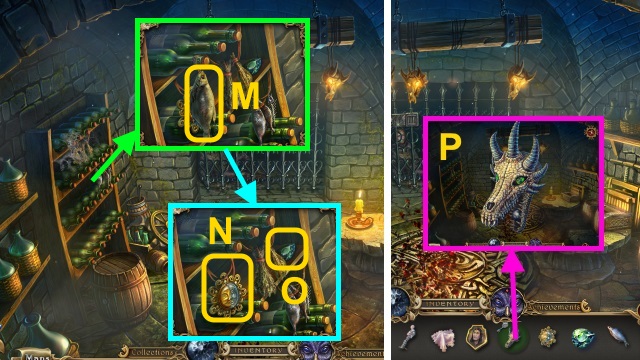
- Remove the cobwebs; take the FISH (M).
- Place the HALF-MOON (N); take the HALF-SUN, STONE EYE (O).
- Combine the DRAGON SKULL and STONE EYE (P); take the PEARL and DRAGON SKULL.
- Use the DRAGON TILE (Q); take the DIRTY EMBLEM (R).
- Combine the DIRTY EMBLEM and HANDKERCHIEF (S); take the PRISONER EMBLEM.
- Walk down.
- Place the HALF-SUN (T); take the PEARL (4/4) (U).
- Walk down twice.
- Place the DRAGON SKULL (V); take the PRISONER EMBLEM (W).
- Walk right, then forward twice.
- Place the 3 PRISONER EMBLEMS (X).
- Talk to Victor (Y); select 'Yes.'
- Take the BAG.
- Open the BAG; examine the box (Z).
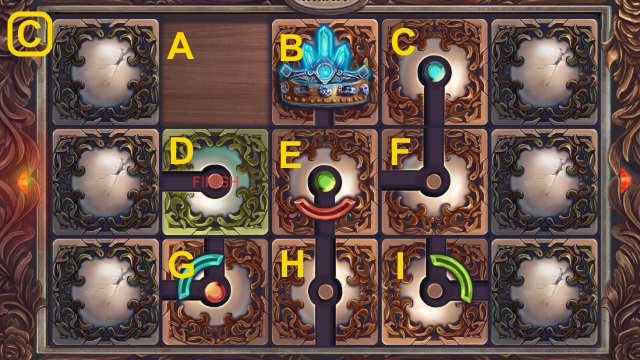
- Open the box; place the PEARLS (4/4) for a mini-game (A).
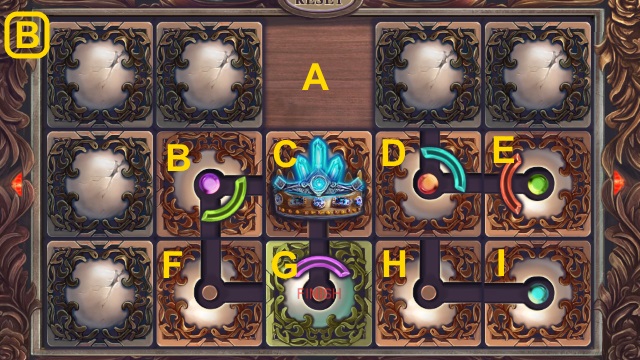
- Solution (B): (C-A)-(D-C)-(H-D)-(G-H)-(C-G)-(D-C); move the crown from A to C.
- (H-D)-(G-H)-(C-G)-(D-C)-(H-D)-(G-H); move the crown from H to I.
- (H-G)-(D-H); move the crown from I to H. (H-D); move the crown from D to E.
- (G-H)-(C-G)-(D-C)-(E-D)-(I-E)-(H-I)-(G-H)-(C-G)-(B-C); move the crown from D to C.
- (F-B)-(G-F)-(H-G); move the crown from C to G.
- Solution (C): (B-A)-(E-B)-(F-E)-(C-F)-(B-C)-(A-B); move the crown from B to E.
- (B-A)-(C-B)-(F-C)-(E-F); move the crown from F to C.
- (F-E)-(C-F)-(B-C)-(E-B)-(H-E)-(G-H)-(D-G)-(E-D)-(F-E); move the crown from E to H.
- (C-F)-(B-C)-(E-B)-(F-E); move the crown from H to E. (E-F); move the crown from F to I.
- (F-E)-(I-F)-(H-I)-(G-H)-(D-G)-(E-D)-(F-E)-(I-F)-(H-I)-(E-H); move the crown from H to I.
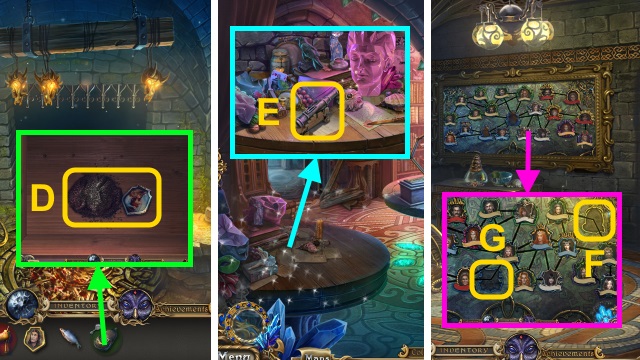
- Take the GUNPOWDER and MY PORTRAIT (D).
- Walk down twice.
- Use the GUNPOWDER and MATCHES (E); play the HOP.
- Receive the KEY.
- Walk down.
- Place ISA'S PORTRAIT (F) and MY PORTRAIT (G) for a mini-game.
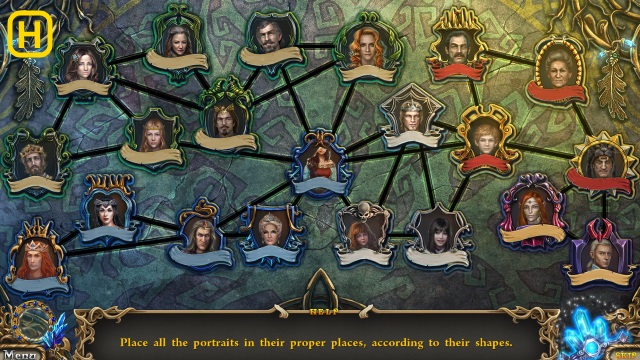
- Solution (H).
- Take the SPECIAL KEY (I).
- Walk down.
- Use the KEY and SPECIAL KEY (J).
- Walk left.
Chapter 4: The King's Chambers
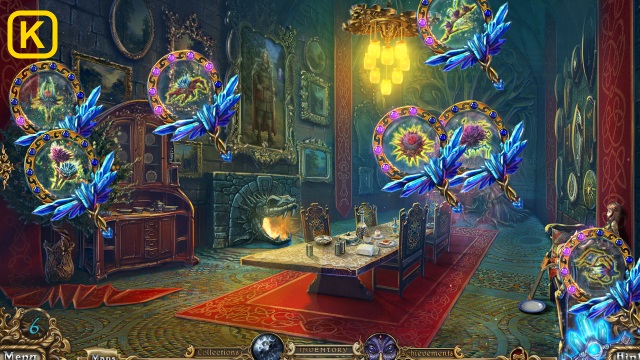
- Use the Amulet; find the thorns (K).
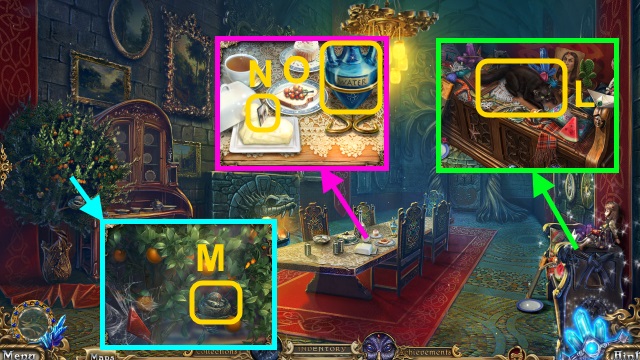
- Use the FISH (L); play the HOP.
- Receive the DRAGON HEAD.
- Take the TOY SHIELD (1/3) and SKULL CORKSCREW (M).
- Take the DOOR PIECE (1/3) (N) and WATER BOTTLE (O).
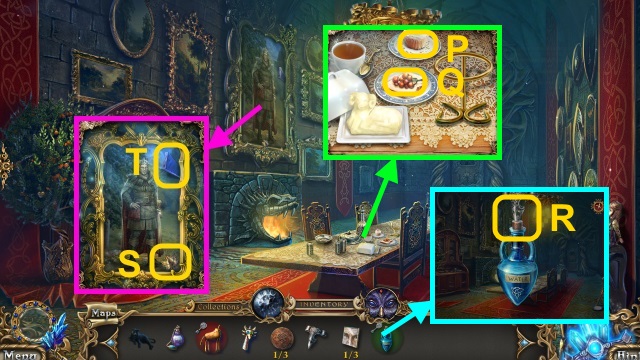
- Take the CUPCAKE BITE (P) and RED BERRIES (1/3) (Q).
- Combine the WATER BOTTLE and SKULL CORKSCREW (R); take the WATER.
- Take the LEAF LEVER (1/2) (S) and GLASS (1/4) (T).
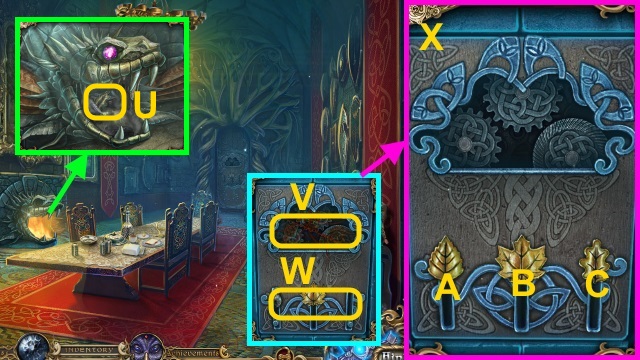
- Pour the WATER; take the LEAF LEVER (2/2) (U).
- Take the RED THREAD; use the RUST REMOVER (V).
- Place the LEAF LEVER (2/2) for a mini-game (W).
- Solution (X): B-A-C-B-A-C-Bx2.
- Walk forward.
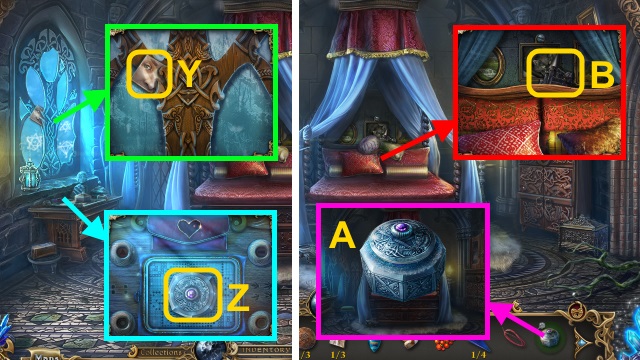
- Take the DOOR PIECE (2/3) (Y).
- Take the POWDER (Z).
- Open the POWDER (A); take the POWDER PUFF.
- Move the pillows; take the CASTLE SHAPE (1/2) (B).
- Walk right.
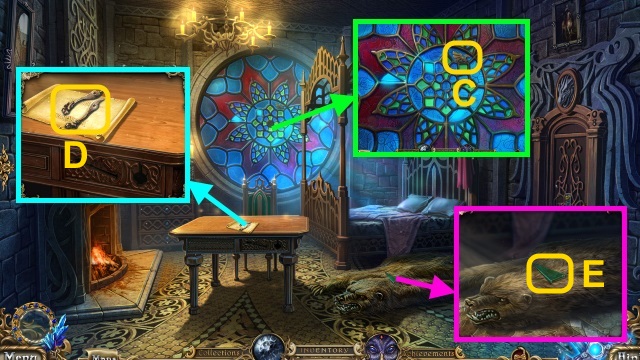
- Take the BIRD EMBLEM (C).
- Take the BROKEN TOOL (D).
- Take the GLASS (E).
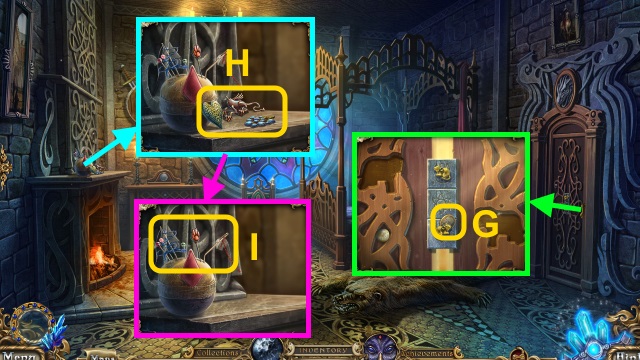
- Take the COIN (G).
- Take the DRAGON, BLUE BERRIES (2/3), and HEART (H).
- Take the CROOKED NEEDLE, BLUE THREAD, and PIN (I).
- Walk down.
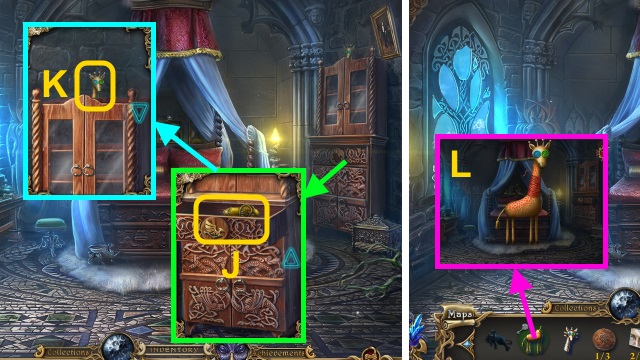
- Place the BIRD EMBLEM; take the ELEPHANT (J).
- Scroll up; use the PANTHER (K).
- Take the GIRAFFE HEAD.
- Combine the GIRAFFE, GIRAFFE HEAD, and RED THREAD (L); take the GIRAFFE.
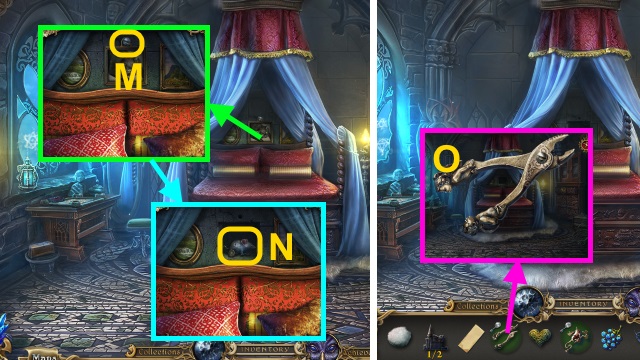
- Use the COIN (M); receive the BOLT.
- Take the BROKEN MOUSE (N).
- Examine the BROKEN TOOL; use the BOLT (O).
- Take the TOOL.
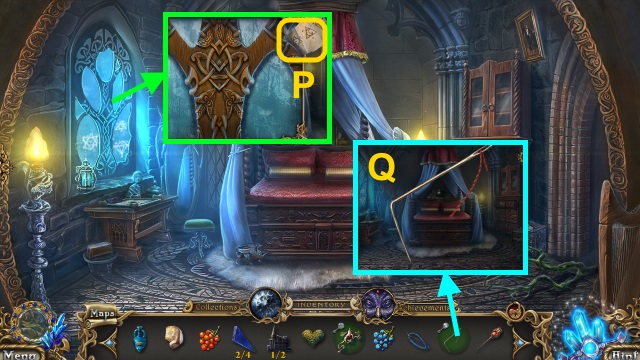
- Use the POWDER PUFF; take the CODE (P).
- Combine the CROOKED NEEDLE and TOOL (Q); take the NEEDLE.
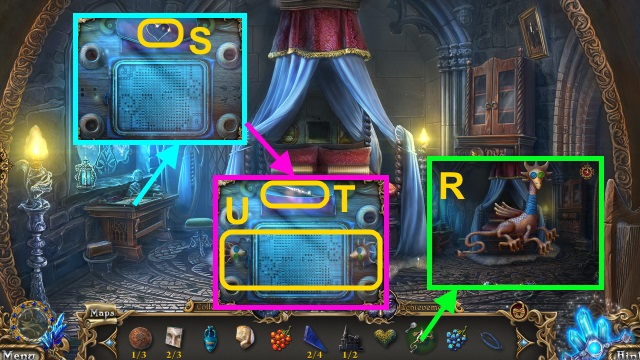
- Combine the DRAGON, DRAGON HEAD, and BLUE THREAD (R); take the DRAGON.
- Place the HEART (S); take the TWEEZERS (T).
- Place the GIRAFFE, DRAGON, and NEEDLE (U); examine the embroidery for a mini-game.
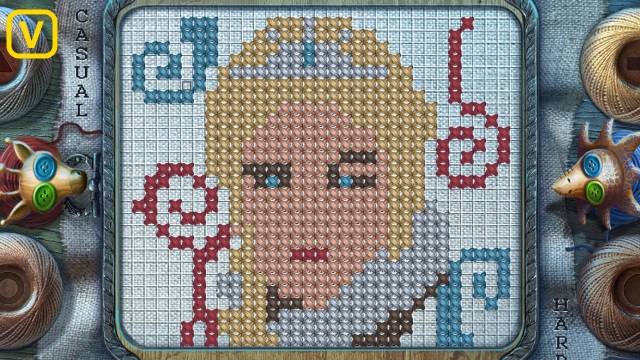
- Solution (V).
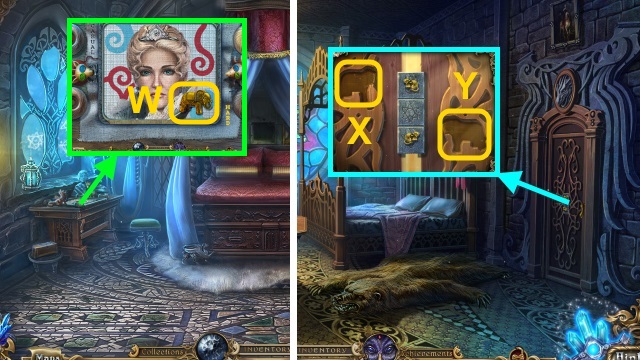
- Take the ELEPHANT (W).
- Walk right.
- Place the CODE and 2 ELEPHANTS (X-Y).
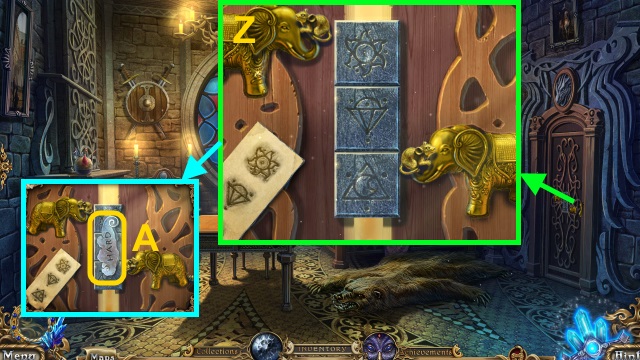
- Enter the code (Z).
- Take the PORTAL PART (A).
- Walk right.
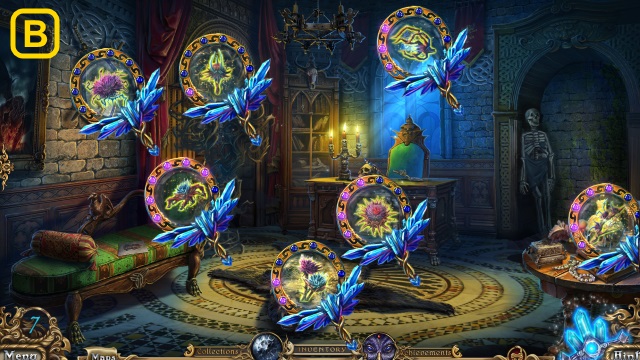
- Use the Amulet; find the thorns (B).
- Take the SHOVEL and SCEPTRE SYMBOL (C).
- Take the TINY BROOM (D).
- Take the DRAWING (E).
- Move the cushion; take the GLASS (3/4) (F).
- Walk down three times.
- Use the TINY BROOM and TWEEZERS (G); receive the GLASS (4/4).
- Walk forward, then right.
- Place the GLASS (4/4) (H); play the HOP.
- Receive the DOOR PIECE (3/3).
- Walk right.
- Place the DOOR PIECE (3/3) for a mini-game (I).
- Solution (J). Starting positions are random.
- Walk left.
- Talk to the King (K).
- Take the CROWN SYMBOL (L).
- Use the TOOL; take the SMALL WHEEL (M).
- Use the PANTHER; take the YELLOW BERRIES (N).
- Use the SHOVEL; take the CLAY (O).
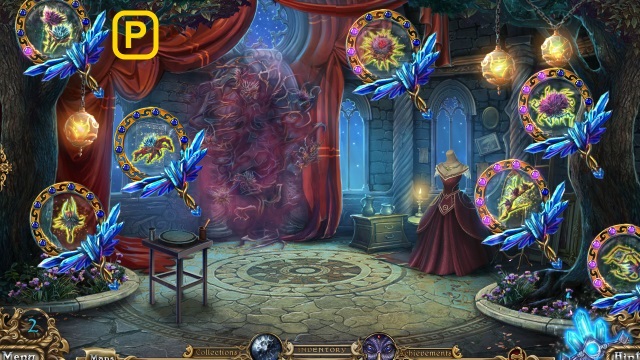
- Use the Amulet; find the thorns (P).
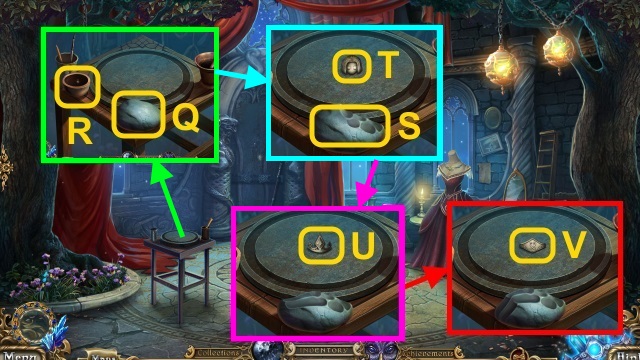
- Place the CLAY (Q); pour the water (R).
- Mold the clay 3x (S); take the FIGURINE HEAD (T).
- Mold the clay 3x; take the FIGURINE CROWN (U).
- Mold the clay 3x; take the FIGURINE BELT (V).
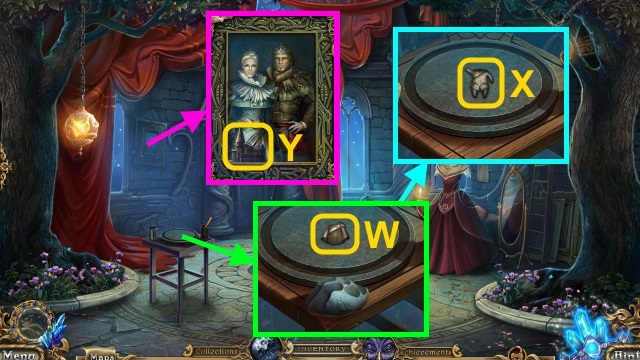
- Mold the clay 3x; take the FIGURINE CLOAK (W).
- Mold the clay 3x; take the ISA FIGURINE (X).
- Take the CASTLE SHAPE (2/2) (Y).
- Walk down twice.
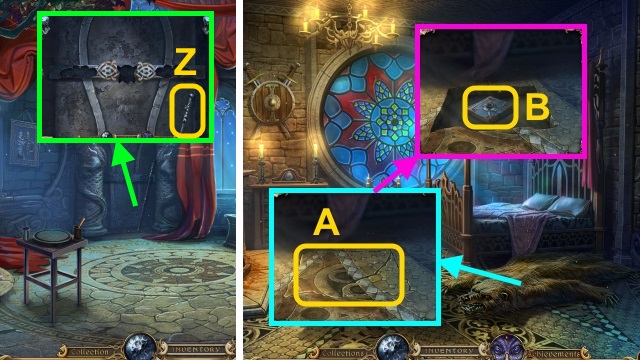
- Take the CANE (Z).
- Walk down twice.
- Move the rug; use the CANE (A).
- Take LEO'S DIARY (B).
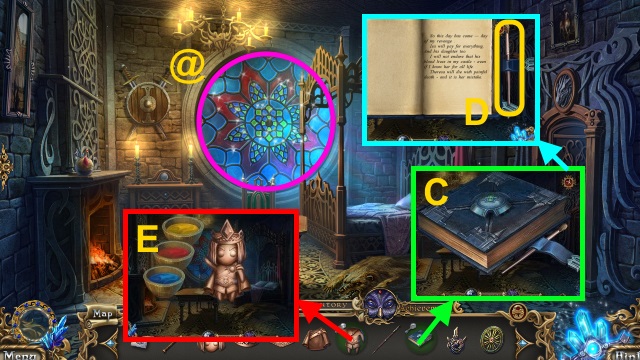
- Combine LEO'S DIARY and the CASTLE SHAPE (2/2) (C); open the diary.
- Take the PAINTBRUSH (D).
- Play the HOP; receive the WIND-UP KEY (@).
- Combine the ISA FIGURINE, FIGURINE CLOAK, FIGURINE HEAD, FIGURINE BELT, FIGURINE CROWN, COLORFUL BERRIES (E); use the DRAWING SCHEME and PAINTBRUSH for a mini-game.
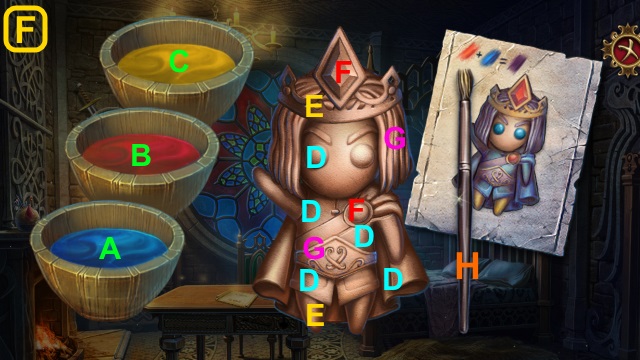
- Solution (F): (H-A-D)-(H-B-G)-(H-C-E)-(H-B-F).
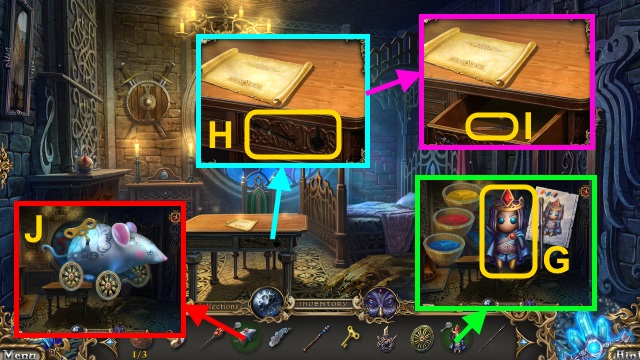
- Take the ISA FIGURINE (G).
- Place the SCEPTER SYMBOL and CROWN SYMBOL (H); take the TOY SWORD (I).
- Combine the BROKEN MOUSE, WIND-UP KEY, and SMALL WHEEL (J); take the TOY MOUSE.
- Walk down twice.
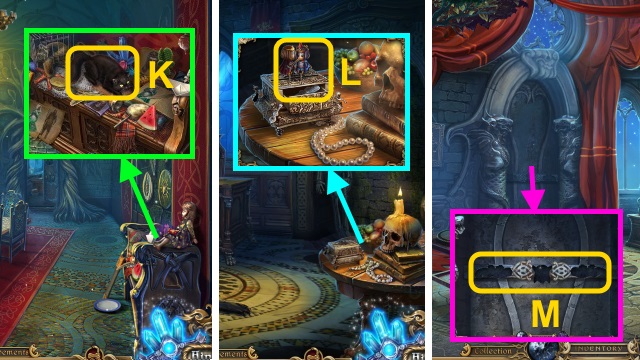
- Use the TOY MOUSE (K); play the HOP.
- Receive the BUTTON.
- Walk forward, then right twice.
- Place the ISA FIGURINE, TOY SHIELD, and TOY SWORD; take the PORTAL PART (L).
- Walk forward.
- Place the BUTTON and 2 PORTAL PARTS for a mini-game (M).
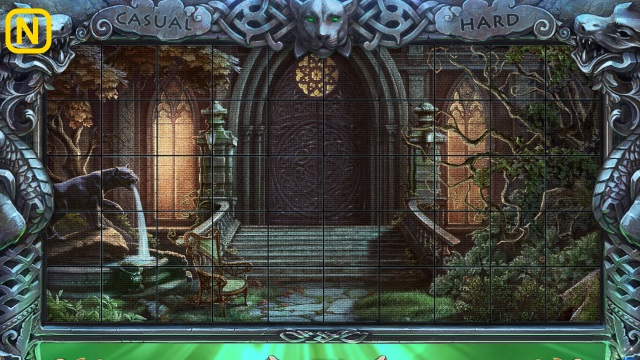
- Solution (N).
- Walk forward.
Chapter 5: Isa's Castle
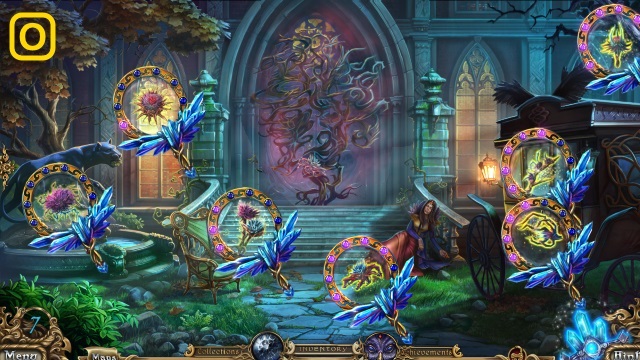
- Use the Amulet; find the thorns (O).
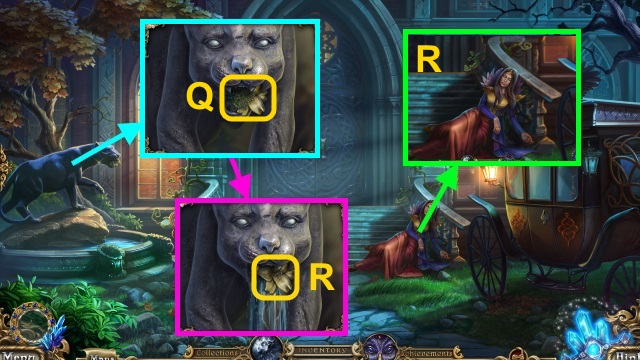
- Talk to Aiza (P); take the HANDKERCHIEF.
- Use the CANE (Q); take the LILY EMBLEM (1/3) (R).
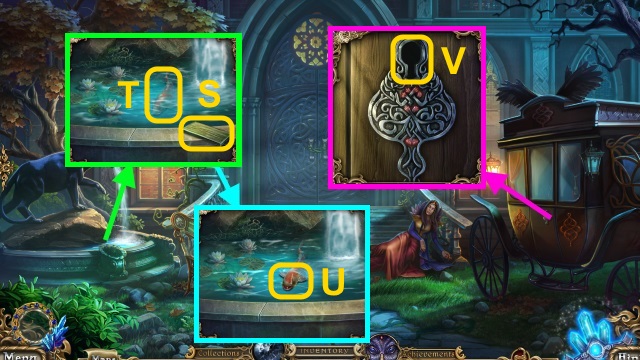
- Take the WOODEN PLANK (1/3) (S).
- Use the CUPCAKE BITE (T); take the COGWHEEL (1/3) (U).
- Use the PIN (V).
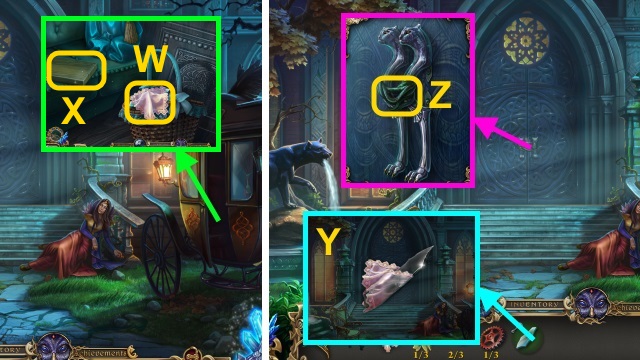
- Take the HANDKERCHIEF, SHARP GLASS (W), and WOODEN PLANK (2/3) (X).
- Combine the SHARP GLASS and HANDKERCHIEF (Y); take the SHARP GLASS.
- Use the SHARP GLASS (Z).
- Walk forward.
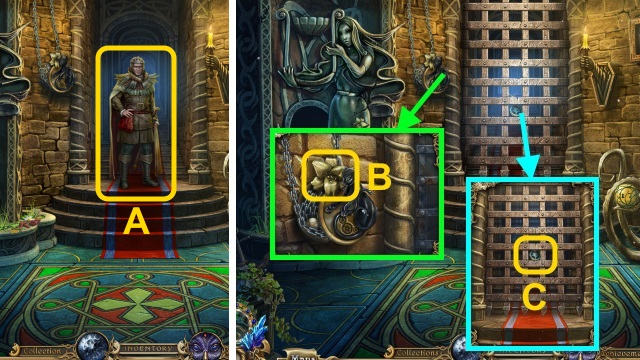
- Talk to the King (A).
- Take the LILY EMBLEM (2/3) (B).
- Take the COGWHEEL (2/3) (C).
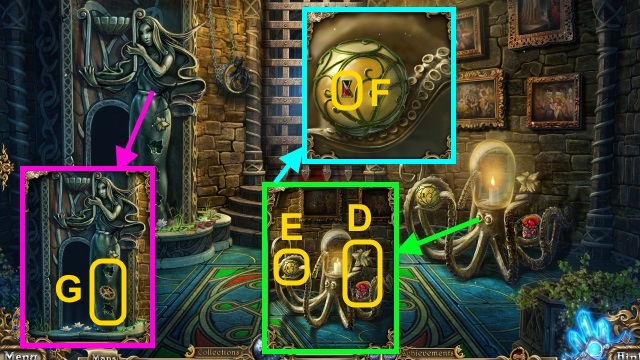
- Take the LILY EMBLEM (3/3) and GEM TILE (D).
- Examine the octopus (E); take the RED CRYSTAL (1/3) (F).
- Take the COGWHEEL (3/3) (G); place the LILY EMBLEM.
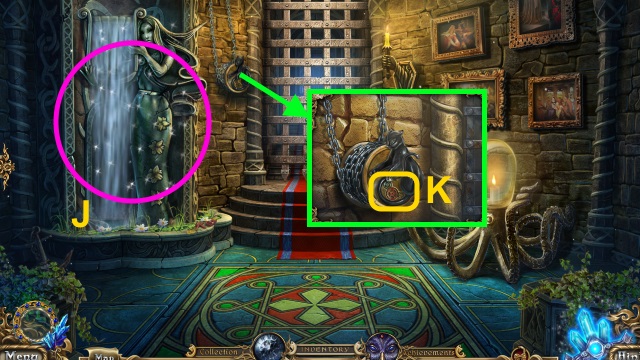
- Play the HOP; receive the OILCAN (J).
- Use the COGWHEEL (3/3) and OILCAN (K).
- Walk forward.
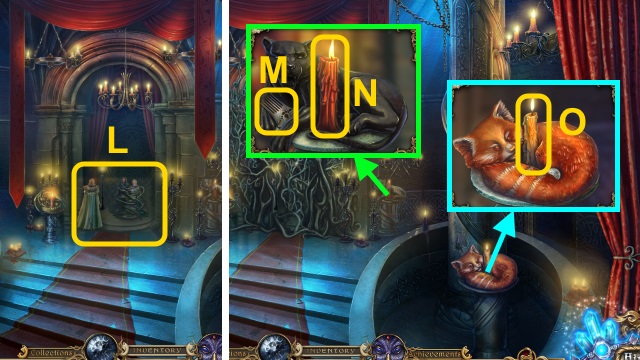
- Examine the scene (L).
- Take the COMB (M); extinguish the candle (N).
- Extinguish the candle (O).
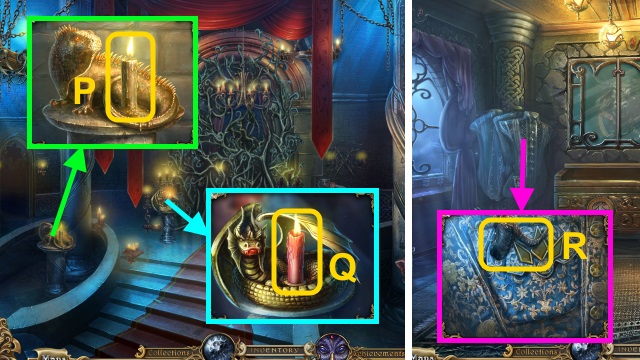
- Extinguish the candle (P).
- Extinguish the candle (Q).
- Walk right.
- Take the HORN(R).
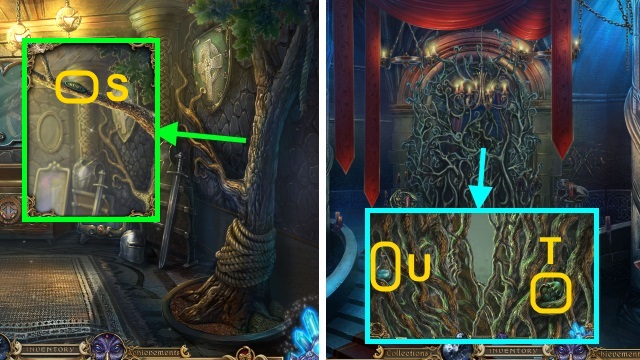
- Use the PANTHER; take the BUTTON (S).
- Walk down, then forward.
- Take the GEM TILE (T) and AMMONIA (U).
- Walk down twice.
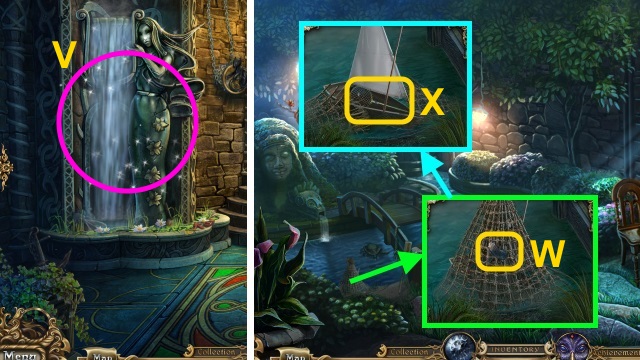
- Play the HOP; receive the WOODEN PLANK (3/3) (V).
- Walk forward, then left.
- Take the HORN (W); use the PANTHER.
- Take the NET (X).
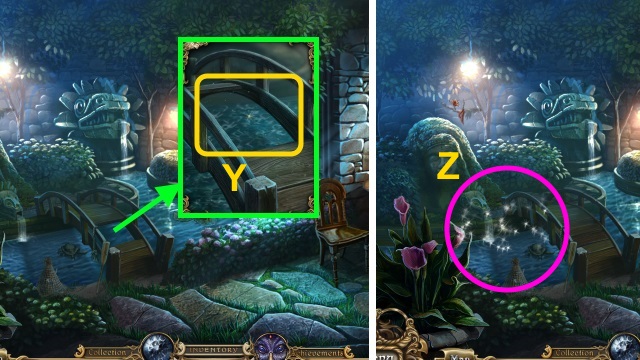
- Place the 3 WOODEN PLANKS (Y).
- Play the HOP; receive the GEM TILE (Z).
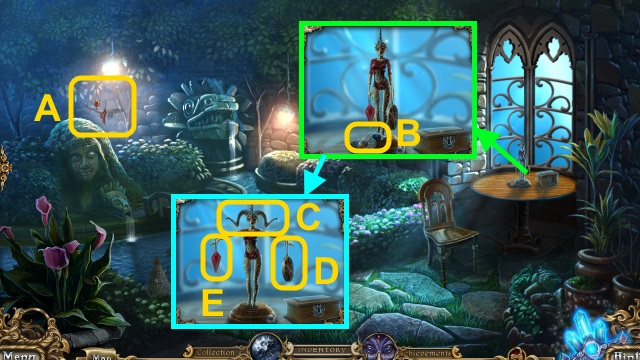
- Take the BRANCH (A).
- Take the LETTER S (B).
- Place the 2 HORNS (C); take the RED CRYSTAL (2/3) (D) and AMULET (E).
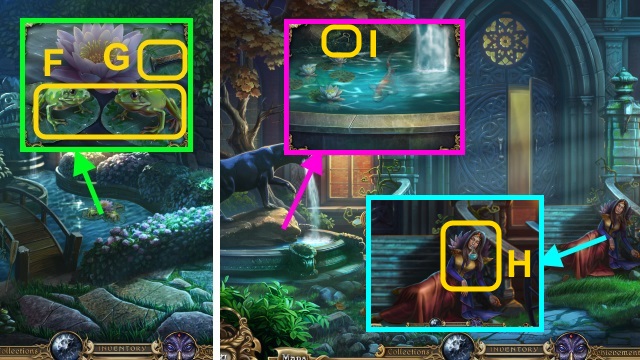
- Examine the frogs (F).
- Use the NET (G); take the LETTER I.
- Walk down three times.
- Use the AMMONIA (H).
- Use the COMB; take the OCTOPUS KEY (I).
- Walk forward.
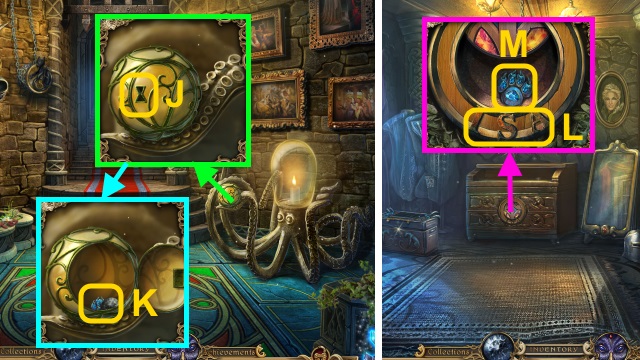
- Use the OCTOPUS KEY (J); take the GEM TILE (4/5) (K).
- Walk forward, then right.
- Place the LETTER S and LETTER I (L); take the GEM TILE (5/5) (M).
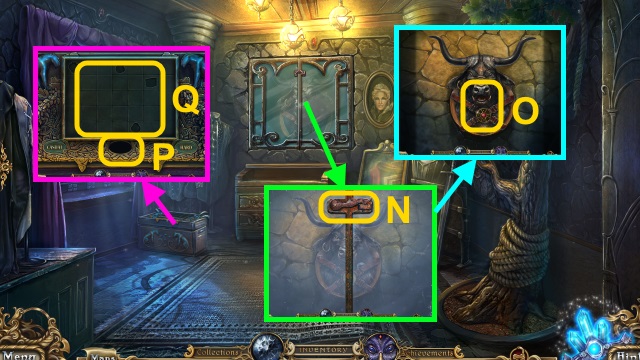
- Use the BRANCH (N).
- Place the AMULET; take the PAW EMBLEM (O).
- Place the BUTTON (P) and GEM TILE (5/5) (Q) for a mini-game.
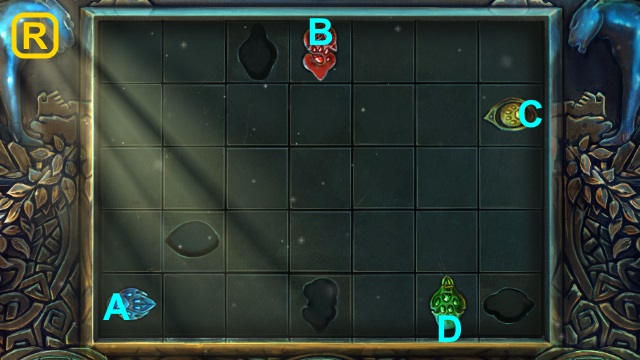
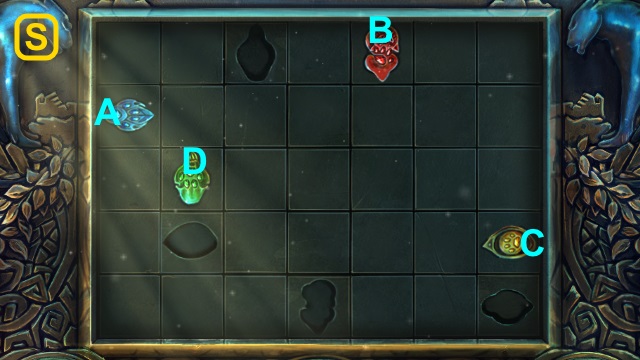
- Casual solution (R): Dx3-Ax6-Cx3-D-Bx2-Cx2-Bx2.
- Hard solution (S): D-A-D-Ax3-Bx3-Ax2-Cx2-B-Cx3.
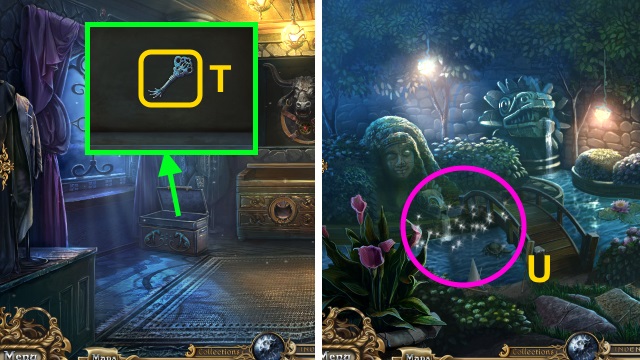
- Take the KEY (T).
- Walk down, then left.
- Play the HOP; receive the BLUE CRYSTAL (1/3) (U).
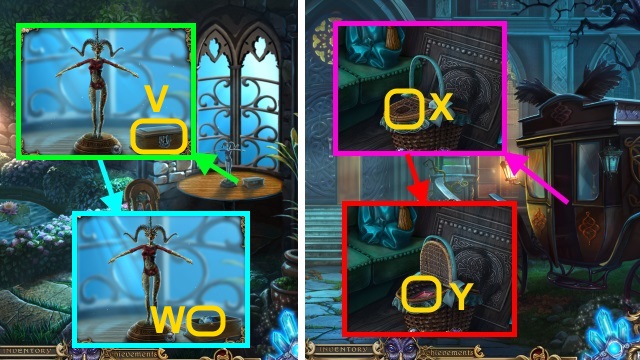
- Use the KEY (V).
- Take the BLUE CRYSTAL (2/3) (W).
- Walk down three times.
- Place the PAW EMBLEM (X).
- Take the RED CRYSTAL (3/3) (Y).
- Walk forward twice, then right.
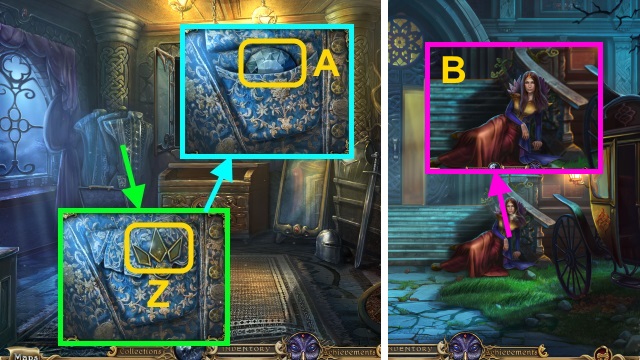
- Place the RED CRYSTAL (3/3) (Z).
- Take the BLUE CRYSTAL (3/3) (A).
- Walk down three times.
- Give the BLUE CRYSTAL (3/3) (B); select 'Yes.'
- Walk forward twice.
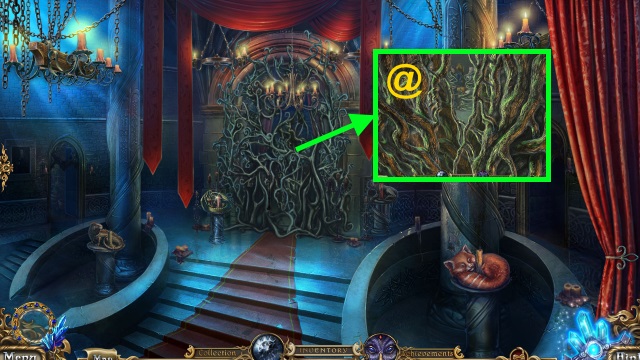
- Examine the door (@).
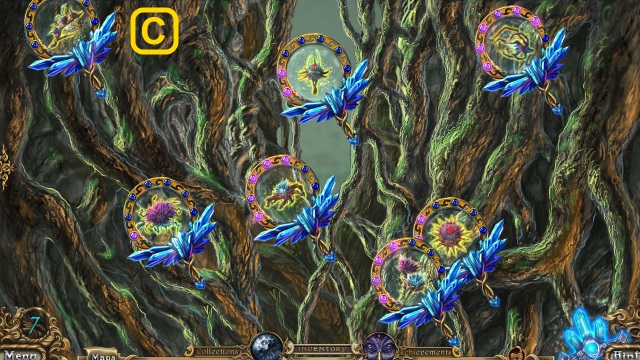
- Use the Amulet; find the thorns (C).
- Select 'No' 2x.
- Congratulations! You have completed Spirits of Mystery: Family Lies.
Created at: 2016-04-22

