Walkthrough Menu
- General Tips
- Chapter 1: The Doctor
- Chapter 2: The Stone Head
- Chapter 3: The Snake Mutant
- Chapter 4: The Crocodile Mutant
- Chapter 5: The Bear-Pigeon Mutant
- Chapter 6: Rescue Mary
General Tips
- This is the official guide for Twilight Phenomena: Strange Menagerie.
- This guide will not mention each time you have to zoom into a location; the screenshots will show each zoom scene.
- You can create a custom play mode using your preferred settings. The mode can be changed during the game.
- We will use the acronym HOP for Hidden-object puzzles. Interactive items will be color-coded and some will be numbered; please follow the numbers in sequence.
- The HOP lists are random; our lists may vary from yours.
Chapter 1: The Doctor
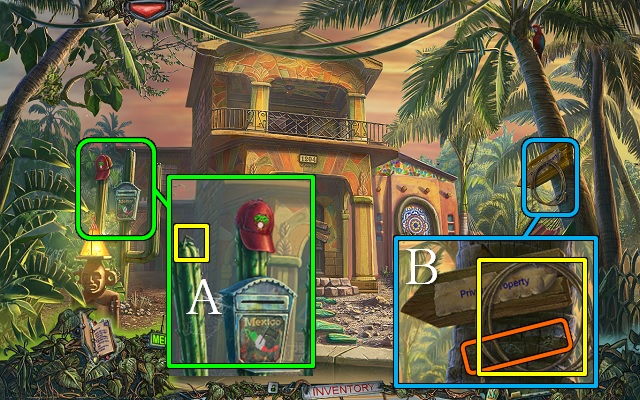
- Move Mary's cap; take the CACTUS NEEDLE (A).
- Take the LASSO; note the symbols (B).
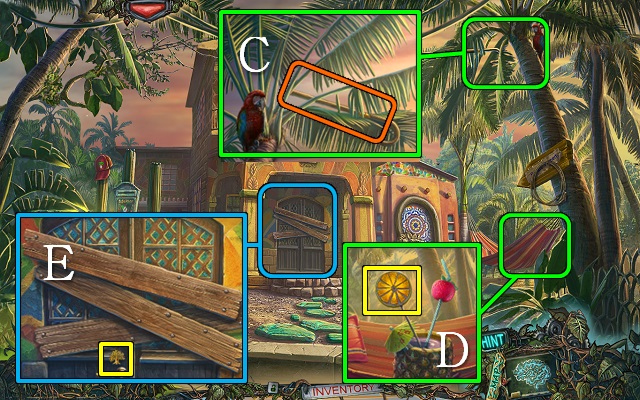
- Use the LASSO to get the CANE (C).
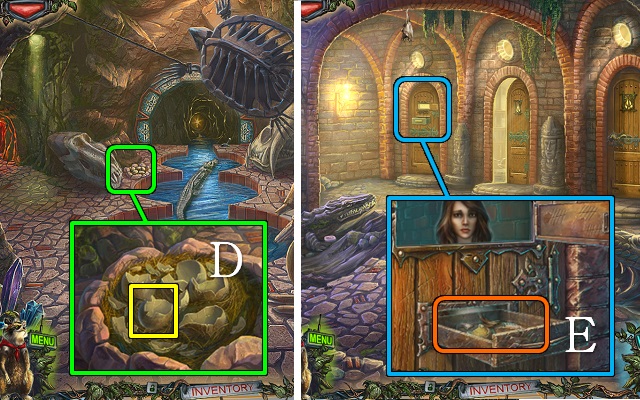
- Take the ORANGE FIGURE (D).
- Remove the boards with the CANE and take the TREE PENDANT (E); walk forward to the Lobby.
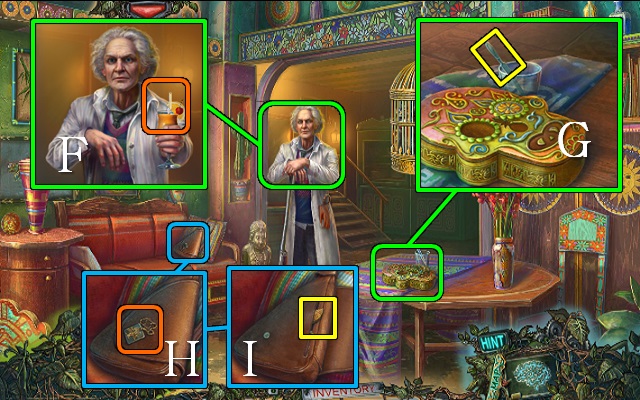
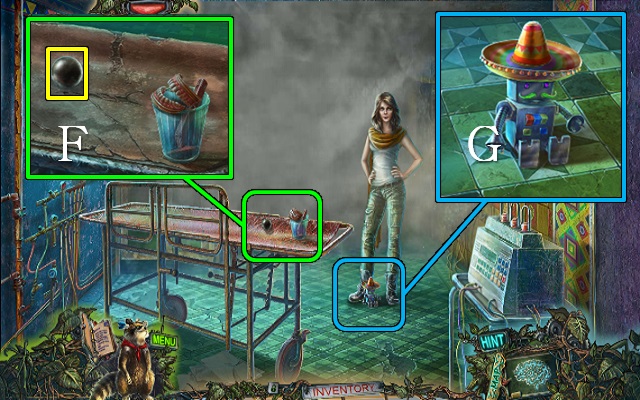
- Talk to the doctor; drink some lemonade (F).
- Take the SCALPEL (G).
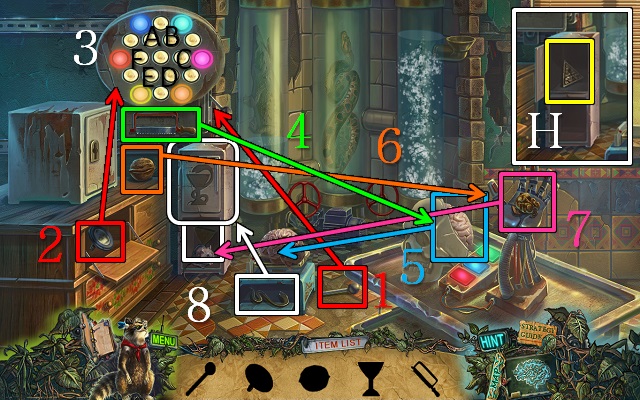
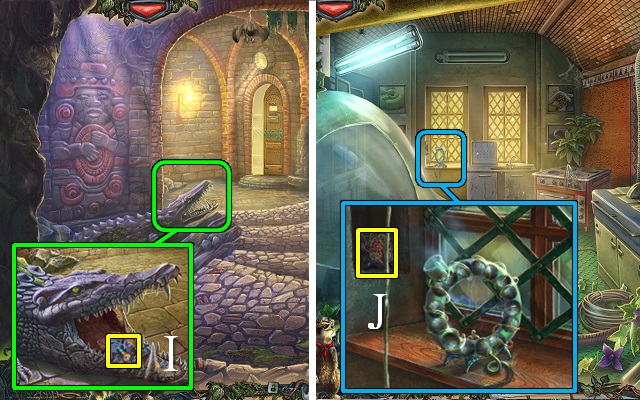
- Put the TREE PENDANT on the locked bag (H) and open the bag; take the STONE SHELL (I).
- Walk down to the Yard.
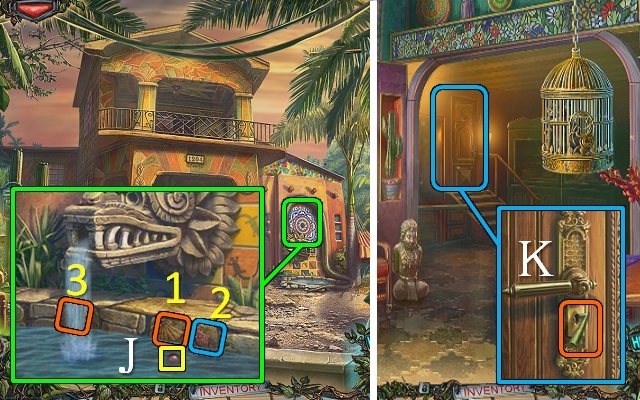
- Put the STONE SHELL on the fountain tile; push the tiles in numerical order and take the EYE (J).
- Go inside.
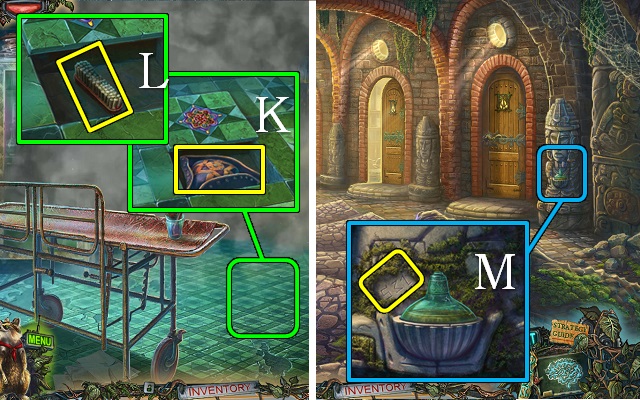
- Pick the back door lock with the CACTUS NEEDLE (K); walk forward to the Corridor.
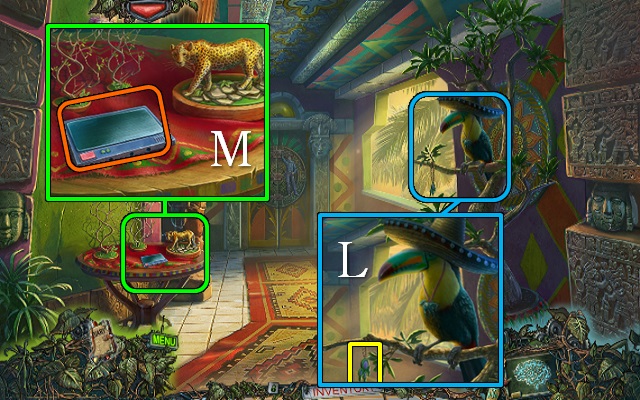
- Take the PAW MEDALLION (L).
- Watch the video (M).
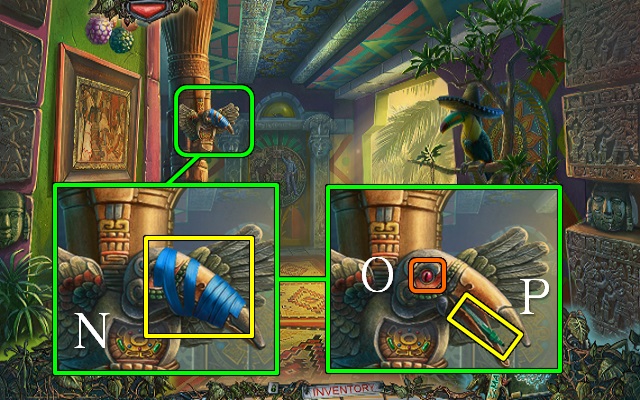
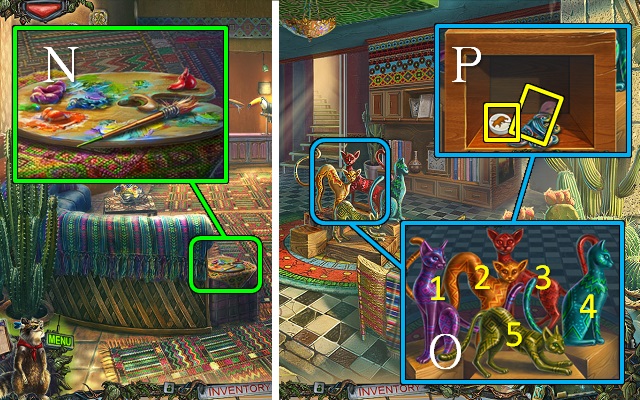
- Take the TAPE (N), put the EYE in the socket (O) and take the GREEN MARKER (P).
- Walk down.
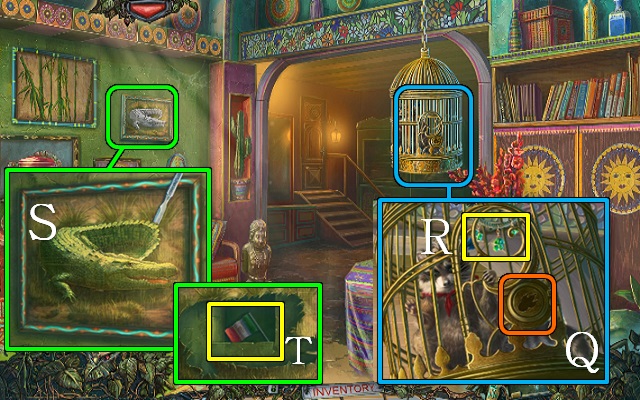
- Open the cage with the PAW MEDALLION (Q).
- Take the GREEN STONES (R).
- Use the GREEN MARKER on the painting and cut it with the SCALPEL; take the CROCODILE PICTURE (S) and FLAG (T).
- Walk down.
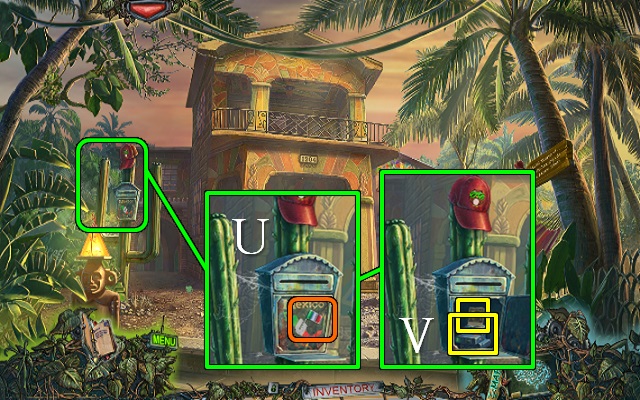
- Chase off the cat; put the FLAG on the mailbox and open it (U), look at the picture and take the CAMERA (V).
- Go inside.
- Talk to the doctor.
- Go to the Corridor.
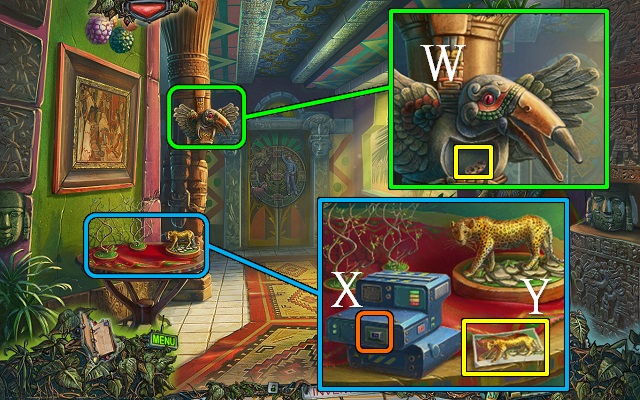
- Put the GREEN STONES on the pillar; take the COOKIE FIGURE (W).
- Put the CAMERA on the table and take a picture (X); move the picture, cut it with the SCALPEL and take the JAGUAR PICTURE (Y).
- Walk down.
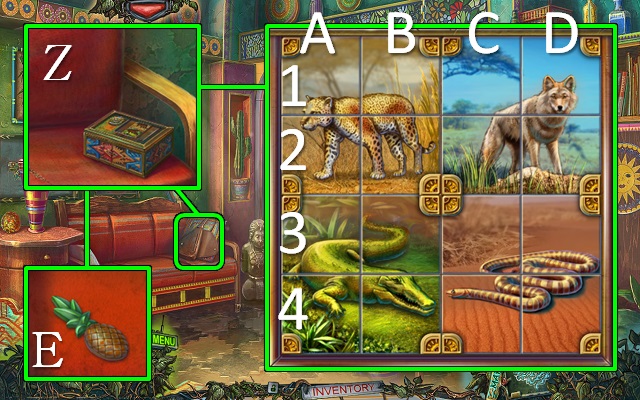
- Move the bag and the cushion; put the CROCODILE PICTURE and JAGUAR PICTURE on the box (Z) for a mini-game.
- Use the medallion to swap two pictures.
- Right-click to turn the medallion.
- Swap the following tiles: D1-C2, D3-C4, turn, C1-D2, C3-D4, B1-C2, B3-C4, turn, C1-B2, C3-B4, D2-C3, turn, C3-D4, C2-D3, turn, C2-D1.
- Take the PINEAPPLE FIGURE (E).
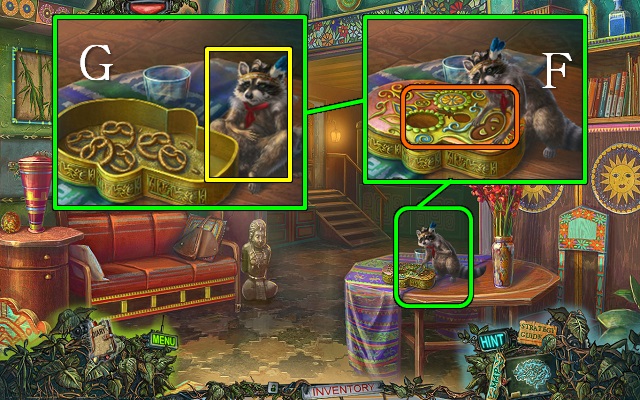
- Put the ORANGE FIGURE, COOKIE FIGURE and PINEAPPLE FIGURE on the box (F); take the raccoon (G).
- Go to the Corridor.
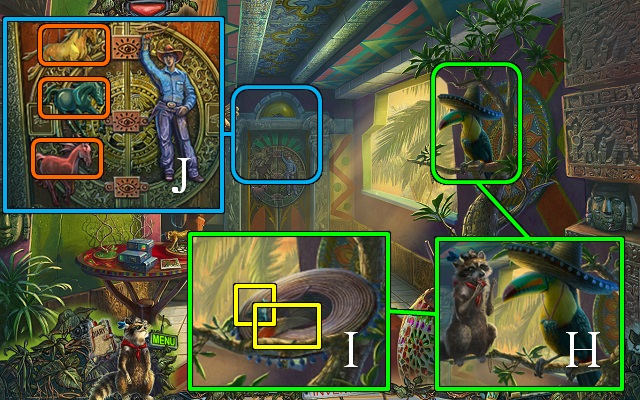
- Use the raccoon to scare off the bird (H); take FEATHER 1/3 and the METAL MUSTANG (I).
- Put the LASSO and METAL MUSTANG on the door; move all three mustangs to the other side (J).
- Go into the Elevator.
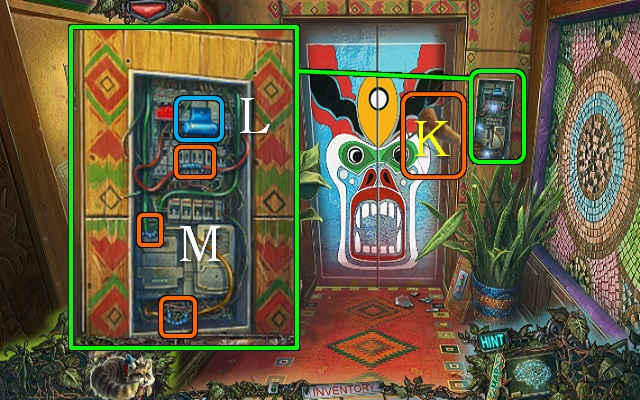
- Slap the arm away (K).
- Turn off the power panel (L), fix the three wires with the TAPE (M) and turn the power back on.
- Walk forward to the Basement.
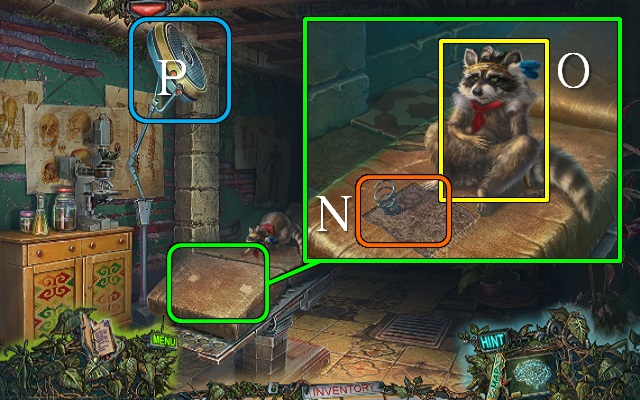
- Cut the examination table with the SCALPEL (N); take the RAG and the raccoon (O).
- Use the raccoon to move the lamp (P).
- Walk down.
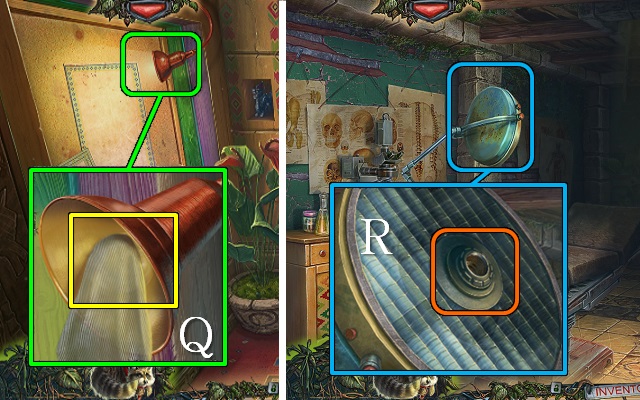
- Take the LIGHT BULB with the RAG (Q).
- Walk forward.
- Remove the note from the lamp and put the LIGHT BULB in it (R).
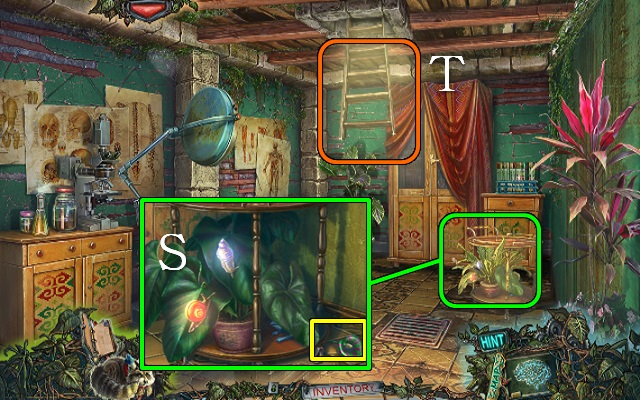
- Take the FLOWER (S).
- Pull down the ladder and go up to the Sitting Room (T).
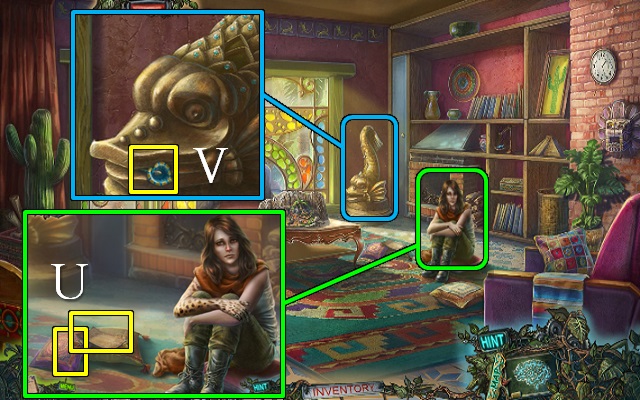
- Talk to Mary; take MARY'S MEDICAL CHART and KEY 1/2 (U).
- Take the FLOWER (V).
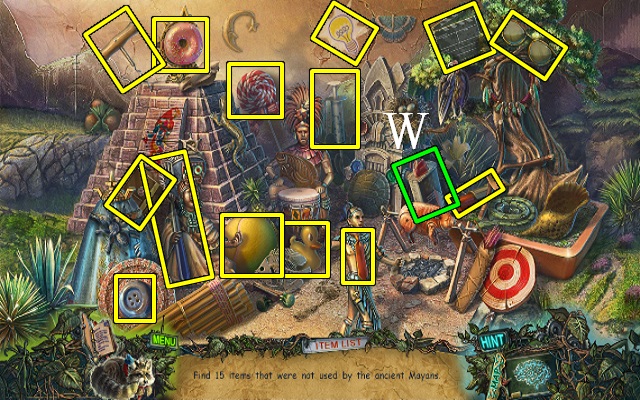
- Play the HOP.
- You receive the LIGHTER FLUID (W).
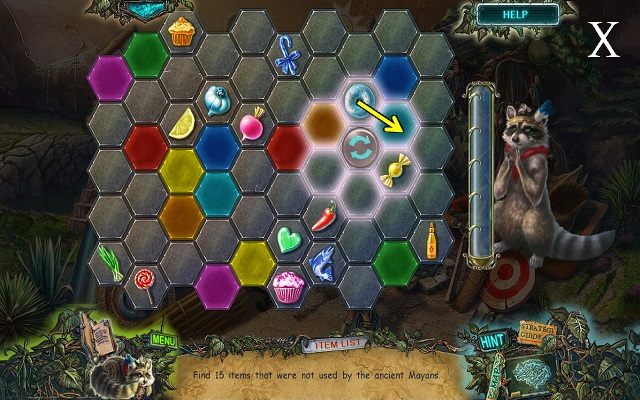
- Instead of a HOP you can choose to play a mini-game (X).
- Rotate groups of tiles to move the sweet snacks to tiles with matching color; for every 5 snacks the raccoon will find one HOP item for you.
- Go to the Elevator.
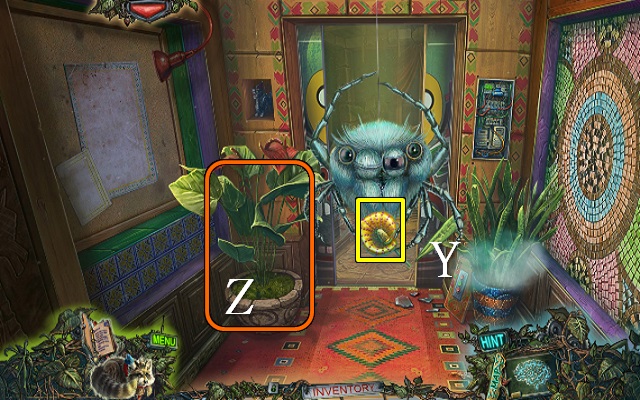
- Take the FLOWER (Y).
- Put the three FLOWERS on the left plant (Z) for a mini-game.
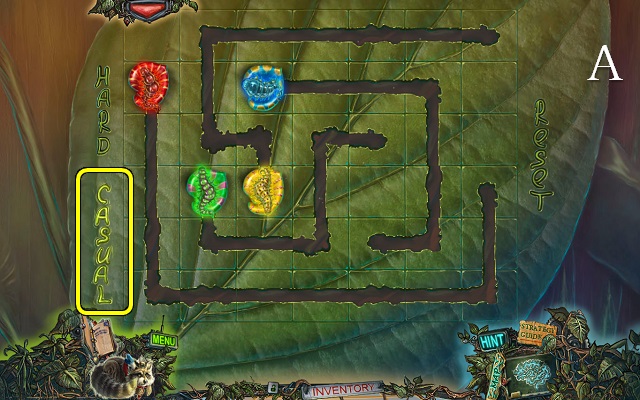
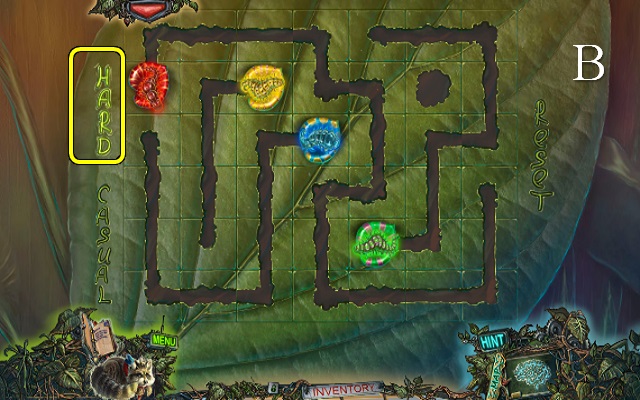
- Select a caterpillar and use the arrow keys to guide it to the flower of the same color.
- The caterpillars' paths may not cross.
- Casual (A) and hard (B) solutions are shown.
- Take a CATERPILLAR.
- Go to the Basement.
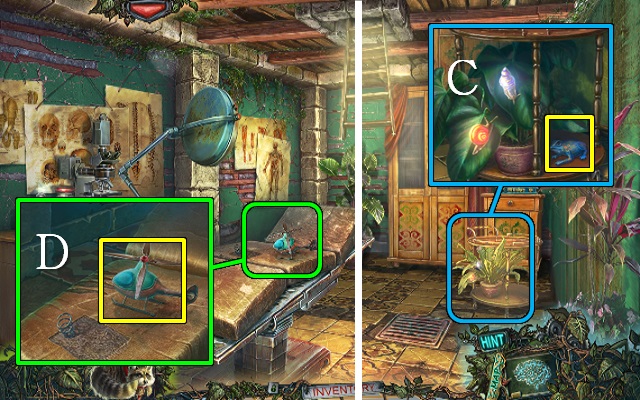
- Use the CATERPILLAR on the plant; take the PORCELAIN FROG (C).
- Take the TOY HELICOPTER (D).
- Go to the Elevator.
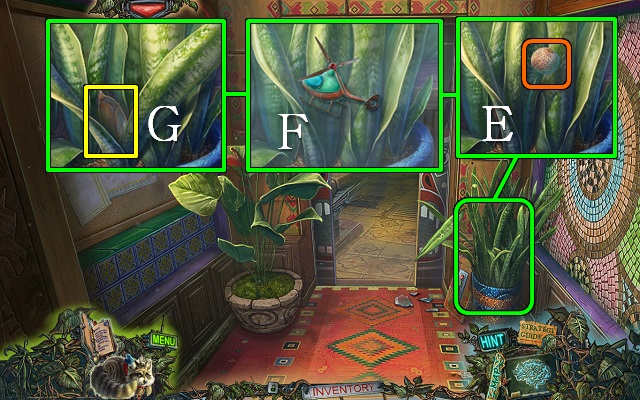
- Pick the seed bulb from the right plant (E) and clear the fog with the TOY HELICOPTER (F); move the leaves and take the SCALE PAN (G).
- Go to the Sitting Room.
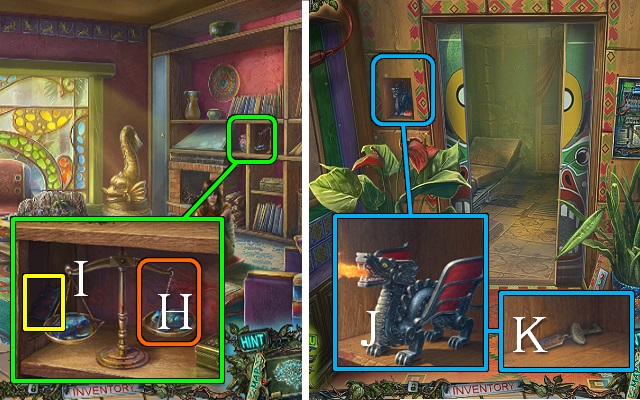
- Put the SCALE PAN and PORCELAIN FROG on the scales (H); take the DRAGON WING (I).
- Go to the Elevator.
- Put the LIGHTER FLUID and DRAGON WING on the dragon; take the DRAGON LIGHTER (J) and KEY 2/2 (K).
- Walk forward.
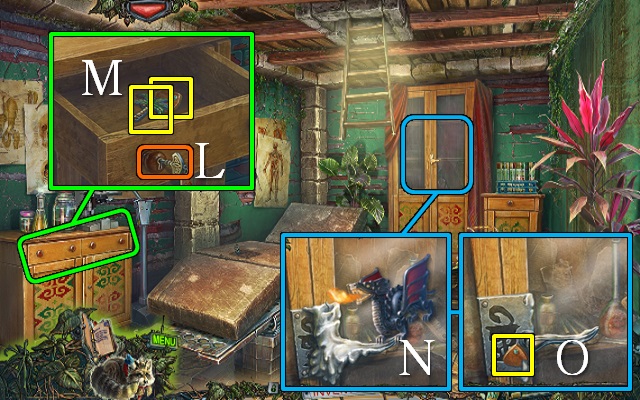
- Put the KEYS in the drawer locks and open the drawer (L); take the PALM FIGURE and FISH SCALE 1/2 (M).
- Move the curtains from the cupboard; melt the candle with the DRAGON LIGHTER (N) and take FISH SCALE 2/2 (O).
- Go to the Sitting Room.
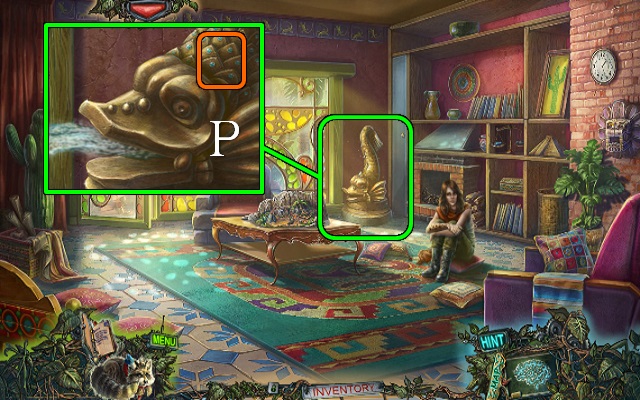
- Put the FISH SCALES on the statue (P).
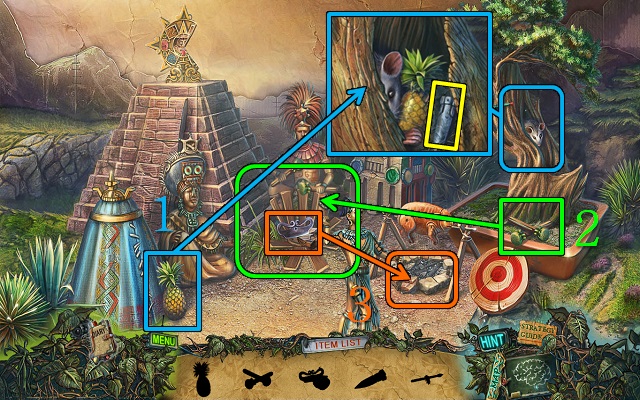
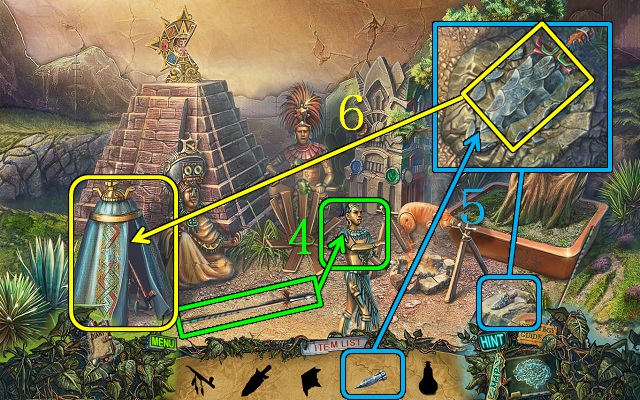
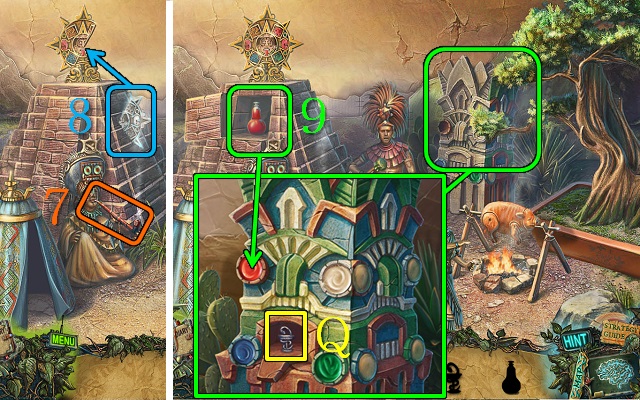
- Play the HOP.
- You receive the MEDICAL EMBLEM (Q).
- Walk down.
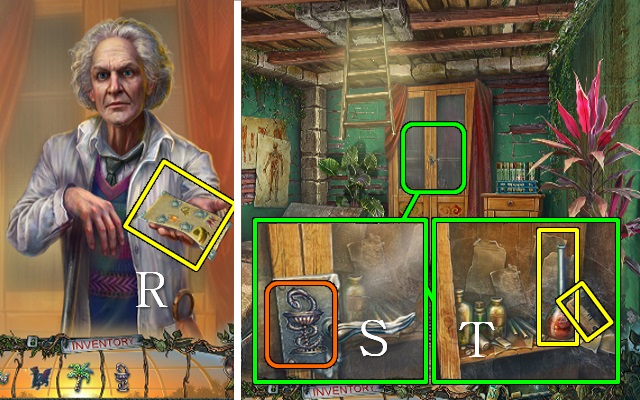
- Talk to the doctor and give him MARY'S MEDICAL CHART.
- Take the paper for the DNA samples (R).
- Put the MEDICAL EMBLEM on the cupboard lock (S); open the cupboard and take the COMB and ACID (T).
- Walk forward.
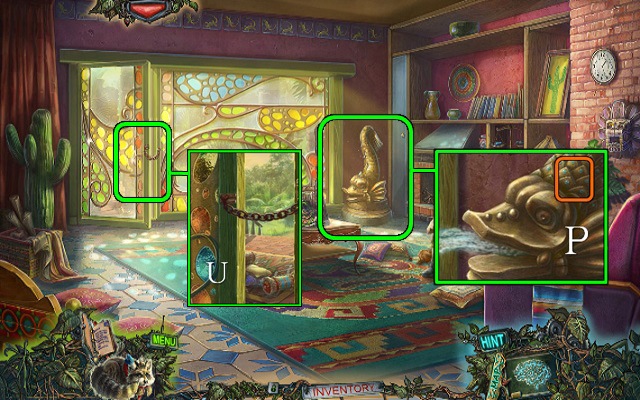
- Melt the back door chain with the ACID and walk forward to the Terrace (U).
Chapter 2: The Stone Head
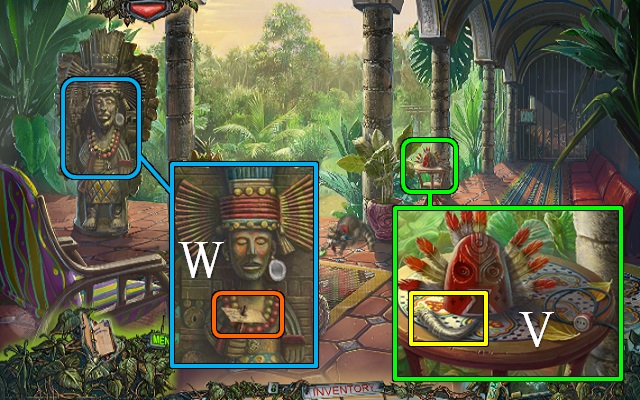
- Take the HORN (V).
- Read the note (W).
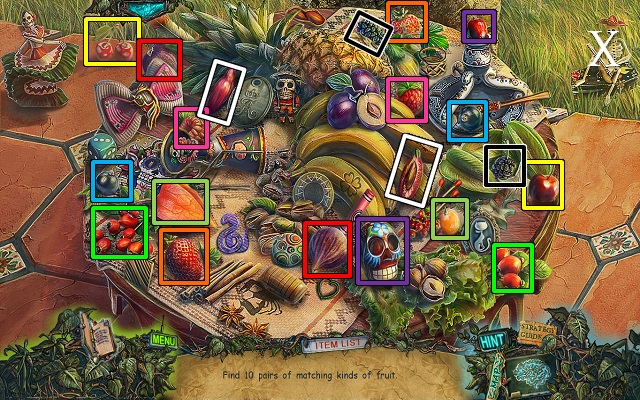
- Play the HOP (X).
- You receive the BERRIES.
- Walk forward to the Stone Head and go on to the Coyote Cage.
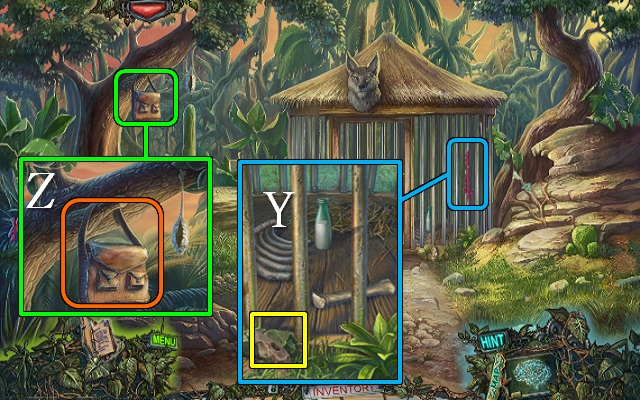
- Take the TOMAHAWK HEAD (Y).
- Move the bag (Z).
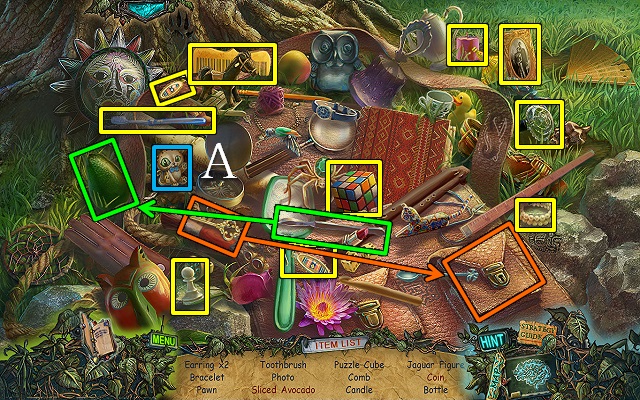
- Play the HOP or mini-game.
- You receive the JAGUAR FIGURE (A).
- Walk down.
- Talk to Mary.
- Walk down.
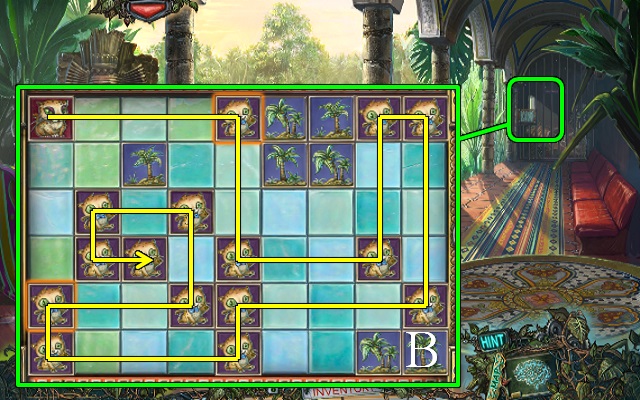
- Put the PALM FIGURE and JAGUAR FIGURE on the back door for a mini-game.
- Help the jaguar collect her cubs; she can only move in straight lines and must collect a cub each move (B).
- Go through to the Jaguar Cage.
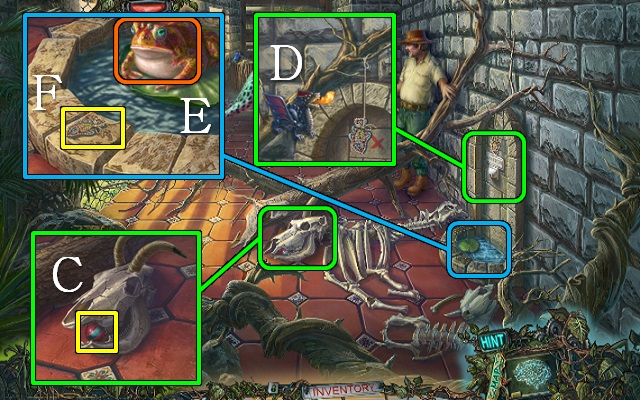
- Talk to the man.
- Put the HORN on the skull; take the BALL (C).
- Burn through the rope with the DRAGON LIGHTER (D).
- Try to take the fish; give the BERRIES to the frog (E) and take the ROPE and FISH 1/2 (F).
- Walk down.
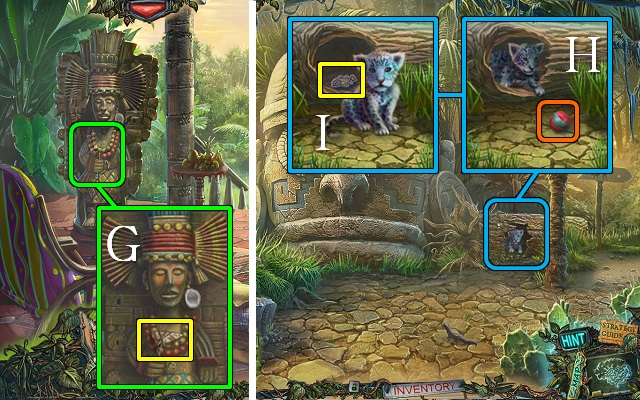
- Put the TOMAHAWK HEAD and ROPE on the stick; take the TOMAHAWK (G).
- Go to the Stone Head.
- Give the BALL to the cub (H); take FISH 2/2 (I).
- Walk down.
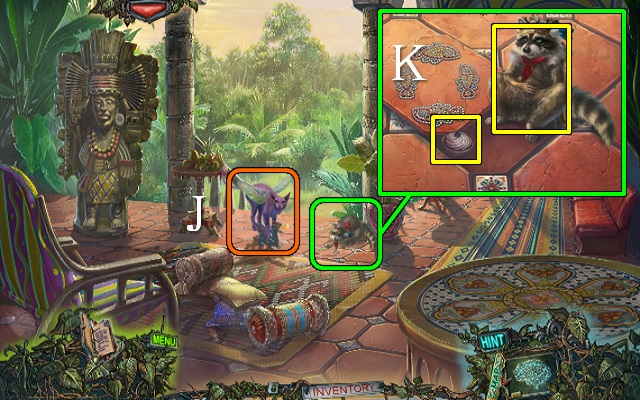
- Chase the cat away (J).
- Put the FISH on the floor tiles; take the CUPCAKE and the raccoon (K).
- Go to the Coyote Cage.
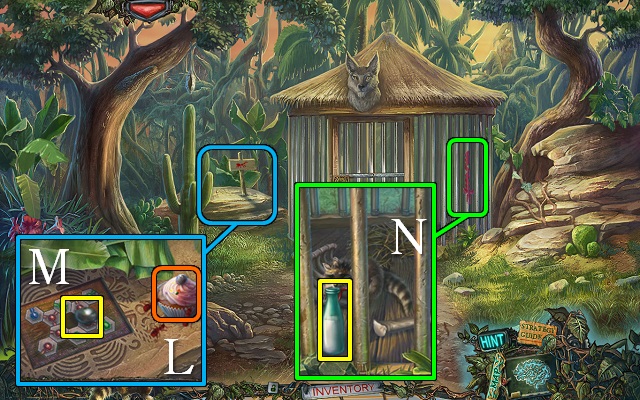
- Put the CUPCAKE (L) on the ant hill; take METAL BALL 1/2 (M).
- Release the raccoon into the cage; take the MILK (N).
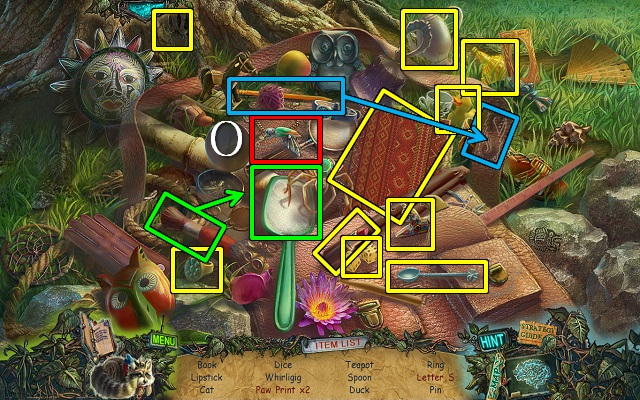
- Play the HOP or mini-game.
- You receive the PIN (O).
- Go to the Terrace.
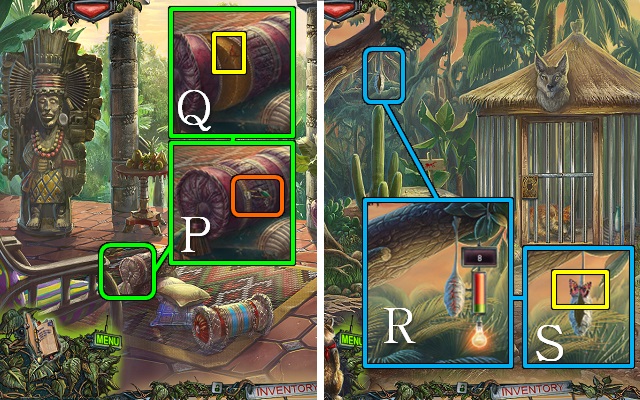
- Put the PIN on the zipper (P); open the zipper and take the NEEDLE AND THREAD (Q).
- Go to the Coyote Cage.
- Put the CATERPILLAR in the cocoon and sew it shut with the NEEDLE AND THREAD (R); wait and take the BUTTERFLY (S).
- Walk down.
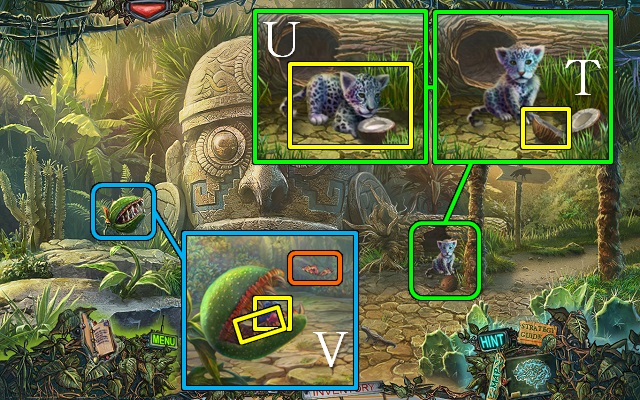
- Use the TOMAHAWK on the coconut and take the COCONUT EARRING (T); put milk in the other half and take the JAGUAR CUB (U).
- Release the BUTTERFLY on the plant; take the PIPETTE and BLUE ELEPHANT (V).
- Walk down.
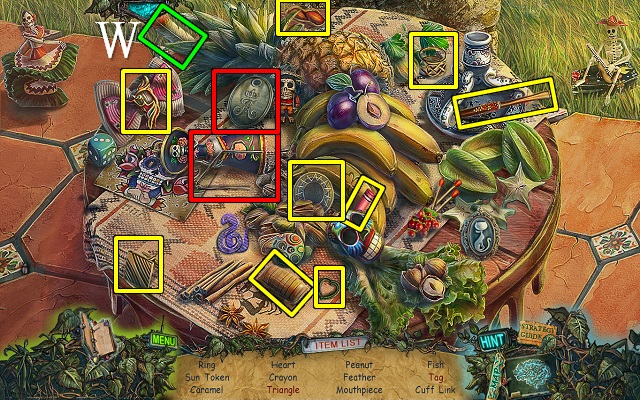
- Play the HOP or mini-game.
- You receive FEATHER 2/3 (W).
- Go into the Jaguar Cage.
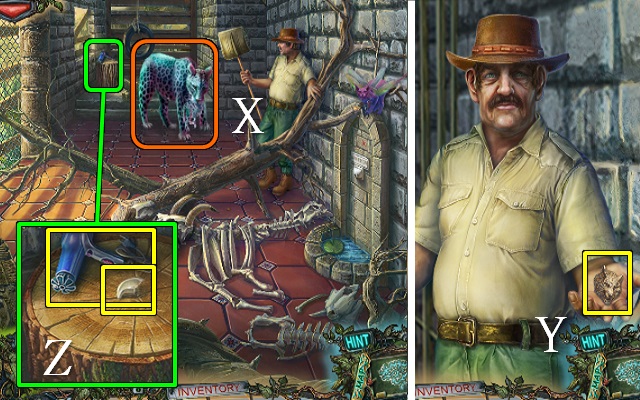
- Give the JAGUAR CUB to the jaguar (X).
- Talk to the man and take the COYOTE KEY (Y).
- Take the HAIR DRYER and JAGUAR CLAW (Z).
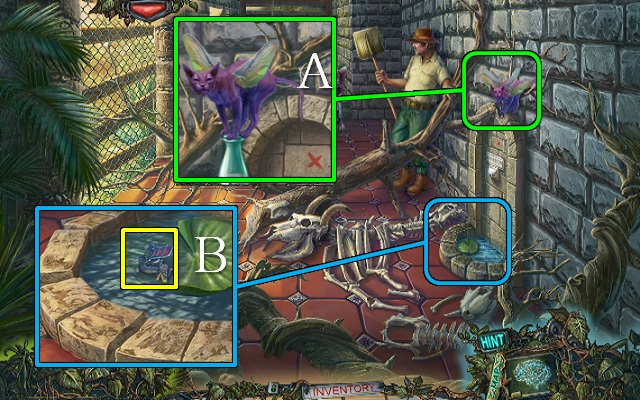
- Feed the MILK to the cat; take the CAT (A).
- Take the WET DRAGON LIGHTER (B).
- Walk down.
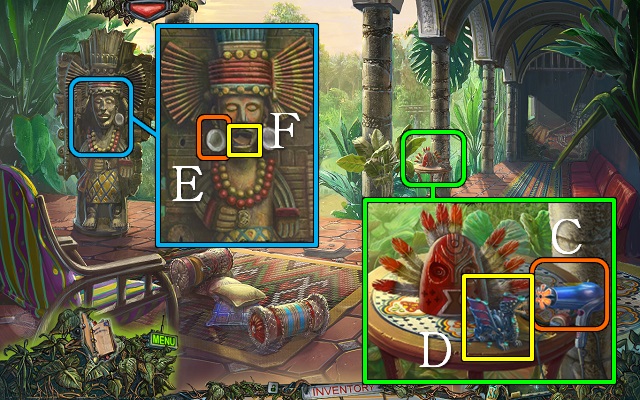
- Put the HAIR DRYER (C) and WET DRAGON LIGHTER on the table; plug in the dryer and take the DRAGON LIGHTER (D).
- Put the COCONUT EARRING (E) on the statue; take the code (F).
- Go to the Stone Head.
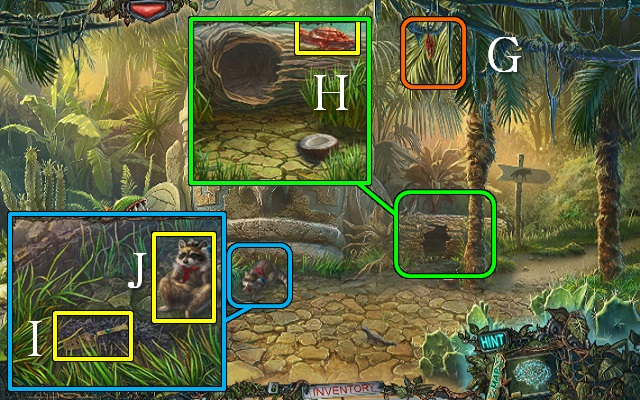
- Use the CAT on the tree (G).
- Take the RED TURTLE (H).
- Use the DRAGON LIGHTER on the thorns; take the SPATULA (I) and the raccoon (J).
- Go to the Coyote Cage.
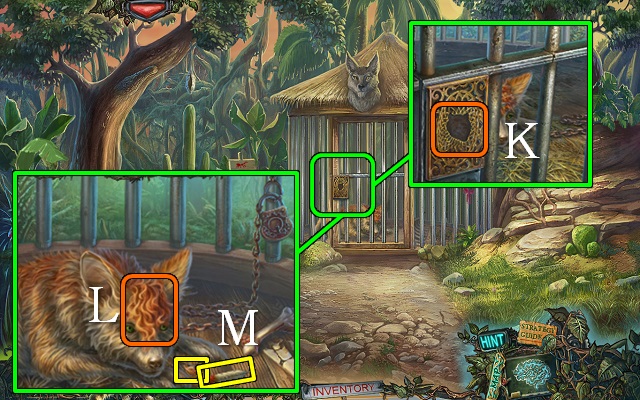
- Put the COYOTE KEY in the lock (K).
- Use the COMB on the coyote (L); take FEATHER 3/3 and the COYOTE HAIR (M).
- Go to the Terrace.
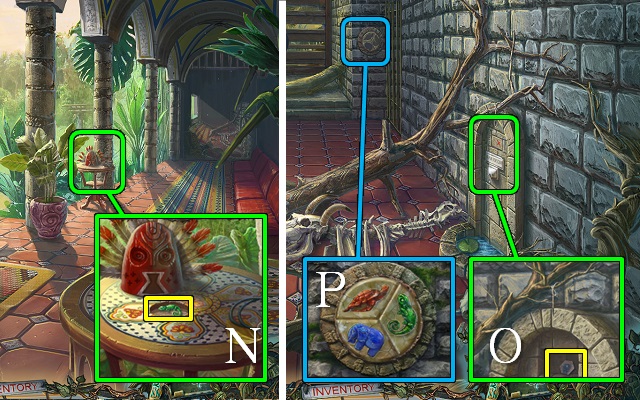
- Put the FEATHERS on the statuette; take the GREEN CHAMELEON (N).
- Go into the Jaguar Cage.
- Remove the marked stone with the SPATULA; take the PUZZLE PART (O).
- Put the BLUE ELEPHANT, RED TURTLE and GREEN CHAMELEON on the safe (P); zoom in for a mini-game.
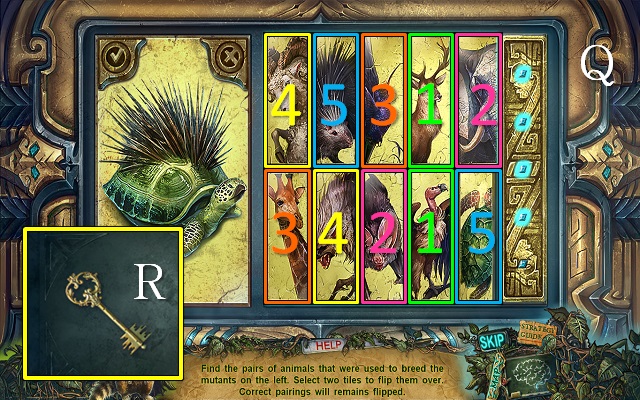
- Find pairs of animals that were used to create the creatures shown (Q).
- Take the KEY (R).
- Go to the Coyote Cage.
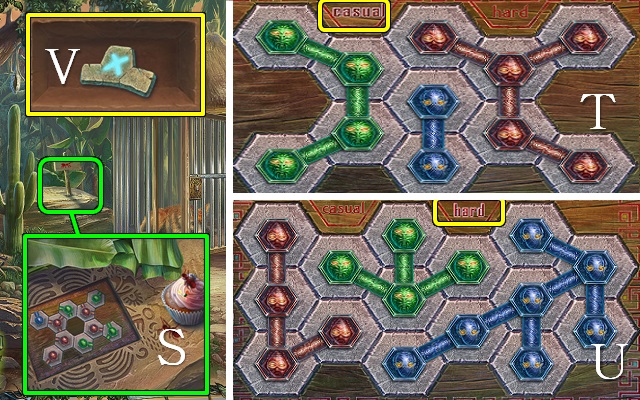
- Put the PUZZLE PART on the ant hill puzzle (S) for a mini-game.
- Move the tiles until all the spokes of the same color connect.
- Casual (T) and hard (U) solutions are shown.
- Take the SYMBOL (V).
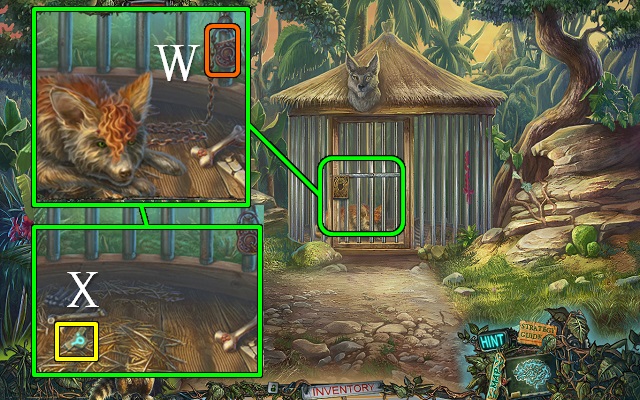
- Put the KEY in the lock and turn it (W); take the SYMBOL (X).
- Walk down.
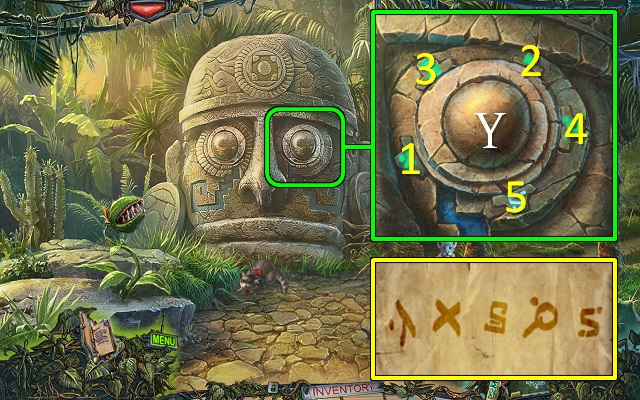
- Put the two SYMBOLS on the statue's eye; push the symbols in numerical order (Y).
- Walk forward to the Sewer.
Chapter 3: The Snake Mutant
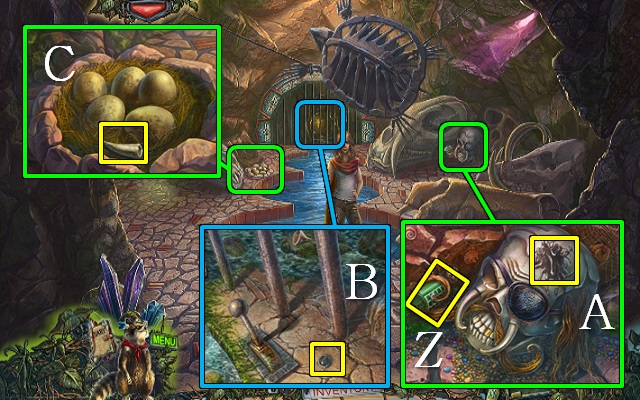
- Talk to Mary.
- Take the CURLER (Z) and take the RESIN with the SPATULA (A).
- Take the SWITCH (B).
- Take the STONE TOOTH (C).
- Go left to the Catacombs.
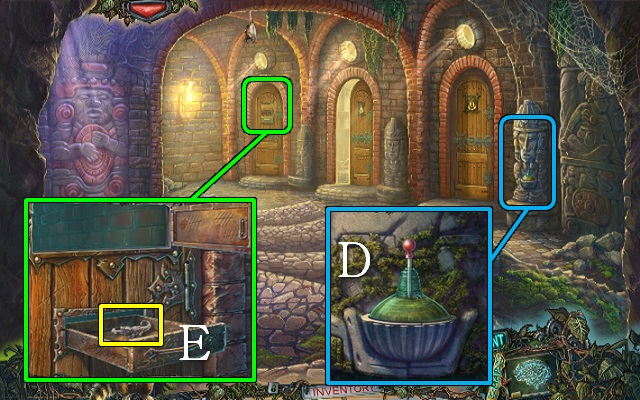
- Use the PIPETTE on the oil burner (D); you receive a PIPETTE WITH OIL.
- Open the latch with the SPATULA; talk to Mary and take the COLLAR KEY (E).
- Go through the middle door to the Incubator.
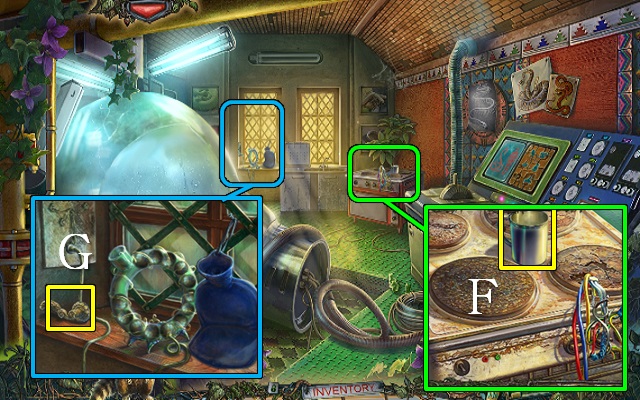
- Take the METAL CUP (F).
- Take the DOOR HANDLE (G).
- Walk down.
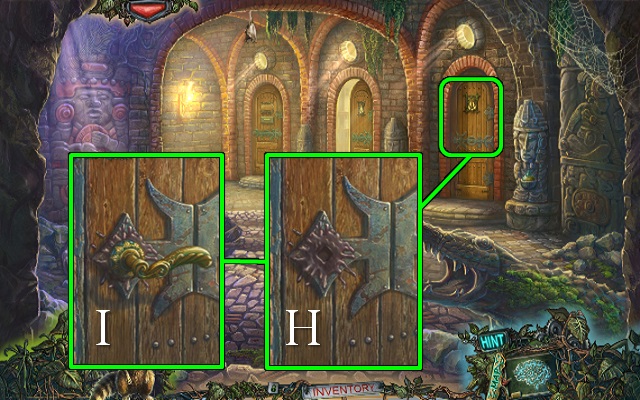
- Put the RESIN (H) and DOOR HANDLE (I) on the right door.
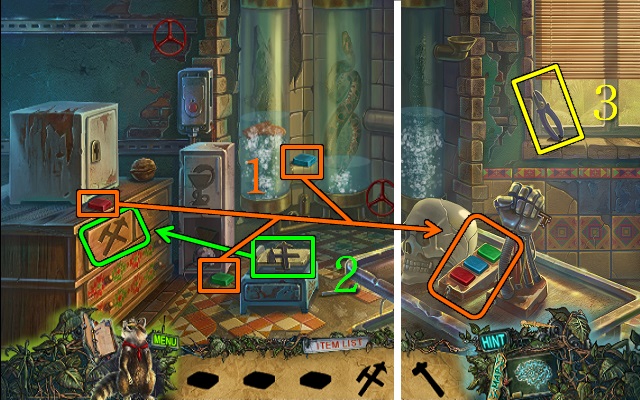
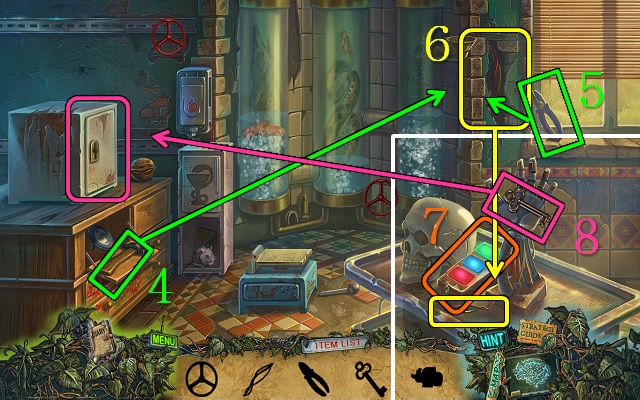
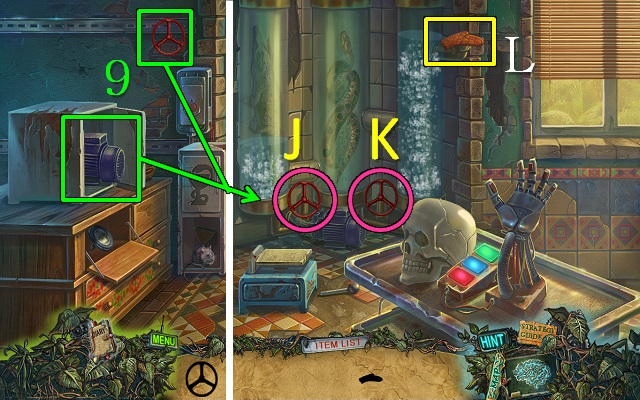
- Play the HOP.
- Push green, red, blue (7).
- Water puzzle: J right x2, K right, K left, J left, K right x2.
- You receive the OVEN MITT (L).
- Go to the Incubator.
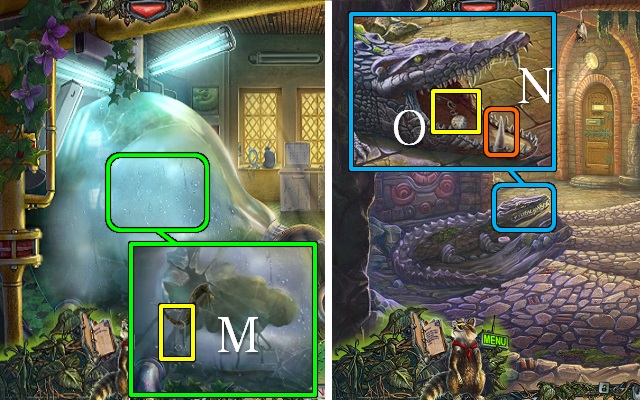
- Clean the incubator with the OVEN MITT; take the WATCH CHAIN (M).
- Walk down.
- Put the STONE TOOTH on the crocodile (N) and open the mouth; put the WATCH CHAIN on the watch and take the WATCH ON A CHAIN (O).
- Walk down.
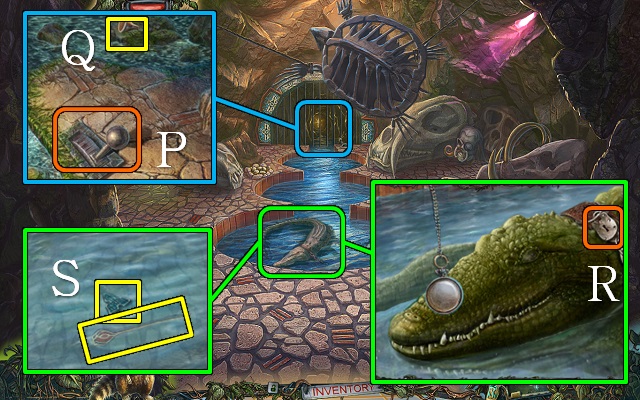
- Use the PIPETTE WITH OIL on the lever (P), pull the lever and take the FUNNEL (Q).
- Hypnotize the crocodile with the WATCH ON A CHAIN; open the collar with the COLLAR KEY (R) and wake up the crocodile with the WATCH ON A CHAIN.
- Take the BUTTON and the PIN (S); use the METAL CUP on the water to get a CUP OF WATER.
- Go to the Incubator.
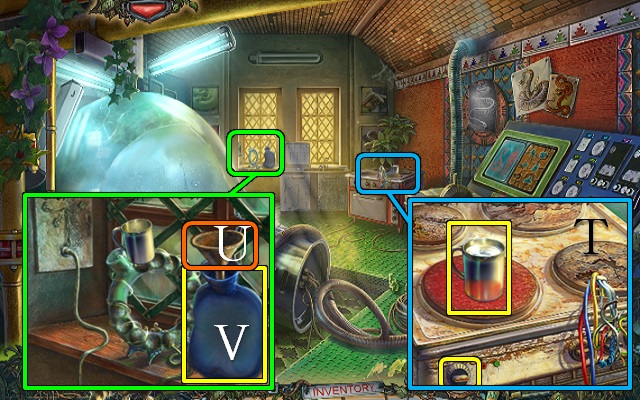
- Put the CUP OF WATER and SWITCH on the stove; switch on the stove and take the CUP OF HOT WATER with the OVEN MITT (T).
- Put the FUNNEL in the hot water bottle (U) and pour in the CUP OF HOT WATER; take the HOT WATER BOTTLE (V).
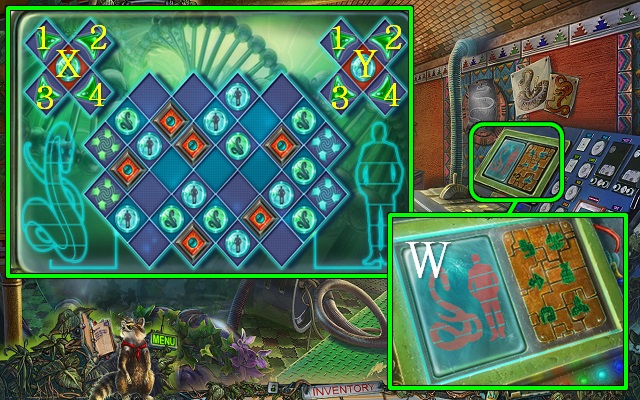
- Put the BUTTON on the control panel; move all buttons to their correct places to access a mini-game (W).
- Use the arrows to move the human tokens to the blue portals and the snakes to the green portals.
- Solution: X3, Y4x3, Y2, Y4, Y2, X1x2, X4, X3x2, Y4x2, Y2x4, Y4x2, Y2, Y4x2, Y2x3, Y4x2, X1, X3x2, X1x2, X3, X1, X3, X1, X3x2, X1, Y1, Y2x2, Y4x2, Y2, X2, X1x3, X3x4, X1x2.
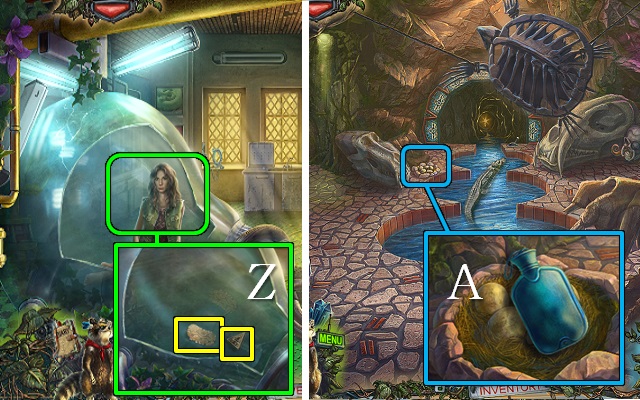
- Talk to the woman; take TRIANGLE 1/2 and the SNAKESKIN (Z).
- Go to the Sewer.
- Put the HOT WATER BOTTLE on the eggs (A); zoom in to play a mini-game.
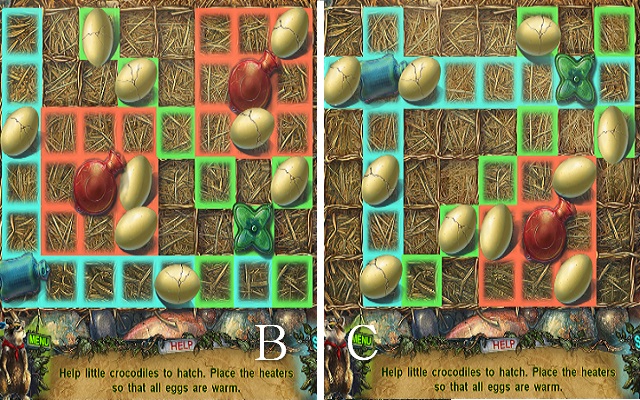
- Place the heaters among the eggs so all eggs are warmed.
- Casual (B) and hard (C) solutions are shown.
- Release the baby crocodiles.
- Take a CROCODILE EGG (D).
- Go to the Catacombs.
- Put the CROCODILE EGG, SNAKESKIN, COYOTE HAIR and JAGUAR CLAW in the drawer (E).
- Go through to the Loading Bay.
- Talk to Mary.
- Take METAL BALL 2/2 (F).
- Take the ROBOT (G).
- Walk down.
- Play the HOP.
- Light puzzle (3): Ax3, Dx3, Ax3, B, C, E, F, Ax2, B, Ax4, Dx2, E, Dx4.
- Push blue, red, green (7).
- You receive TRIANGLE 2/2 (H).
- Put the ROBOT in the crocodile's mouth; close and open the mouth and take the BATTERY (I).
- Go to the Incubator.
- Put the METAL BALLS in the bottle; take the TILE INLAY (J).
- Go to the Loading Bay.
- Put the TILE INLAY on the tile; take the PIRATE HAT (K) and BRUSH (L).
- Walk down.
- Clean the wall with the BRUSH and note the code (M).
- Walk down.
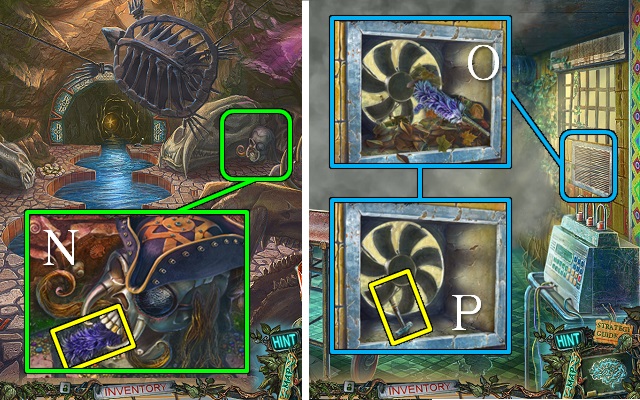
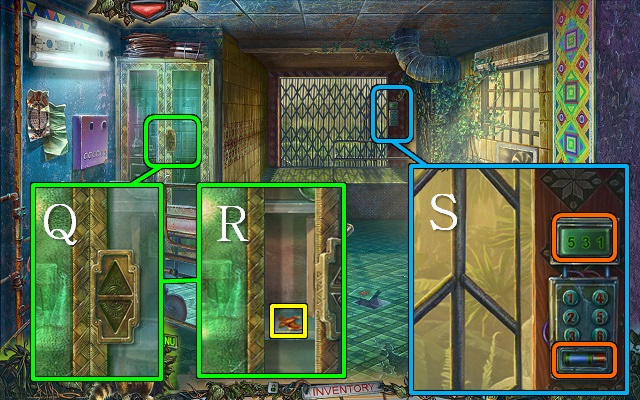
- Put the PIRATE HAT on the skull; take the FEATHER DUSTER (N).
- Go to the Loading Bay.
- Remove the vent with the PIN; read the note, use the FEATHER DUSTER (O) twice and take the BELL HAMMER (P).
- Open the cupboard with the TRIANGLES (Q); take BIRD FIGURINE 1/3 (R).
- Talk to Mary, remove the panel, put the battery in the lock and enter 531 (S).
- Walk forward to the Pond.
Chapter 4: The Crocodile Mutant
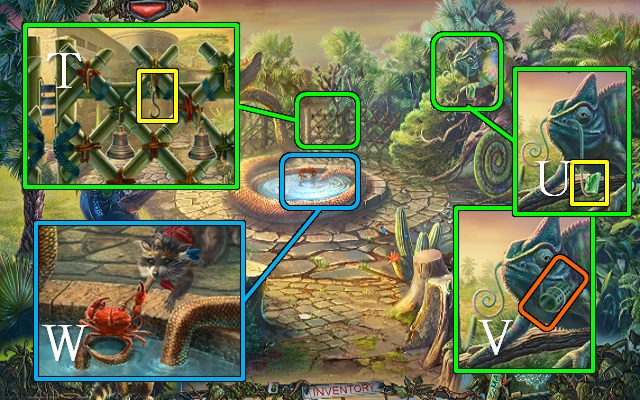
- Take the HOOK (T).
- Take STAINED GLASS 1/2 (U); put the CURLER on the chameleon (V).
- Use the raccoon on the crab (W); zoom in for a mini-game.
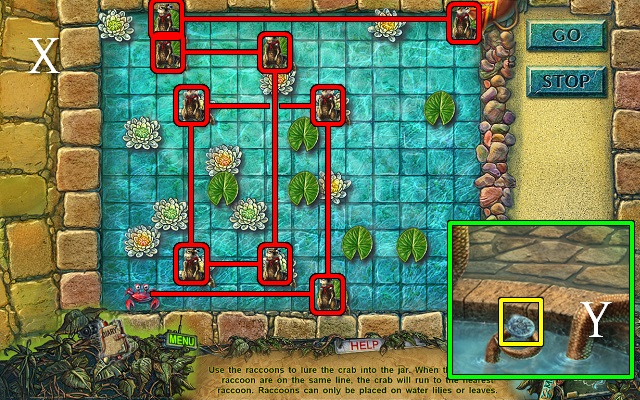
- Use the raccoons to guide the crab over the lilies to the jar; the crab will walk to the nearest raccoon in a straight line (X).
- Take the SYMBOL (Y).
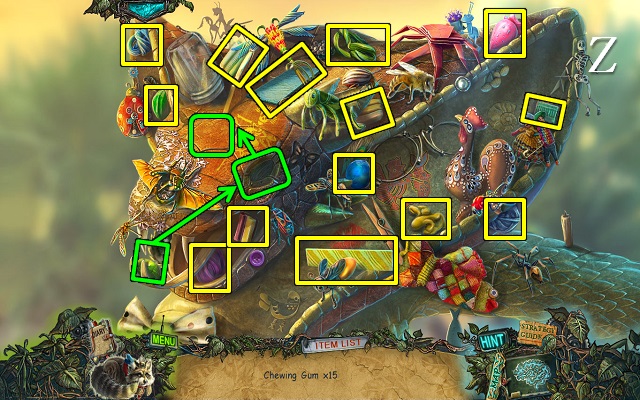
- Play the HOP or mini-game (Z).
- You receive the CHEWING GUM.
- Walk down.
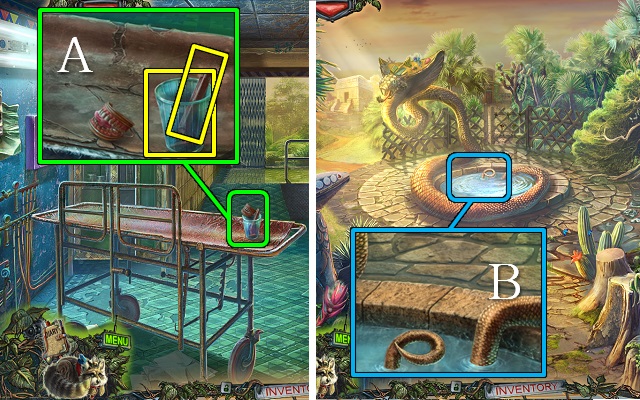
- Use the CHEWING GUM on the dentures; take the RAZOR and GLASS (A).
- Walk forward.
- Fill the GLASS to get a GLASS OF WATER (B).
- Walk forward to the Stream.
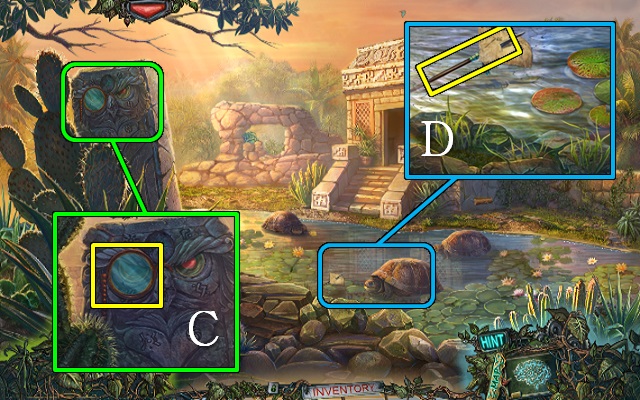
- Take the MONOCLE (C).
- Take the code and the SPEAR (D).
- Walk down and go right to the Reptile House.
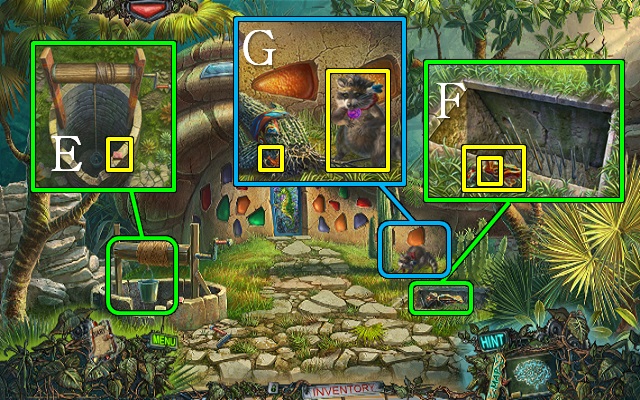
- Take the MATCHES (E).
- Use the SPEAR on the pit; take BIRD FIGURINE 2/3 and the SHAWL (F).
- Read the note by the cactus; use the RAZOR and the SHAWL on the cactus and pull it over, and take BIRD FIGURINE 3/3 and the raccoon (G).
- Walk down.
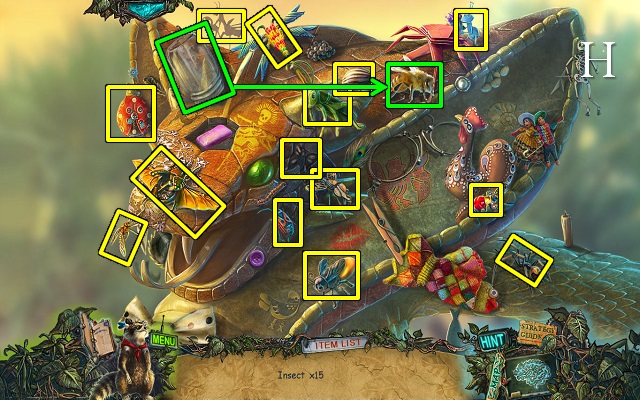
- Play the HOP or mini-game.
- You receive a BEE IN A JAR (H).
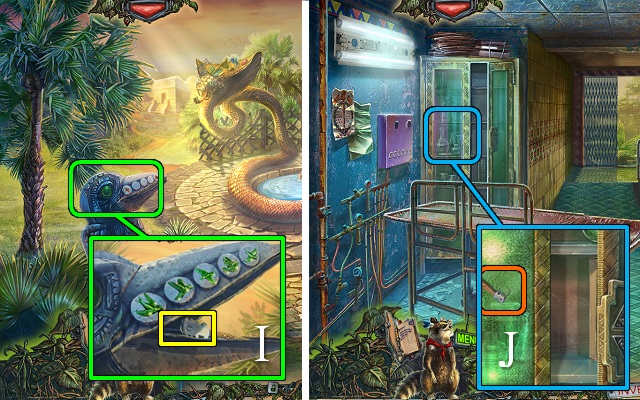
- Put the BIRD FIGURINES on the statue; swap the birds until they're all green and take the GLASS CUTTER (I).
- Walk down.
- Use the GLASS CUTTER to get STAINED GLASS 2/2 (J).
- Go to the Reptile House.
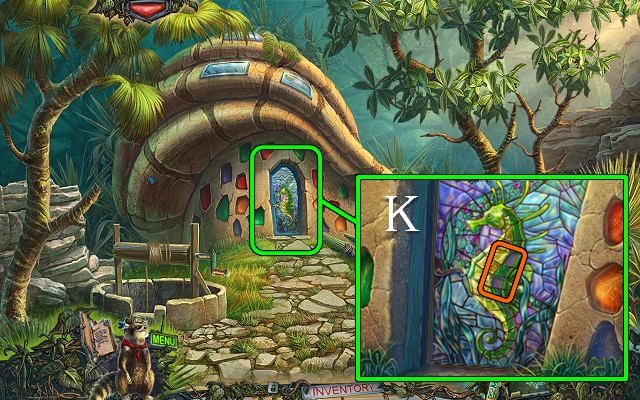
- Put the STAINED GLASS on the door (K).
- Go in.
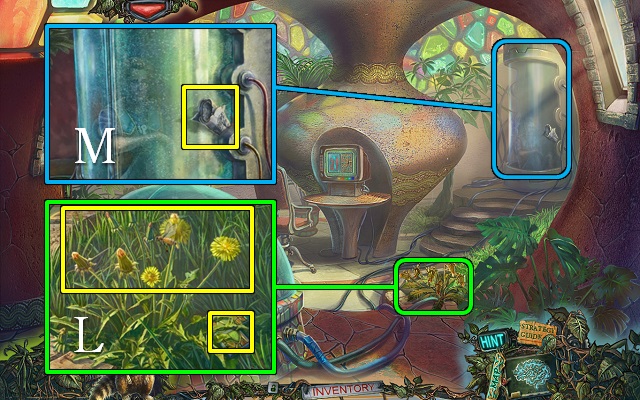
- Put the GLASS OF WATER on the flowers, release the BEE IN A JAR and take the DANDELIONS and the MOSAIC TILE (L).
- Take the NEWSPAPER (M).
- Go to the Stream.
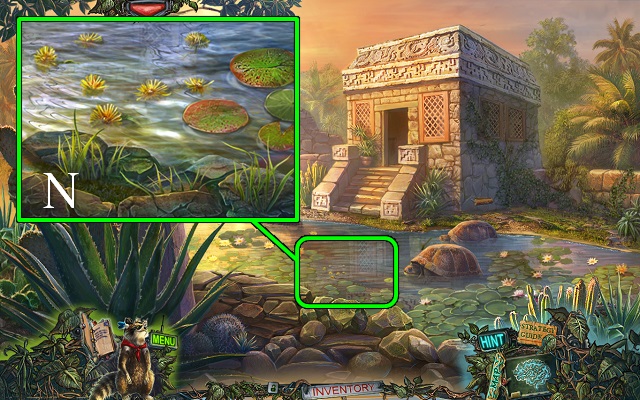
- Put the DANDELIONS in the water (N).
- Walk forward to the Mayan Hut.
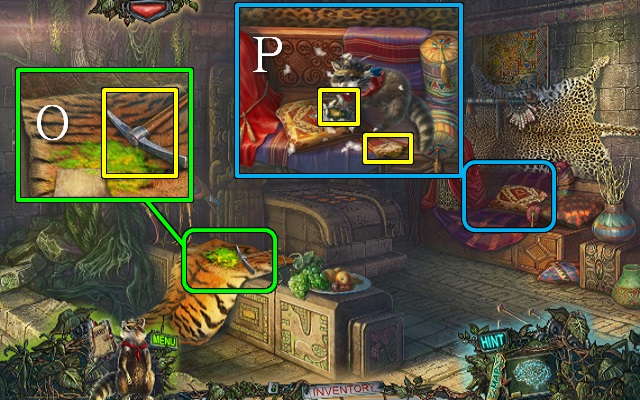
- Take note and the PICKAXE (O).
- Use the raccoon on the bench; take the RAG and BELL 1/3 (P).
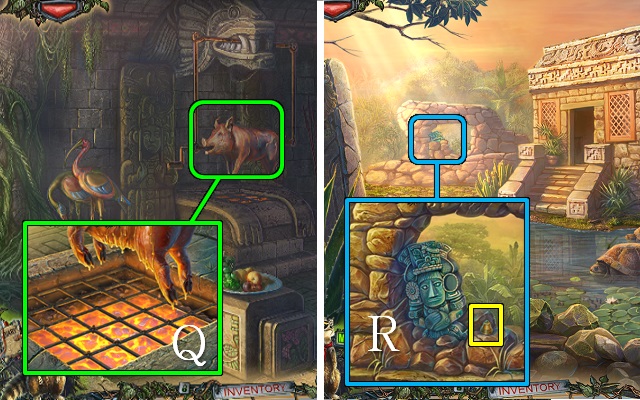
- Put the NEWSPAPER on the coals and light it with the MATCHES; use the RAG on the pig to get an OILY RAG (Q).
- Walk down.
- Use the PICK on the ruins three times; take BELL 2/3 (R).
- Go to the Reptile House.
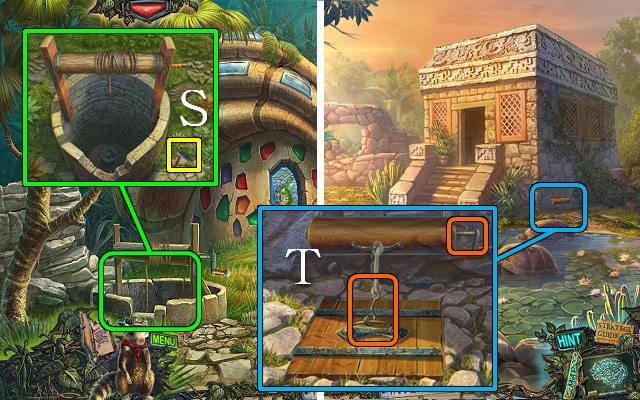
- Grease the winch with the OILY RAG and turn it; take the HANDLE (S).
- Go to the Stream.
- Put the HOOK and HANDLE on the hatch (T); turn the handle and zoom into the hatch.
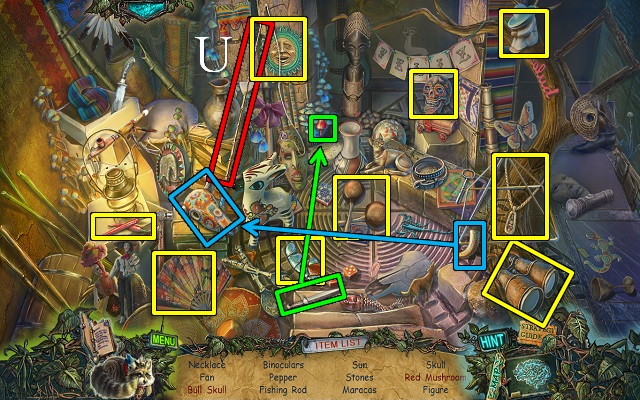
- Play the HOP or mini-game.
- You receive the FISHING ROD (U).
- Go to the Reptile House.
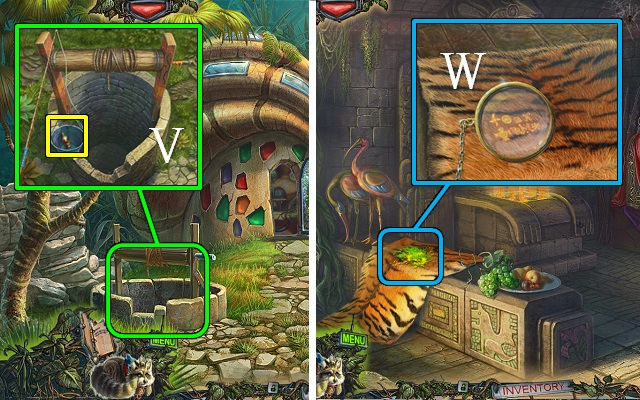
- Use the FISHING ROD on the well; take the SOLVENT (V).
- Go to the Mayan Hut.
- Use the SOLVENT on the stain; look at the symbols with the MONOCLE (W).
- Walk down.
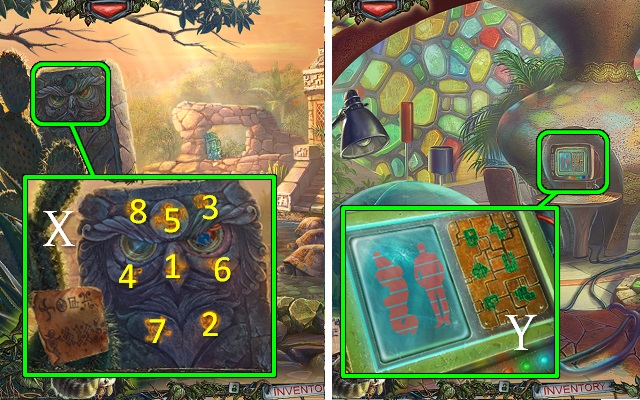
- Put the SYMBOL on the owl; push the buttons in numerical order and take the BUTTON (X).
- Go into the Reptile House.
- Put the BUTTON on the computer; move the buttons into their correct places for a mini-game (Y).
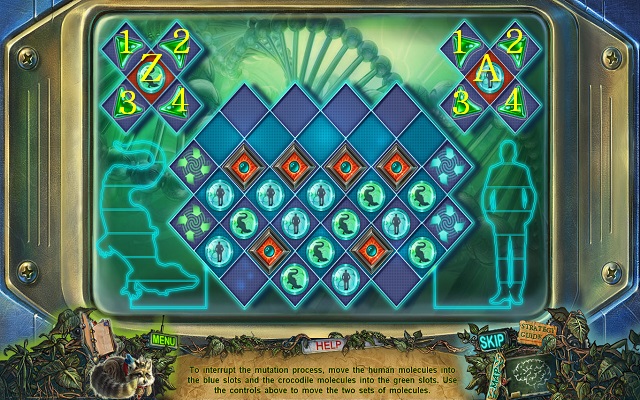
- Play as before.
- Solution: Z2, Z1, Z2, Z1, A2x2, Z3, Z1, Z3, Z1, Z3, Z1, Z3, Z1, Z3x3, A1, A2, A1, A2, A4, A2, A4, A2, A4, A2, A4, A2, A4x2, Z1x2, Z2x2, Z4, Z2, Z1, Z2, Z1, Z3, Z1, Z3, Z1, Z3, Z1, Z3, Z1, Z3x2, A4, A2, A4, A2, A4, A2, A4, A2x2, Z2, Z1x2, Z3, Z1, Z3, Z1x2, A1, A2x2, A4x2, A2.
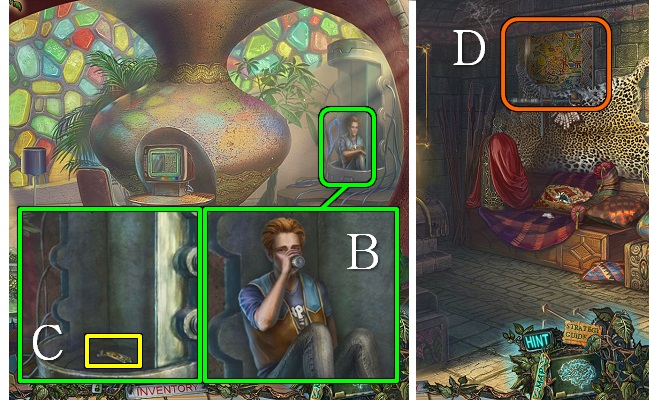
- Talk to the man and give him the GLASS OF WATER (B); take the PUZZLE PIECE (C).
- Go to the Mayan Hut.
- Put the PUZZLE PIECE on the mural for a mini-game (D).
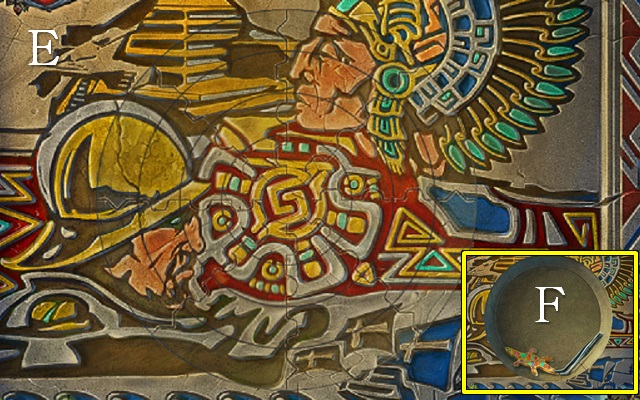
- Swap the fragments in each ring to recreate the mural (E).
- Take the TWEEZERS and CROCODILE FIGURE (F).
- Go into the Reptile House.
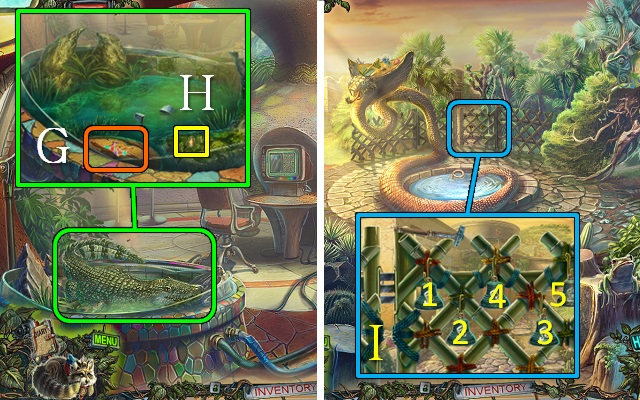
- Put the CROCODILE FIGURE in the reservoir (G); take BELL 3/3 (H).
- Go to the Pond.
- Hang the BELLS on the fence; use the BELL HAMMER to hit the bells in numerical order (I).
- Walk forward to the Garden.
Chapter 5: The Bear-Pigeon Mutant
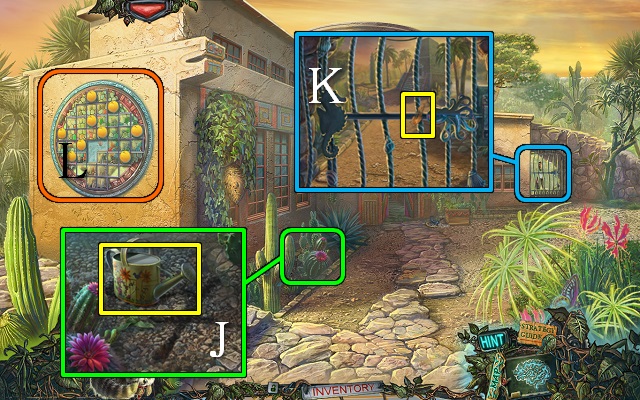
- Take the WATERING CAN (J).
- Talk to Mary and take the FUR (K).
- Put the MOSAIC TILE on the mural for a mini-game (L).
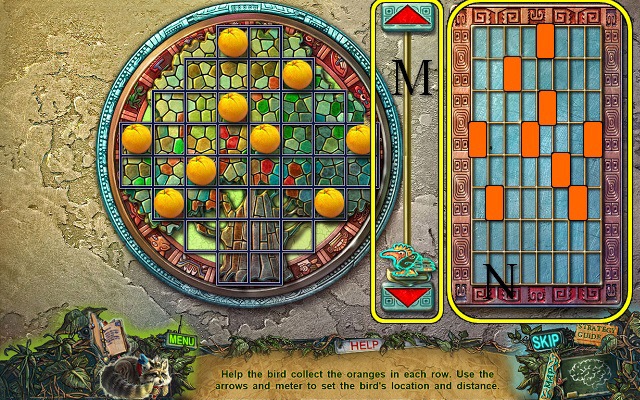
- Move the bird up and down with the arrows (M) and use the grid (N) to select a speed for the bird to collect the oranges.
- You receive the GLASS BALLS.
- Go into the Museum and go up the stairs.
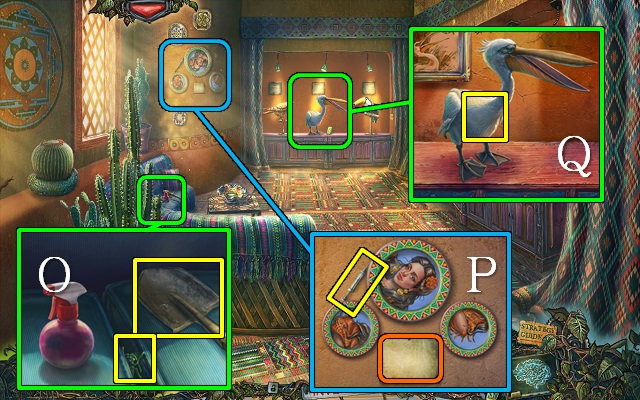
- Take the SHOVEL; take the BEETLE with the TWEEZERS (O).
- Read the note and take the SYRINGE (P).
- Take a pelican FEATHER (Q).
- Go to the Garden.
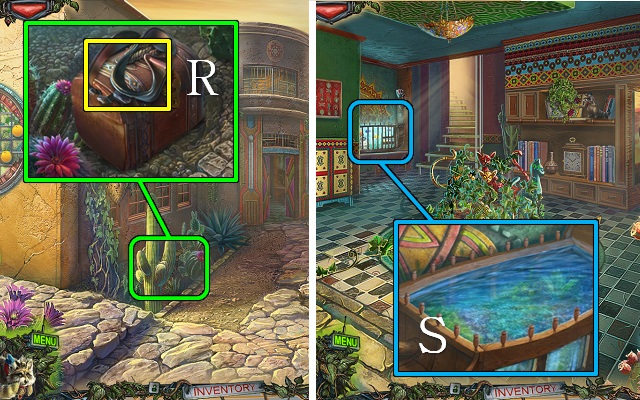
- Dig with the SHOVEL; take the DIVING MASK (R).
- Go inside.
- Use the DIVING MASK on the fish tank (S).
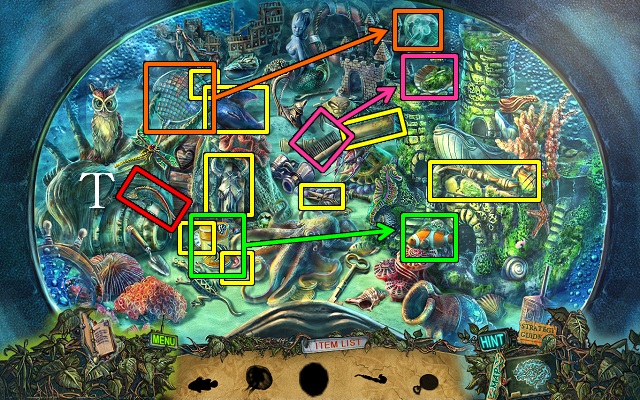
- Play the HOP.
- You receive a FISH (T).
- Go upstairs.
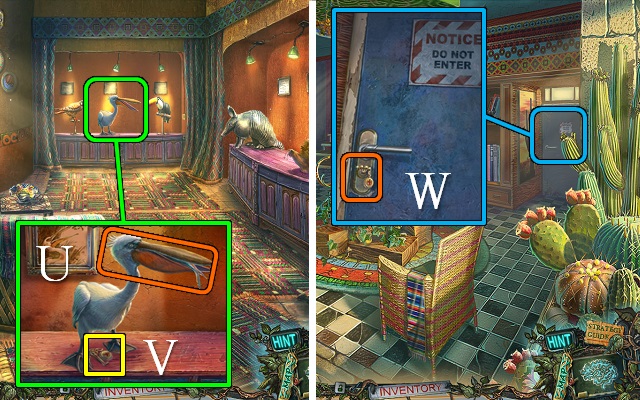
- Give the FISH to the pelican (U); take the KEY (V).
- Walk down.
- Try to go through the door, then open it with the KEY (W) and go through to the Hospital Ward.
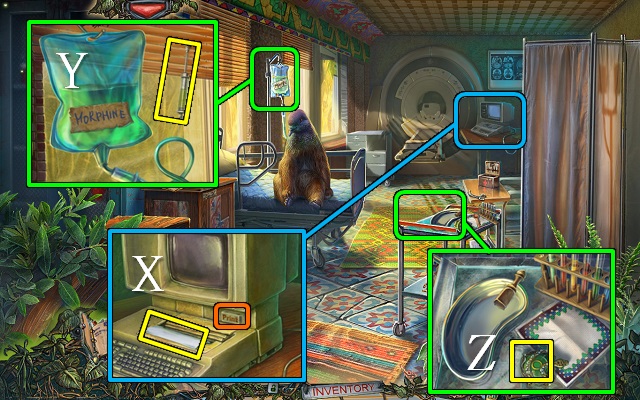
- Talk to the doctor.
- Print and take the recipe (X).
- Take some MORPHINE from the drip with your SYRINGE (Y).
- Take the SNAKE VENOM (Z).
- Go back upstairs.
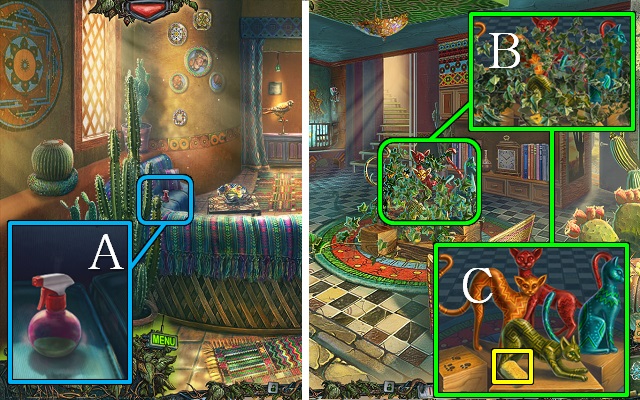
- Open the spray bottle; put the MORPHINE and the SNAKE VENOM in it, close it and pick up the POISON-IVY POISON (A).
- Go downstairs.
- Use the POISON-IVY POISON on the ivy (B); take the SPONGE (C).
- Go upstairs.
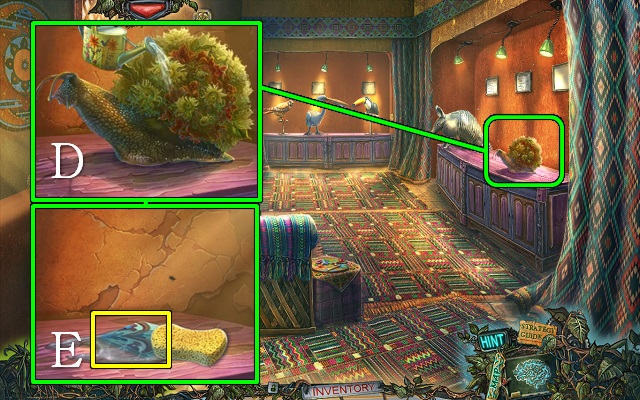
- Use the WATERING CAN on the snail (D); wipe up the slime with the SPONGE and take the TILE (E).
- Go to the Hospital Ward.
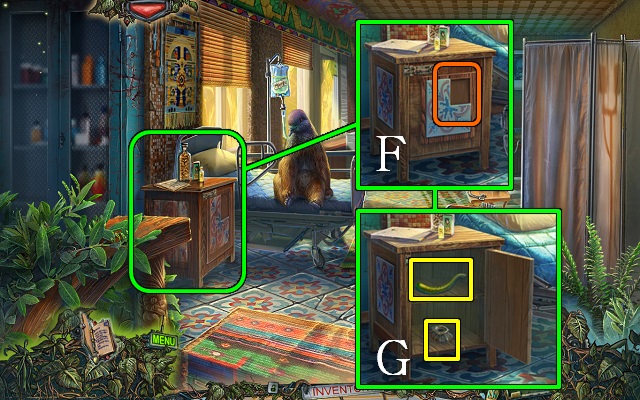
- Open the bedside table with the TILE (F); take the INK and the TAIL (G).
- Walk down.
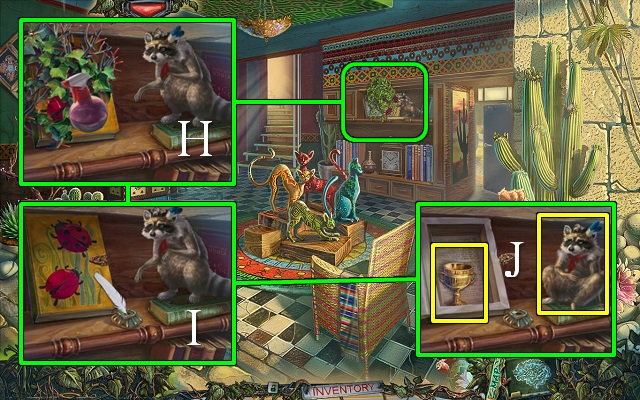
- Use the POISON-IVY POISON on the shelf (H); put down the INK and the FEATHER, draw dots on the ladybird (I), open the book, and take the recipe, CHALICE KEY and the raccoon (J).
- Walk down.
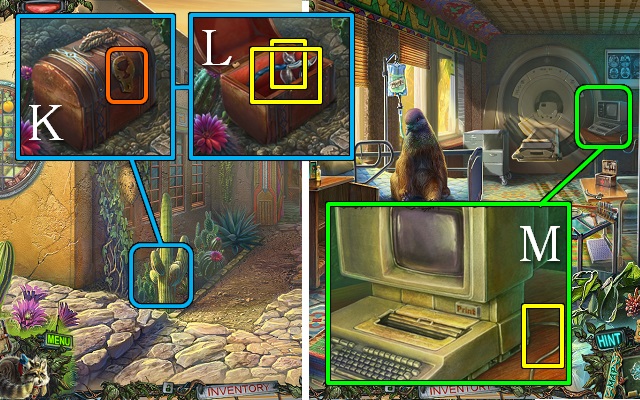
- Open the bag with the CHALICE KEY (K); take the NIPPERS and the CAT FIGURINE (L).
- Go to the Hospital Ward.
- Cut the computer WIRE with the NIPPERS (M).
- Go upstairs.
- Put the FUR and WIRE on the brush; take the BRUSH WITH PALETTE (N).
- Go downstairs.
- Put the TAIL on the green cat and put down the CAT FIGURINE and BRUSH WITH PALETTE for a mini-game.
- Make all cats raise their tails by touching them once in numerical order (O).
- Take the BEAR PILL and OCTOPUS PART (P).
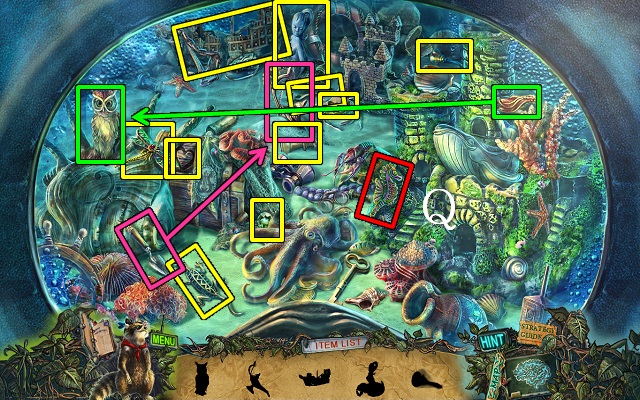
- Play the HOP.
- You receive the SEA HORSE (Q).
- Walk down.
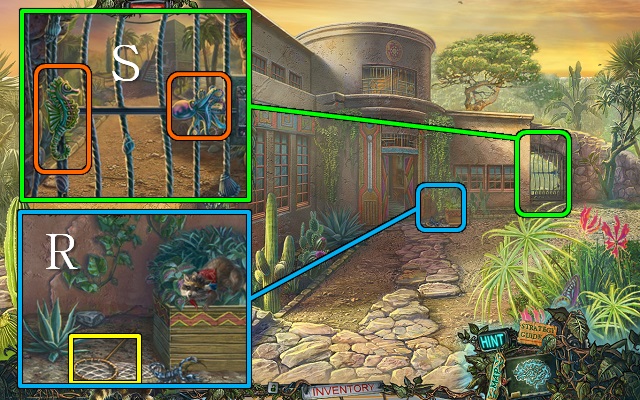
- Distract the scorpion with the raccoon; take the NET (R).
- Put the OCTOPUS PART and SEA HORSE on the gate (S); move the octopus.
- Walk forward to the Pyramid.
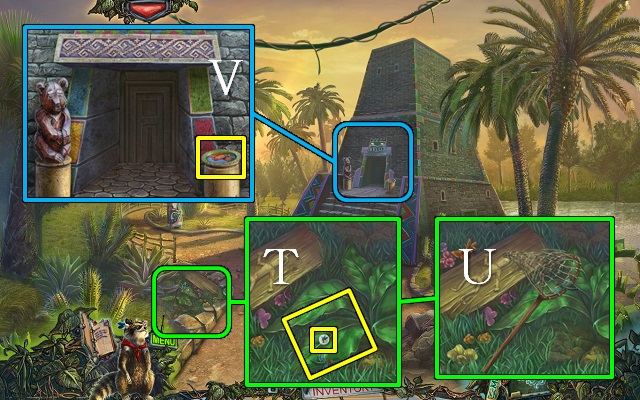
- Take the BIRD PILL and LEAF (T); catch the DRAGONFLY with the NET (U).
- Take the PLATE (V).
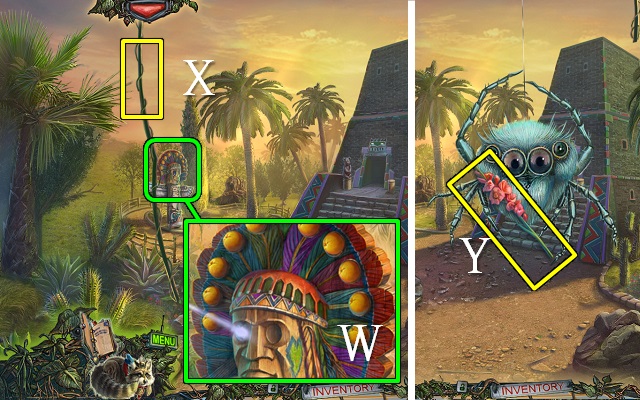
- Put the GLASS BALLS on the totem pole (W).
- Take the VINE (X) and FLOWER (Y).
- Go to the Museum and go upstairs.
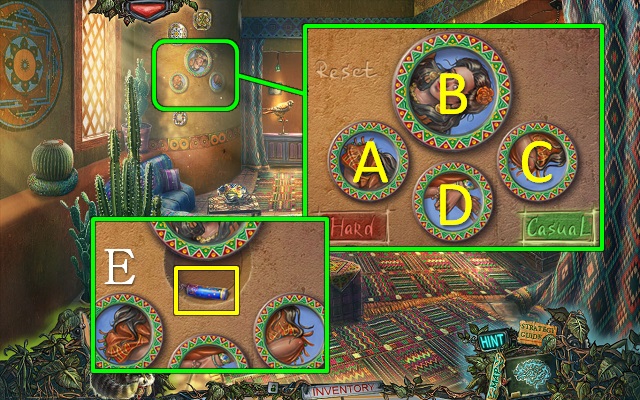
- Put the PLATE on the wall for a mini-game.
- Turn the plates until they're all the right way up.
- Casual: turn plates C, B, A, D.
- Hard: turn plates Dx2, C, Ax3.
- Take the FIRECRACKER (E).
- Go to the Pyramid and walk on to the Cave.
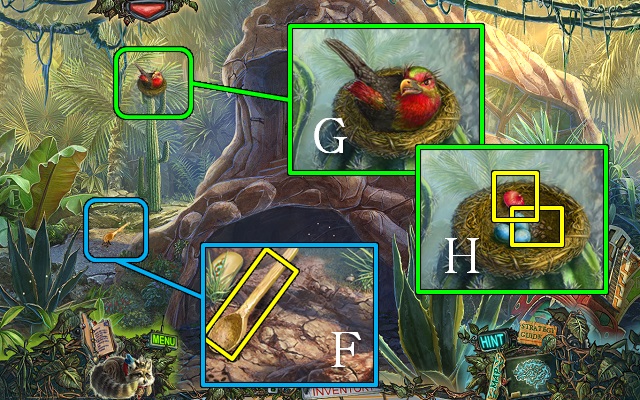
- Take the WOODEN SPOON (F).
- Scare the bird with the FIRECRACKER (G); take the GRAIN and COCKTAIL UMBRELLA (H).
- Go to the Garden.
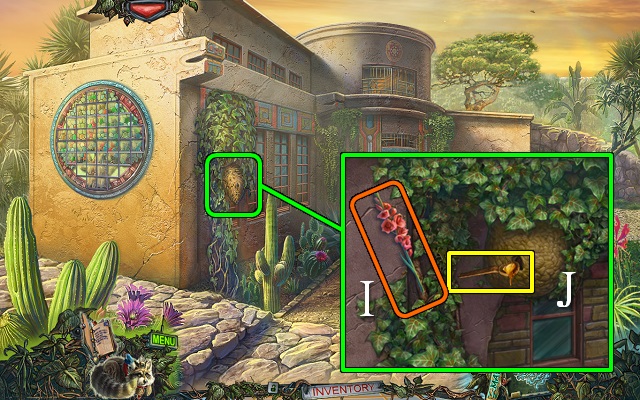
- Put the FLOWER on the vines (I) and use the WOODEN SPOON to get a SPOON WITH HONEY (J).
- Go to the Hospital Ward.
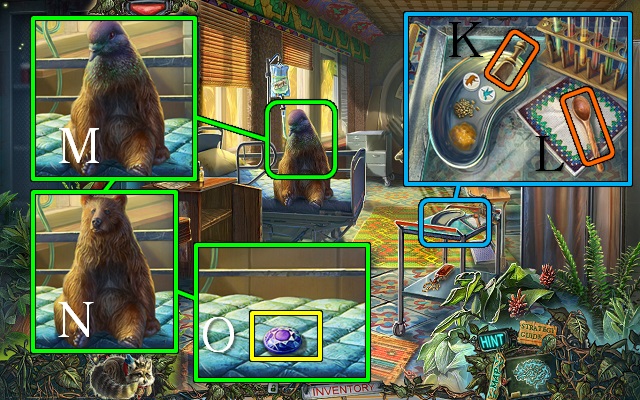
- Put the BEAR PILL, BIRD PILL, SPOON WITH HONEY and GRAIN in the dish; mash it together with the pestle (K) and take the BEAR-PIGEON MEDICINE with the spoon (L).
- Give the BEAR-PIGEON MEDICINE to the creature (M); take the BEAR (N) and SAPPHIRE (O).
- Go to the Pyramid.
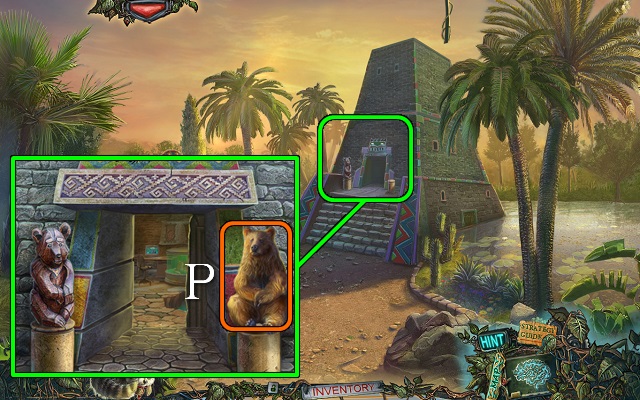
- Put the BEAR on the pedestal (P) and go in.
Chapter 6: Rescue Mary
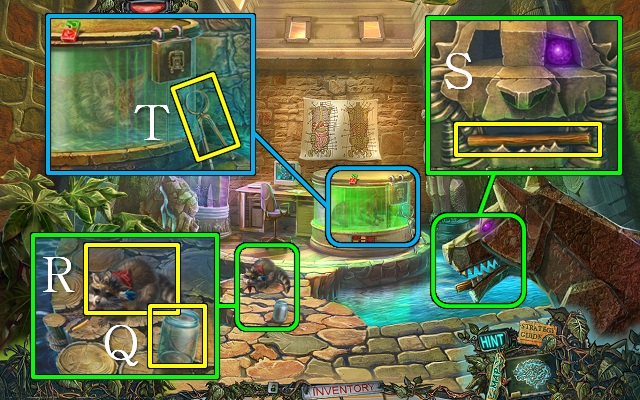
- Take the JAR (Q) and use the COCKTAIL UMBRELLA on the orange wedge; take the raccoon (R).
- Take the STICK (S).
- Take the TONGS (T).
- Walk down.
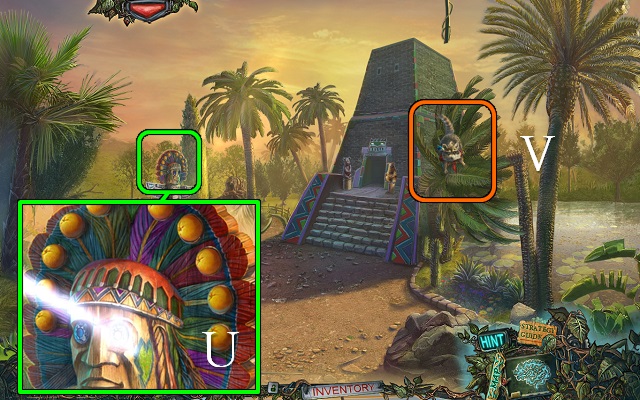
- Put the SAPPHIRE in the totem's eye (U).
- Use the raccoon (V).
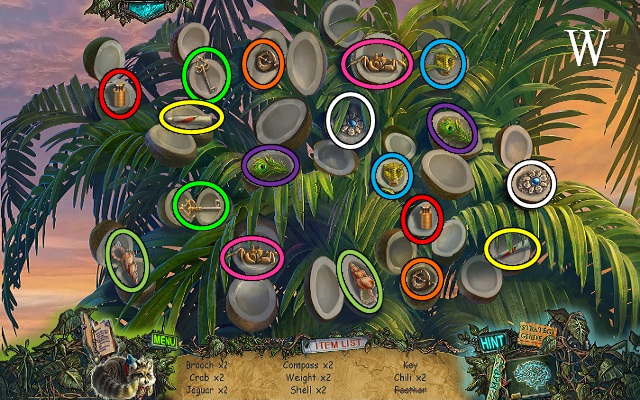
- Play the HOP (W).
- You receive a TUBE OF CHILLI.
- Go to the Cave.
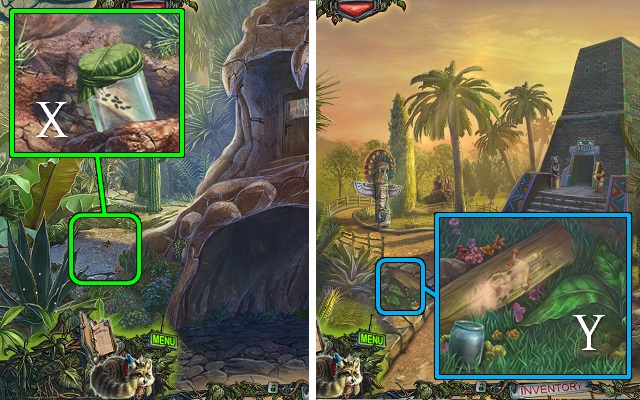
- Put the JAR in the dirt and put the STICK in it; put the LEAF and VINE on the jar and take the JAR OF TERMITES (X).
- Walk down.
- Put the TUBE OF CHILLI on the wood; release the JAR OF TERMITES and zoom in for a mini-game (Y).
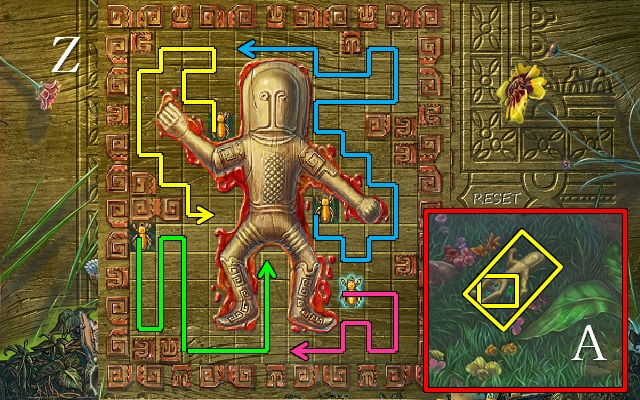
- Use the termites to remove all wood from around the figurine (Z).
- Take the WOODEN IDOL and COYOTE CONTROLS (A).
- Go into the pyramid.
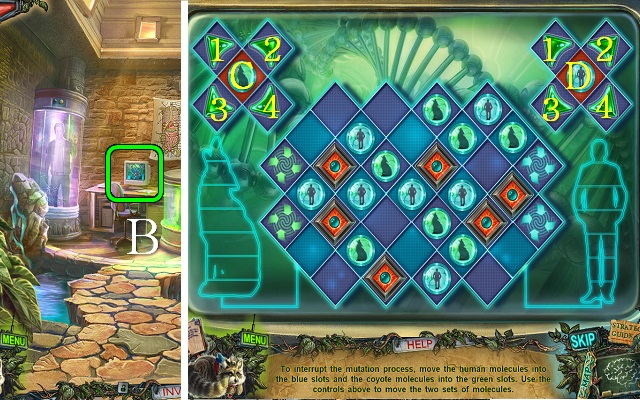
- Put the COYOTE CONTROLS on the computer for a mini-game.
- Solution: C3, C1x2, D2x2, D4x2, D2x2, C3x2, C1x2, C3x2, C1x2, D4x3, D2x2, D4, D2x2, C3, C4, C3x2, C1x2, C3, C1x2, C4, C3x2, C1x2, C4, C3x2, C1x2, D1, D2, D4, D2, D4, D2, D4, D2, D4x2, D2, D4.
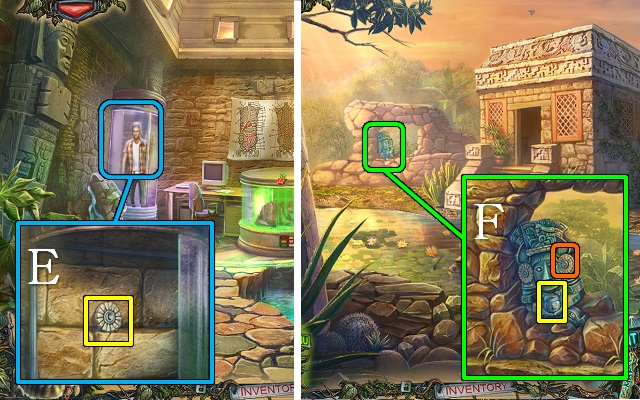
- Talk to Clive and take the STONE FLOWER (E).
- Go to the Stream.
- Put the STONE FLOWER on the idol; take the BEETLE IN A JAR (F).
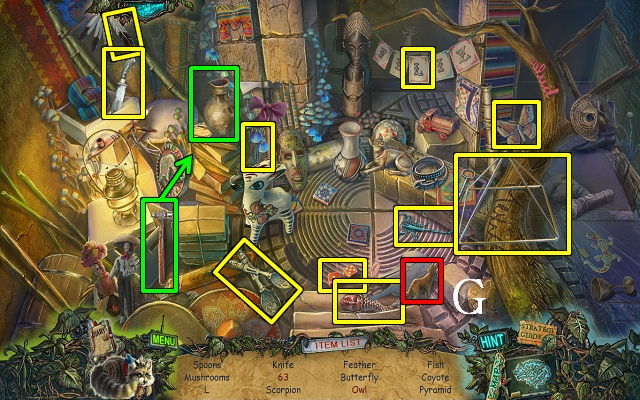
- Play the HOP or mini-game.
- You receive a COYOTE FIGURINE (G).
- Go into the Pyramid.
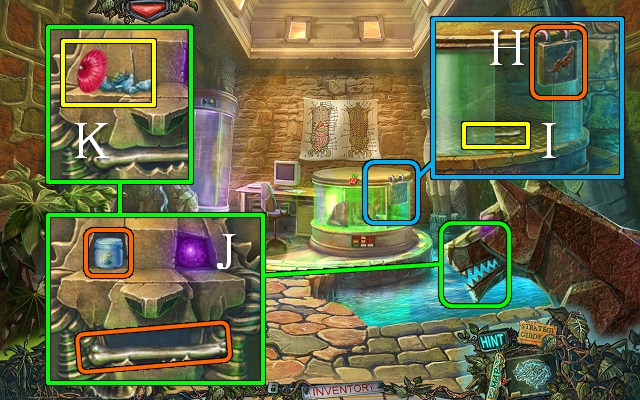
- Open the cage with the COYOTE FIGURINE (H); take the BONE (I).
- Put the BONE in the wolf's mouth and the BEETLE IN A JAR in its eye socket (J); push the bone and use the COCKTAIL UMBRELLA to take the BEETLE (K).
- Walk down.
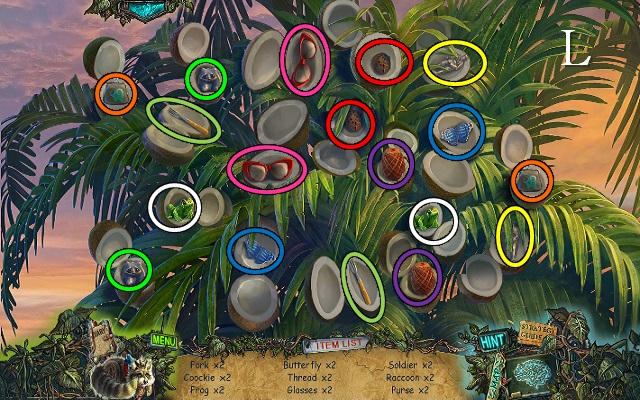
- Play the HOP (L).
- You receive a TIN SOLDIER.
- Go to the Museum.
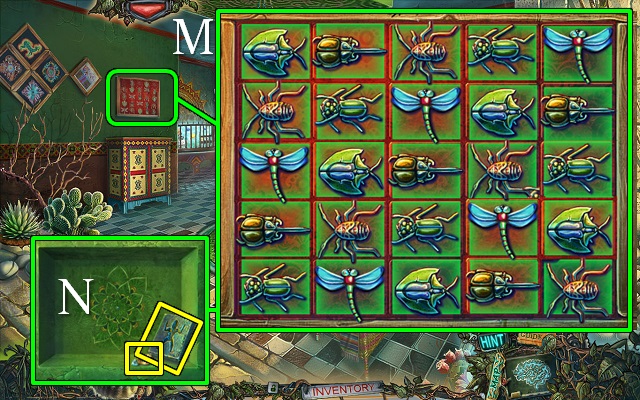
- Put the two BEETLES and the DRAGONFLY in the box for a mini-game.
- Arrange the bugs so that there are no identical bugs in rows, columns or diagonals (M).
- Take the RING WITH DIAMOND and STONE FORM (N).
- Go to the Mayan Hut.
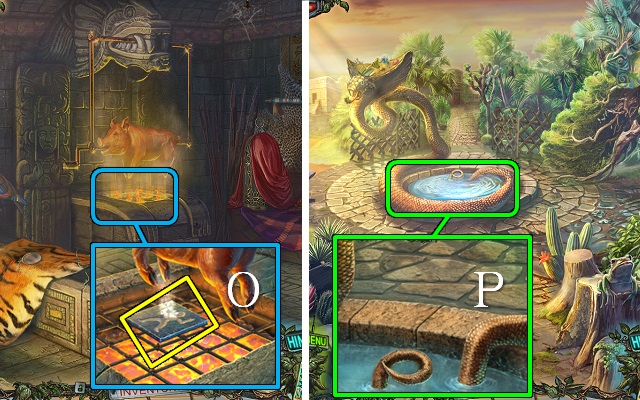
- Put the STONE FORM by the fire and use the TONGS to put it on the fire; put the TIN SOLDIER in the form and take out the HOT IDOL with the TONGS (O).
- Go to the Pond.
- Put the HOT IDOL in the pond to receive a TIN IDOL (P).
- Go to the Cave.
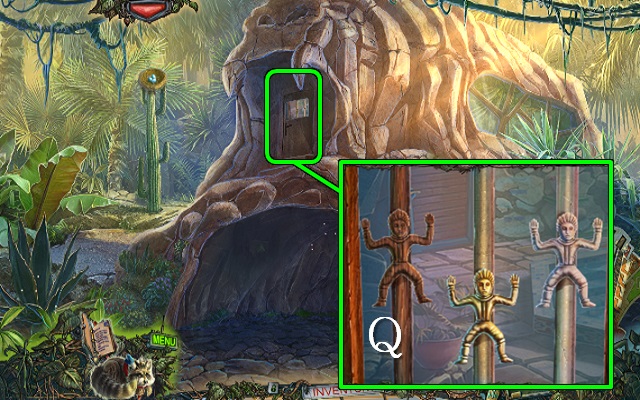
- Put the WOODEN IDOL and TIN IDOL on the bars in the door (Q).
- Go into the Cave House.
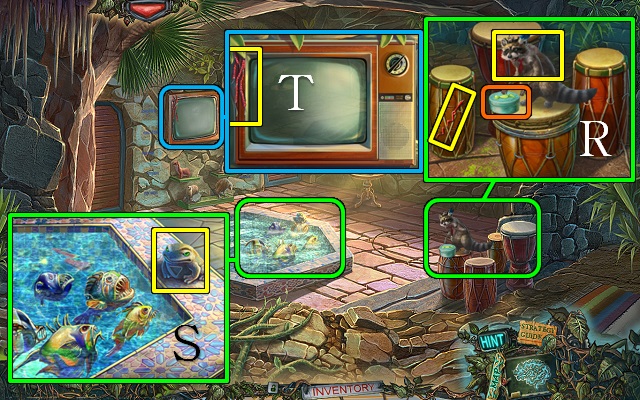
- Open the tin and take the raccoon and the CLOCK HAND (R).
- Take the FROG FIGURINE (S).
- Take the RED BEADS (T).
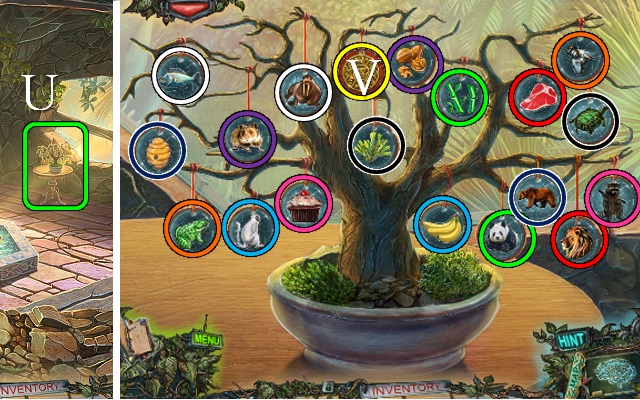
- Zoom into the plant for a mini-game (U).
- Match the animals to their foods.
- Take the GOLD COIN (V).
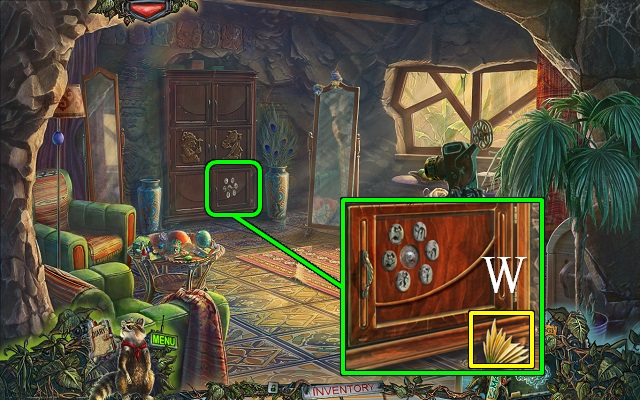
- Go through the right door to the Projector Room.
- Talk to Mary.
- Take the FISHTAIL (W).
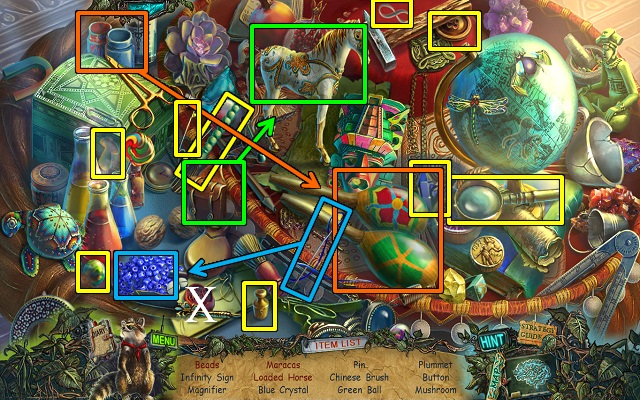
- Play the HOP or mini-game.
- You receive the BLUE BEADS (X).
- Walk down and go through the left door to the Office.
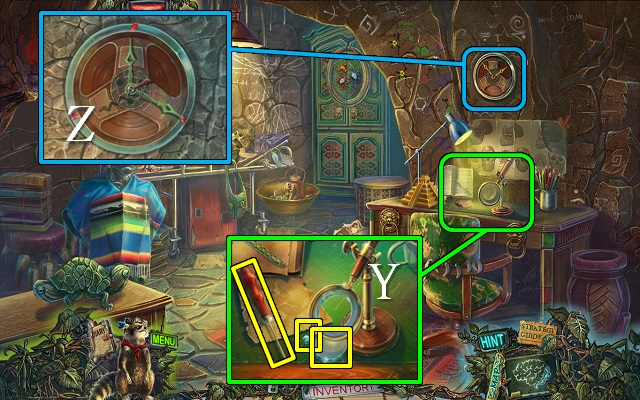
- Use the RING WITH DIAMOND on the lens; take the DIAMOND, LENS and AWL (Y).
- Put the CLOCK HAND on the clock and move the hands until they turn green (Z); remove the hands and take the FILM REEL and note.
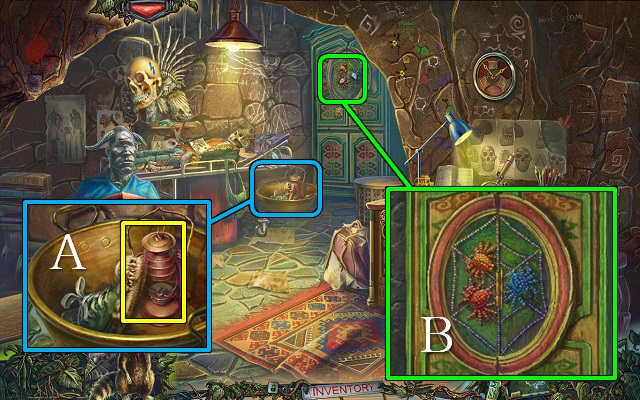
- Take the LAMP (A).
- Put the RED BEADS and BLUE BEADS on the spiders (B).
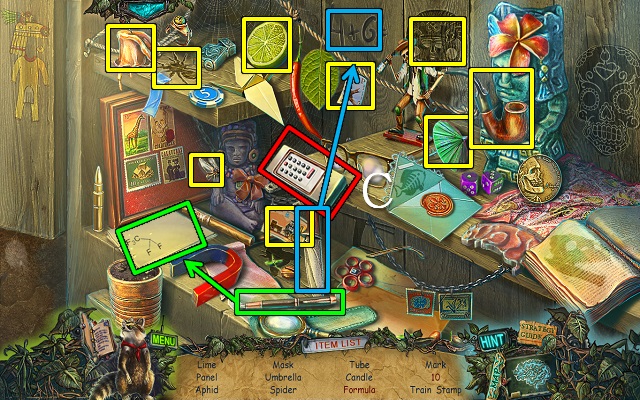
- Play the HOP or mini-game.
- You receive the REMOTE CONTROL (C).
- Walk down.
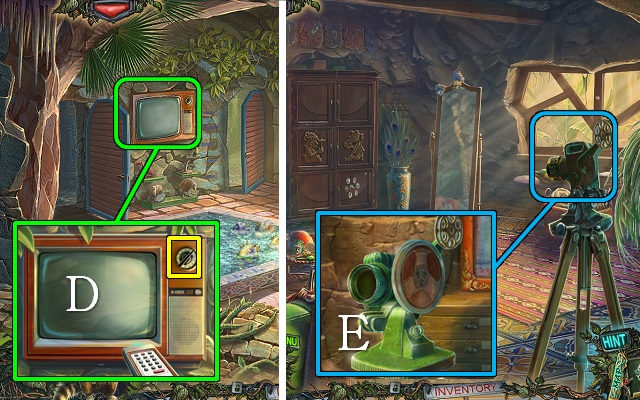
- Use the REMOTE CONTROL on the TV; take the KNOB (D).
- Go into the Projector Room.
- Remove the lens from the projector and put the LENS and the FILM REEL on it (E).
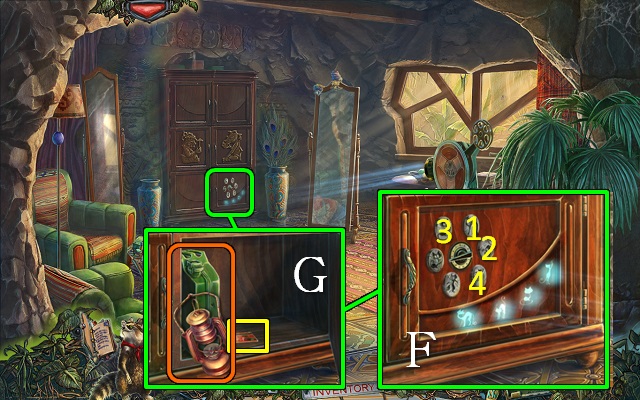
- Put the KNOB on the cupboard and push the buttons in the order shown by the lights (F); take the ELECTRONIC CARD, make a hole in the canister with the AWL and fill the LAMP to get a LAMP WITH GASOLINE (G).
- Go to the Office.
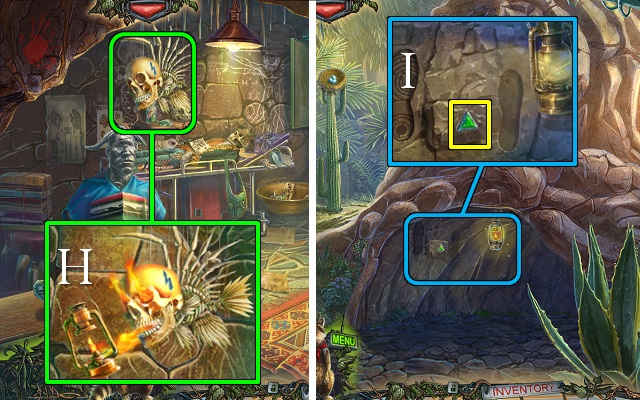
- Put the FISHTAIL on the skeleton; light the LAMP WITH GASOLINE to get a BURNING LAMP (H).
- Go to the Cave.
- Use the BURNING LAMP on the cave.
- Take the GEM with the AWL (I).
- Go to the Projector Room.
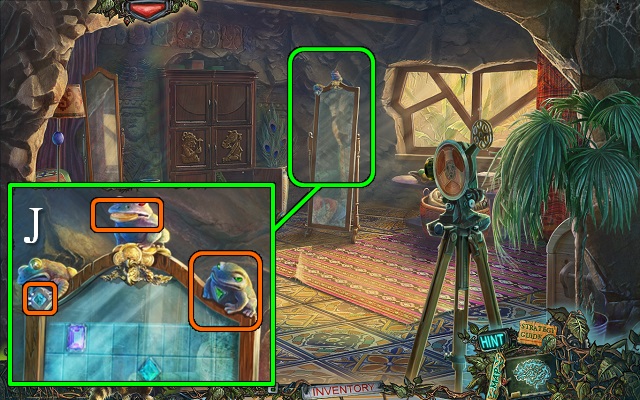
- Put the FROG FIGURINE on the right corner of the mirror; give the GOLD COIN to the middle frog, the DIAMOND to the left frog and the GEM to the right frog (J).
- Look into the mirror for a mini-game.
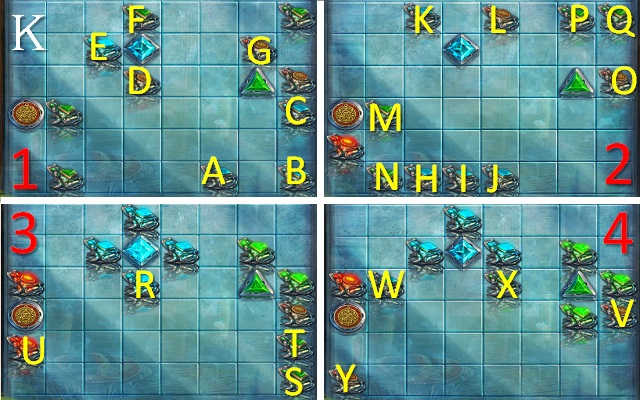
- Slide the frogs to the jewels with the same color.
- Casual solution (K) (l = left, r = right, u = up, d = down):
- Section 1: A l; B l; C d l; D d l; E u; F r; G l u.
- Section 2: H u; I u; J u; K r; L r d l u l; M d r; N r; O d; P d; Q d.
- Section 3: R d; S l; R u l; T l u r; S u; U d.
- Section 4: V d l u r; W r; X r; Y u.
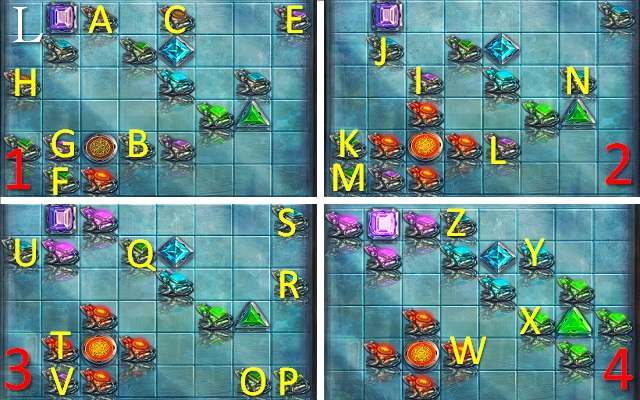
- Hard solution (L): Section 1: A d; B d; C l d r d; E l d; F l; G d; H d r d; B r u.
- Section 2: I u; J l; K u; L u l u l u; K r d r d r; M u r d r d r; N r.
- Section 3: O u; P u; Q u r d; R u l; S l; T l; U d r u r u; T r; V l u.
- Section 4: W r; X u; Y u; Z r; Y d; X d; W l.
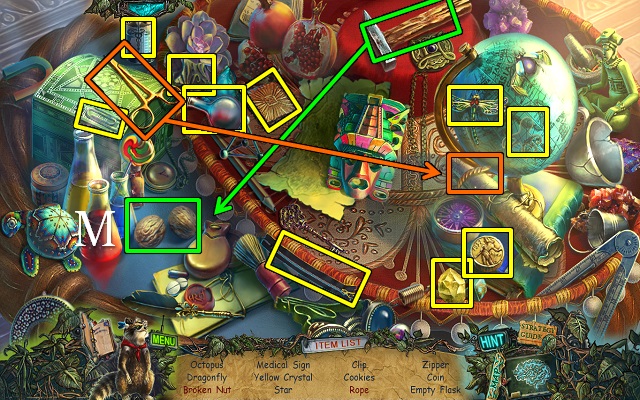
- Play the HOP or mini-game.
- You receive the NUTS (M).
- Walk forward to the Leopard Cage.
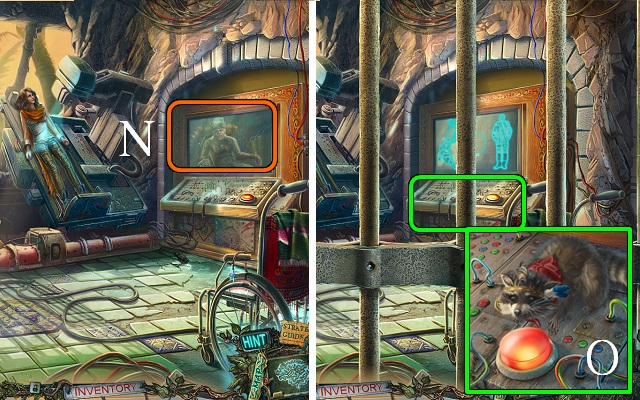
- Look at the monitor (N).
- Use the raccoon on the controls (O).
- Walk down.
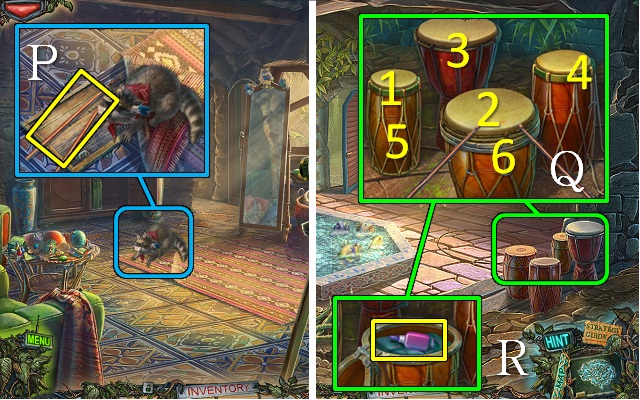
- Move the rug; take the DRUMSTICKS (P).
- Walk down.
- Put the DRUMSTICKS on the bongos and hit the drums in numerical order (Q); take the GLUE (R).
- Go into the Office.
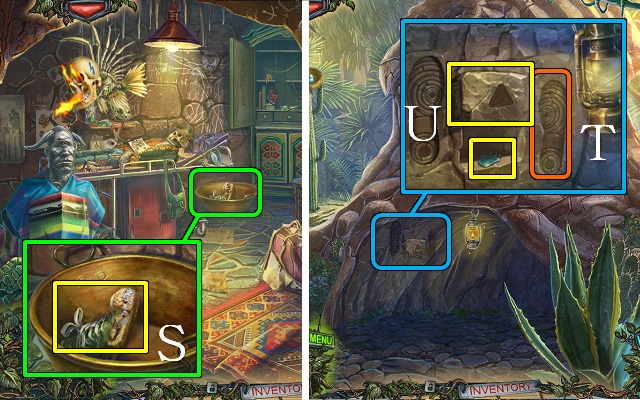
- Use the GLUE on the shoe; take the SHOE and the BUCKET (S).
- Go to the Cave.
- Put the SHOE on the plain footprint (T); take the BUTTON and STONE (U).
- Go to the Leopard Cage.
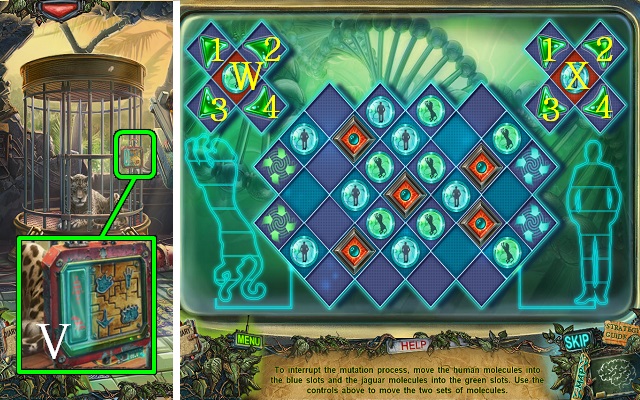
- Put the BUTTON on the cage and move the buttons to their matching slots (V); play the mini-game.
- Play as before.
- Solution: X1, X2, W1, W3x2, W1, W3, W1, X4, X2, X1x3, W1x3, W3, W1x2, W3x2, W1, X3, X4x4, X2x2, X4, X2x2, X4x2, X2, X4, X2x2, X4, X2x2, X3, X4x3, X2x2, X4, X2x2, X3x2, X4x3, X2, X4, X2x2, W3x5, W1, W3x4, W1x2.
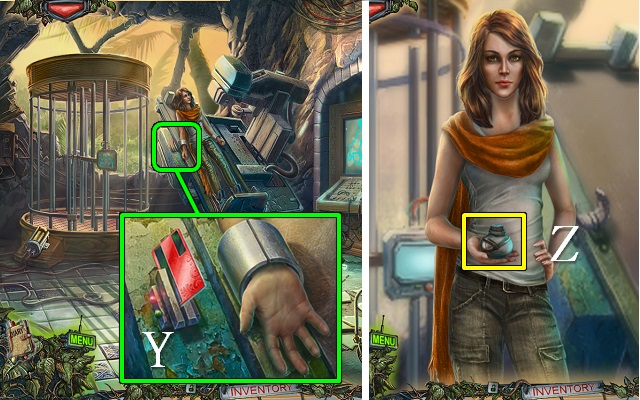
- Use the ELECTRONIC CARD on Mary's cuff (Y).
- Talk to Mary and take the SLEEPING POWDER (Z).
- Walk down twice.
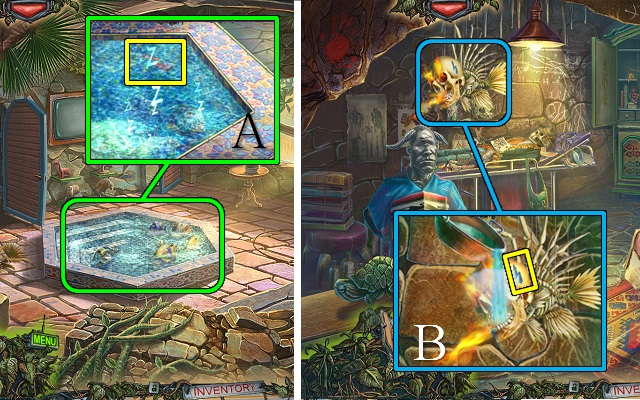
- Put the SLEEPING POWDER in the water; take the LIGHTNING FIGURE and put the BUCKET in the water to get a BUCKET OF WATER (A).
- Go into the Office.
- Pour the BUCKET OF WATER over the skeleton; take the LIGHTNING FIGURE (B).
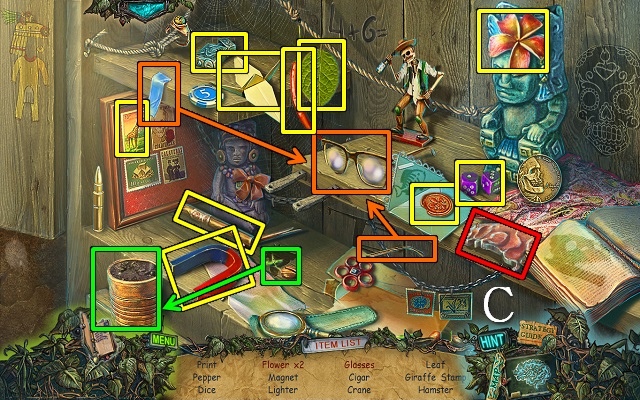
- Play the HOP or mini-game.
- You receive the HAMSTER FIGURE (C).
- Go to the Leopard Cage.
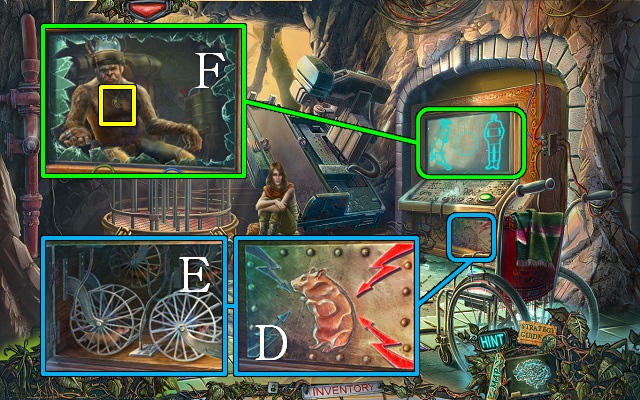
- Put the HAMSTER FIGURE and LIGHTNING FIGURES on the metal panel (D); give the NUTS to the hamsters (E).
- Smash the monitor with the STONE; take the CHAIN (F).
- Walk down.
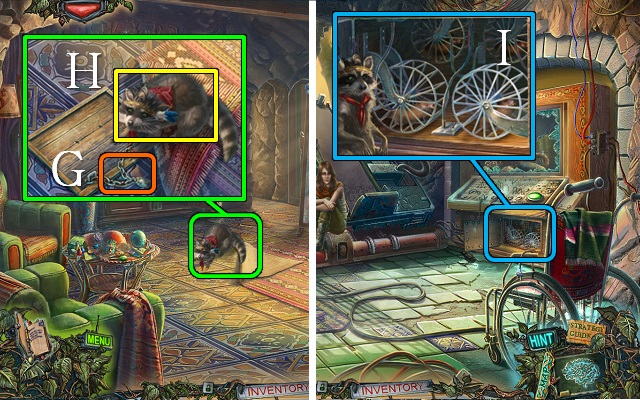
- Put the CHAIN on the hatch and open it (G); take the raccoon (H).
- Go to the Leopard Cage.
- Release the raccoon on the hamsters (I).
- Congratulations, you have completed Twilight Phenomena: Strange Menagerie.
Created at: 2013-09-20

