Walkthrough Menu
- General Tips
- Chapter 1: The Orphanage
- Chapter 2: The Train Station
- Chapter 3: The Witches' Caves
- Chapter 4: The City
General Tips
- This is the official guide for Witches' Legacy: The Ties That Bind.
- This guide will not mention each time you have to zoom into a location; the screenshots will show each zoom scene.
- Hidden-object puzzles are referred to as HOPs. This guide will not show screenshots of the HOPs, however, it will mention when an HOP is available and the inventory item you'll collect from it.
- This guide will give step-by-step solutions for all puzzles which are not random. Please read the instructions in the game for each puzzle.
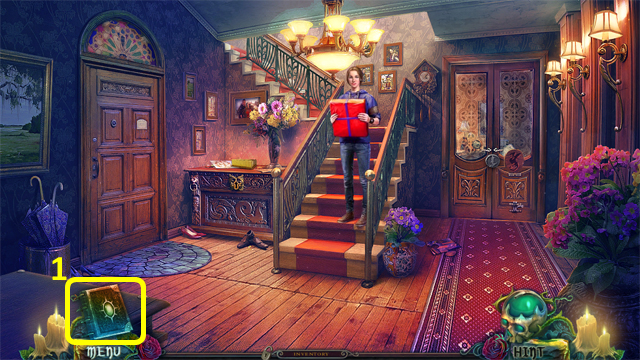
- Select the diary (1) for story updates.
Chapter 1: The Orphanage
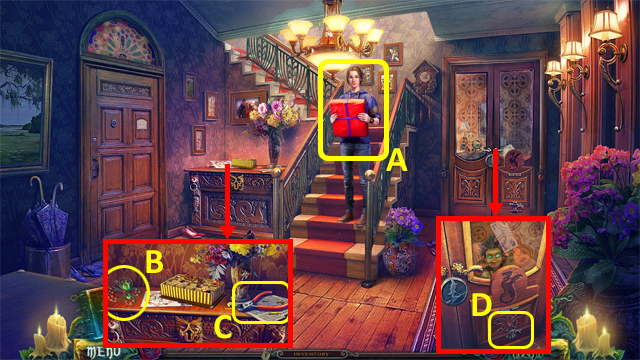
- Talk to Lynn (A).
- Read the invitation; take the BROKEN BUTTERFLY (B) and NIPPERS (C).
- Use the NIPPERS (D).
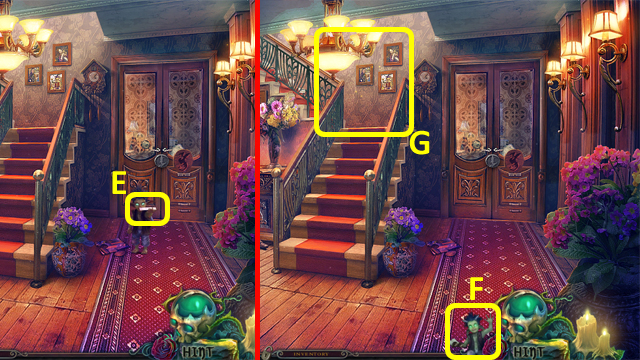
- Grab EDWARD'S LETTER (E).
- Select the Imp (F) for current objective.
- Walk up (G).
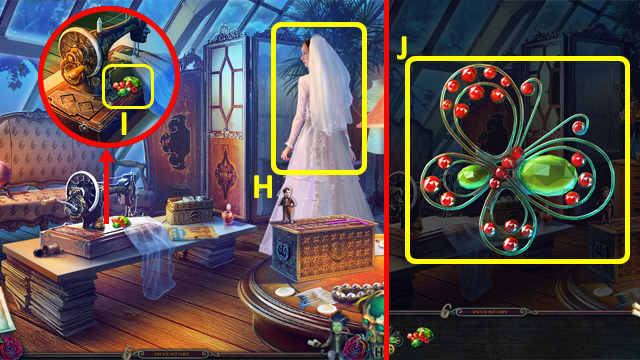
- Give EDWARD'S LETTER to Lynn (H).
- Grab the TINY JEWELS (I).
- Select the BROKEN BUTTERFLY in the Inventory, and add the TINY JEWELS (J); receive a BUTTERFLY FIGURINE.
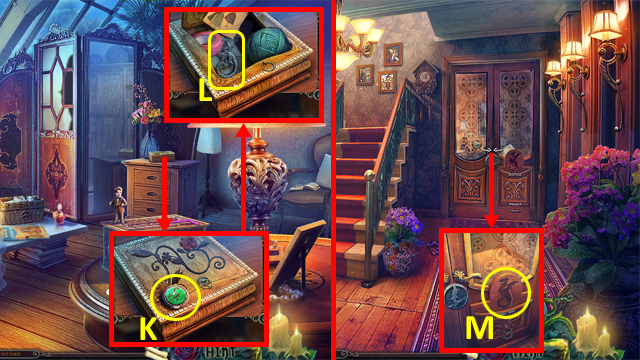
- Grab the RUNE (K).
- Place the BUTTERFLY FIGURINE in the box; move the three items and take the DRAGON (L).
- Back out.
- Place the DRAGON (M).
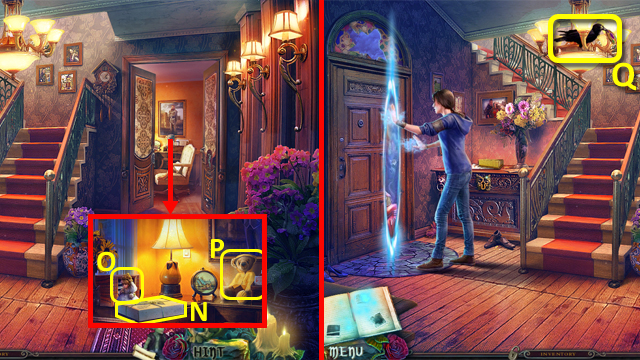
- Look at the picture, then grab the GIFT (N), BRIDE FIGURINE (O) and SMALL SLICKER (P).
- Select the bird (Q).
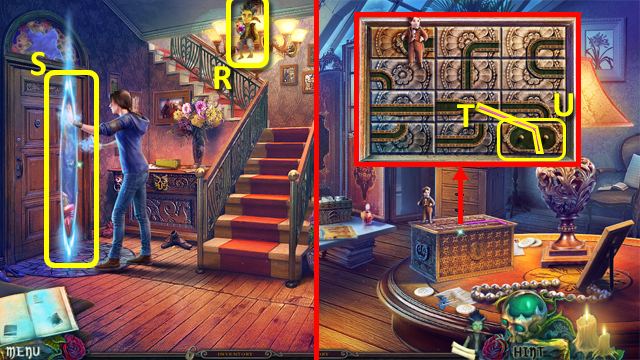
- Grab LYNN'S MEDALLION (R); place it (S).
- Walk up.
- Grab the DRINKING STRAW (T), and place the BRIDE FIGURINE to trigger a puzzle (U).
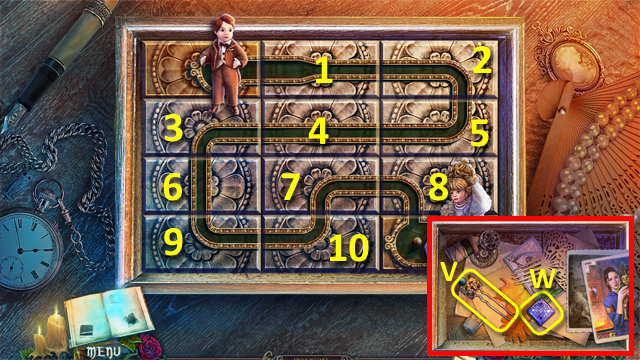
- Switch the pieces to create a path from the groom to the bride.
- Solution: 1-7, 2-8, 5-10, 4-6, 3-7, 9-10, 7-8.
- Move the two photos; grab the BOBBY PIN (V) and BUTTON (W).
- Back out.
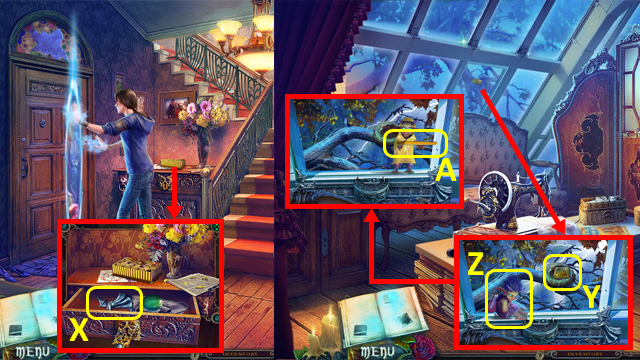
- Unlock the drawer with the BOBBY PIN; grab the WITCH FIGURE (X).
- Walk up.
- Place the WITCH FIGURE in the slot and select the button (Y); give the SMALL SLICKER to the Imp (Z), then grab the BUTTON (A).
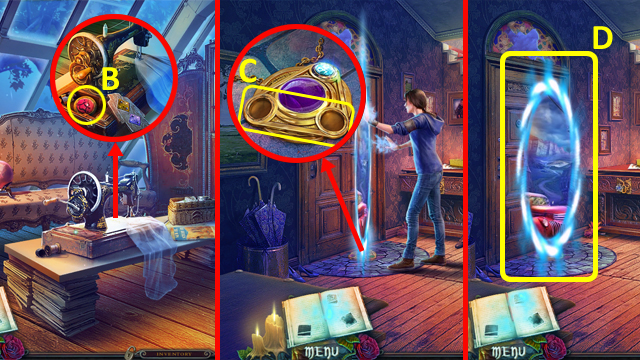
- Place the BUTTONS in the slots; grab the RUNE (B).
- Back out.
- Remove the broken stones, then add the RUNES (C).
- Go through the portal (D).
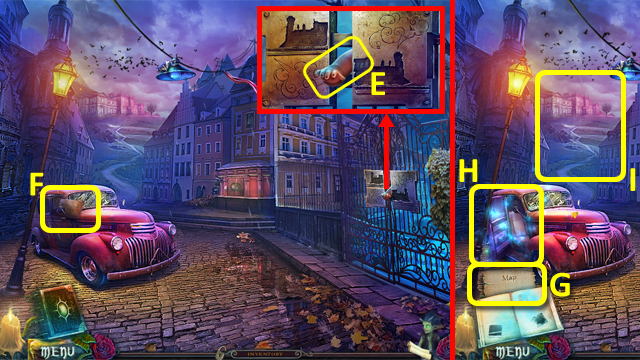
- Grab the DOLL ARM (E).
- Select the map (F) to access a HOP. Find all the pieces of the map; receive a MAP.
- Select the MAP (G) to travel quickly between locations.
- Open the car door and play the HOP (H); receive some GUNPOWDER.
- Walk forward to the Orphanage Yard (I).
- Talk to Lynn.
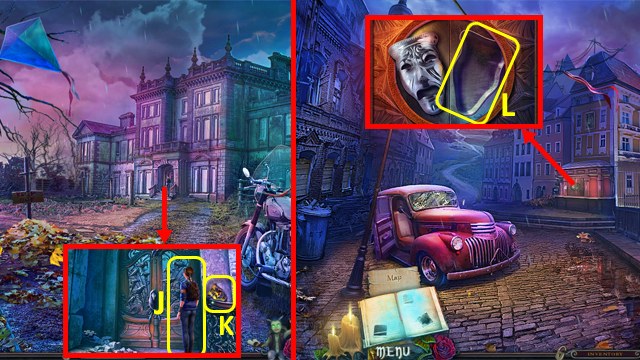
- Talk to Lynn (J) and grab the GOLDEN MASK (K).
- Back out.
- Place the GOLDEN MASK to trigger a puzzle (L).
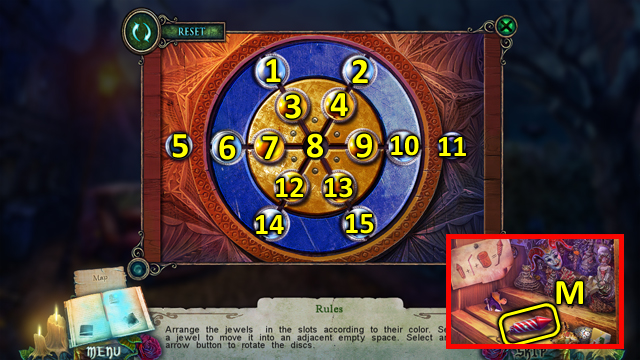
- Solution: 7-5-6-5-12-5x2-14-5x2-9-5x2-10-5x2-3-8.
- Select the ROCKET CASING (M) twice to take it.
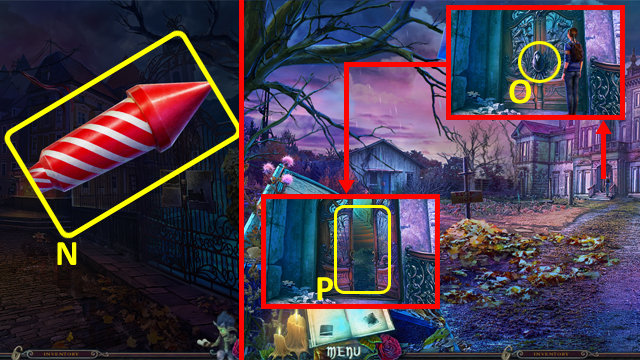
- Select the ROCKET CASING in the Inventory, and add the DRINKING STRAW and GUNPOWDER (N); receive a ROCKET.
- Walk forward.
- Place the ROCKET (O).
- Enter the Main Hall (P).
- Talk to Lynn.
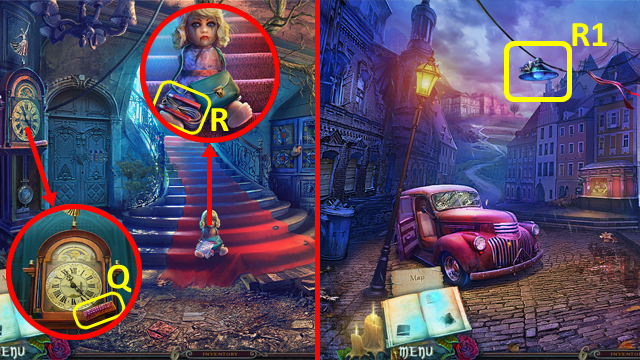
- Grab the VIOLET BROOCH (Q).
- Read the note, then take the JUMP ROPE (R).
- Back out twice.
- Use the JUMP ROPE (R1); receive a TOY RIDER.
- Return to the Main Hall.
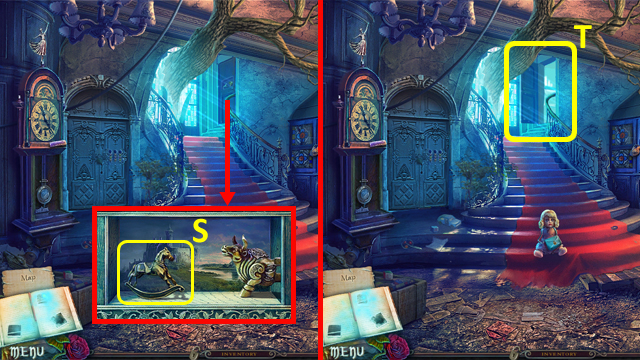
- Place the TOY RIDER (S).
- Walk up to the Second Floor (T).
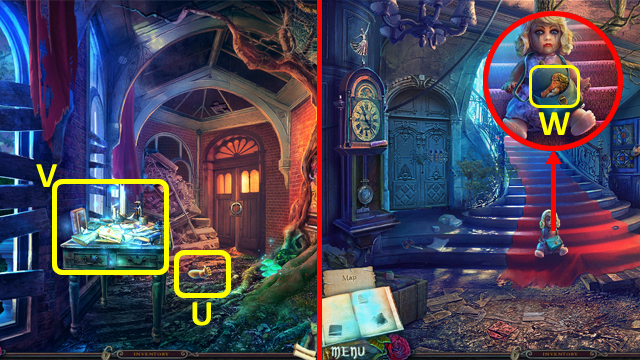
- Read the notes, then grab the DOLL ARM (U).
- Play the HOP (V); receive an OILCAN.
- Back out.
- Place the DOLL ARMS on the doll; take the ANGEL EMBLEM PIECE (W).
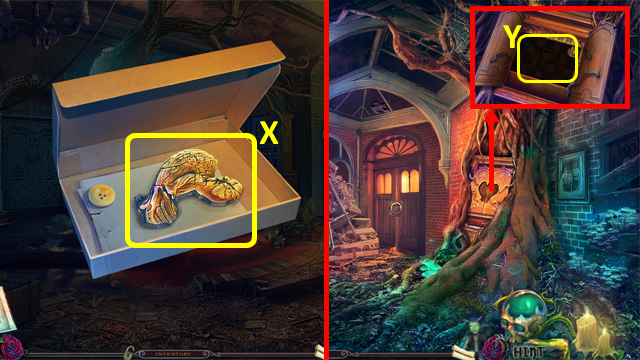
- Select the GIFT in the Inventory; remove the string and grab the ANGEL EMBLEM PIECE (X).
- Walk up.
- Place the ANGEL EMBLEM PIECES in the door; select inside to trigger a puzzle (Y).
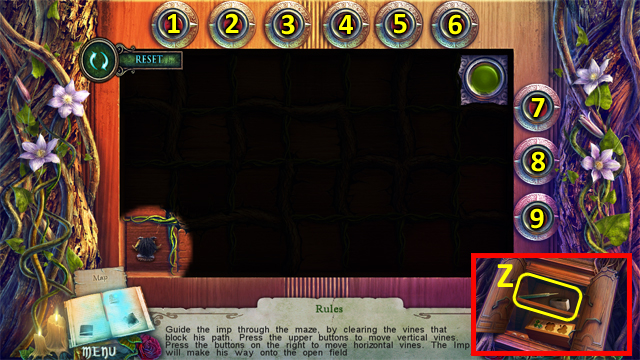
- Guide the Imp through the maze.
- Solution: 9-1-2-8-3-8-9-4-5-9-6-8-6-7-6.
- Look at the picture, then take the FILE and HAMMERHEAD (Z).
- Back out.
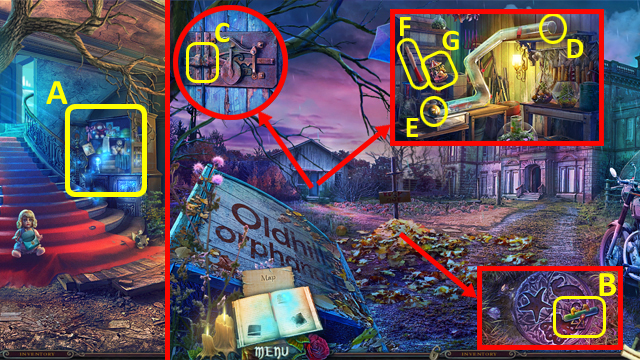
- Use the FILE on the lock, then play the HOP (A); receive a WIND-UP CAR.
- Back out.
- Clear the leaves; take the SEESAW SYMBOL (B).
- Use the OILCAN on the latch (C).
- Insert the WIND-UP CAR (D); grab the BEE MARBLE(E), HANDLE (F) and CAROUSEL SYMBOL (G).
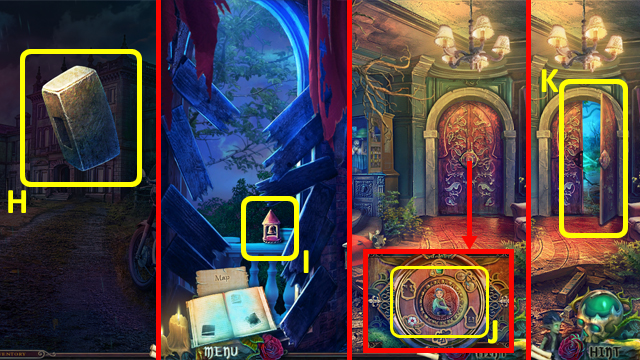
- Select the HAMMERHEAD in the Inventory and attach the HANDLE (H); receive a HAMMER.
- Return to the Second Floor.
- Smash the boards with the hammer; grab the BELL TOWER SYMBOL (I).
- Back out.
- Place the SEESAW SYMBOL, CAROUSEL SYMBOL and BELL TOWER SYMBOL (J).
- Enter the Courtyard (K).
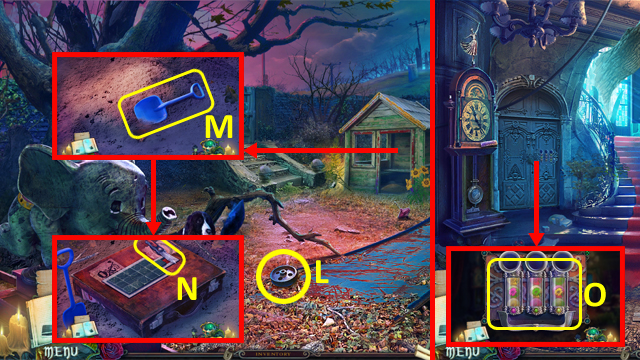
- Grab the WHEEL (L).
- Select the spade (M); take the KNIFE (N).
- Return to the Main Hall.
- Place the MARBLE to trigger a puzzle (O).
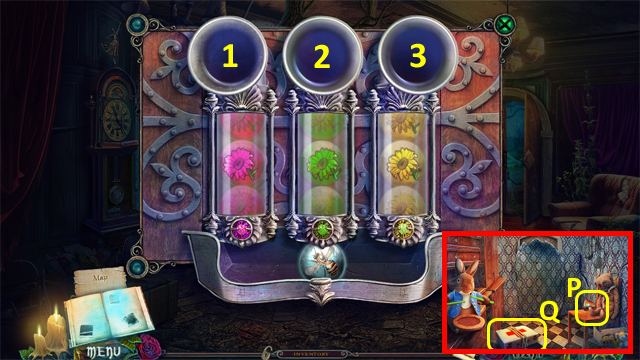
- Sort the marbles into the correct tubes by dropping the free marble into the tubes.
- Solution: 2-1-3-2-3-1-2-1-3-2.
- Move the bear; take the GOLDEN BELL (P) and FIRST-AID KIT (Q).
- Return to the Courtyard.
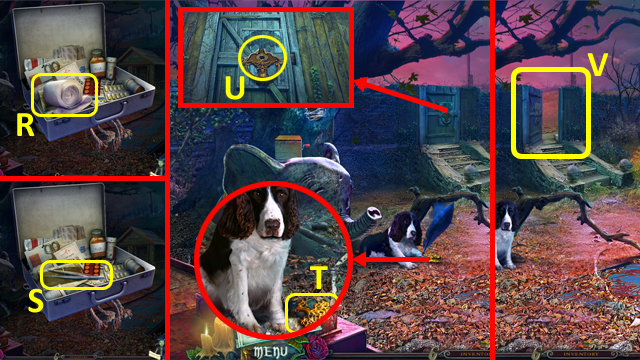
- Select the FIRST-AID KIT in the Inventory, cut the ropes with the KNIFE, then open the kit; take the BANDAGE (R) and TWEEZERS (S).
- Remove the feather with the TWEEZERS, then use the BANDAGE on the dog's paw; grab the TREE EMBLEM (T).
- Place the TREE FIGURE (U); enter Near the Bell Tower (V).
- Talk to Abigail.
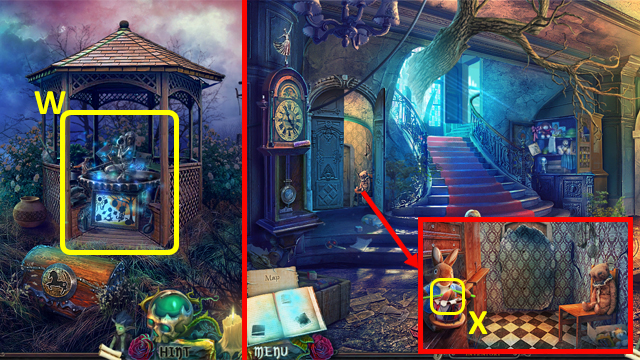
- Play the HOP (W); receive a SMALL DRUM.
- Return to the Main Hall.
- Place the drum on the rabbit; grab the BRUSH (X).
- Return to Near the Bell Tower.
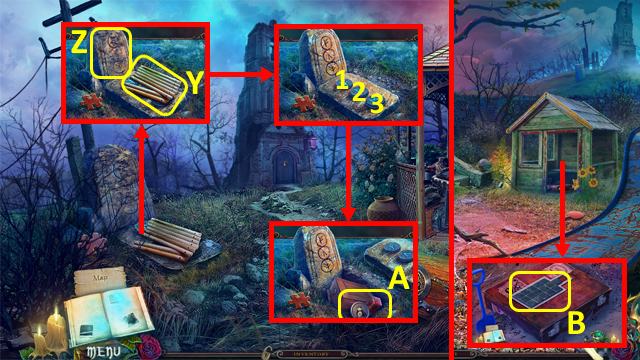
- Grab the WOODEN PLANKS (Y); use the BRUSH (Z).
- Press the buttons: 1x6, 2x3, 3x2; grab the PRINCESS TOKEN and PATTERNED BAR (A).
- Back out.
- Place the PATTERNED BAR to trigger a puzzle (B).
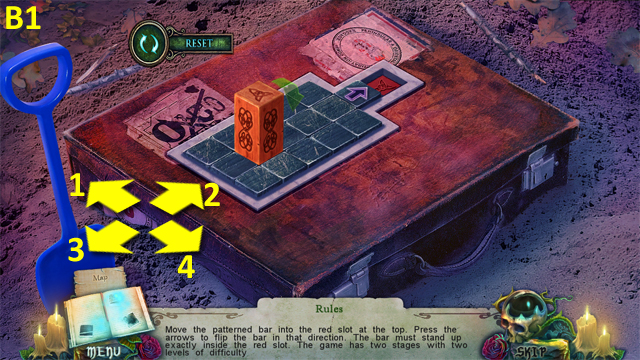
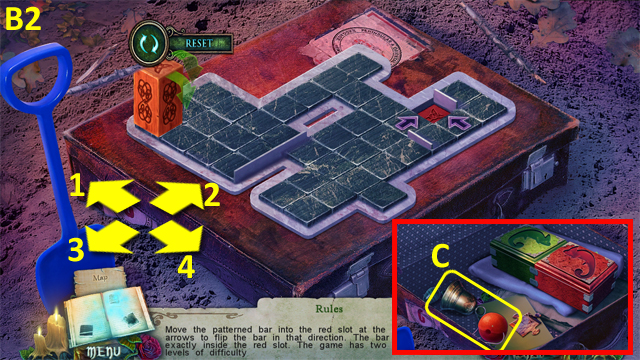
- Move the bar into the open space.
- Solution (B1): 2-1-3-4-2x2-1-3-4-2x3.
- Solution (B2): 2-4-3-4-2x2-1-3-4-2x3-4x2-3-1-3-4-2-1-2-4-2.
- Grab the GOLDEN BELL and CLOWN NOSE (C).
- Return to Near the Bell Tower.
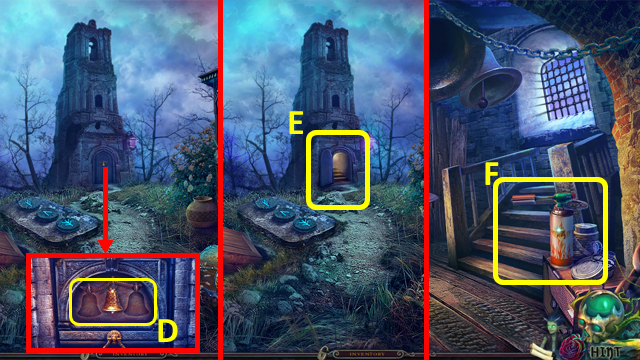
- Place the GOLDEN BELLS (D); enter Inside the Bell Tower (E).
- Talk to Lynn.
- Grab the BLOWTORCH (F).
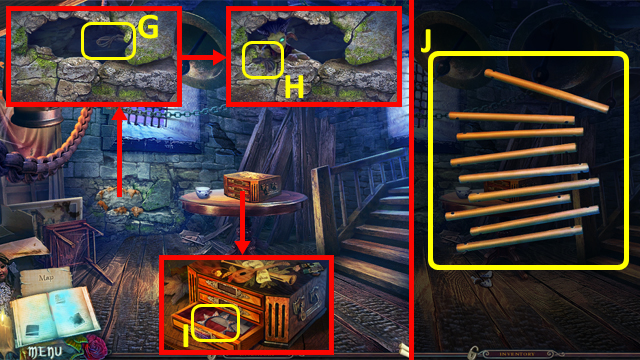
- Use the KNIFE on the wall, then select the rope (G); take the ROPE (H).
- Place the VIOLET BROOCH into the chest; grab the SUN (I).
- Select the WOODEN PLANKS in the Inventory and add the ROPE (J); receive a ROPE LADDER.
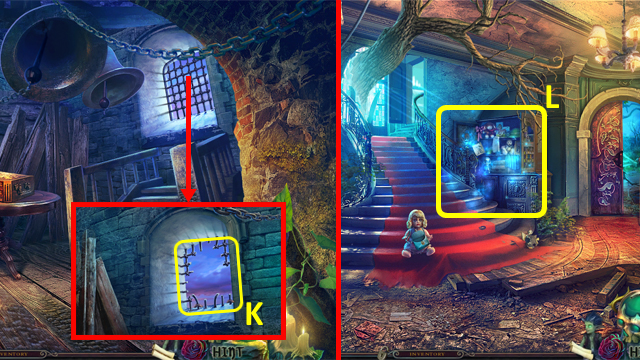
- Use the BLOWTORCH then the ROPE LADDER on the bars; exit Inside the Bell Tower (K).
- Return to the Main Hall.
- Play the HOP (L); receive a SCREWDRIVER.
- Return to the Courtyard.
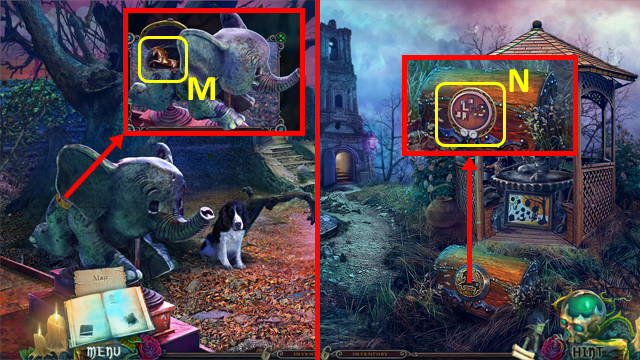
- Use the SCREWDRIVER on the seat; grab the UNICORN FIGURE (M).
- Walk forward.
- Place the UNICORN FIGURE in the chest; select the chest to trigger a puzzle (N).
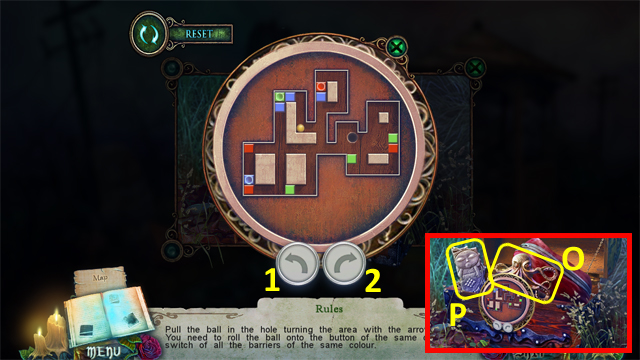
- Guide to ball to the hole.
- Solution: 2x2-1-2x3-1x5-2-1-2x3-1x2-2-1-2-1x3.
- Look at the drawings; grab the OCTOPUS (O) and SLEEPING CHILD FIGURE (P).
- Return to the Orphanage Yard.
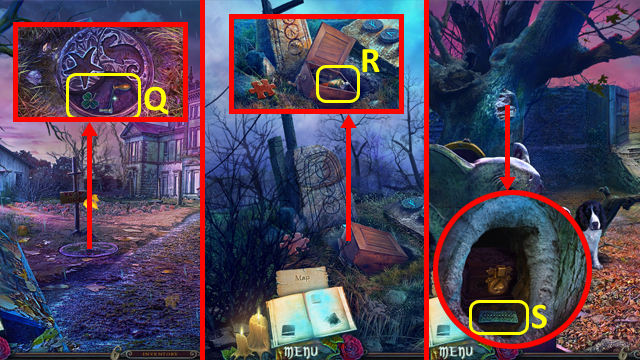
- Place the OCTOPUS in the slot; take the THREE-LEAF CLOVER and HANDLE (Q).
- Return to Near the Bell Tower.
- Open the box with the HANDLE; grab the BUG REPELLENT (R).
- Back out.
- Use the BUG REPELLENT on the spiders; take the GREEN BROOCH (S).
- Return to Inside the Bell Tower.
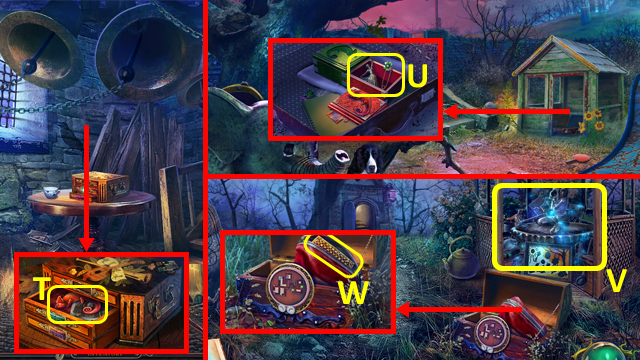
- Place the GREEN BROOCH in the chest; take the RED CHAMELEON (T).
- Return to the Courtyard.
- Place the RED CHAMELEON in the slot; grab the DANCING FIGURE and PIN (U).
- Walk forward.
- Play the HOP (V); receive a PAINTBRUSH.
- Attach the PIN to the bag; unzip it and take the YELLOW BROOCH (W).
- Return to Inside the Bell Tower.
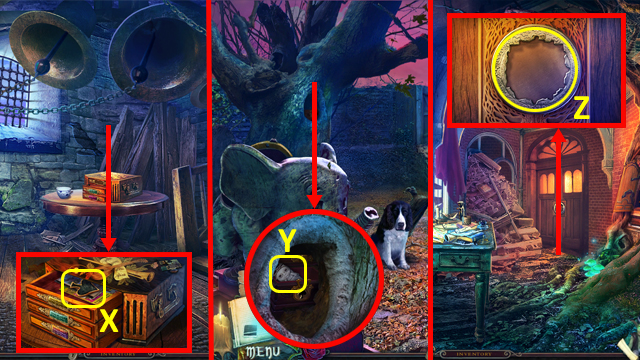
- Place the YELLOW BROOCH in the chest; take the SPADE EMBLEM (X).
- Return to the Courtyard.
- Place the SPADE EMBLEM into the box; grab the SMILING CHILD FIGURE (Y).
- Return to the Second Floor.
- Place the SLEEPING CHILD FIGURE and SMILING CHILD FIGURE to trigger a puzzle (Z).
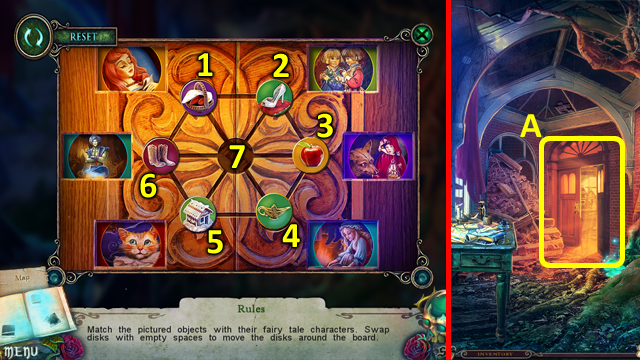
- Re-arrange the discs by moving the disc in the numbered slot to the available empty space.
- Solution: 5-6-7-3-2-7-1-2-3-7-4-3-2-1-6-7-1-2-3-4-7-2-3-7-4-3-2-7.
- Enter the Children's Room (A).
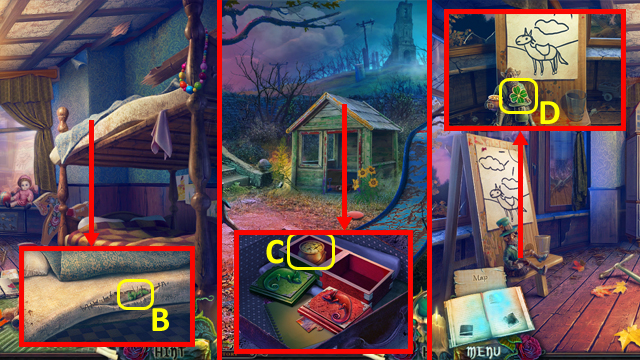
- Talk to Lynn.
- Remove the cover, cut the stitches with the KNIFE, and look at the drawing; grab the GREEN CHAMELEON (B).
- Return to the Courtyard.
- Place the GREEN CHAMELEON in the slot; take the POT OF GOLD (C).
- Return to the Children's Room.
- Place the POT OF GOLD on the Leprechaun; grab the FOUR LEAF CLOVER (D).
- Back out.
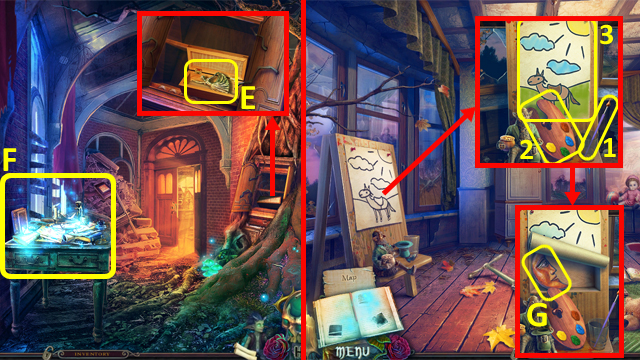
- Place the THREE-LEAF CLOVER, and FOUR LEAF CLOVER into the box; grab the DANCING FIGURE (E).
- Play the HOP (F); receive a PALETTE.
- Walk forward.
- Place the PAINTBRUSH (1) and PALETTE (2); paint the picture (1-3), then take the MOON (G).
- Return to the Main Hall.
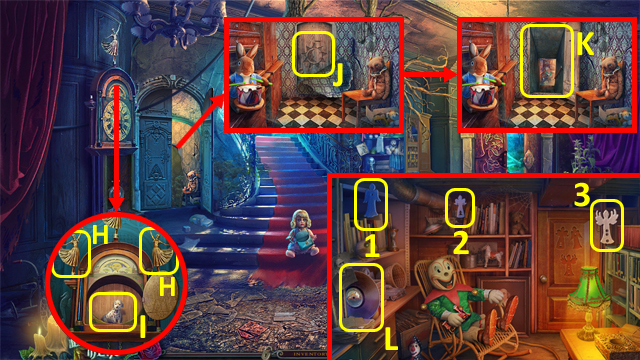
- Place the DANCING FIGURES (H); grab the TOY DOG (I).
- Remove the paper from the door, then place the SUN and MOON (J); enter the Orphanage Basement (K).
- Grab the RECORD (L), then select the angels (1-3).
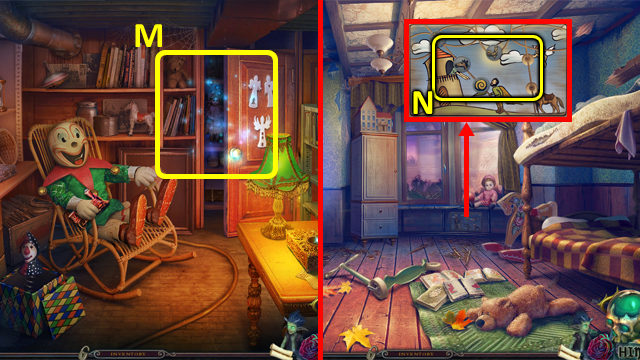
- Play the HOP (M); receive a FLOWER TOKEN.
- Return to the Children's Room.
- Place the PRINCESS TOKEN and FLOWER TOKEN to trigger a puzzle (N).
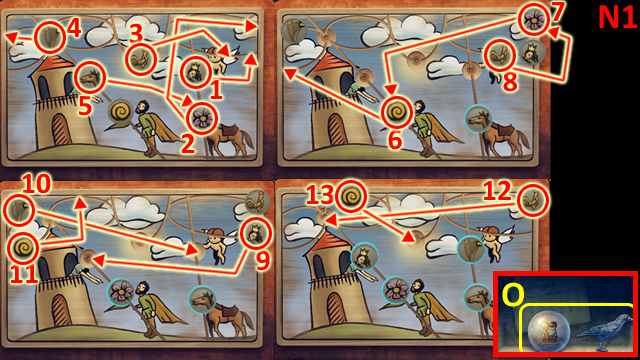
- Move the tokens into the correct positions.
- Solution (N1).
- Grab the CRYSTAL BALL and RAVEN FIGURE (O).
- Return to the Orphanage Basement.
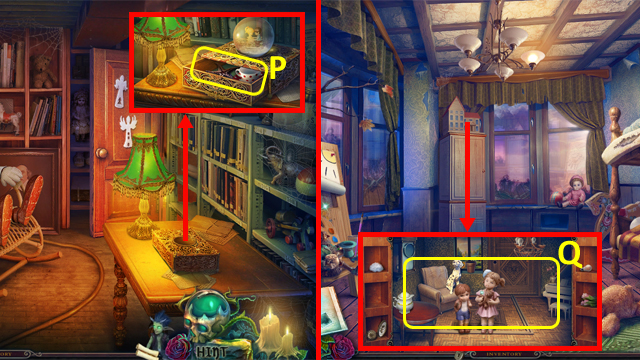
- Place the CRYSTAL BALL on the box; look at the drawing, then take the STARFISH and TOY CUP AND SAUCER (P).
- Return to the Children's Room.
- Place the TOY DOG and TOY CUP AND SAUCER (Q).
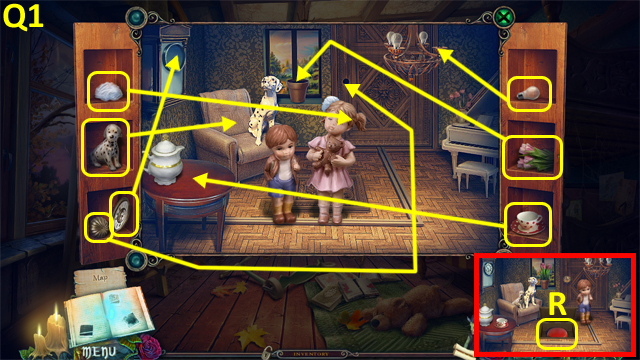
- Place the toys in the scene (Q1).
- Grab the CONTROL BUTTON (R).
- Return to the Orphanage Yard.
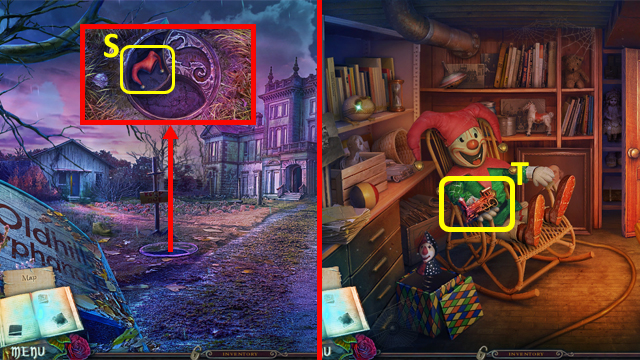
- Place the STARFISH FIGURE in the slot; grab the CLOWN HAT (S).
- Return to the Orphanage Basement.
- Place the CLOWN NOSE and CLOWN HAT on the clown; take the TRAIN (T).
- Return to Oldhills City.
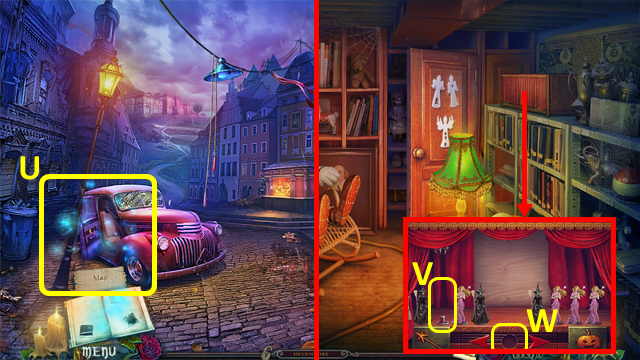
- Play the HOP (U); receive a WITCH FIGURE.
- Return to the Orphanage Basement.
- Open the curtains; place the WITCH FIGURE (V) and CONTROL BUTTON (W) to trigger a puzzle.
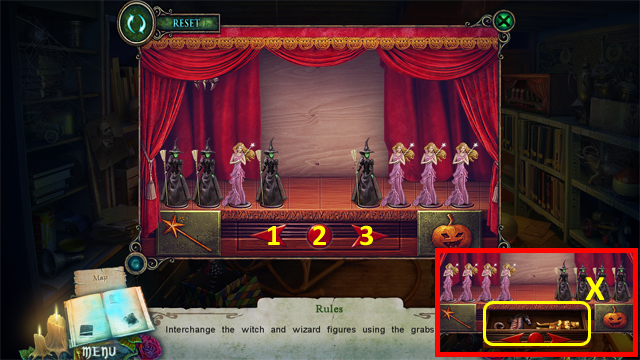
- Re-arrange the witches and fairies.
- Solution: 2-3x4-2-3x4-2-1x8-2-3x3-2-3x5-2-1-2-1x4-2-3-2-3x3-2.
- Take the SEAHORSE and FEMALE CONDUCTOR FIGURE (X).
- Return to the Orphanage Yard.
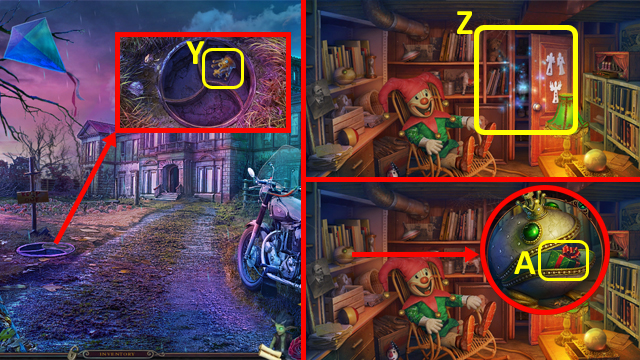
- Place the SEAHORSE in the slot; take the SMALL CROWN (Y).
- Return to the Orphanage Basement.
- Play the HOP (Z); receive a TRAIN.
- Place the SMALL CROWN on the frog; grab the GIFT (A).
- Return to Oldhills City.
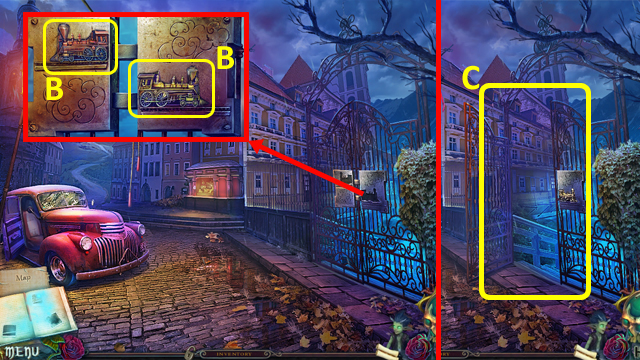
- Place the TRAINS in the slots (B).
- Enter the Station Square (C).
Chapter 2: The Train Station
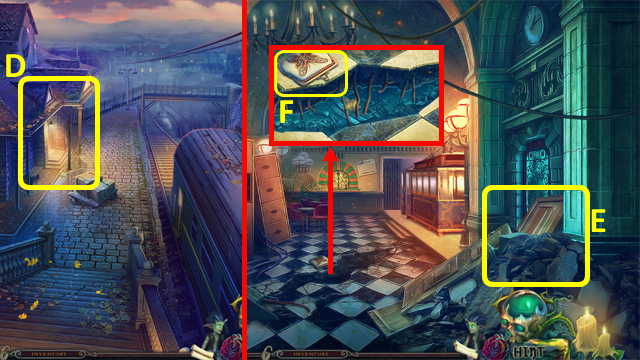
- Enter the Station Building (D); talk to Lynn.
- Select the rubble (E) twice.
- Grab the PURSE (F).
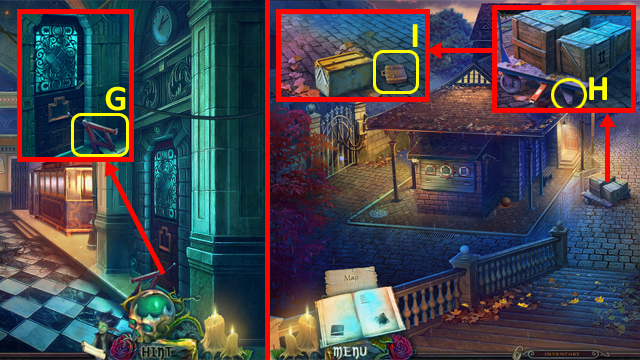
- Grab the JACK (G).
- Back out.
- Use the JACK with the luggage trolley; add the WHEEL (H), move the trolley, and take the SMALL SUITCASE (I).
- Return to the Station Building.
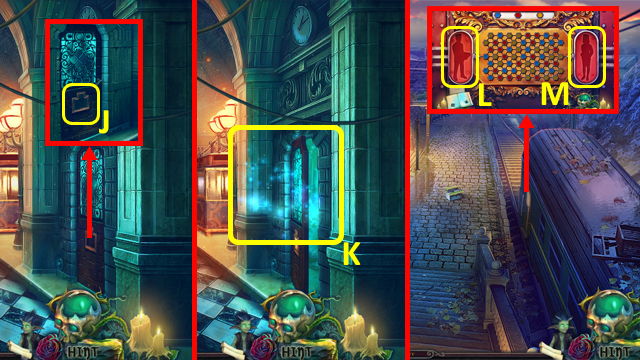
- Place the SMALL SUITCASE (J).
- Play the HOP (K); receive a CONDUCTOR FIGURE.
- Back out.
- Place the CONDUCTOR FIGURE (L) and FEMALE CONDUCTOR FIGURE (M) to trigger a puzzle.
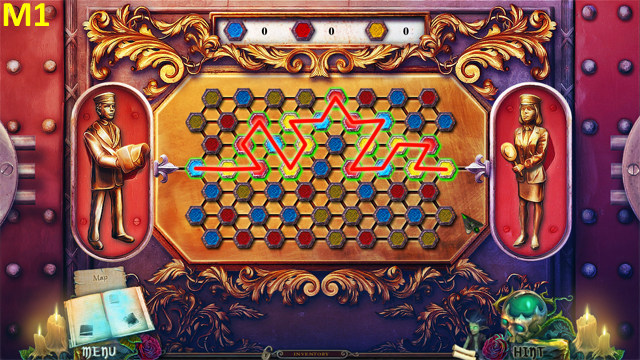
- Find a way across the board left to right.
- Solution (M1).
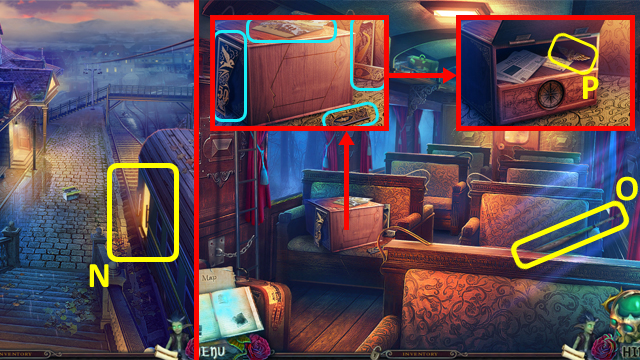
- Enter the CABLE CAR (N).
- Grab the BASEBALL BAT (O).
- Select all the picture pieces (blue); read the newspaper, then take the MACHINIST'S SYMBOL (P).
- Return to the Station Building.
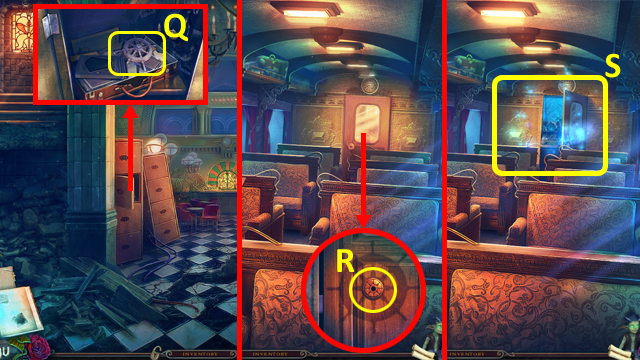
- Place the MACHINST SYMBOL in the briefcase; grab the SHIP'S WHEEL (Q).
- Return to the Cable Car.
- Place the SHIP'S WHEEL (R).
- Play the HOP (S); receive SAILOR EMBLEM.
- Return to the Station Building.
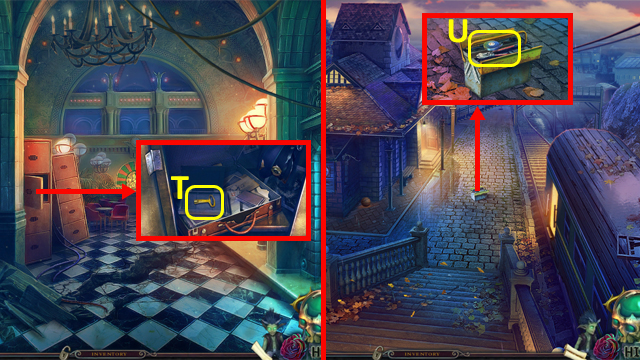
- Place the SAILOR EMBLEM in the book; grab the TRIANGULAR KEY (T).
- Back out.
- Use the TRIANGULAR KEY in the toolbox; take the ELECTRICAL TAPE and PLIERS (U).
- Return to the Cable Car.
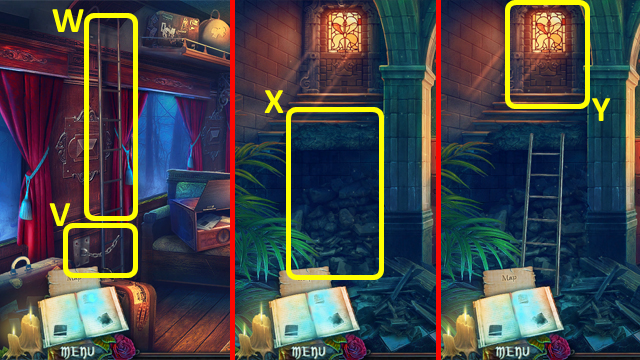
- Use the PLIERS to cut the chain (V); take the METAL LADDER (W).
- Return to the Station Building.
- Place the METAL LADDER (X).
- Open the door, and enter the Station Attic (Y).
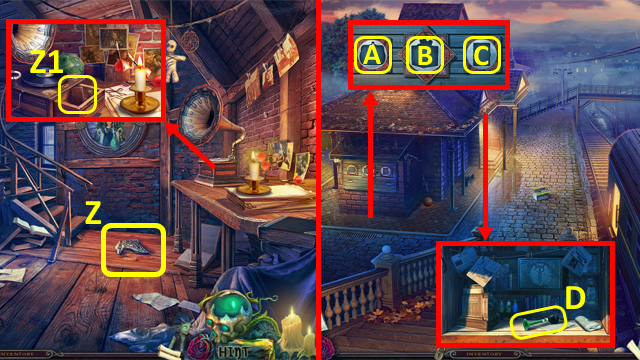
- Grab the GRIFFIN HEAD (Z).
- Place the RECORD on the player; grab the BOOK EMBLEM (Z1).
- Return to the Station Square.
- Place the PURSE (A), GIFT (B) and BOOK EMBLEM (C); take the BIKE HORN (D).
- Return to the Station Attic.
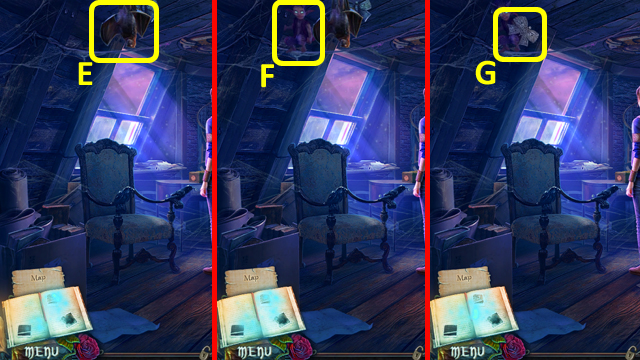
- Select the bat (E).
- Give the BIKE HORN to the Imp (F).
- Take the SILVER BOW (G).
- Return to the Cable Car.
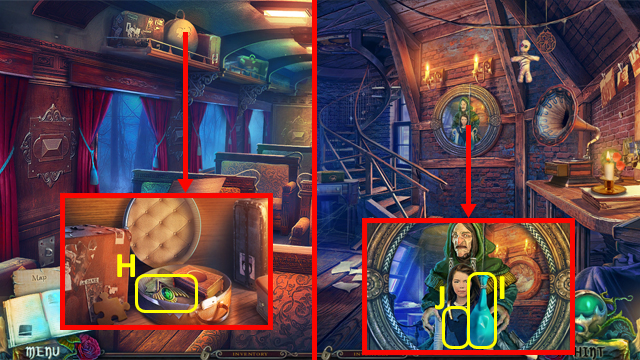
- Place the SLVER BOW in the case; take the MAGICAL MEDALLION (H).
- Return to the Station Attic.
- Grab the BALLOON (I); place the MAGICAL MEDALLION in the slot to trigger a puzzle (J).
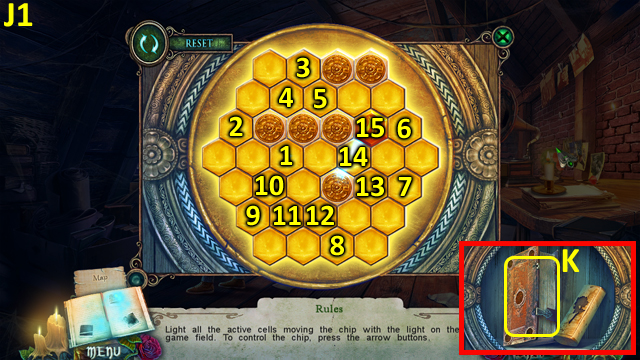
- Light up all the hexagons.
- Solution (J1).
- Select the book (K).
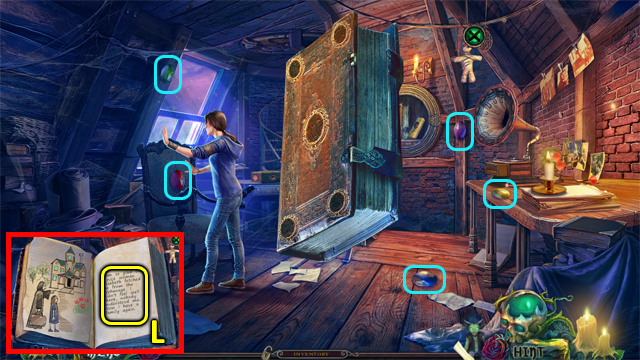
- Select the jewels (blue).
- Select the book, then the page (L) four times.
- Receive a LEVER.
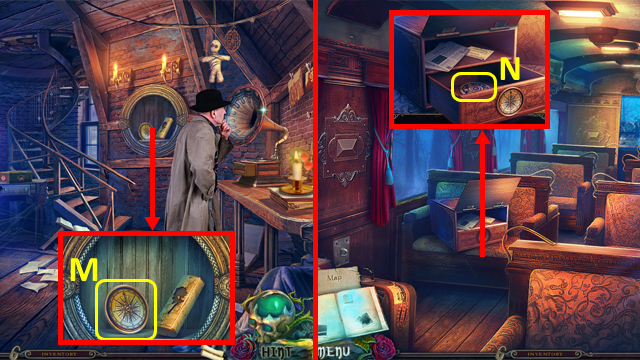
- Grab the COMPASS (M).
- Return to the CABLE CAR.
- Place the COMPASS in the drawer; take the GEAR (N).
- Return to the Station Attic.
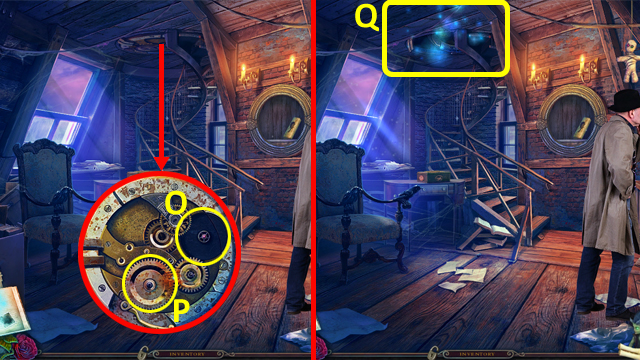
- Place the GEAR (O); use the OILCAN (P).
- Play the HOP (Q); receive a RULER.
- Back out.
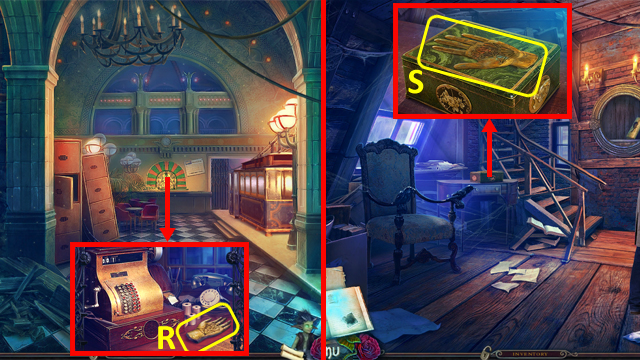
- Use the RULER to open the gate; move the magazine and grab the PALM (R).
- Return to the Station Attic.
- Place the PALM (S); select it to trigger a puzzle.
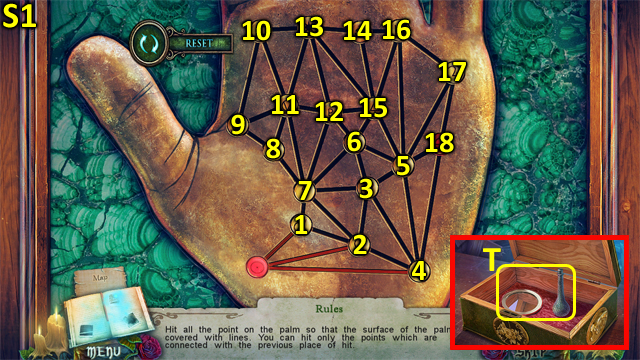
- Connect all the points on the palm.
- Solution (S1).
- Grab the MIRROR and STRANGE BOTTLE (T).
- Return to the CABLE CAR.
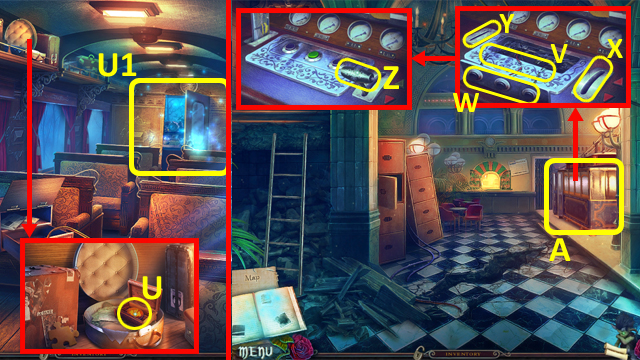
- Place the MIRROR in the box; take the FIRE SYMBOL (U).
- Play the HOP (U1); receive CABLE CAR ACCESS CARD.
- Return to the Station Building.
- Use the ELECTRICAL TAPE on the wires (V); close the panel (W).
- Attach the LEVER (X).
- Insert the CABLE CAR ACCESS CARD (Y).
- Push the lever (Z).
- Travel to On the Mountain (A).
Chapter 3: The Witches' Caves
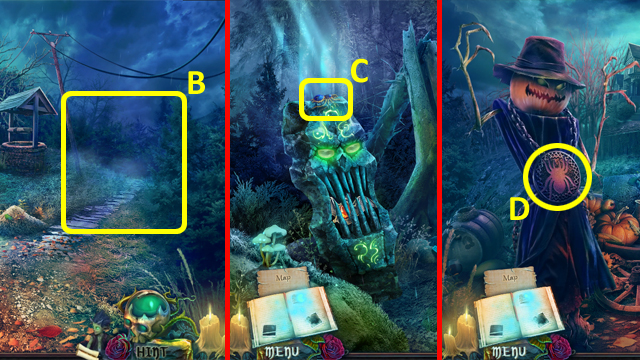
- Enter the Witch's Forest (B).
- Talk to Lynn; grab the GOLDEN SPIDER (C).
- Back out.
- Place the GOLDEN SPIDER (D).
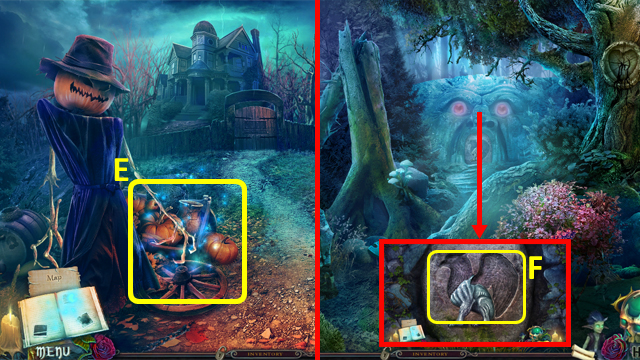
- Play the HOP (E); receive a GRIFFIN'S WING.
- Enter the Witch's Forest.
- Place the GRIFFIN HEAD and GRIFFIN'S WING to trigger a puzzle (F).
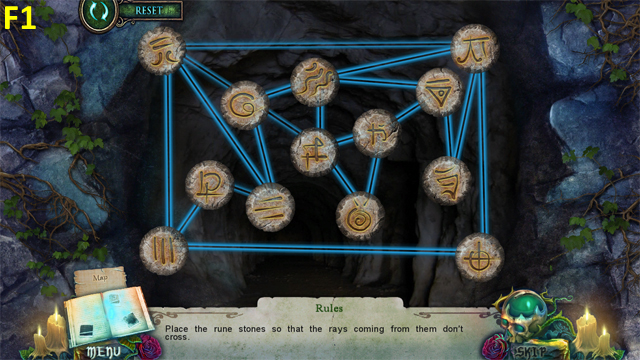
- Re-arrange the runes.
- Solution (F1).
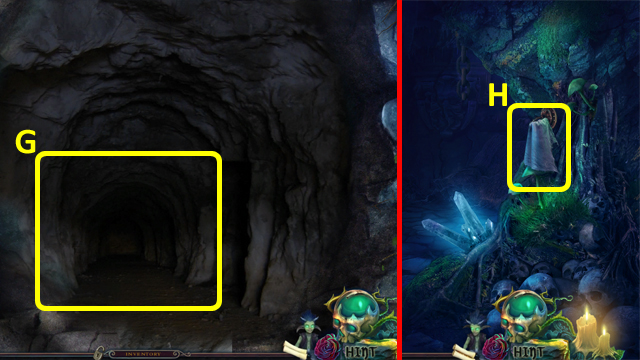
- Enter the Witch's Cave (G).
- Grab the PIECE OF CLOTH (H).
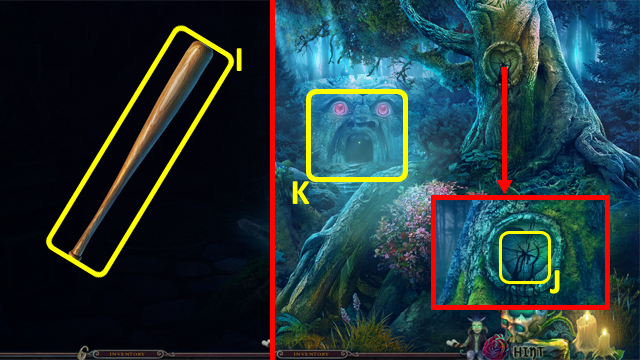
- Select the BASEBALL BAT in the Inventory and add the PIECE OF CLOTH (I); receive CLOTH-WRAPPED BAT.
- Back out.
- Use the CLOTH-WRAPPED BAT with the tree (J); receive a TORCH.
- Return to the Witch's Cave (K).
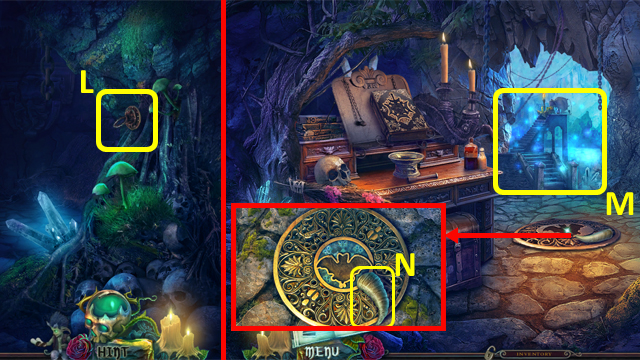
- Place the TORCH (L).
- Play the HOP (M); receive a HANDLE.
- Grab the STONE HORN (N).
- Back out twice.
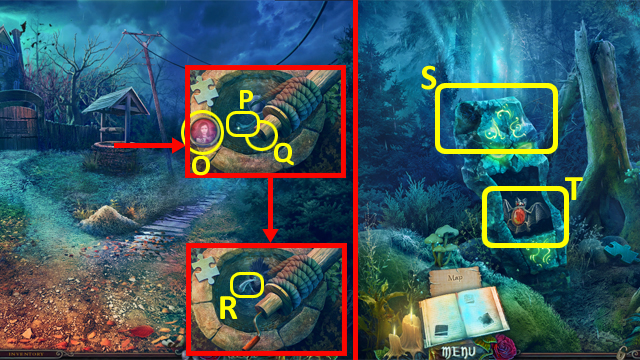
- Grab the DAUGHTER'S PORTRAIT (O).
- Select the well (P) and attach the HANDLE (Q); take the STONE HORN (R).
- Walk right.
- Place the STONE HORNS (S); grab the BAT (T).
- Walk forward.
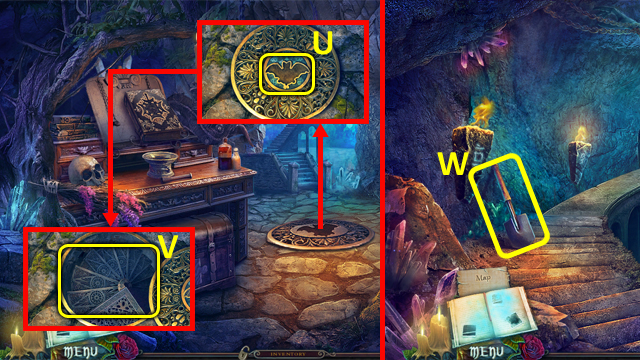
- Place the BAT (U); enter the Ritual Chamber (V).
- Grab the SHOVEL (W).
- Return to On the Mountain.
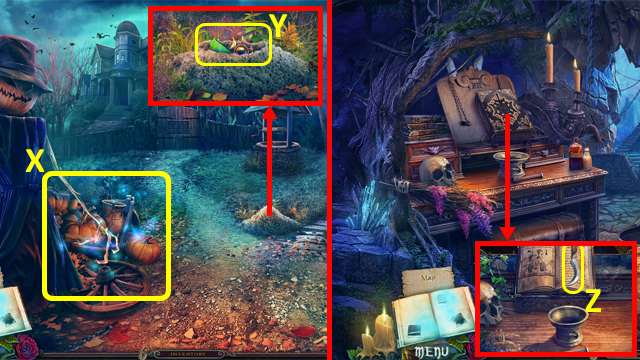
- Play the HOP (X); receive a WATER SYMBOL.
- Use the SHOVEL on the dirt; grab the GREEN PLATE and LYNN'S MEDALLION (Y).
- Return to the Witch's Cave.
- Place LYNN'S MEDALLION in the book; grab the ENGRAVED DAGGER (Z).
- Walk down.
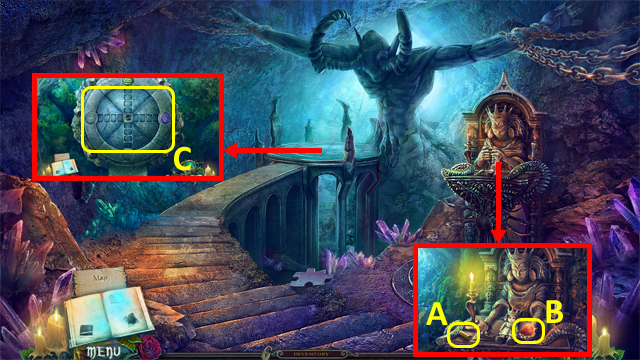
- Grab the BULLET (A).
- Use the ENGRAVED DAGGER with the doll; take the MAGIC FRUIT (B).
- Place the FIRE SYMBOL and WATER SYMBOL to trigger a puzzle (C).
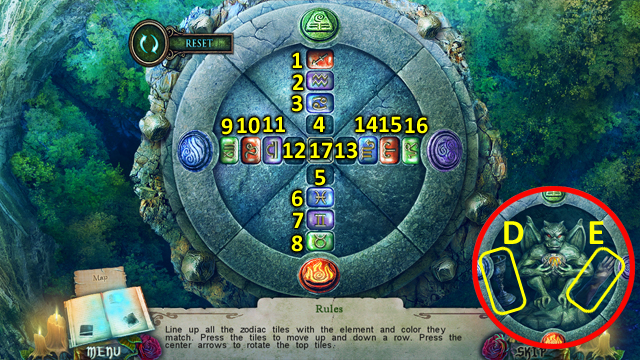
- Re-arrange the zodiac signs into the correct places.
- Solution: 6, 5, 7, 6, 8, 7, 17, 6, 5, 17, 7, 5, 17x2, 14, 13, 15, 14, 17, 5, 6, 17, 14, 13, 17, 13, 14, 17x3, 6, 5, 17x3, 5, 8, 17x2, 3, 4, 2, 3, 1, 2, 17x4, 5, 6, 17, 14, 13, 17, 16, 14, 6, 7, 5, 6, 17, 14, 13, 17, 13, 16, 17x2, 11, 12, 17x2, 13, 15, 17, 3, 4, 17x3, 13, 14, 17x2, 10, 12, 17x2, 12, 11, 17x3, 2, 4, 17, 4, 1, 17x2, 4, 2, 17, 11, 12, 17x2, 9, 12, 17x2, 12, 9, 17, 4, 3, 6, 5, 17x3, 12, 10, 17, 7, 5, 17x3, 12, 11, 5, 7, 17x2, 5, 7.
- Grab the WITCH'S GOBLET (D) and GLOVE (E).
- Return to the Witch's Forest.
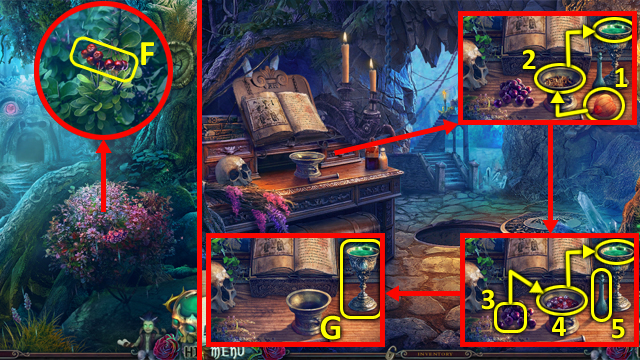
- Use the GLOVE to get the BERRIES (F).
- Walk forward.
- Place the BERRIES, MAGIC FRUIT, STRANGE BOTTLE, and WITCH'S GOBLET on the table, then mix the potion as shown (1-5); grab the ENCHANTED POTION (G).
- Walk down.
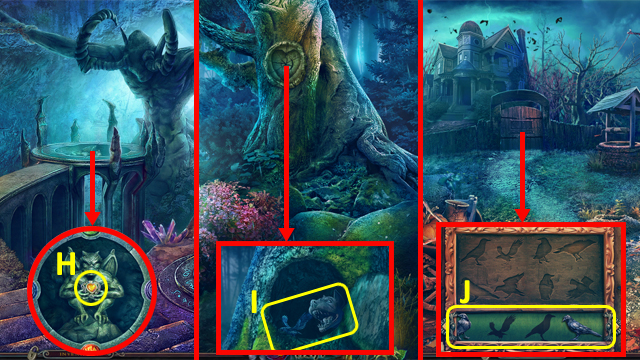
- Use the ENCHANTED POTION on the gargoyle; take the AMBER HEART (H).
- Back out twice.
- Place the AMBER HEART in the tree; take the RAVEN FIGURE and CERBERUS HEAD (I).
- Back out.
- Place the RAVEN FIGURES to trigger a puzzle (J).
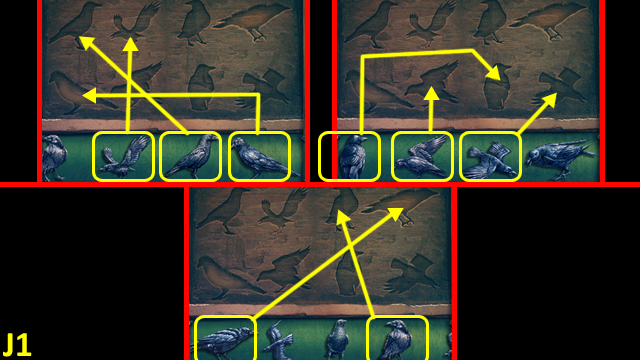
- Place the Ravens in the correct places.
- Solution (J1).
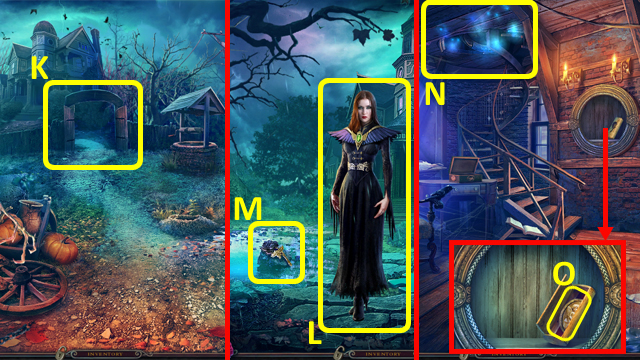
- Enter ABIGAIL'S HOUSE (K).
- Talk to Abigail (L); grab the BLACK ROSE (M).
- Return to the Station Attic.
- Play the HOP (N); receive a RED EMBLEM.
- Place the BLACK ROSE in the box; take the MEDALLION HALF (O).
- Back out.
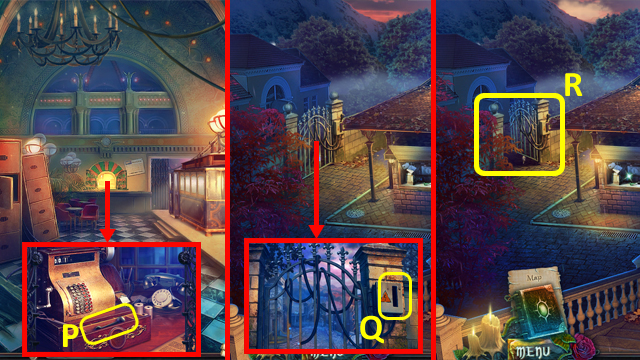
- Place the RED EMBLEM in the drawer; grab the ELECTRICAL PANEL SWITCH (P).
- Back out.
- Place the ELECTRICAL PANEL SWITCH in the slot (Q).
- Enter the City Street (R).
Chapter 4: The City
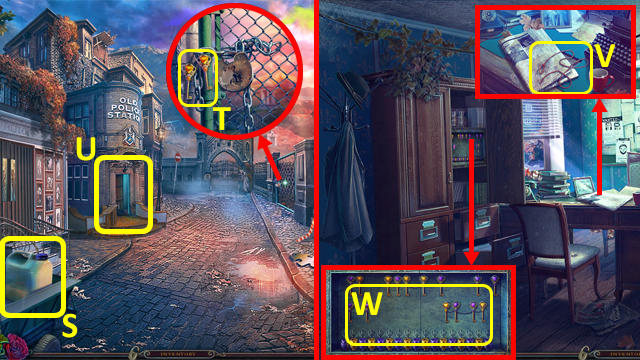
- Take the GASOLINE (S) and ELECTRONIC KEYS (T); enter the Police Station (U).
- Talk to Jonathan.
- Grab the SHOELACE (V).
- Open the cupboard; place the ELECTRONIC KEYS to trigger a puzzle (W).
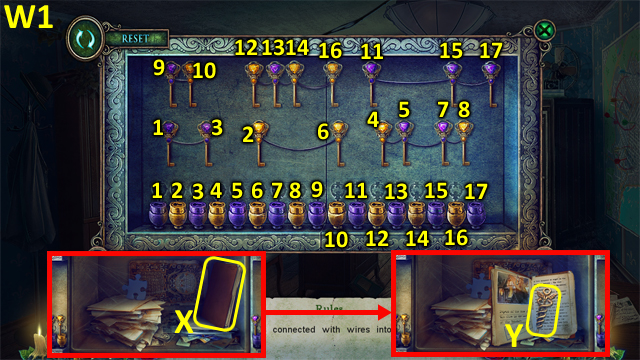
- Place the keys in the locks correctly.
- Solution (W1).
- Read the file (X); take the CADUCEUS (Y).
- Return to the Station Square.
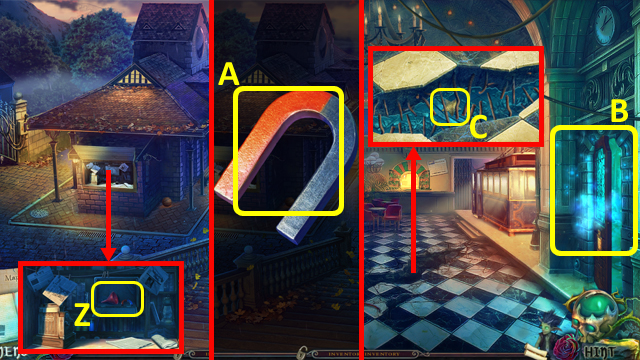
- Place the CADUCEUS in the box; grab the FUNNEL and MAGNET (Z).
- Select the MAGNET in the Inventory and add the SHOELACE (A); receive a MAGNET ON SHOESTRING.
- Enter the Station Building.
- Play the HOP (B); receive an HOURGLASS.
- Use the MAGNET ON SHOESTRING to get the SHERIFF'S BADGE (C).
- Return to the Police Station.
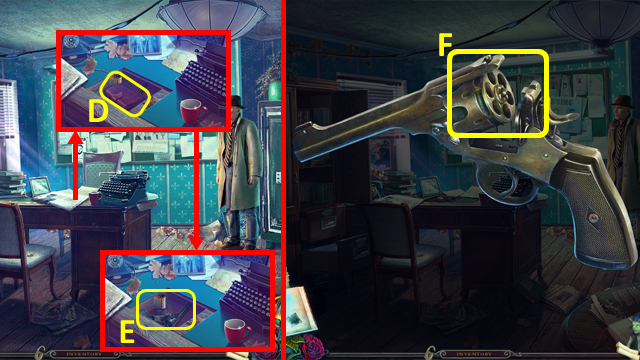
- Move the newspaper, place the SHERIFF'S BADGE in the slot, and read the note (D); grab the FILM and UNLOADED REVOLVER (E).
- Select the UNLOADED REVOLVER in the Inventory, and add the BULLET (F); receive a REVOLVER.
- Back out.
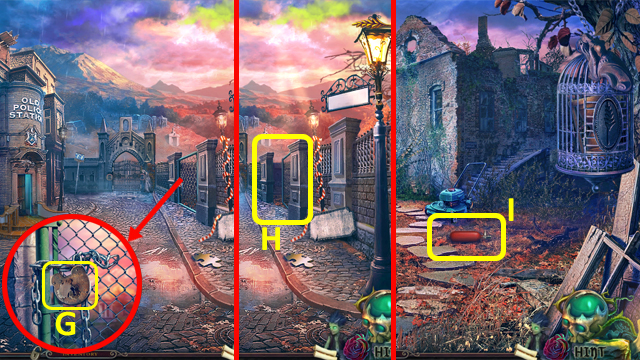
- Use the REVOLVER on the lock (G).
- Enter the Watson House Ruins (H).
- Grab the HELIUM TANK (I).
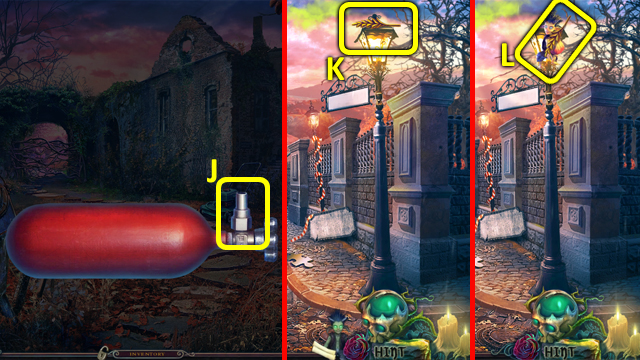
- Select the HELIUM TANK in the Inventory, and add the BALLOON (J); receive a BALLOON.
- Back out.
- Use the BALLOON (K); grab the SPIKE (L).
- Return to the Watson House Ruins.
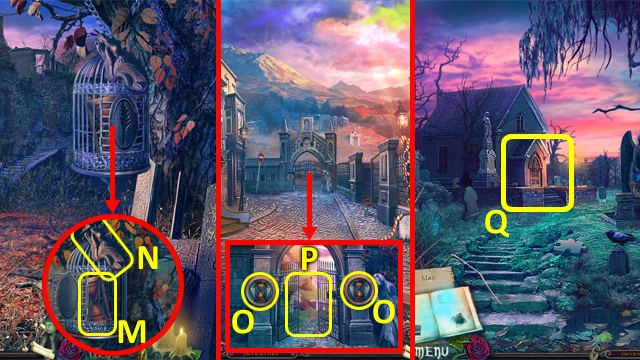
- Place the SPIKE in the birdcage; grab the HOURGLASS (M) and SHIP'S PROW (N).
- Back out.
- Place the HOURGLASSES (O); enter the Oldhills City Cemetery (P).
- Select the church entrance to trigger a puzzle (Q).
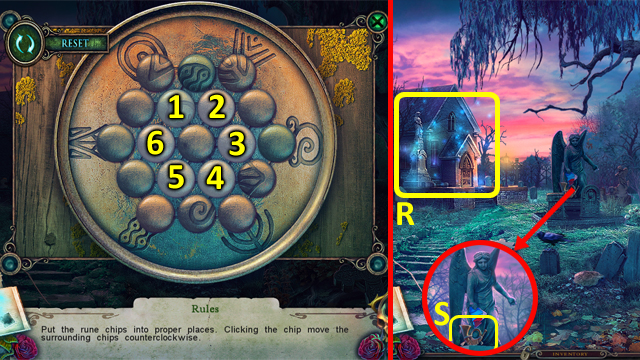
- Arrange the chips into their proper places.
- Solution: 1x2-5x3-1x4-3x2-1-2x3-1x3-2x4-6x3-2x4-4x3-2x3.
- Play the HOP (R); receive a PATTERNED PLATE.
- Grab the POST HORN (S).
- Back out.
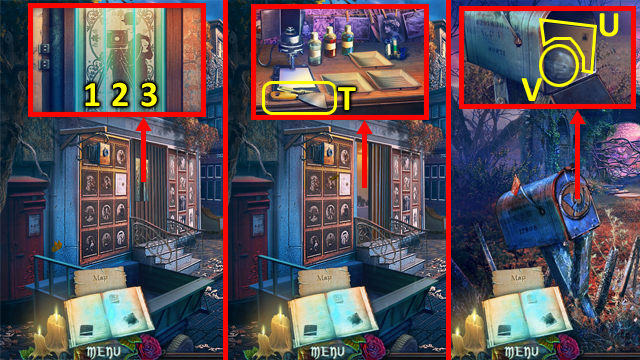
- Place the PATTERNED PLATE into the door; press the boards as follows: 2-1-3-2.
- Grab the PUTTY KNIFE (T).
- Return to the Watson House Ruins.
- Place the POST HORN into the post box; read the letter (U), then take the LIGHT BULB (V).
- Return to the Oldhills City Cemetery.
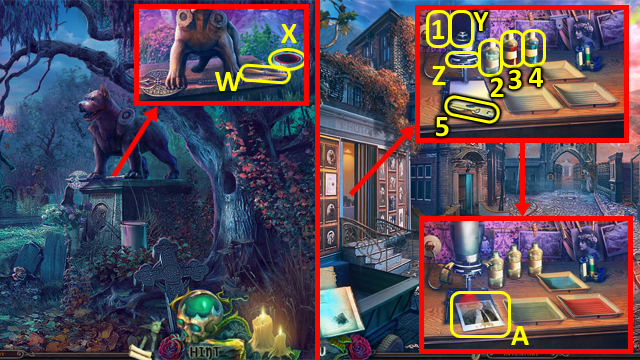
- Grab the AIRPLANE PROPELLER (W).
- Use the PUTTY KNIFE and then the LIGHT BULB on the paint can (X); receive a RED LIGHT.
- Back out.
- Place the RED LIGHT (Y) and FILM (Z), then select the items (1-5); take the PHOTO WITH CODE (A).
- Enter the police station.
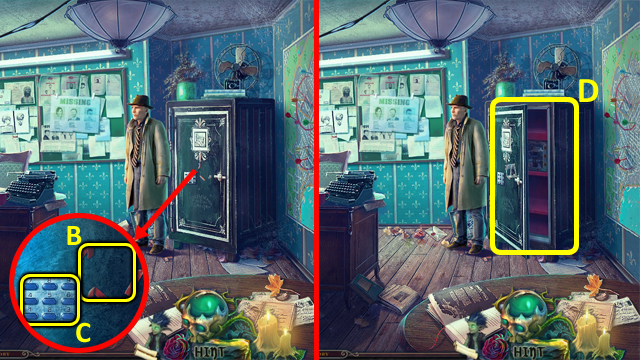
- Place the PHOTO WITH CODE (B); enter 8759 on the keypad (C).
- Select the safe to trigger a puzzle (D).
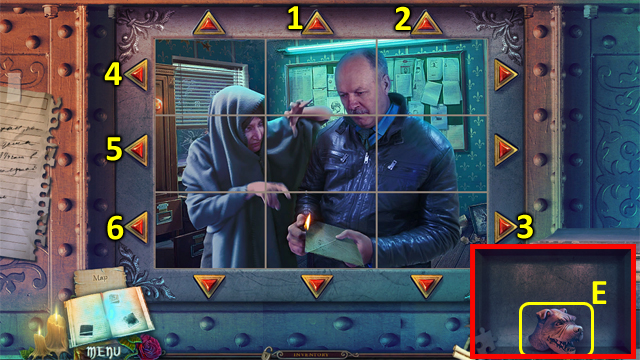
- Re-arrange the tiles to make a complete picture.
- Solution: 1-4-5-6-1-1-3-2-2-3-3.
- Grab the CERBERUS HEAD (E).
- Return to the Oldhills City Cemetery.
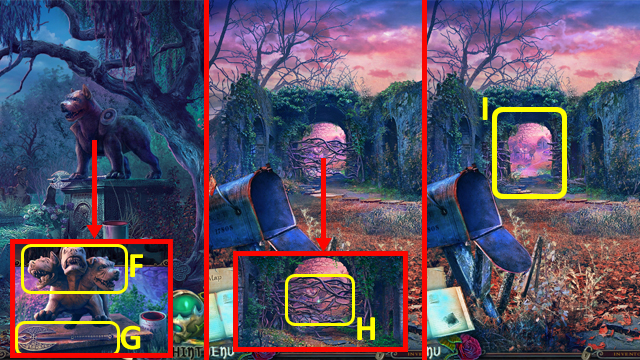
- Place the CERBERUS HEADS (F); grab the AXE (G).
- Return to the Watson House Ruins.
- Use the AXE on the branches (H).
- Enter the Abandoned Garden (I).
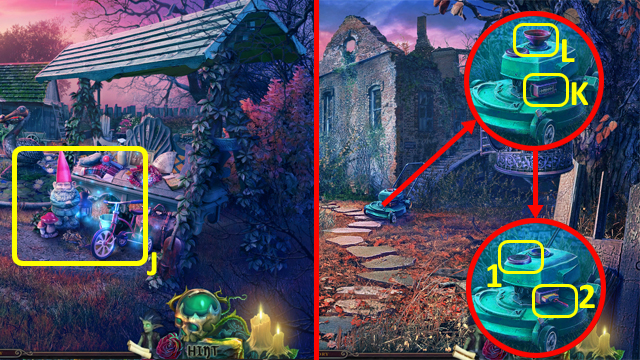
- Play the HOP (J); receive a TOGGLE SWITCH.
- Back out.
- Place the TOGGLE SWITCH (K).
- Remove the cover; place the FUNNEL into the hole and pour the GASOLINE (L).
- Select the items (1-2).
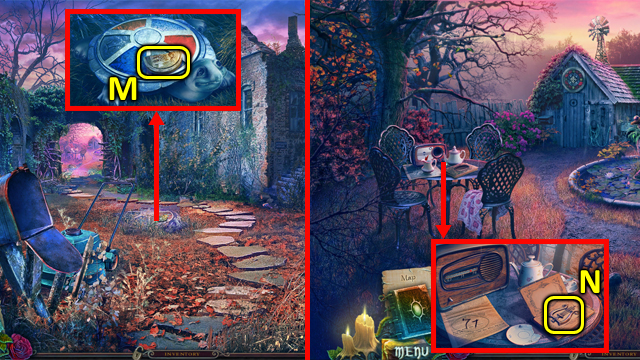
- Grab the HALF OF MEDALLION (M).
- Walk forward.
- Place the MEDALLLION HALVES into the book; open it, read the note, then take the HARP (N).
- Return to the Oldhills City Cemetery.
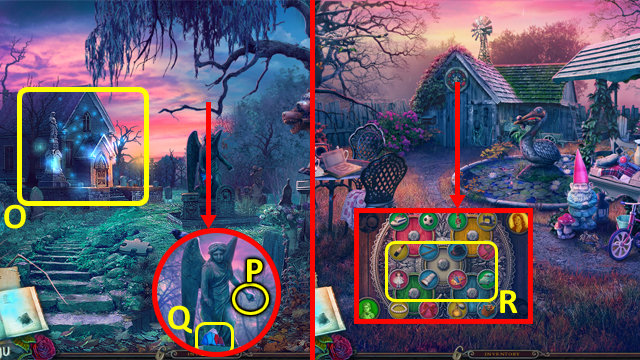
- Play the HOP (O); receive FATHER'S PORTRAIT.
- Place the HARP (P); grab the STAINED GLASS (Q).
- Return to the Abandoned Garden.
- Place the DAUGHTER'S PORTRAIT and FATHER'S PORTRAIT to trigger a puzzle (R).
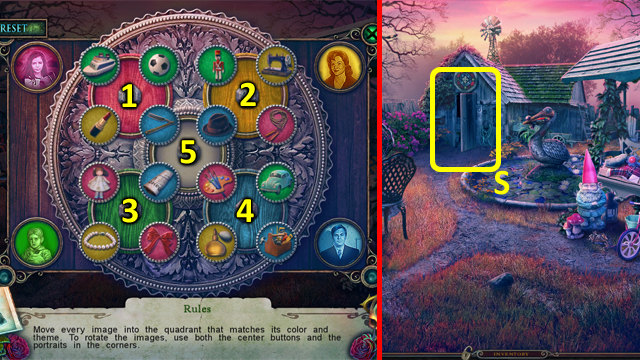
- Move the pieces to the correct positions.
- Solution: 4-5-4-4-5-4-2-3-5-1-5-1-5-1-5-3-2-2-5-2-3-5.
- Enter Father's Workshop (S).
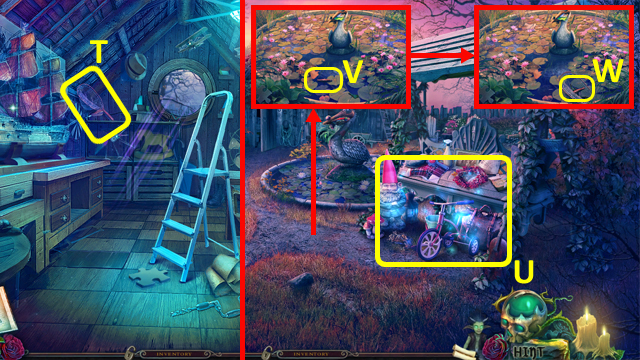
- Grab the SKIMMER NET (T).
- Back out.
- Play the HOP (U); receive some GLUE.
- Use the SKIMMER (V); grab the CORKSCREW (W).
- Walk forward.
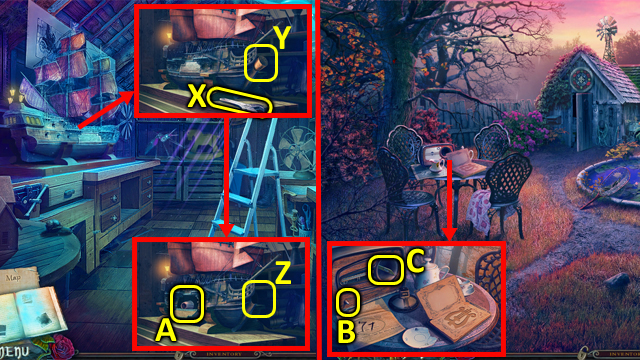
- Grab the WRENCH (X); use the CORKSCREW (Y).
- Place the SHIP'S PROW (Z); take the RADIO KNOB (A).
- Back out.
- Attach the RADIO KNOB (B) and select it once; grab the AIRPLANE WING (C).
- Walk forward.
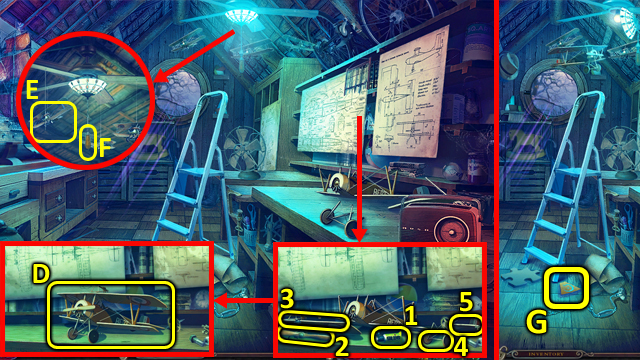
- Place the AIRPLANE PROPELLER, AIRPLANE WING, and GLUE on the table, and select the items (1-4); take the AIRPLANE (D).
- Place the AIRPLANE (E); pull the cord (F).
- Grab the YELLOW PLATE (G).
- Back out twice.
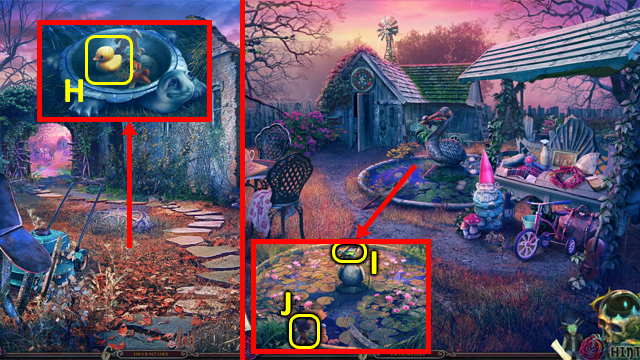
- Place the GREEN PLATE and YELLOW PLATE in the turtle's shell; grab the RUBBER DUCKY (H).
- Walk forward.
- Select the bird (I), then give the WRENCH and RUBBER DUCKY to the Imp (J); receive some STAINED GLASS.
- Walk forward.
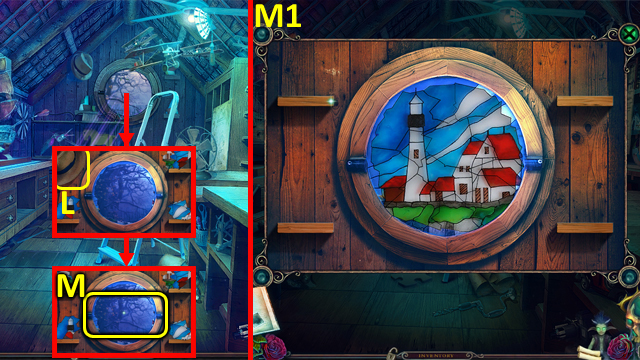
- Move the hat (L).
- Add the STAINED GLASS pieces to the window to trigger a puzzle (M).
- Re-arrange the pieces to make a complete picture.
- Solution (M1).
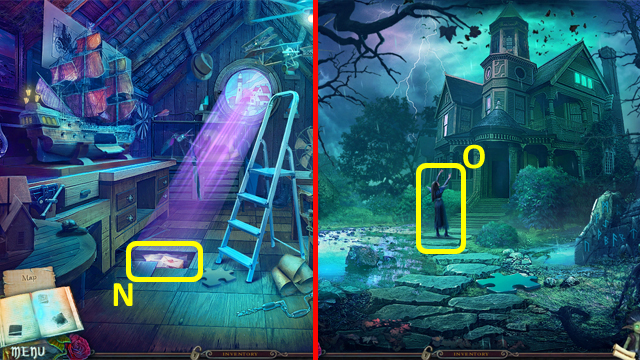
- Open the panel, move the item, and read the letter (N); receive ELIZABETH'S LETTER.
- Return to Abigail's House.
- Give ELIZABETH'S LETTER to Abigail (O).
- Congratulations, you have completed Witches' Legacy: The Ties That Bind.
Created at: 2014-09-14

